Notices
86-95 Trucks & 4Runners 2nd/3rd gen pickups, and 1st/2nd gen 4Runners with IFS

Low Compression After Rebuild

Thread Tools
 
Search this Thread
 
Old Aug 31, 2013 | 07:29 PM
  #21  
big bear's Avatar
Thread Starter
Registered User
 
Joined: Jul 2013
Posts: 294
Likes: 0
From: Big Bear Lake, Cali
The lady at the DMV said I was the 5th owner.
Reply
Old Aug 31, 2013 | 07:32 PM
  #22  
big bear's Avatar
Thread Starter
Registered User
 
Joined: Jul 2013
Posts: 294
Likes: 0
From: Big Bear Lake, Cali
I've downloaded the FSM off the net, downloaded a program called 'Open It' but I can't get the FSM to open, it's a RAR file.
Reply
Old Aug 31, 2013 | 07:34 PM
  #23  
big bear's Avatar
Thread Starter
Registered User
 
Joined: Jul 2013
Posts: 294
Likes: 0
From: Big Bear Lake, Cali
Originally Posted by big bear
I've downloaded the FSM off the net, downloaded a program called 'Open It' but I can't get the FSM to open, it's a RAR file.
My computer skills suck, I'm a lot better with a wrench and socket set.
Reply
Old Aug 31, 2013 | 07:36 PM
  #24  
Cyberman's Avatar
Registered User
 
Joined: Nov 2007
Posts: 954
Likes: 0
From: Dillsburg, PA
Download a program called WinRAR.
Reply
Old Aug 31, 2013 | 08:10 PM
  #25  
big bear's Avatar
Thread Starter
Registered User
 
Joined: Jul 2013
Posts: 294
Likes: 0
From: Big Bear Lake, Cali
Originally Posted by Cyberman
Download a program called WinRAR.
Downloaded it, it won't work.
Says it's experiencing problems, launch me again.

Tried again, same thing.

Thanks though.
Reply
Old Aug 31, 2013 | 08:58 PM
  #26  
Kiroshu's Avatar
Registered User
 
Joined: Oct 2007
Posts: 2,747
Likes: 3
From: NC
Replace timing components to spec and to proper set-up would be a good start ^_^.

-Engine re-built... including top end(cylinder heads)...?

-Valve clearance correct...?
Reply
Old Aug 31, 2013 | 09:35 PM
  #27  
big bear's Avatar
Thread Starter
Registered User
 
Joined: Jul 2013
Posts: 294
Likes: 0
From: Big Bear Lake, Cali
Originally Posted by Kiroshu
Replace timing components to spec and to proper set-up would be a good start ^_^.

-Engine re-built... including top end(cylinder heads)...?

-Valve clearance correct...?
Going to turn the sprockets around tomorrow.

Heads were micro-fluxed, valves 3 angle grind, re-seated, new seals and adjusted by a machine shop.

I've double checked the clearances, they're in spec.
Reply
Old Sep 1, 2013 | 06:45 AM
  #28  
big bear's Avatar
Thread Starter
Registered User
 
Joined: Jul 2013
Posts: 294
Likes: 0
From: Big Bear Lake, Cali
I' going out there to turn those sprockets over.

I'll take some pix.
Reply
Old Sep 1, 2013 | 08:00 AM
  #29  
Marc's Avatar
Contributing Member
 
Joined: Sep 2003
Posts: 1,241
Likes: 13
From: Winnipeg, MB, Canada
The marks should line up.

Left
Low Compression After Rebuild-img_3798s.jpg

Right
Low Compression After Rebuild-img_3799s.jpg
Reply
Old Sep 1, 2013 | 08:06 AM
  #30  
big bear's Avatar
Thread Starter
Registered User
 
Joined: Jul 2013
Posts: 294
Likes: 0
From: Big Bear Lake, Cali
Thanks for the pix.
Reply
Old Sep 1, 2013 | 08:22 AM
  #31  
big bear's Avatar
Thread Starter
Registered User
 
Joined: Jul 2013
Posts: 294
Likes: 0
From: Big Bear Lake, Cali
Ok gents.

TDC, timing mark pointing at 0, rotor pointing at #1 spark plug.
Name:  DSCF6001-14.jpg
Views: 80
Size:  104.6 KB
Name:  DSCF6002-8.jpg
Views: 100
Size:  102.0 KB

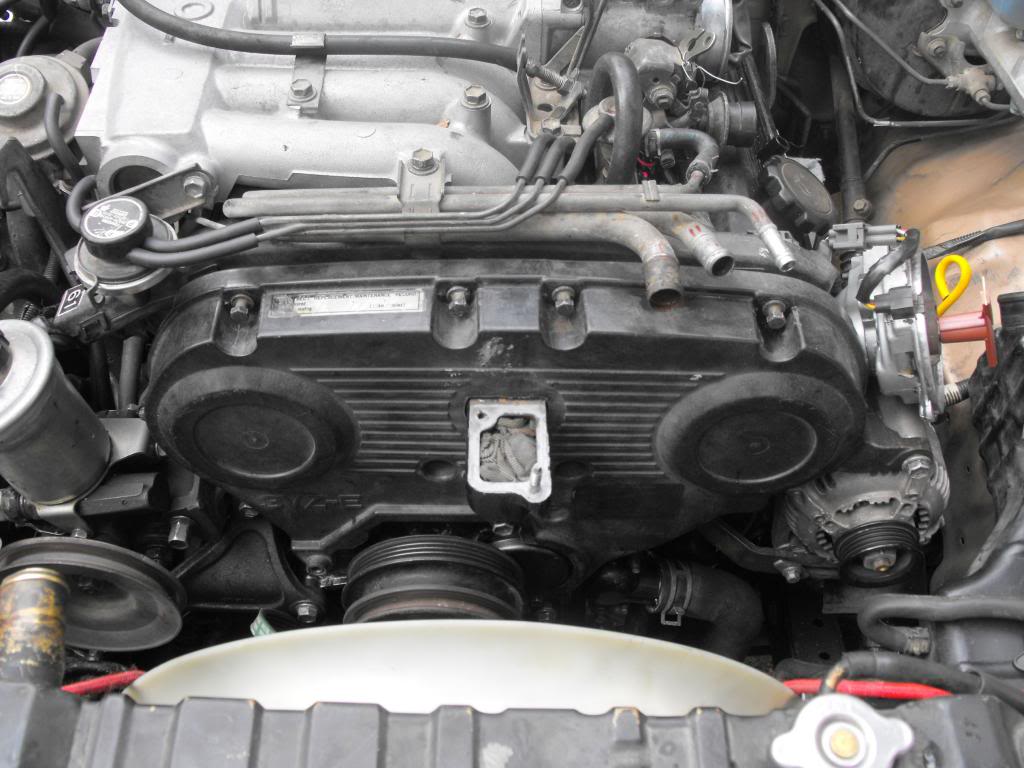
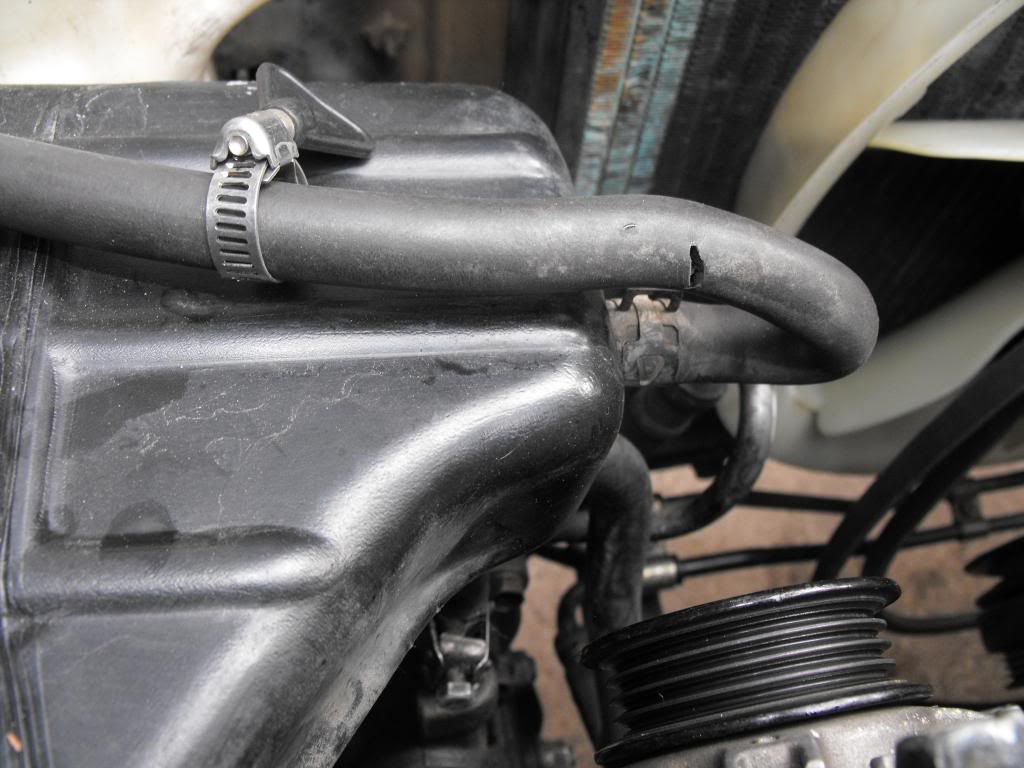
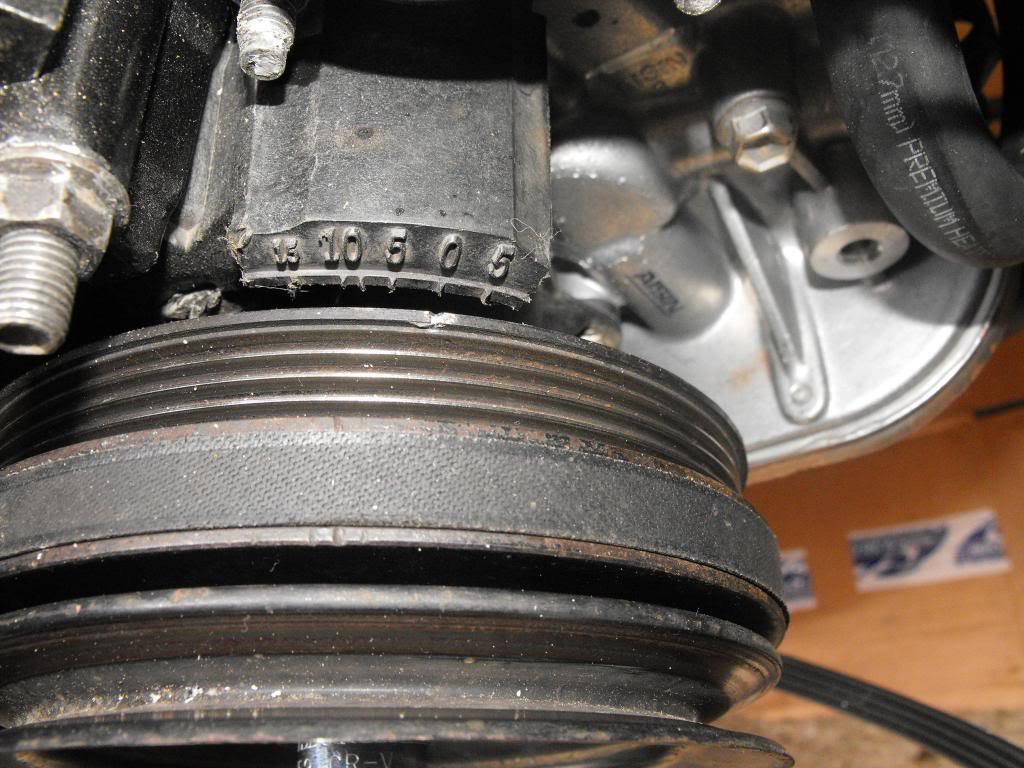
Found this, needs to be fixed for sure.
Name:  DSCF6004-5.jpg
Views: 82
Size:  88.8 KB


How they were when I first took the motor apart.

Name:  DSCF6005-3.jpg
Views: 92
Size:  46.3 KB

Flipped and torqued, 80ft #s

Name:  DSCF6008-2.jpg
Views: 93
Size:  45.2 KB

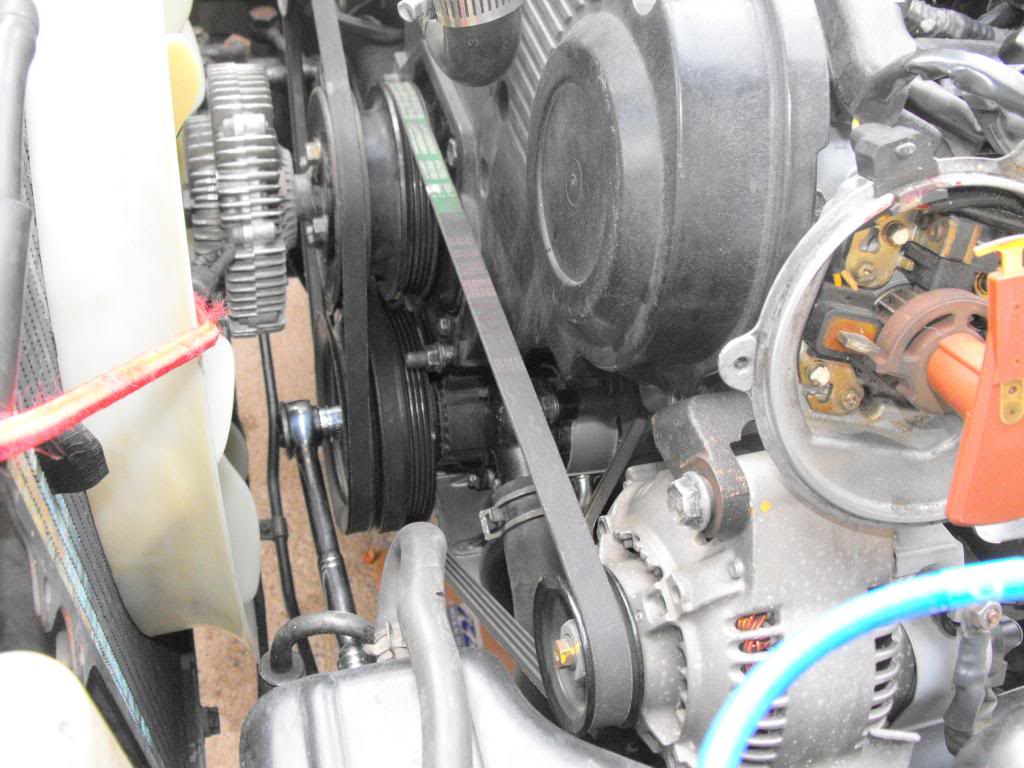
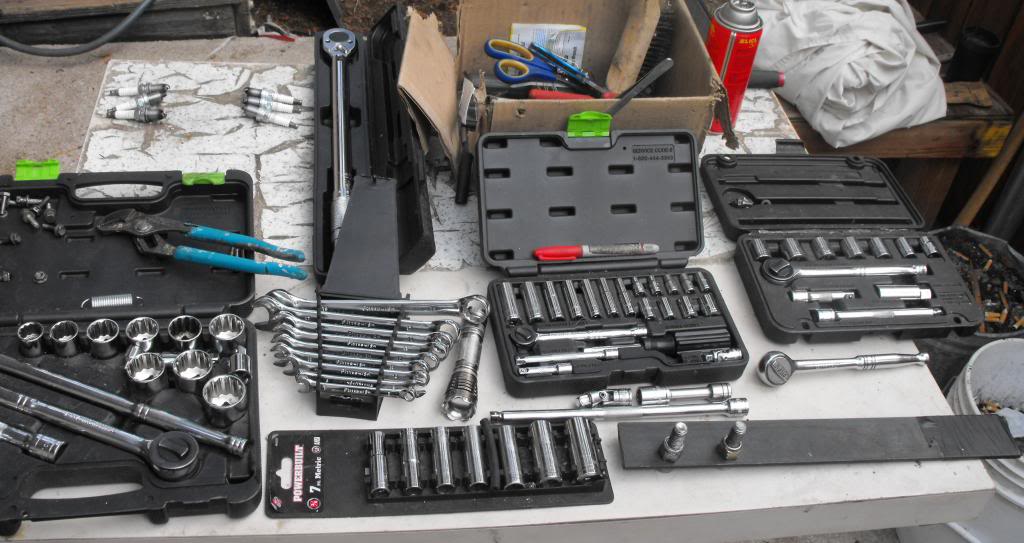
Tool shot, my home made sprocket tool, bottom right, works very well.
Name:  DSCF6010-1.jpg
Views: 102
Size:  93.6 KB

After install.
Name:  DSCF6011-2.jpg
Views: 76
Size:  120.4 KB

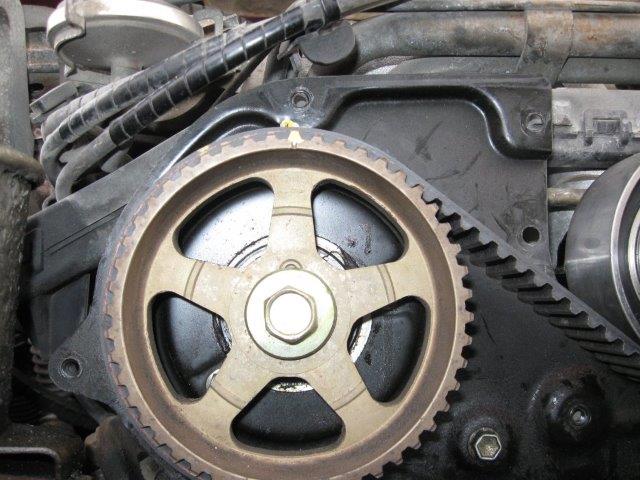
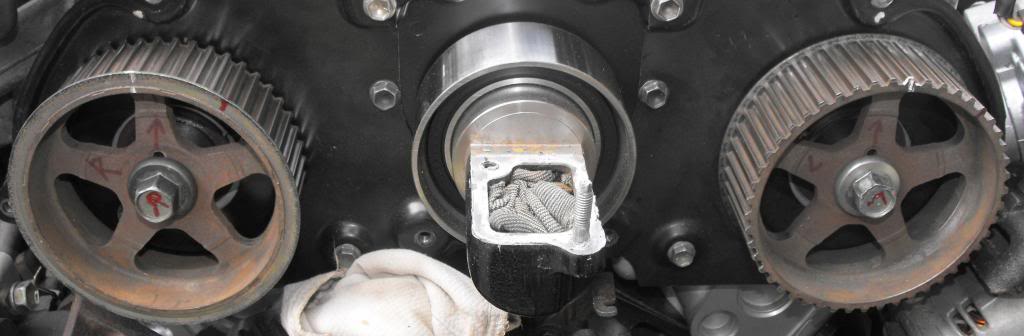
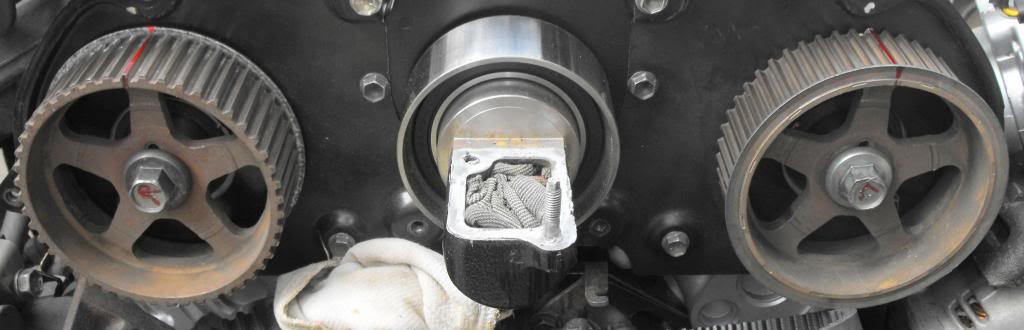
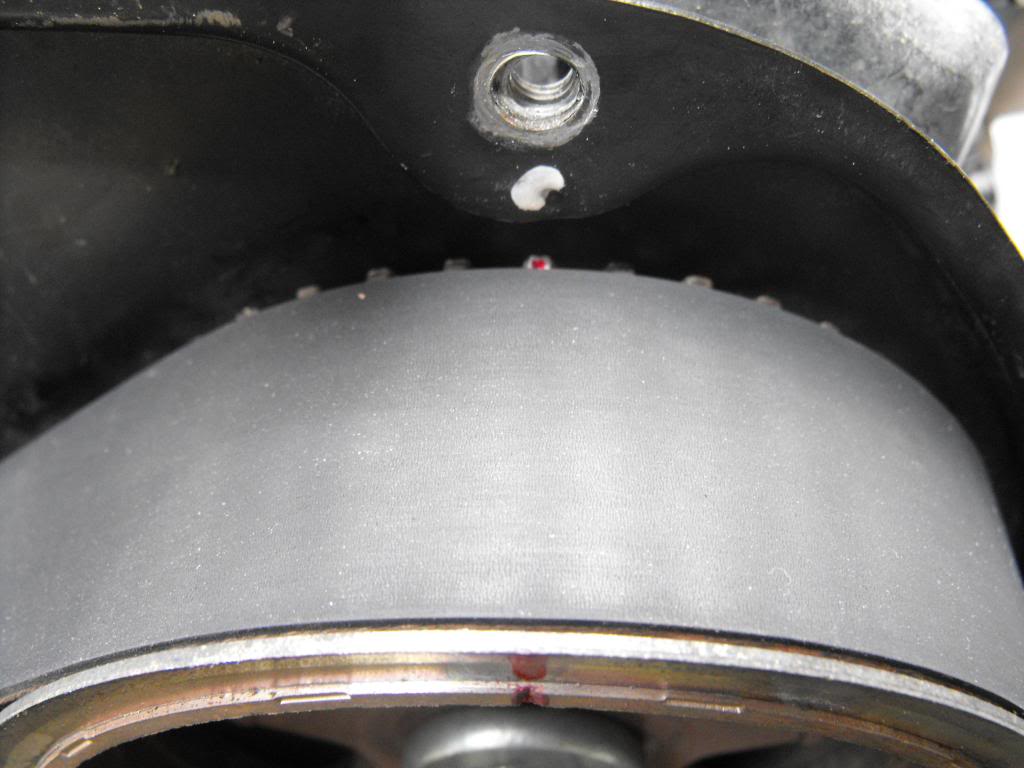
Left sprocket, marks line up great.
Name:  DSCF6012-1.jpg
Views: 104
Size:  71.3 KB

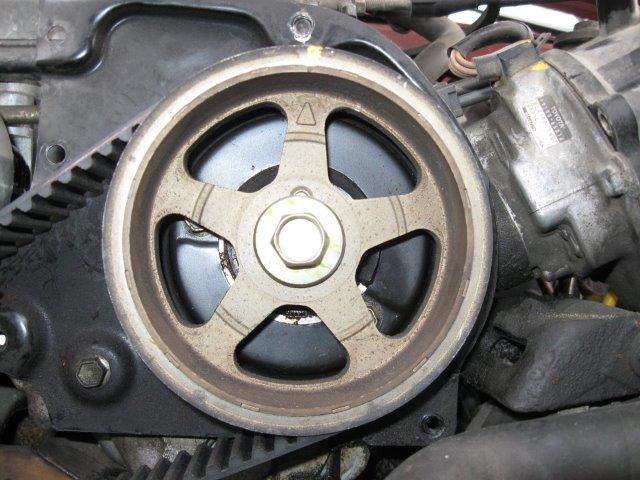
Right sprocket, here's what I meant when I stated the marks are a little ambiguous. Mark won't line up perfectly, mark lines up a little behind or I could set it a little ahead, but not dead on.
Name:  DSCF6013.jpg
Views: 93
Size:  75.0 KB


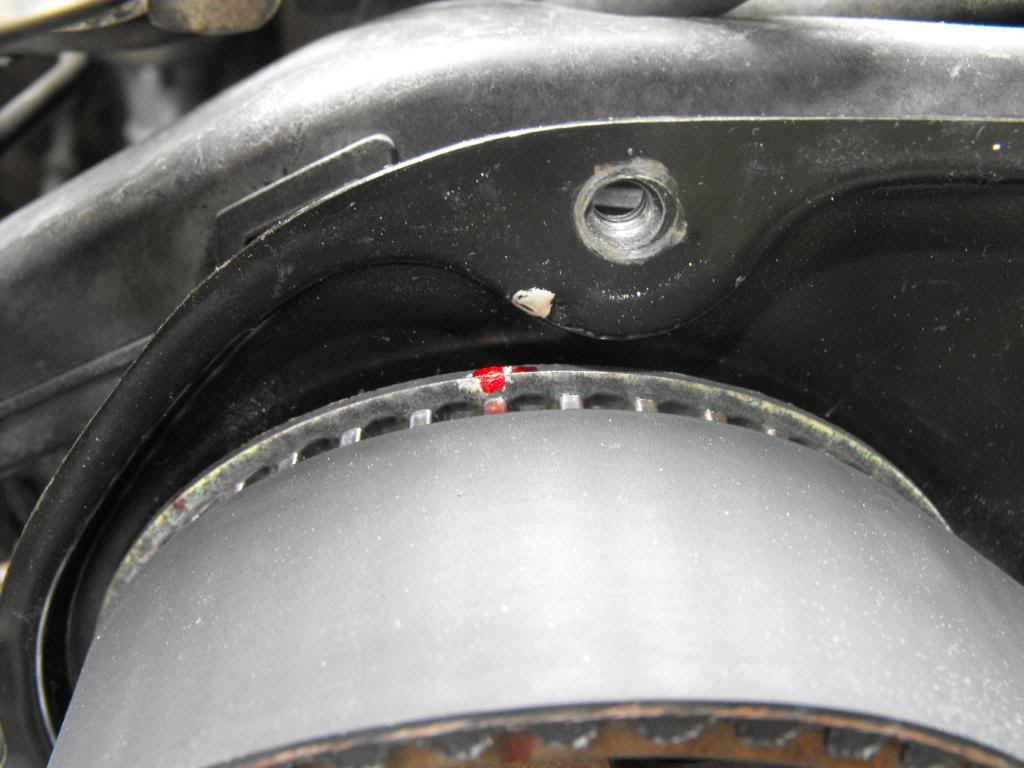
I'm holding at this point to see what you guys think, set mark behind like it is now, or move it a tooth ahead ??
Reply
Old Sep 1, 2013 | 09:17 AM
  #32  
rworegon's Avatar
Contributing Member
 
Joined: Nov 2010
Posts: 5,125
Likes: 4
From: Columbia River Gorge, Oregon...east side
Looks to be a tooth behind. IIRC, the timing mark on the sprocket will be in the exact 12 o'clock position when everything is lined up.

This may help.
Another source: http://personal.utulsa.edu/~nathan-b...67timingbe.pdf

Last edited by rworegon; Sep 1, 2013 at 09:34 AM.
Reply
Old Sep 1, 2013 | 09:55 AM
  #33  
big bear's Avatar
Thread Starter
Registered User
 
Joined: Jul 2013
Posts: 294
Likes: 0
From: Big Bear Lake, Cali
Wink

Originally Posted by rworegon
Looks to be a tooth behind. IIRC, the timing mark on the sprocket will be in the exact 12 o'clock position when everything is lined up.

This may help.
Another source: http://personal.utulsa.edu/~nathan-b...67timingbe.pdf
Alright, moved the sprocket forward a tooth, the sprocket mark is just past the timing cover mark, but is at 12 o'clock now.

Thanks for the FSM link, I downloaded one from a different site, it was in RAR format and I wasn't having much luck getting it to open, your version is in PDF, sweet.

Looks like I'll go button things up and see how she runs, take care of the cracked hose too.
Reply
Old Sep 1, 2013 | 09:58 AM
  #34  
Cyberman's Avatar
Registered User
 
Joined: Nov 2007
Posts: 954
Likes: 0
From: Dillsburg, PA
Kinda hard to tell, considering it looks like you're using a used timing belt. New belts usually have timing marks on them as well. Your gear marks look dead on though.
Reply
Old Sep 1, 2013 | 10:53 AM
  #35  
big bear's Avatar
Thread Starter
Registered User
 
Joined: Jul 2013
Posts: 294
Likes: 0
From: Big Bear Lake, Cali
Originally Posted by Cyberman
Kinda hard to tell, considering it looks like you're using a used timing belt. New belts usually have timing marks on them as well. Your gear marks look dead on though.
That's what those dashed lines are for, live and learn.

It's a brand new Gates belt, bought a full timing component kit.
There was no way I was going to re-use the ITM belt it had on it.
Reply
Old Sep 1, 2013 | 02:18 PM
  #36  
big bear's Avatar
Thread Starter
Registered User
 
Joined: Jul 2013
Posts: 294
Likes: 0
From: Big Bear Lake, Cali
Just waiting for the RTV to cure before I re-fill the rad and fire it up.
Reply
Old Sep 1, 2013 | 02:20 PM
  #37  
maachine's Avatar
Registered User
 
Joined: Feb 2011
Posts: 384
Likes: 0
From: Hammond, LA
so you think having those pulleys reversed was the issue?
Reply
Old Sep 1, 2013 | 02:28 PM
  #38  
big bear's Avatar
Thread Starter
Registered User
 
Joined: Jul 2013
Posts: 294
Likes: 0
From: Big Bear Lake, Cali
Not really, but as Kiro said getting things as they are in the book is a good place to start.

Did more the right cam clock-wise 1 tooth, see what that does.
Reply
Old Sep 1, 2013 | 02:32 PM
  #39  
big bear's Avatar
Thread Starter
Registered User
 
Joined: Jul 2013
Posts: 294
Likes: 0
From: Big Bear Lake, Cali
Oh yeah, found that cracked hose too.
Reply
Old Sep 1, 2013 | 02:37 PM
  #40  
maachine's Avatar
Registered User
 
Joined: Feb 2011
Posts: 384
Likes: 0
From: Hammond, LA
i suppose if those pulleys were on backwards the valve timing couldve been off slightly. that hose could have caused a bad vacuum leak creating the low power condition you were describing.
Reply


All times are GMT -8. The time now is 11:49 AM.