
Loose Auto Shifter Fix
 Apr 1, 2013 | 05:23 PM
#1
Thread Starter
Registered User
Joined: Dec 2012
Posts: 50
Likes: 0
From: Northern UT
Loose Auto Shifter Fix
So my auto shifter lever was so loose it felt like a manual. Lots of side to side and forward back movement. Called my local dealer for a pair of shift lever bushings, none in stock, so 4 days later the order came in and I picked them up. Total cost $3.03 with tax. Total time was about 45 min including all the hand wiping and picture taking.
Tools you will need for the job:
Small screwdiver
Philips screwdriver
1/4' drive ratchet, 12mm socket, 10mm socket and long extention
Needle nose pliers
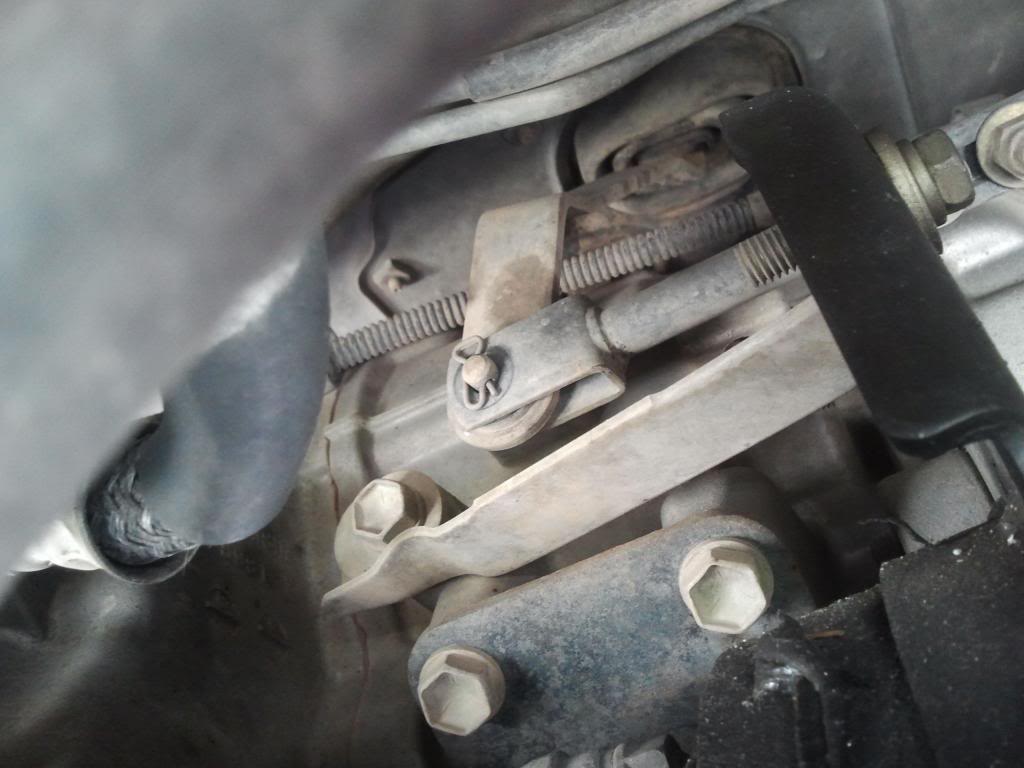
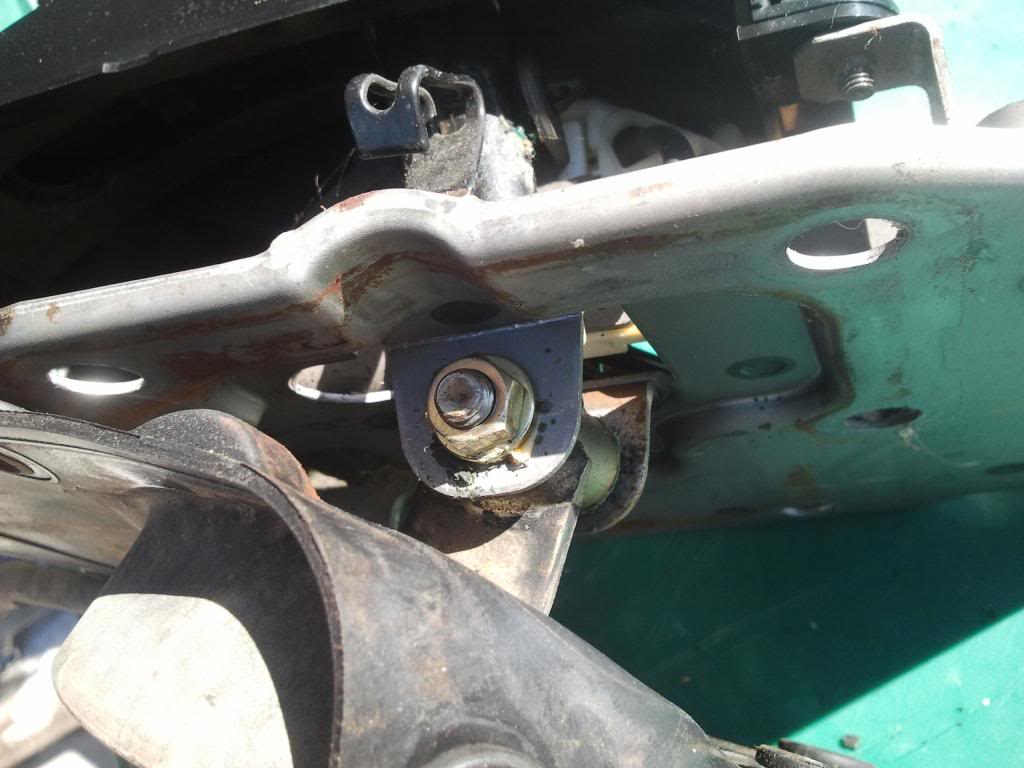
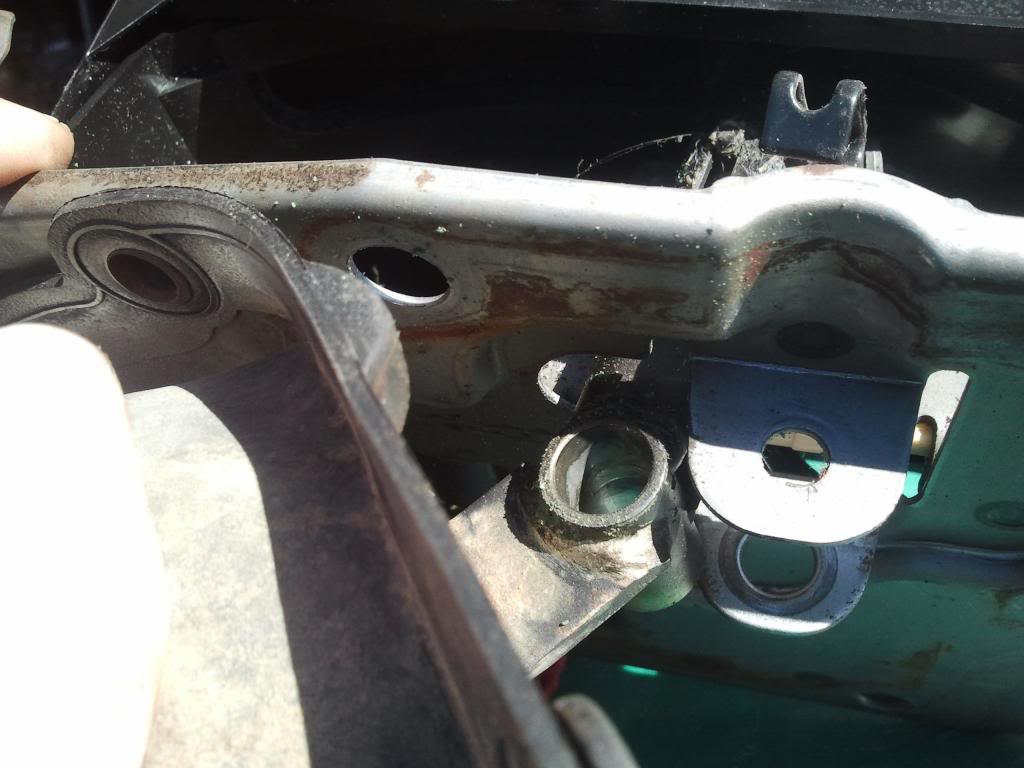
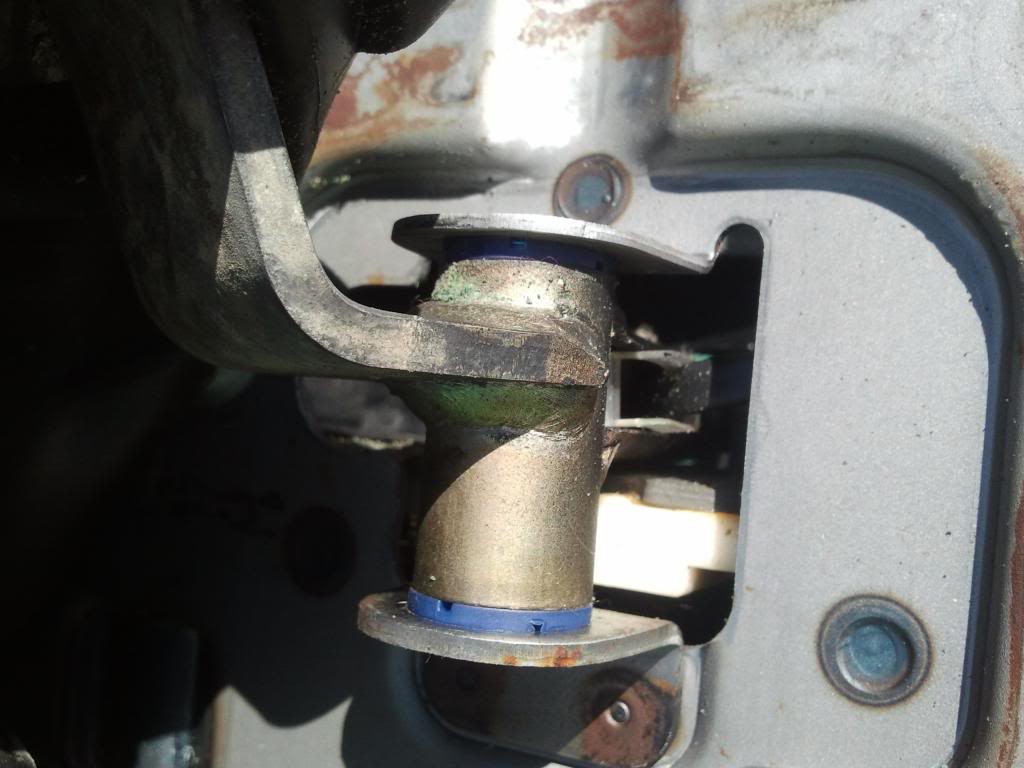
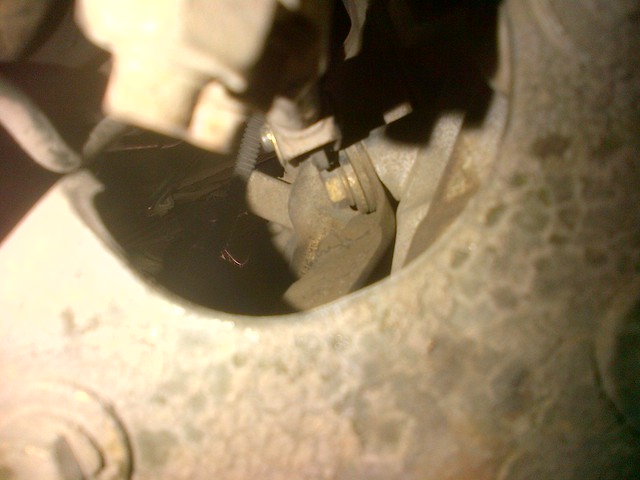
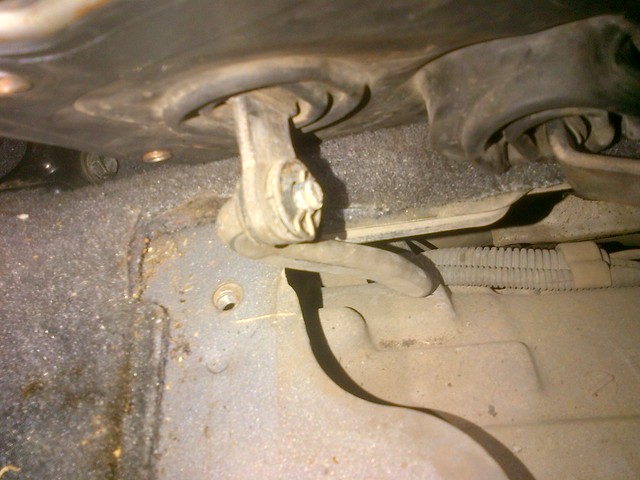
1. From under your 4runner, on the drivers side of transmission, Remove the 12mm nut,lock washer and flat washer from tranfer case shifter rod.

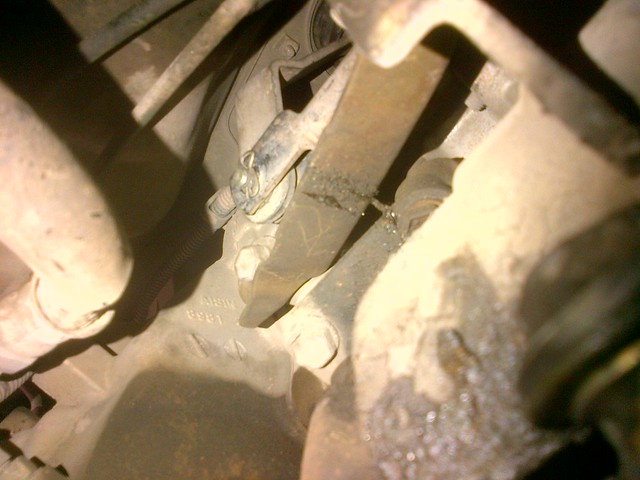
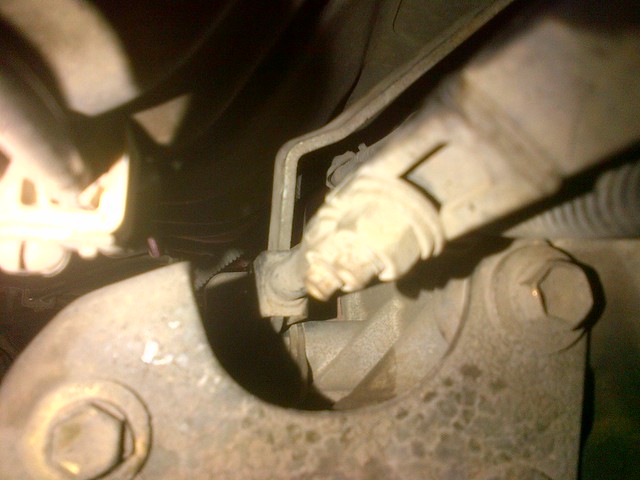
2. From under your 4runner, on the passenger side of transmission, remove the retaining clip from the trans shifter lever with needle nose pliers and remove pin.
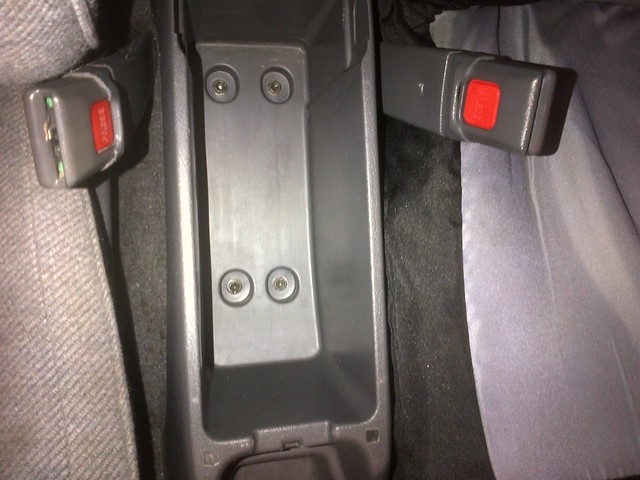
3. Remove the 6 philips screws on the center and shifter console. 2 on each side and 2 in the storage compartment.
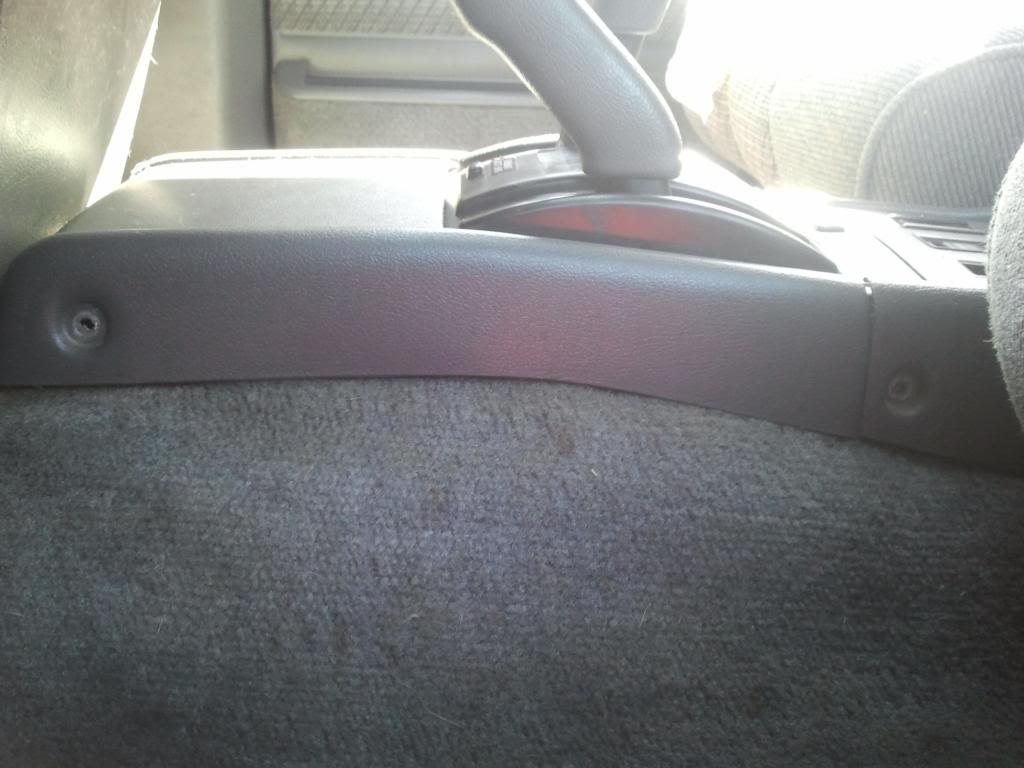
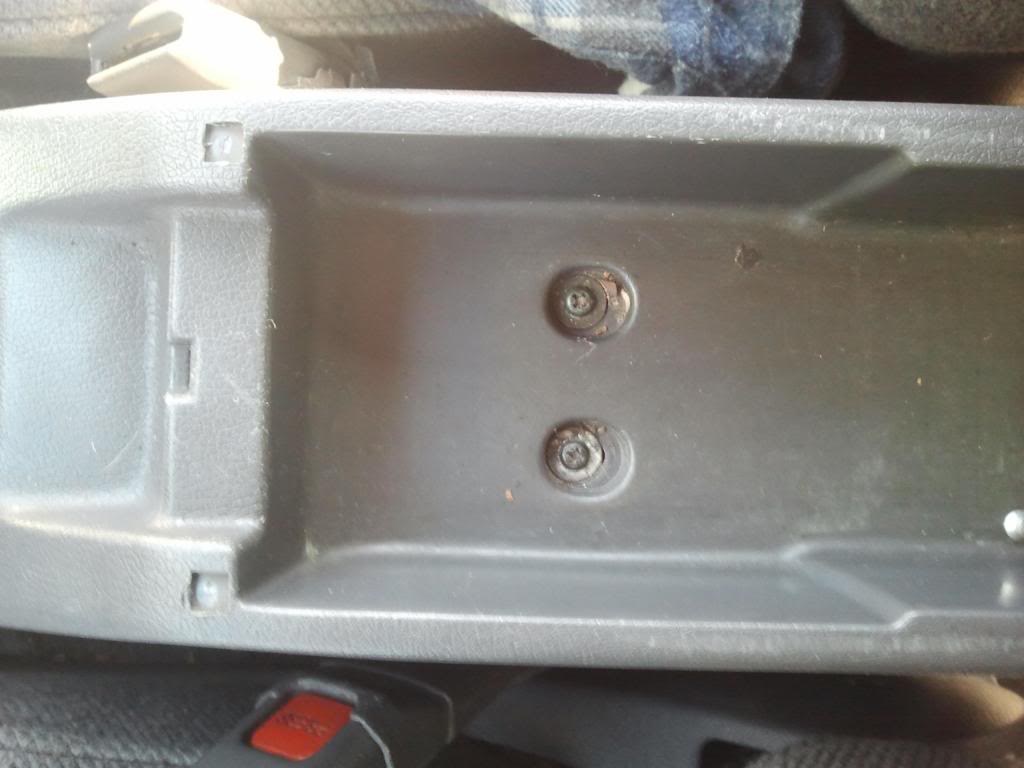
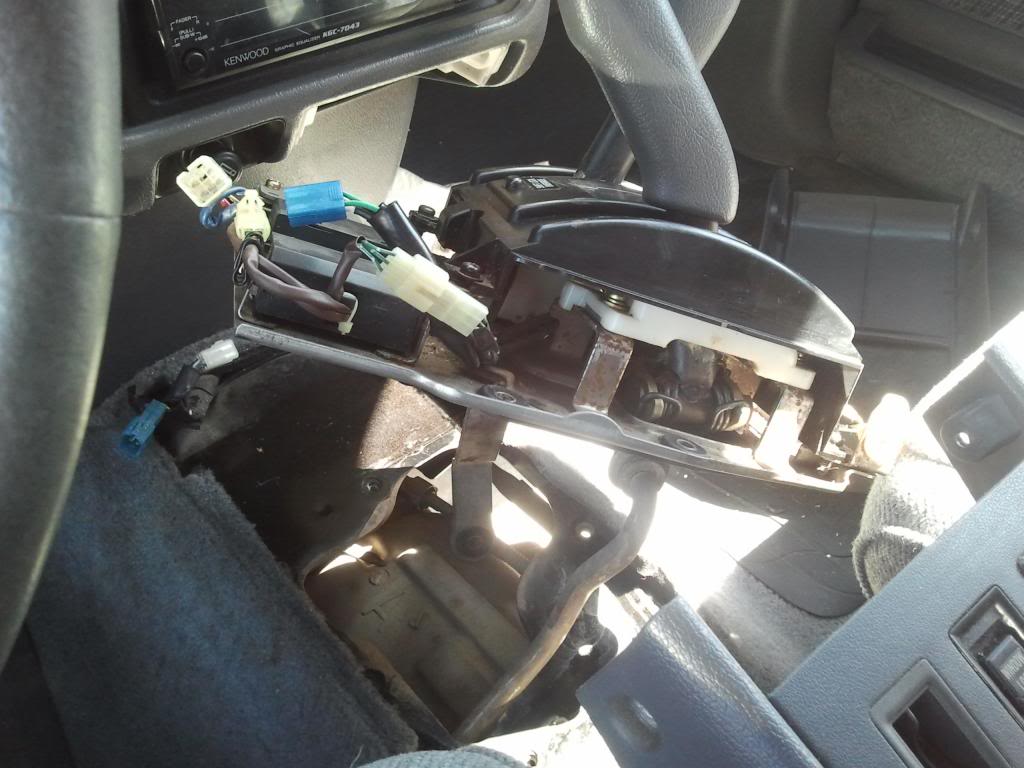
4. Lift and slide the center console back as much as the wires allow. no need to disconnect any wires. Lift the shifter cover up and over the shift levers and lay it on the passenger floor. Still no need to disconnect any wires.
5. Using the 10mm socket and extention, remove the 7 bolts securing the shifter assembly to the floor. 2 bolts on the left, bottom, right, and one on the top.
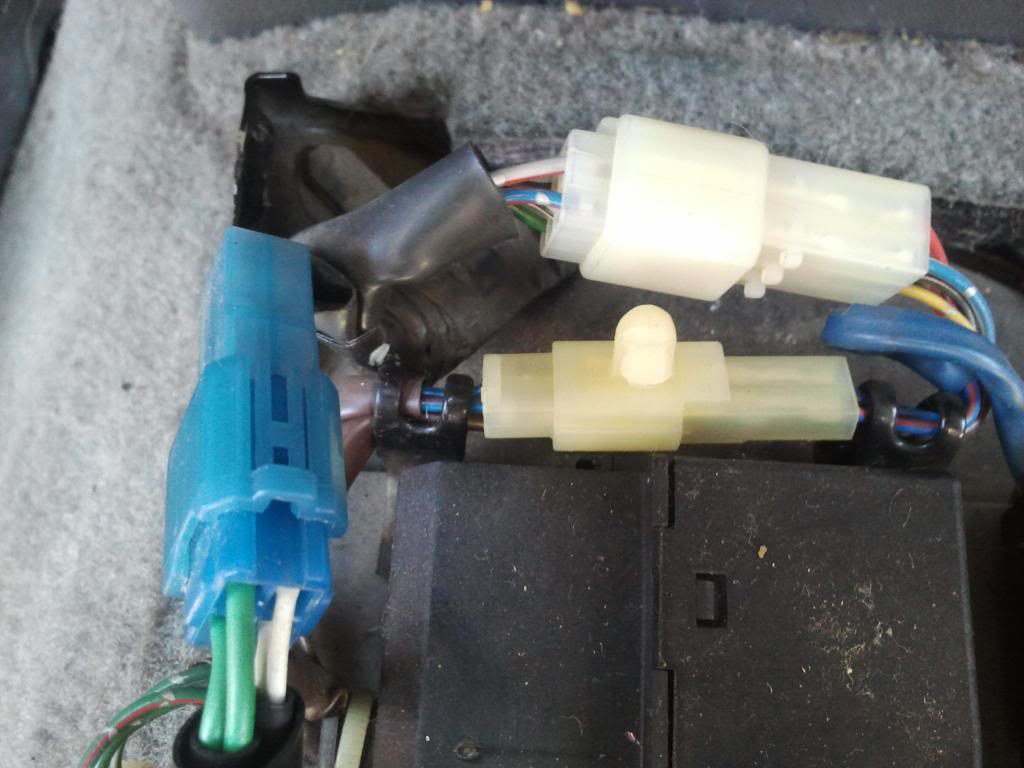
6. Carefully disconnect the large white, and the blue connectors using a small screwdriver to relaese the lock.
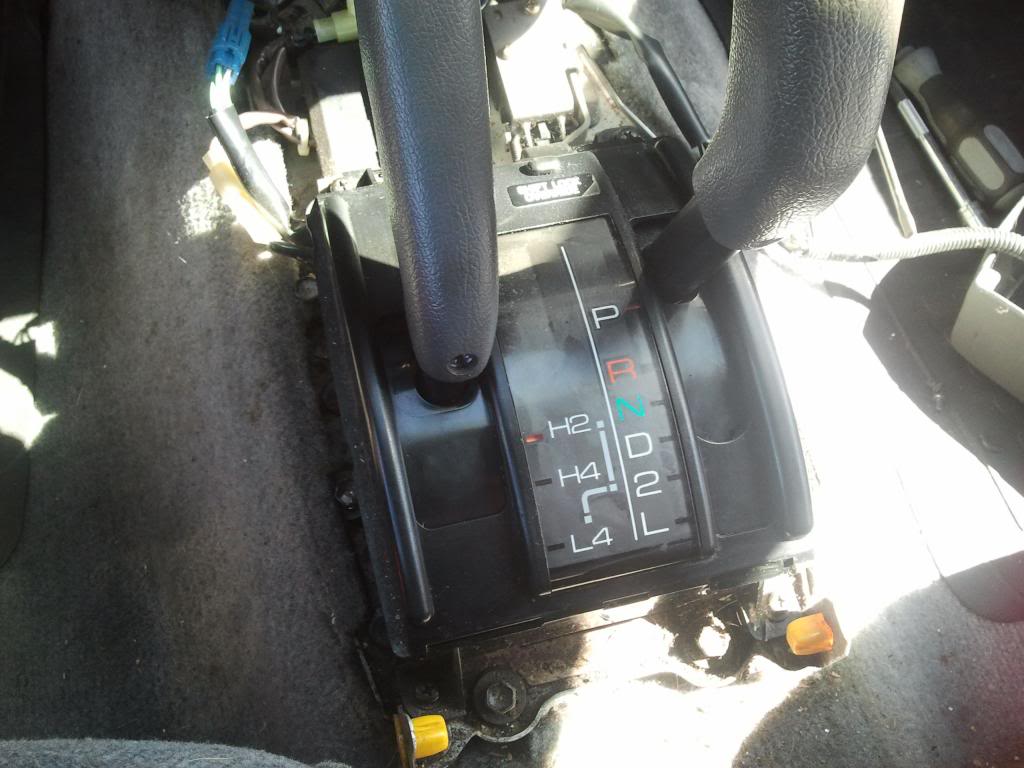
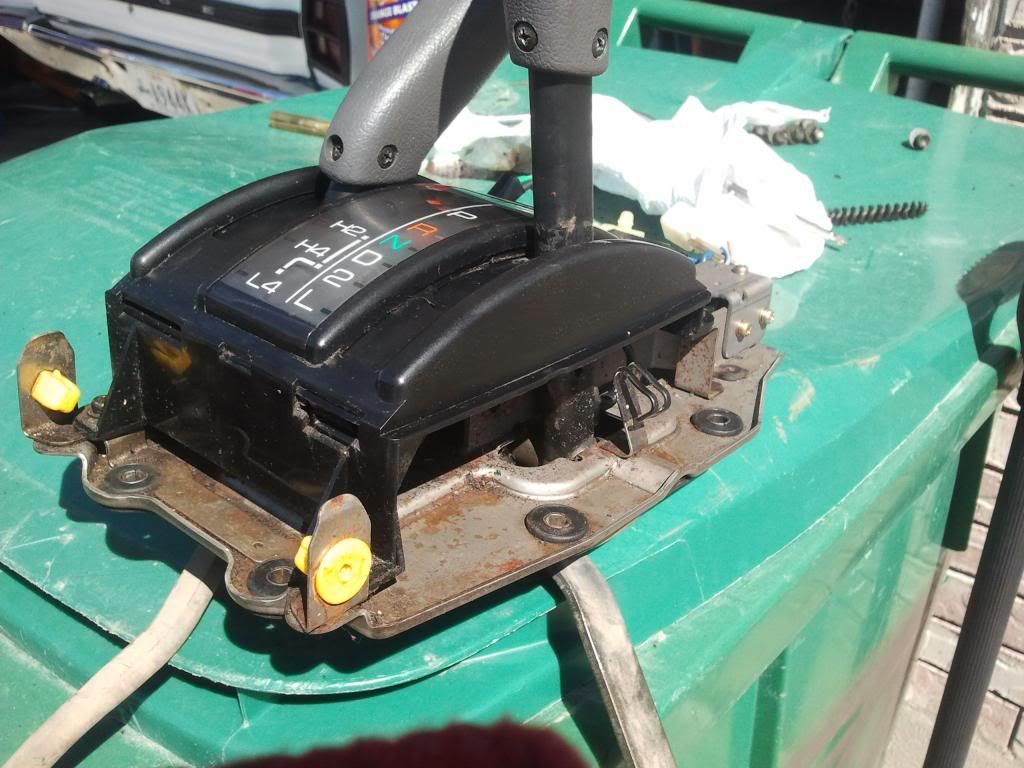
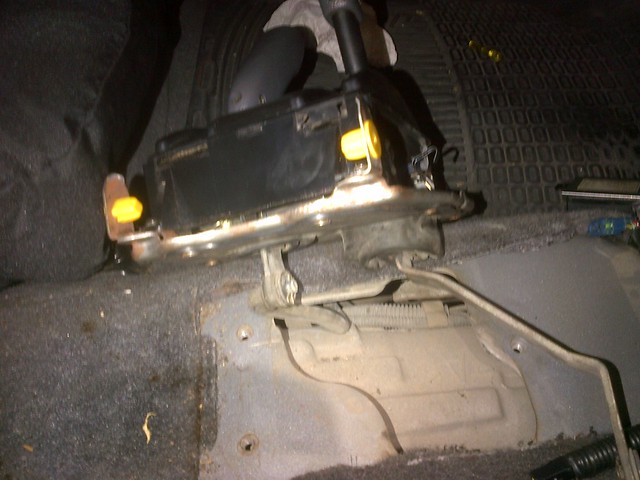
7. Carefully pry up the shifter assembly from the floor. It will probably want to stick a little bit. There is a rubber gasket/boot that is attatched to the bottom of the assembly. Pull the shifter assembly straight up and rotate it about 90 degrees counterclockwise in order for the shift linkages to clear the opening.
8. The shift assembly is out!
9. Turn the assembly over and push out all the metal bushings inside the holes of the rubber gasket/boot.
10. Carefully pry / push the grommet part of the gasket through the mountont holes from the top of the shifter so you can slide the gasket/boot down enough to access the pivot bolt.
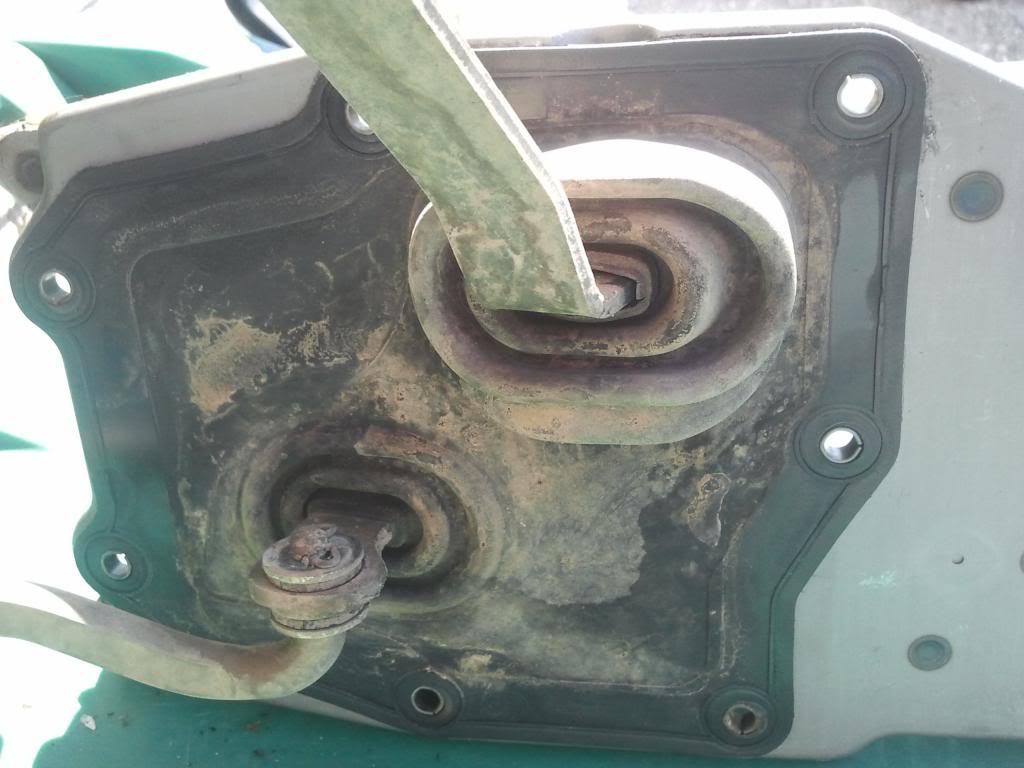
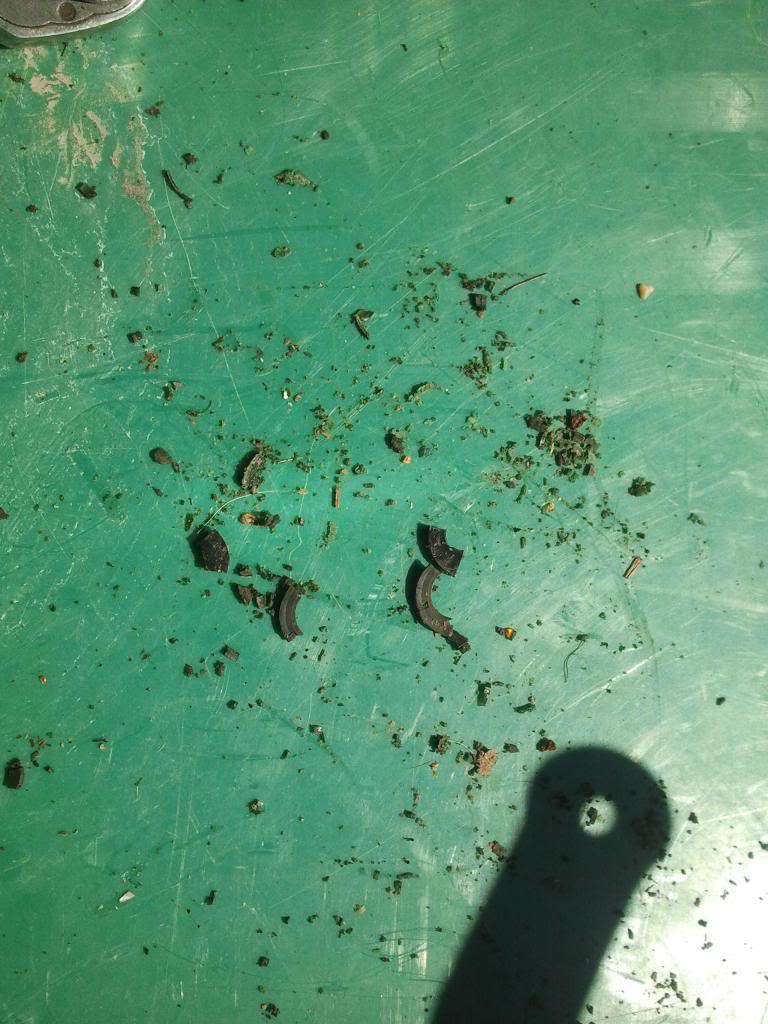
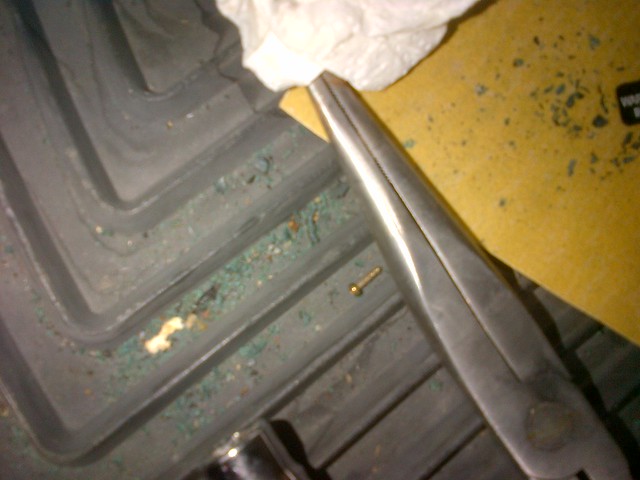
11. Remove the 12mm nut and push out the pivot bolt. Slide the shift arm out of the bracket and clean the pivot hole of whatever (if anything) is left of the old bushings.
This is what was left of mine.....
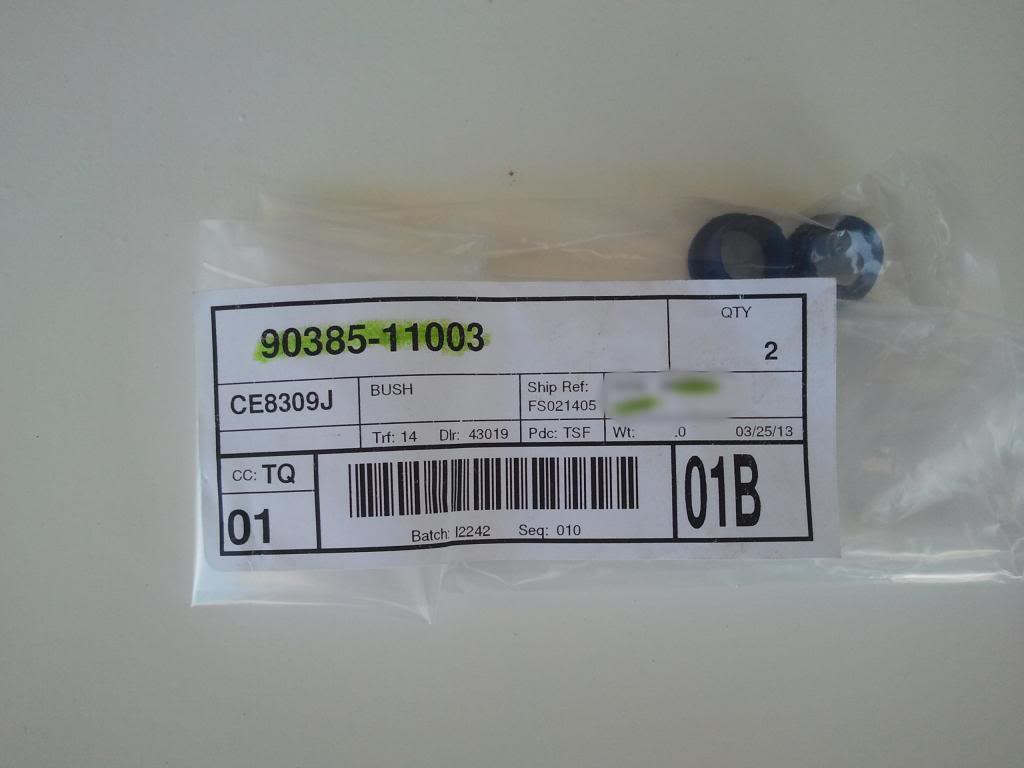
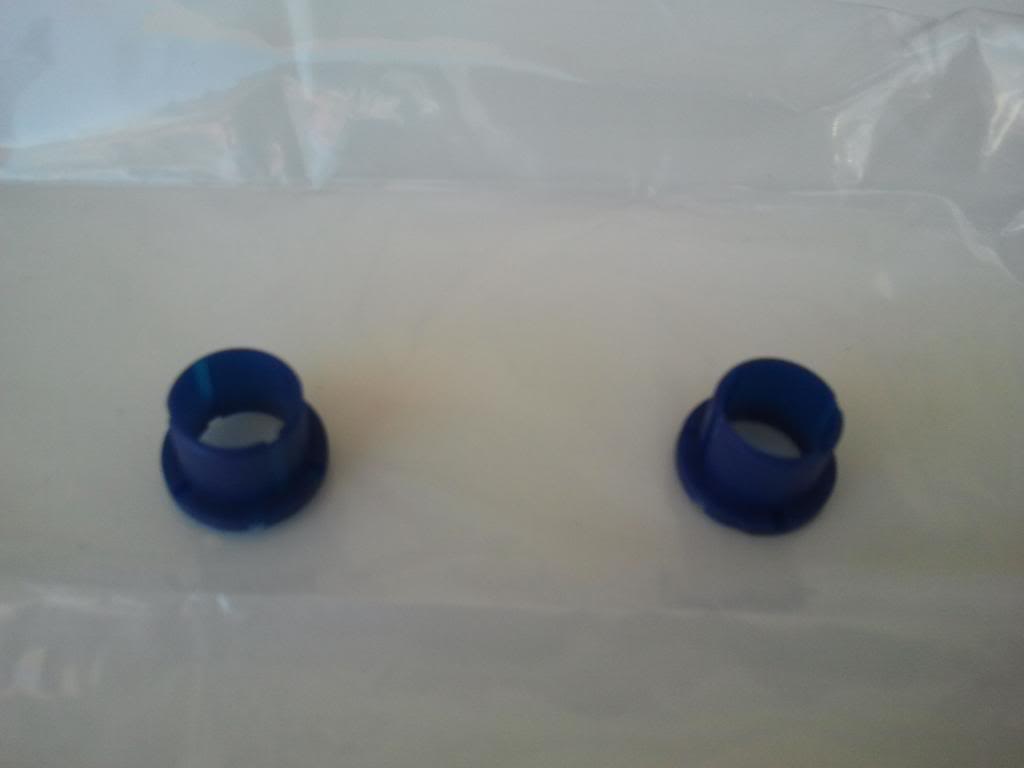
New $3.03 bushings!
12. Push new bushings into the shift arm, slide the arm into the bracket, make sure the bushing and hole line up nice and push the pivot bolt in. Tighten the nut.
13. Reverse procedure to re install shifter, covers and linkage.
Tools you will need for the job:
Small screwdiver
Philips screwdriver
1/4' drive ratchet, 12mm socket, 10mm socket and long extention
Needle nose pliers
1. From under your 4runner, on the drivers side of transmission, Remove the 12mm nut,lock washer and flat washer from tranfer case shifter rod.
2. From under your 4runner, on the passenger side of transmission, remove the retaining clip from the trans shifter lever with needle nose pliers and remove pin.
3. Remove the 6 philips screws on the center and shifter console. 2 on each side and 2 in the storage compartment.
4. Lift and slide the center console back as much as the wires allow. no need to disconnect any wires. Lift the shifter cover up and over the shift levers and lay it on the passenger floor. Still no need to disconnect any wires.
5. Using the 10mm socket and extention, remove the 7 bolts securing the shifter assembly to the floor. 2 bolts on the left, bottom, right, and one on the top.
6. Carefully disconnect the large white, and the blue connectors using a small screwdriver to relaese the lock.
7. Carefully pry up the shifter assembly from the floor. It will probably want to stick a little bit. There is a rubber gasket/boot that is attatched to the bottom of the assembly. Pull the shifter assembly straight up and rotate it about 90 degrees counterclockwise in order for the shift linkages to clear the opening.
8. The shift assembly is out!
9. Turn the assembly over and push out all the metal bushings inside the holes of the rubber gasket/boot.
10. Carefully pry / push the grommet part of the gasket through the mountont holes from the top of the shifter so you can slide the gasket/boot down enough to access the pivot bolt.
11. Remove the 12mm nut and push out the pivot bolt. Slide the shift arm out of the bracket and clean the pivot hole of whatever (if anything) is left of the old bushings.
This is what was left of mine.....
New $3.03 bushings!
12. Push new bushings into the shift arm, slide the arm into the bracket, make sure the bushing and hole line up nice and push the pivot bolt in. Tighten the nut.
13. Reverse procedure to re install shifter, covers and linkage.
Last edited by mopar_runner; Apr 1, 2013 at 05:48 PM. Reason: photobucket pissin me off
 Apr 2, 2013 | 04:40 PM
#5
Registered User
Joined: Jan 2013
Posts: 271
Likes: 0
From: AZ
How did you get that pin back in from step 2? I'm having a real hard time getting my hand in there. Other than that great and easy to follow. To get the rubber gasket thing out of the way, I peeled in the top and pulled on the back at each of the holes

Trending Topics
Apr 2, 2013 | 08:42 PM
#8

Registered User
Joined: Mar 2013
Posts: 139
Likes: 0
From: Leesport, PA
Apr 2, 2013 | 08:45 PM
#9
Registered User
Joined: Mar 2013
Posts: 139
Likes: 0
From: Leesport, PA

 Apr 3, 2013 | 03:28 PM
#12
Registered User
Joined: Jan 2013
Posts: 271
Likes: 0
From: AZ
Do you think this was probably easier to do vs the pin? I lost my somehow when I was trying to put it back in. Dropped somewhere looked for hours with no luck, and there is not really any place for it to hide. Hopefully I can find something that will fit at the local hardware store.
Apr 3, 2013 | 04:15 PM
#13
Registered User
Joined: Mar 2013
Posts: 139
Likes: 0
From: Leesport, PA
Do you think this was probably easier to do vs the pin? I lost my somehow when I was trying to put it back in. Dropped somewhere looked for hours with no luck, and there is not really any place for it to hide. Hopefully I can find something that will fit at the local hardware store.
You should be able to find something at hardware store to fit, for sure.
Apr 4, 2013 | 07:44 AM
#14
Thread Starter
Registered User
Joined: Dec 2012
Posts: 50
Likes: 0
From: Northern UT
Do you think this was probably easier to do vs the pin? I lost my somehow when I was trying to put it back in. Dropped somewhere looked for hours with no luck, and there is not really any place for it to hide. Hopefully I can find something that will fit at the local hardware store.
You should be able to find a pin like that at the local hardware store. I bet I know where its hiding though. Directly under where that pin goes is a tranny mount. I'm almost certain it fell in between that mount and the tranny. Remove the little angle bracket (2 bolts) and wiggle a magnet in between the mount as deep as you can get it. LOL... who else's mind just took a detour? LOL.
Apr 4, 2013 | 08:00 AM
#15
Registered User
Joined: Jan 2013
Posts: 271
Likes: 0
From: AZ
Yeah, I think the 5/16 pin I picked up was the one that fit right in. Putting that pin in by removing those two nuts was so much easier.
Thats where I was thinking it fell, took a magnet all over in there and felt everything. I'm almost thinking it dropped onto me and fell into my pants then dropped out somewhere.
Either way, is so nice having that lever nice and tight!
Thats where I was thinking it fell, took a magnet all over in there and felt everything. I'm almost thinking it dropped onto me and fell into my pants then dropped out somewhere.
Either way, is so nice having that lever nice and tight!
Jul 13, 2013 | 05:05 PM
#18
Registered User
Joined: Mar 2013
Posts: 139
Likes: 0
From: Leesport, PA
Jul 14, 2013 | 06:04 PM
#19

Registered User
Joined: Jan 2013
Posts: 12
Likes: 0
From: Kunsan AB, ROK
There is one thing I would suggest, it is much easier to pull the pin on the transmission in you put it in L (all the way back). This will bring the linkage closer to the front of the vehicle and put it in a much easier to reach location without the danger of dropping the pin into the transmission mount.
What a great and easy fix. I have been wondering for a long time now what was the cause of this and was just about to dig into the shifter when I saw your post. My bushings looked exactly like yours by the way.
Aug 10, 2013 | 12:07 PM
#20

Registered User
Joined: Mar 2013
Posts: 1,047
Likes: 1
From: Central TX
Thanks for the great writeup MoparRunner. It definitely took me longer than 45 minutes. Closer to 2.5 hours and then 30 minutes prep, cleanup and cleaning and vacuuming while I had everything out/up...
I have a pickup so there were a few minor variations.
Step 2 is much tighter to get to. I used a small pair of needle nose pliers contorting my arm to get to the clip on the pin. The clip was facing the tranny and there was really no angle where I could see it, just feel it and once pushed part of the way out by hand could see to grab w/ pliers. But I ultimately worked it out.
On reinstall, I used a long pair of needle nose pliers to insert the pin from transmission side through and then put the clip through where I could see it. It's about twice as wide on that side now as before, but it doesn't appear to hit anything upon shifting.
(I also initially tried to remove the clip and pin from the connection closer to the tranny as the recommended one was such a pain, but it didn't allow me to remove the shifter from the floor.)
With clip and pin reinstalled opposite direction of removal:
Following the bolts in foreground, back that's the connection to the shifter shaft that you pull through floor:
Showing how tight it is -- side towards tranny has maybe two inches in which to work:
Step 3: I had 4 10mm bolts holding the center console to the frame.
Step 6 was tough. Those connectors are small and my hands couldn't really get ahold of them. So I used a small screwdriver and pair of needle nose pliers to disconnect.
Step 7 I had trouble removing the transfer case rod through the slot, so I ended up removing the clip and pin immediately beneath the case to remove.
Step 9: closed needle nose worked great for pushing those metal bushings out.
Step 10: Grabbing those rubber boots with needle nose made great for pushing those rubber grommets through. To put back together, I found pinching in half, putting one end through and then pushing the rest of the way worked best. No pliers needed for reinstall.
Step 11: All that was left of my old bushings was dusty blue powder.

The last thing I'll add is that it looks like the the 4wd/transfercase shifter looks like it has 4 of the same blue bushings as well. If your tcase shifter is also wobbly, it definitely makes sense to do them all while you're in there.
I have a pickup so there were a few minor variations.
Step 2 is much tighter to get to. I used a small pair of needle nose pliers contorting my arm to get to the clip on the pin. The clip was facing the tranny and there was really no angle where I could see it, just feel it and once pushed part of the way out by hand could see to grab w/ pliers. But I ultimately worked it out.
On reinstall, I used a long pair of needle nose pliers to insert the pin from transmission side through and then put the clip through where I could see it. It's about twice as wide on that side now as before, but it doesn't appear to hit anything upon shifting.
(I also initially tried to remove the clip and pin from the connection closer to the tranny as the recommended one was such a pain, but it didn't allow me to remove the shifter from the floor.)
With clip and pin reinstalled opposite direction of removal:
Following the bolts in foreground, back that's the connection to the shifter shaft that you pull through floor:
Showing how tight it is -- side towards tranny has maybe two inches in which to work:
Step 3: I had 4 10mm bolts holding the center console to the frame.
Step 6 was tough. Those connectors are small and my hands couldn't really get ahold of them. So I used a small screwdriver and pair of needle nose pliers to disconnect.
Step 7 I had trouble removing the transfer case rod through the slot, so I ended up removing the clip and pin immediately beneath the case to remove.
Step 9: closed needle nose worked great for pushing those metal bushings out.
Step 10: Grabbing those rubber boots with needle nose made great for pushing those rubber grommets through. To put back together, I found pinching in half, putting one end through and then pushing the rest of the way worked best. No pliers needed for reinstall.
Step 11: All that was left of my old bushings was dusty blue powder.
The last thing I'll add is that it looks like the the 4wd/transfercase shifter looks like it has 4 of the same blue bushings as well. If your tcase shifter is also wobbly, it definitely makes sense to do them all while you're in there.
Last edited by RSR; Aug 10, 2013 at 02:04 PM.


