
Hella Vision Plus H4 Light Conversion
 Aug 11, 2013 | 08:56 PM
#1

Thread Starter
Registered User
Joined: Mar 2013
Posts: 1,047
Likes: 1
From: Central TX
Hella Vision Plus H4 Light Conversion
Okay, I'm posting over a couple posts, so bear with me.
Resources:
2 Hella Vision Plus Lights, 190 x 132mm, Item 003427291 -- These for ~$95: http://www.ebay.com/itm/Hella-003427...-/161079324027
1 Dick Cepek Wire Stoneguard for 7 3/8" x 5 3/8" lights for ~$15 -- This: http://www.ebay.com/itm/Wire-Stone-R...-/121155277263
1 Wiring Relay Harness - This for ~$30: http://www.ebay.com/itm/CERAMIC-H4-H...-/330813121438
2 Front Grill Clips for ~$2 - this http://www.toyotapartsoverstock.com/...046712020.html
9 Front Grill Clips for ~$7 - this http://www.toyotapartsoverstock.com/...046712040.html
All in, this was approx a $150 project.
For Wire Harness Install, head here: https://www.yotatech.com/forums/f131.../#post52106589
I had to buy a sheet of metal flashing (to make a bracket) and a bolt to mount the relay as well for ~$2.
And I had dialelectric grease, both grease (used on grounds) and spray (used for all connections), that were used as well.
For cleaning grounds, you'll want some sandpaper and/or steel wool too.
Last edited by RSR; Aug 11, 2013 at 10:10 PM.
Aug 11, 2013 | 09:04 PM
#2
Thread Starter
Registered User
Joined: Mar 2013
Posts: 1,047
Likes: 1
From: Central TX
About the lamps:
Low beam image off of box (kind of hard to see, but think of it as overhead view of car with lines being the road and car to the left):

High beam image off of box:

There are both SAE/DOT approved lamps and those that aren't in this product line. The item number in my first post is the SAE/DOT approved option, which I purchased. DOT stamp on light glass.
Delivering powerful lighting at the maximum legal limit without increasing glare to on-coming traffic, an advanced HB2 (9003) halogen bulb and high-sheen metal reflector are combined with advanced optics to provide a more uniform, controlled, and even illumination on the road. HELLA's Vision Plus produces a 50 percent more powerful low beam and a 25 percent more powerful high beam than standard halogen sealed beam headlamps. This produces a greater range of vision for the driver, improves driver safety and reduces driver strain and fatigue. And the replaceable-bulb design saves money - no need to replace the entire unit if a bulb goes.
• Based on European headlamp technology
• Brighter than a standard halogen due to improved optics without increased glare
• Produces 50% more powerful beam on low beam
• Produces 25% more powerful beam on high beam
• Single lamp fits left or right
• Replaces standard sealed beam 6052, 6053, H6052, H6054
• Direct fit – no modification
Technology:
• Halogen
• Parabolic Reflector
Single Lamp includes:
• (1) Lamp
• (1) Bulb - 12V 60/55W HB2 (9003)
• (1) Dust Boot
High beam image off of box:
There are both SAE/DOT approved lamps and those that aren't in this product line. The item number in my first post is the SAE/DOT approved option, which I purchased. DOT stamp on light glass.
Last edited by RSR; Aug 11, 2013 at 11:17 PM.
Aug 11, 2013 | 09:05 PM
#3
Thread Starter
Registered User
Joined: Mar 2013
Posts: 1,047
Likes: 1
From: Central TX
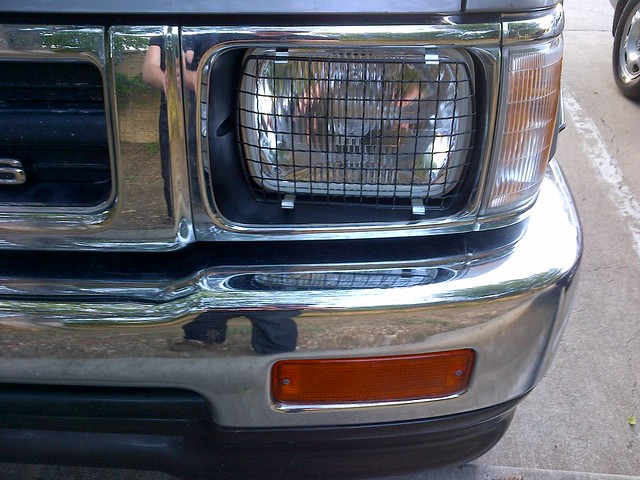
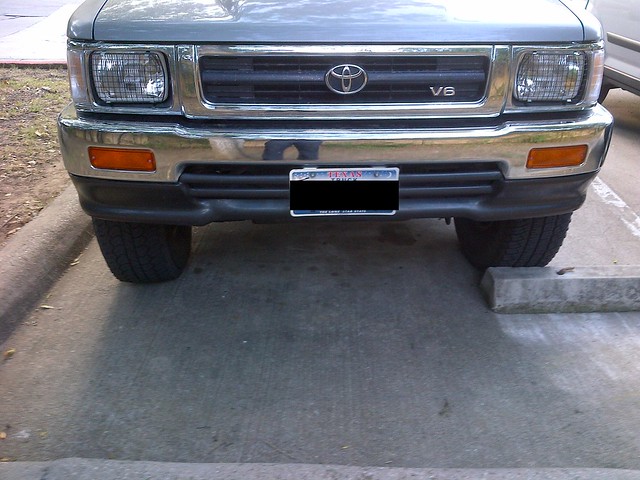
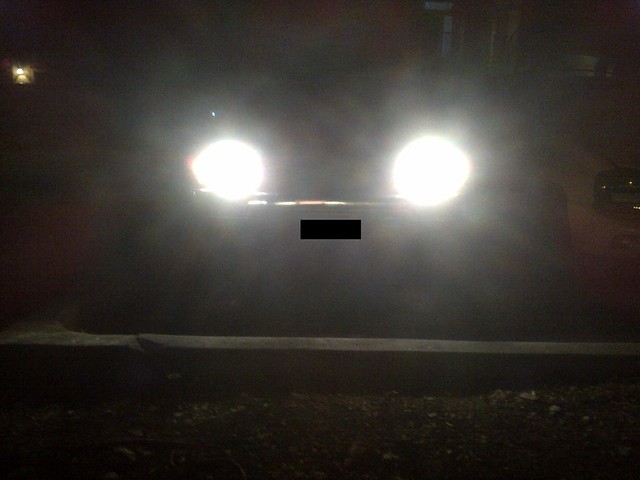
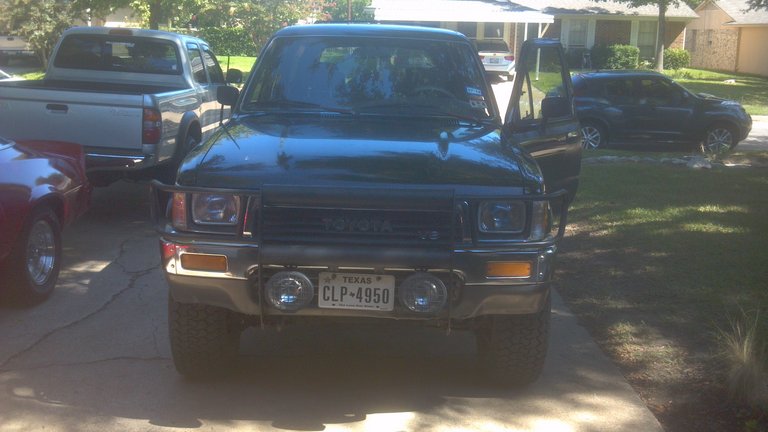
For comparison here are some initial pics.
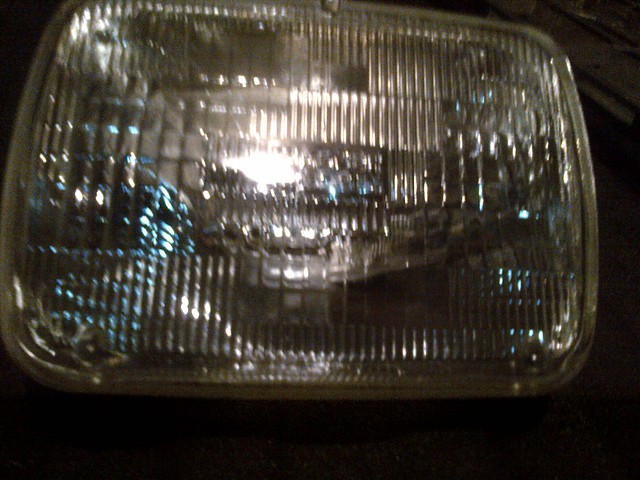
Standard sealed:
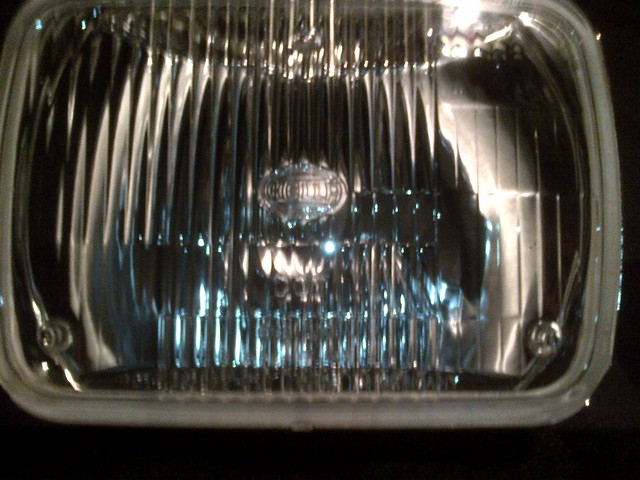
Hella Vision Plus:
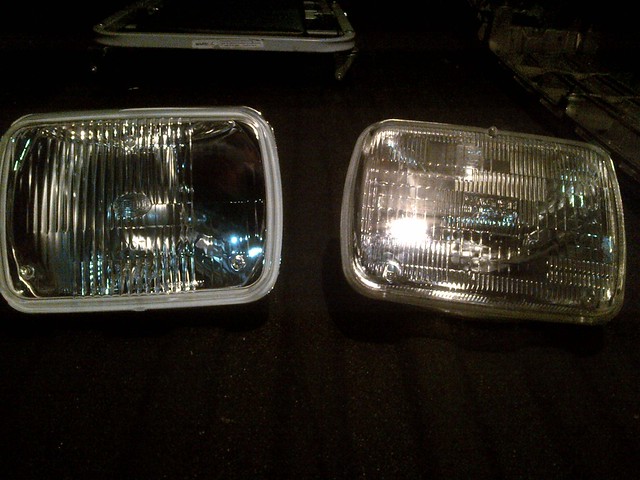
Side by side w/o flash:
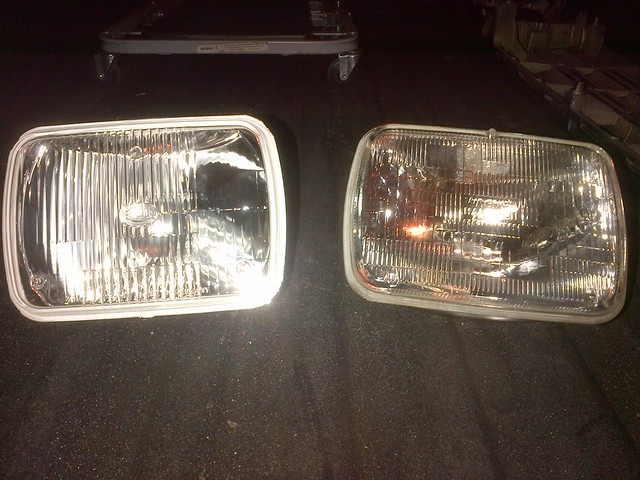
Side by side w/ flash:
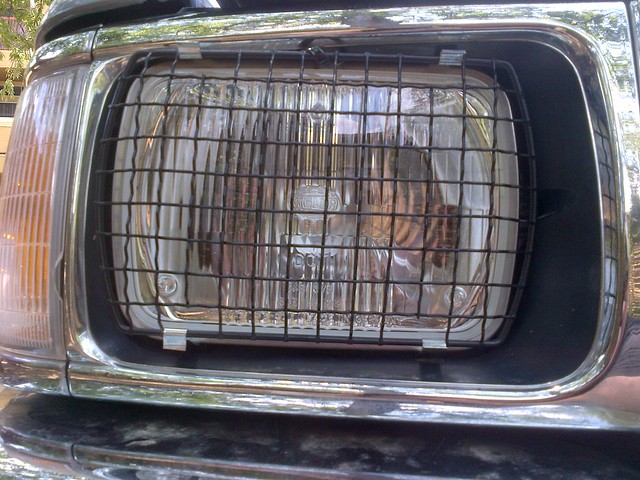
And then the Dick Cepek Stone Guard installed -- like sealed beams, the bulbs are glass so prone to breaking if struck w/ a rock.
This is the clips at stock setup:
Guards on both lights:
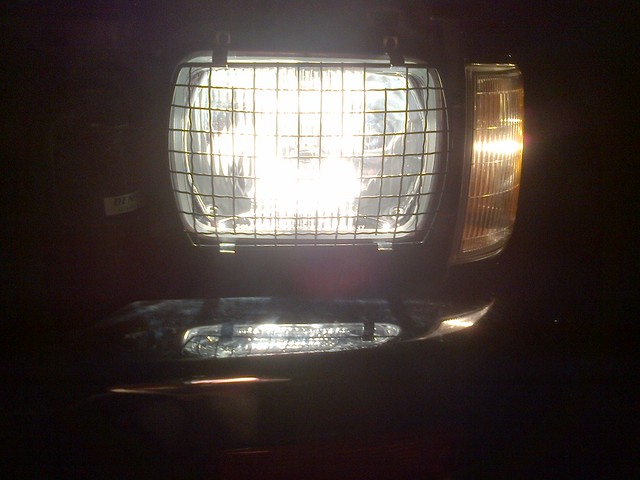
And my modified setup, passenger side (drivers is a mirror). The bottom outside I bent down so that it shouldn't slip out if impacted (the outside edge, the clamps/clips extend past light housing; on the inside they're still within it). The top middle section I ziptied to the light housing so that no one can take the protectors from my truck and so that if hit I don't lose them. The top and bottom clips I also had to bend using needle nosed pliers to ensure appropriate tension throughout -- the grille sort of pinches them, so the tension changes after you put on the grille. And have your stone guard installed on the clips when installing grille, else you risk scratching your light housing.
And with the light on drivers side (note before clip/clamp mod noted above):
Standard sealed:
Hella Vision Plus:
Side by side w/o flash:
Side by side w/ flash:
And then the Dick Cepek Stone Guard installed -- like sealed beams, the bulbs are glass so prone to breaking if struck w/ a rock.
This is the clips at stock setup:
Guards on both lights:
And my modified setup, passenger side (drivers is a mirror). The bottom outside I bent down so that it shouldn't slip out if impacted (the outside edge, the clamps/clips extend past light housing; on the inside they're still within it). The top middle section I ziptied to the light housing so that no one can take the protectors from my truck and so that if hit I don't lose them. The top and bottom clips I also had to bend using needle nosed pliers to ensure appropriate tension throughout -- the grille sort of pinches them, so the tension changes after you put on the grille. And have your stone guard installed on the clips when installing grille, else you risk scratching your light housing.
And with the light on drivers side (note before clip/clamp mod noted above):
Last edited by RSR; Aug 11, 2013 at 09:18 PM.
 Aug 11, 2013 | 10:13 PM
#6
Thread Starter
Registered User
Joined: Mar 2013
Posts: 1,047
Likes: 1
From: Central TX
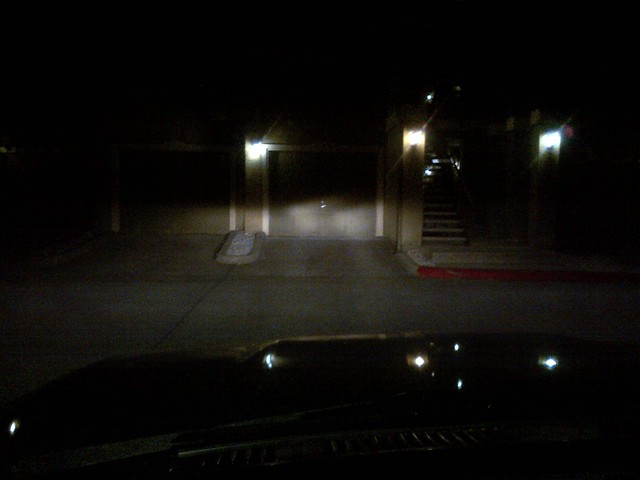
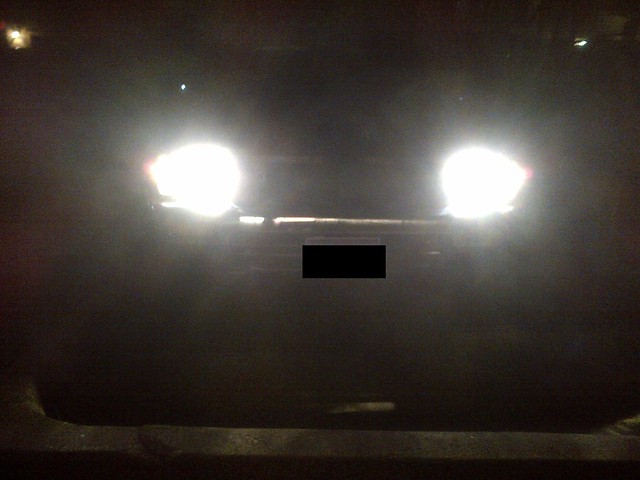
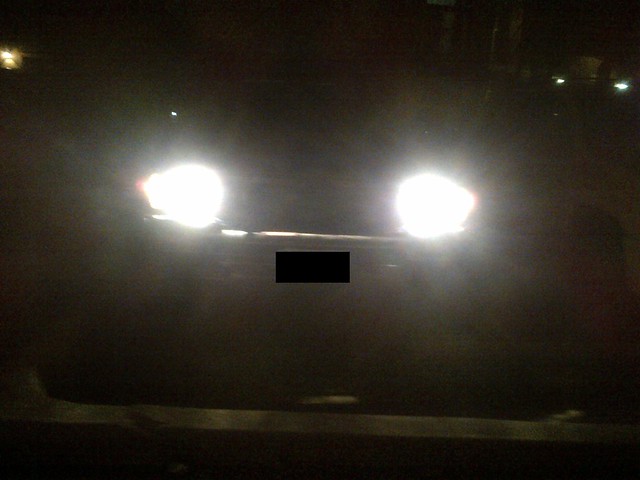
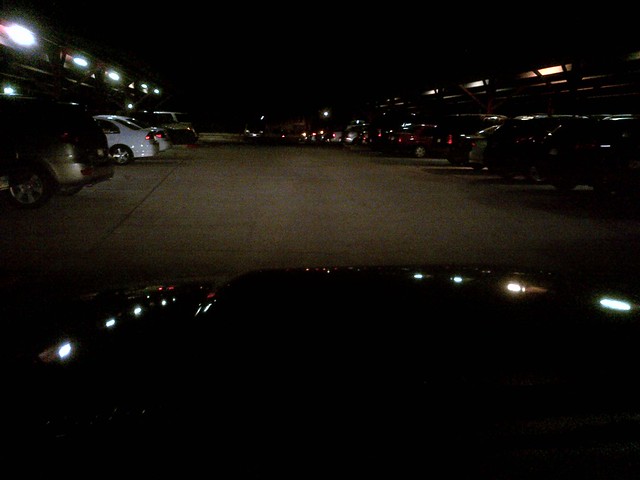
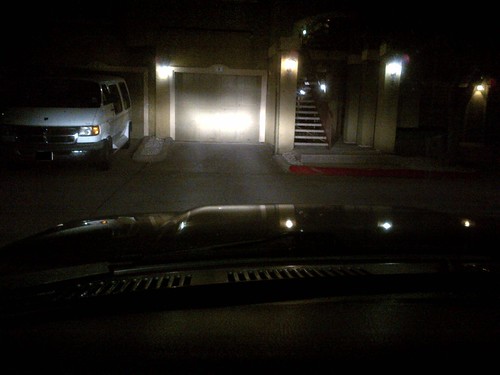
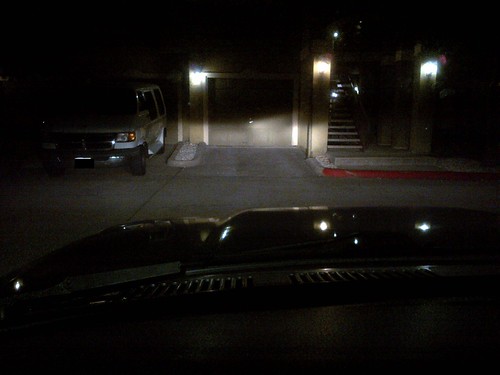
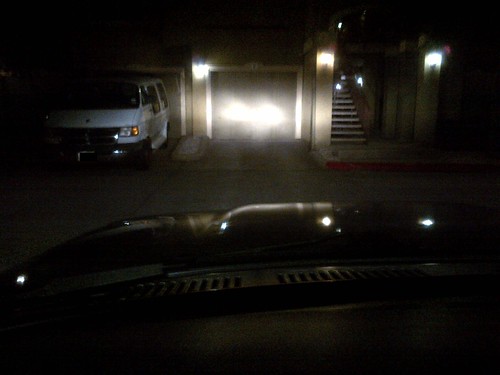
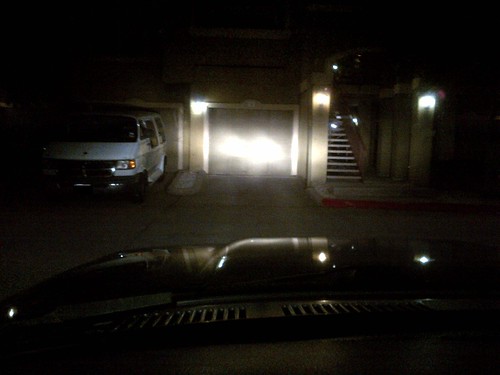
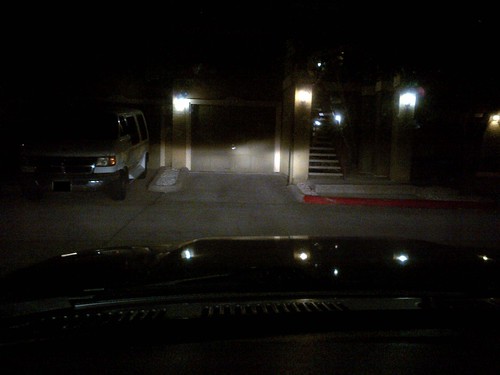
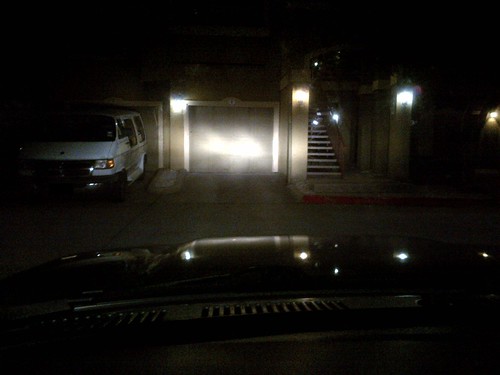
These are all on stock wiring and low beams.
Stock sealed lights:
Driver Hella, Passenger stock sealed:
Both Hella (note that the light increased enough that camera appears to have lightened the entire picture, but beam pattern can still be observed):
Stock sealed lights:
Driver Hella, Passenger stock sealed:
Both Hella (note that the light increased enough that camera appears to have lightened the entire picture, but beam pattern can still be observed):
Aug 11, 2013 | 11:02 PM
#7
Thread Starter
Registered User
Joined: Mar 2013
Posts: 1,047
Likes: 1
From: Central TX
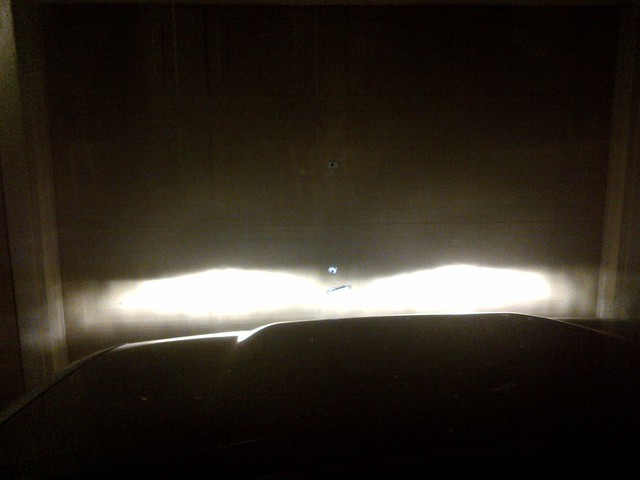
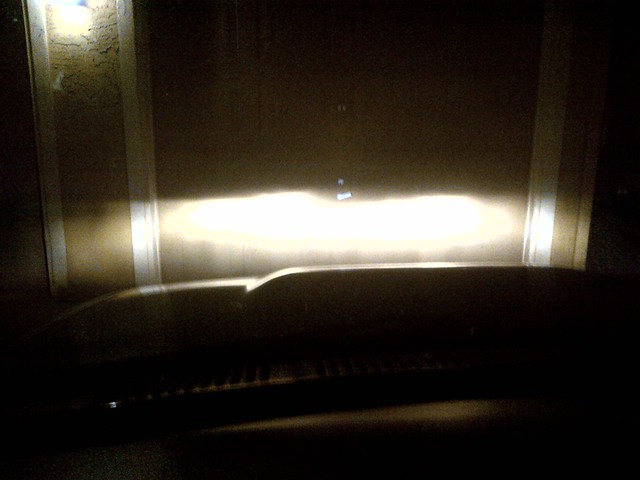
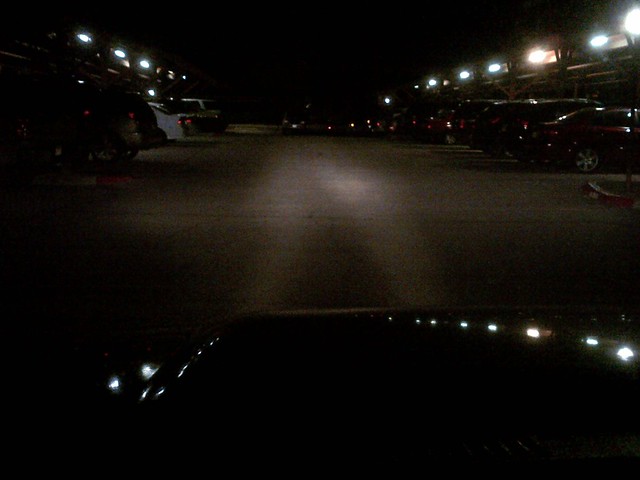
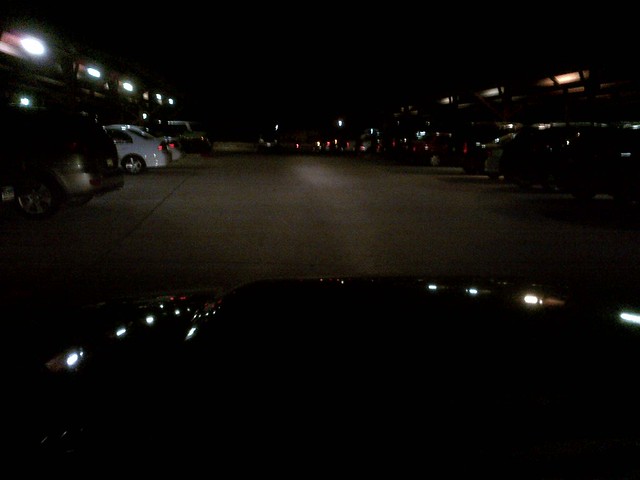
The wiring harnesses for these vary, so pay attention.
Stock sealed beams, factory harness - Low then Hi Beams:
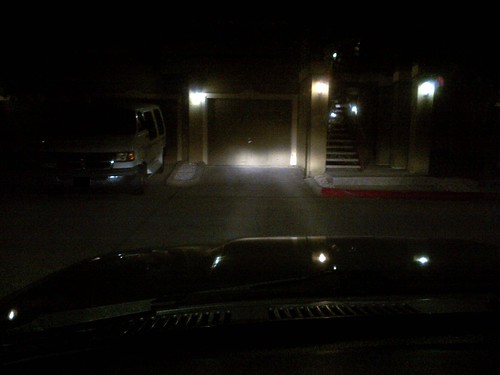
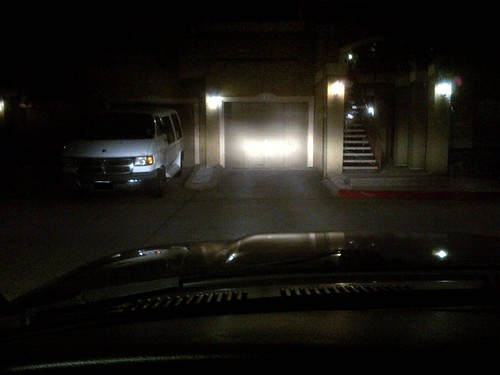
Stock sealed beams, new external harness - Low then Hi Beams:
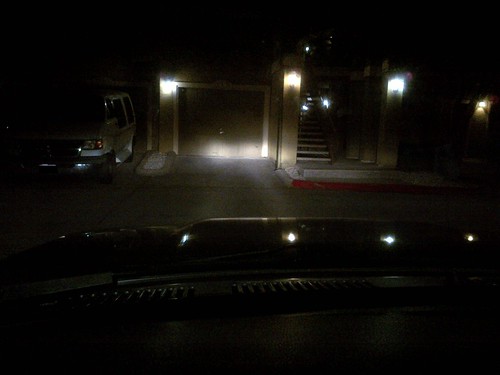
Hellas, factory harness - Low then Hi Beams:
Hellas, new external harness - Low then Hi Beams:
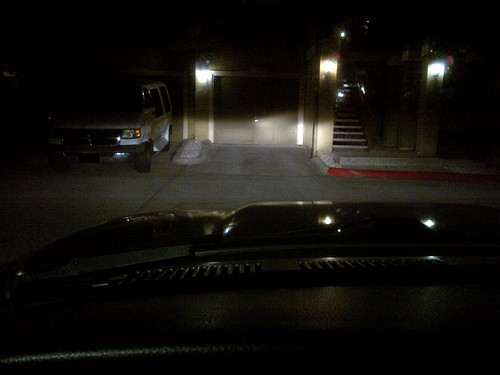
Hellas *WITH ROCKGUARD*, new external harness - Low then Hi Beams:
(Note that rockguard adds slight streaking on low beams outside of main point of aim, little to no effect on high beams other than slightly reduced light output)
Stock sealed beams, factory harness - Low then Hi Beams:
Stock sealed beams, new external harness - Low then Hi Beams:
Hellas, factory harness - Low then Hi Beams:
Hellas, new external harness - Low then Hi Beams:
Hellas *WITH ROCKGUARD*, new external harness - Low then Hi Beams:
(Note that rockguard adds slight streaking on low beams outside of main point of aim, little to no effect on high beams other than slightly reduced light output)
Last edited by RSR; Aug 11, 2013 at 11:13 PM.
Trending Topics
Aug 11, 2013 | 11:08 PM
#8
Thread Starter
Registered User
Joined: Mar 2013
Posts: 1,047
Likes: 1
From: Central TX
I'll try to get some better road pics posted at some point too. But living in the city, I was primarily interested in increased low beam performance, which I got and then some... Overall very happy.
For my situation, the harness didn't make a huge difference, but from a reliability standpoint, it was well worthwhile.
For my situation, the harness didn't make a huge difference, but from a reliability standpoint, it was well worthwhile.
Last edited by RSR; Aug 11, 2013 at 11:14 PM.
 Aug 15, 2013 | 01:08 AM
#11
Thread Starter
Registered User
Joined: Mar 2013
Posts: 1,047
Likes: 1
From: Central TX
It connects directly to your battery positive. There's an inline fuse on it that I ended up sort of zip tieing to the factory fuse box under the hood. I'm sure it's fine, but I may end up swapping that out for a genuine waterproof one that ATC makes -- pretty sure both the harness and fuse holders I saw are 10 gauge... I need to do some other electrical anyways...
 Oct 6, 2013 | 07:48 PM
#13
Registered User
Joined: Jul 2013
Posts: 254
Likes: 1
From: Mesquite Texas
thanks again for posting this up RSR, just completed my harness and light swap today!
left is the new lens, right is the old halogen-
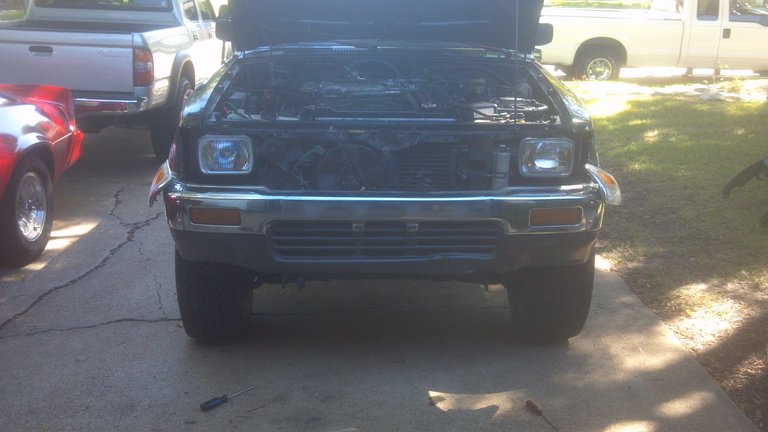
finished product-
I'd post up a night shot but my camera is terrible at night photos... But i will say my light output doubled, at minimum. Best upgrade i've done to my 4Runner so far!
left is the new lens, right is the old halogen-

finished product-

I'd post up a night shot but my camera is terrible at night photos... But i will say my light output doubled, at minimum. Best upgrade i've done to my 4Runner so far!
Last edited by jb451; Oct 6, 2013 at 07:51 PM.
Oct 10, 2013 | 10:30 PM
#15

Registered User
Joined: May 2012
Posts: 3
Likes: 0
From: Southern California
This looks great. lots of great info on this site. I have been looking into this for my 89 pickup. Has anyone tried these ones?
http://www.rallylights.com/h6054-200...dlamp-kit.html
http://www.rallylights.com/h6054-200...dlamp-kit.html
Oct 11, 2013 | 02:22 PM
#16
Thread Starter
Registered User
Joined: Mar 2013
Posts: 1,047
Likes: 1
From: Central TX
This looks great. lots of great info on this site. I have been looking into this for my 89 pickup. Has anyone tried these ones?
http://www.rallylights.com/h6054-200...dlamp-kit.html
http://www.rallylights.com/h6054-200...dlamp-kit.html
To be road legal in US, make sure you're getting the DOT stamped headlights -- I believe DOT headlamps have to scatter slightly more light upwards to illuminate overhead roadsigns with low beams than the ECE approved lights. That said, ECE beam patterns are in this shape: _/_/ , and the DOT Hellas definitely have that pattern to them as you can see in above pictures.
Here's an example of a some stock DOT approved headlight and a replacement Autopal ECE stamped light.
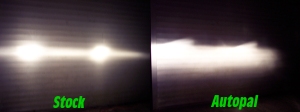
This site has some more pics: http://betterautomotivelighting.com/...ce-headlights/
Also, wanted to note that Hella has a cool simulator for their auxiliary lights, but replacement housings not included: http://www.hella.com/MicroSite/elive...ion/index.html
Last edited by RSR; Oct 11, 2013 at 02:25 PM.
May 29, 2014 | 10:33 AM
#17
Contributing Member
Joined: Dec 2003
Posts: 2,226
Likes: 3
From: Vancouver, BC
Is upgrading the wiring harness a must-do? Could I go temporarily on the oem harness? Would they just not be as bright as they could be or is there a safety issue? One of my standard halogens needs to be replaced and I am contemplating the H4s. The old styles are tolerable, and I do have lightforce 170s, but having brighter driving lights that I don't have to worry about bothering oncoming traffic with would be nice too.
Can't decide whether to get nighthawks/xtravisions or H4s...
Can't decide whether to get nighthawks/xtravisions or H4s...
May 29, 2014 | 04:55 PM
#18

Registered User
Joined: Aug 2011
Posts: 26
Likes: 0
From: Kirkland, WA
Is upgrading the wiring harness a must-do? Could I go temporarily on the oem harness? Would they just not be as bright as they could be or is there a safety issue? One of my standard halogens needs to be replaced and I am contemplating the H4s. The old styles are tolerable, and I do have lightforce 170s, but having brighter driving lights that I don't have to worry about bothering oncoming traffic with would be nice too.
Can't decide whether to get nighthawks/xtravisions or H4s...
Can't decide whether to get nighthawks/xtravisions or H4s...
This is an old thread... but:
Upgrading the wiring harness is only required if you are using higher than stock wattage bulbs. The bulb connections are the same as OEM.
I highly recommend H4s, I would also suggest using a European E-code (TUV) lens instead of a DOT lens. The E-code lamps put drastically more light on the ground than DOT lamps, and actually cause less glare to oncoming drivers than DOT lamps. They are plug and play for the pre-Tacoma pickups. I ran them in mine and it was a huge difference.
May 29, 2014 | 06:29 PM
#19
Contributing Member
Joined: Dec 2003
Posts: 2,226
Likes: 3
From: Vancouver, BC
This is an old thread... but:
Upgrading the wiring harness is only required if you are using higher than stock wattage bulbs. The bulb connections are the same as OEM.
I highly recommend H4s, I would also suggest using a European E-code (TUV) lens instead of a DOT lens. The E-code lamps put drastically more light on the ground than DOT lamps, and actually cause less glare to oncoming drivers than DOT lamps. They are plug and play for the pre-Tacoma pickups. I ran them in mine and it was a huge difference.
Last edited by Brendan; May 29, 2014 at 06:33 PM.
May 30, 2014 | 10:54 PM
#20
Thread Starter
Registered User
Joined: Mar 2013
Posts: 1,047
Likes: 1
From: Central TX
Well, that's not entirely true. While the auxillary harness isn't required, continuing run the stock setup won't give your lights full power, and also will lead to early failure of your light switch in the console, which is a pain to replace. Those light harnesses are $25 and maybe an hour or two to install. Highly worth it IMO.


