
Definitive Temp Gauge Fix!
 Jul 18, 2013 | 10:17 AM
#1
Thread Starter
Registered User
Joined: Apr 2010
Posts: 481
Likes: 9
From: Spokane, WA
Definitive Temp Gauge Fix!
The temperature gauge in my 87' 4runner ha been finicky since i first got it years ago. Some have suggested bad senders, loose screws in the gauge cluster, etc. I tried a few things and after disassembly finally found a fix to what seems to be a VERY common problem. This fix will work for 4runners 84' to 89' and trucks 84' to 88 at LEAST and probably others.
Symptoms
-Temp gauge only works sometimes
-Needle jumps to middle regardless of whether engine is warm or not
-Smacking the dashboard sometimes helps it to work
Cause
-Broken wire inside temp gauge
Fix
-Remove gauge, resolder wire
Explanation
-The temp gauge works by having current flowing through 2 different windings of copper wire. Each winding tries to pull the gauge towards the top or bottom. With engine cold, there is high resistance to ground through the winding that tries to pull it to the top, and low resistance for the one pulling it to the bottom, this is why the needle is (or should be) at the bottom when cold. As the motor warms, resistance through the sender in the intake manifold lessens and lets more current flow through the winding that tries to pull the needle to the top. If one of the wires in the windings breaks, it will try to ground through somewhere else, causing erratic readings.
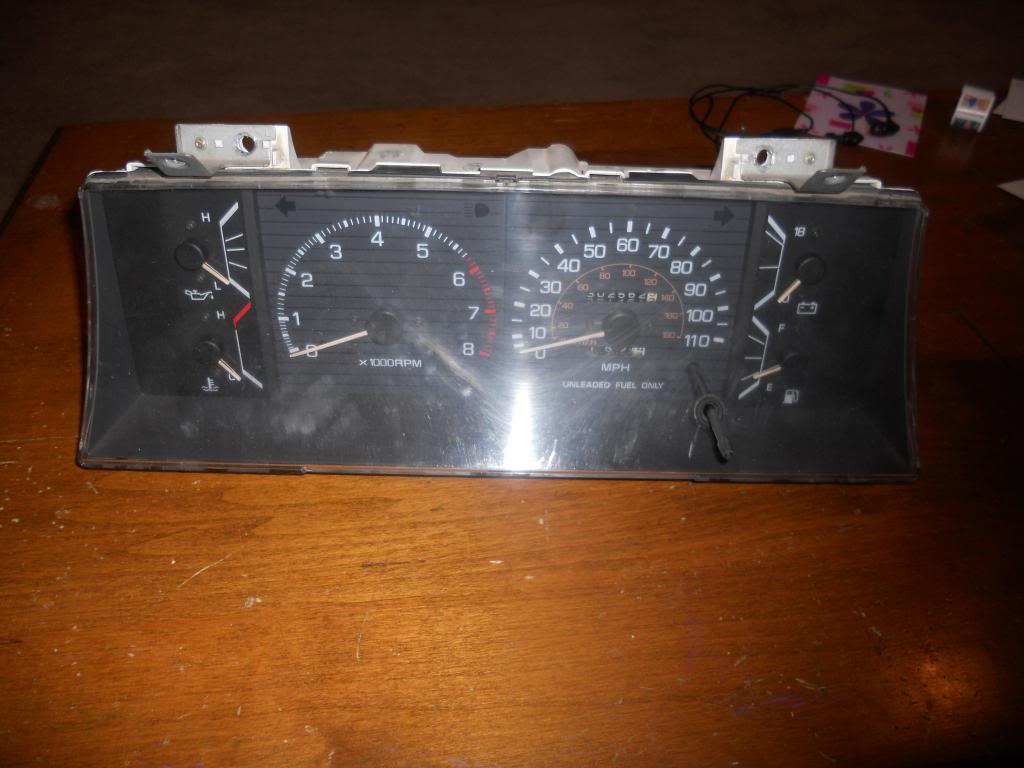
Begin by removing the gauge cluster. I won't detail that here, there are many good writeups here on Yotatech. You'll end up with this:
Remove these 2 brackets on the back of the gauge cluster by unscrewing them.
Push these clips down and they will pull out. This will let you remove the clear plastic face
End up with this:
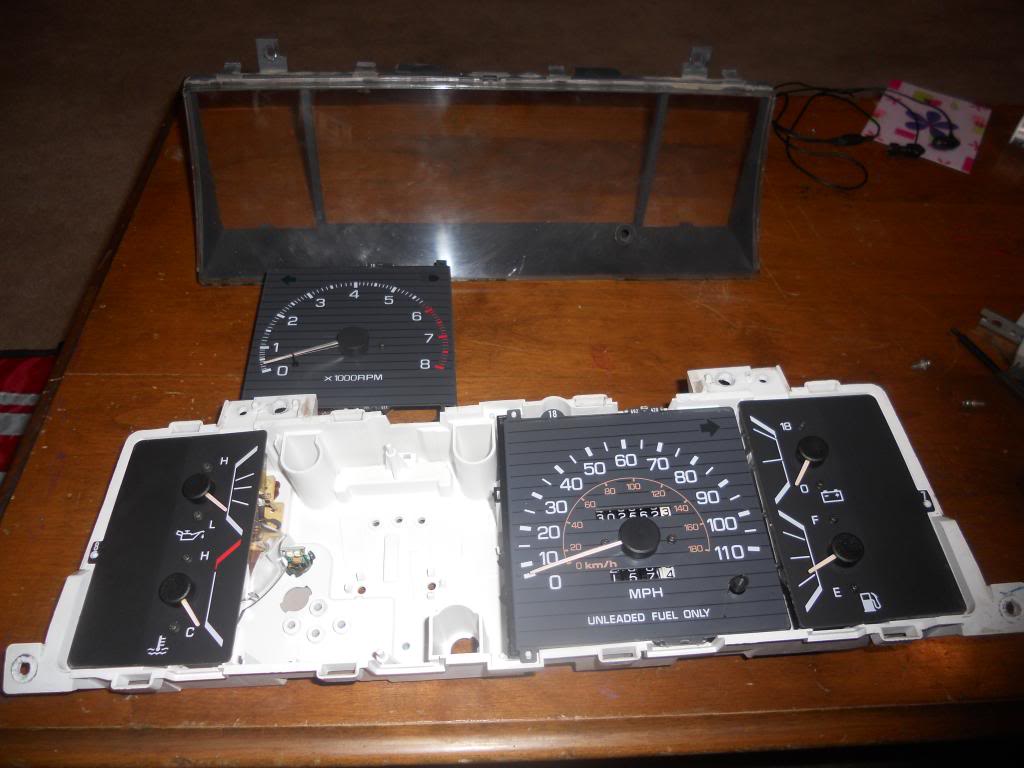
Flip it over and remove the tachometer by unscrewing these 3 screws:
And these 2 Screws:
End up with this:
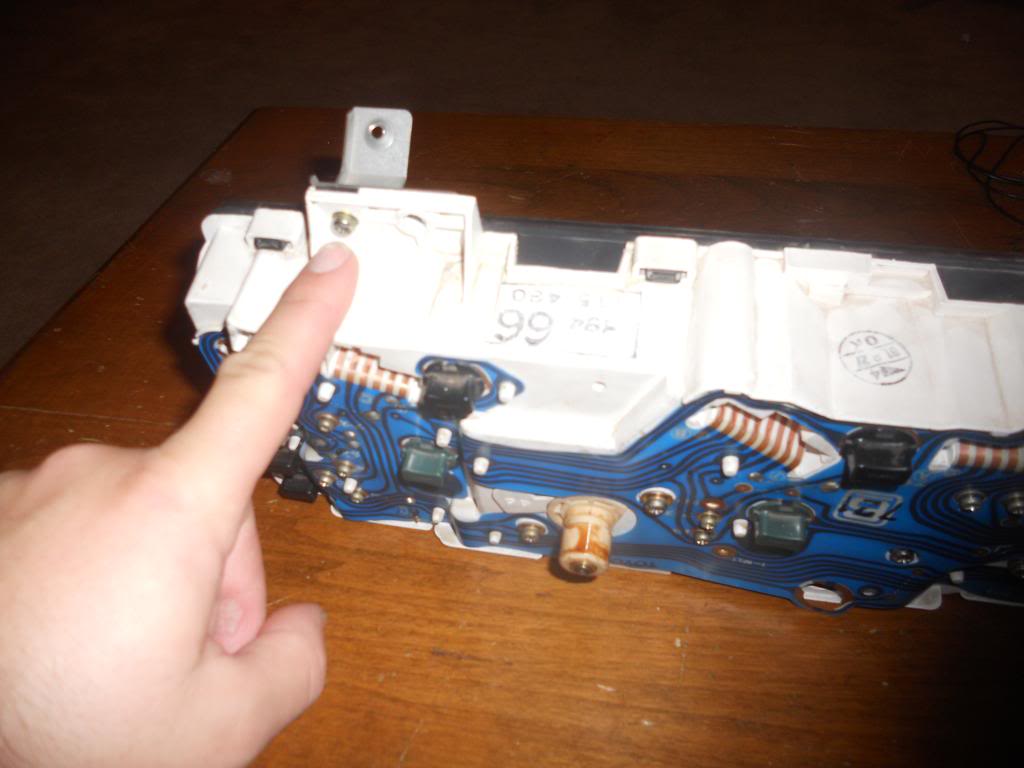
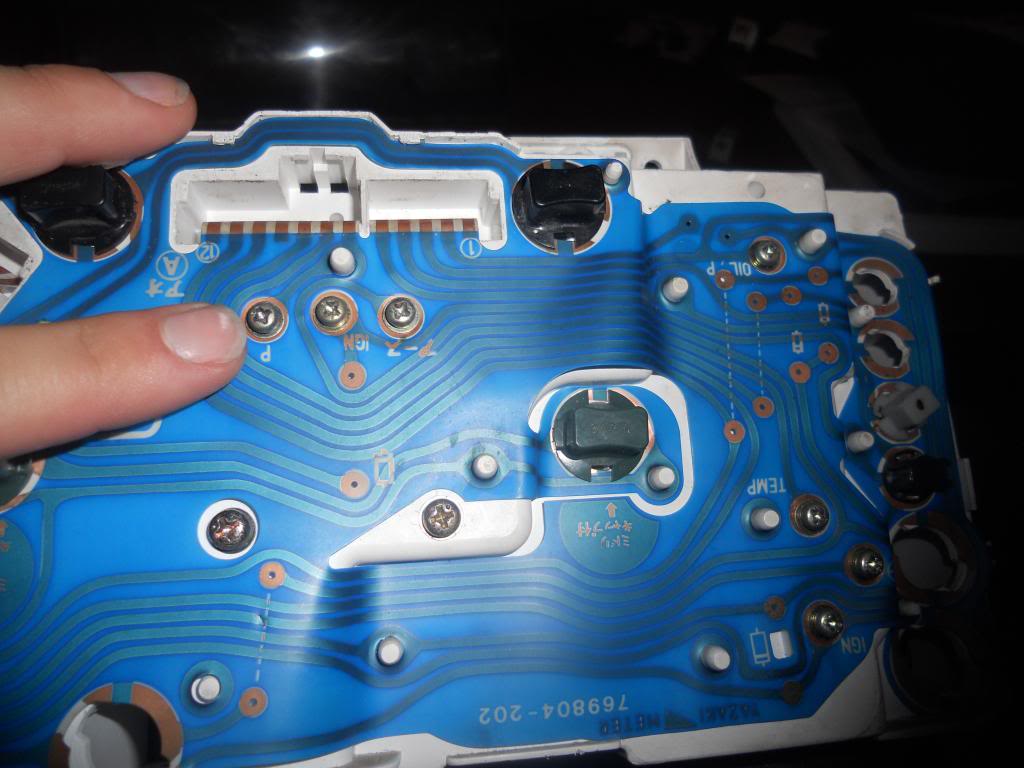
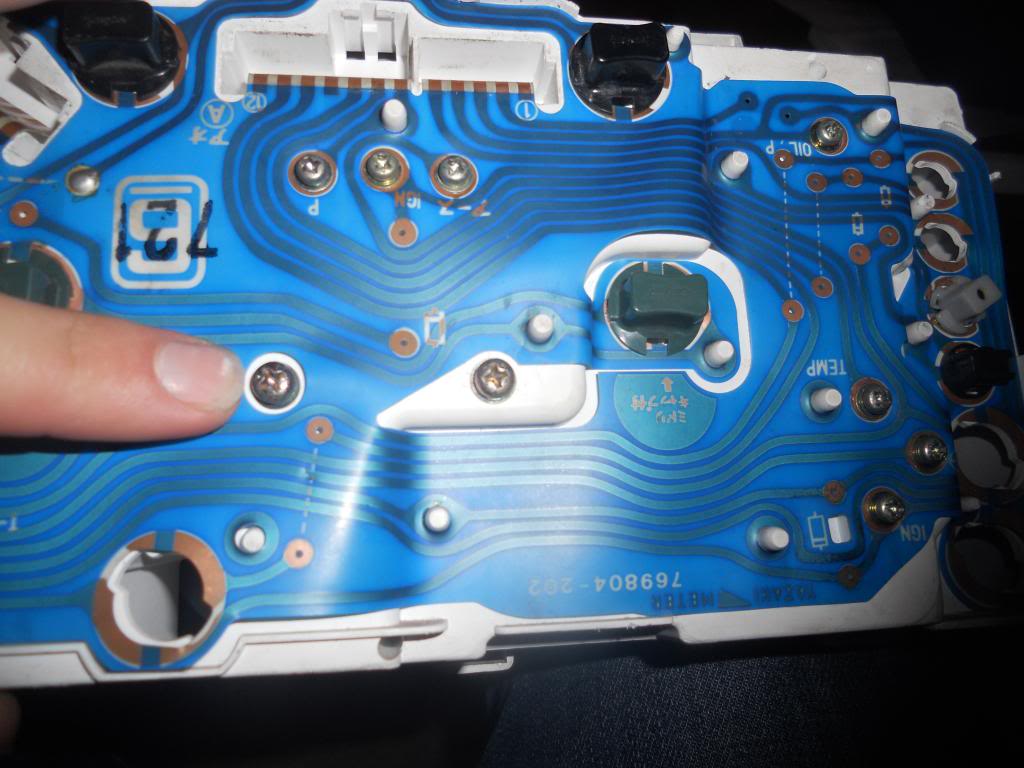
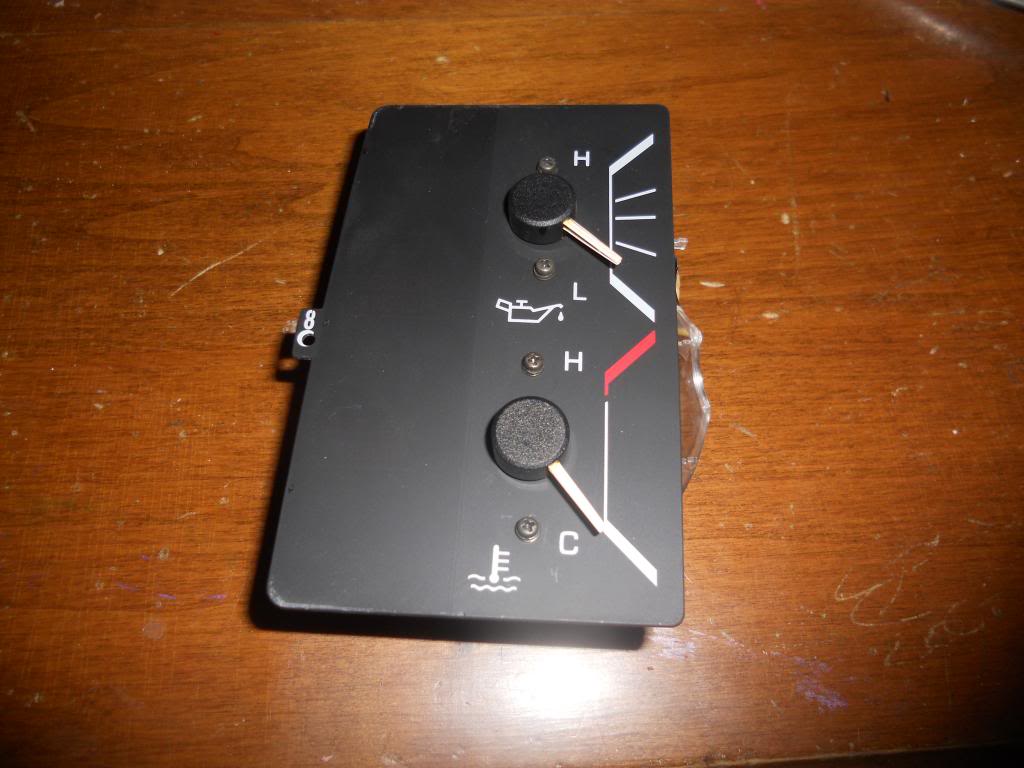
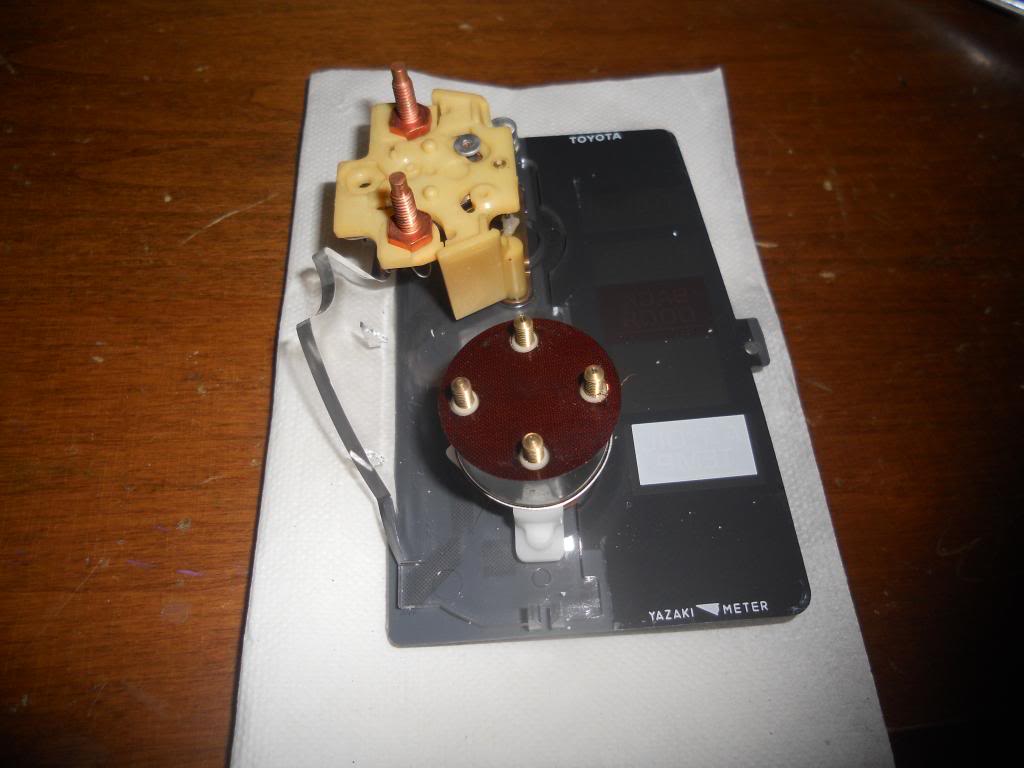
Remove the oil pressure/ temp gauge by unscrewing this top screw:
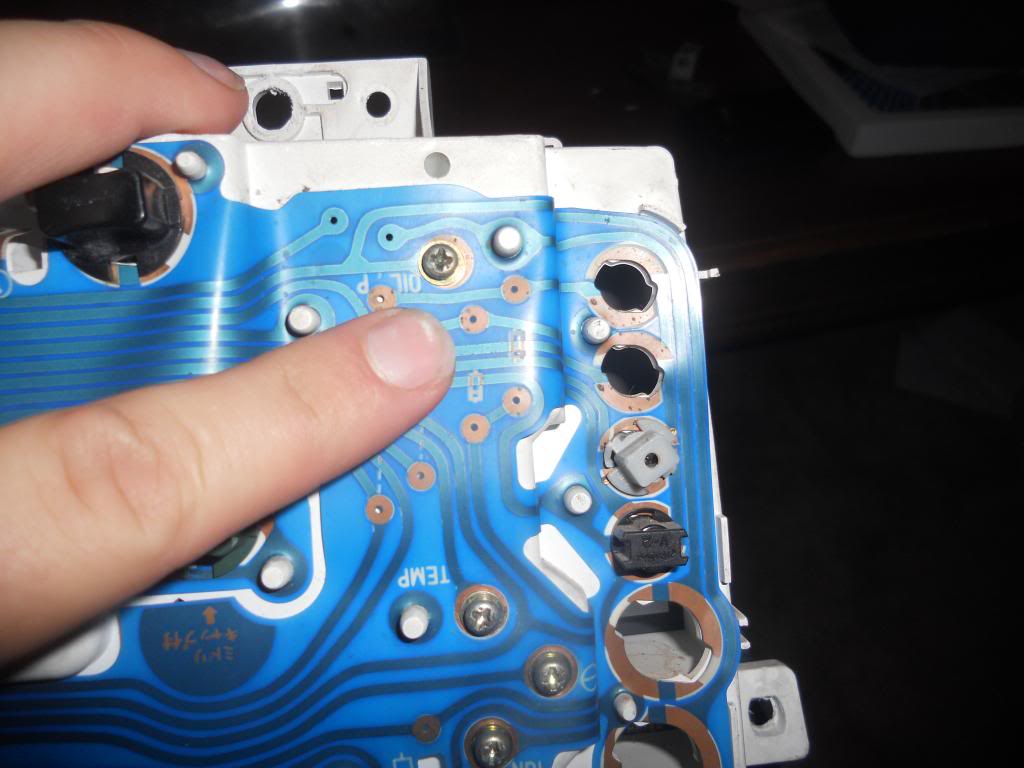
And these 3 screws:
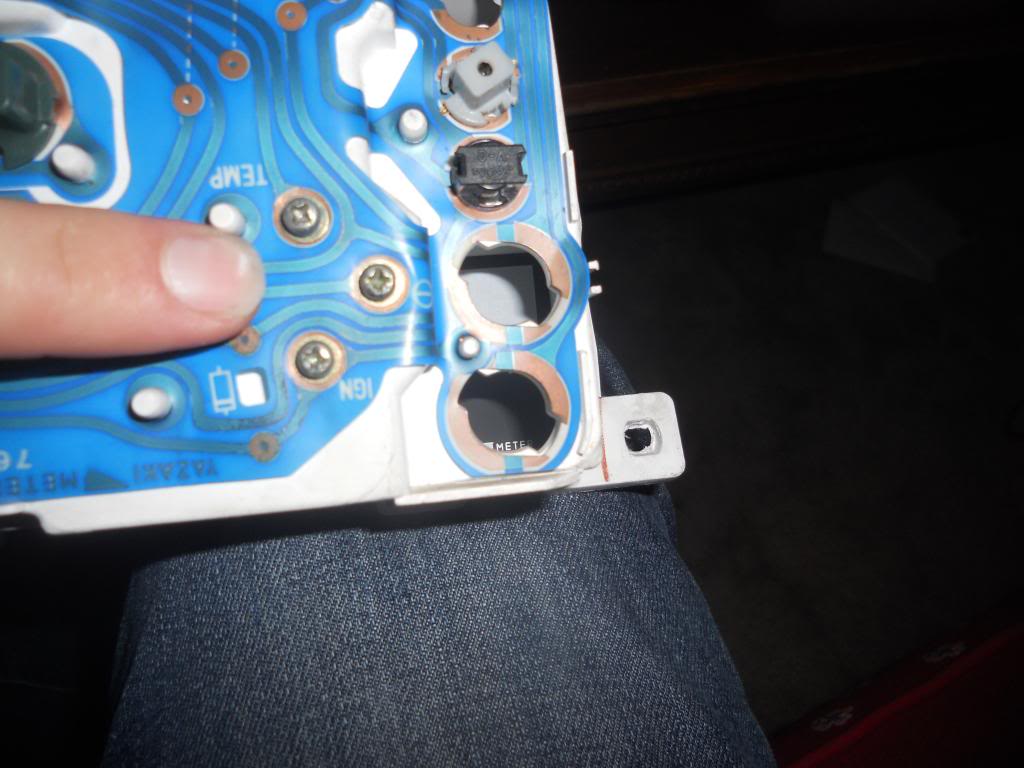
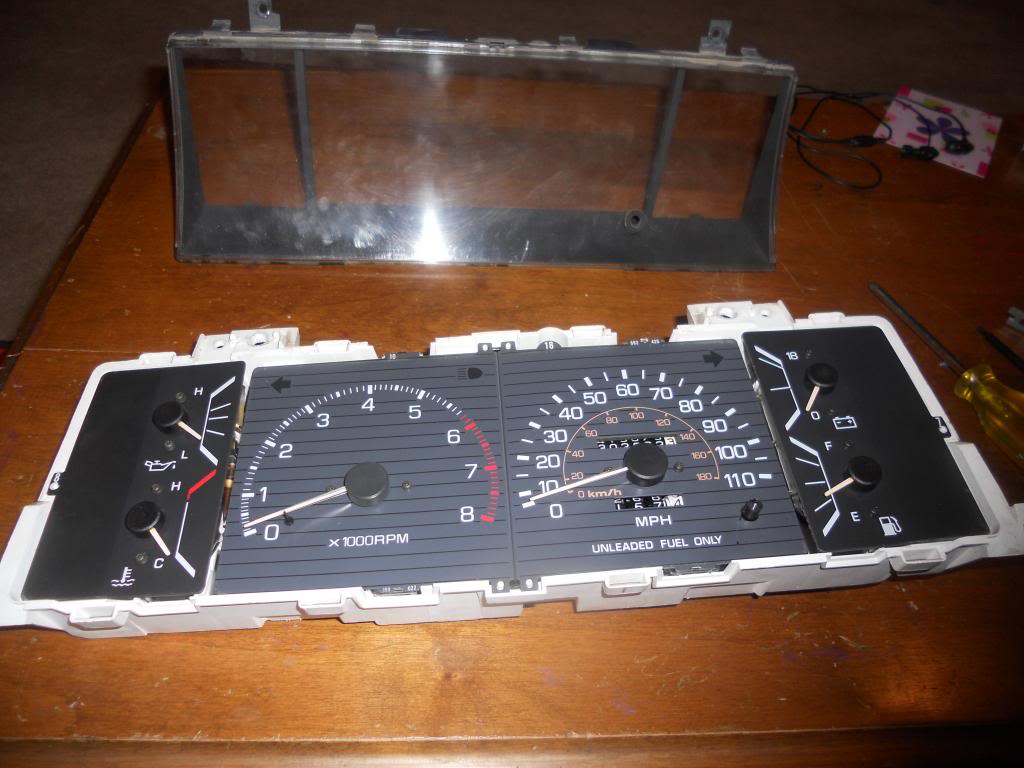
Then pull out the gauge, set aside rest of the cluster, and end up with this:
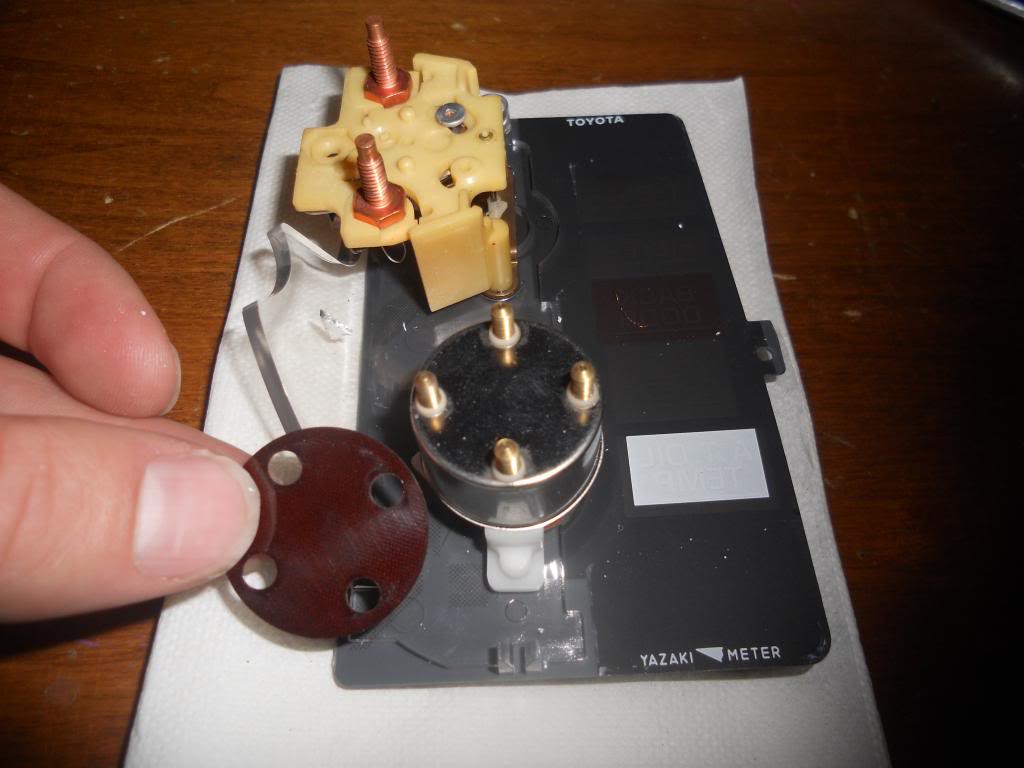
Flip it over and remove these 4 nuts and washers (remember where the small one goes):
And these 2 nuts and washers:
Remove the circuit board and end up with this:
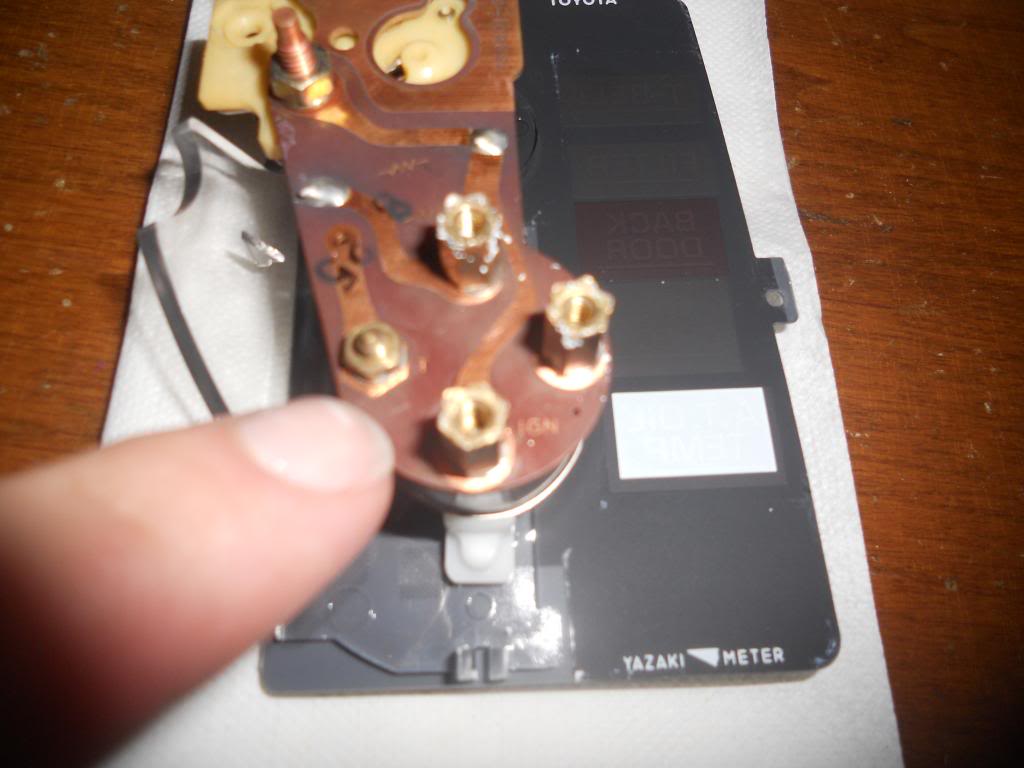
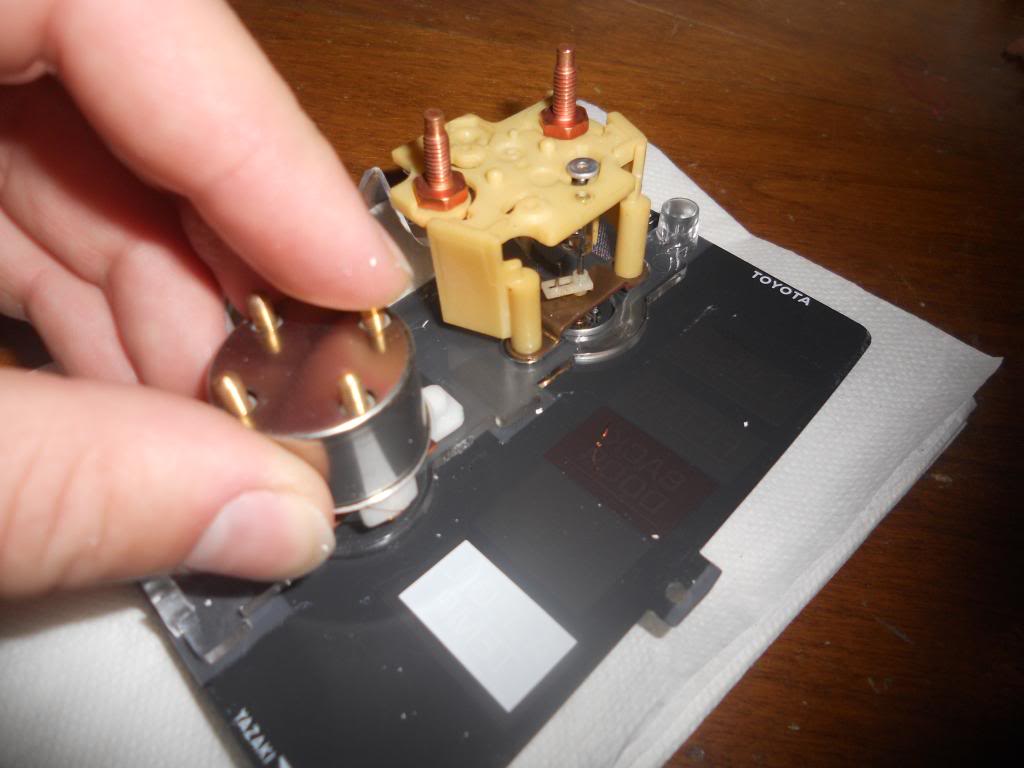
Remove the insulating piece from the back of temp gauge:
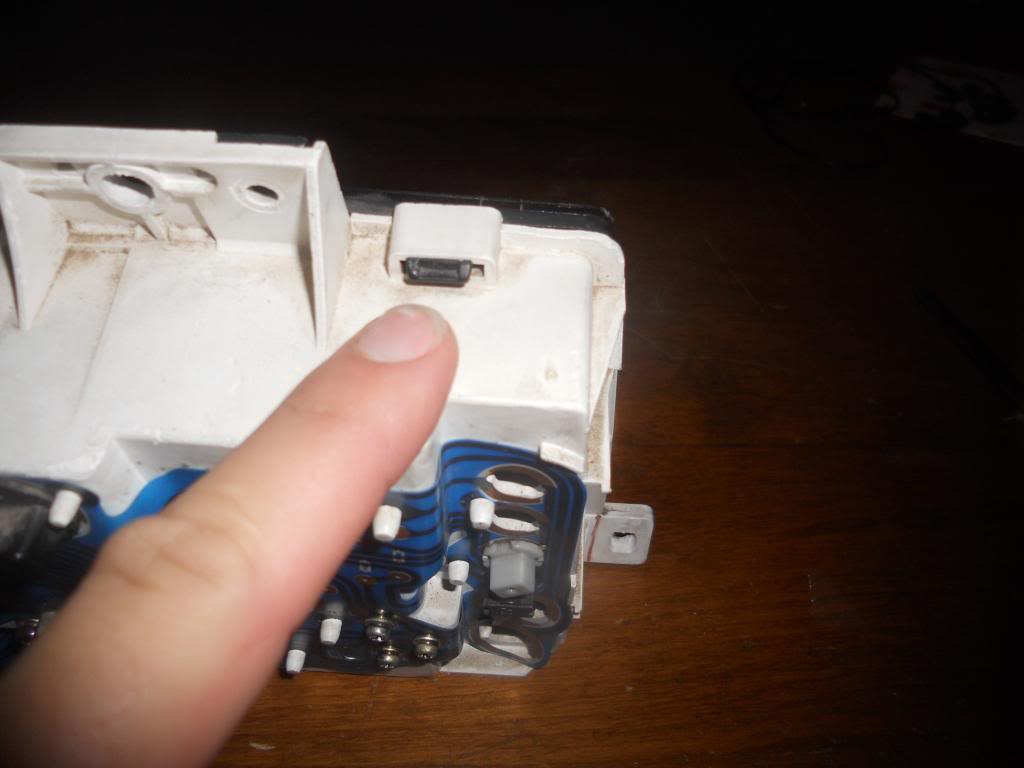
Lift off back of temp gauge by pushing on one of the studs and pulling on it with your fingers. It's not glued on or anything:
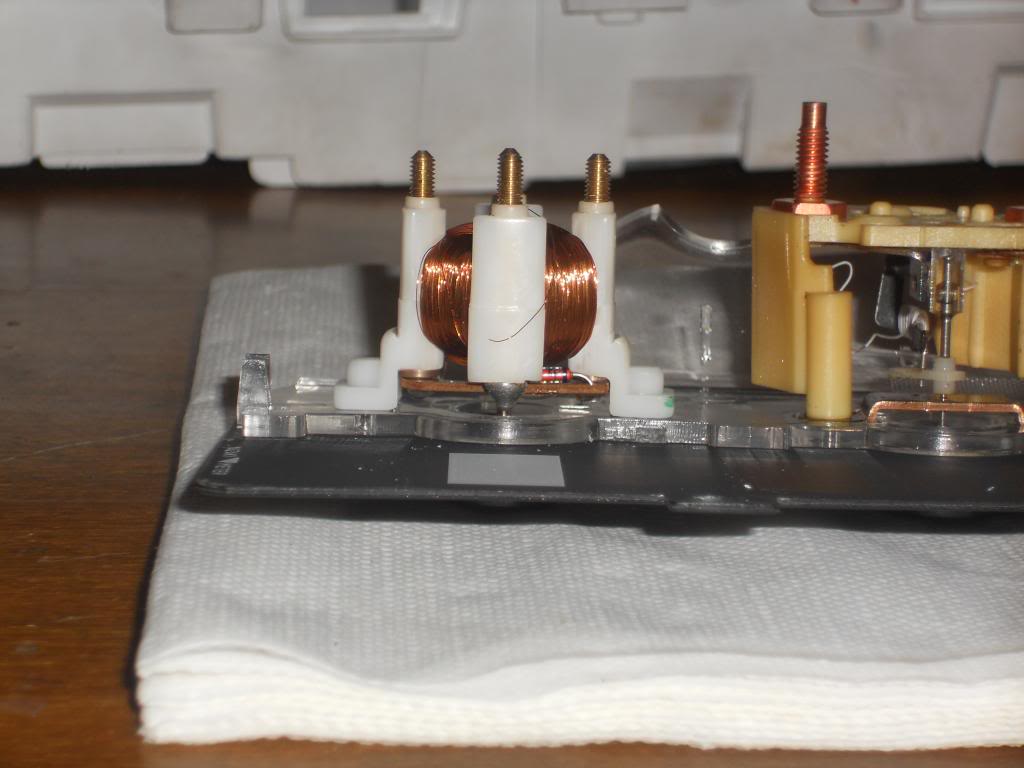
End up with windings revealed:
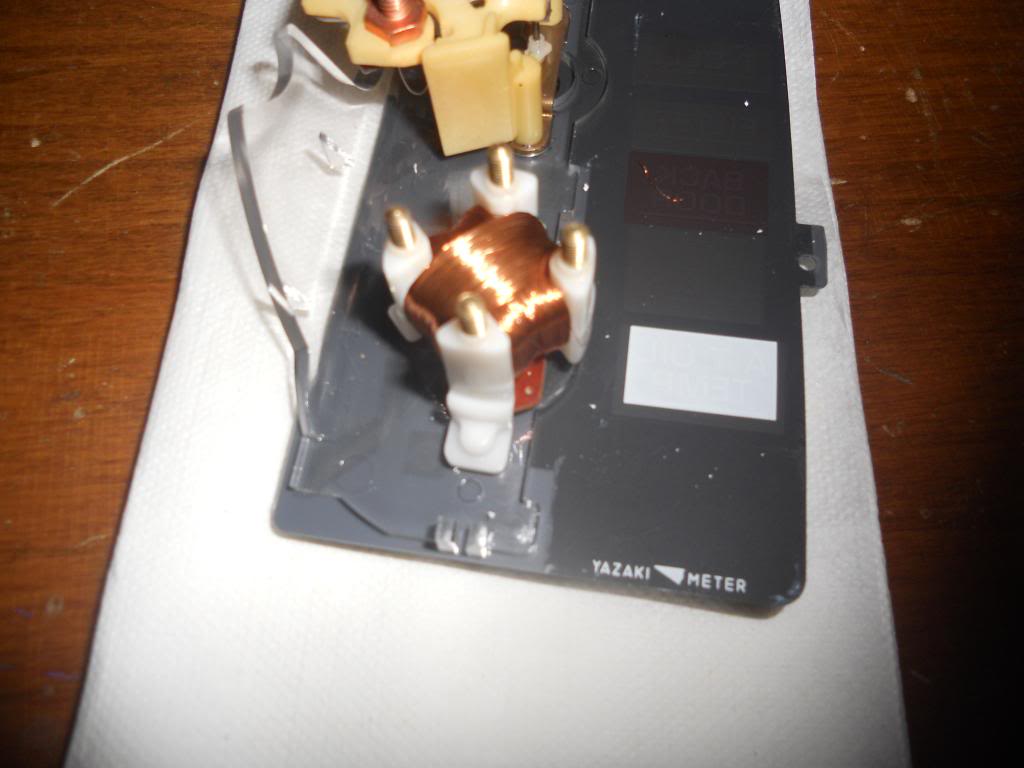
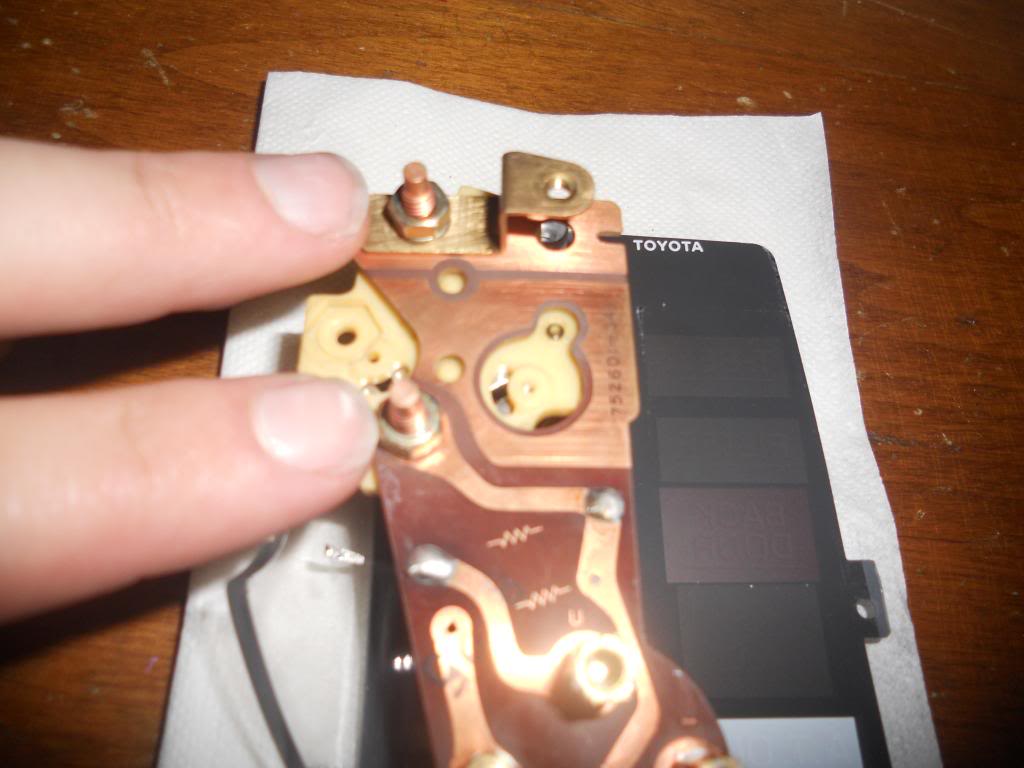
There's our culprit. This wire should be soldered onto that grey pointy peice below it. Check each wire carefully for breaks, your broken wire may not be the same as mine:
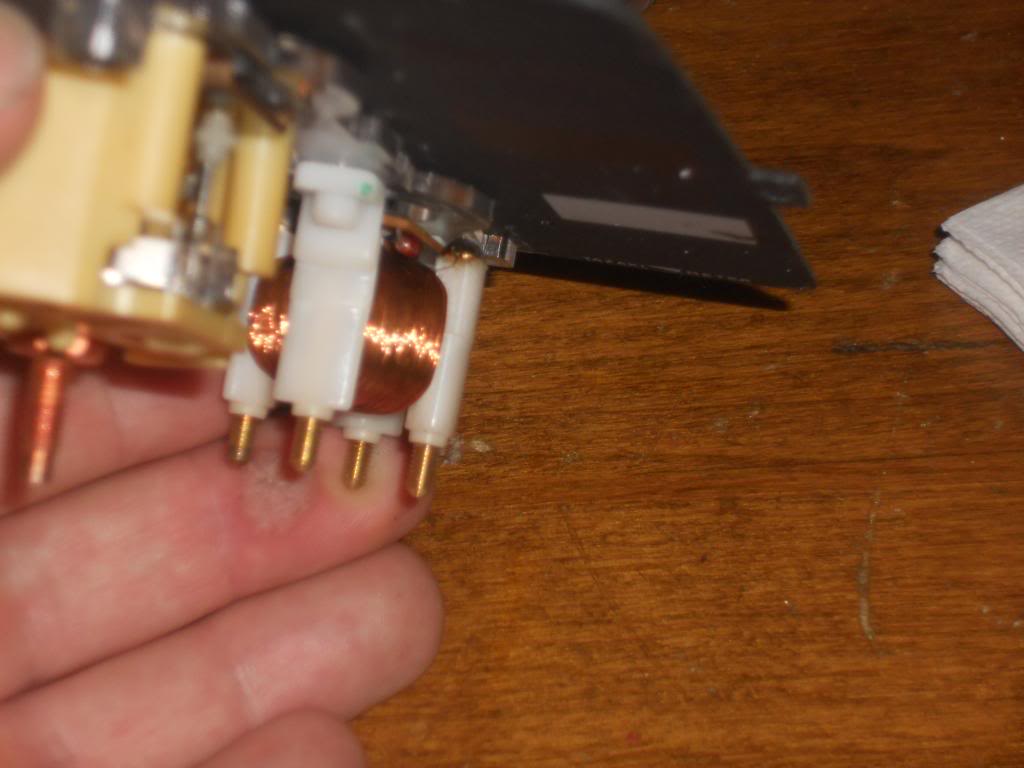
You will probably need to unwind one coil to have enough wire to solder to that terminal. These wires are covered with an insulating coating, so you'll have to strip it off either with a razor blade (what I used) or sandpaper, emory cloth, or similar. Be careful, these wires are extremely thin. Solder the wire back onto the terminal and end up with this:
Assembly is, as they say reverse of disassembly. I'm happy to say that my temp gauge now works 100%. Good luck!
Symptoms
-Temp gauge only works sometimes
-Needle jumps to middle regardless of whether engine is warm or not
-Smacking the dashboard sometimes helps it to work
Cause
-Broken wire inside temp gauge
Fix
-Remove gauge, resolder wire
Explanation
-The temp gauge works by having current flowing through 2 different windings of copper wire. Each winding tries to pull the gauge towards the top or bottom. With engine cold, there is high resistance to ground through the winding that tries to pull it to the top, and low resistance for the one pulling it to the bottom, this is why the needle is (or should be) at the bottom when cold. As the motor warms, resistance through the sender in the intake manifold lessens and lets more current flow through the winding that tries to pull the needle to the top. If one of the wires in the windings breaks, it will try to ground through somewhere else, causing erratic readings.
Begin by removing the gauge cluster. I won't detail that here, there are many good writeups here on Yotatech. You'll end up with this:

Remove these 2 brackets on the back of the gauge cluster by unscrewing them.

Push these clips down and they will pull out. This will let you remove the clear plastic face

End up with this:

Flip it over and remove the tachometer by unscrewing these 3 screws:

And these 2 Screws:

End up with this:

Remove the oil pressure/ temp gauge by unscrewing this top screw:

And these 3 screws:

Then pull out the gauge, set aside rest of the cluster, and end up with this:

Flip it over and remove these 4 nuts and washers (remember where the small one goes):

And these 2 nuts and washers:

Remove the circuit board and end up with this:

Remove the insulating piece from the back of temp gauge:

Lift off back of temp gauge by pushing on one of the studs and pulling on it with your fingers. It's not glued on or anything:

End up with windings revealed:

There's our culprit. This wire should be soldered onto that grey pointy peice below it. Check each wire carefully for breaks, your broken wire may not be the same as mine:

You will probably need to unwind one coil to have enough wire to solder to that terminal. These wires are covered with an insulating coating, so you'll have to strip it off either with a razor blade (what I used) or sandpaper, emory cloth, or similar. Be careful, these wires are extremely thin. Solder the wire back onto the terminal and end up with this:

Assembly is, as they say reverse of disassembly. I'm happy to say that my temp gauge now works 100%. Good luck!
Last edited by Inferno451; Sep 17, 2013 at 11:14 AM.


 Jul 20, 2013 | 12:16 PM
#7

Registered User
Joined: Jun 2011
Posts: 179
Likes: 0
From: Twin Cities, MN
I've actually just came in from the garage investigating my own temp gauge. I have noticed that the stock gauge is horribly slow, taking over a minute to settle. This design explains why! Thanks for taking the time to disassemble the entire thing.
Trending Topics


 Jul 21, 2013 | 08:53 AM
#10

Joined: Jan 2003
Posts: 17,692
Likes: 58
From: Marysville, WA
Stickied. I think pretty much every one of our trucks has a temp gauge problem, and you cannot get this gauge from Toyota anymore. No dealers in the US have them, and all warehouses are out of stock. Sucks we can't get the part new.
Great thread!
Great thread!

 Jul 23, 2013 | 07:53 PM
#14
Jul 24, 2013 | 08:00 AM
#15
Thread Starter
Registered User
Joined: Apr 2010
Posts: 481
Likes: 9
From: Spokane, WA
It can really be on any of the 4 posts, some of them are tough to see. Did you try and follow the wire down from the dab of solder on the end of the post? Mine was broken about 1/4 of an inch down.
Jul 24, 2013 | 07:39 PM
#17
Jul 28, 2013 | 01:26 AM
#18
I got one of my guages working great thanks to this thread. Mine did not have the broken wire, but it did have some corrosion on one of the post. Also I did have a loose nut on the guage itself. It was one of the longer nuts that needed tightening. I am not sure which one corrected the problem but it is working great.
I have started it up 5 different times and each time, it was defintely cold. Had been sitting at least 3 hours at the minimum to overnite. It gradually raises the needle as it warms up. It use to jump to the halfway mark when you started it.
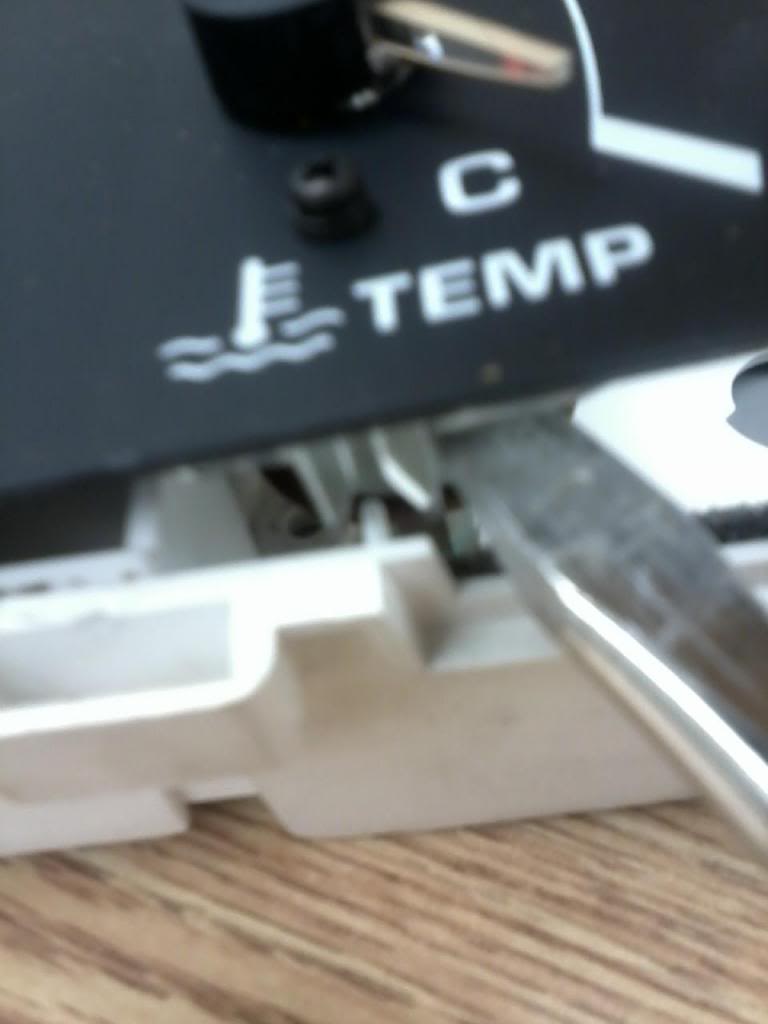
I did have a problem of getting the guage out of the cluster assembly. At the bottom of the guage, I took a flat blade screwdriver and pried it up as there is a wedge that helps hold the guage to the assembly. I still have another guage to look at but one is working great now.
Just to the left of the screwdriver is the pinch/wedge that took me a little bit to figure out. I was worried about it being a fragile piece, but is fairly solid guage.
I have started it up 5 different times and each time, it was defintely cold. Had been sitting at least 3 hours at the minimum to overnite. It gradually raises the needle as it warms up. It use to jump to the halfway mark when you started it.
I did have a problem of getting the guage out of the cluster assembly. At the bottom of the guage, I took a flat blade screwdriver and pried it up as there is a wedge that helps hold the guage to the assembly. I still have another guage to look at but one is working great now.
Just to the left of the screwdriver is the pinch/wedge that took me a little bit to figure out. I was worried about it being a fragile piece, but is fairly solid guage.


