
Carburetor Rebuild Time
 Dec 21, 2010 | 04:41 PM
#1
Well, I'm finally going to try and rebuild the carb on this thing. It runs fine when warm but it craps out when cold; hopefully, it wil also get rid of a slight hesitation/stumble when accelerating.
Now, I've searched yotatech and have a pretty good idea of what to expect and how it all goes back together(I also have the FSM to help me out), but in my search i have found two different kits:
The NAPA kit that everyone recommends
http://www.napaonline.com/Search/Det...50070+2070026#
and the Autozone kit
http://www.autozone.com/autozone/par...questid=335547
Every thread i've read recommends the Napa kit because "it has more carb specific parts" . I bought this kit, for 60 bucks, but after looking around i found the autozone kit, for $34, which i also got. After comparing the two and studying the reference pics from their sites: they look identical. The autozone one looks like it has a couple of other pieces to it.
My question: does anyone have any first hand experience with any of the two? What kit did you use? Is the NAPA kit that much better to justify the extra $30? Anybody used Gp-Sorensen parts before, are they any good?
Post up your carb rebuild experiences, tips, tricks and woes. (For future YOTATECHERS!! and me)
Now, I've searched yotatech and have a pretty good idea of what to expect and how it all goes back together(I also have the FSM to help me out), but in my search i have found two different kits:
The NAPA kit that everyone recommends
http://www.napaonline.com/Search/Det...50070+2070026#
and the Autozone kit
http://www.autozone.com/autozone/par...questid=335547
Every thread i've read recommends the Napa kit because "it has more carb specific parts" . I bought this kit, for 60 bucks, but after looking around i found the autozone kit, for $34, which i also got. After comparing the two and studying the reference pics from their sites: they look identical.
The autozone one looks like it has a couple of other pieces to it.My question: does anyone have any first hand experience with any of the two? What kit did you use? Is the NAPA kit that much better to justify the extra $30? Anybody used Gp-Sorensen parts before, are they any good?
Post up your carb rebuild experiences, tips, tricks and woes. (For future YOTATECHERS!! and me)
 Any Takers?
Dec 24, 2010 | 10:30 AM
Any Takers?
Dec 24, 2010 | 10:30 AM
#3
Registered User
Joined: Oct 2009
Posts: 879
Likes: 3
From: Nw Arkansas
I went with the napa kit ,only problem was it had the wrong instruction sheet but i was able to figure it out . Only tip is to have it soaked in cleaner if you can ,some parts stores will do it for a small fee or you can buy a gallon and do it at home .
Dec 24, 2010 | 11:06 AM
#4
Did you end up using all the parts? Needle valve, plunger, and strainer?
Something i noticed is that in the NAPA kit those^ are nice and shiny, but on the autzone they look stained and tarnished?
Also the auto zone has this little part called a power valve that the NAPA doesn't.
Something i noticed is that in the NAPA kit those^ are nice and shiny, but on the autzone they look stained and tarnished?
Also the auto zone has this little part called a power valve that the NAPA doesn't.
Dec 25, 2010 | 06:27 AM
#5
Registered User
Joined: Oct 2009
Posts: 879
Likes: 3
From: Nw Arkansas
I used all the parts that went to my carb. If you have opened both kits use the parts that are missing from the napa kit out of the autozone one,because it would be unlikely that you can return eather kit.
Last edited by swampfox; Dec 25, 2010 at 06:34 AM.
Jan 7, 2011 | 07:22 PM
#6
Bump
Thanks for the replies swampfox.
After a lot of thinking, i jumped at it. I settled for the autozone kit because it was half the price of the NAPA kit and it had more parts to it (Check the websites above to see what i mean). And yeah, they took it back; I didn't open the package. And from the money i saved I got a gallon of carburetor dip.
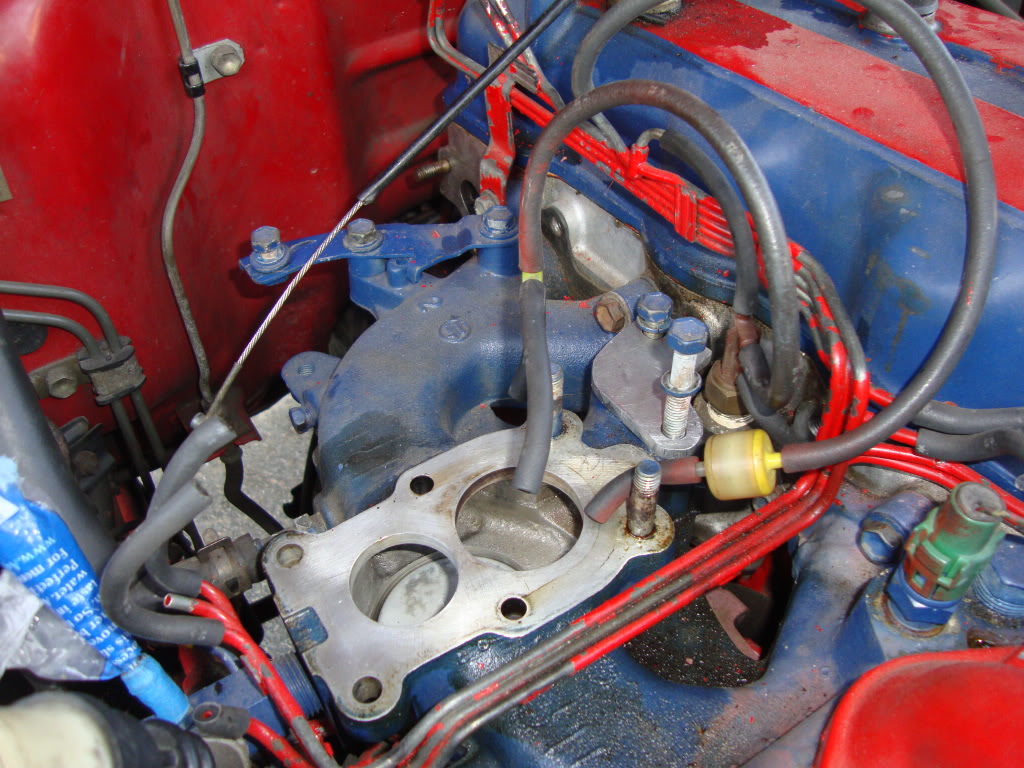
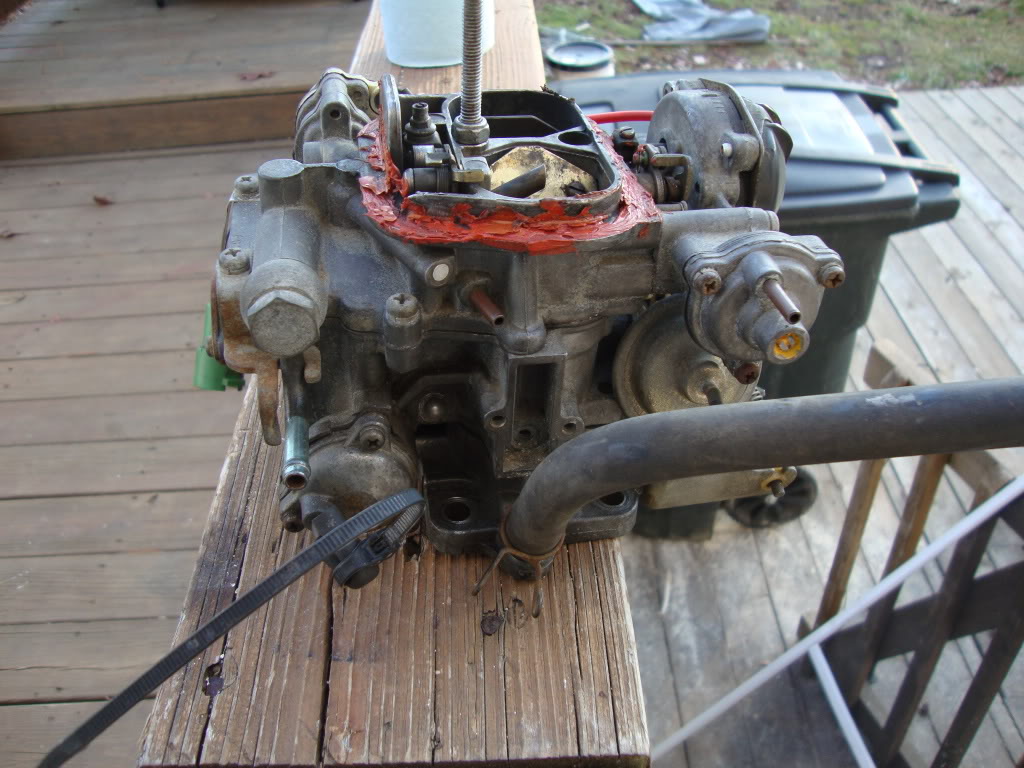
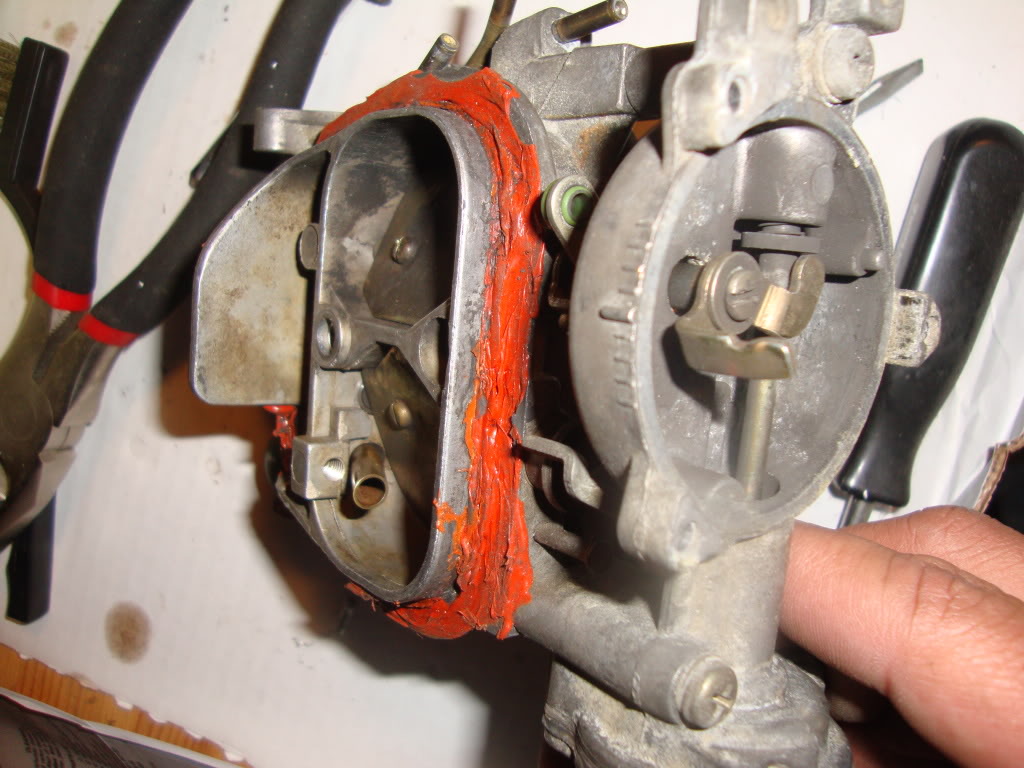
I started the tear down friday, and this is what it looked like:
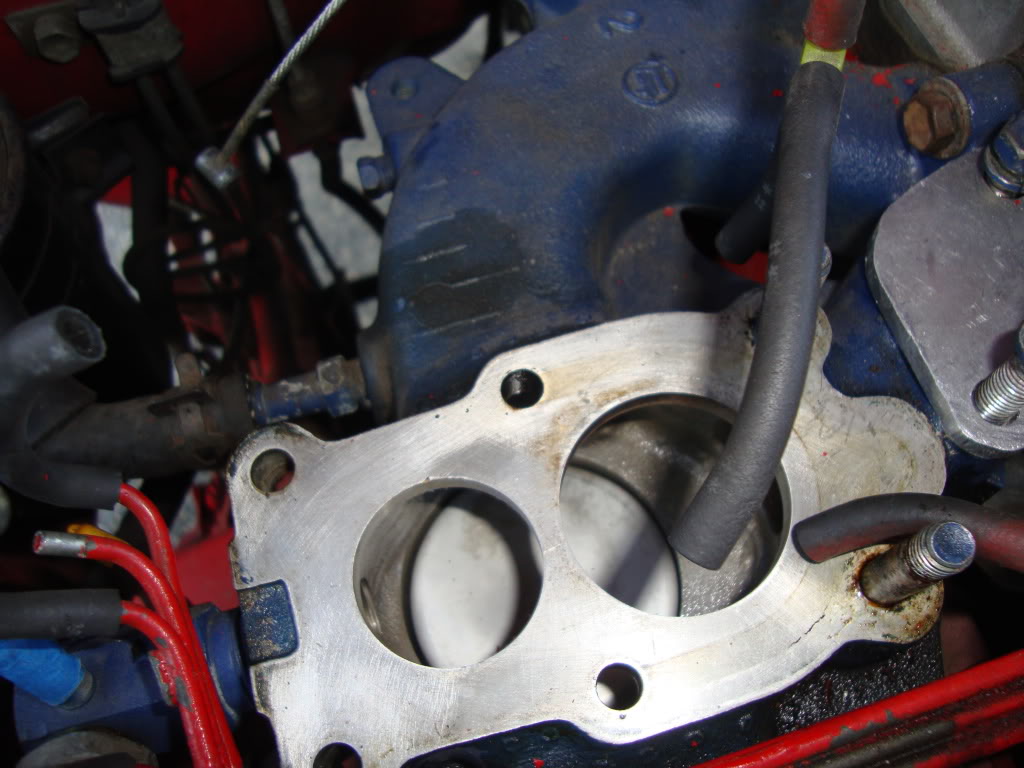
I also removed the EGR: currently making block of plates
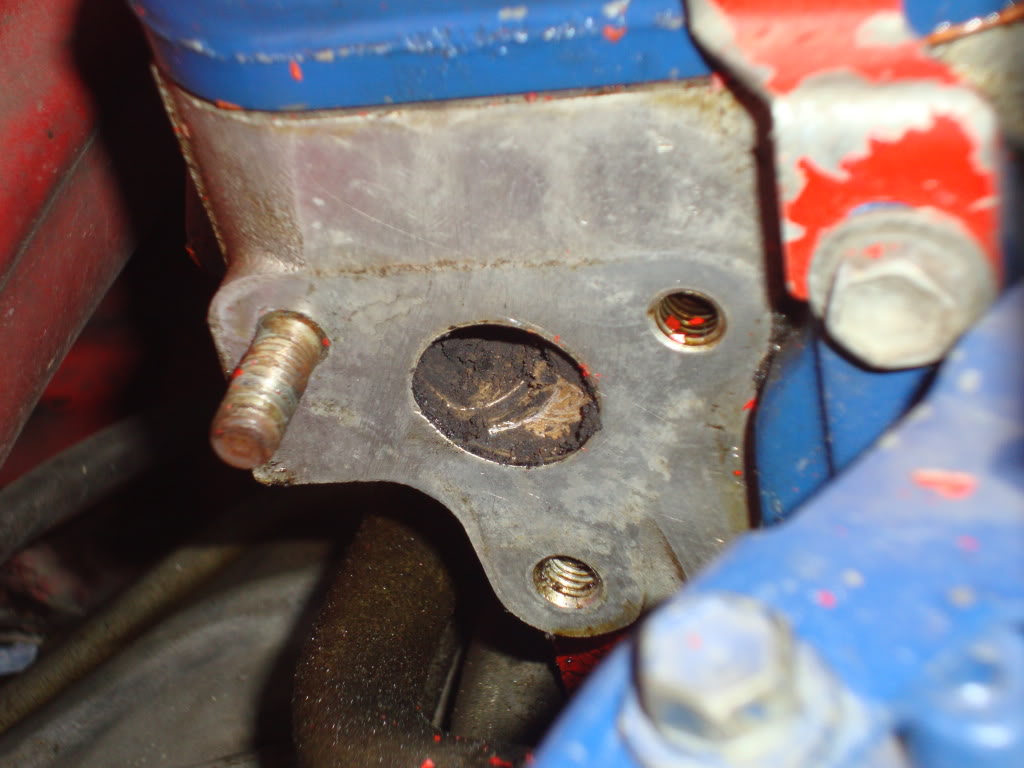
Look at it, dumping crud into my clean intake
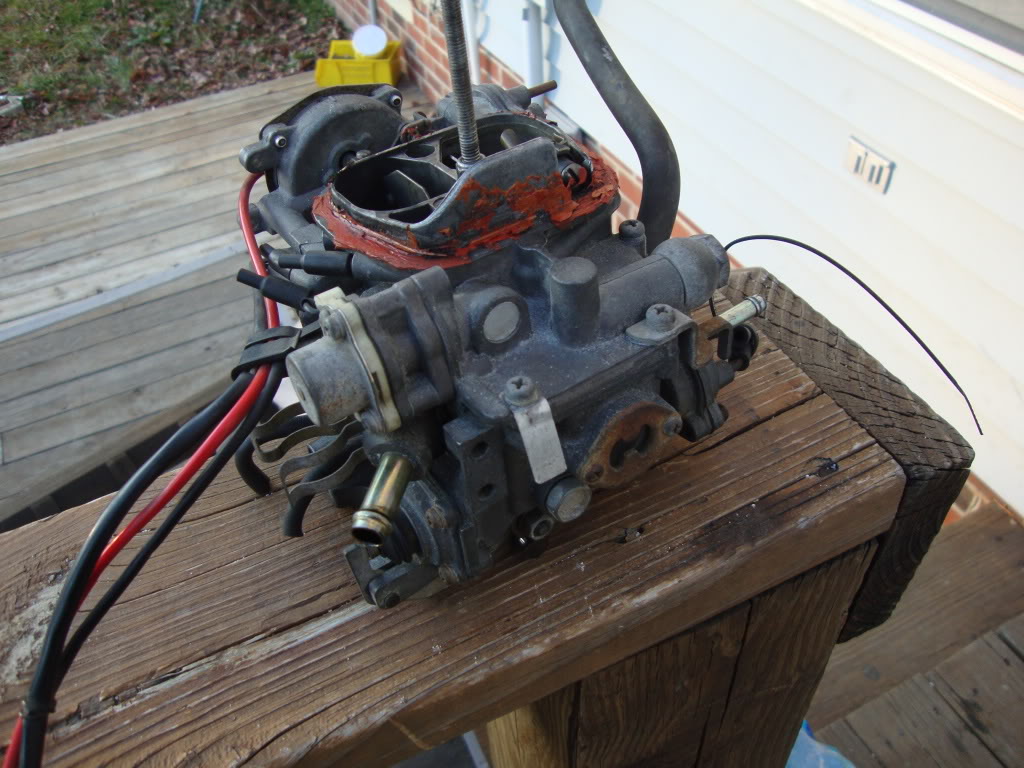
The Main Attraction
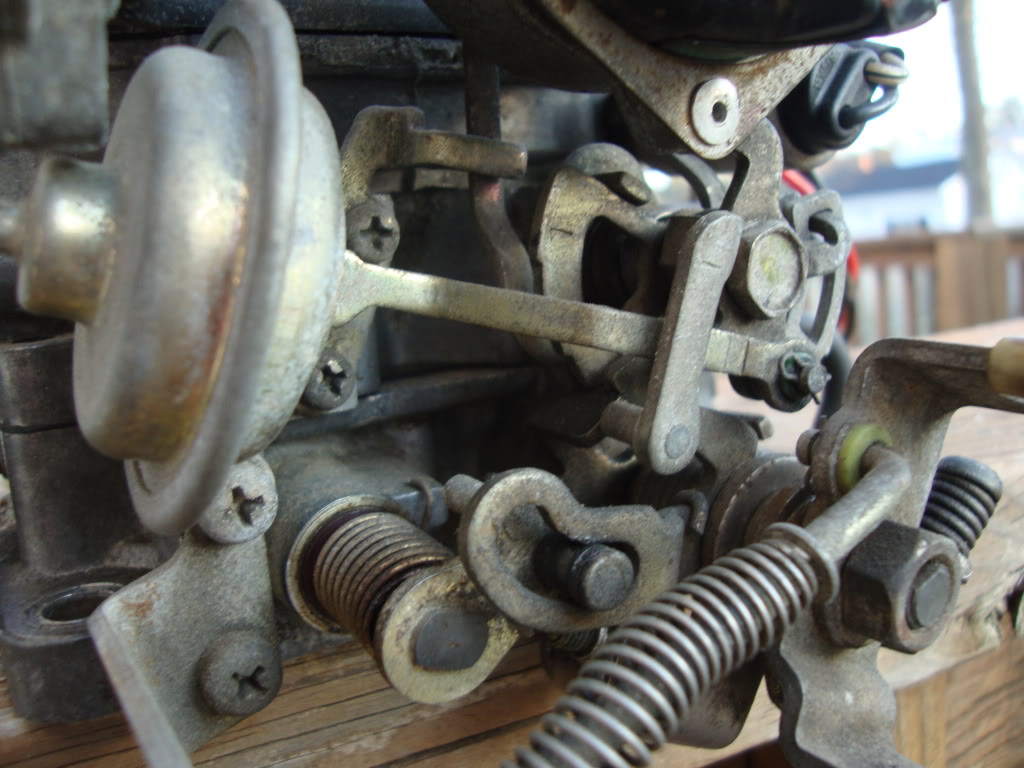
Linkage
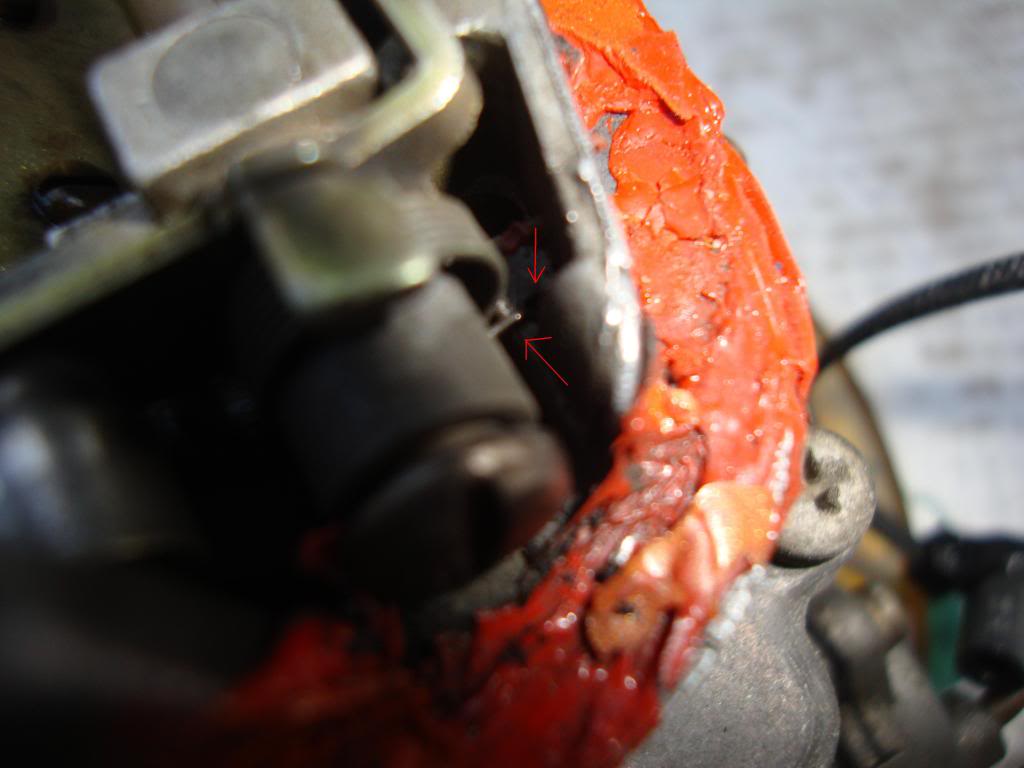
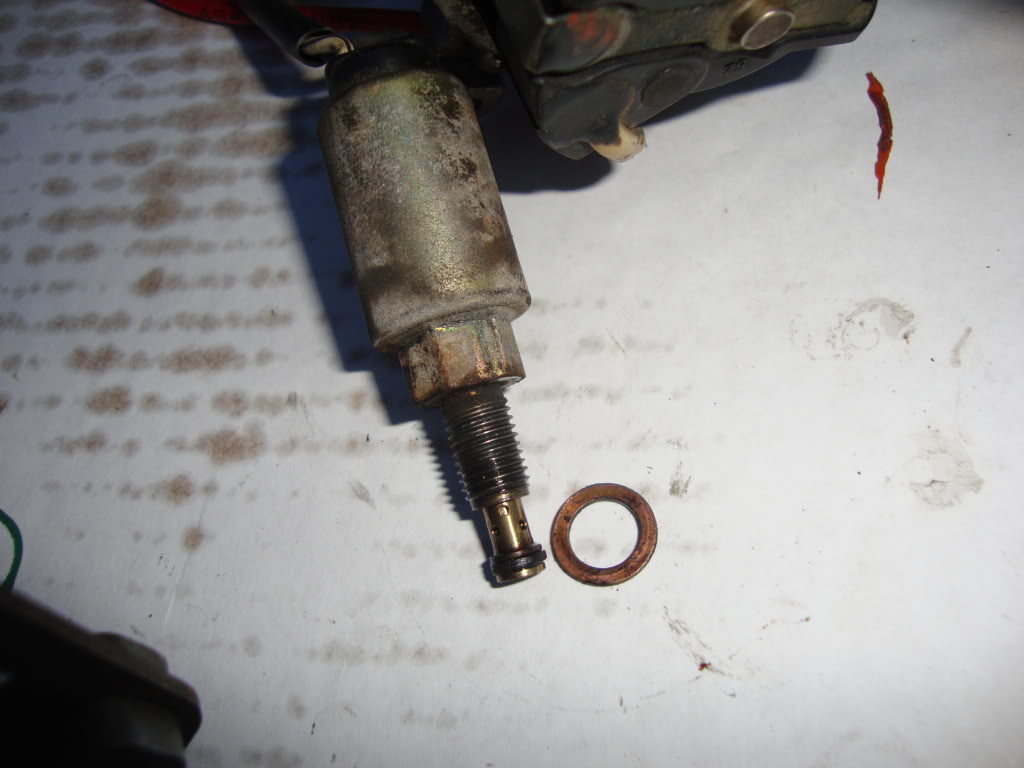
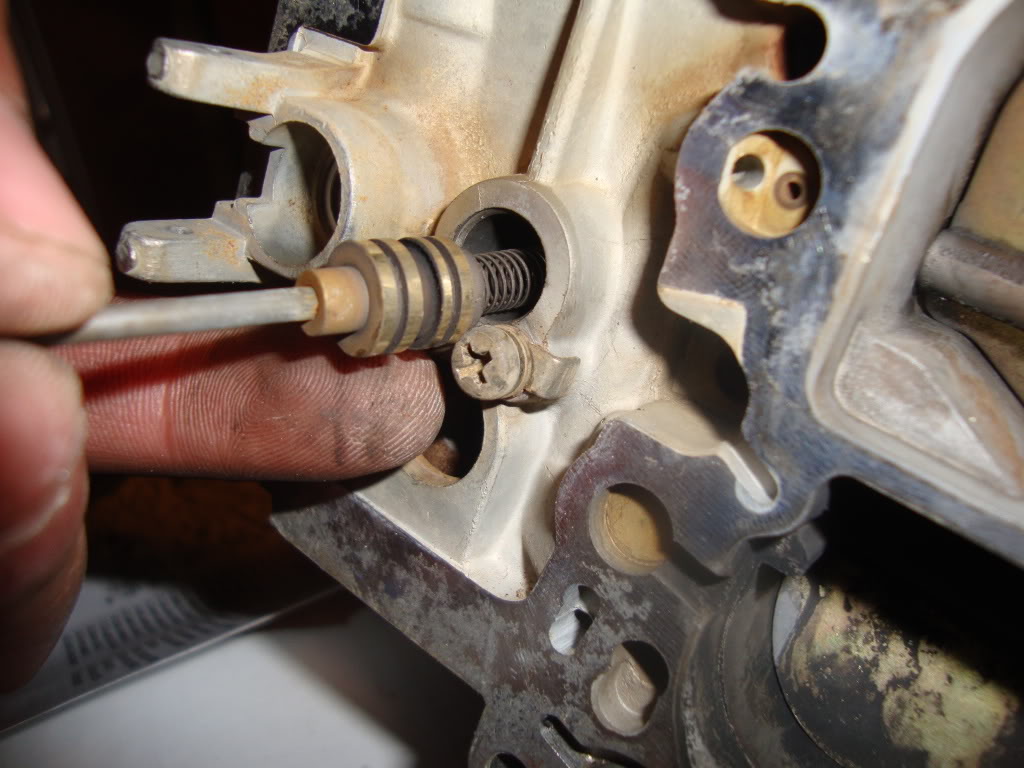
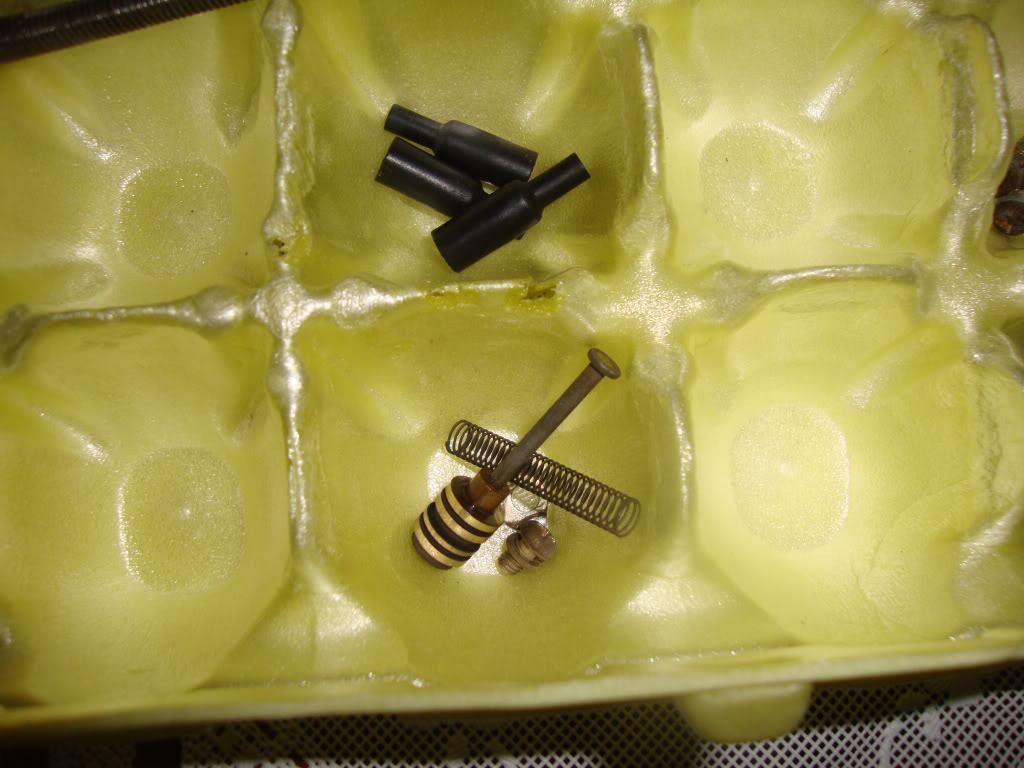
First thing is to remove the screw securing the metering needle. Take note of how the spring goes:
After you pull the metering needle:

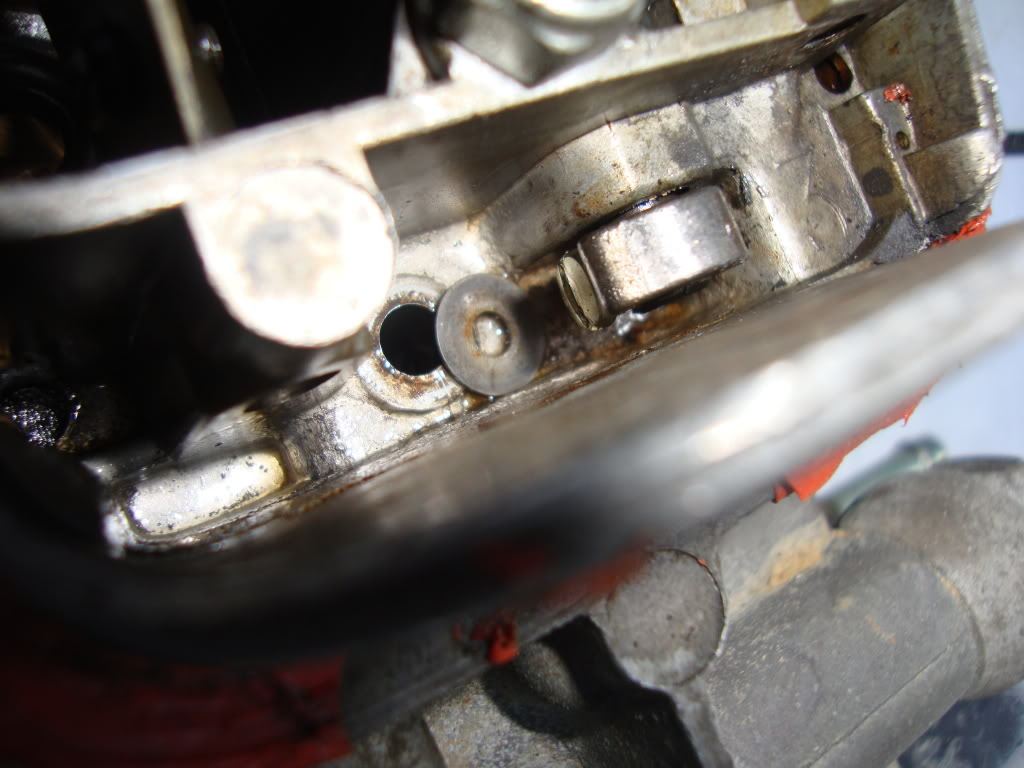
Don't loose the little washer down in the hole:
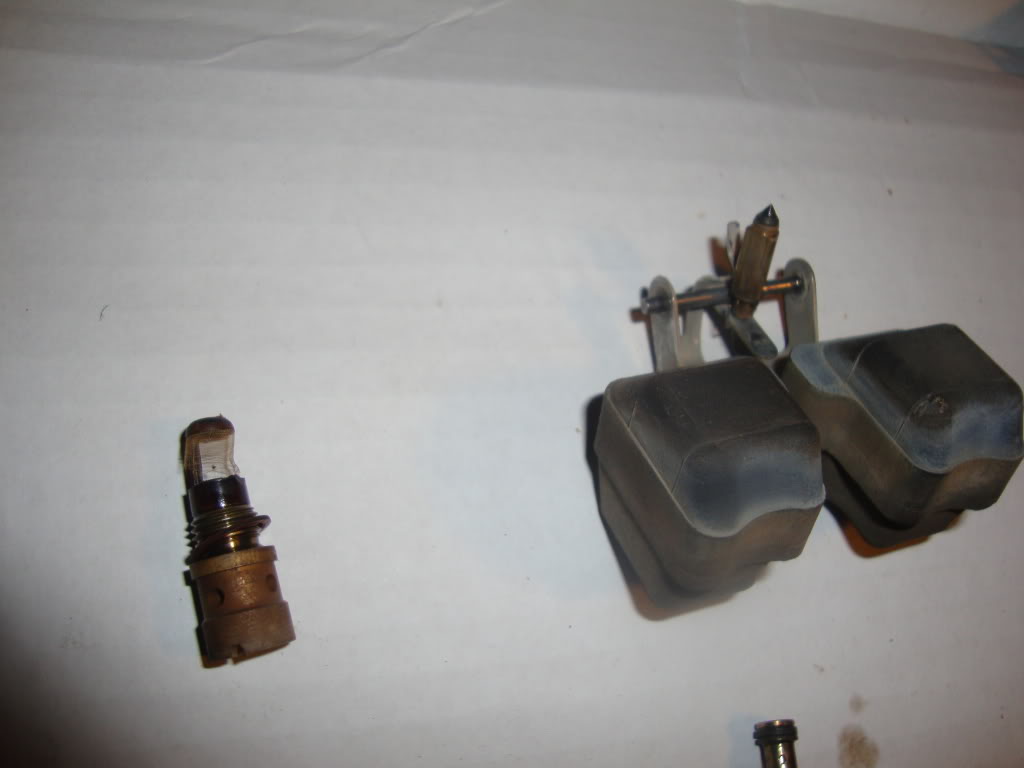
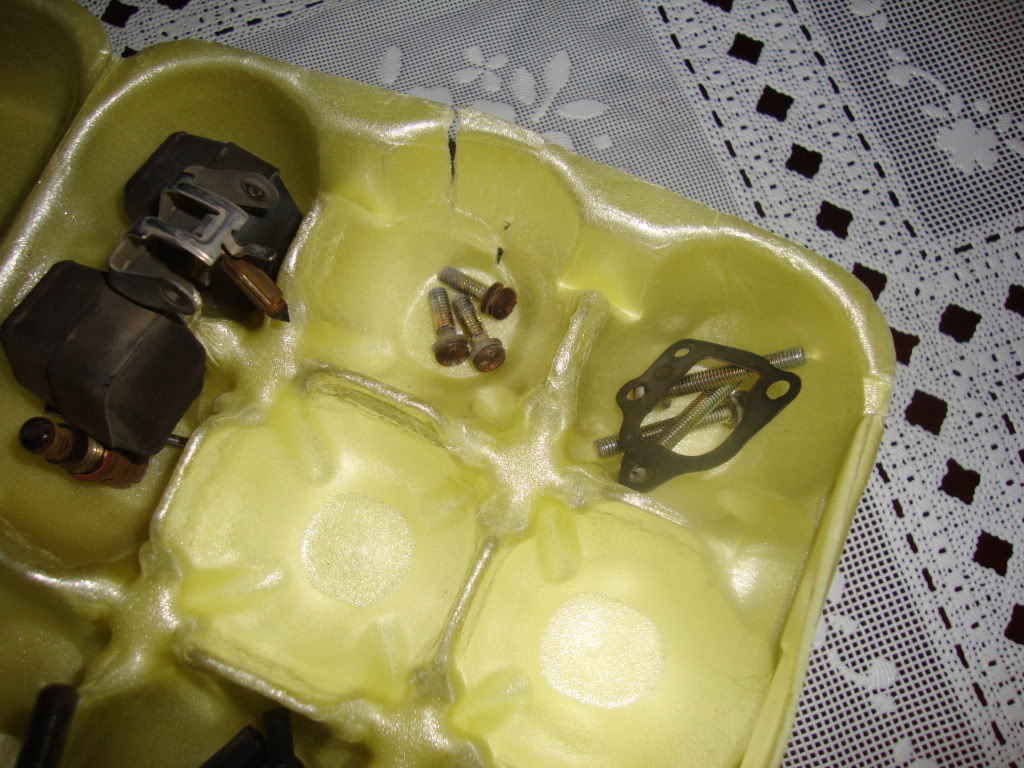
Remove the little clips and pop out the arms

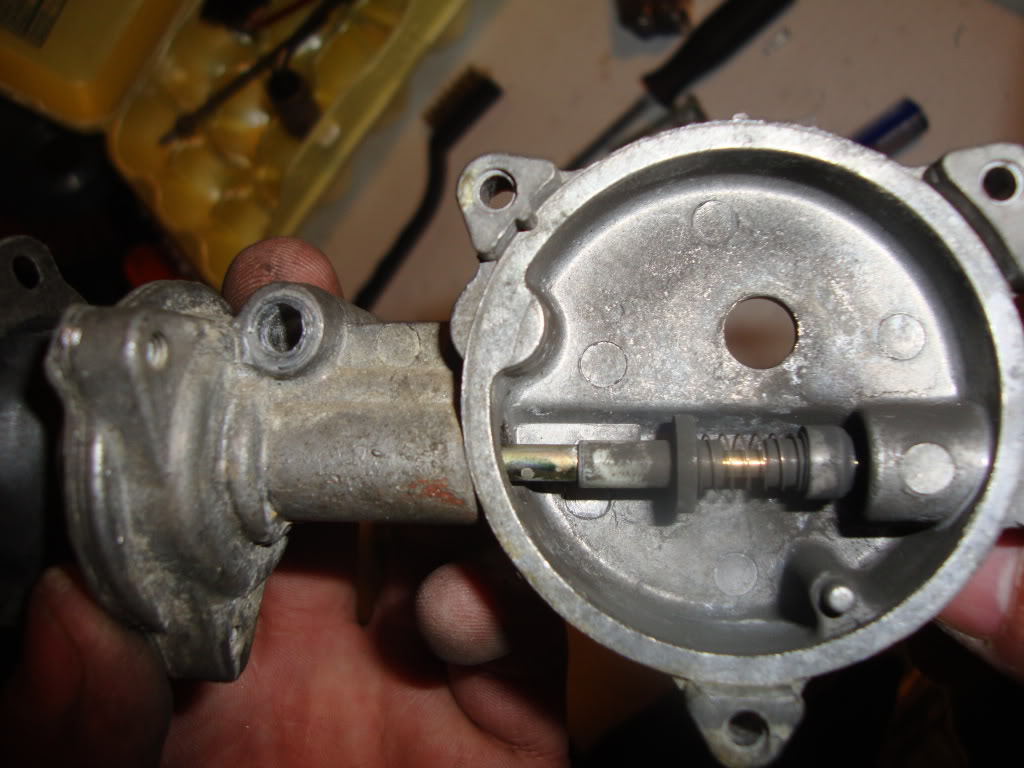
The airhorn should pop right out after removing the five screws
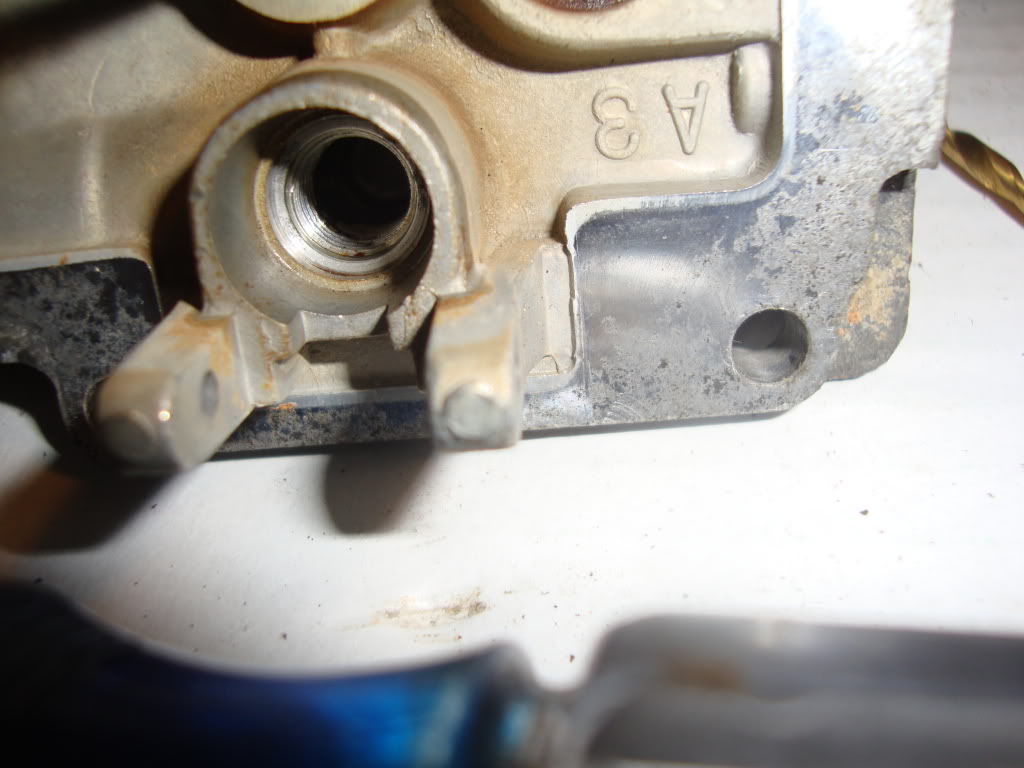
For now ill just dump the pictures, Ill make it into a write up when i have time
After a lot of thinking, i jumped at it. I settled for the autozone kit because it was half the price of the NAPA kit and it had more parts to it (Check the websites above to see what i mean). And yeah, they took it back; I didn't open the package. And from the money i saved I got a gallon of carburetor dip.
I started the tear down friday, and this is what it looked like:
I also removed the EGR: currently making block of plates
Look at it, dumping crud into my clean intake
The Main Attraction
Linkage
First thing is to remove the screw securing the metering needle. Take note of how the spring goes:
After you pull the metering needle:
Don't loose the little washer down in the hole:
Remove the little clips and pop out the arms
The airhorn should pop right out after removing the five screws
For now ill just dump the pictures, Ill make it into a write up when i have time
Trending Topics
Jan 8, 2011 | 08:10 PM
#8
 Thanks. And yeah, contrary to what most people believe this carb is really easy to work on.
 Not much work on it today, but i did manage to check a couple of systems:
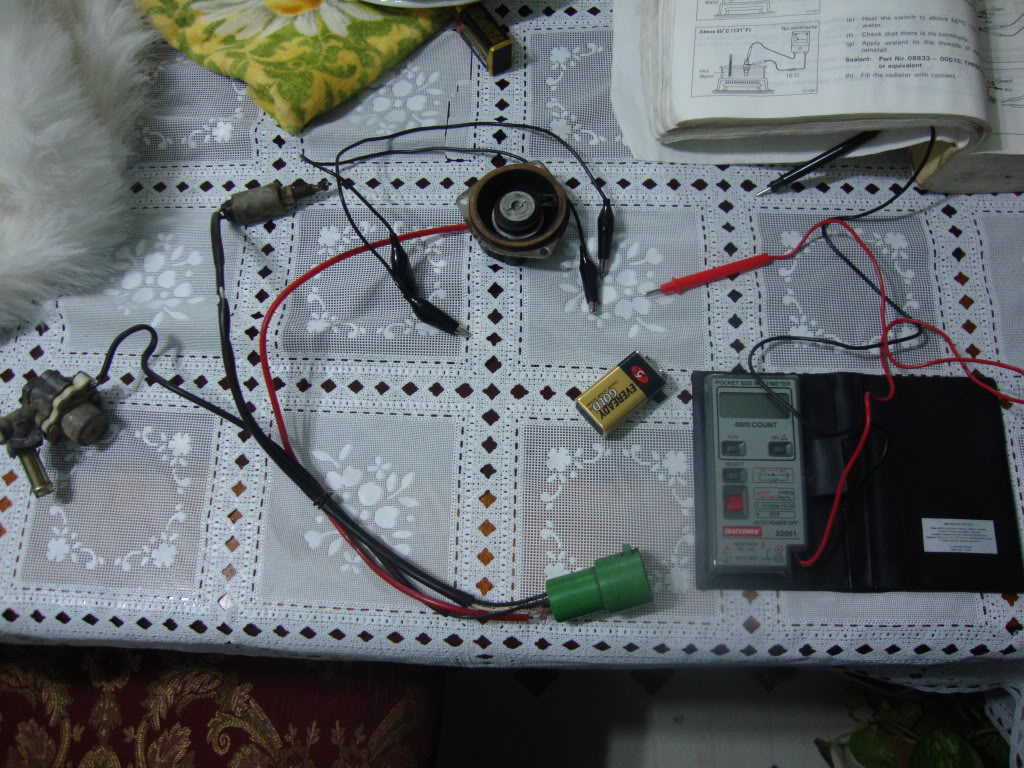
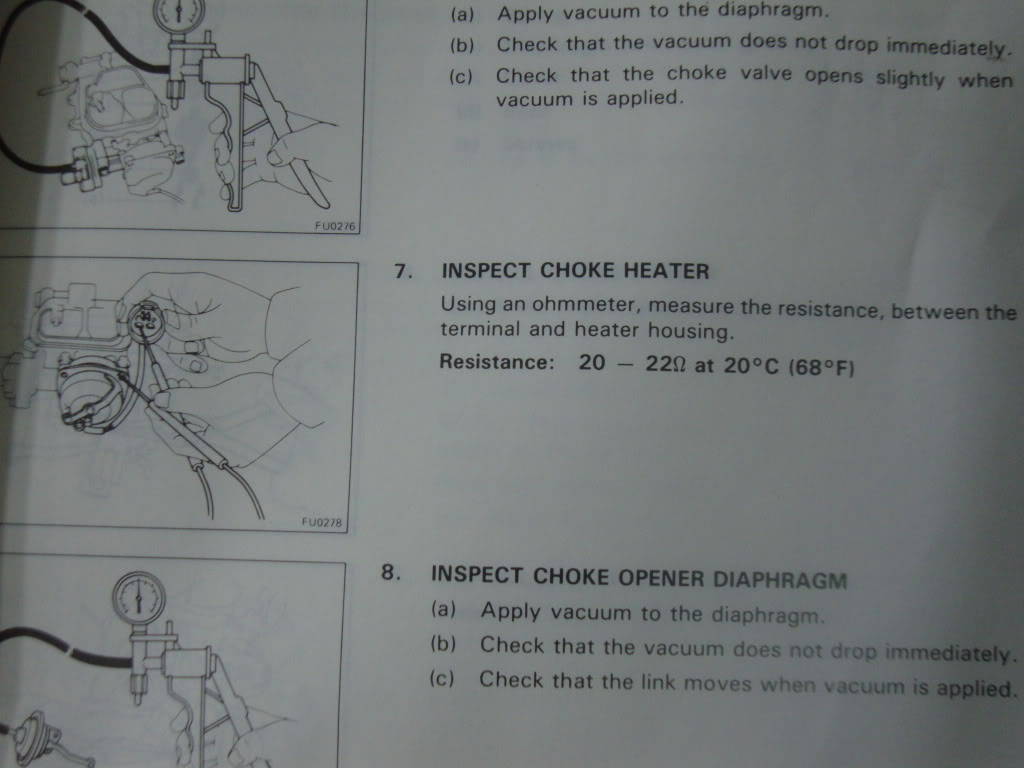
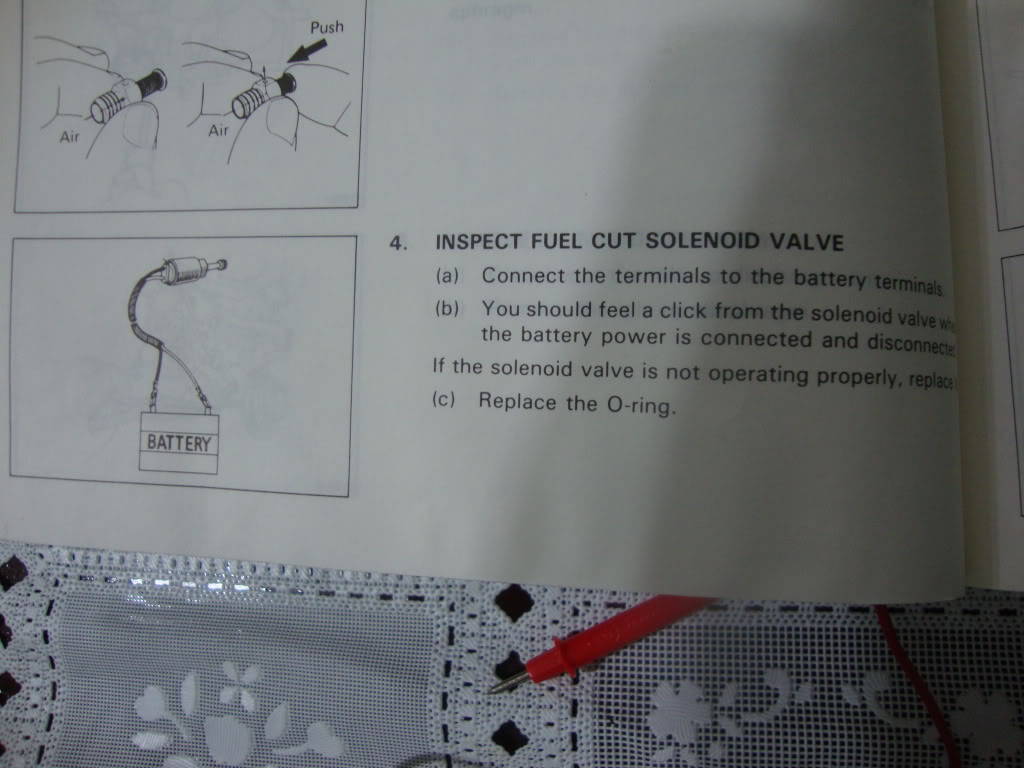
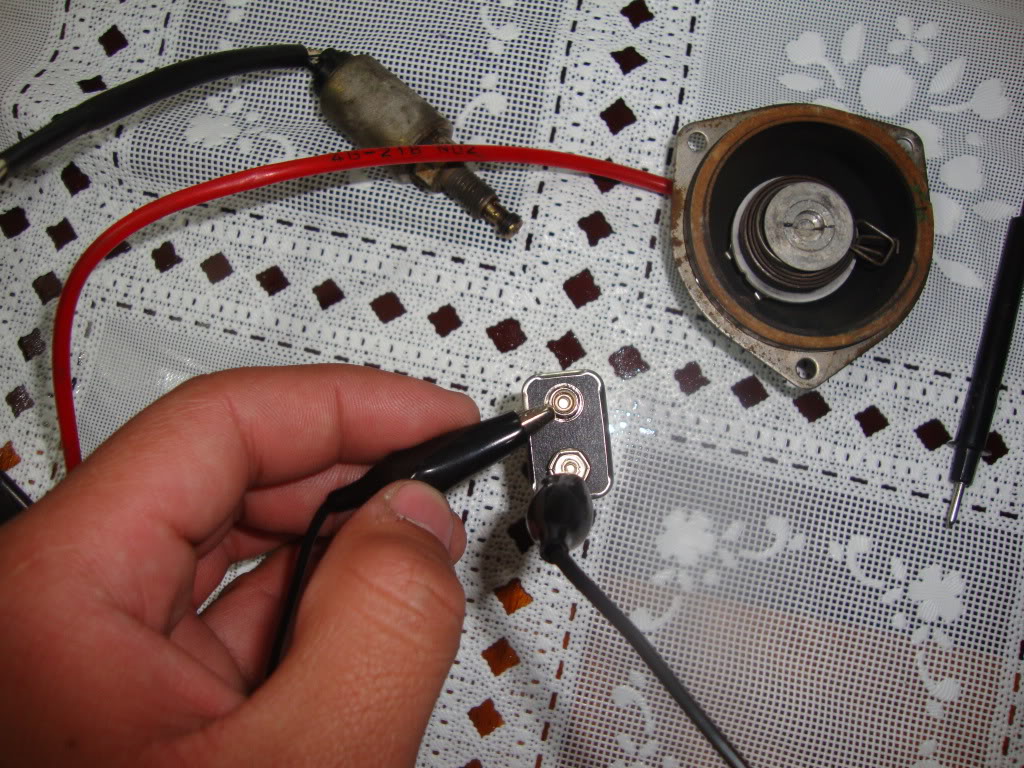
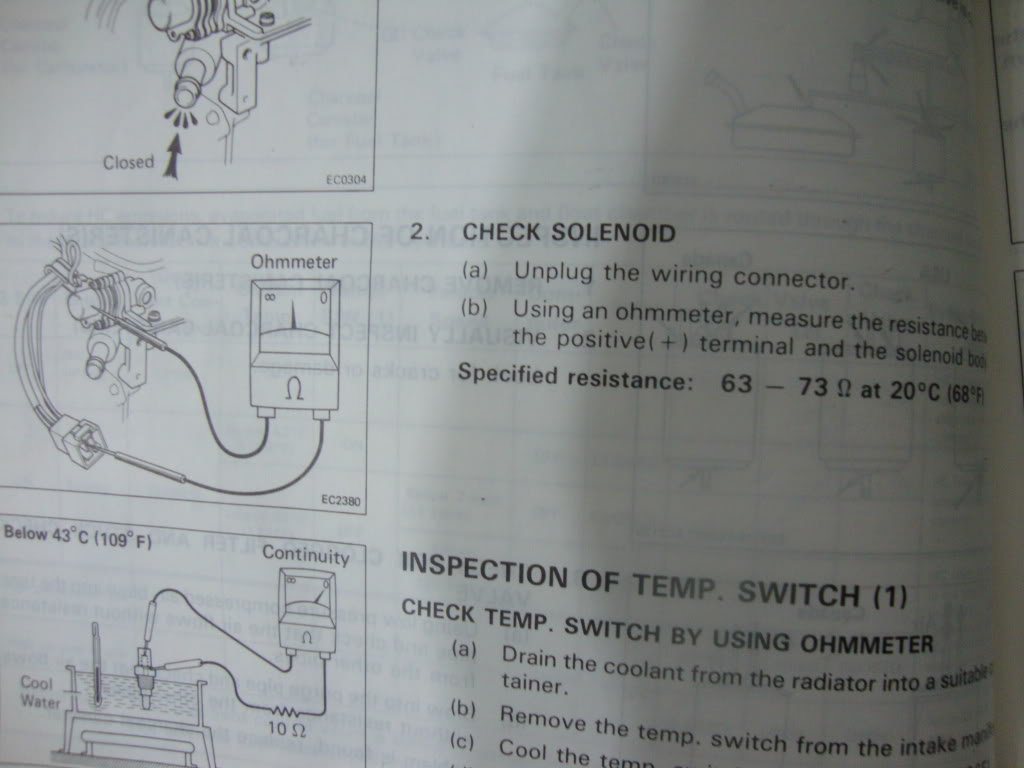
I tested the outer vent control valve, fuel cut solenoid valve, and choke heater. According to my fsm they're all working right and within spec.
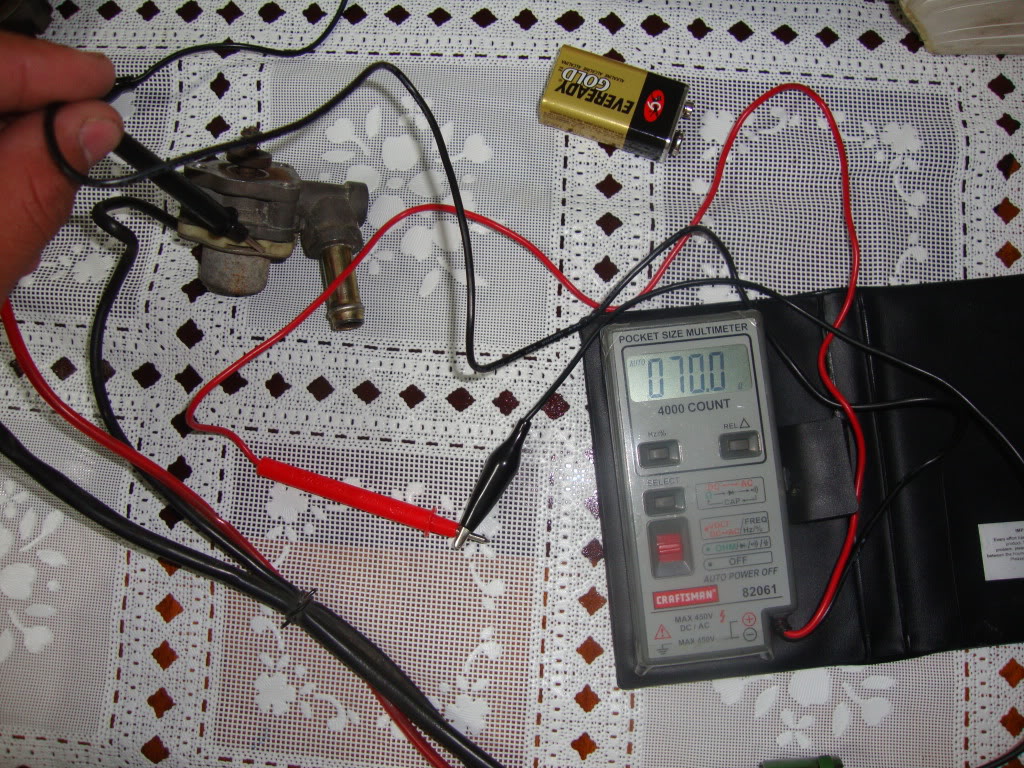
Choke Heater:
^that is this plug (+)
to the housing (-)... oops got the wires mixed up 21.1 ohms
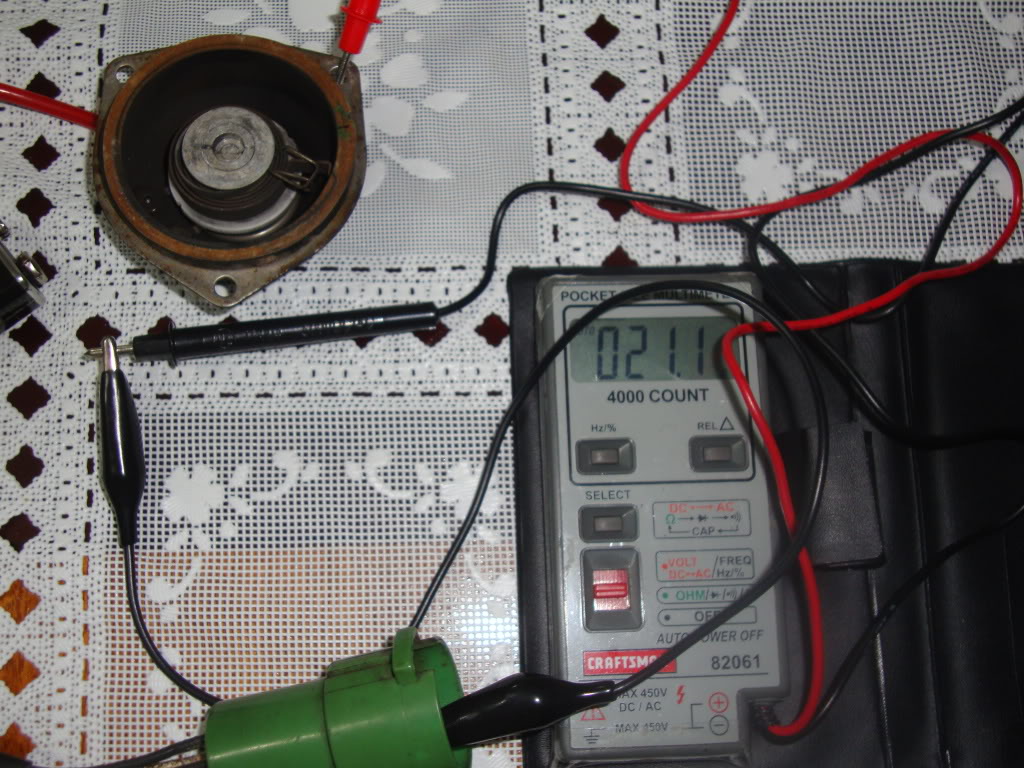
I also heated up the choke and sure enough, the coil expanded.
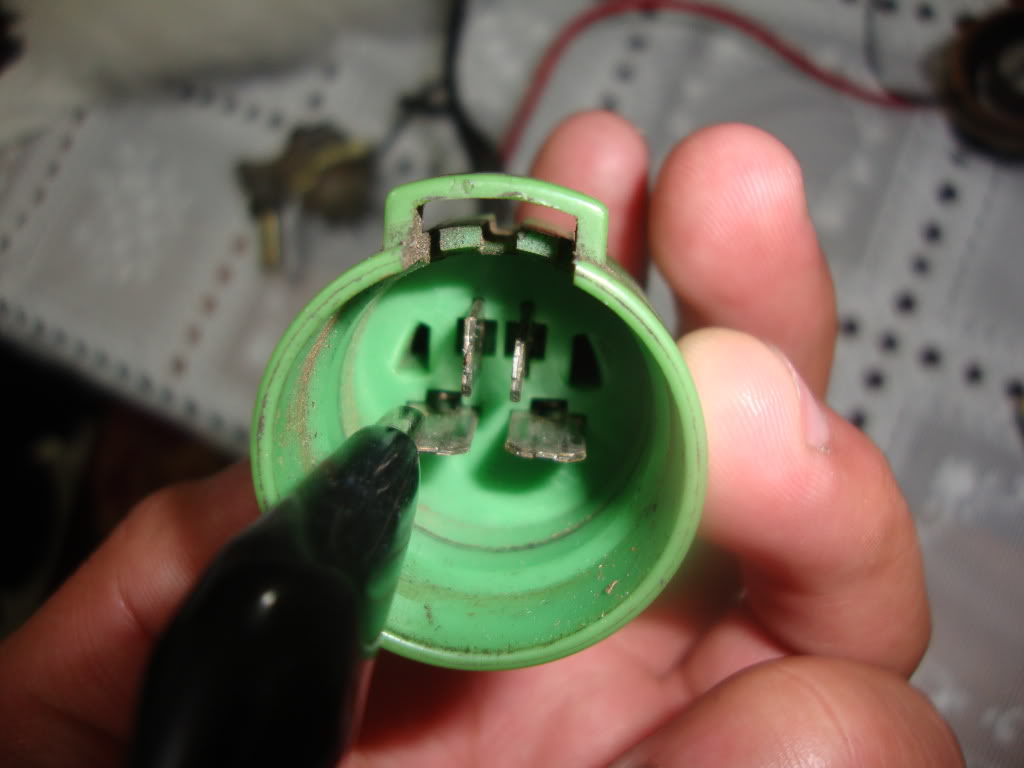
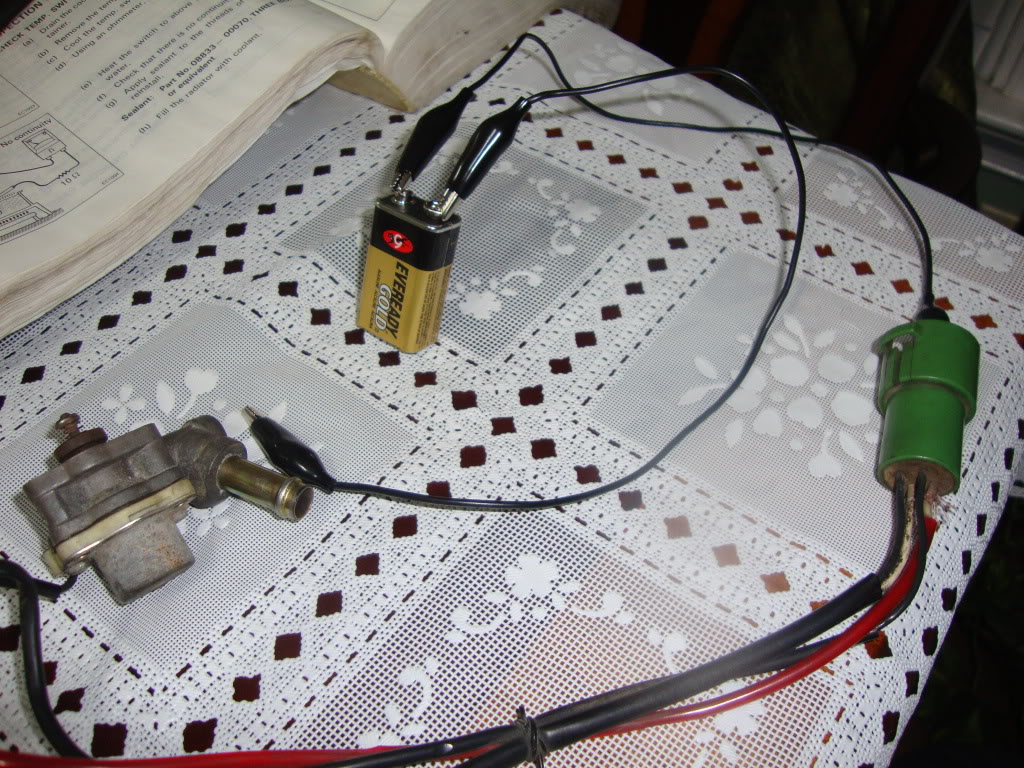
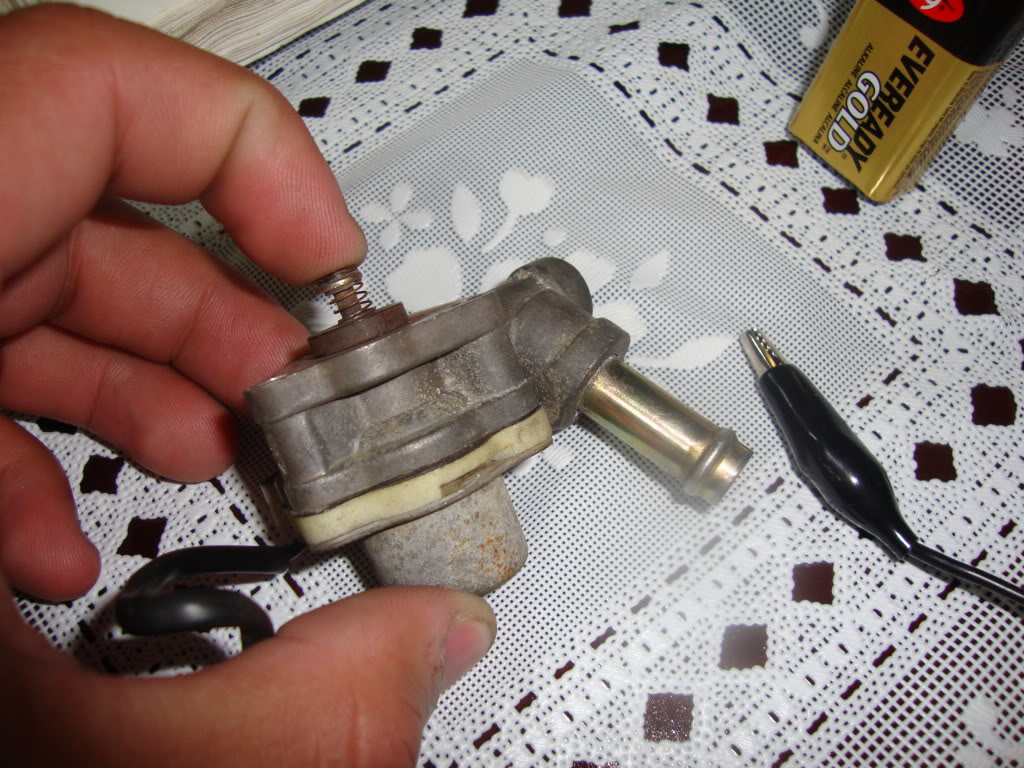
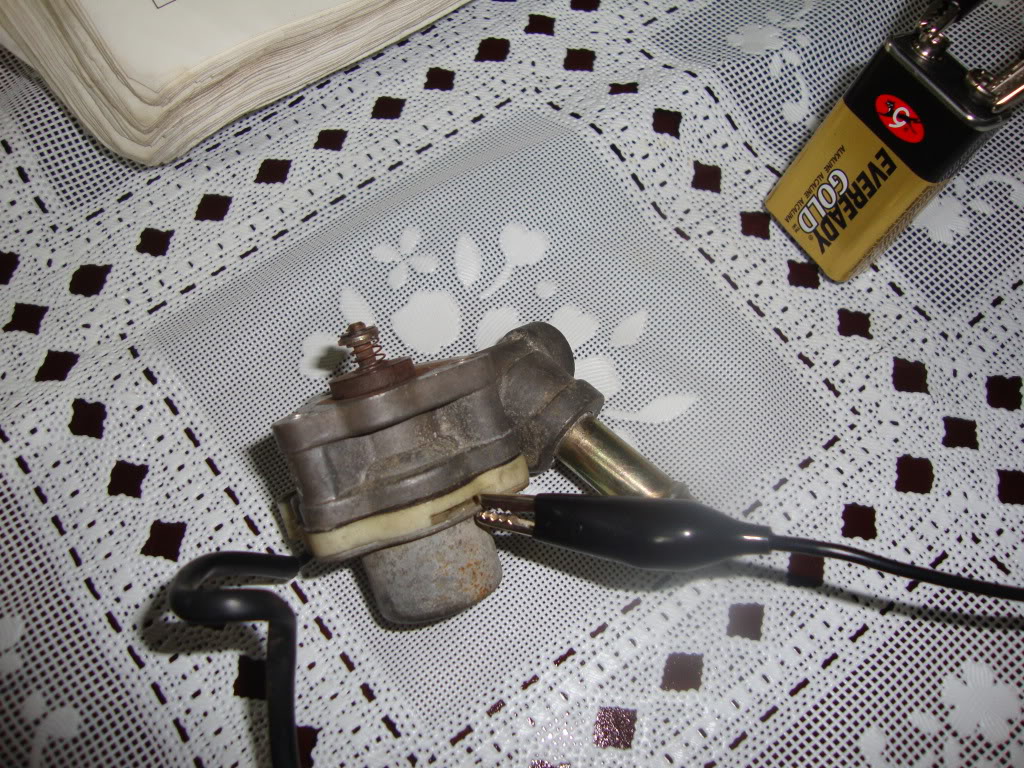
Fuel Cut Solenoid Valve:
Black (-) White (+)
I used a 9v battery since i don't have a car battery lying around the house. It should be enough voltage, all you're looking for here is a click when you hookup the power.
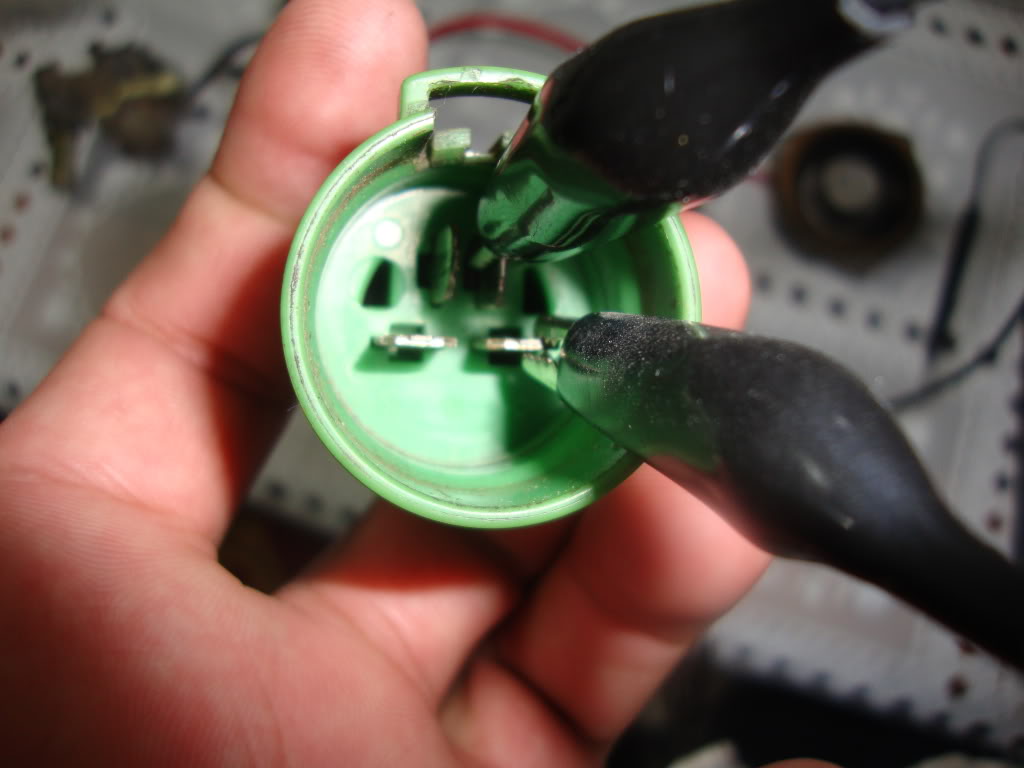
Lastly, Outer Vent Control Valve:
This plug
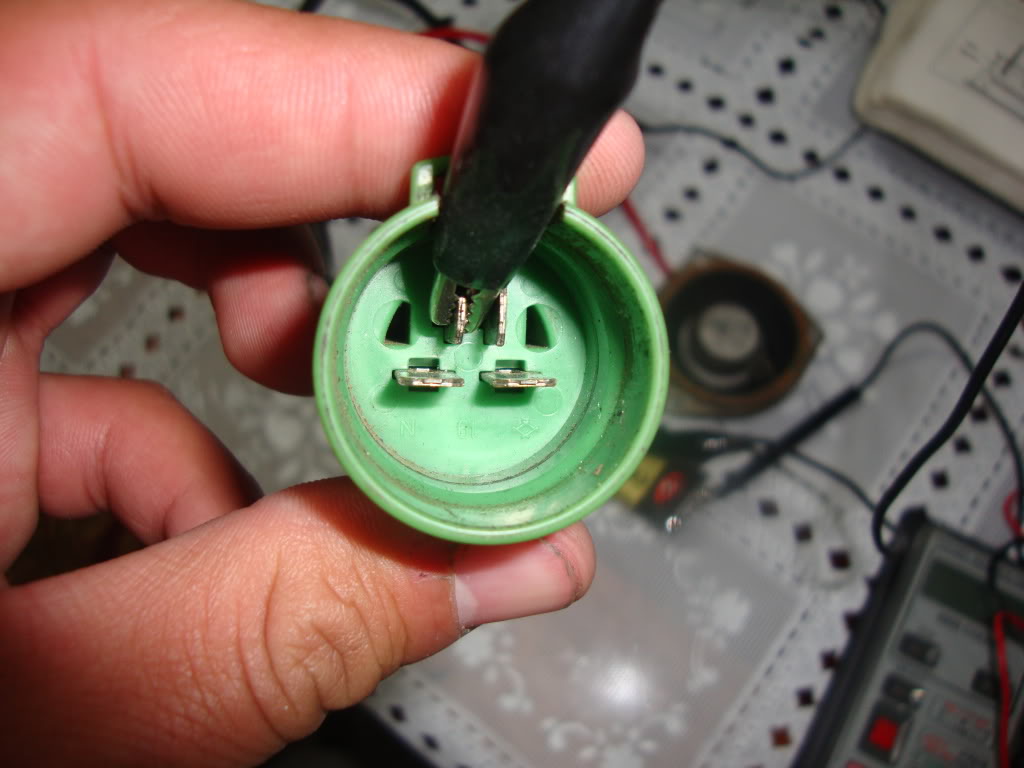
70 ohms here
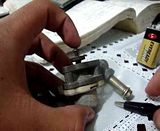
Another test i did:
Little video to help explain it:
Last edited by streetlancer; Jan 8, 2011 at 08:33 PM.
 Jan 14, 2011 | 04:33 PM
#11
Go for it I recently finished the carb and i got say what a difference, night and day!!! It now starts on the first crank!! It used to take forever to start, at least 10 tries, and once it did i had to baby the gas pedal if not it will stumble and die. Now i can take off on a cold engine: no stumbles, no hesitations, no problems. She purrs perfectly at 2,000 rpm and drops down to 900rpm when warm. Ill be uploading the photos soon as well as finishing the write up. This is by far the best improvement iv'e done to this truck. 
I recently finished the carb and i got say what a difference, night and day!!! It now starts on the first crank!! It used to take forever to start, at least 10 tries, and once it did i had to baby the gas pedal if not it will stumble and die. Now i can take off on a cold engine: no stumbles, no hesitations, no problems. She purrs perfectly at 2,000 rpm and drops down to 900rpm when warm. Ill be uploading the photos soon as well as finishing the write up. This is by far the best improvement iv'e done to this truck.
Jan 15, 2011 | 07:07 PM
#17
Sorry I'm taking so long to finish this but i've been really busy.
As for the choke: I recommend using screws because you have to adjust the choke to work just right. I didn't use the rivets supplied with the kit instead i used two screws i found lying around. I didn't tap the holes either they just screwed right in with a little force.
As for the choke: I recommend using screws because you have to adjust the choke to work just right. I didn't use the rivets supplied with the kit instead i used two screws i found lying around. I didn't tap the holes either they just screwed right in with a little force.
Jan 15, 2011 | 07:44 PM
#18
Commencing Image Dump:
Tha AutoZone Kit:
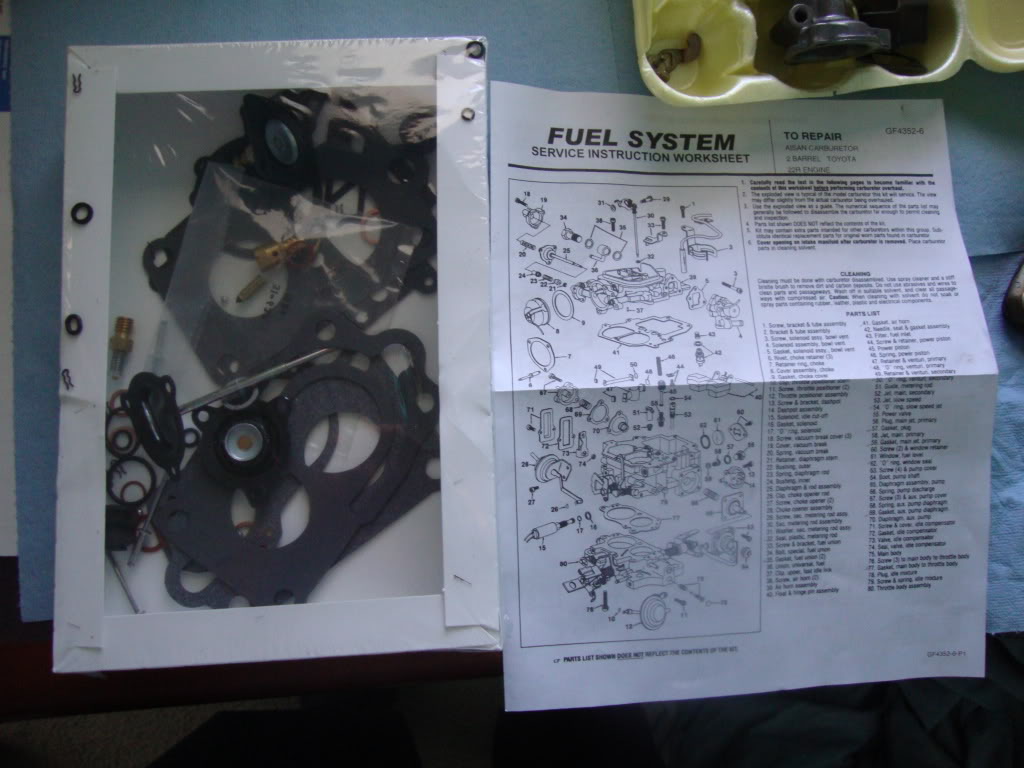
Overall I'm happy with the quality of the kit and the extra parts included that the NAPA one lacked. Among the extras was a new power valve and new manifold spacer gaskets. I've read various post regardingkits that don't include the new gaskets which lead to vacuum leaks around the manifold.
They supply you with 3 different gaskets but based on your specific carb spacer you will only need two. I found out toyota used two different styles of spacers based on a recent trip to the junkyard, don't know why??

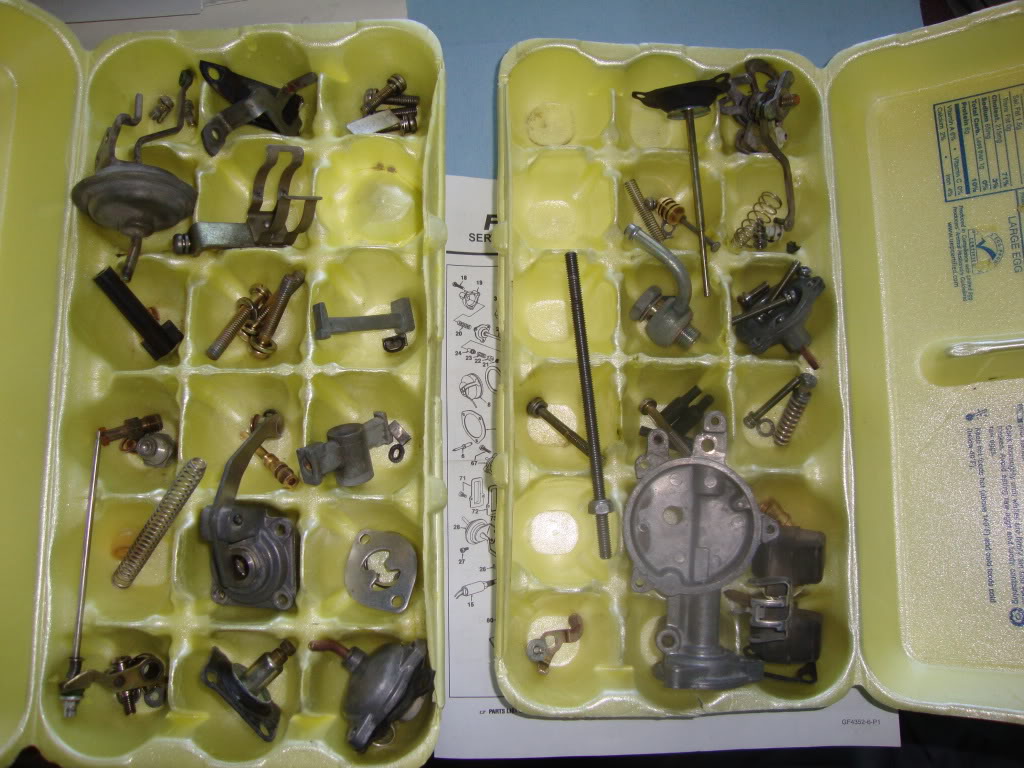
Unfortunately, I did not have my camera during disassembly but I did document the reassembly.
After taking it apart as per the instruction sheet above, I cleaned and soaked everything that was not rubber, plastic, or electrical. I used a carburetor dip along with carb cleaner, plastic/brass brushes, and compressed air. Everything soaked for at least a day except the throttle body assym. I used carb cleaner on it and blew all the passages clean with compressed air.
ALSO VERY IMPORTANT!! When you take your carb apart make sure to use the right screwdriver for the job; It should fit snug. And apply pressure towards the screw as you loosen it, otherwise, you risk stripped screw heads. Ask me how I know. Oh.... and don't get none of those nasty cleaners on your hands or face.
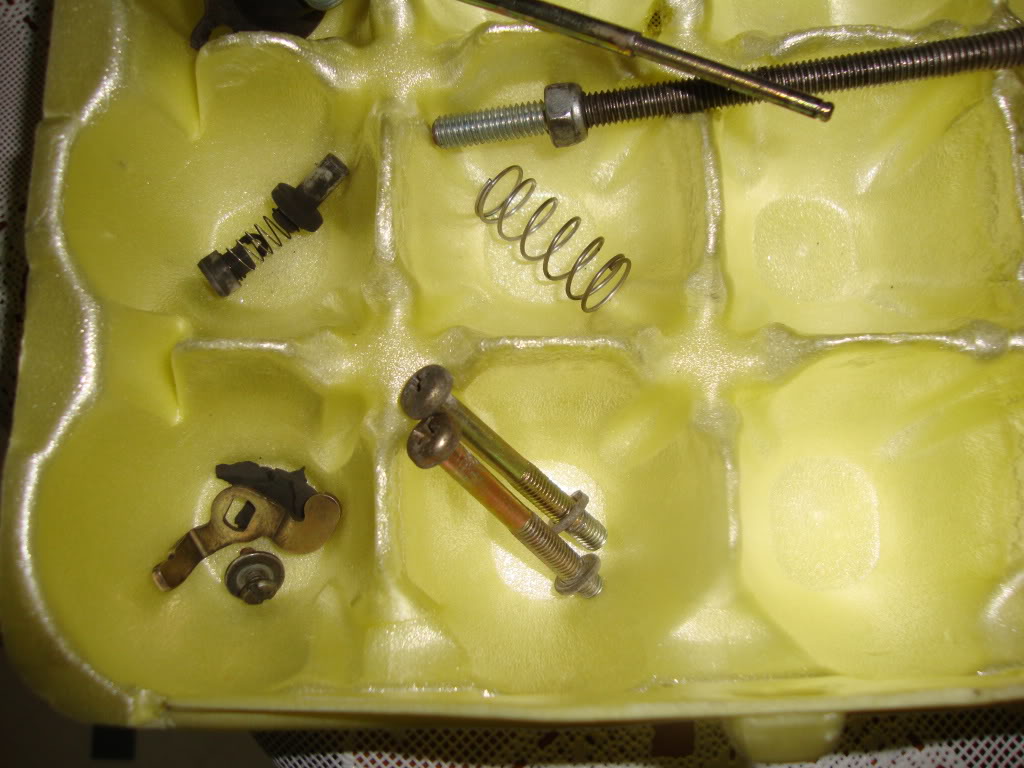
Here are all the bits & pieces after a good clean up:
I started with the bowl assembly but you can follow any order you want.
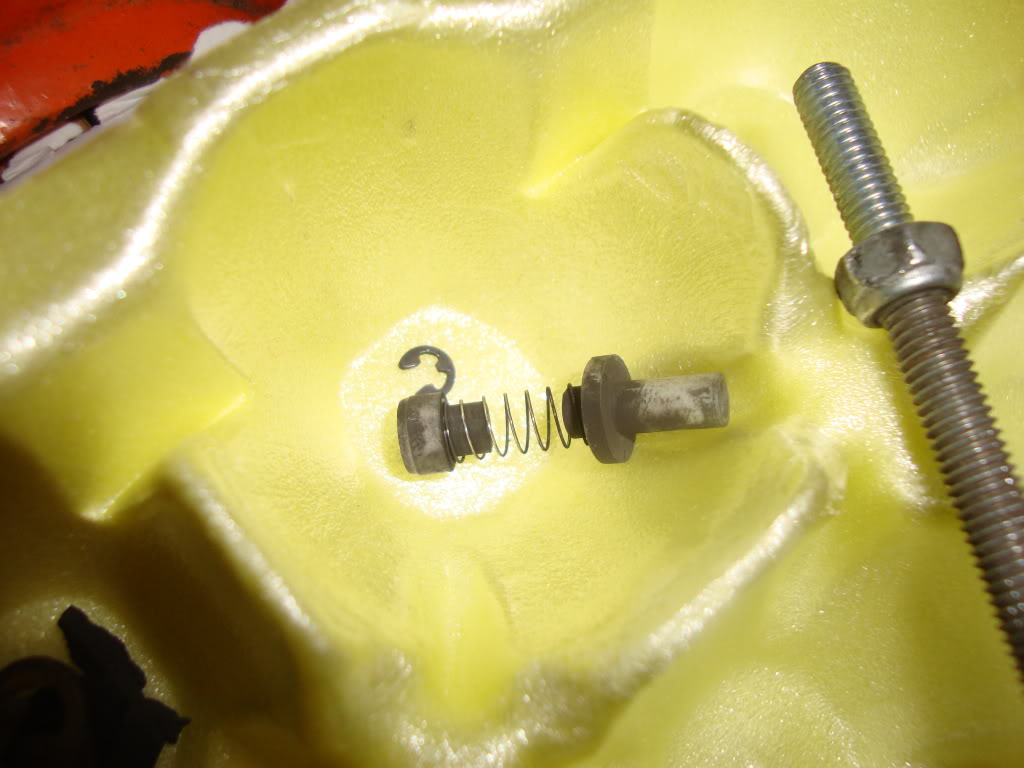
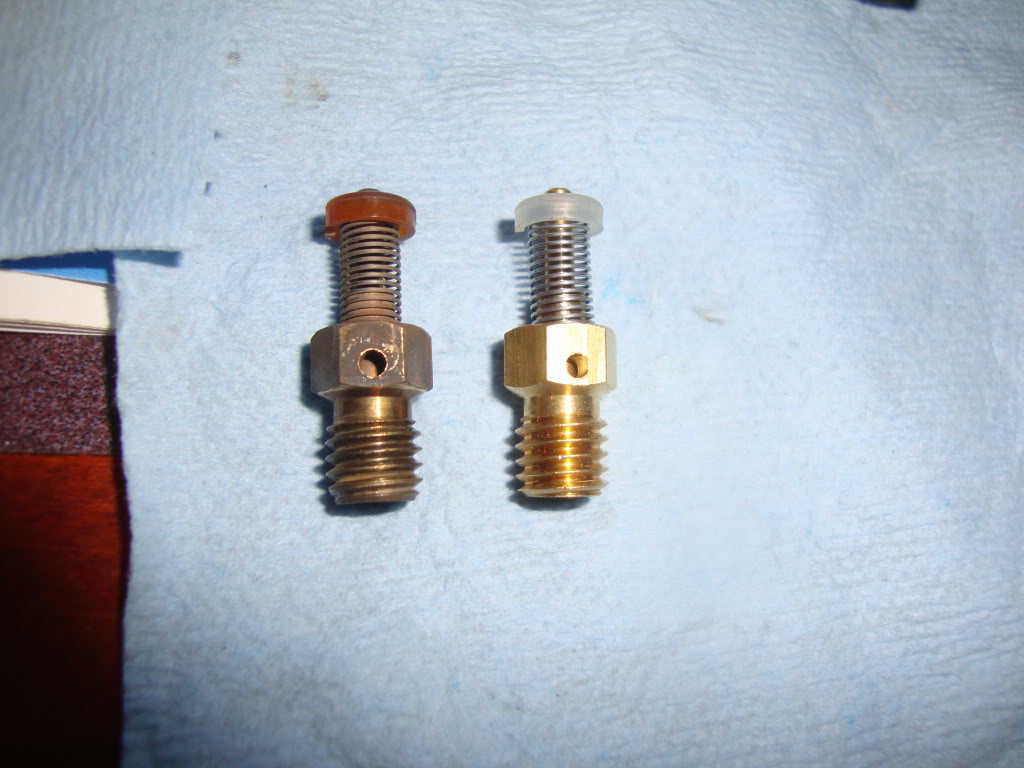
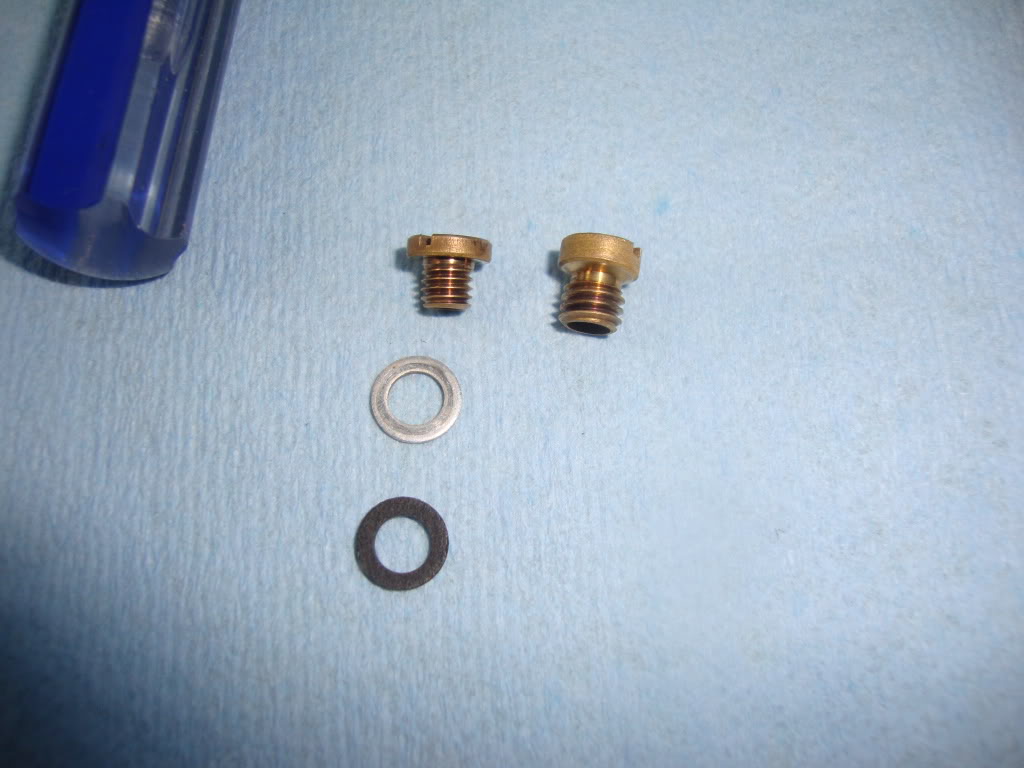
Here are your two jets: The one on the left is the primary main followed by the secondary main. Notice only the primary uses a "gasket". For comparison the stock gasket is an alum. washer the kit included something else. I ended using the stock washer because i felt it was better.
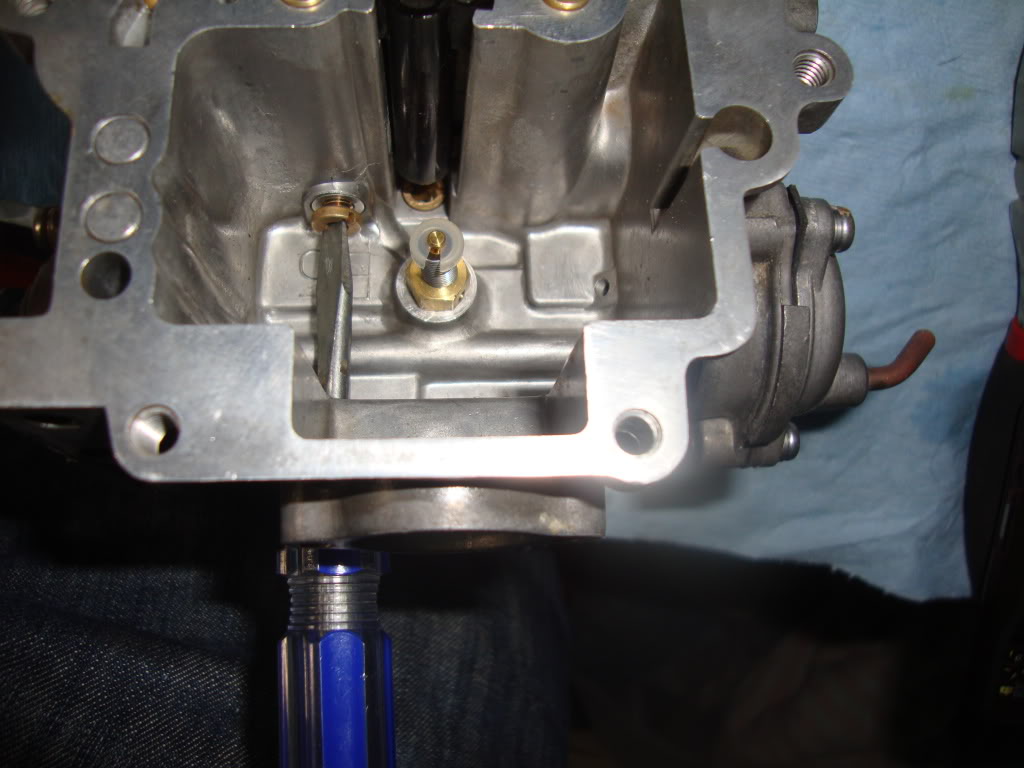
Next, you can go on and install the new power valve along with the meetering needle guide. There is a specific way the guide goes on so it will only fit one way.
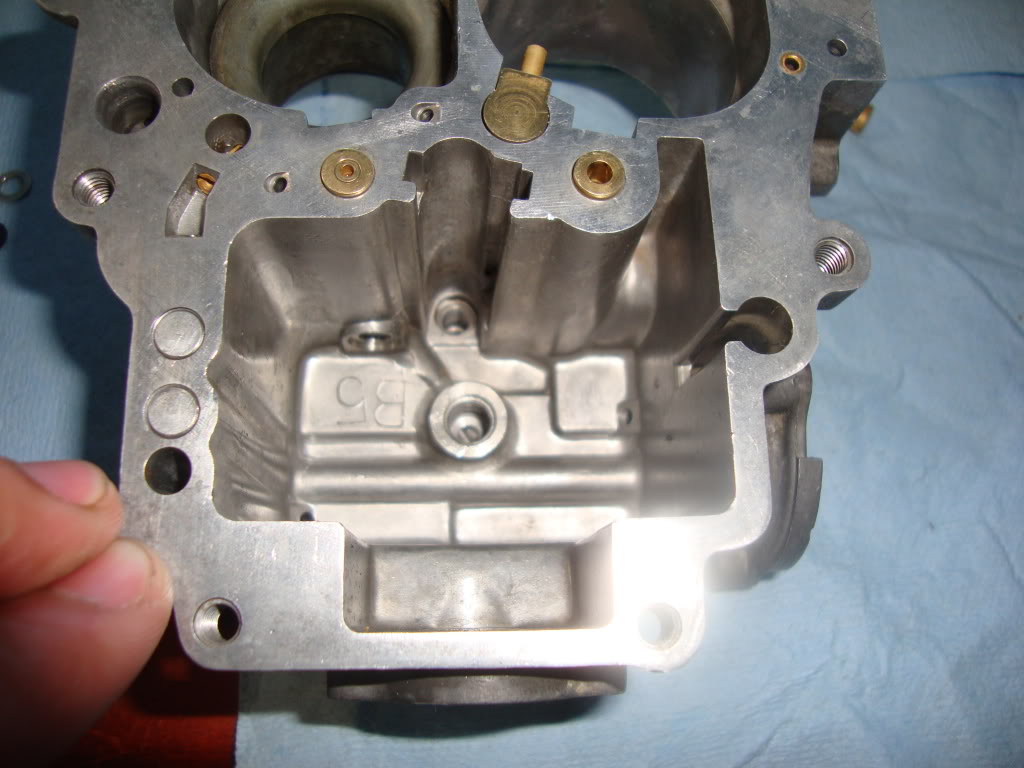
Venturi Primary, old & new o-ring, retainer
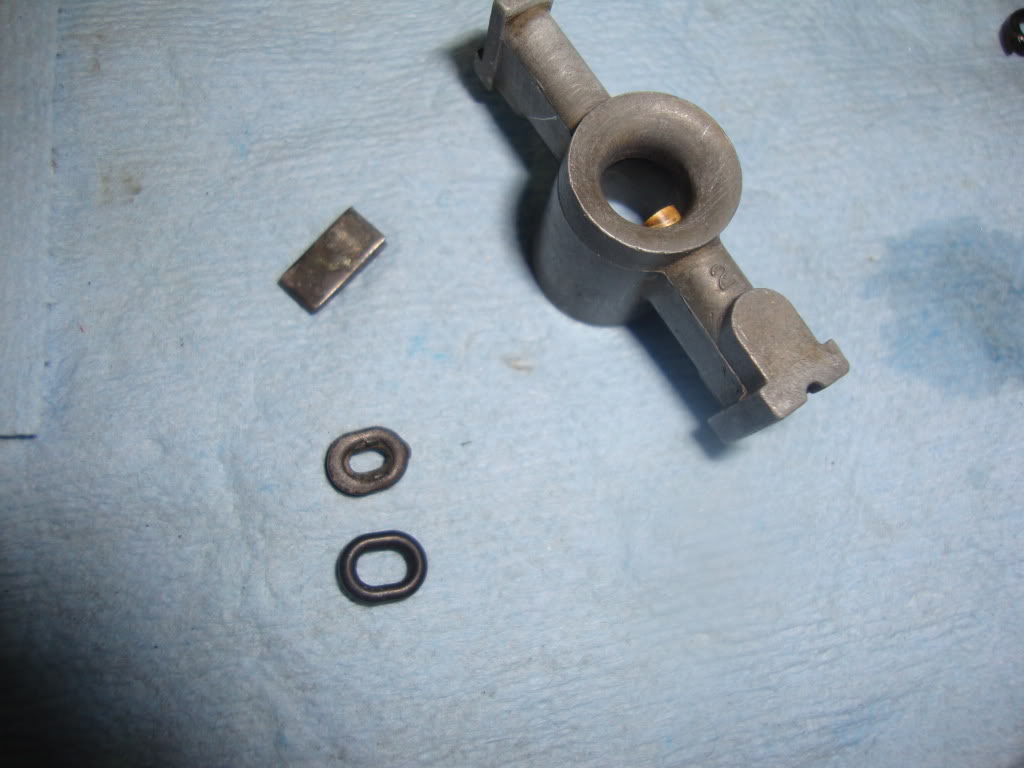
The kit only provides one oval oring which goes on the primary:
For the venturi secondary you use a regular oring and push it in to shape. Use the one that fits the best.
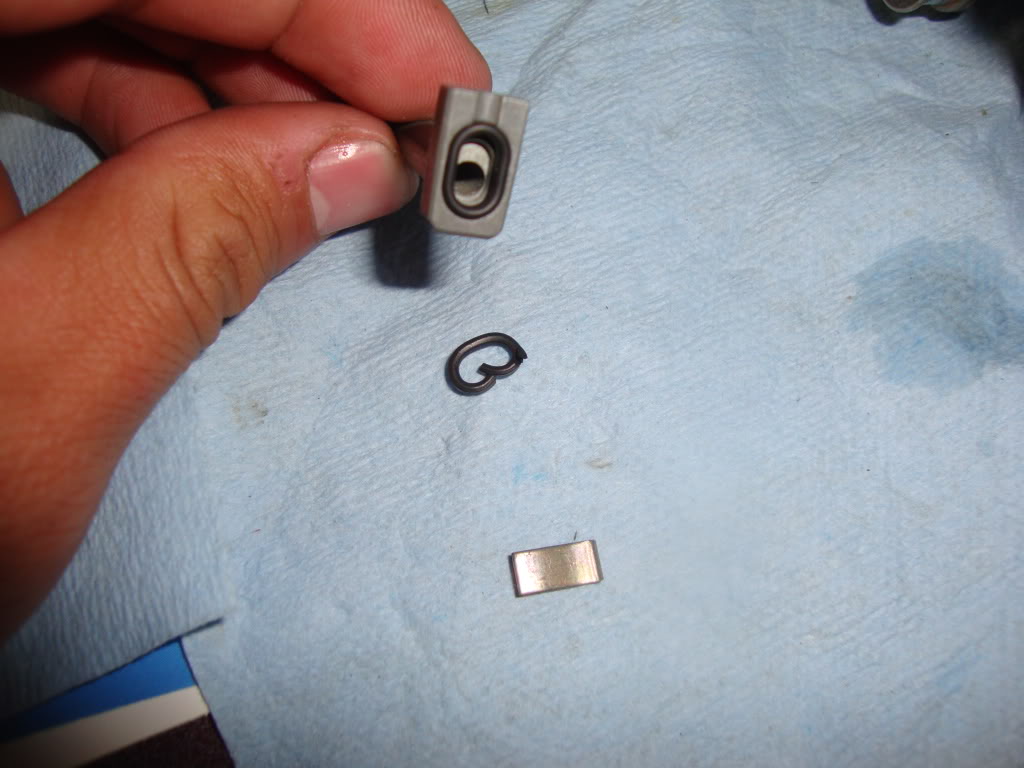
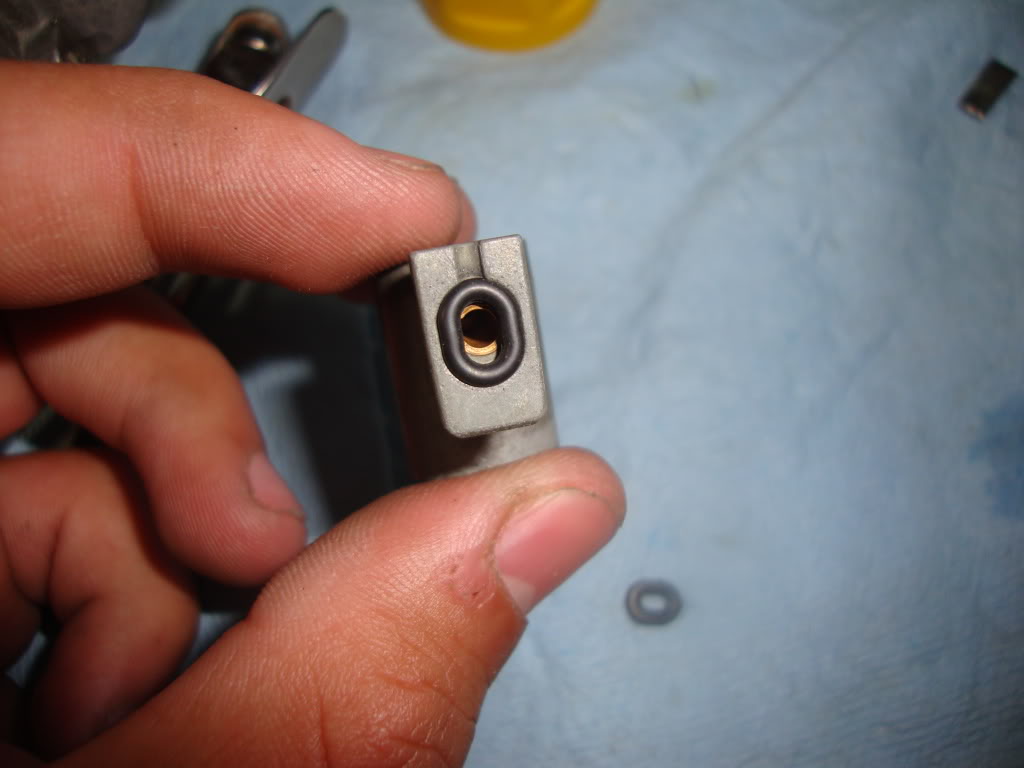
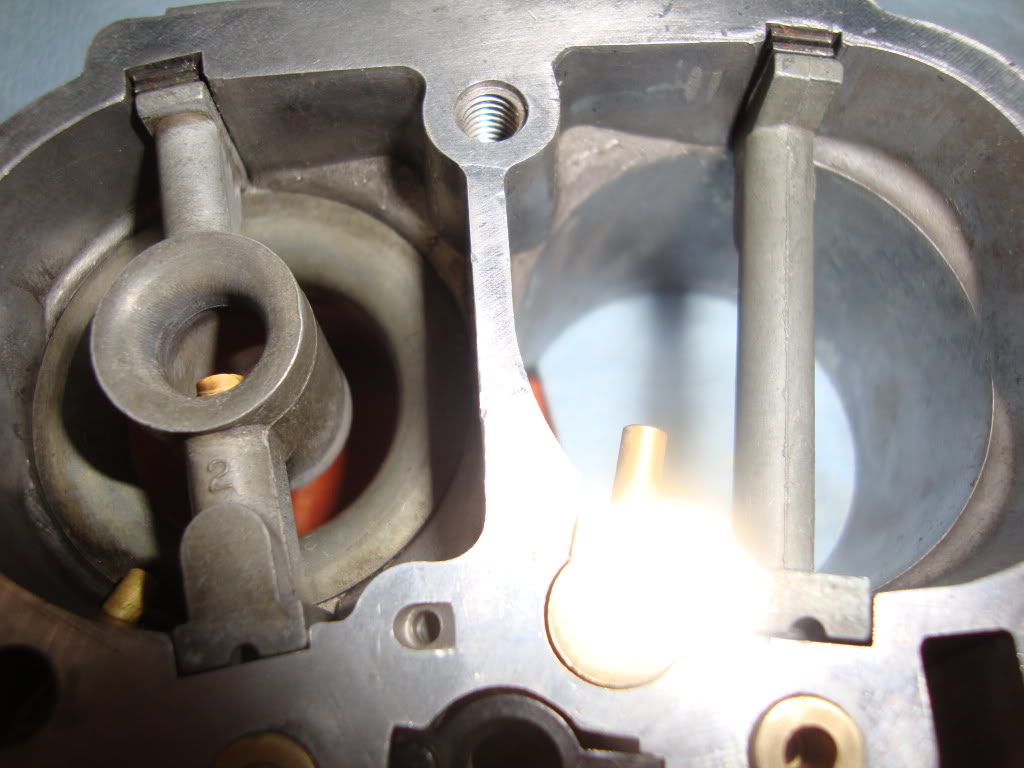
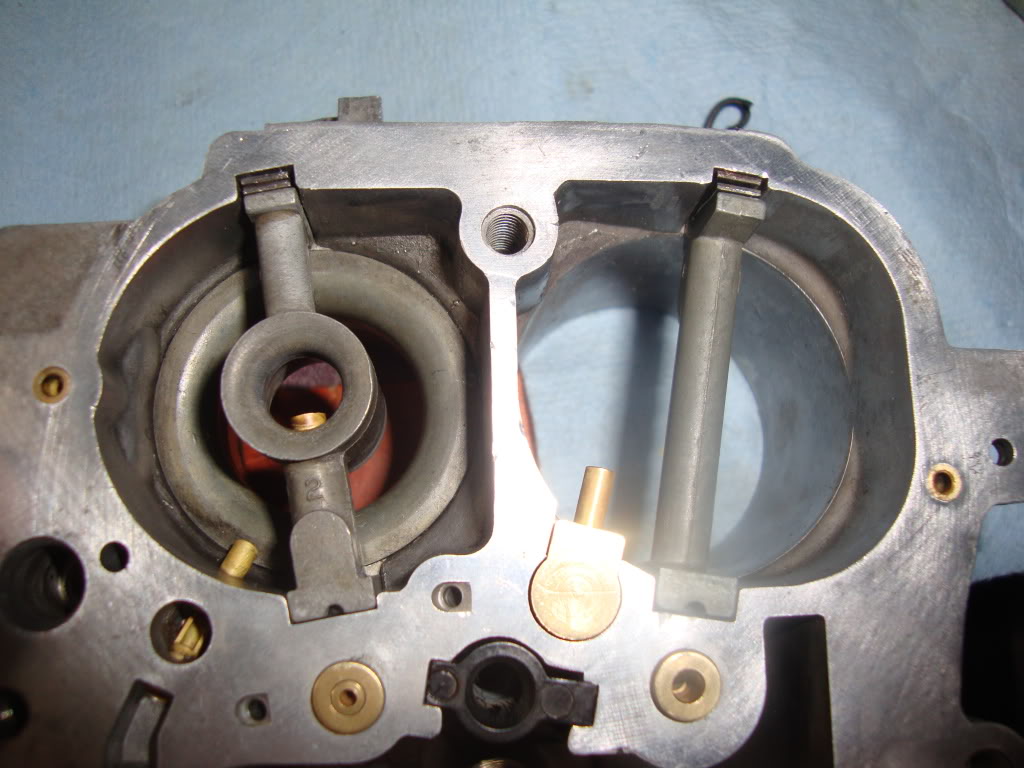
Both Venturis installed with retainers
A little tip: To get a tighter fit stick a flathead screwdrider on the retainers before installing to open them up a little. One of my retainers allowed movement of the venturi.
Tha AutoZone Kit:
Overall I'm happy with the quality of the kit and the extra parts included that the NAPA one lacked. Among the extras was a new power valve and new manifold spacer gaskets. I've read various post regardingkits that don't include the new gaskets which lead to vacuum leaks around the manifold.
They supply you with 3 different gaskets but based on your specific carb spacer you will only need two. I found out toyota used two different styles of spacers based on a recent trip to the junkyard, don't know why??
Unfortunately, I did not have my camera during disassembly but I did document the reassembly.
After taking it apart as per the instruction sheet above, I cleaned and soaked everything that was not rubber, plastic, or electrical. I used a carburetor dip along with carb cleaner, plastic/brass brushes, and compressed air. Everything soaked for at least a day except the throttle body assym. I used carb cleaner on it and blew all the passages clean with compressed air.
ALSO VERY IMPORTANT!! When you take your carb apart make sure to use the right screwdriver for the job; It should fit snug. And apply pressure towards the screw as you loosen it, otherwise, you risk stripped screw heads. Ask me how I know. Oh.... and don't get none of those nasty cleaners on your hands or face.
Here are all the bits & pieces after a good clean up:
I started with the bowl assembly but you can follow any order you want.
Here are your two jets: The one on the left is the primary main followed by the secondary main. Notice only the primary uses a "gasket". For comparison the stock gasket is an alum. washer the kit included something else. I ended using the stock washer because i felt it was better.
Next, you can go on and install the new power valve along with the meetering needle guide. There is a specific way the guide goes on so it will only fit one way.
Venturi Primary, old & new o-ring, retainer
The kit only provides one oval oring which goes on the primary:
For the venturi secondary you use a regular oring and push it in to shape. Use the one that fits the best.
Both Venturis installed with retainers
A little tip: To get a tighter fit stick a flathead screwdrider on the retainers before installing to open them up a little. One of my retainers allowed movement of the venturi.
Last edited by streetlancer; Jan 15, 2011 at 08:41 PM.
Jan 16, 2011 | 07:43 PM
#19

Registered User
Joined: Jun 2010
Posts: 6
Likes: 0
From: Sugar Hill, GA
Thank you. I've been cleaning mine up this weekend. Hopefully get to pick up the rebuild kit this week. I did a stupid thing thinking id be able to clean the choke plates better out of the airhorn and sheered one of the screws right off. I was able to find a donor carb off ebay for $59 plus shipping. Now I just hope I can get the busted one out without breaking anything else. Palm to forehead...
Feb 1, 2011 | 09:13 AM
#20
Oops... I just noticed it's not finished...must have forgot to hit the "save" button.
I'll get on it right away. So, hows it coming along haole07?
I'll get on it right away. So, hows it coming along haole07?
Last edited by streetlancer; Feb 1, 2011 at 09:15 AM.


