
22RE Crankshaft Bolt removal
 Oct 8, 2009 | 02:30 PM
#41
Thread Starter
YotaTech Milestone-Two Millionth Post
Joined: Jan 2009
Posts: 12,009
Likes: 122
From: Northeast Pennsylvania
An impact gun's not gonna flip the motor over on a stand
 I got a great visual there, though and laughed out loud.
The cool thing about using an impact gun is that it's in such short, quick, high torque bursts, that the component doesn't really see much of any rotation at all. I don't understand the physics behind it, really, all I know is that when I go to pull wheel lugs or something, it doesn't spin my wheel like it does if I get on it with a long ratchet.
Thanks for the advice....but on a silly note........and in relation to the torque of the impact wrench......
Years ago was remodeling an old batroom and putting tile on the floor. floor tile is thicker than wall tile for obvious reasons........being lazy and needing to make some tricky cuts and not feeling like taking them to the tile shop for the wet-saw, I put one of those sandpaper-on-chicken-wire discs on an EXTREMELY over-powered (for the job) drill. It was an industrial Milwaukee Drill....about 5lbs or so.......so picture this.....me (and i'm lucky i could still count to 10) holding the drill steady on top of a paint can with one hand and holding the tile steady with the other....something happened causing the disc to catch and the drill totally made my wrist twist around.......wrist blew out like a cartoon, but no broken bones........so it's torque like that, that makes me nervous. In retrospect I would have done things a little different......musta had BEER STRENGTH to not let go of the drill.
 Oct 9, 2009 | 10:04 AM
#44
Thread Starter
YotaTech Milestone-Two Millionth Post
Joined: Jan 2009
Posts: 12,009
Likes: 122
From: Northeast Pennsylvania
Yeh, sorry, I wrote about it on my thread. switch over to it.
No dice.
Not going to say that your technique suggested won't work, but just that it didn't work for me.
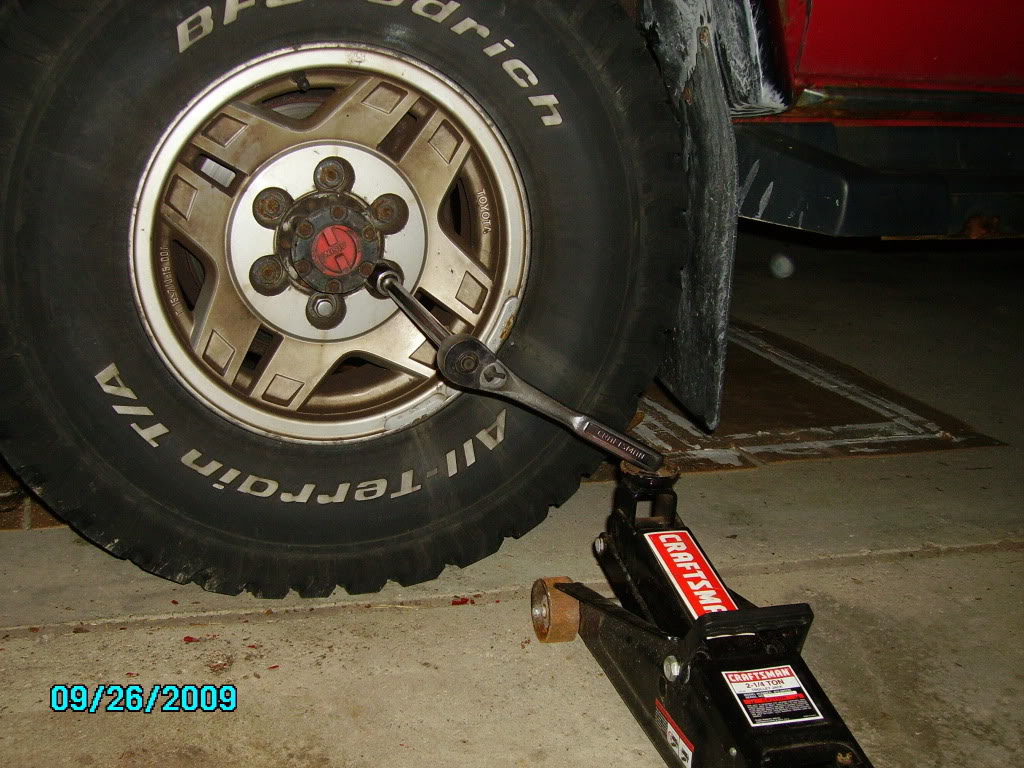
Nice tires....I used to have those, lasted forever.
I ha a hell of a time with those exact rims. I think they were over tightened.
see the thread https://www.yotatech.com/forums/f115...me-off-187067/
No dice.
Not going to say that your technique suggested won't work, but just that it didn't work for me.
Nice tires....I used to have those, lasted forever.
I ha a hell of a time with those exact rims. I think they were over tightened.
see the thread https://www.yotatech.com/forums/f115...me-off-187067/
Oct 9, 2009 | 04:07 PM
#45
Registered User
Joined: Feb 2004
Posts: 641
Likes: 0
From: detroit, mi
Yeh, sorry, I wrote about it on my thread. switch over to it.
No dice.
Not going to say that your technique suggested won't work, but just that it didn't work for me.
Nice tires....I used to have those, lasted forever.
I ha a hell of a time with those exact rims. I think they were over tightened.
see the thread https://www.yotatech.com/forums/f115...me-off-187067/
well, i wasn't sure if it would work or not, but it was worth a try.
i LOVE my tires. i've never been stuck in anything, dirt, sand, mud, snow, doesn't matter. i just don't get stuck. plus, they're fairly cheap and they don't affect gas mileage. by far the best all around truck tire you can buy in my opinion.
as for the rims, i hate them. every single time i need to remove a wheel i have problems. it's something to do with the aluminum wheel and the steel hub. one swells more than the other and they end up fusing together somehow, i guess. i've done several things to get them off, some successful, others not. 1/2 the time, a well placed kick will do it. the other 1/2 of the time i'm not so lucky. once, i tried loosening all the lug nuts so there was a few spare threads of tire "wiggle" room, then set the wheel on the ground and rocked the entire truck back and forth sideways till it "popped" off. it worked for one wheel, but not the other. the other wheel i loosened just like the first one and ended up driving around the neighborhood swerving around till it popped. except that it never did. so then i utilized one of the best tire business plans in the industry that discount tire company offers. if you buy tires from them, they will rotate your tires for free for life. i just drove it to them and said "rotate my tires, please". i don't know how they did it, but when i got back to my house, the tire came off no problem! haha
Oct 10, 2009 | 06:26 AM
#47
Registered User
Joined: Oct 2009
Posts: 95
Likes: 0
From: Virginia Beach
I have the SR5 wheels, too. I had them powdercoated. they don't tell you this at the time, but powdercoating narrows the hub opening. you guys think your wheels were stuck? one time, I couldn't get my truck inspected because they couldn't get the wheels off!
ended up grinding off the coating inside the hub opening. I've found that smearing a bit of antiseize on the hubs, opening and backs of the wheels helps a lot. you might also consider taking a wire wheel to your hubs to remove any surface rust beforehand, which will help.
just my .02
ended up grinding off the coating inside the hub opening. I've found that smearing a bit of antiseize on the hubs, opening and backs of the wheels helps a lot. you might also consider taking a wire wheel to your hubs to remove any surface rust beforehand, which will help.
just my .02
 Oct 15, 2009 | 05:42 AM
#49
Thread Starter
YotaTech Milestone-Two Millionth Post
Joined: Jan 2009
Posts: 12,009
Likes: 122
From: Northeast Pennsylvania
OK, I'm going to re-visit this topic.
Now I haven't done TOO much searching around about THIS specific question.....but...
Has anyone tried the "tap the starter" trick with the engine being this far torn down?
I hav removed all the necessary-to-be-removed-to-get-the-head-off parts so that what I am left with is my block basically.
I am nervous about just hooking the battery back up and turning the key to engage the starter. I am not going to dispte what others have told me, but I would like it if someone would chime in and say they have done it when they have been this far into things.
I have the head off and need to get the timing chain cover off for replacement of the cover due to chain damage.
Oct 18, 2009 | 03:12 AM
#50
Thread Starter
YotaTech Milestone-Two Millionth Post
Joined: Jan 2009
Posts: 12,009
Likes: 122
From: Northeast Pennsylvania
Sorry for the cross-posting, but this is in case someone is searching and comes across this thread.
Actually I just google'd for "22re crankshaft pulley removal" and got linked to here....go figure.
So anyway, I created this thread for additional advice and ideas on how to remove the crankshaft bolt.
So let me tell you WHAT DOESN'T WORK....
-CHEAP TOOLS......being a newbie, I use what I have and buy what I think I need. NEVER buy a 3/8'' drive breaker bar.....what was I thinking, I shreaded it!
-NEVER USE A 12-POINT SOCKET WHEN IT MATTERS.......again another lesson. Not enough bite on it to get a sure grip.
-NEVER USE A DEEP 19mm SOCKET FOR THIS JOB......my idea of buying a NEW breaker bar, but this time a 1/2'' drive was a good one but again, you're only as good as your weakest link. At ACE HARDWARE (insert chuckles and snickering here), they only had a DEEP 19mm 6-point socket, so because of the overall weight of this socket I thought "man this has to work"....NOPE!!! Failed on the 1st pull. Fractured long-ways down about 2/3 of the socket and a 2nd fracture of less length. AND>>> the crankshaft bolt didn't budge.
-DO BUY A GOOD PIPE EXTENSION........on my same shoppping trip when I bought a new breaker bar and deep 19mm socket I also bought a 3 foot piece of black pipe.
*****OK but here's the trick*******
I tied off the pulley with several feet of webbing.....used for rappelling etc in the Fire Service / Rescue etc that I used to do in a previous life. I also used a piece of rubbery matting used for keeping carpets from sliding.
Lay the mat so it covers the pulley , tie the webbing off to the driver's side frame, and wrap the pulley and tie off the excess........because of the amount of tightness you need, you are going to start off at TDC, but not end there ( I have to set it back before I attempt to pull the pulley off).....but anyway, it will hold, quite well, Thank-you.
-BUY A 1/2''DRIVE SHORT 19MM IMPACT SOCKET.......this time it's a Craftsman socket, and actually was the same price, or less, than the wimpy 19mm deep one I bought at ACE. This purchase, right here, was the crucial one.
-depending on where your bolt is set, will determine what angle you are going to pull / or push (as was my case), because with a 6-point socket your choies of position are much more limited than with a 12-point one (see I'm understanding stuff now)....so in my case, my choices were have the breaker bar at about the 10 o'clock position (no good) or the 2 o'clock position (the one I used)........ended up having the breaker bar with it's extension coming just in front of my K&N filter.
-In my case because of the position of the breaker bar, the hood prop became a potential part of the equation. Have a volunteer from the audience hold the hood open, in my case, my son did just that....because you don't want to un-prop your hood and take it to the face.
-push or pull real hard ......in my case it was PUSH. I'm not the biggest guy in the world (5'8'' and 195lbs) but Im fairly strong for my size, so I really found little or no effort in this part like I thought it would be.
-the nut loosened with a very un-dramatic "click", not the big "crack" I had expected and after about another 1/2 a turn, I was ale to finger-loosen the bolt. It's not anywhere the size I had thought it would be.
>>>>>>>>>>and that's where we are now.
I will document both here and on my thread on how the pulley removing goes......but check my thread for idle chit-chat and some decent pics.
"see one, do one, teach one", did you ever hear that? Well, I'm at the "teach one" part and it feels good!!!
Last edited by 92 TOY; Oct 18, 2009 at 03:17 AM.
Oct 18, 2009 | 03:44 AM
#51
Thread Starter
YotaTech Milestone-Two Millionth Post
Joined: Jan 2009
Posts: 12,009
Likes: 122
From: Northeast Pennsylvania
Let me say this much......
Not to disregard any of the advice I had been given, but doing the "tap the starter" trick, to me was very nerve-wracking to contemplate. So I was going to do EVERYTHING possible to NOT do that. And I proved it CAN be done a different way.
But, certainly, I have been told several times that it works to do it that way.....just made me nervous as all hell to think of trying that.
And, again, you are only as good as your weakest link, so I was able to identify what the links were and where and what was or did fail for me, but also identified , more importantly what DOES work.
The crankshaft bolt is the most evil thing I've encountered yet. Doesn't look like much of an opponent but it is.
And no, I won't be re-using it and if your's ends up beaten up like mine, I would definitely recommend against re-using it.
Last edited by 92 TOY; Oct 18, 2009 at 03:48 AM.
 [/IMG]
 [/IMG]
Oct 18, 2009 | 05:08 AM
[/IMG]
Oct 18, 2009 | 05:08 AM
#53
Registered User
Joined: Feb 2004
Posts: 641
Likes: 0
From: detroit, mi
-BUY A 1/2''DRIVE SHORT 19MM IMPACT SOCKET.......this time it's a Craftsman socket, and actually was the same price, or less, than the wimpy 19mm deep one I bought at ACE. This purchase, right here, was the crucial one.
-the nut loosened with a very un-dramatic "click", not the big "crack" I had expected and after about another 1/2 a turn, I was ale to finger-loosen the bolt. It's not anywhere the size I had thought it would be.
and you're lucky that "click" was the only sound you heard! normally, that "un-dramitic click" is followed by the sound of a bunch of streams of profanities because you end up punching something much harder than your hands, aka sharp metal. i broke my ring finger about a year ago doing that.
Oct 18, 2009 | 07:40 AM
#54
Thread Starter
YotaTech Milestone-Two Millionth Post
Joined: Jan 2009
Posts: 12,009
Likes: 122
From: Northeast Pennsylvania
haha, good quality tools is ALWAYS key!
and you're lucky that "click" was the only sound you heard! normally, that "un-dramitic click" is followed by the sound of a bunch of streams of profanities because you end up punching something much harder than your hands, aka sharp metal. i broke my ring finger about a year ago doing that.
and you're lucky that "click" was the only sound you heard! normally, that "un-dramitic click" is followed by the sound of a bunch of streams of profanities because you end up punching something much harder than your hands, aka sharp metal. i broke my ring finger about a year ago doing that.
yeah I was waiting for something like that to happen. That's why I sized up the situation, envisioned me knocking the hood-prop out and then smashing me in the face and that's why I had my son on the other side of the truck holding the hood up.
Oh yeah....definitely, the quality of the tools is absolutely key........I may just buy me a complete set of those metric impact sockets.
Oct 18, 2009 | 08:01 AM
#55

Registered User
Joined: Jan 2007
Posts: 243
Likes: 0
From: Minot, ND
for future readers, the chain method works too.
https://www.yotatech.com/50683234-post20.html
Once it's bolted to the face of the pulley at one end, loop the chair around the frame rail and bolt the other end to the pulley.
https://www.yotatech.com/50683234-post20.html
Once it's bolted to the face of the pulley at one end, loop the chair around the frame rail and bolt the other end to the pulley.
Last edited by hodgepodge79; Oct 18, 2009 at 06:05 PM.
Oct 18, 2009 | 08:15 AM
#56
Thread Starter
YotaTech Milestone-Two Millionth Post
Joined: Jan 2009
Posts: 12,009
Likes: 122
From: Northeast Pennsylvania
Yes, thank you, some posts back I posted a picture of that trick from my manual. For me I needed that tool, so I just did the same but different with webbing.
Oct 18, 2009 | 10:45 AM
#57
Registered User
Joined: Feb 2004
Posts: 641
Likes: 0
From: detroit, mi
yeah I was waiting for something like that to happen. That's why I sized up the situation, envisioned me knocking the hood-prop out and then smashing me in the face and that's why I had my son on the other side of the truck holding the hood up.
Oh yeah....definitely, the quality of the tools is absolutely key........I may just buy me a complete set of those metric impact sockets.
Oh yeah....definitely, the quality of the tools is absolutely key........I may just buy me a complete set of those metric impact sockets.
Oct 18, 2009 | 06:02 PM
#58
Registered User
Joined: Jan 2007
Posts: 243
Likes: 0
From: Minot, ND
Webbing, or an electrical cord for that matter, wrapped around the pulley is hardly chain bolted to the face of the pulley.
Last edited by hodgepodge79; Oct 19, 2009 at 04:35 AM.
Oct 19, 2009 | 01:19 AM
#59
Thread Starter
YotaTech Milestone-Two Millionth Post
Joined: Jan 2009
Posts: 12,009
Likes: 122
From: Northeast Pennsylvania
yes, and someone else posted about a tool bolted to the front as well.
whatever works to hold it steady.
I will say the webbing trick is the simplist of all and works very well.


