
1st Gen 4Runner: B-Pillar Badge Restoration?
 Jun 15, 2012 | 11:03 AM
#21
YotaTech Milestone-Two Millionth Post
Joined: Jan 2009
Posts: 12,009
Likes: 122
From: Northeast Pennsylvania
hmmm....might be a nice project for us.
Jun 15, 2012 | 03:49 PM
#23
Registered User
Joined: Dec 2010
Posts: 592
Likes: 0
From: merritt island, FL
i did mine myself, i popped off the trim and then the little circels on the back that look like little spot welds (but in plastic of course) i pushed those through and out came the little plastic piece. then i took some goo gone, and krud kutter to take the old crap off. Then i used some industrial cleaner and polish to shine and clean the plastic. Then i got some paint and paint brushes from walmart.
result(yea i know the paint on the panels themselves suck this pic was before i finished) :
the pics are bad sorry but you get the idea
result(yea i know the paint on the panels themselves suck this pic was before i finished) :
the pics are bad sorry but you get the idea
Jun 15, 2012 | 08:48 PM
#24
Registered User
Joined: Jun 2010
Posts: 1,448
Likes: 100
From: Virginia
At first I tried using Goo Gone and a plastic razor blade to get the gunk and paint off. It was slow going.
Goof Off works much better. Goof Off, wood toothpicks and Q-Tips were the ticket. Slosh the Goof Off on and work quickly. It seems like it wants to melt the plastic.
After about 45 minutes I ended up with two clear lenses. Photobucket isn't let me load more pictures tonight. I wet sanded them with 600 grit and a few drops of Dawn liquid. I will buff them with plastic lens compound and degrease before I paint them. Terry87 had good results with clear coating tail lenses so I think I'll do that with these to make them shine.
Jun 25, 2012 | 10:50 PM
#27
Thread Starter

Joined: Nov 2011
Posts: 688
Likes: 22
From: Portland, OR
Not so good news on my research to have new badges made. The shop that I was talking to said that in order for them to embed a badge within acrylic, the minimum acrylic thickness must be 3/4".... too thick for what we're trying to do.
Restoration of the existing badge may be the only option.
Restoration of the existing badge may be the only option.
Last edited by stanz; Jun 26, 2012 at 11:59 AM.
Jun 29, 2012 | 12:19 PM
#30
Registered User
Joined: Jun 2010
Posts: 1,448
Likes: 100
From: Virginia
I'm finished and satisfied except for the Rustoleum Clear Coat I used. It kind of melted the plastic. Fortunately I only put a light coat on. I'm out of town but when I get back I'll sand it off and use Testor's Clear Coat since it's meant for plastic.
Here's what I used:
Gold leafing; about 5 layers:

About 5 layers of the silver pen:
The letters end up kind of messy. Wait for the paint to dry well and wet sand lightly with 1500 grit. The letters come out very neat (above I had sanded the gold)
Then paint the back with Testor's Black Gloss model paint:

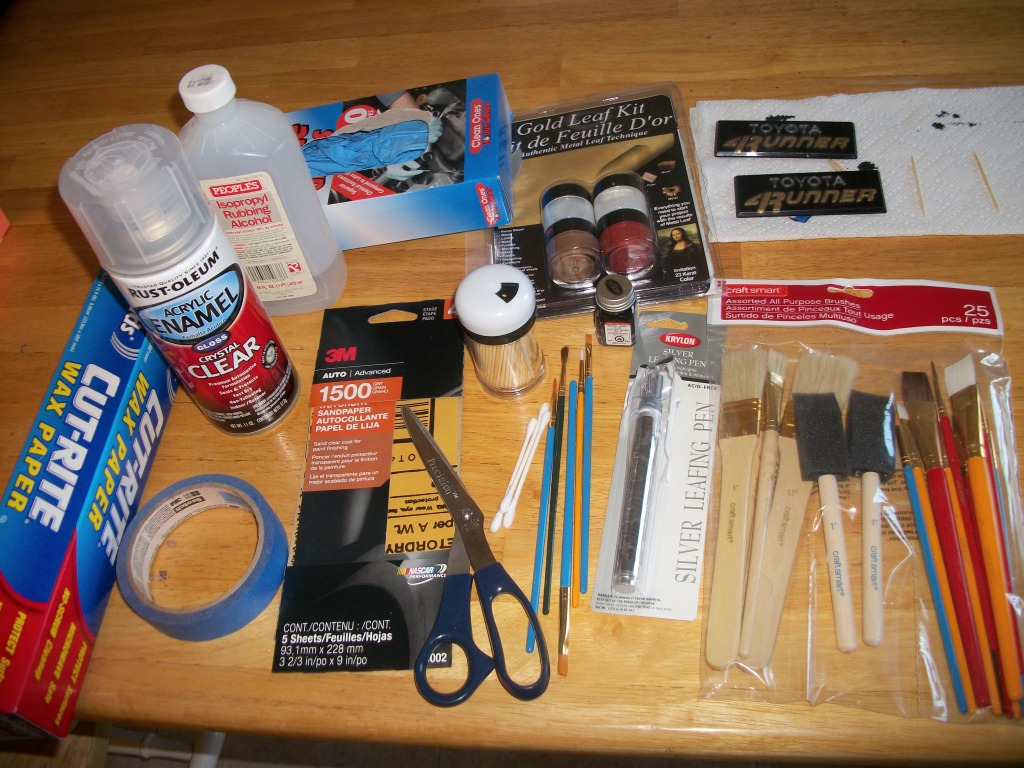
I then wet sanded the face and let it dry. As I said the Rustoleum did not do well. The emblems do look better in person. The whole project took about three days due to waiting for drying times. It takes only a couple of minutes to do a layer of gold leaf but you have to apply the adhesive and wait an hour for it to dry. If you have some gold paint left on your own emblems (most 4Runners I've seen say "unne" in gold.) IMO leave what gold you have and gold leaf over it. The gold leaf kit cost about $6.99. The silver leaf pen was $6.99 also .They make a gold leaf pen but they were out of stock and I kind of think the leaf is more accurate than paint. I got a pack of artist's brushes for about $6.99 too. You need the really tiny brush tips. You also need wax paper and 1500 grit wet/dry sandpaper from an auto store and Testor's black model paint from the craft store. Q-Tips and toothpicks and masking tape. I guess I'll get Testor's Clear Coat too. I used very little material so I have a lot left over. It would be sooo worth buying these new for $75 if Toyota still sold them. I am not a patient person.
Here's what I used:
Gold leafing; about 5 layers:
About 5 layers of the silver pen:
The letters end up kind of messy. Wait for the paint to dry well and wet sand lightly with 1500 grit. The letters come out very neat (above I had sanded the gold)
Then paint the back with Testor's Black Gloss model paint:
I then wet sanded the face and let it dry. As I said the Rustoleum did not do well. The emblems do look better in person. The whole project took about three days due to waiting for drying times. It takes only a couple of minutes to do a layer of gold leaf but you have to apply the adhesive and wait an hour for it to dry. If you have some gold paint left on your own emblems (most 4Runners I've seen say "unne" in gold.) IMO leave what gold you have and gold leaf over it. The gold leaf kit cost about $6.99. The silver leaf pen was $6.99 also .They make a gold leaf pen but they were out of stock and I kind of think the leaf is more accurate than paint. I got a pack of artist's brushes for about $6.99 too. You need the really tiny brush tips. You also need wax paper and 1500 grit wet/dry sandpaper from an auto store and Testor's black model paint from the craft store. Q-Tips and toothpicks and masking tape. I guess I'll get Testor's Clear Coat too. I used very little material so I have a lot left over. It would be sooo worth buying these new for $75 if Toyota still sold them. I am not a patient person.
Last edited by Nervo19; Jun 29, 2012 at 12:29 PM.
Jul 7, 2012 | 08:29 PM
#31
Registered User
Joined: Jun 2012
Posts: 15
Likes: 0
From: Fresno, CA
Looks good man. I'm glad I searched, this is exactly what I was looking for! I am going to try a different approach soon (as soon as I get some time off) and maybe just use paint... maybe gold paint might lay a bit more even, or just use white for the lettering but it wont be original... Gonna probably be a lot of trial and error when I do it lol. I just got done "restoring" my mud flaps (dont laugh!) and they turned out pretty slick.

 Jul 19, 2012 | 04:44 PM
#33
Registered User
Joined: Jul 2005
Posts: 1,224
Likes: 1
From: Chandler AZ
Jul 20, 2012 | 09:05 AM
#35
Very cool... saw this recently and forgot to scribe! lol... Glad it popped up today on the 'new posts' link
HOWSIT, NERVO?
PS> Nice work.... I'll definitely be using it in some way to fix those up.
HOWSIT, NERVO?
PS> Nice work.... I'll definitely be using it in some way to fix those up.
Jun 20, 2013 | 12:27 AM
#36

Registered User
Joined: Jun 2013
Posts: 5
Likes: 0
From: SoCal
Thanks to Nervo19, I attempted this repair.
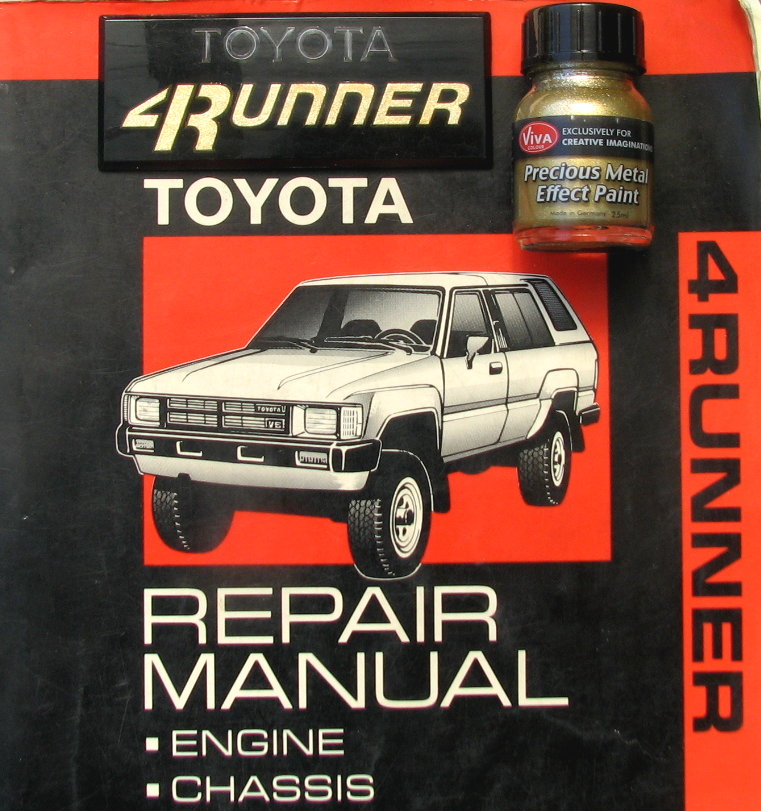
I bought the paint at Jo-Ann Fabric and Craft Store
http://www.joann.com
The VIVA Colour paint was formulated for Creative Imaginations. I checked the internet and it appears the paint is now sold by Splash of Color
http://www.splashofcolor.us/products/paint.html?cat=29
I bought the paint at Jo-Ann Fabric and Craft Store
http://www.joann.com
The VIVA Colour paint was formulated for Creative Imaginations. I checked the internet and it appears the paint is now sold by Splash of Color
http://www.splashofcolor.us/products/paint.html?cat=29
Last edited by AW11MR2; Jun 20, 2013 at 08:08 PM.
 Jun 20, 2013 | 04:42 PM
#38
Registered User
Joined: Jun 2013
Posts: 5
Likes: 0
From: SoCal
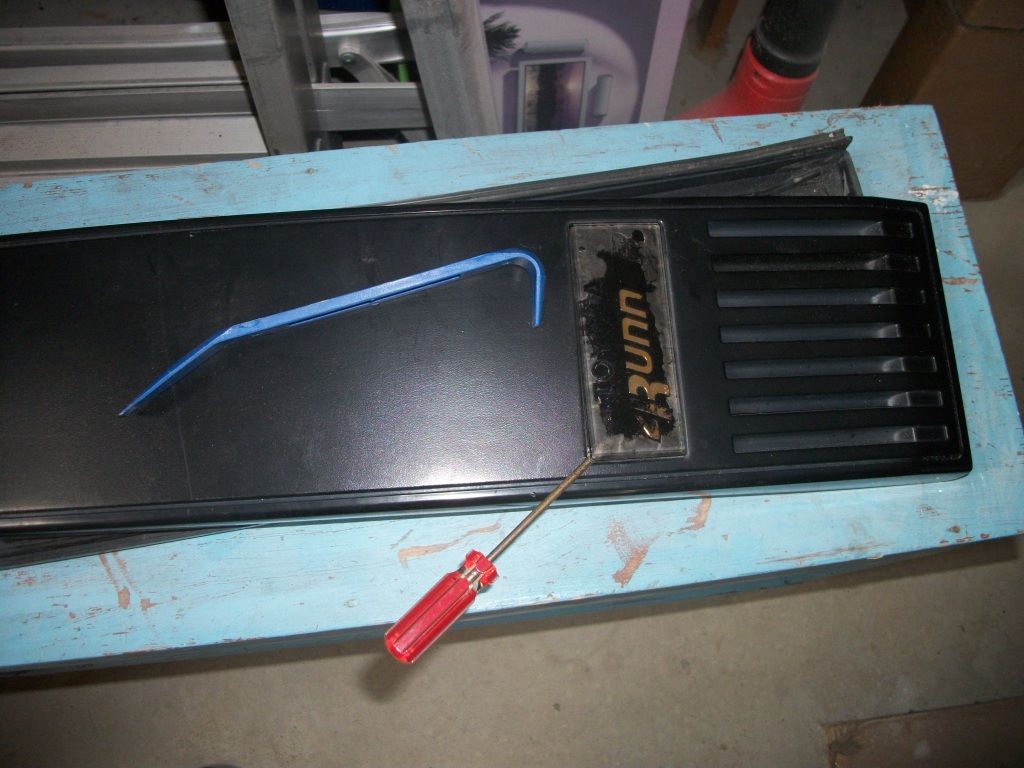
Removing the emblem using a flexible feeler gauge blade andbamboo skewer to cut/tear through the remaining double stick tape
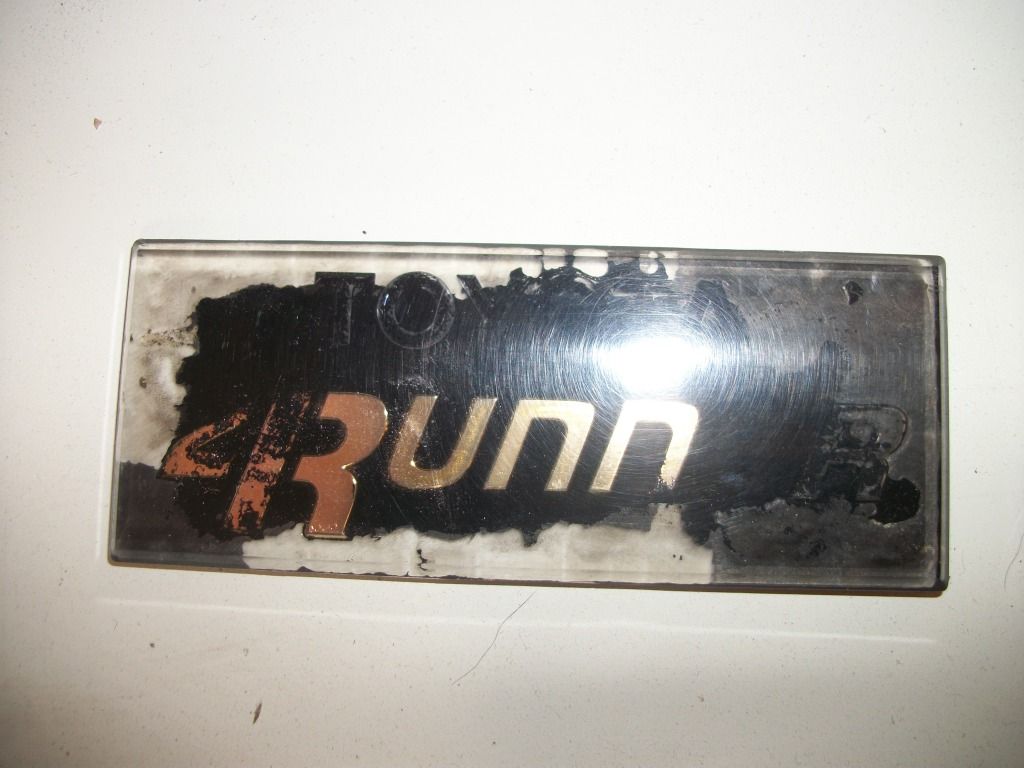
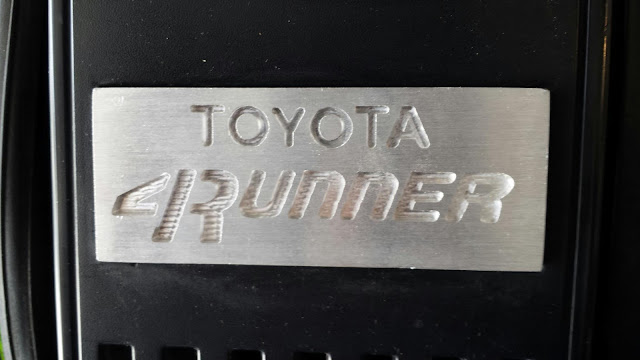
Cleaned emblems. Ifound that the inside face of the letters missing the gold have a pittedsurface.
Testing various paints on a spare emblem.
Jun 20, 2013 | 04:43 PM
#39
Registered User
Joined: Jun 2013
Posts: 5
Likes: 0
From: SoCal
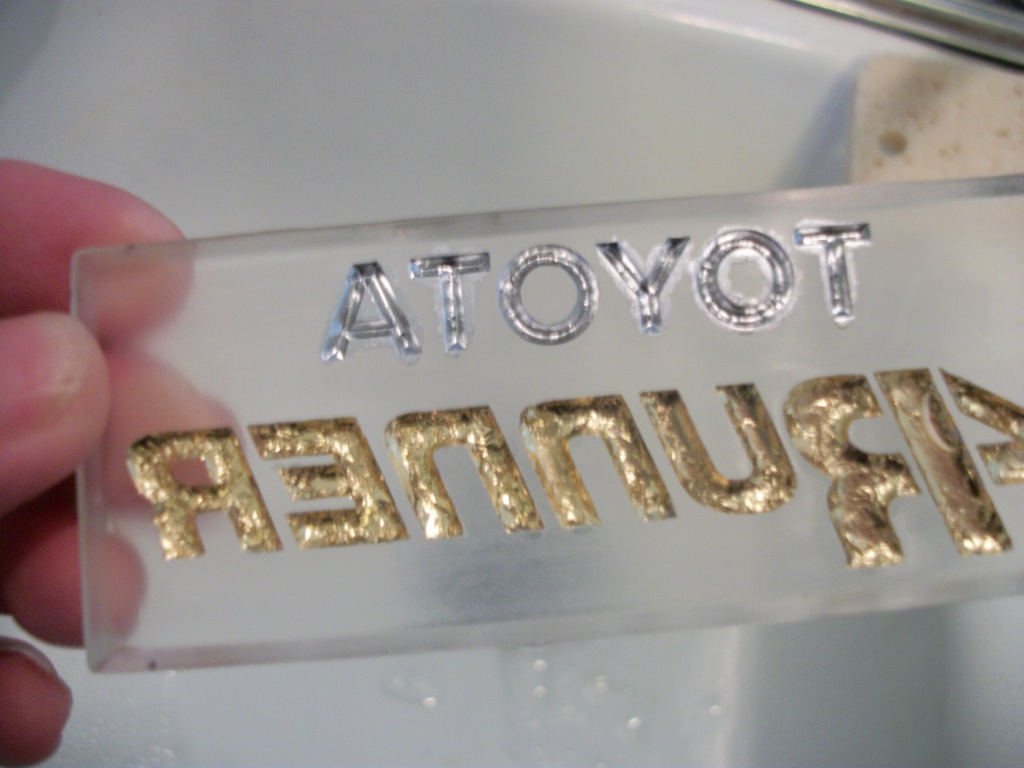
Comparing gold leaf method (top) to VIVA Precious MetalEffect Gold Paint. Both have a �bumpy�appearance. The VIVA paint appears to be composed of afine-grained glitter type material suspended in a water based acrylic.
Painted TOYOTA letters with Testors Silver Leaf Pen Paint
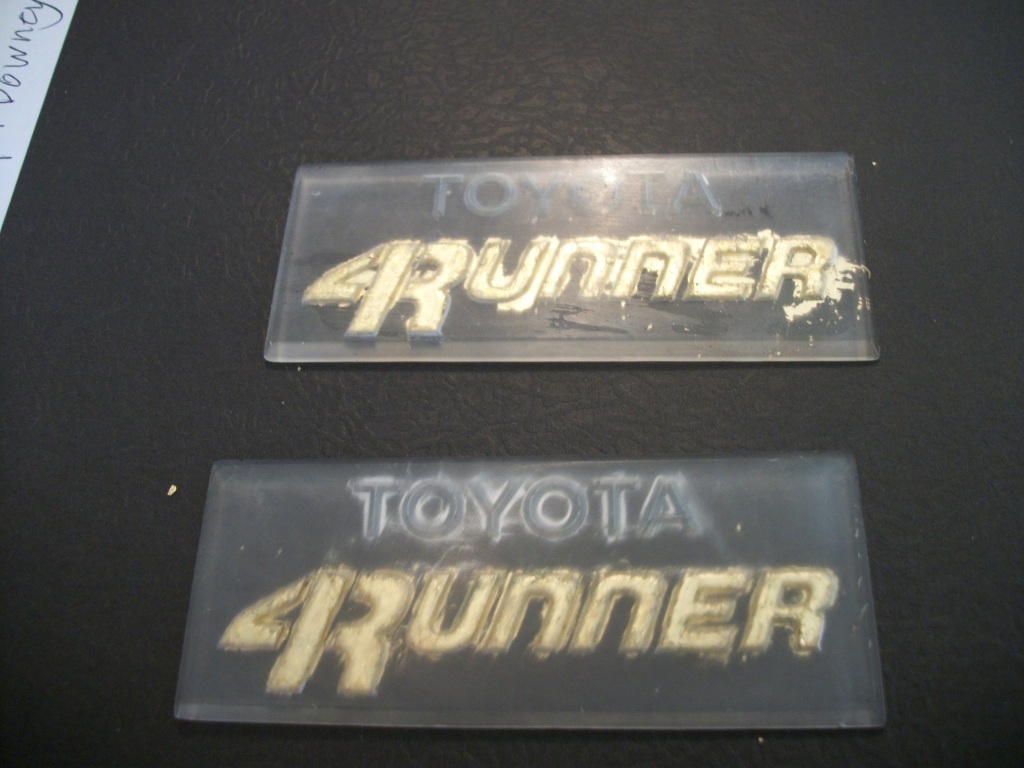
Wet sanding the emblem to remove the paint outside theletters.
Jun 20, 2013 | 04:46 PM
#40
Registered User
Joined: Jun 2013
Posts: 5
Likes: 0
From: SoCal
Emblems are taped to protect the front and spray paintedon the back side.
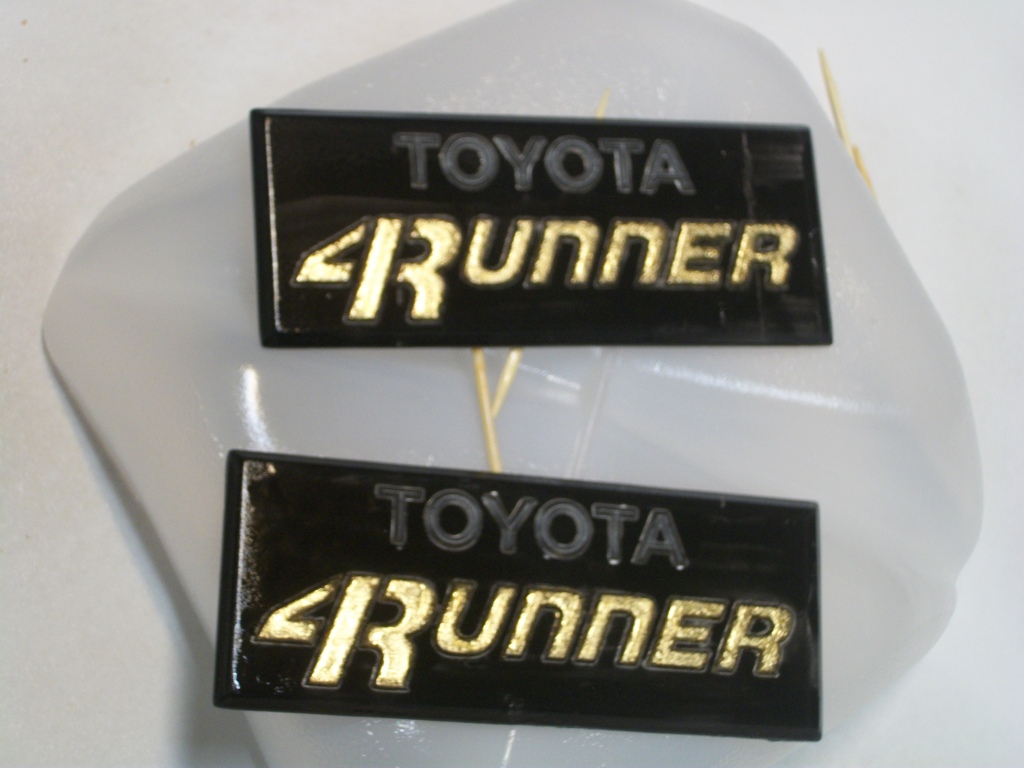
Typical damaged emblems (left) and repaired emblems
VIVA and Testors paint I used
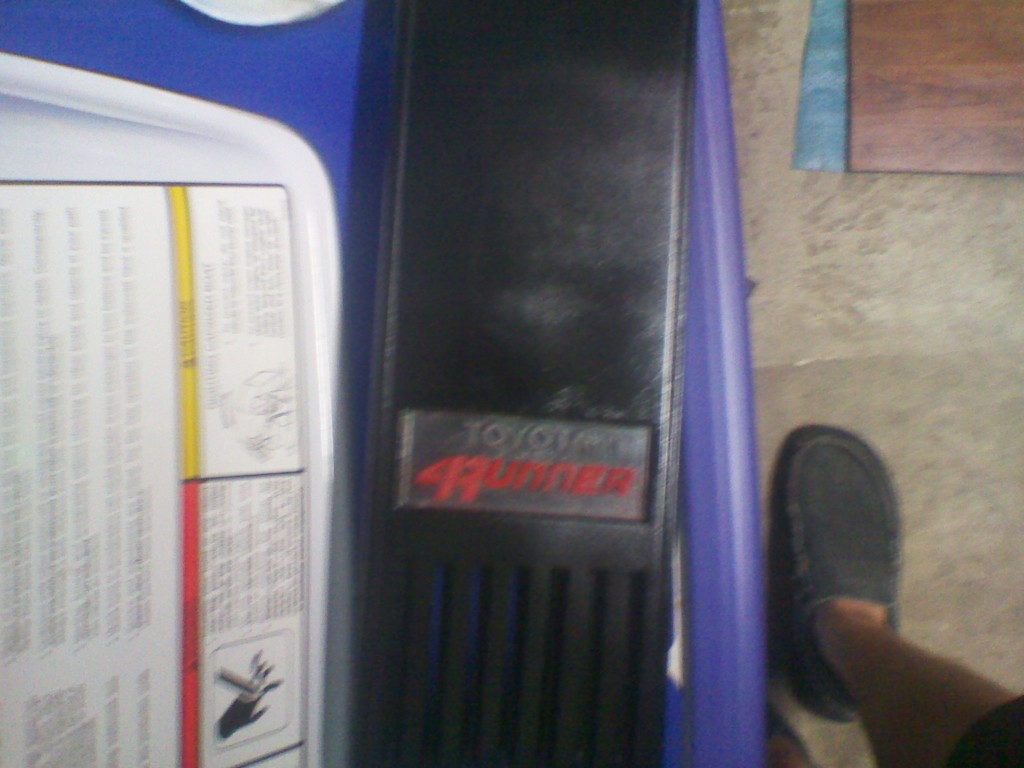
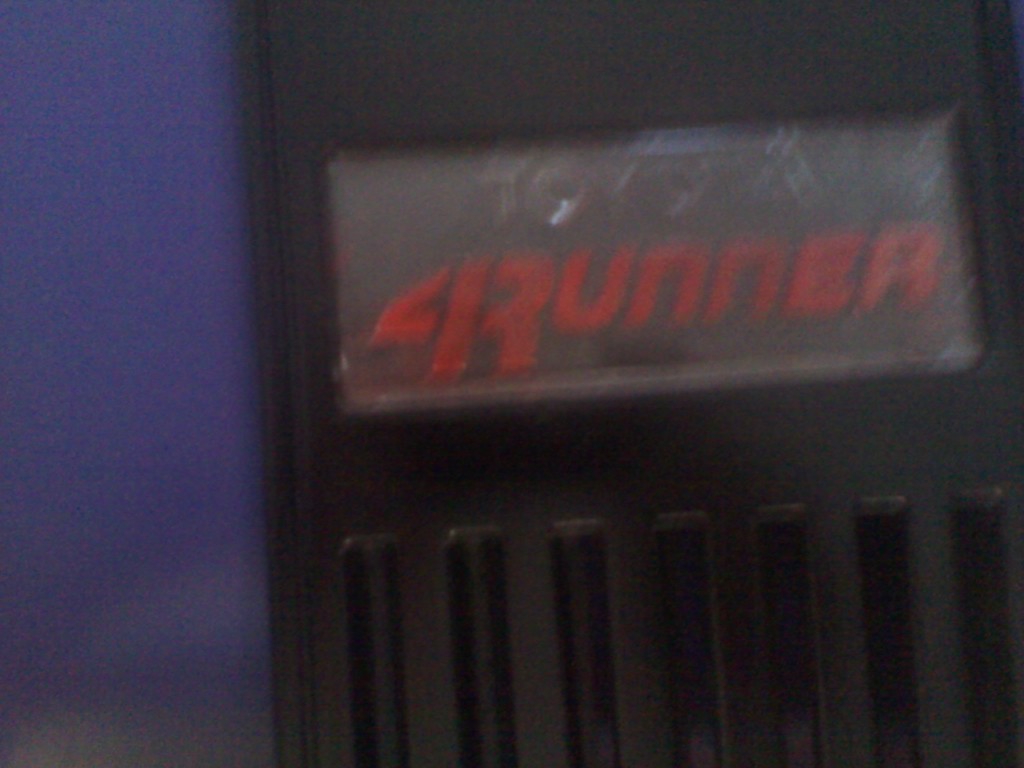
Emblem on the vehicle. The gray band is caused by refracted sunlight passing through the angledplastic on the upper edge of the emblem


