
External Reg Alt to Internal Reg Alt Conversion
 Aug 20, 2017 | 02:34 PM
#1
Thread Starter
Registered User
iTrader: (2)
Joined: Nov 2006
Posts: 546
Likes: 16
From: Reno , Nevada
External Reg Alt to Internal Reg Alt Conversion
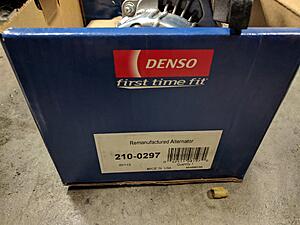
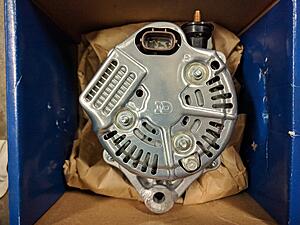
So there are very few write-ups on this and not many pictures so I thought I would post up my conversion. First you need a internally regulated alternator. I chose the Denso 70 amp version model 210-0297 for 93-95 4Runner 22RE. A nice upgrade from the 40 Amp that I was running. Started getting a flicker in the dash for the charging system. Was planning on doing this upgrade so it was the perfect time to start seeing as I already had everything needed to complete it.
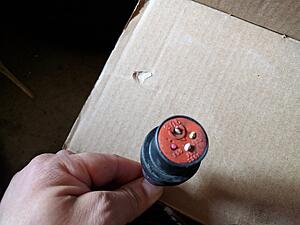
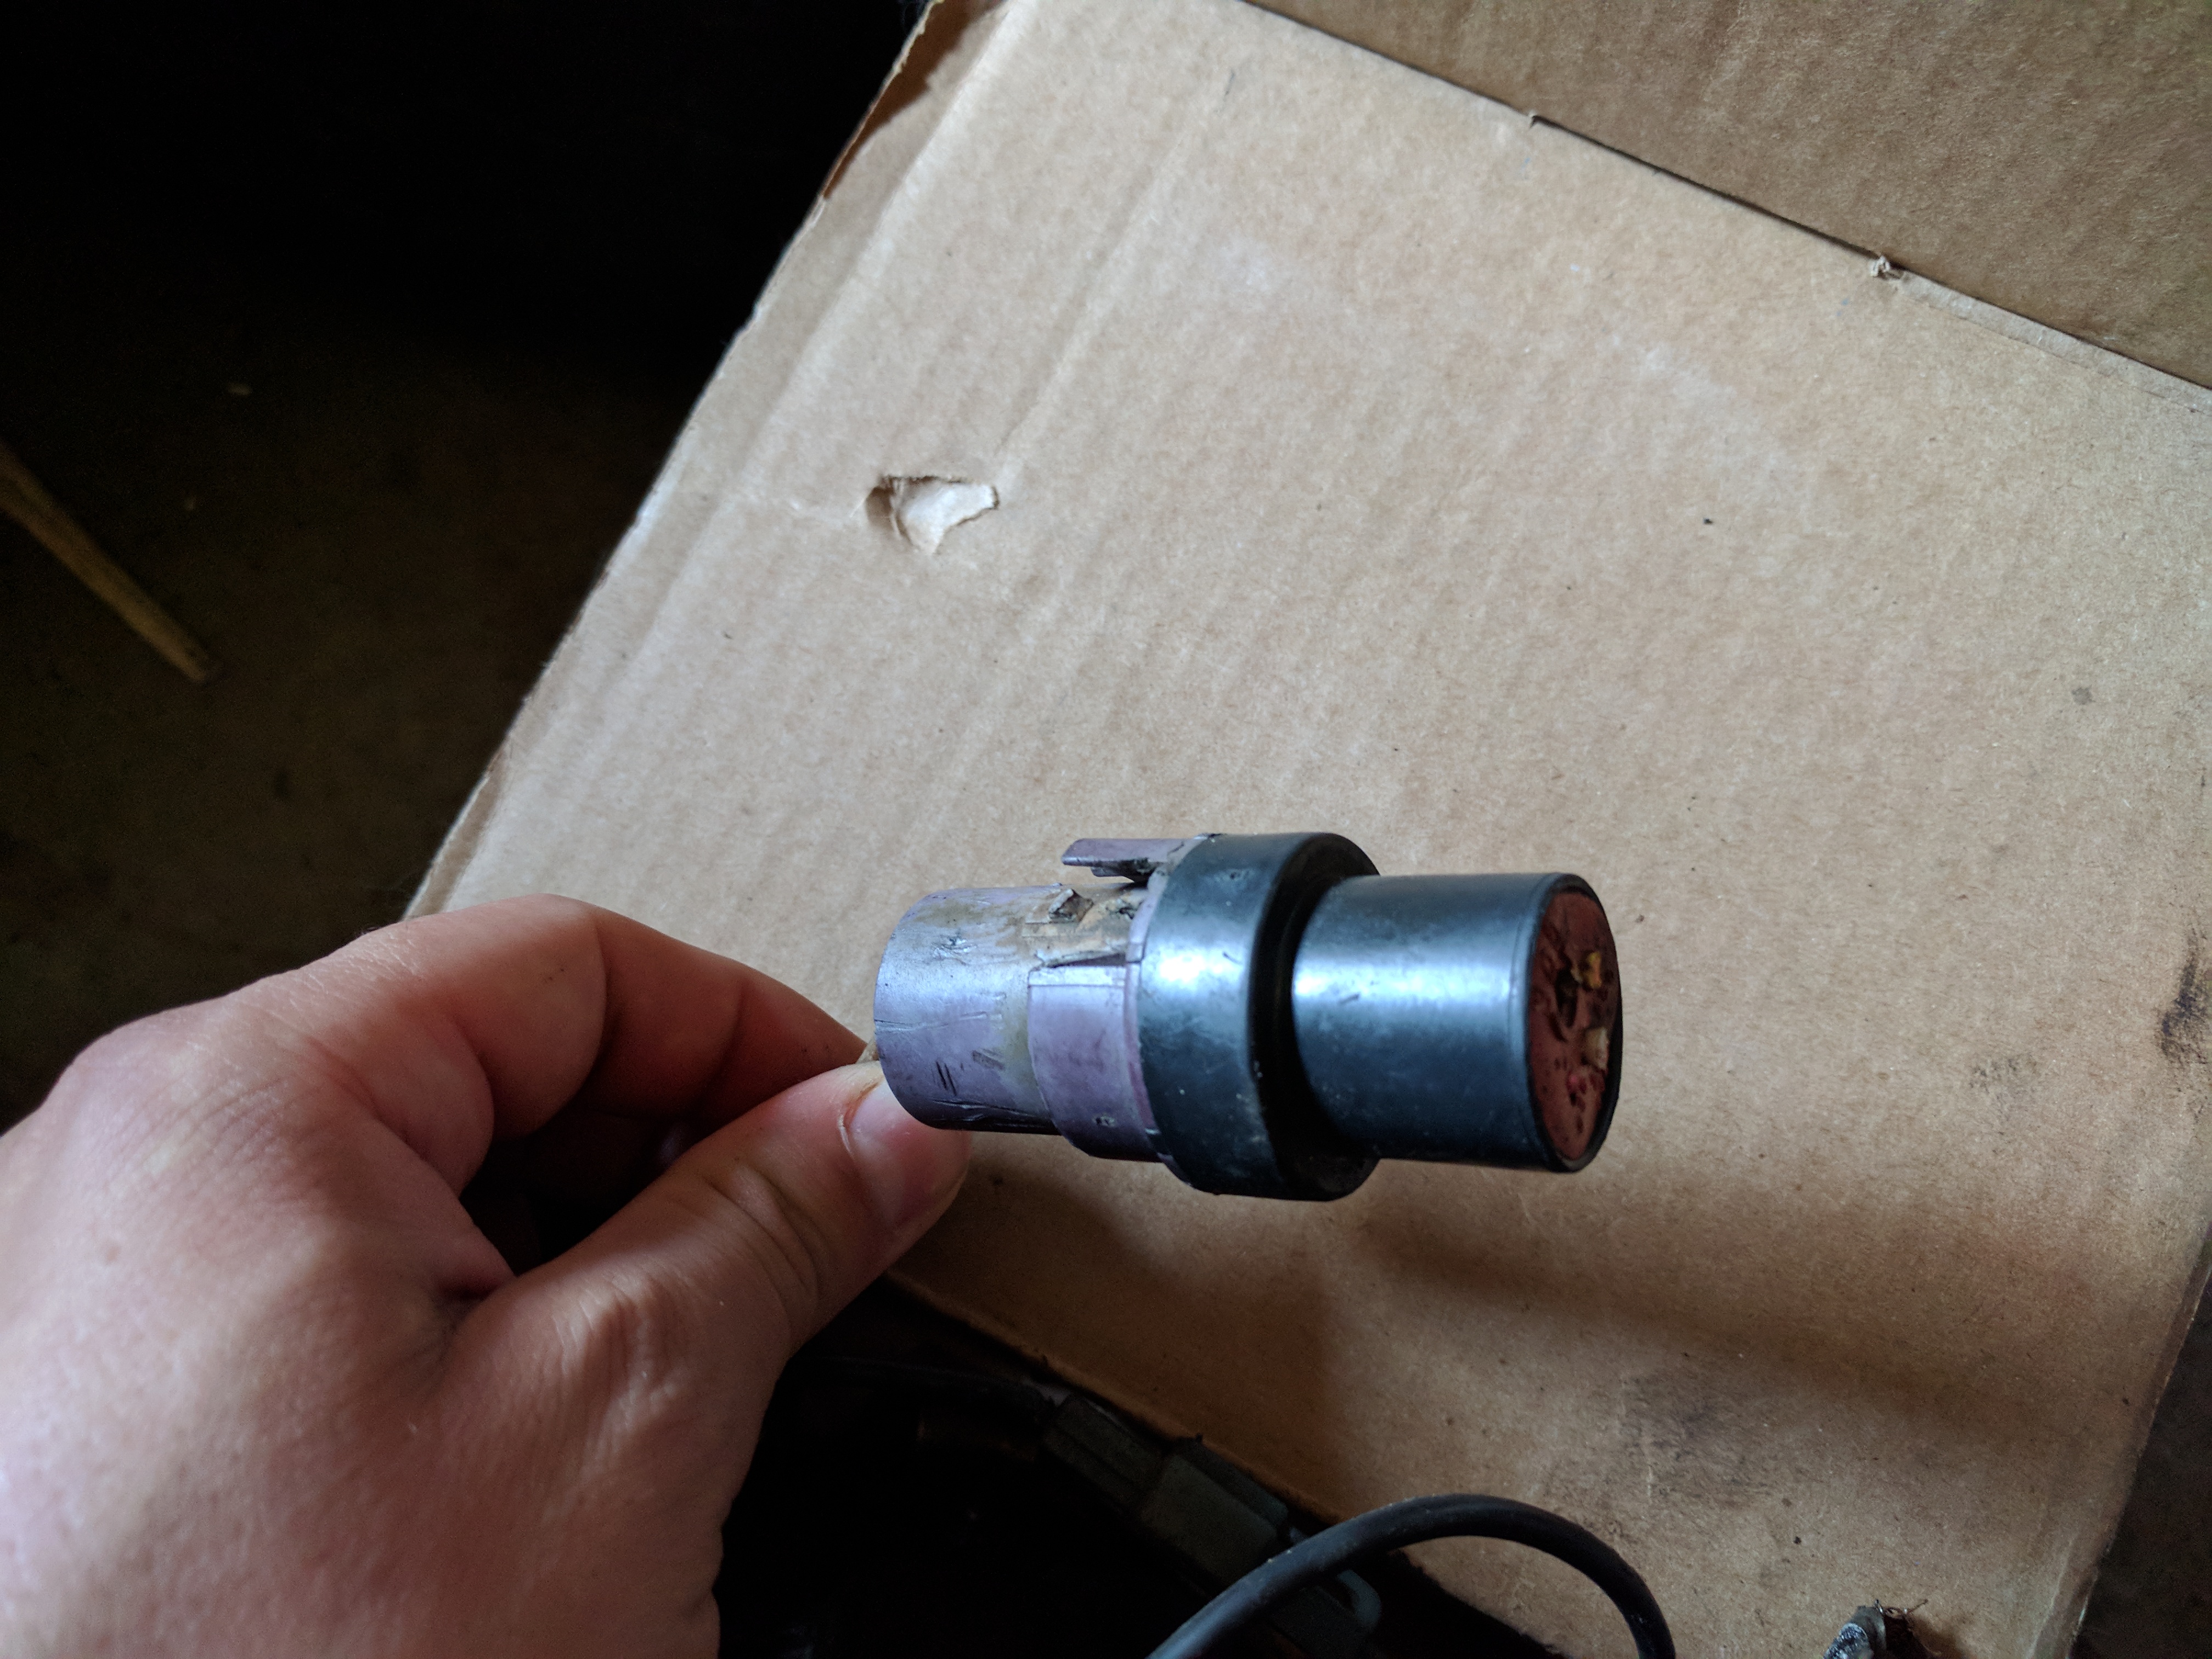
 It's an oval style plug so you will need the harness to match. I took mine from a 90+ 22re, I don't remember specifically what year or model it came from but you will know by the Alt plug if it will work. The different alts have a square plug just like my original harness had and a round plug like below

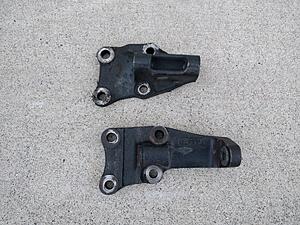
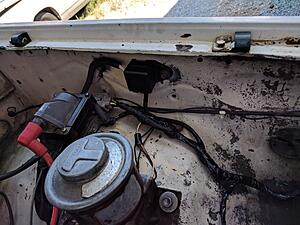
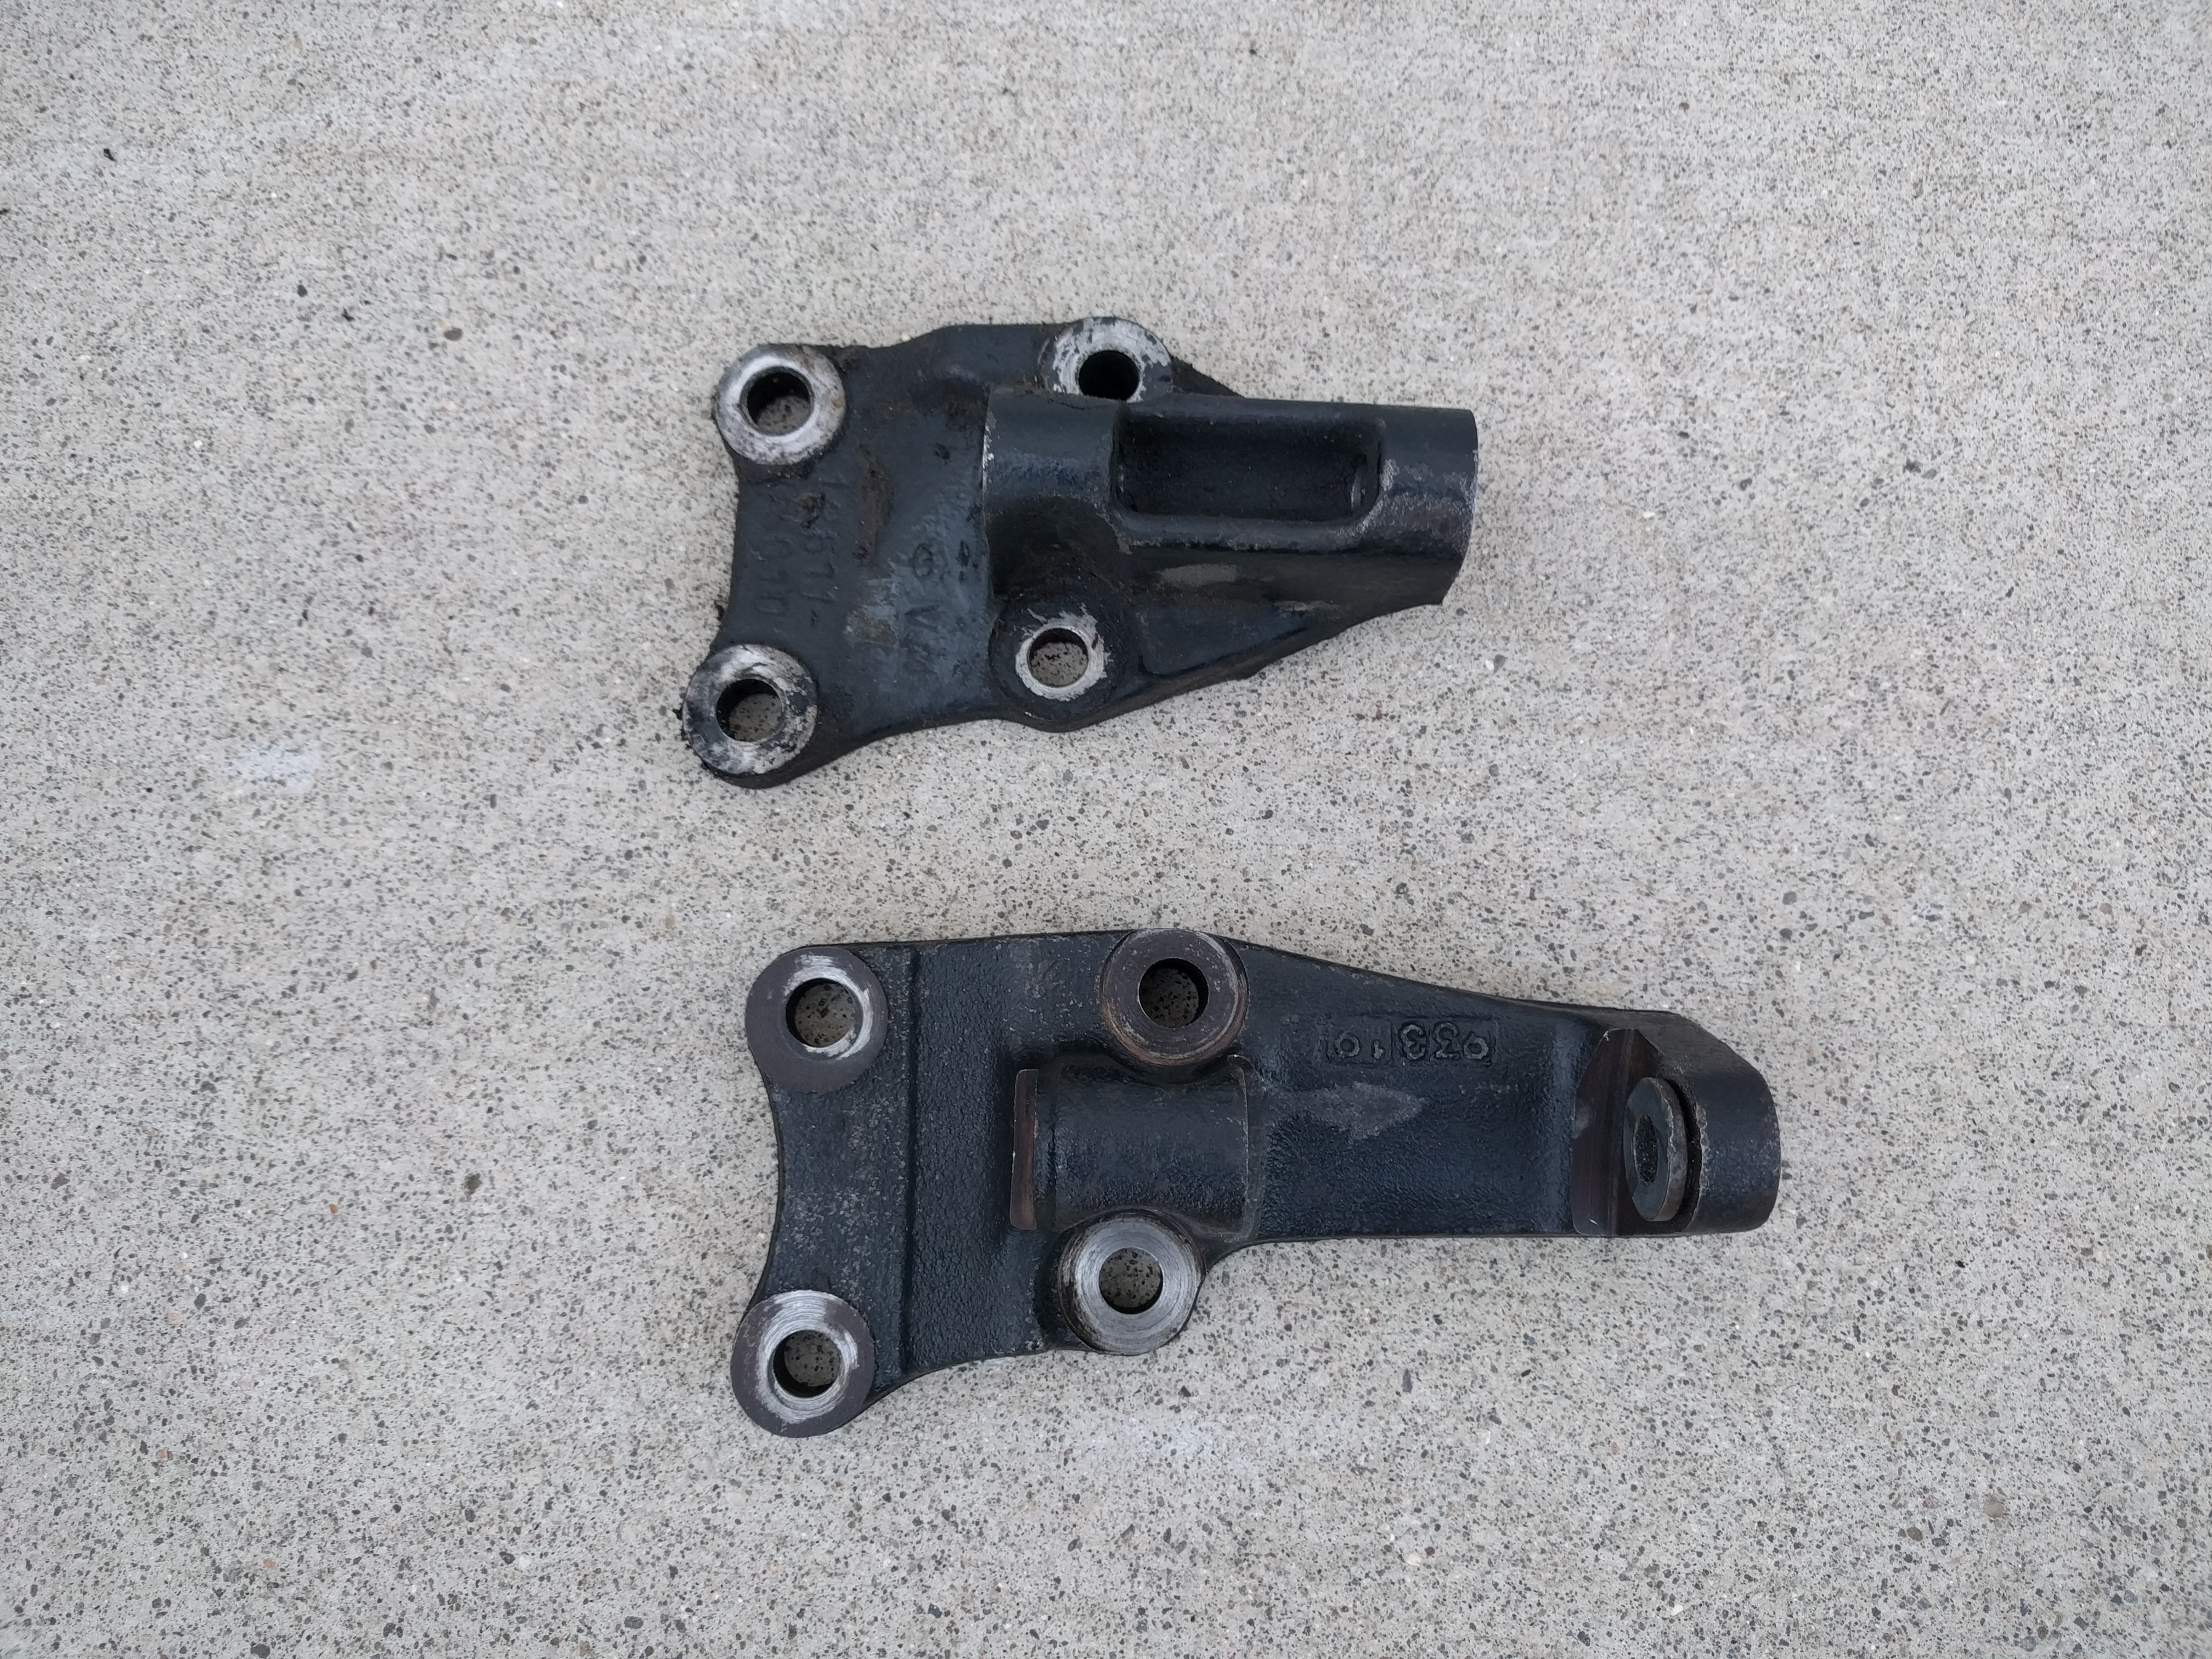
You will also need a new alternator bracket for the internal reg. alternator. It's a bit different and is longer with a different mount for the alt. On top is the old vs. the newer style on the bottom. Easy enough to find at the junk yard, most don't take it off when they pull the alternator. It has four bolts and is not difficult to swap them out. Might need a little help prying the engine mount back open when you install the new one as it rest under the front side of the engine mount as show below with the old one.

To be honest the hardest part was getting the old alternator out as it only has one way it can go and that's through the fan and down by the radiator hose. If you were to remove the hose it would make it easier but I wasn't willing to do that so it was a bit trying. The newer alt. is smaller and went in a lot easier. Although it was a chore getting the bolt to feed through the mount and alt as it is a tight fit new and no play. A few expletives and a BFH made it go right in.
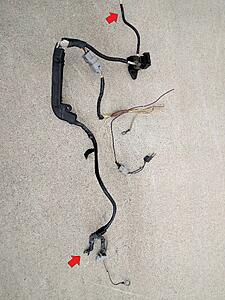
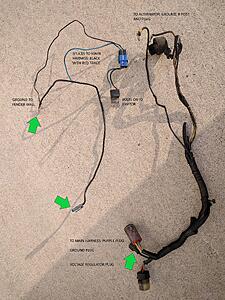
I cut the donor harness as far back as I could to utilize as much of it as possible. At the top is the "B" post wire. At the bottom is the "B" post wire end that attaches to the Alt., the Alt plug and ground wire that attaches to the PS bracket. The middle section is what you splice into the main harness.
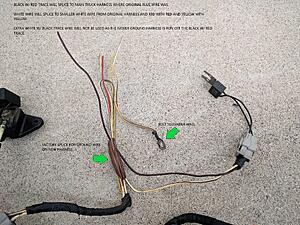
Once everything is unplugged on the original harness you can ditch it. It's all one piece and shouldn't need any cutting except the blue wire that splices with the black w/ red trace wire as shown below.

I also could have kept the original harness plug and spliced my new harness into it but didn't feel like it because it wasn't in the best shape. The old harness out. Green arrow is ground and they connect to each other.
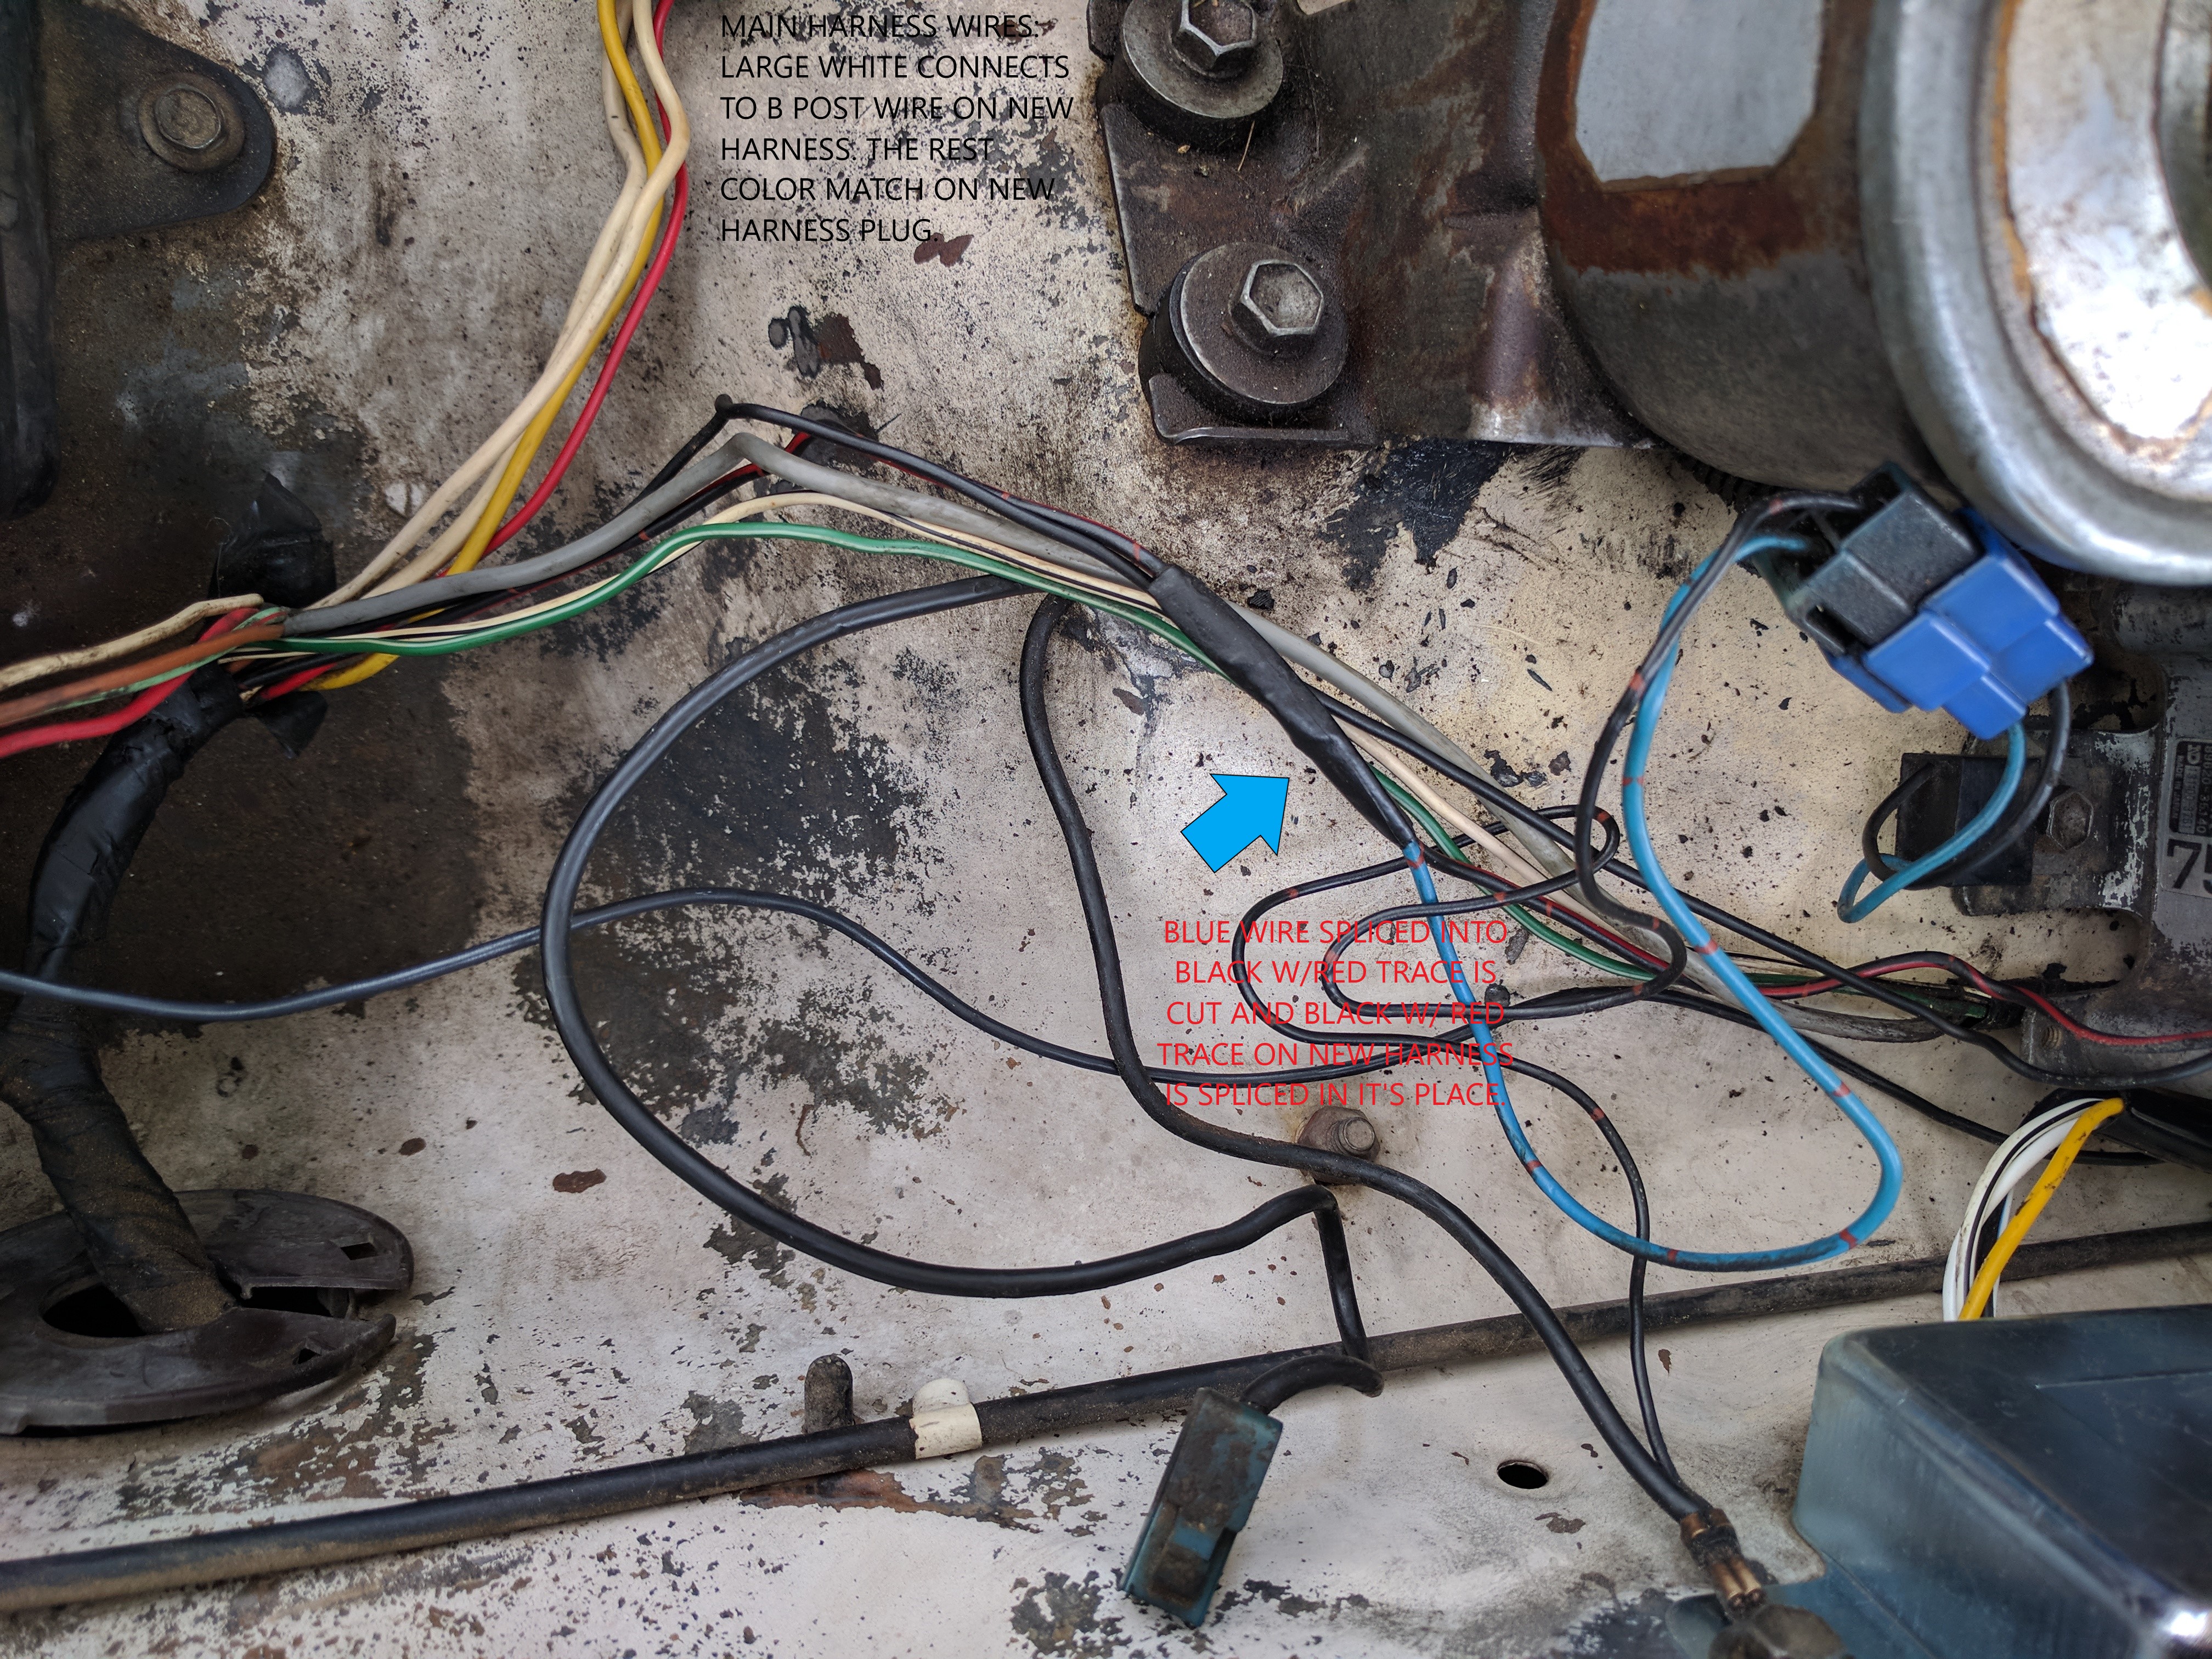
I forgot to take a pic of the old harness before I cut it out but here it is after. It's only four wires: One large white wire marked 305, a smaller white wire, a red wire and a yellow wire. The larger wire goes to the "B" post to the "B" post wire on the new harness. The smaller white wire will splice to white on the new harness plug along with the others, red will splice to red and yellow to yellow.


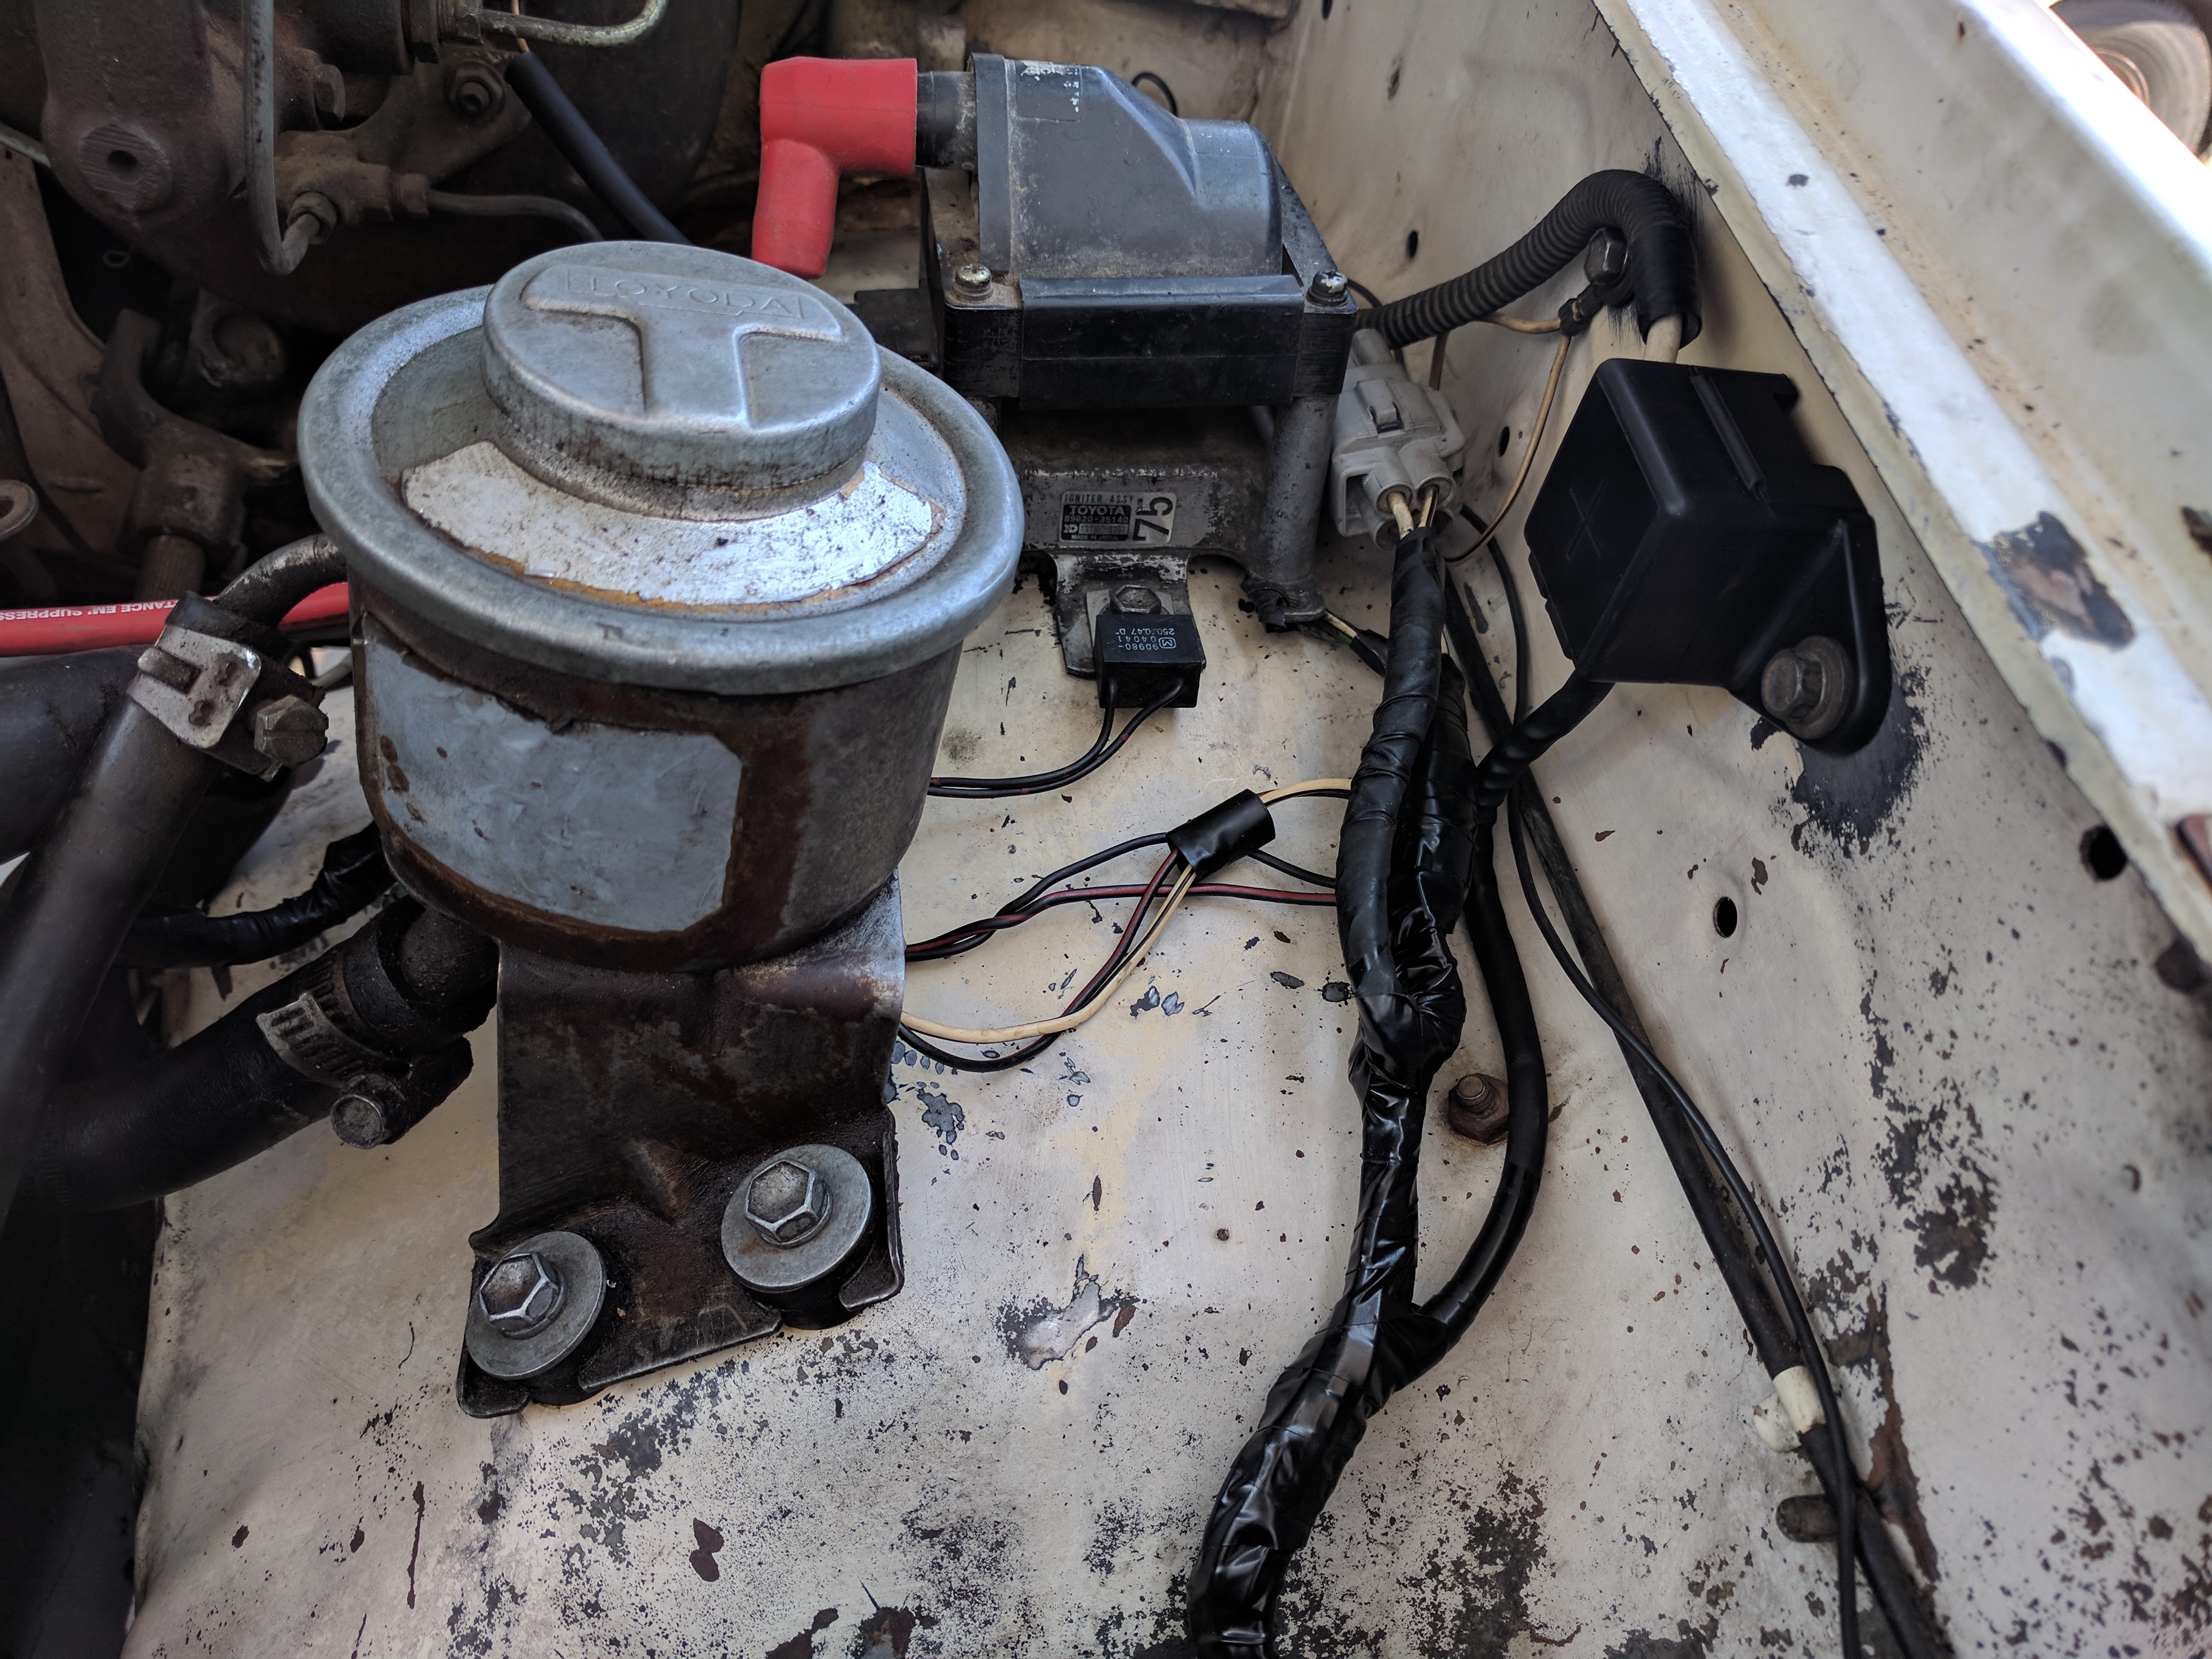
Once everything was spliced in it was soldered and covered in heat shrink, then taped off.
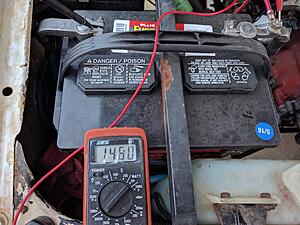
Voltage was steady around 14.8 but I wasn't really testing it's capabilities. Just making sure it was working after all was said and done.
I would have liked to stop and take more pictures but it was stormy and I didn't want this dragging on any longer than it did. It's fairly easy to do this swap and could be done in a day if you have everything ready to go. Hopefully this is enough to get you through your conversion if you choose to do it. For me it's enough of a Amp jump to justify the work. For some it may not be enough. I'm fairly stock at the moment and don't need anything bigger than a 70 amp Alternator. Maybe later when I swap in my Tacoma's 3RZ I'll change my mind but for now this will do.

 It's an oval style plug so you will need the harness to match. I took mine from a 90+ 22re, I don't remember specifically what year or model it came from but you will know by the Alt plug if it will work. The different alts have a square plug just like my original harness had and a round plug like below
You will also need a new alternator bracket for the internal reg. alternator. It's a bit different and is longer with a different mount for the alt. On top is the old vs. the newer style on the bottom. Easy enough to find at the junk yard, most don't take it off when they pull the alternator. It has four bolts and is not difficult to swap them out. Might need a little help prying the engine mount back open when you install the new one as it rest under the front side of the engine mount as show below with the old one.
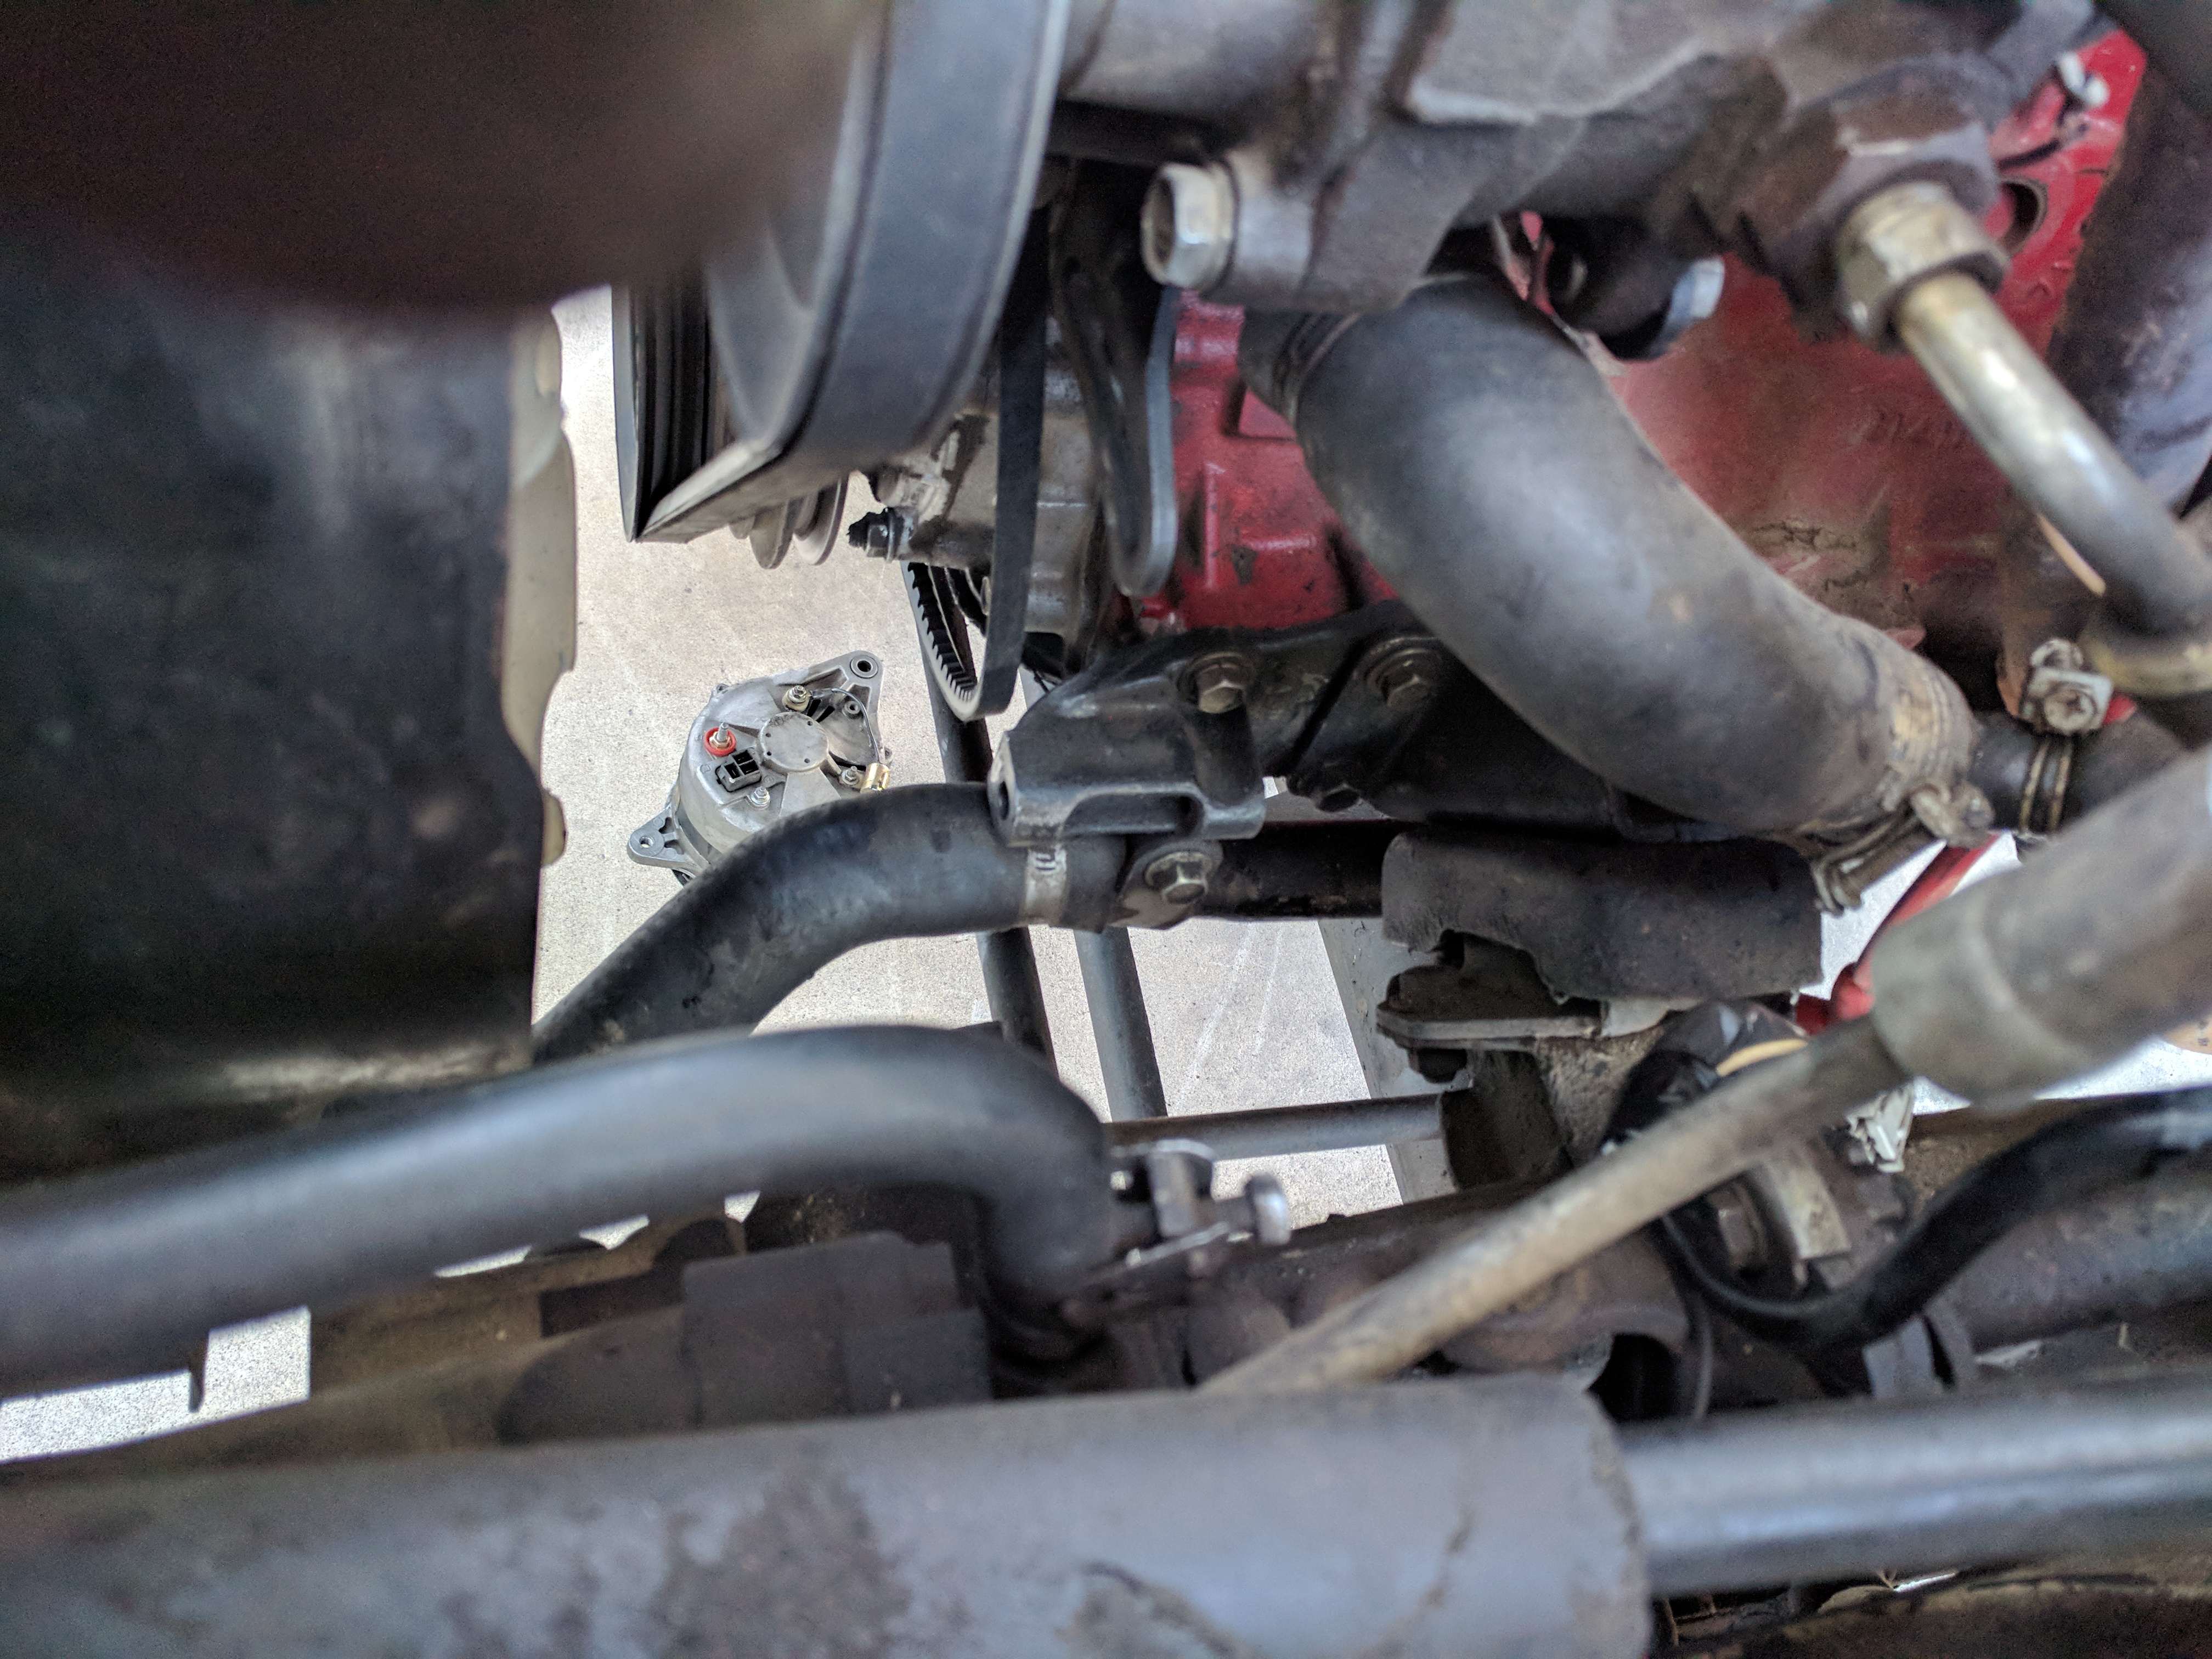
To be honest the hardest part was getting the old alternator out as it only has one way it can go and that's through the fan and down by the radiator hose. If you were to remove the hose it would make it easier but I wasn't willing to do that so it was a bit trying. The newer alt. is smaller and went in a lot easier. Although it was a chore getting the bolt to feed through the mount and alt as it is a tight fit new and no play. A few expletives and a BFH made it go right in.
I cut the donor harness as far back as I could to utilize as much of it as possible. At the top is the "B" post wire. At the bottom is the "B" post wire end that attaches to the Alt., the Alt plug and ground wire that attaches to the PS bracket. The middle section is what you splice into the main harness.

Once everything is unplugged on the original harness you can ditch it. It's all one piece and shouldn't need any cutting except the blue wire that splices with the black w/ red trace wire as shown below.

I also could have kept the original harness plug and spliced my new harness into it but didn't feel like it because it wasn't in the best shape. The old harness out. Green arrow is ground and they connect to each other.

I forgot to take a pic of the old harness before I cut it out but here it is after. It's only four wires: One large white wire marked 305, a smaller white wire, a red wire and a yellow wire. The larger wire goes to the "B" post to the "B" post wire on the new harness. The smaller white wire will splice to white on the new harness plug along with the others, red will splice to red and yellow to yellow.


Once everything was spliced in it was soldered and covered in heat shrink, then taped off.

Voltage was steady around 14.8 but I wasn't really testing it's capabilities. Just making sure it was working after all was said and done.

I would have liked to stop and take more pictures but it was stormy and I didn't want this dragging on any longer than it did. It's fairly easy to do this swap and could be done in a day if you have everything ready to go. Hopefully this is enough to get you through your conversion if you choose to do it. For me it's enough of a Amp jump to justify the work. For some it may not be enough. I'm fairly stock at the moment and don't need anything bigger than a 70 amp Alternator. Maybe later when I swap in my Tacoma's 3RZ I'll change my mind but for now this will do.


