
Custom CB and iPod Console, with Shifter boot upgrade.
 Mar 11, 2008 | 05:31 PM
#1
Thread Starter
Registered User

Joined: Sep 2007
Posts: 42
Likes: 1
From: TX
Custom CB and iPod Console, with Shifter boot upgrade.
I just completed my latest project and wanted to share my handiwork. If anyone is interested, I can post more photographs and instructions.
-Q
[IMG]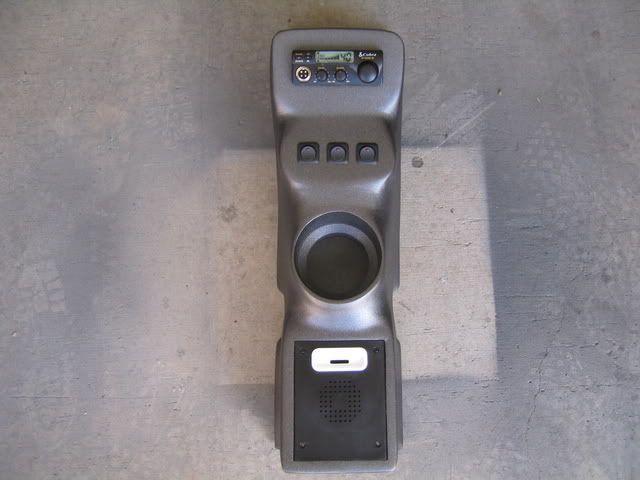 [/IMG]
[IMG] [/IMG]
[IMG]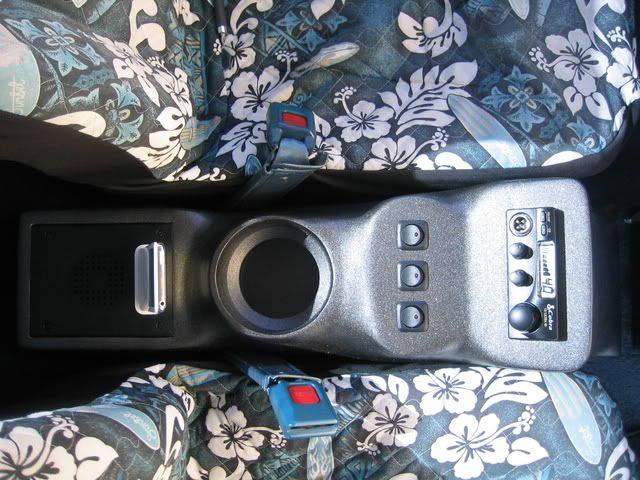 [/IMG]
[IMG] [/IMG]
-Q
[IMG]
[/IMG][IMG]
[/IMG][IMG]
[/IMG][IMG]
[/IMG]
Mar 11, 2008 | 06:48 PM
#3
Thread Starter
Registered User
Joined: Sep 2007
Posts: 42
Likes: 1
From: TX
First, take a look at this site: http://www.the12volt.com/installbay/...TID~74519~PN~1
This is where I got all the instructions from and where I was inspired to make the console.
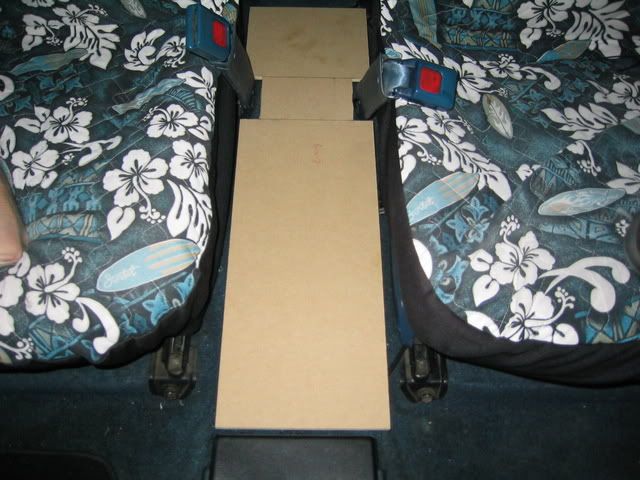
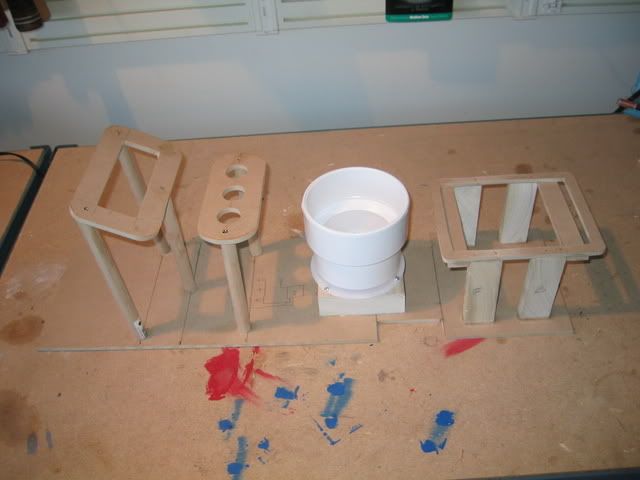
I started with the base made of MDF.
Added the trim rings for the CB and switches.
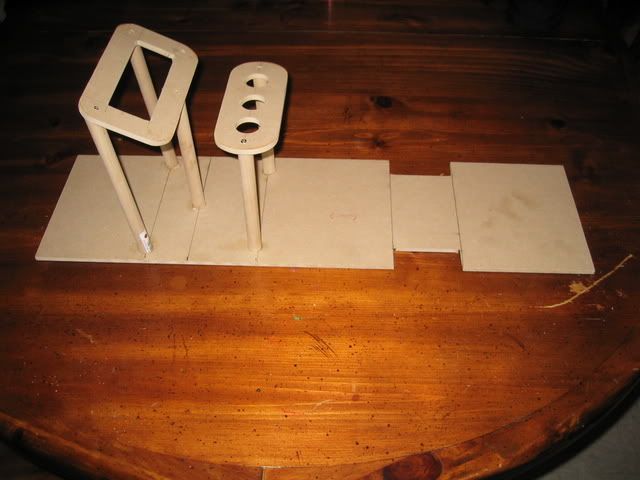
Added a plastic pipe, from the hardware store, and iPod mount trim ring.
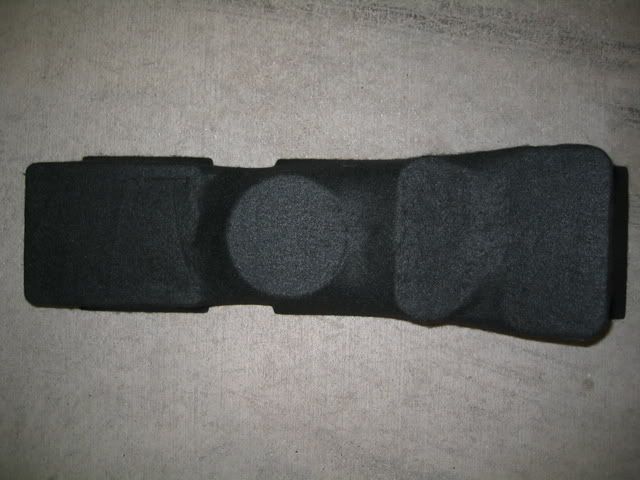
Wrapped all in a lightweight felt. Coat with fiberglass resin and cover with fiberglass, per the instructions on the above listed site. Make sure to use the fiberglass roller or you will pay the price! On a project this small, you might get away with only using the resin. It is up to you.
Primer then paint.
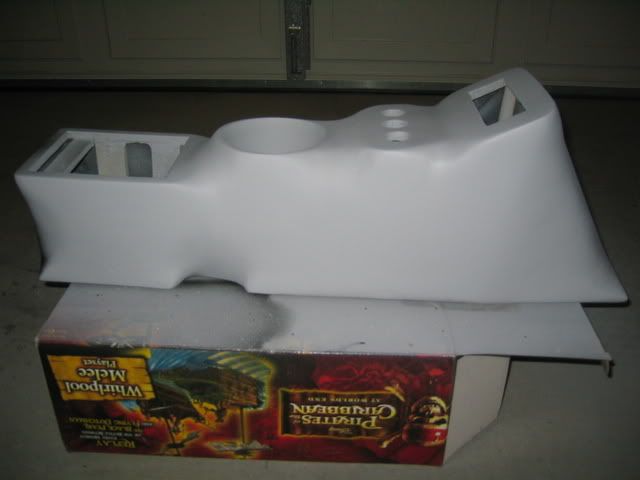
I removed the case from the CB prior to the install. I used part of the case to mount the iPod mount in. This also allows me to use the CB speaker.

I hope this helps. This project was not as hard as one would think. My next project will be a sub box behind the seat.
-Q
This is where I got all the instructions from and where I was inspired to make the console.
I started with the base made of MDF.
Added the trim rings for the CB and switches.
Added a plastic pipe, from the hardware store, and iPod mount trim ring.
Wrapped all in a lightweight felt. Coat with fiberglass resin and cover with fiberglass, per the instructions on the above listed site. Make sure to use the fiberglass roller or you will pay the price!
On a project this small, you might get away with only using the resin. It is up to you.Primer then paint.
I removed the case from the CB prior to the install. I used part of the case to mount the iPod mount in. This also allows me to use the CB speaker.
I hope this helps. This project was not as hard as one would think. My next project will be a sub box behind the seat.
-Q
Mar 11, 2008 | 07:38 PM
#7
Thread Starter
Registered User
Joined: Sep 2007
Posts: 42
Likes: 1
From: TX
I picked up the felt, fiberglass, and resin at Wal-mart, go figure. However, I have read that one can get fresher and more cost friendly supplies on the web. That's what I will probably do next time. Oh yea, MDF at Home Depot.
-Q
-Q
Trending Topics
Mar 11, 2008 | 07:47 PM
#9
Thread Starter
Registered User
Joined: Sep 2007
Posts: 42
Likes: 1
From: TX
Be sure to get protective gear (disposable gloves, mask, coveralls, safety glasses) before you start. That stuff is pretty nasty. Also, a rotary tool, with different bits, and sander come in handy.
 Mar 13, 2008 | 01:13 PM
#14
Registered User
Joined: Feb 2008
Posts: 27
Likes: 0
From: Orange County, CA
Nice work!
I made a sub box with two 6 1/4" speaker boxes on the side for mine. Came out nice. Ask your local audio shop where they get their carpet from. I asked and went in to the carpet wholesale shop, bought auto carpet same color as my interior so it looks smooth.
Look at the specs for your sub it will say recommend space and port tube if needed. Then google truck sub boxes find exact size. Some sites even have the dimensions. Thats what I did and it sounds perfect.
May have to make that console myself.
Mar 14, 2008 | 10:19 PM
#15
Thread Starter
Registered User
Joined: Sep 2007
Posts: 42
Likes: 1
From: TX
Nice work!
I made a sub box with two 6 1/4" speaker boxes on the side for mine. Came out nice. Ask your local audio shop where they get their carpet from. I asked and went in to the carpet wholesale shop, bought auto carpet same color as my interior so it looks smooth.
Look at the specs for your sub it will say recommend space and port tube if needed. Then google truck sub boxes find exact size. Some sites even have the dimensions. Thats what I did and it sounds perfect.
May have to make that console myself.
I made a sub box with two 6 1/4" speaker boxes on the side for mine. Came out nice. Ask your local audio shop where they get their carpet from. I asked and went in to the carpet wholesale shop, bought auto carpet same color as my interior so it looks smooth.
Look at the specs for your sub it will say recommend space and port tube if needed. Then google truck sub boxes find exact size. Some sites even have the dimensions. Thats what I did and it sounds perfect.
May have to make that console myself.
-Q
Mar 15, 2008 | 08:46 AM
#18
Thread Starter
Registered User
Joined: Sep 2007
Posts: 42
Likes: 1
From: TX
I was going to secure it, but decided not to. Between the seatbelts and the friction between the carpet the bottom of the console, it moves very little.
Mar 15, 2008 | 08:53 AM
#19
Thread Starter
Registered User
Joined: Sep 2007
Posts: 42
Likes: 1
From: TX


