
Alt relocate to passenger side
 Sep 27, 2012 | 04:13 PM
#1
Thread Starter
Registered User
iTrader: (1)
Joined: Apr 2011
Posts: 1,220
Likes: 4
From: Memphis, TN
Alt relocate to passenger side
Does anyone have pictures of doing this with gm/chevy brackets? I have been reading about this but all the threads are older and the pictures don't show up. Only I found one with pictures and they didn't use chevy brackets:
http://www.pirate4x4.com/forum/toyot...l#post14815210
I'm going to the scrapyard this weekend to get a cs-130 and harness and I would really like to put it on the passenger side to get it out of mud and water. I figure since my truck has no A/C I can mock it up in place with out a belt and drive to autozone to size a belt and have the figure out a smaller one for the old alt location.
 Oct 14, 2012 | 05:01 PM
#5
Thread Starter
Registered User
iTrader: (1)
Joined: Apr 2011
Posts: 1,220
Likes: 4
From: Memphis, TN
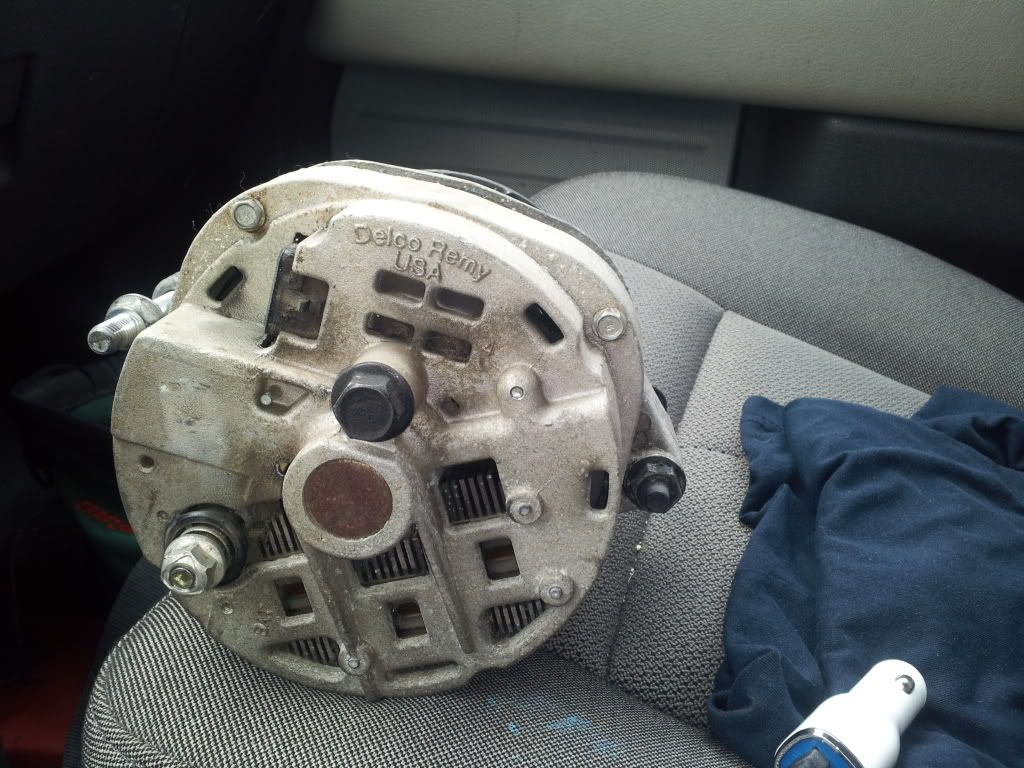
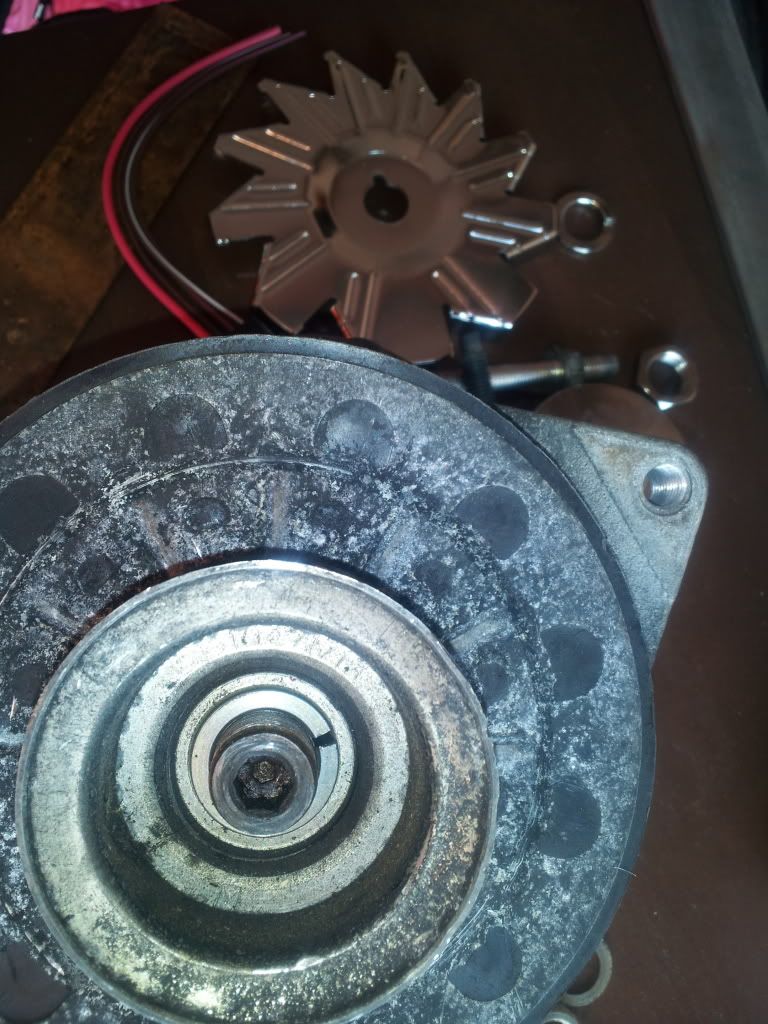
Got the old pulley and fan off and got the new one on. I had searched for this and couldn't find the same setup with that ring (turns out its a tapered washer) but I searched again and found this article:
http://www.ifsja.org/forums/vb/showthread.php?t=131960
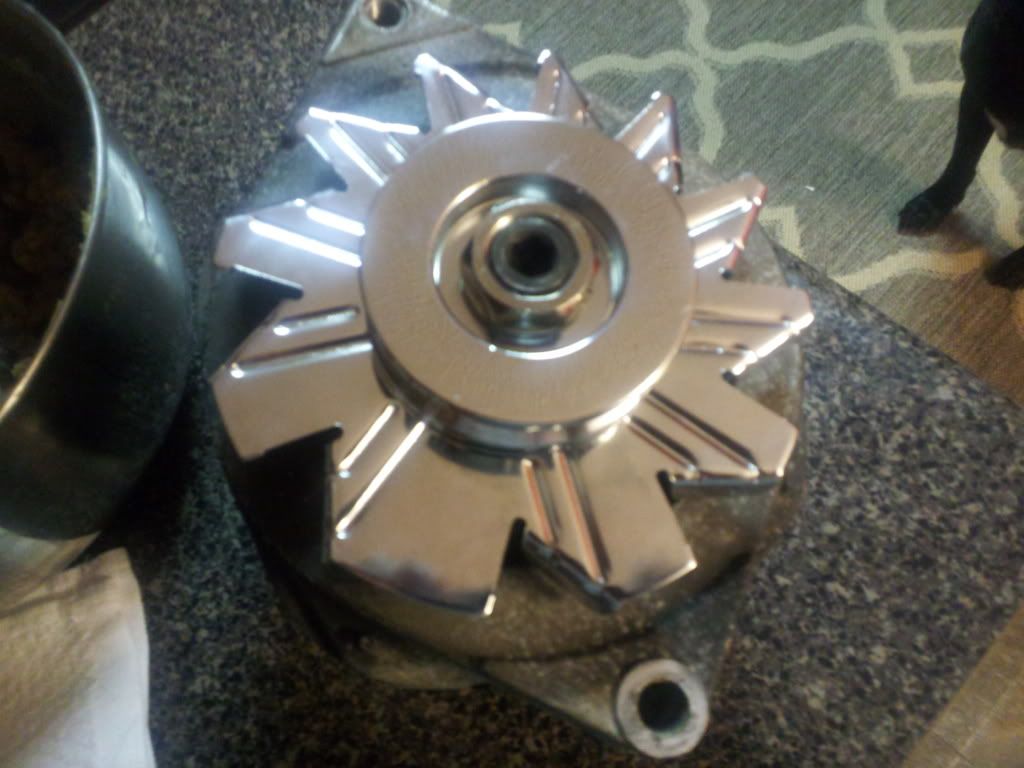
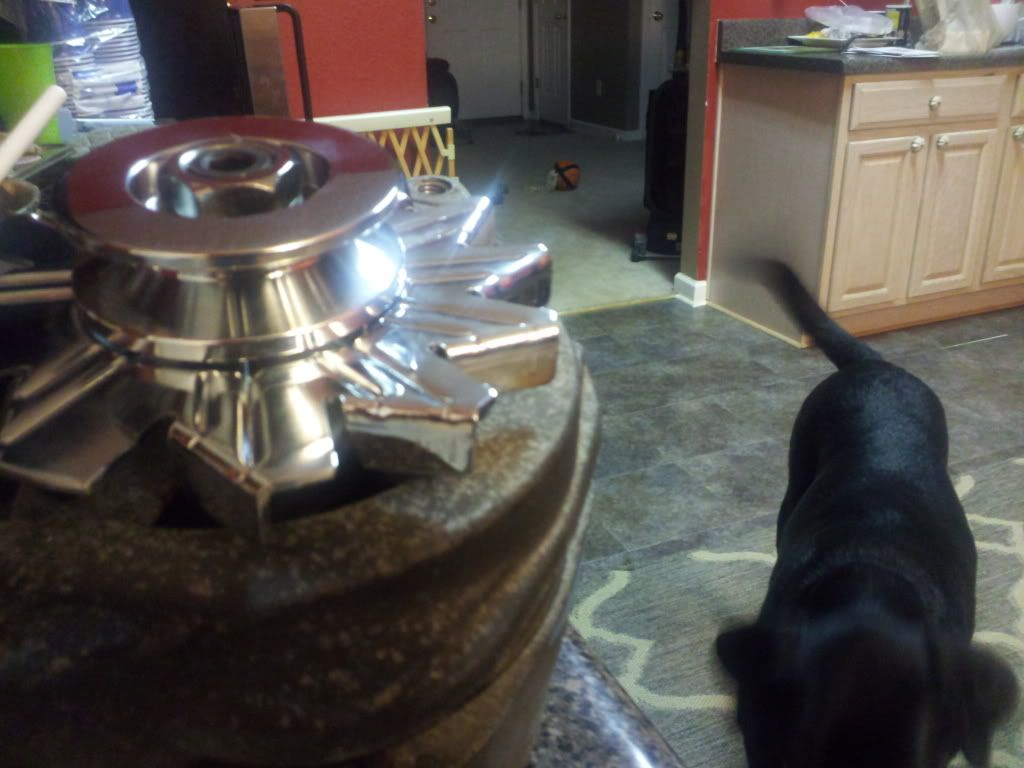
Came off with one good whack from a bfh and a 1 1/16" socket sittin on the pulley. I was amazed lol. If Google could run for President I would vote for it. Put the new fan and pulley got it hand tight.

http://www.ifsja.org/forums/vb/showthread.php?t=131960
Came off with one good whack from a bfh and a 1 1/16" socket sittin on the pulley. I was amazed lol. If Google could run for President I would vote for it. Put the new fan and pulley got it hand tight.
Oct 17, 2012 | 12:50 PM
#7
Thread Starter
Registered User
iTrader: (1)
Joined: Apr 2011
Posts: 1,220
Likes: 4
From: Memphis, TN
Update:
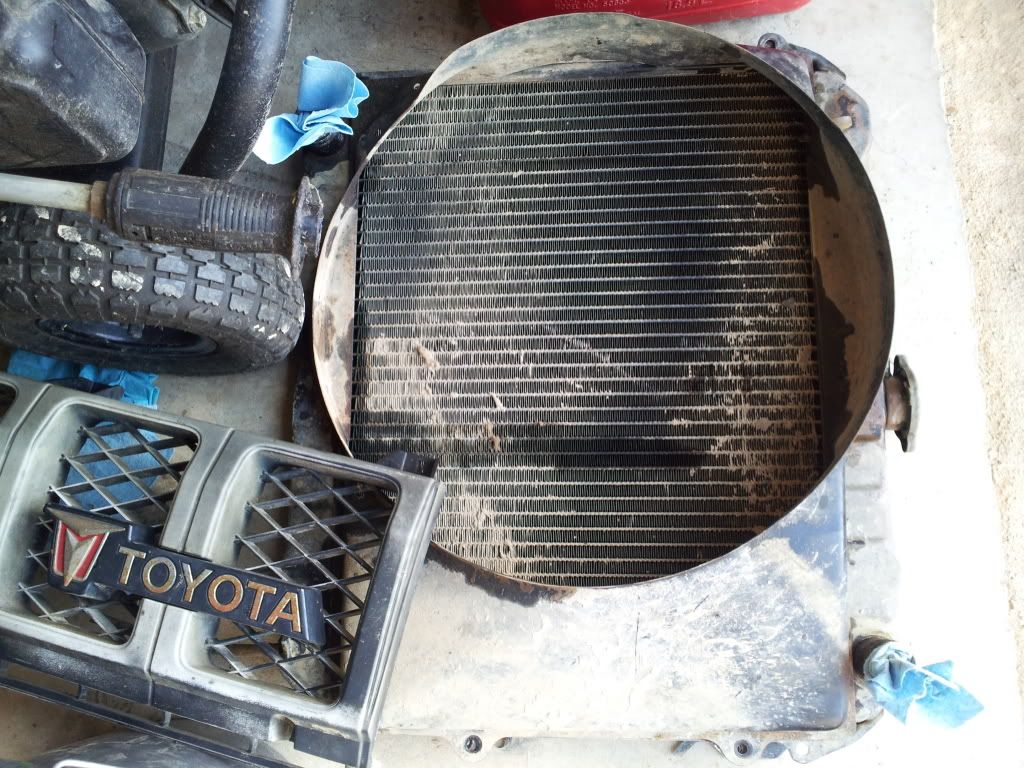
Got the grill, radiator, and fan shroud removed. All need to be cleaned and painted. Back side of the radiator had a good bit of mud on it. Antifreeze was super clean too.
Took a lot measurements of the engine and pulleys and this is what I got so far:
Side view of the motor:
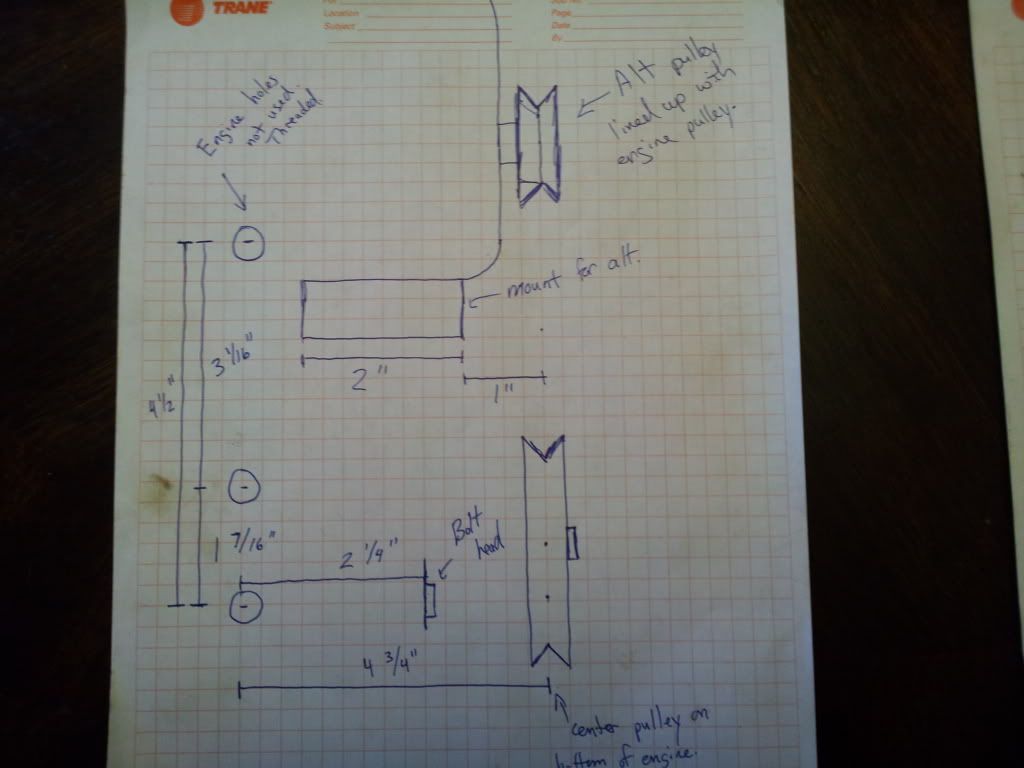
I plant to use the three empty holes in the engine to hold one side of the mount and the bolt on the front to hold the other side. This is all to scale for the most part and the alt was just drawn on to show a reference of its mounts with the pulleys lined up. The alt should sit a lot lower than it is in diagrams.
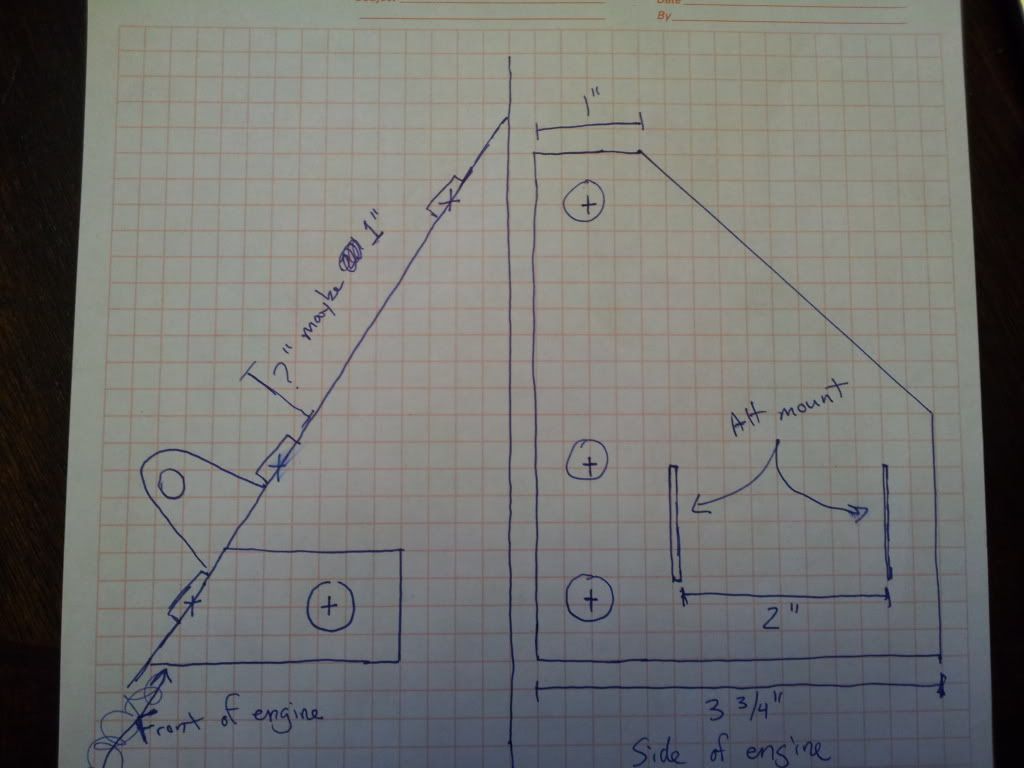
Front view of the motor:
The three holes on the side I want to use are at an angle.
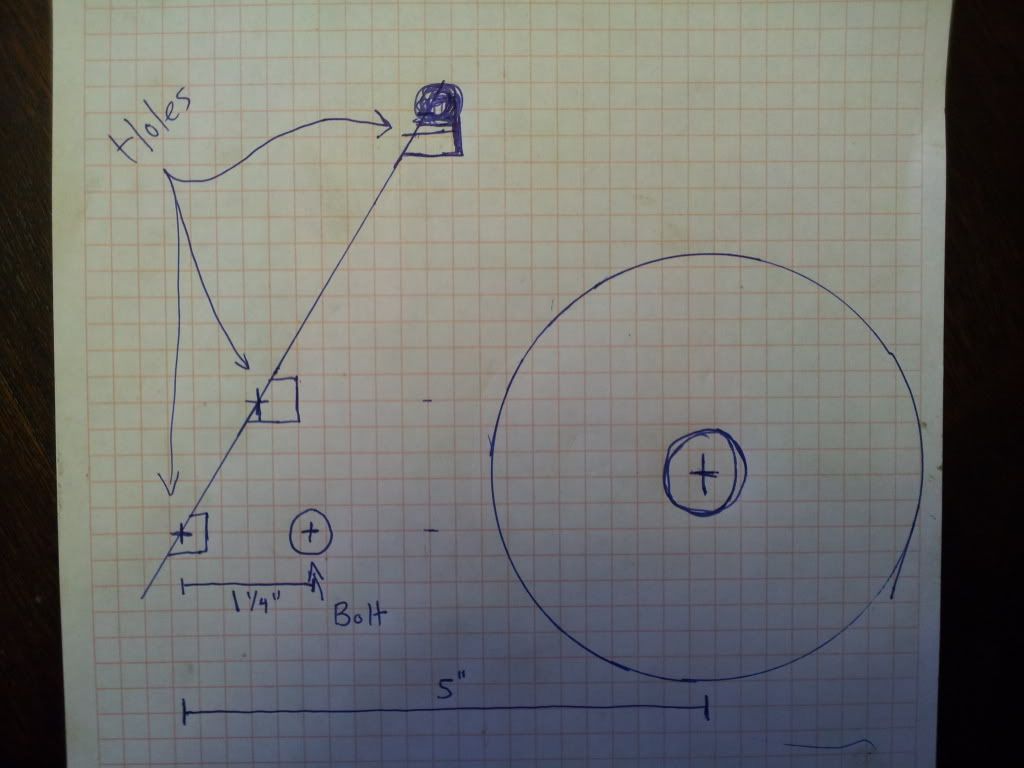
Sketch of the bracket:
Pics of the motor so you can see what I'm talking about:
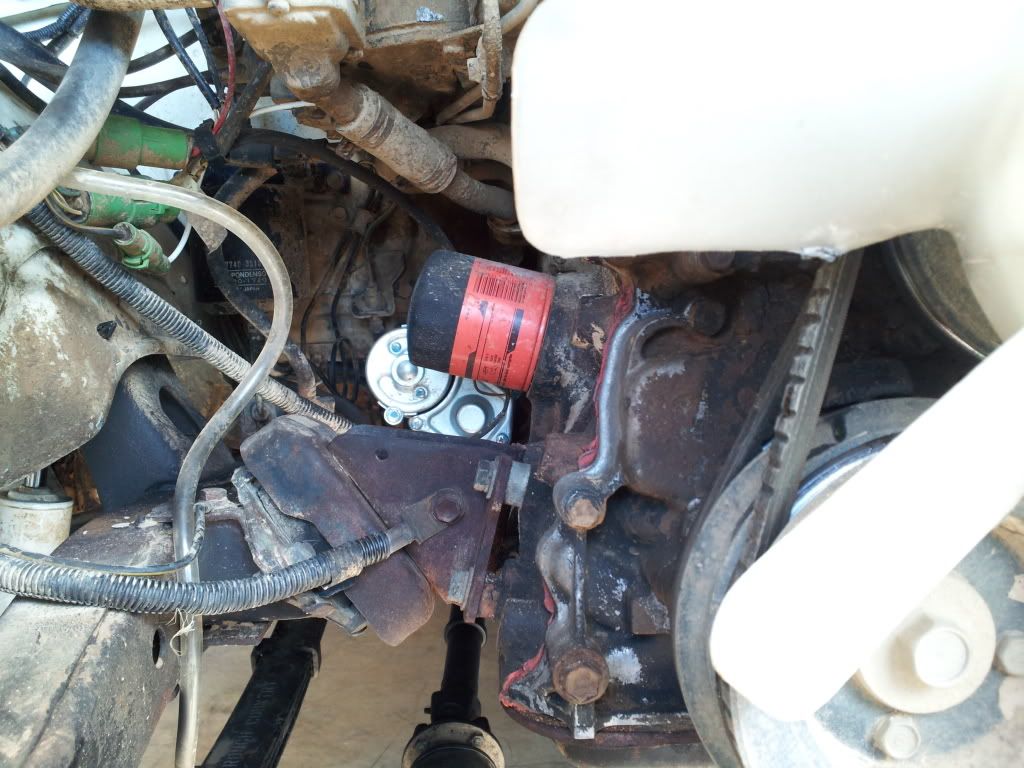
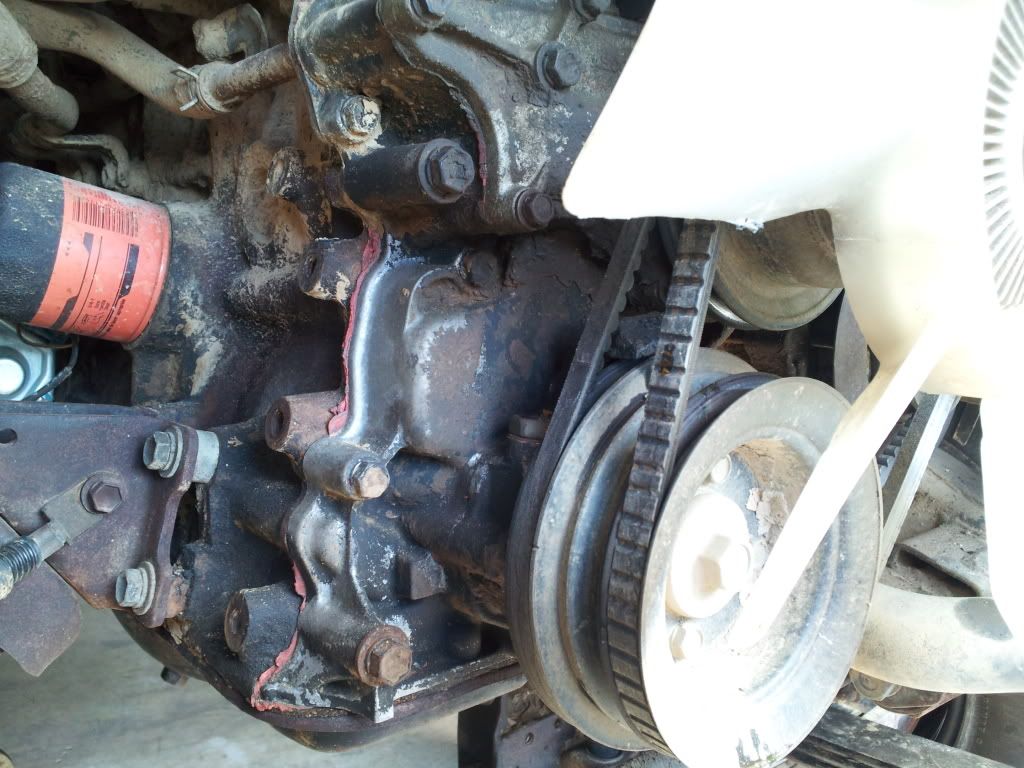
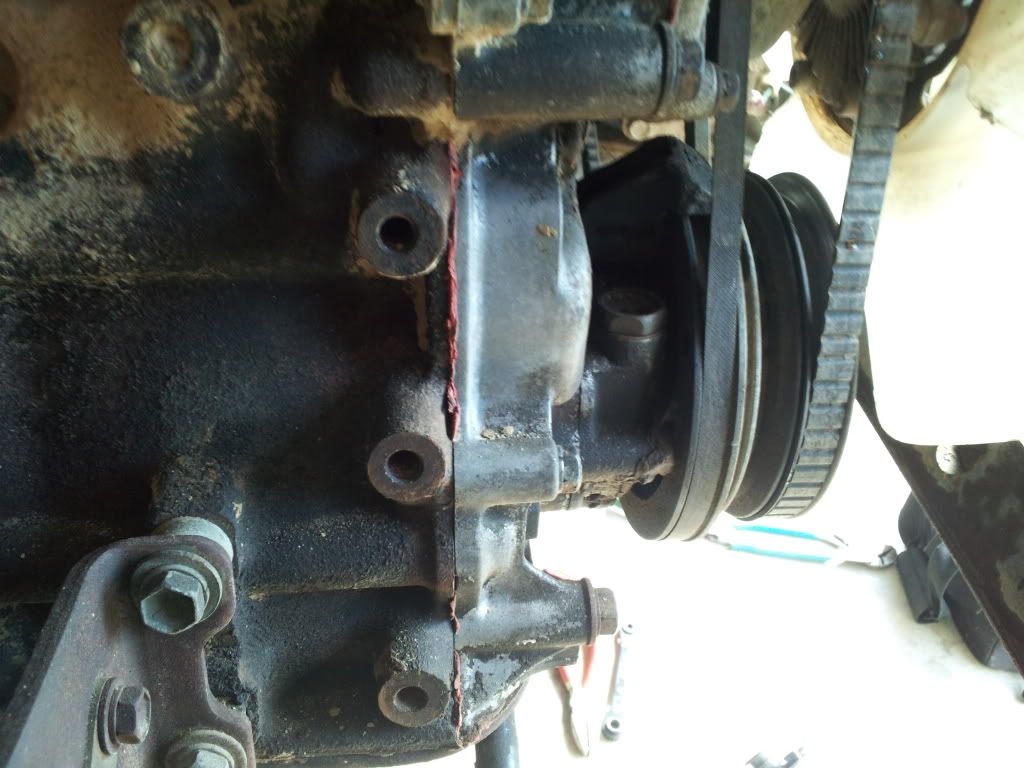
So that's whats I'm looking at. If anyone has any input or feedback please let me know!
Got the grill, radiator, and fan shroud removed. All need to be cleaned and painted. Back side of the radiator had a good bit of mud on it. Antifreeze was super clean too.
Took a lot measurements of the engine and pulleys and this is what I got so far:
Side view of the motor:
I plant to use the three empty holes in the engine to hold one side of the mount and the bolt on the front to hold the other side. This is all to scale for the most part and the alt was just drawn on to show a reference of its mounts with the pulleys lined up. The alt should sit a lot lower than it is in diagrams.
Front view of the motor:
The three holes on the side I want to use are at an angle.
Sketch of the bracket:
Pics of the motor so you can see what I'm talking about:
So that's whats I'm looking at. If anyone has any input or feedback please let me know!
Trending Topics
Oct 20, 2012 | 03:49 PM
#8
Thread Starter
Registered User
iTrader: (1)
Joined: Apr 2011
Posts: 1,220
Likes: 4
From: Memphis, TN
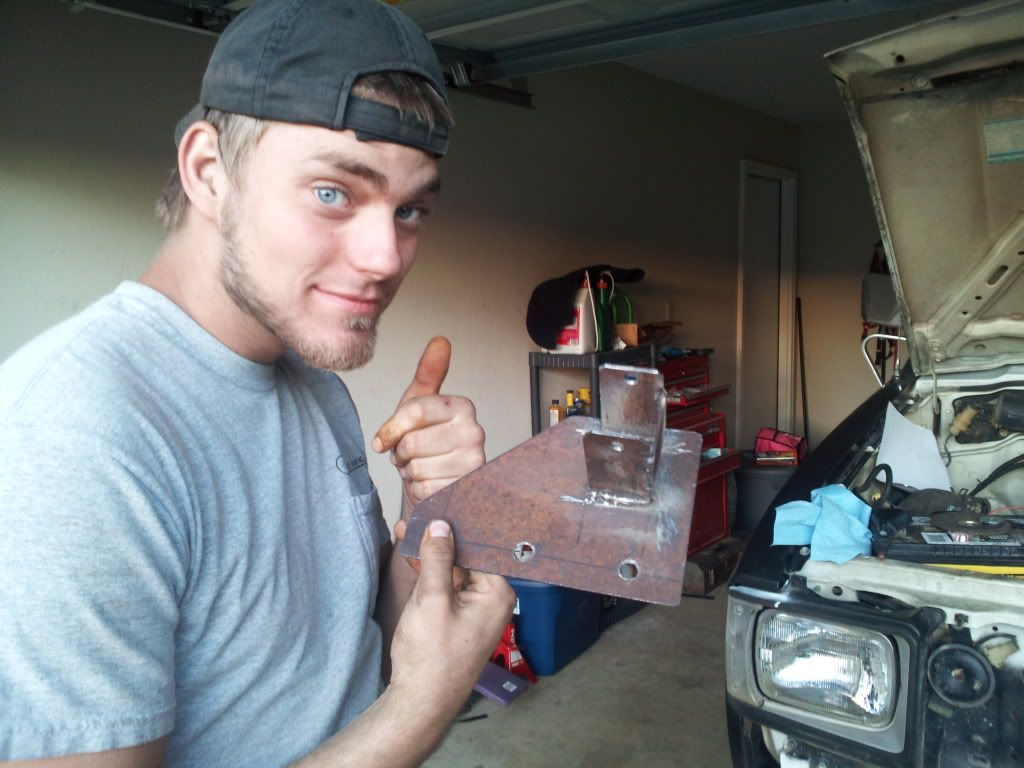
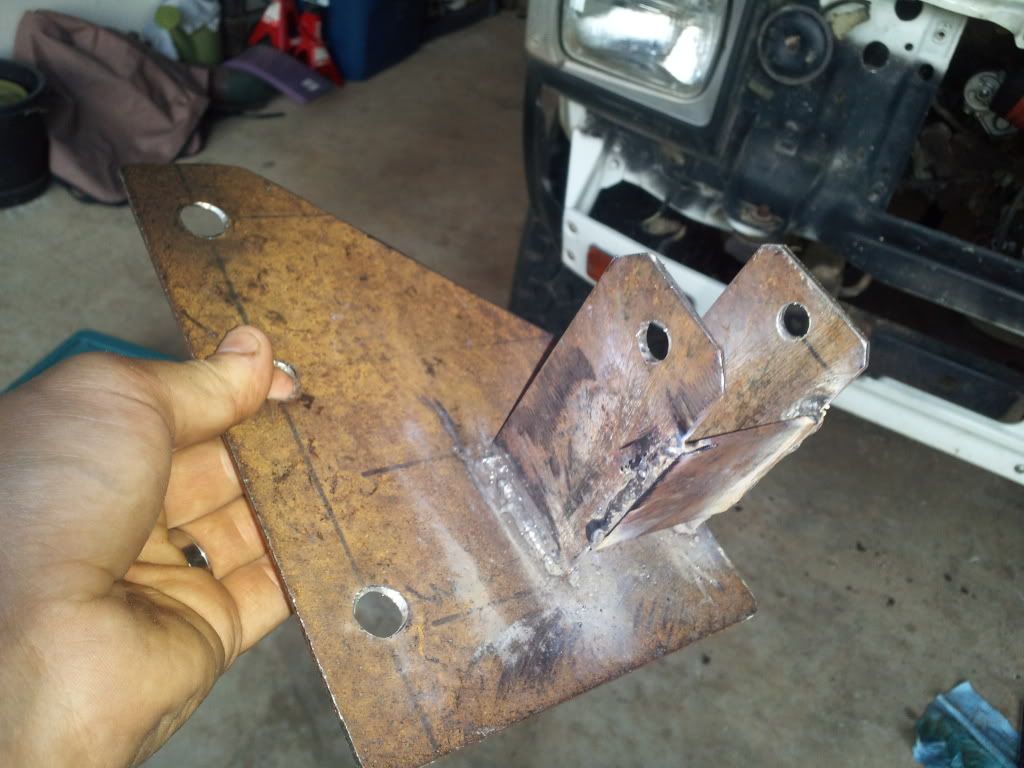
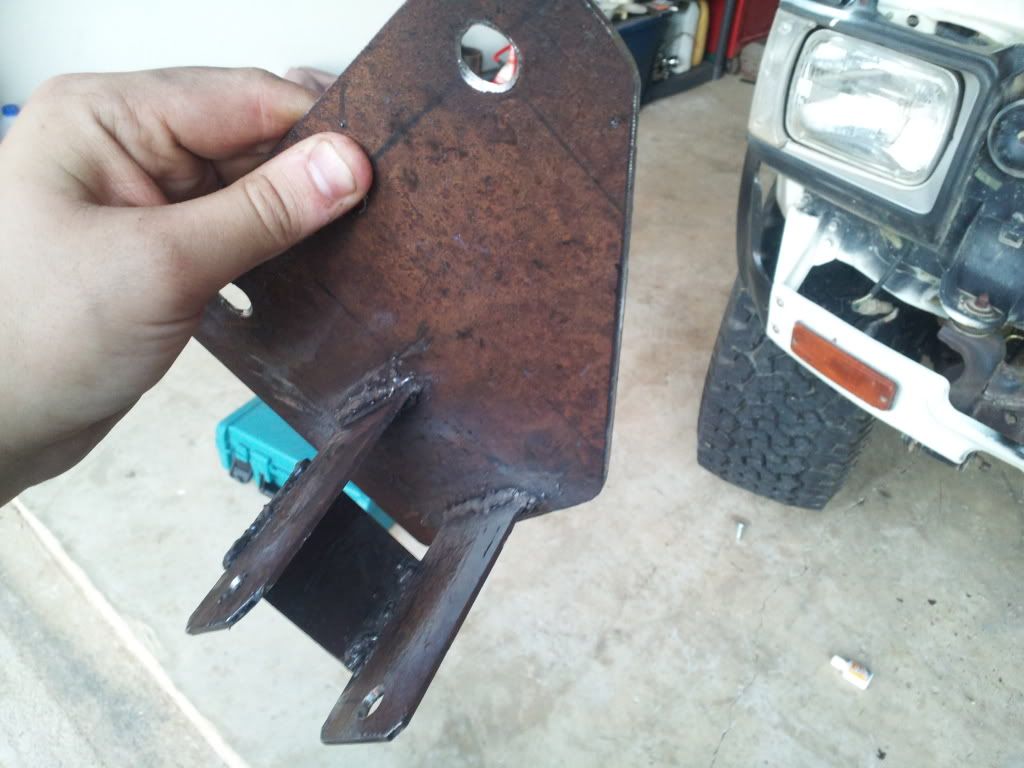
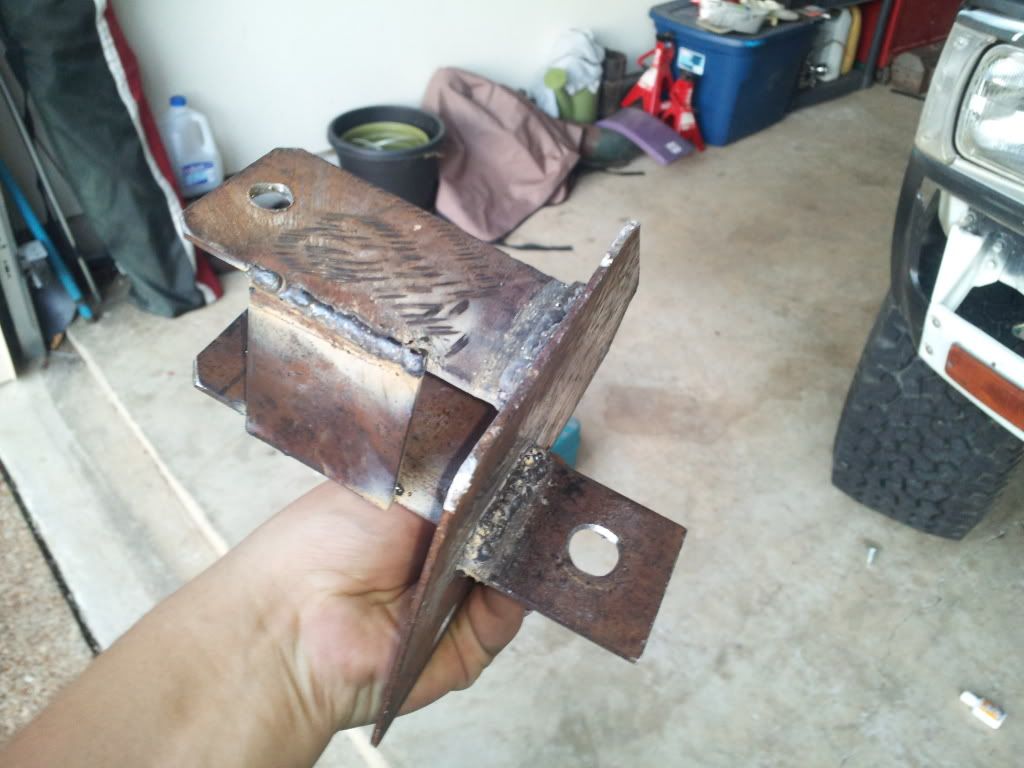
Alright today was very productive. Got a bracket made for my alternator! Used 16 gauge metal. Its not sheet metal either. Welds are fugly but they hold. Here is the bracket not installed:
Goofy guy in the picture is my friend, he was bored and came and helped me:
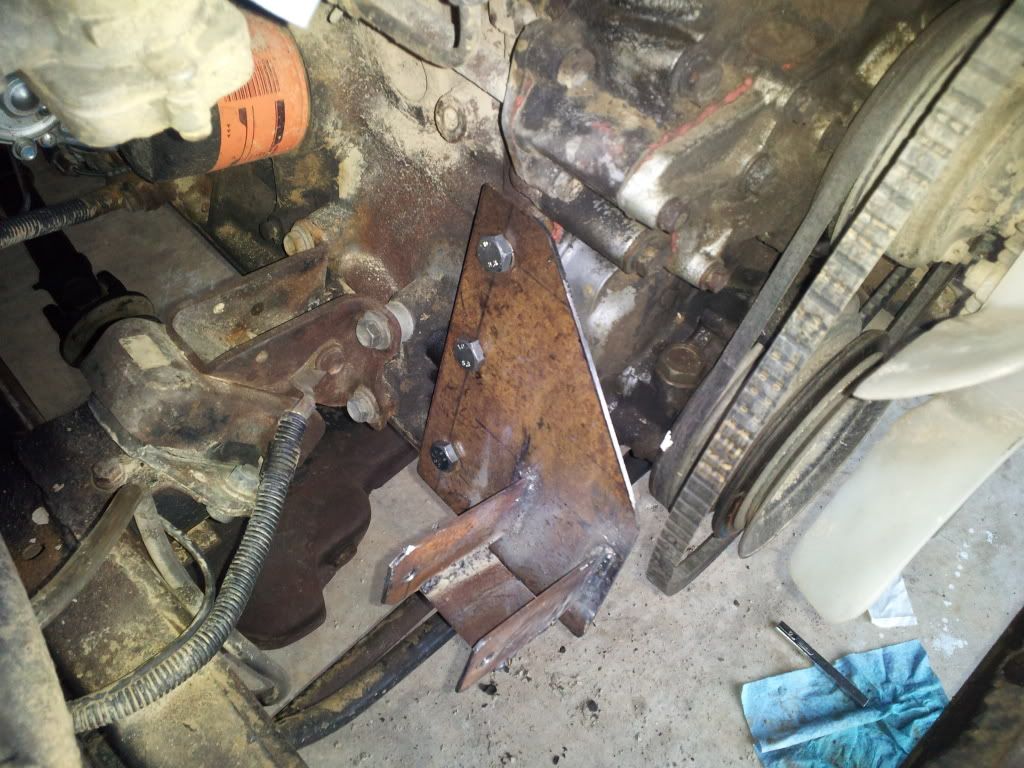
Mount installed on engine:
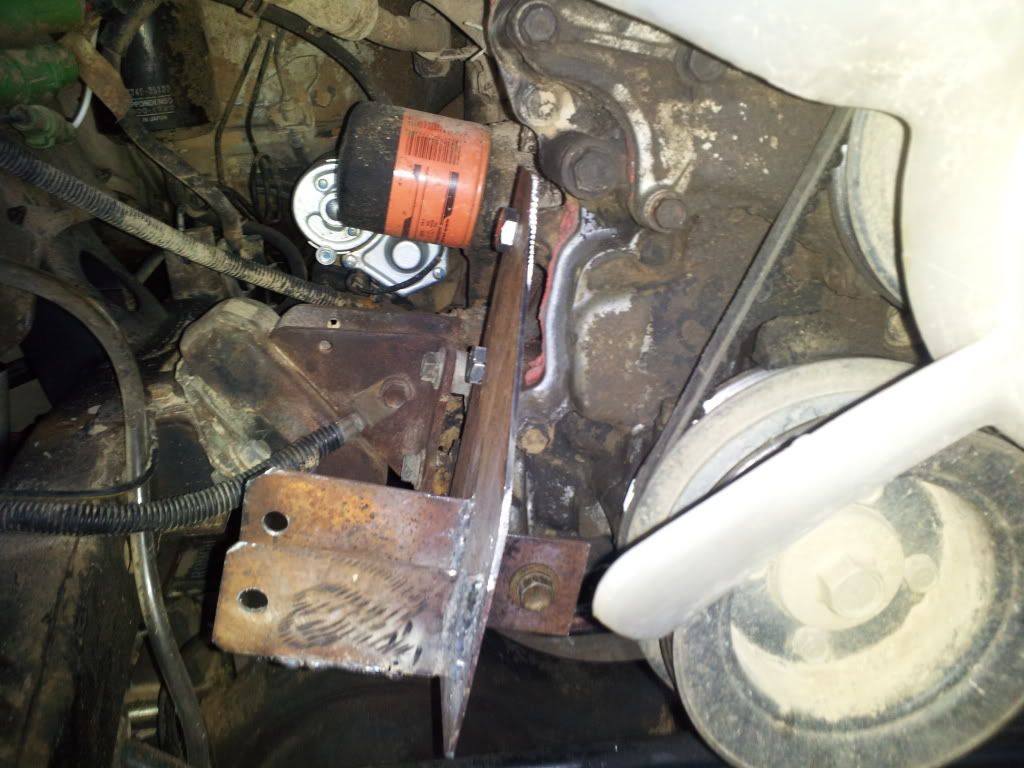

Alternator installed:

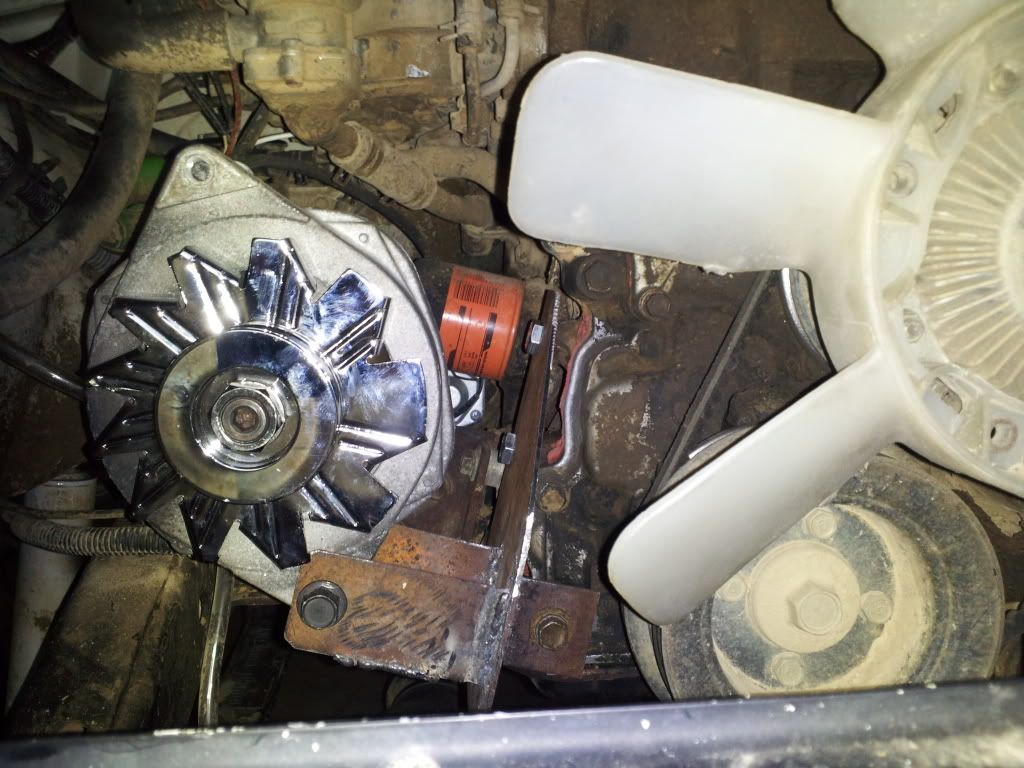
Still got make the top piece to hold it in place. Im using the belt on the outside pulley rather than the middle pulley with nothing on it. If I used the middle one I would have to make some kind of tension bracket and with using the outside pulley I can use the stock one. What do yall think?
Goofy guy in the picture is my friend, he was bored and came and helped me:
Mount installed on engine:
Alternator installed:
Still got make the top piece to hold it in place. Im using the belt on the outside pulley rather than the middle pulley with nothing on it. If I used the middle one I would have to make some kind of tension bracket and with using the outside pulley I can use the stock one. What do yall think?
Oct 22, 2012 | 07:06 PM
#9
Thread Starter
Registered User
iTrader: (1)
Joined: Apr 2011
Posts: 1,220
Likes: 4
From: Memphis, TN
Got a question on the wiring. Obviously the cs144 is internally regulated and the old alternator isn't so I have to remove the voltage regulator. Anyone know how to get rid of this properly and wire the new alt? I hadn't considered this before since just all the articles i have found on alt mods are for 85+ trucks that don't have an external regulator. I purchased a 83 pickup FSM yesterday which should help whenever it comes in the mail. Any thoughts?
 Oct 27, 2012 | 01:29 PM
#11
Thread Starter
Registered User
iTrader: (1)
Joined: Apr 2011
Posts: 1,220
Likes: 4
From: Memphis, TN
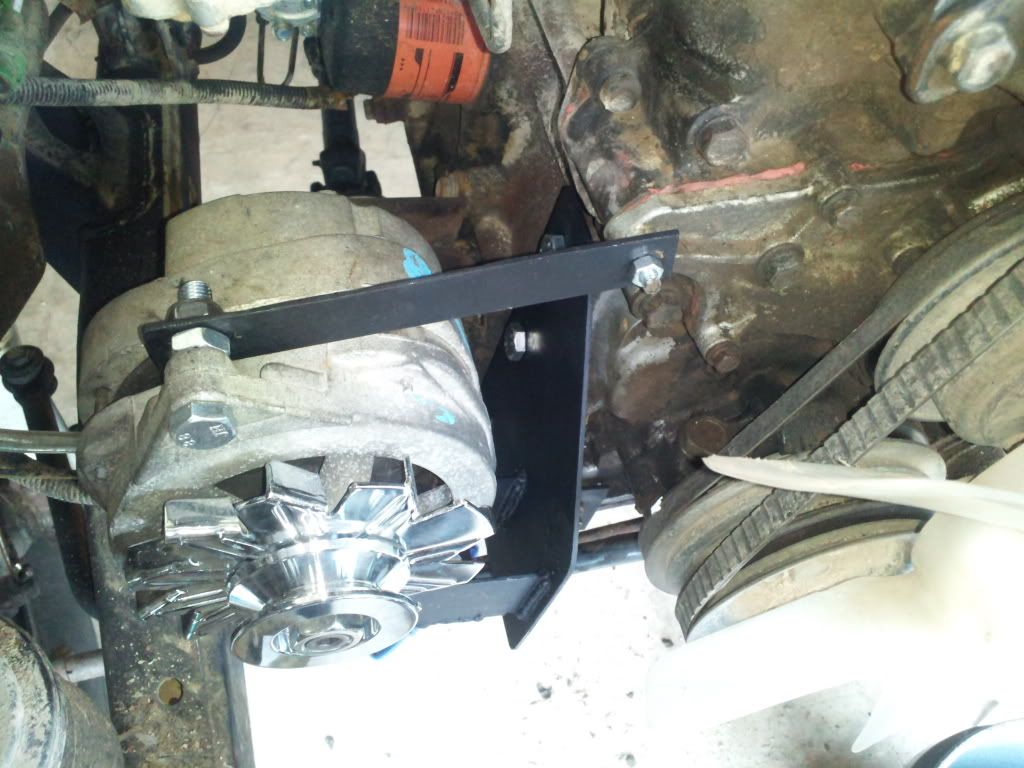
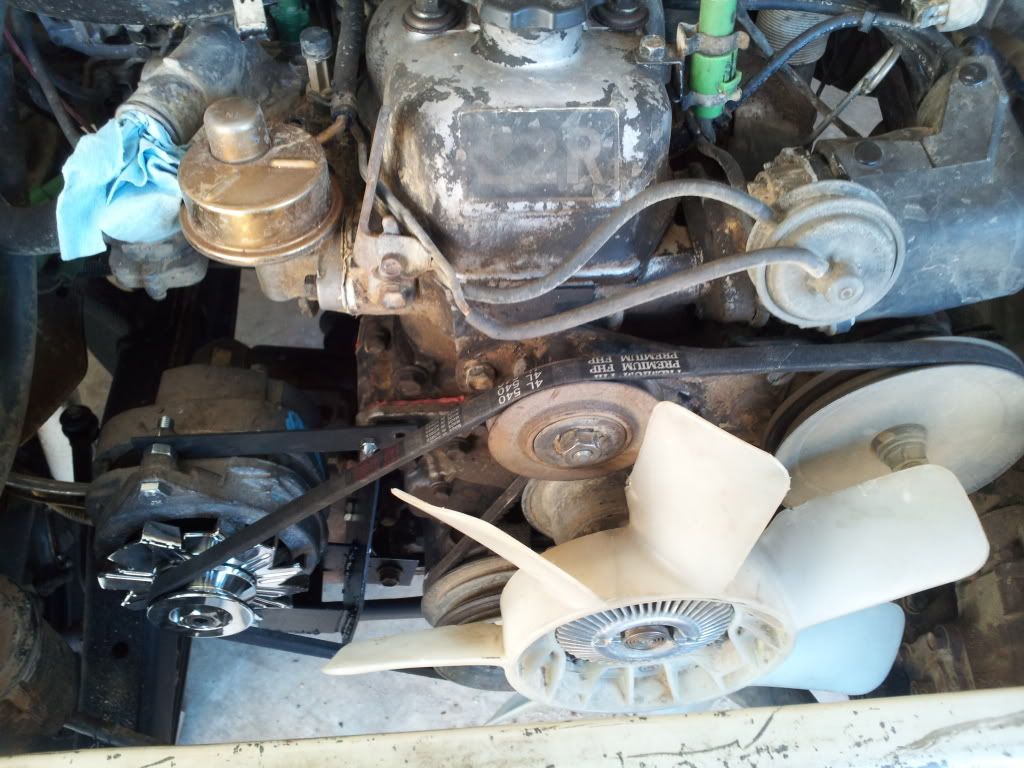
Got a belt put on the alt.
Got some electrical issues now too. Old alt wires disconnected. Started the truck to check the belt and it was fine. Had a hard time getting the truck to start because I still have the stock positive battery cable so I bought a new one from autozone. I took the old one off and hooked one end up to the starter. The old cable had a three wires that connect directly to the positive side. One is guages, one is ignition, and not sure what the other is. So I took all three of them and crimped them to the connector on the positive cable. It has one of the small wires atttached to the battery clamp to hook small wires too and thats what I used. I did that and touched the clamp to the battery terminal and it sparked. I did it again to make sure that it actually sparked and it did. But when It sparked it also made a sound like the starter was trying to kick in and I didn't even have the keys in the ignition. So apperntly I popped a fusible link somewhere because now it doesn't spark and nothing on the dash comes on. I checked the "engine" and "guage" fuse under the dash and they were ok. Were is this fusible link to the ignition at? Any ideas why the starter was acting crazy when I touched the wire to the battery. Oh I also cut the three wires off the clamp one time and it still sparked when I touched the clamp to the battery. Maybe something went screwy in the starter solenoid or something?
Got some electrical issues now too. Old alt wires disconnected. Started the truck to check the belt and it was fine. Had a hard time getting the truck to start because I still have the stock positive battery cable so I bought a new one from autozone. I took the old one off and hooked one end up to the starter. The old cable had a three wires that connect directly to the positive side. One is guages, one is ignition, and not sure what the other is. So I took all three of them and crimped them to the connector on the positive cable. It has one of the small wires atttached to the battery clamp to hook small wires too and thats what I used. I did that and touched the clamp to the battery terminal and it sparked. I did it again to make sure that it actually sparked and it did. But when It sparked it also made a sound like the starter was trying to kick in and I didn't even have the keys in the ignition. So apperntly I popped a fusible link somewhere because now it doesn't spark and nothing on the dash comes on. I checked the "engine" and "guage" fuse under the dash and they were ok. Were is this fusible link to the ignition at? Any ideas why the starter was acting crazy when I touched the wire to the battery. Oh I also cut the three wires off the clamp one time and it still sparked when I touched the clamp to the battery. Maybe something went screwy in the starter solenoid or something?
Oct 31, 2012 | 07:40 PM
#15
Thread Starter
Registered User
iTrader: (1)
Joined: Apr 2011
Posts: 1,220
Likes: 4
From: Memphis, TN
Alright I ordered me some parts to finish my wire upgrade for the alternator. I ordered a battery connector with multiple inputs, which I almost crapped myself when I found it, I had no idea they even made these. http://www.sonicelectronix.com/item_...n-BT0288P.html It has hookups for the starter, alternator, and ignition/guage wires. Freakin awesome  . Keeps me from having wire splices and connections everywhere. Also ordered 2 foot of 2 gauge red welding wire with a connector for the alternator and a boot cover from http://www.remybattery.com/Default.aspx. Got all of these parts for $30 shipped! I had already upgraded my negative battery cable and starter cable to 2 guage so this should complete it. All thats left is to remove the external voltage regulator and wire the old harness to the new alt.
. Keeps me from having wire splices and connections everywhere. Also ordered 2 foot of 2 gauge red welding wire with a connector for the alternator and a boot cover from http://www.remybattery.com/Default.aspx. Got all of these parts for $30 shipped! I had already upgraded my negative battery cable and starter cable to 2 guage so this should complete it. All thats left is to remove the external voltage regulator and wire the old harness to the new alt.
Nov 4, 2012 | 05:35 AM
#16
Thread Starter
Registered User
iTrader: (1)
Joined: Apr 2011
Posts: 1,220
Likes: 4
From: Memphis, TN
I think have figured out the correct way the alt harness up. As you know the GM alt has a 4-wire harness and I don't need the stator wire. The other three are ignotion, charge, and sense. For the ignition I am using the red wire leaving the voltage regulator, for the sense is the white with the black stripe from the original alt harness, and for the charge light I can use the yellow wire from either the old alt harness or the voltage regulator since they both tie into the charge light circuit. I found a lot of info for doing this on 84+ second gen trucks but not really any on 1st gens. Can anyone confirm what I am thinking on the wiring?
 Nov 4, 2012 | 06:00 AM
#19
 . Looks like a clean job, I like it.


