DIRTCO's 1985 4Runner Build-Up Thread
 01-09-2008, 07:12 PM
#1
Registered User
Thread Starter
Join Date: May 2007
Location: Summit County, Colorado
Posts: 1,441
Likes: 0
Received 0 Likes
on
0 Posts
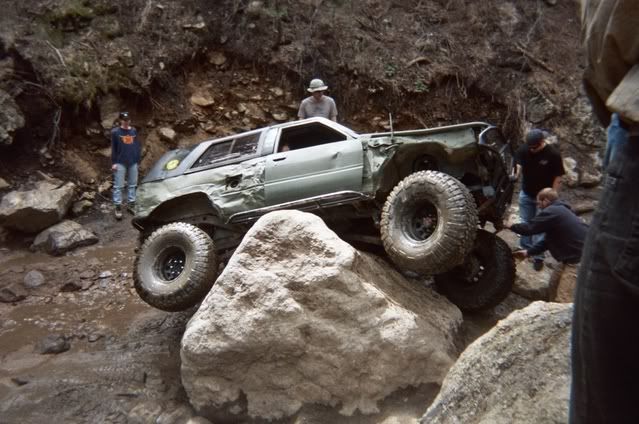
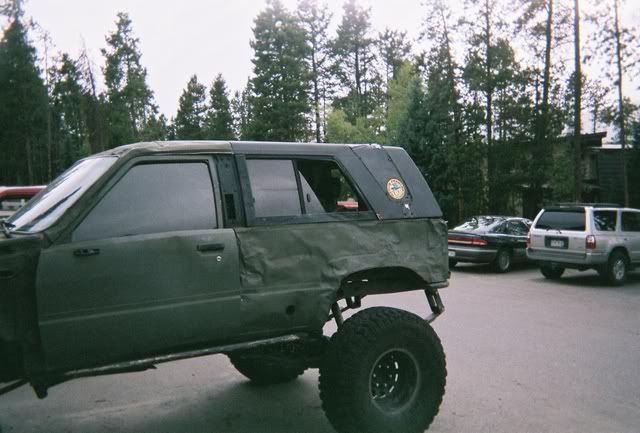
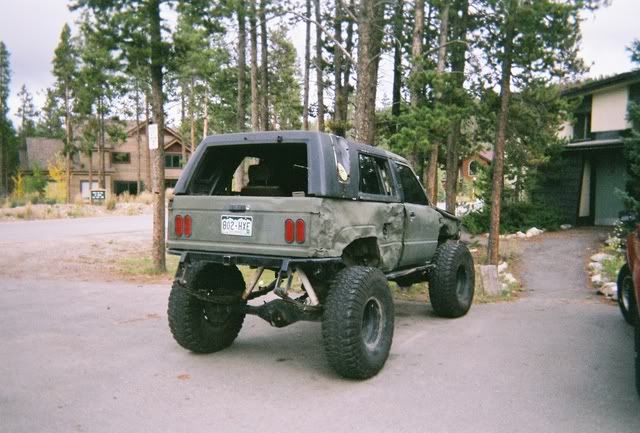
Well, after one eventful trip it's time to tear the truck apart and fix the damage that has rendered my truck immobile. But while I'm fixing the damage I might as well change some things around to make the truck more capable and prevent things like this happening again (to a certain extent). 
Here's a quick history of the truck. Started working on it around 4 or 5 years ago, I bought it as a bone stock 85' 4Runner, 22re, Auto trans and a shot motor. After getting it home I replaced the motor and converted it to a manual transmission. While I was at it, it got some cheap lift springs and some long shackles. That's when I decided to do things right, replaced the crappy lift springs with Alcan 63" hybrid rear springs and rears up front. I bobbed the bed 14" and mounted up some 37" MTR's with 5:29's, a spool in the rear and a lock right in the front. Then added dual case's, bumpers and some other stuff.
Through the years I changed little things around, but for the most part it stayed a short 4Runner (and some added body damage )
)
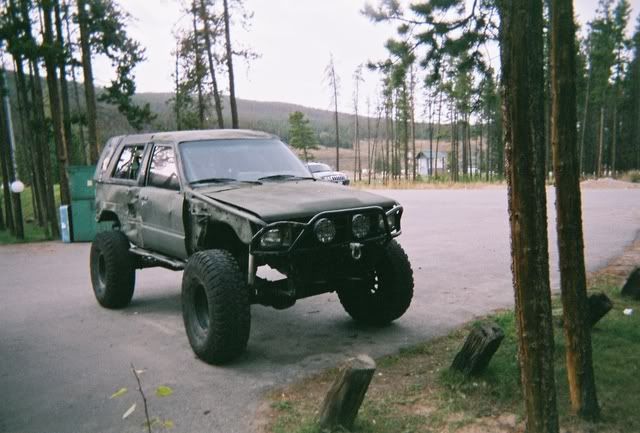
Here's some pic's


Here's a quick history of the truck. Started working on it around 4 or 5 years ago, I bought it as a bone stock 85' 4Runner, 22re, Auto trans and a shot motor. After getting it home I replaced the motor and converted it to a manual transmission. While I was at it, it got some cheap lift springs and some long shackles. That's when I decided to do things right, replaced the crappy lift springs with Alcan 63" hybrid rear springs and rears up front. I bobbed the bed 14" and mounted up some 37" MTR's with 5:29's, a spool in the rear and a lock right in the front. Then added dual case's, bumpers and some other stuff.
Through the years I changed little things around, but for the most part it stayed a short 4Runner (and some added body damage
)Here's some pic's


 01-09-2008, 07:30 PM
#3
Registered User
Thread Starter
Join Date: May 2007
Location: Summit County, Colorado
Posts: 1,441
Likes: 0
Received 0 Likes
on
0 Posts
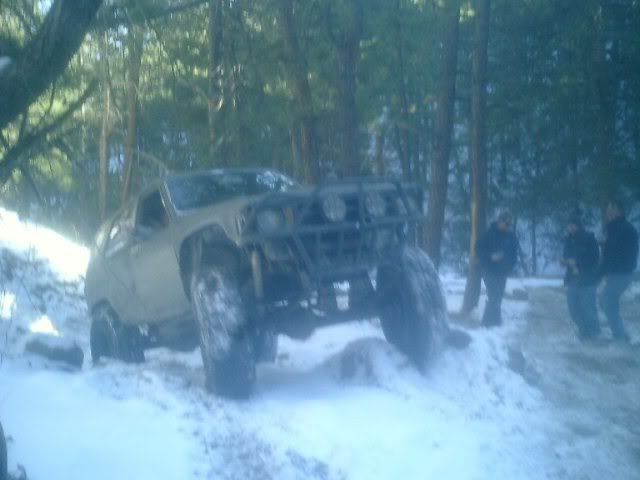
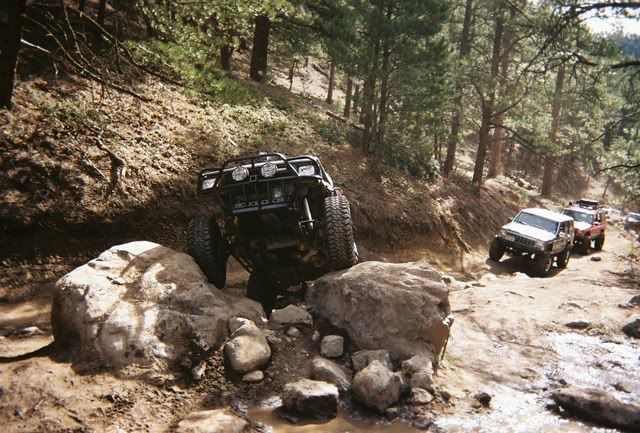
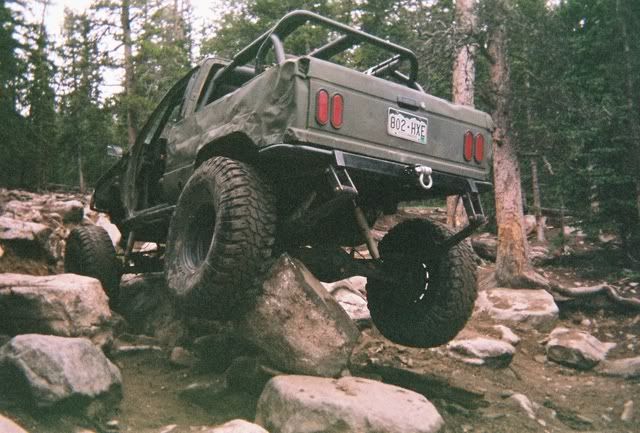
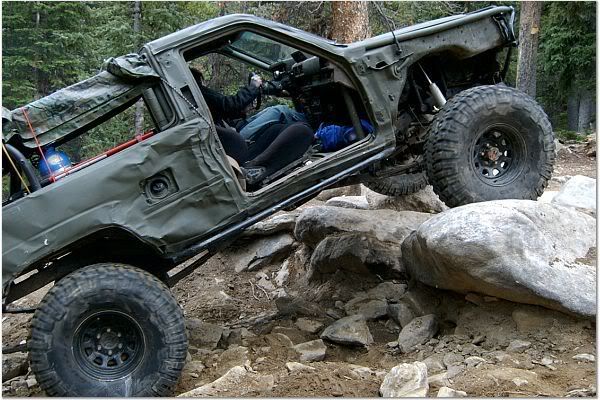
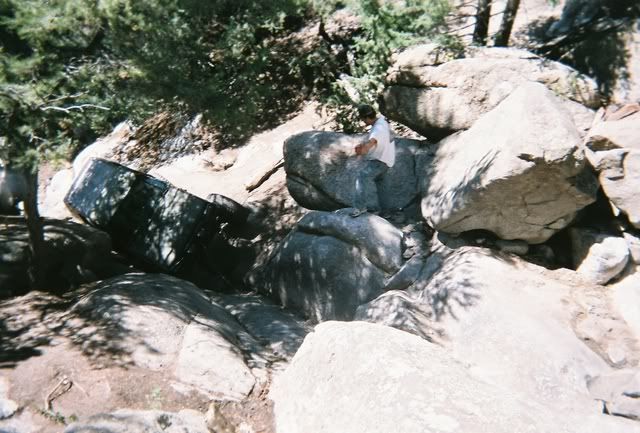
The trail that led to the 4Runner's demise was Carnage BV in Colorado. While I had previously run the trail probably a dozen times, things had changed. A recent rain storm had changed a lot of the obstacles around and made sections of the trail a lot harder. As we approached the V-Notch this became clear, after several tries I broke both birfields (old ringed Longfield's) at the same time. With the help from some friends we replaced the units with two stock spares I had, but within 20-40 feet I managed to break those. I ended up having to by dragged out of the trail by two of my friends strapped together, that's what took it's final toll on the truck.
Pictures of the trip
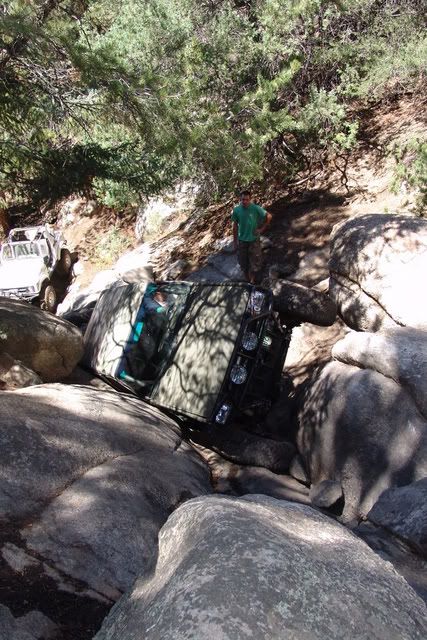
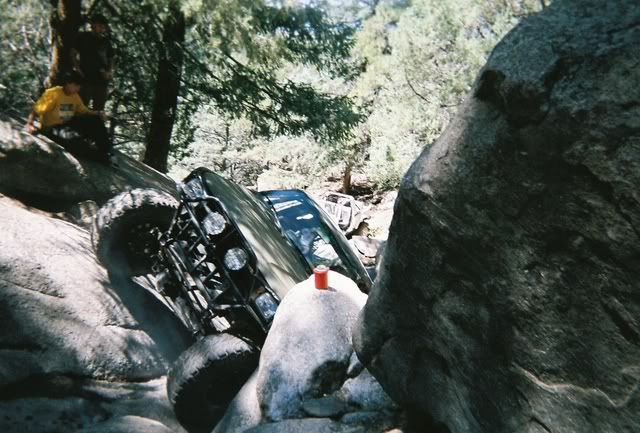
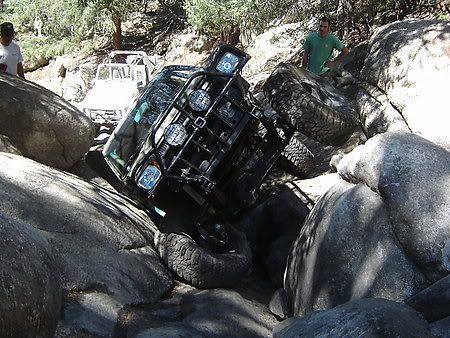
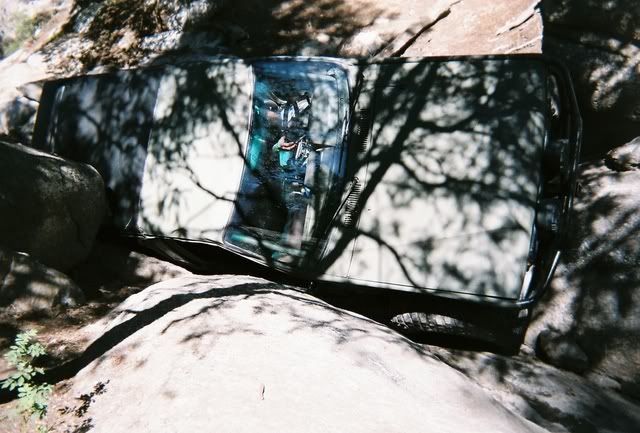
Being winched out of the hole after I broke
Pictures of the trip
Being winched out of the hole after I broke
01-09-2008, 07:31 PM
#4
Registered User
Thread Starter
Join Date: May 2007
Location: Summit County, Colorado
Posts: 1,441
Likes: 0
Received 0 Likes
on
0 Posts
And a video of me being dragged out of the exit.
http://s229.photobucket.com/albums/e...t=MOV07574.flv
http://s229.photobucket.com/albums/e...t=MOV07574.flv
01-09-2008, 07:35 PM
#6
Registered User
Thread Starter
Join Date: May 2007
Location: Summit County, Colorado
Posts: 1,441
Likes: 0
Received 0 Likes
on
0 Posts
Broken parts for the trip were: 
2 old ringed Longfields
1 stock birfield
Front leafsprings - 1 broke in half, other bent and twisted
Rear springs - both main leafs kinked and bent
One rear driveshaft
Both knuckles (or parts in that area)
Just a little body damage
2 old ringed Longfields
1 stock birfield
Front leafsprings - 1 broke in half, other bent and twisted
Rear springs - both main leafs kinked and bent
One rear driveshaft
Both knuckles (or parts in that area)
Just a little body damage
Trending Topics
01-09-2008, 07:43 PM
#8
Registered User
Thread Starter
Join Date: May 2007
Location: Summit County, Colorado
Posts: 1,441
Likes: 0
Received 0 Likes
on
0 Posts
Let me know when your ready and I'll give you some pointers, it's really not that bad. 
-Here is the current plan I have for it.
Fix broken front axle parts, get 30 spline Longfields. Make front axle as strong as possible.
Replace and repair broken leaf springs, try to lower the rig as much as possible in the process
Dovetail the rear and replace rear cage, possibly narrow the rocksliders
There is alot more details that I have planned but that is the basic idea.
01-09-2008, 07:53 PM
#9
Registered User
Thread Starter
Join Date: May 2007
Location: Summit County, Colorado
Posts: 1,441
Likes: 0
Received 0 Likes
on
0 Posts
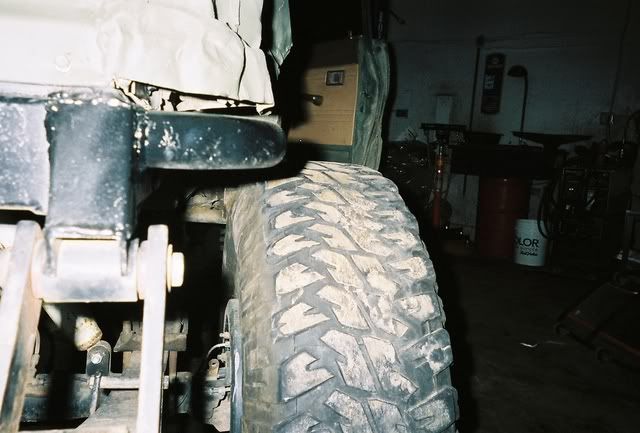
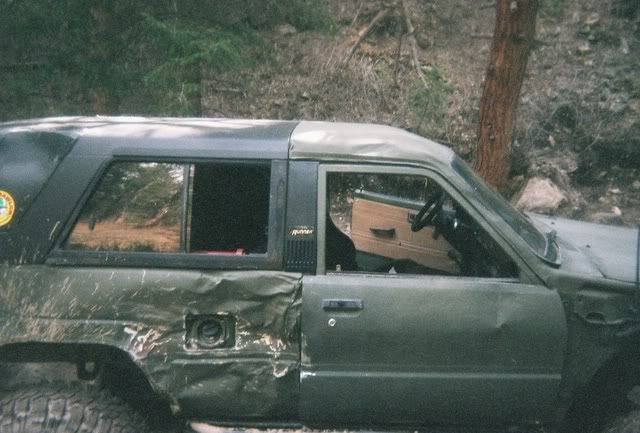
Some pic's of the damage. The pictures were taken with a disposable camerea, so they suck. But it gives you a pretty good idea of what happened.
Rear spring
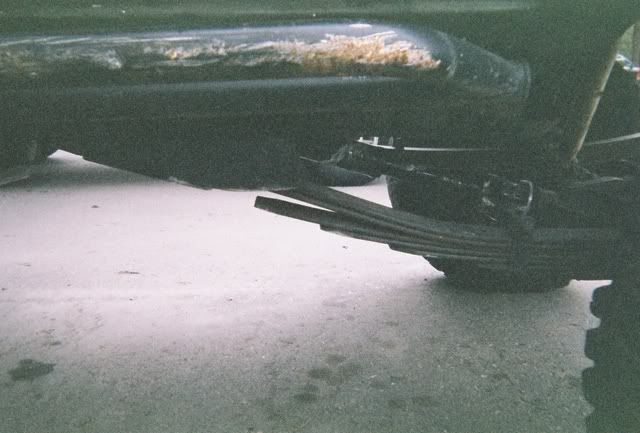
Broken front spring, dented tub
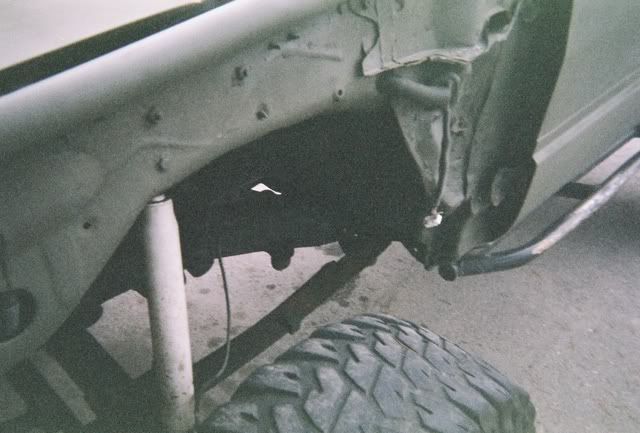
Bent front spring

Front axle, around 5" of toe out and both front tires are // --- \\
When the rear springs bent it created more lift
Rear spring
Broken front spring, dented tub
Bent front spring
Front axle, around 5" of toe out and both front tires are // --- \\
When the rear springs bent it created more lift
01-09-2008, 11:25 PM
#10
Registered User

edit: by the time i posted this you answered my question 
nice truck. i like the longs but for the price i would be looking real hard for a d60. might as well go all the way right?
look on the bright side.. at least you defeated the 4runner sag
nice truck. i like the longs but for the price i would be looking real hard for a d60. might as well go all the way right?
look on the bright side.. at least you defeated the 4runner sag
Last edited by fork; 01-09-2008 at 11:32 PM.
01-10-2008, 09:07 PM
#11
Registered User
Thread Starter
Join Date: May 2007
Location: Summit County, Colorado
Posts: 1,441
Likes: 0
Received 0 Likes
on
0 Posts
I already have all of the Toyota stuff and (besides for the Longs) I have all the replacement parts in a box waiting to be installed. The advantages of the Toyota axles over the one tons is weight and clearance. I also don't have a tow rig or trailer, this is driven everywhere it go's.
01-11-2008, 11:42 AM
#12
Registered User
Nice 4Runner!!! Let me know when you plan on running BV Carnage again! I also ran it last summer (https://www.yotatech.com/forums/f100...1-07-a-122306/) and had alittle body damage as well  I'm running 30 spline Longfields so no driveline brakeage for me but I did take a ton of driver side sheetmetal damage (not like I really care )
I'm 45 minutes away from Penrose (Independence trail system) so if you want to come down to run Indy, let me know! I'm always looking for fellow hardcore Toyota guys to run with.
I'm running 30 spline Longfields so no driveline brakeage for me but I did take a ton of driver side sheetmetal damage (not like I really care )I'm 45 minutes away from Penrose (Independence trail system) so if you want to come down to run Indy, let me know! I'm always looking for fellow hardcore Toyota guys to run with.
01-11-2008, 07:38 PM
#13
Registered User
Thread Starter
Join Date: May 2007
Location: Summit County, Colorado
Posts: 1,441
Likes: 0
Received 0 Likes
on
0 Posts
Nice 4Runner!!! Let me know when you plan on running BV Carnage again! I also ran it last summer (https://www.yotatech.com/forums/f100...1-07-a-122306/) and had alittle body damage as well I'm running 30 spline Longfields so no driveline brakeage for me but I did take a ton of driver side sheetmetal damage (not like I really care )
I'm 45 minutes away from Penrose (Independence trail system) so if you want to come down to run Indy, let me know! I'm always looking for fellow hardcore Toyota guys to run with.
I'm running 30 spline Longfields so no driveline brakeage for me but I did take a ton of driver side sheetmetal damage (not like I really care )I'm 45 minutes away from Penrose (Independence trail system) so if you want to come down to run Indy, let me know! I'm always looking for fellow hardcore Toyota guys to run with.
The V-Notch had changed a lot, I'm looking forward to giving it another shot! As for the body damage, well it happens, and after a while it's kind of fun. I've run Carnage around a dozen times, but never Independence. I have really wanted to run Independence for a while, give me a couple of months and I'll come down and run it with you. Should be a fun time.
01-17-2008, 07:44 PM
#15
Registered User
Join Date: Oct 2007
Location: B.C
Posts: 832
Likes: 0
Received 0 Likes
on
0 Posts
For you manual tranny swap, once you bolted it up with the new flywheel what did you have to do for wiring? and nice truck by the way, i have an 88 with similar setup but i havnt chopped the back yet. ive bin putting off the tranny swap for as long as possible but i think its time. Any help would be great thanks.
Justin
Justin
Last edited by Justinvd; 01-17-2008 at 07:46 PM.
01-19-2008, 07:17 PM
#16
Registered User
Thread Starter
Join Date: May 2007
Location: Summit County, Colorado
Posts: 1,441
Likes: 0
Received 0 Likes
on
0 Posts
For you manual tranny swap, once you bolted it up with the new flywheel what did you have to do for wiring? and nice truck by the way, i have an 88 with similar setup but i havnt chopped the back yet. ive bin putting off the tranny swap for as long as possible but i think its time. Any help would be great thanks.
Justin
Justin
I left the original computer and removed the separate auto transmission computer. I don't have a check engine light, but it does store a code about the neutral safety switch.
01-21-2008, 08:27 PM
#17
Registered User
Thread Starter
Join Date: May 2007
Location: Summit County, Colorado
Posts: 1,441
Likes: 0
Received 0 Likes
on
0 Posts
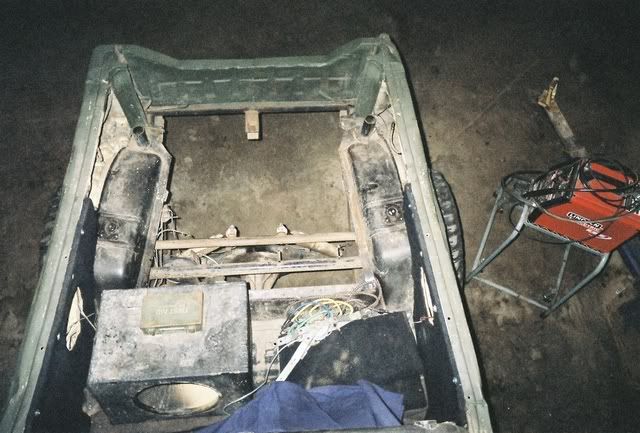
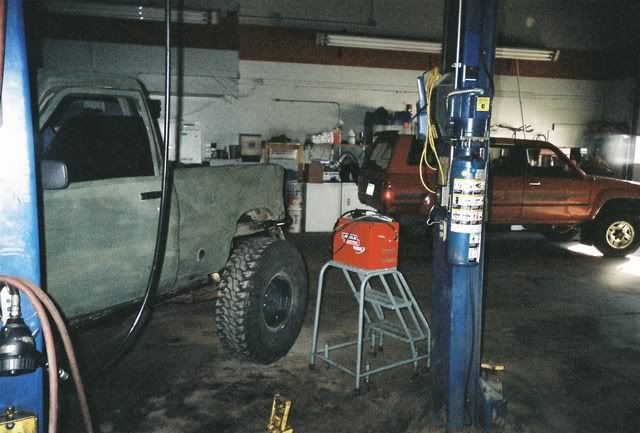
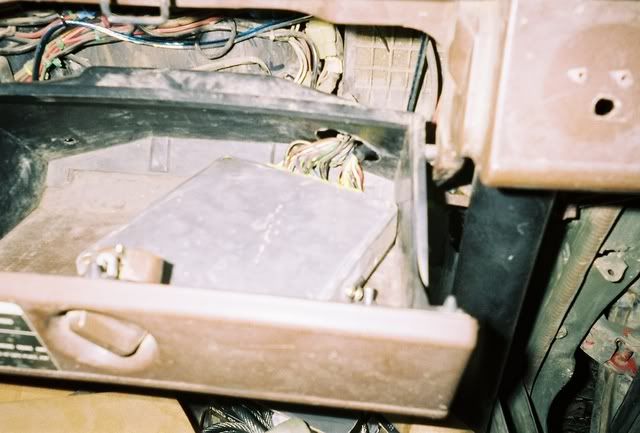
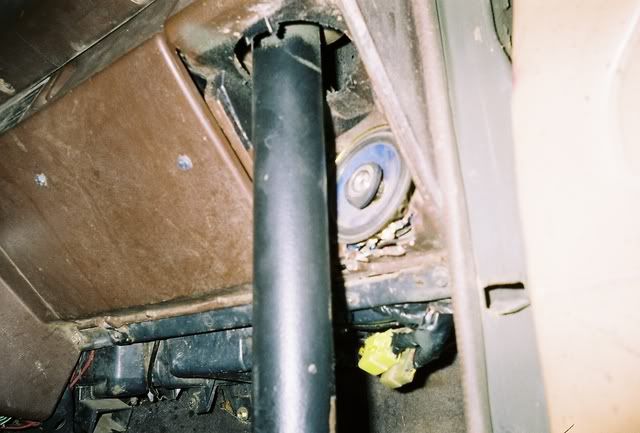
I wanted to show the progress step by step, but my first pictures did not turn out. All of these pictures were taken after a couple weekends in the shop.
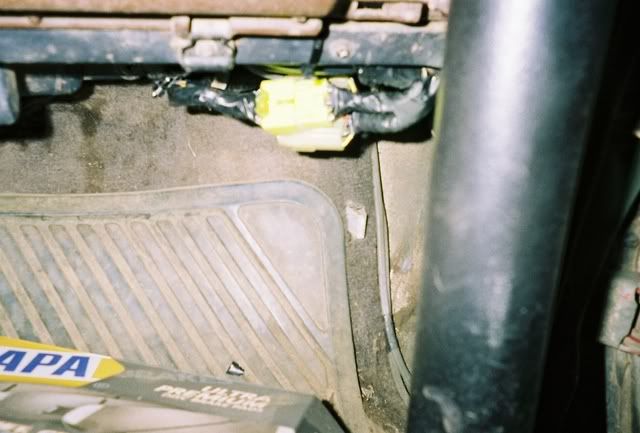
I want to lower the truck as much as possible, so the first thing I did was to relocate the computer to the glove box. The tires already rub the firewall so I plan to tub the firewall for some more clearance and a smoother surface for the tires to rub on (if they do make contact).
It was very easy and I did not have to cut or extend and of the wires. I cut the loom off and spent some time running the wires.
All of these pictures were taken after a couple weekends in the shop.I want to lower the truck as much as possible, so the first thing I did was to relocate the computer to the glove box. The tires already rub the firewall so I plan to tub the firewall for some more clearance and a smoother surface for the tires to rub on (if they do make contact).
It was very easy and I did not have to cut or extend and of the wires. I cut the loom off and spent some time running the wires.
01-21-2008, 09:00 PM
#18
Registered User
Thread Starter
Join Date: May 2007
Location: Summit County, Colorado
Posts: 1,441
Likes: 0
Received 0 Likes
on
0 Posts
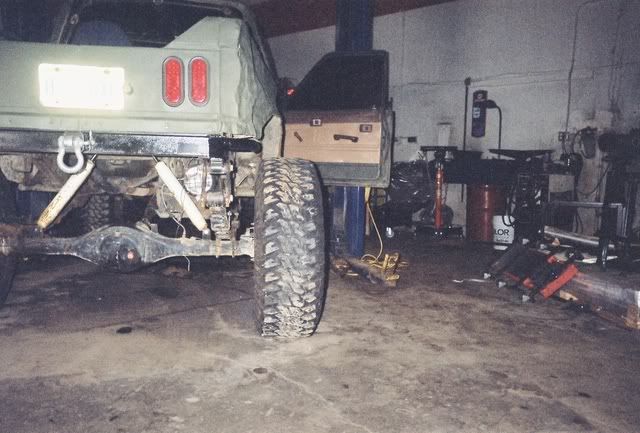
After I relocated the computer, I moved to the rear springs. The springs that were on the truck were a custom set of Alcans that were based off of 63" chevys. They moved the center pin back one inch and made the rear of the spring one inch shorter, they also increased the amount of lift.
After the last trip both main leafs were bent (my fault, not Alcan's). I picked up a set of stock 63" chevy springs and mixed the packs together. The main leaf, anti-wrap, and military wrap were removed from Alcan pack and the single main leaf from the stock pack was used to replace these. I also removed one extra leaf from the pack to make it softer.
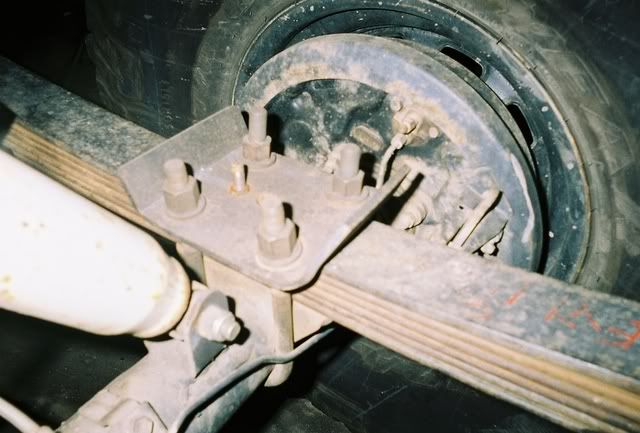
The U-Bolt plate had to be drilled to move the axle back to were it used to be, the spring perches already had holes drilled in them for different spacing.
This lowered the rear of the truck quite a bit. I never measured it before, but I would say around 3". The rear shackle mount may have to be moved because the springs are longer in the rear. There is no weight in the truck at the time of the picture and the shocks are going to be relocated for more up travel
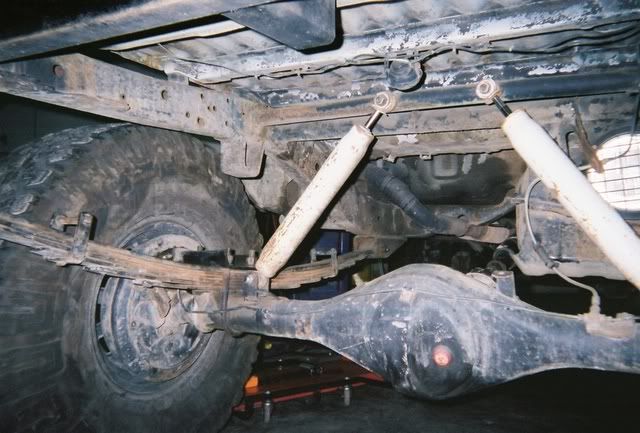
After the last trip both main leafs were bent (my fault, not Alcan's). I picked up a set of stock 63" chevy springs and mixed the packs together. The main leaf, anti-wrap, and military wrap were removed from Alcan pack and the single main leaf from the stock pack was used to replace these. I also removed one extra leaf from the pack to make it softer.
The U-Bolt plate had to be drilled to move the axle back to were it used to be, the spring perches already had holes drilled in them for different spacing.
This lowered the rear of the truck quite a bit. I never measured it before, but I would say around 3". The rear shackle mount may have to be moved because the springs are longer in the rear. There is no weight in the truck at the time of the picture and the shocks are going to be relocated for more up travel
01-21-2008, 09:28 PM
#19
Registered User
Thread Starter
Join Date: May 2007
Location: Summit County, Colorado
Posts: 1,441
Likes: 0
Received 0 Likes
on
0 Posts
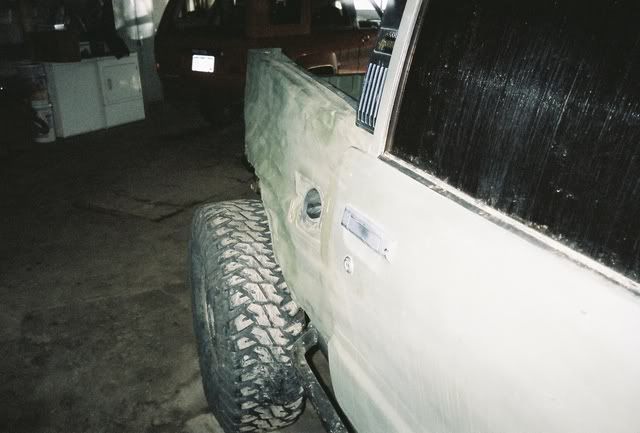
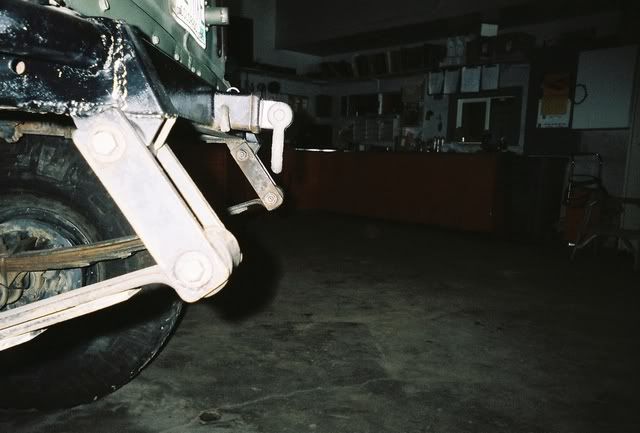
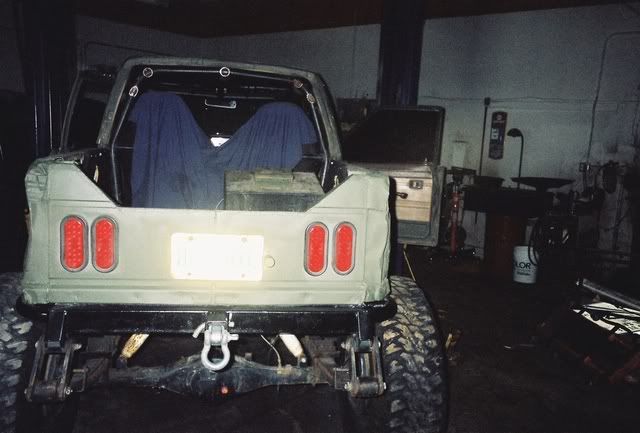
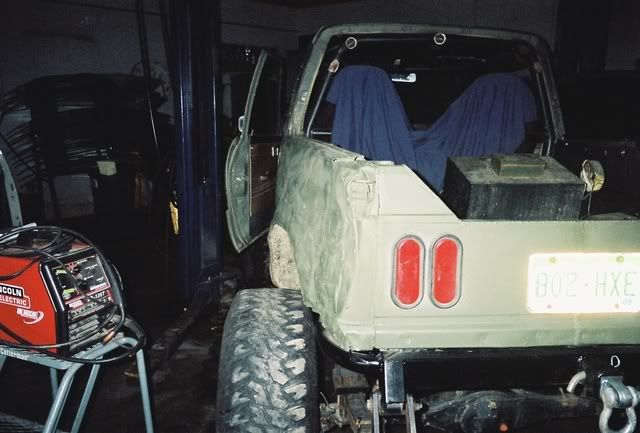
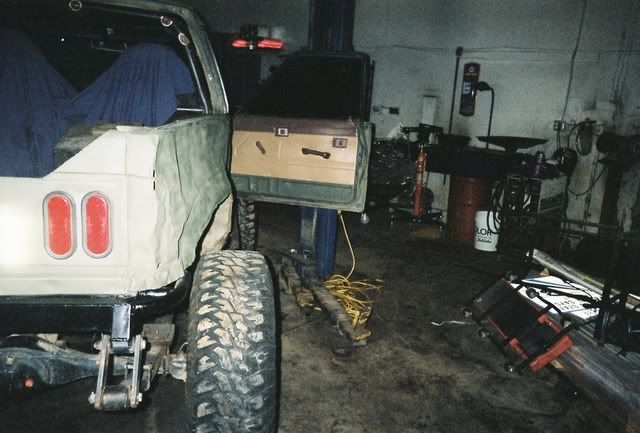
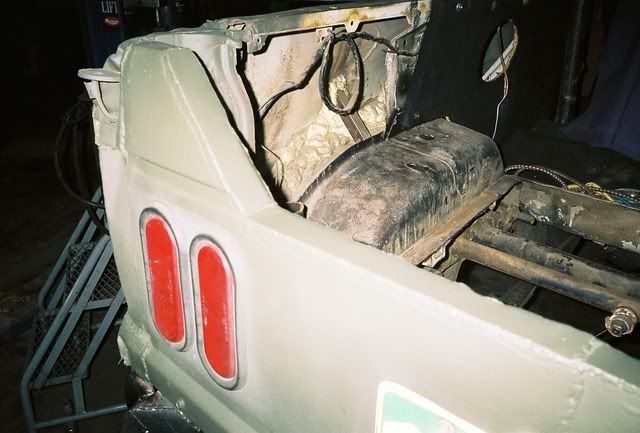
At this point I decieded to jump into the project before changing my mind. It was time to start the dovetail. 
I removed the topper, single rear bucket seat, and everything that was in the back of the truck. I then proceed to cut the old cage out of the back.
I decided on 12", this would put my tailgate at just about frame width and narrow each side 6". I also wanted to make it easyer to get into the back of the truck since the tailgate is welded solid.
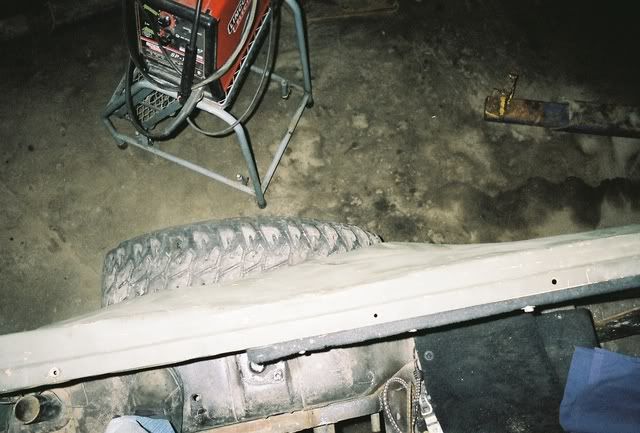
Since the shock were going to have to come through the floor, and the ribbed sections of the floor were going to be a pain to work with; I just cut the entire thing out. I will be building a new floor out of expanded steel. Then the tailgate got 12" cut out of the center.
After a couple of Come-Along's, a sledge hammer and a couple days welding, this is how it looks.
I removed the topper, single rear bucket seat, and everything that was in the back of the truck. I then proceed to cut the old cage out of the back.
I decided on 12", this would put my tailgate at just about frame width and narrow each side 6". I also wanted to make it easyer to get into the back of the truck since the tailgate is welded solid.
Since the shock were going to have to come through the floor, and the ribbed sections of the floor were going to be a pain to work with; I just cut the entire thing out. I will be building a new floor out of expanded steel. Then the tailgate got 12" cut out of the center.
After a couple of Come-Along's, a sledge hammer and a couple days welding, this is how it looks.