1983 Toyota P/U Beginner Build
 12-04-2013, 05:26 PM
#1
Registered User
Thread Starter
1983 Toyota P/U Beginner Build
So my first time doing a real build mostly by myself, i bought an '83 toy p/u
from a guy who didn't really know any kind of dingobarries about the truck.
Now the guy had told me the engine and tranny had been swapped from another
'83, but the tranny (guessing) came from a '93/'92 truck. He had it overhauled by someone from his ex'es family, and from the beginning i could tell the rev's
were set to high( guess he had an overheating problem, so they thought running
it higher will fix it). But once i got the title in my hands and took it home, i began
going deep into making a list on the primer covered bondo layered steel body.
What i know when purchased:
1983 Toyota pickup short-bed
Early 1985 22r ( perfect for hybrid )
After market Carb
Tranny year and model unknown
70-75% Body covered in Bondo
Tri-y Headers, Believe is Doug Thorley
GoodWill $40 Bench seat
Removed stereo system( unknown wires)
From here on i'll start describing what i've done and plan on doing with some pictures to go along
Wish me Luck.

 12-05-2013, 06:01 PM
#4
Registered User
Thread Starter
Well wish could figure how to delete or move the thread myself, but i'm clueless on that.
But to continue on.
Sorry but i forgot to take pic's of the engine hauling process.
The first thing i did was pull the carb out to try and find out what it was. After about
2 hours, i found it to be a 32/36 E-Choke(not connected) Weber. I wish i had taken pic's of the dis-assemble, but it didn't come to mind to make a thread. After cleaning it and checking all the little ports for possibly sand, i put the gasket kit i order from the webers site, about $31-ish.
Then i had taken apart the cylinder head, and oil pan (for peace at mind) to check the condition it was in. The block was just perfect, but the head needed a bit of cleaning and the oil pan bolt hole had to get straighter. After that i took 320 sand paper/cotton like rotary piece and smoothed the combustion camber, and polished.
And just clean up everything else, dirt duel-plane intake, emission ports(thick black walls). The old radiator had a bad core, so i put an aluminum single row just like my 4runners. It does get just a little warm, but i got a hose to redirect, and it only has water in it.
Here's what it look like now
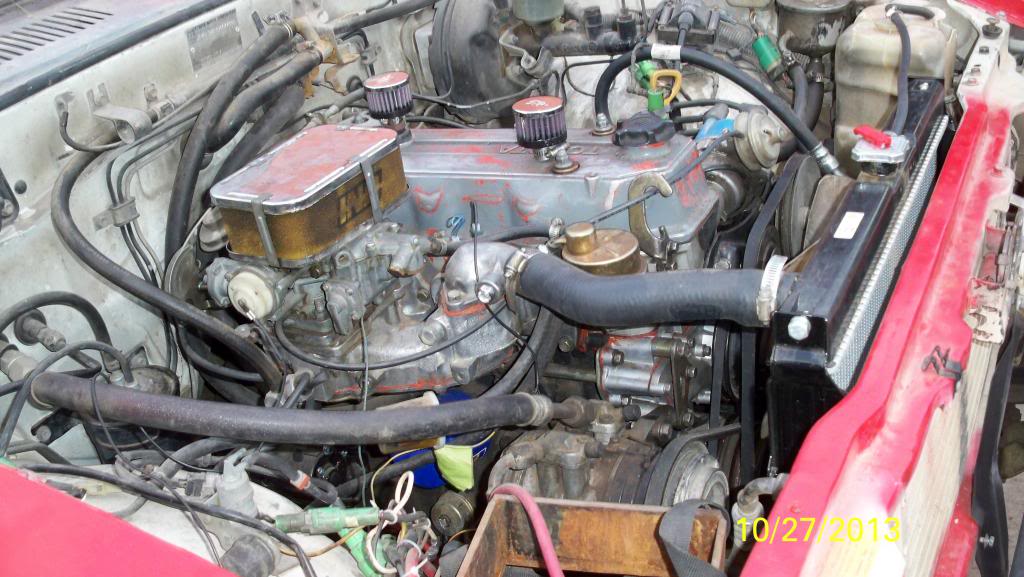
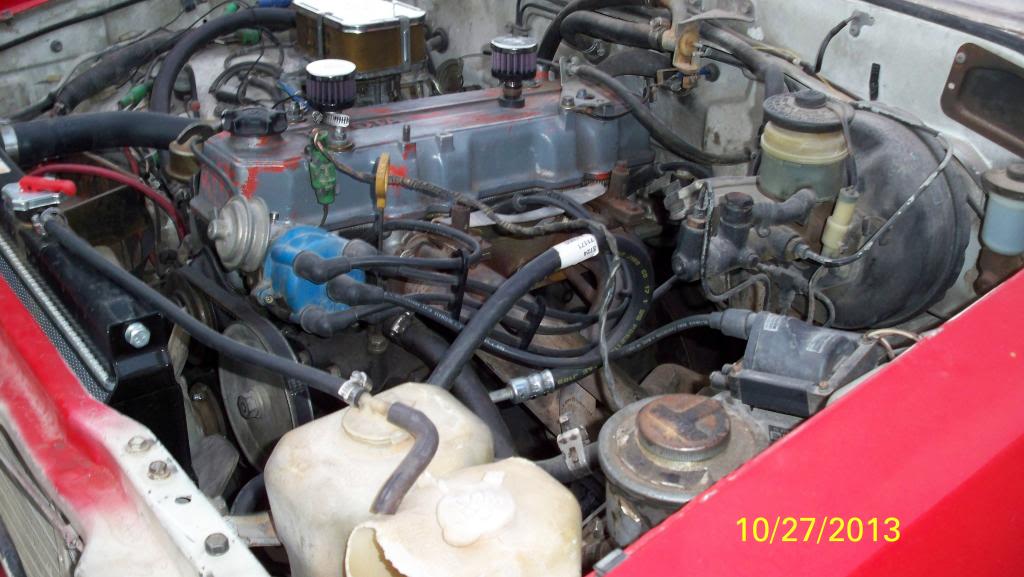
If the the engine is clean,something must be wrong.
After putting it all back together, i made a wire from my alternator to the electric choke.
And man did it start running beautifully, was able to get at 1000 rpms (sounded sexy) and start up.
Had put in for the engine, gaskets, lude, oil filter, cyl. head cover air filters, and a new starter.
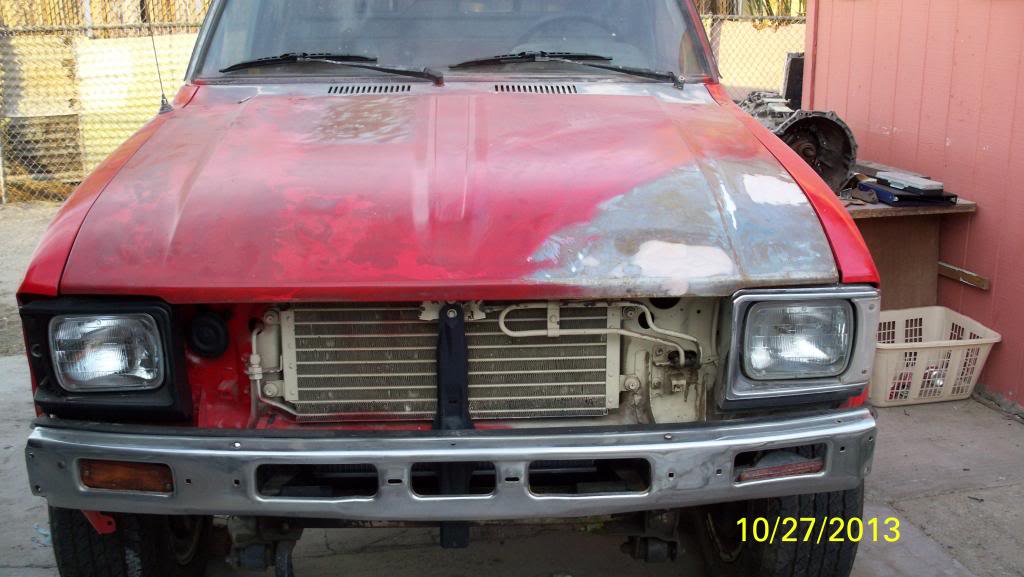
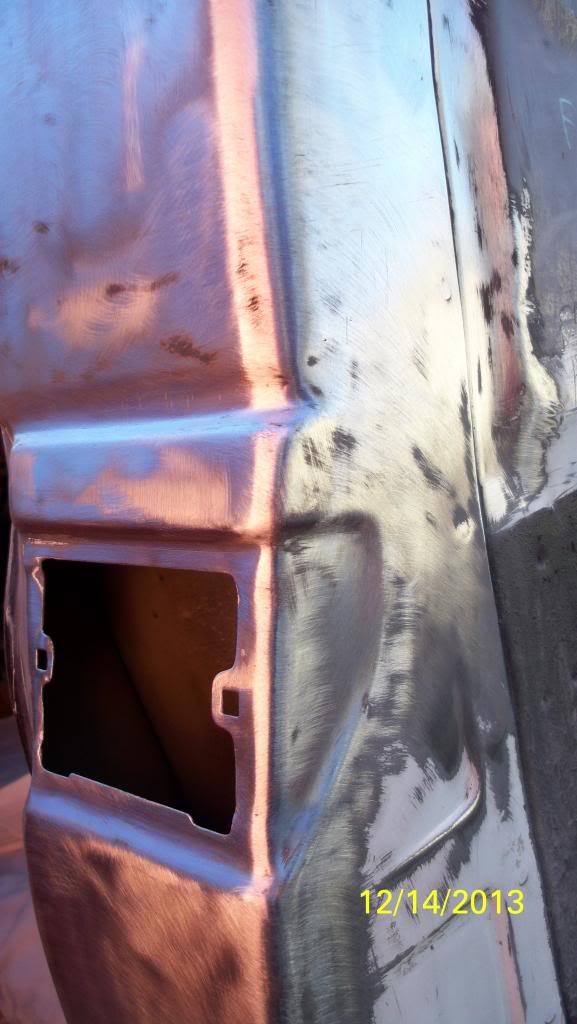
Next was the body, imagine the entire cab, hood, and fenders cover by a layer bondo and then premiered over. I took a 40grit sand paper to the fenders and hood first, went down to the metal, hammered (not to perfection, it is a truck)and cleaned with mineral spirits. Add 3 layers of Rustoleum red cherry enamel, the fenders temporarily done.
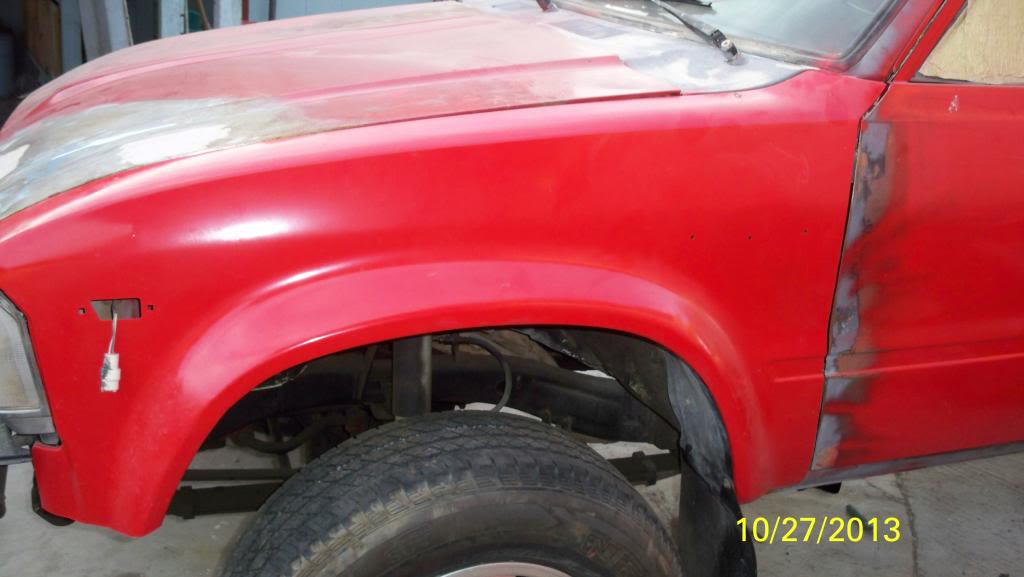
The hood on the other hand i didn't complete, 3 areas i gonna have to bondo since the metal was too stretched. i left it until the rest of the truck gets painted.
But to continue on.
Sorry but i forgot to take pic's of the engine hauling process.
The first thing i did was pull the carb out to try and find out what it was. After about
2 hours, i found it to be a 32/36 E-Choke(not connected) Weber. I wish i had taken pic's of the dis-assemble, but it didn't come to mind to make a thread. After cleaning it and checking all the little ports for possibly sand, i put the gasket kit i order from the webers site, about $31-ish.
Then i had taken apart the cylinder head, and oil pan (for peace at mind) to check the condition it was in. The block was just perfect, but the head needed a bit of cleaning and the oil pan bolt hole had to get straighter. After that i took 320 sand paper/cotton like rotary piece and smoothed the combustion camber, and polished.
And just clean up everything else, dirt duel-plane intake, emission ports(thick black walls). The old radiator had a bad core, so i put an aluminum single row just like my 4runners. It does get just a little warm, but i got a hose to redirect, and it only has water in it.
Here's what it look like now
If the the engine is clean,something must be wrong.
After putting it all back together, i made a wire from my alternator to the electric choke.
And man did it start running beautifully, was able to get at 1000 rpms (sounded sexy) and start up.
Had put in for the engine, gaskets, lude, oil filter, cyl. head cover air filters, and a new starter.
Next was the body, imagine the entire cab, hood, and fenders cover by a layer bondo and then premiered over. I took a 40grit sand paper to the fenders and hood first, went down to the metal, hammered (not to perfection, it is a truck)and cleaned with mineral spirits. Add 3 layers of Rustoleum red cherry enamel, the fenders temporarily done.
The hood on the other hand i didn't complete, 3 areas i gonna have to bondo since the metal was too stretched. i left it until the rest of the truck gets painted.
12-06-2013, 04:51 AM
#6
Looks good! You mentioned you have only water in it now, I suggest flushing it or putting an additive in because water will rust out everything and create nightmares, it also boils at a lower temp than coolant and has not lubrication to it, but the worse thing really is corrosion.
Trending Topics
12-12-2013, 06:05 PM
#9
Registered User
Thread Starter
Continuing on, So one thing i forgot to mention is i had to make a plate above the thermostat since it didn't seal properly. And made my own gasket from those gasket rolls, and sealed nicely.
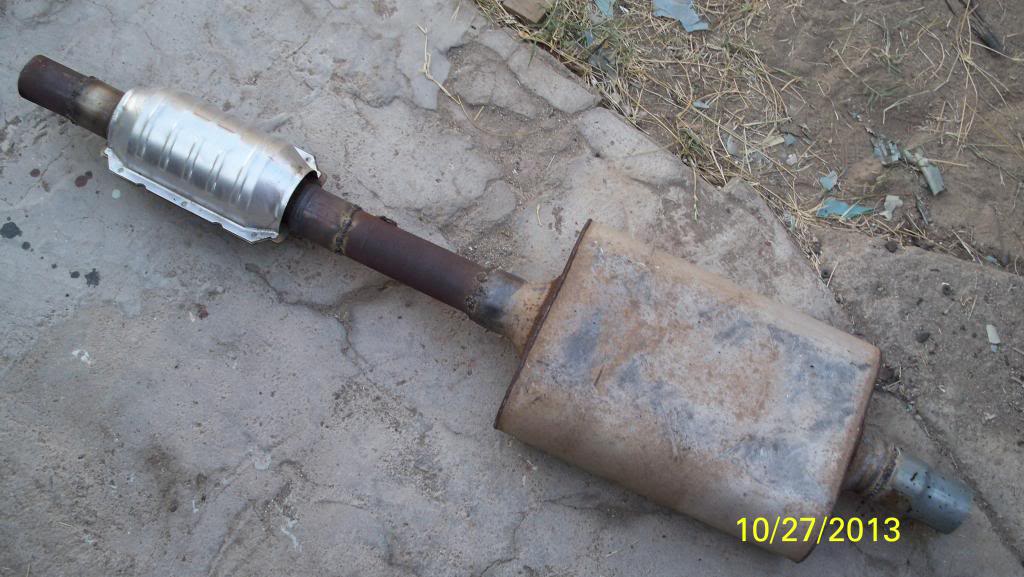
Now you know that the header is a tri-y (nice for this low-end torq.), but when i got it the guy told me the muffler had fell off when he was at a McDanelds drive thru. So i ended up welding a 2"-1 3/4" pipe to the header, then welded some extra pipe i had from my 4runners exhaust to the Flowmaster 60 series muffler. Attached the 49state Magnaflow cat. .
Doesn't really make sense but, i like the reduced engine sound. In my opinion.
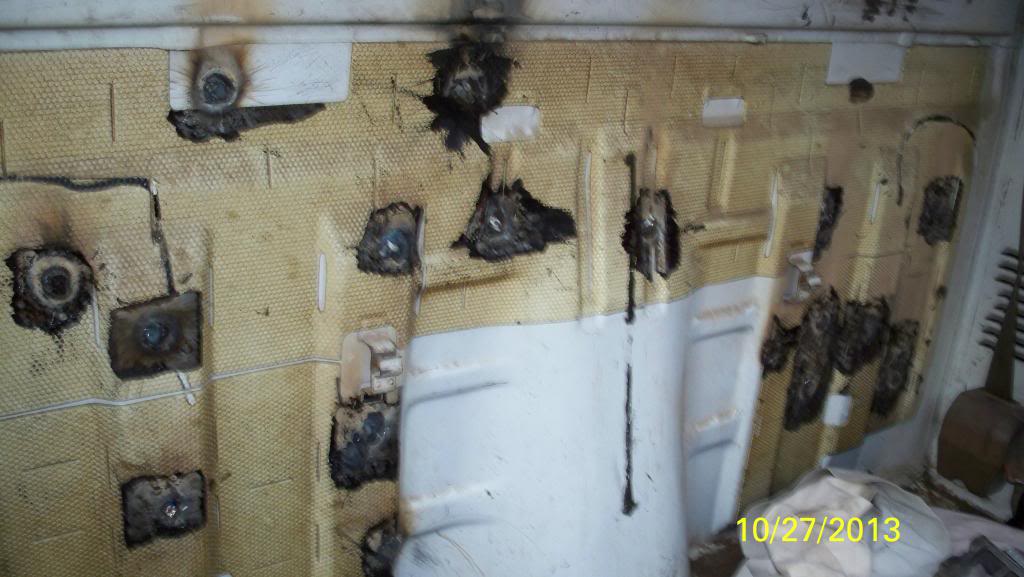
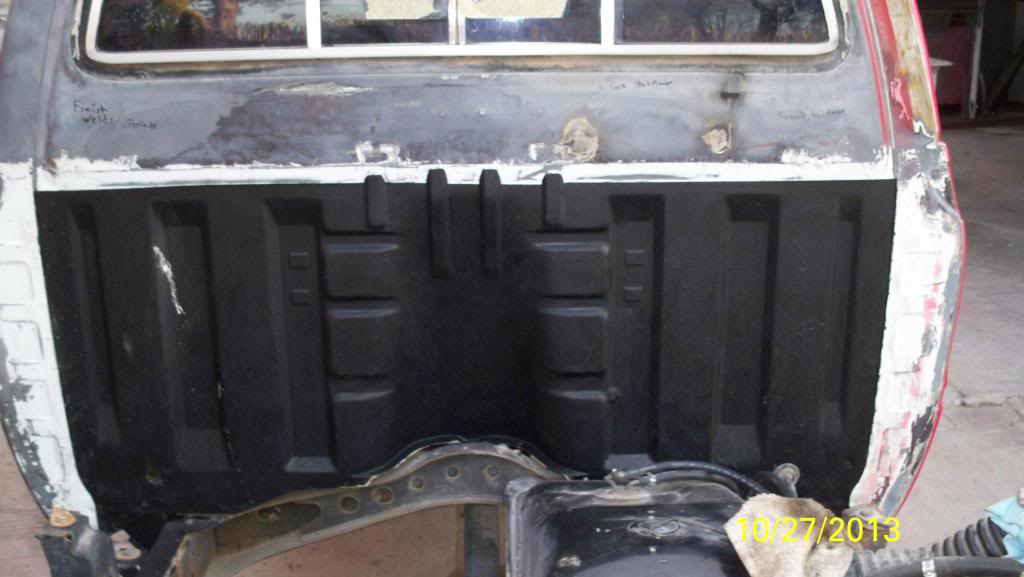
Also i notice a lot of screw holes on the back of the cab, i believe the other guy had a system (amps, crossovers, etc.) in the truck. So i decided to weld those up and smooth the outside of it, then added some Dupli-color Kevlar Bed Armor. Nice.
Had metal termites.
A bird left a gift on the driver side.
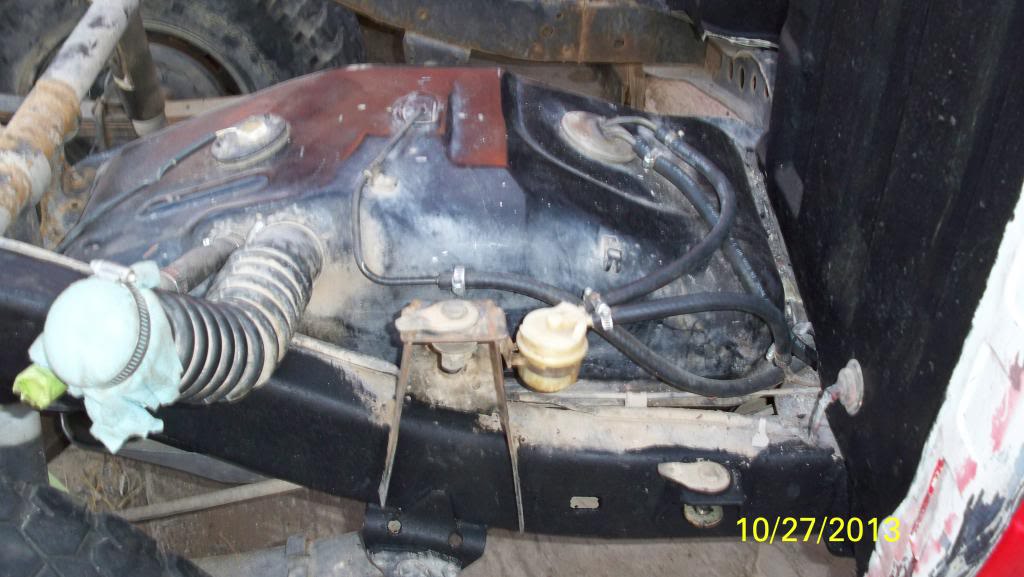
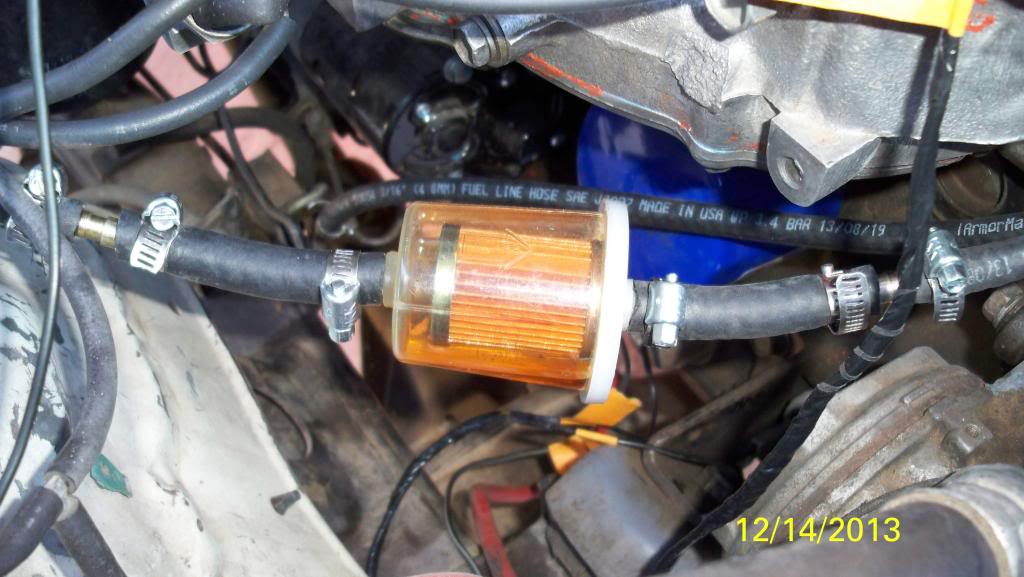
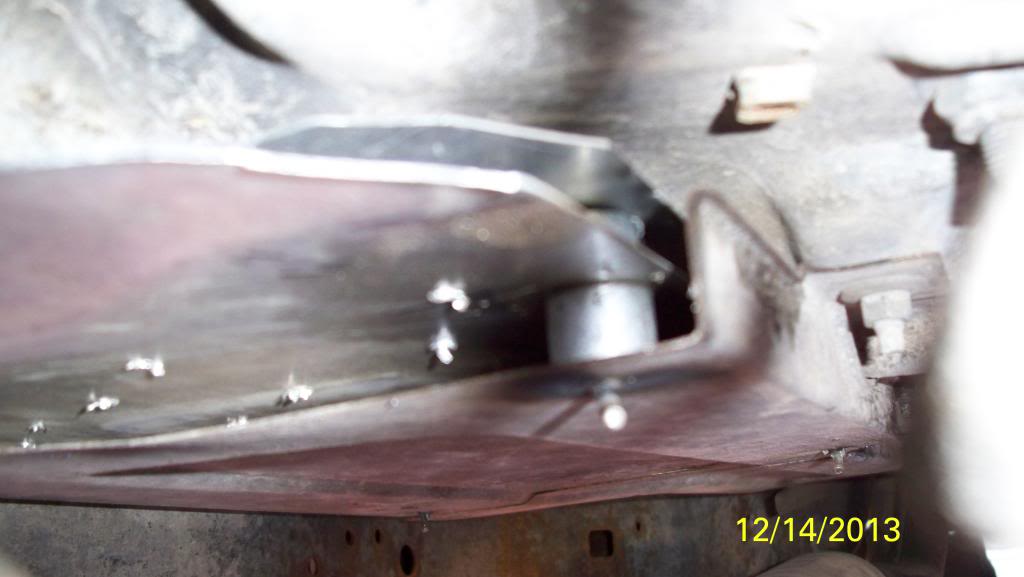
I even did some of the frame (not done), did all the fuel lines and played with the filter i put between the carb. & steel fuel line.
Will get front filter pic later.
On a side note, i thinking of removing this and given it a good cleaning, but on the side line because nothing is wrong with it, no crud in the lines all brakes work. What do you guys think?
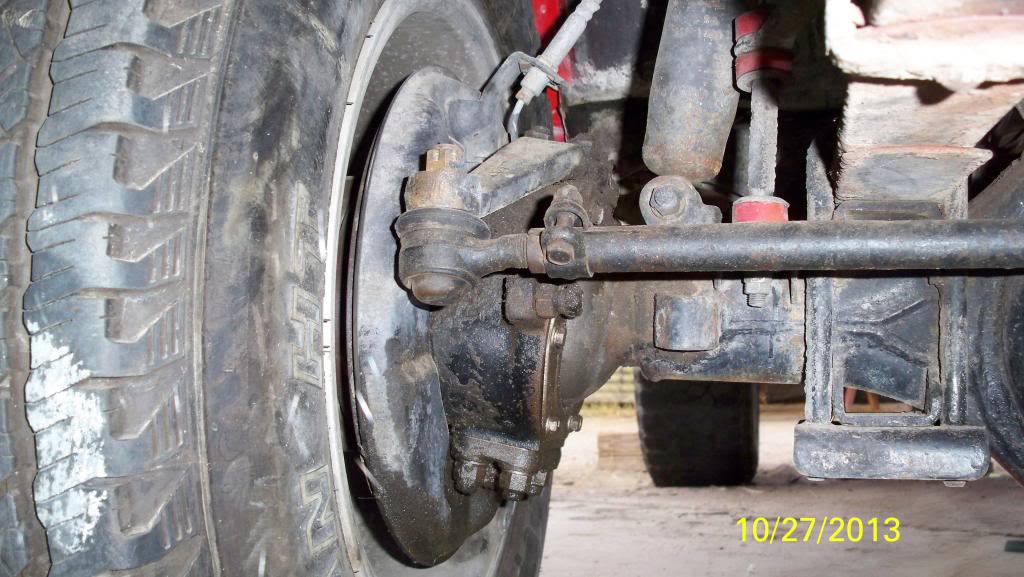
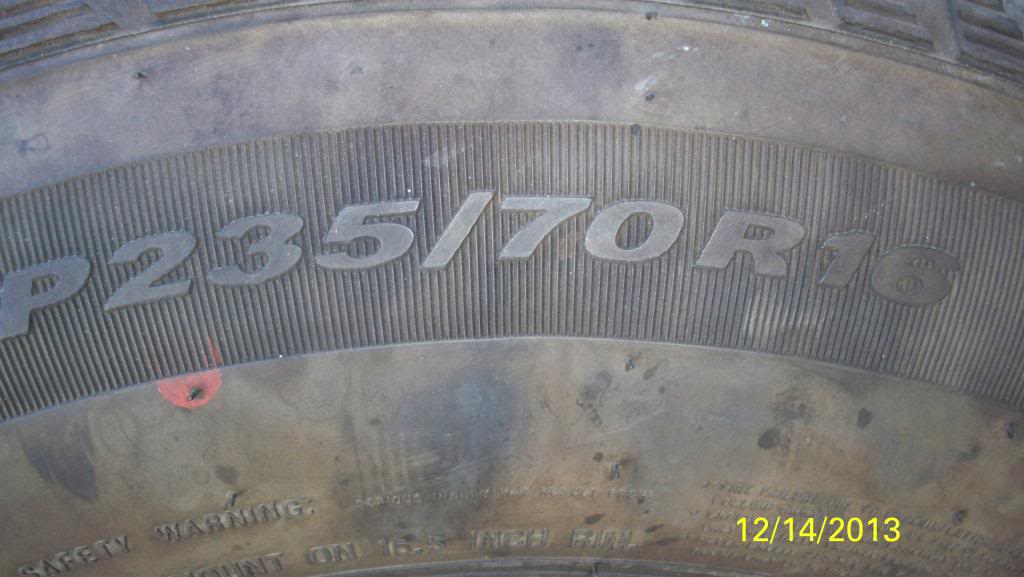
Also put a set of aluminum wheels on 16x8, with an 1.25" wheels spacers on the front. Other wise it would be right on the pitman arm, Before there were 15x11.50 Steelies on 32" BFG M/T's, to much for the 22r to drive done the road with enough push. wasted a 1/4 of the tank going about 8 miles to a buddy's yard, straight from where-when i just bought it.
Nice safe spacing. Will get images
Thanks for watching, stay tuned for your regular scheduled programming.
P.S
To the RTV guys, "Don't judge a book by it's cover".
Now you know that the header is a tri-y (nice for this low-end torq.), but when i got it the guy told me the muffler had fell off when he was at a McDanelds drive thru. So i ended up welding a 2"-1 3/4" pipe to the header, then welded some extra pipe i had from my 4runners exhaust to the Flowmaster 60 series muffler. Attached the 49state Magnaflow cat. .
Doesn't really make sense but, i like the reduced engine sound. In my opinion.
Also i notice a lot of screw holes on the back of the cab, i believe the other guy had a system (amps, crossovers, etc.) in the truck. So i decided to weld those up and smooth the outside of it, then added some Dupli-color Kevlar Bed Armor. Nice.
Had metal termites.
A bird left a gift on the driver side.
I even did some of the frame (not done), did all the fuel lines and played with the filter i put between the carb. & steel fuel line.
Will get front filter pic later.
On a side note, i thinking of removing this and given it a good cleaning, but on the side line because nothing is wrong with it, no crud in the lines all brakes work. What do you guys think?
Also put a set of aluminum wheels on 16x8, with an 1.25" wheels spacers on the front. Other wise it would be right on the pitman arm, Before there were 15x11.50 Steelies on 32" BFG M/T's, to much for the 22r to drive done the road with enough push. wasted a 1/4 of the tank going about 8 miles to a buddy's yard, straight from where-when i just bought it.
Nice safe spacing. Will get images
Thanks for watching, stay tuned for your regular scheduled programming.
P.S
To the RTV guys, "Don't judge a book by it's cover".
 12-13-2013, 08:04 AM
#11
Registered User
Genius! 
For AZ, just to be clear, I'm not mocking your truck at all. Just what a previous owner did to it. If you're the one who did that rtv job, well...I can't say I agree with your methods, but if you know what you're doing, I won't argue!
For AZ, just to be clear, I'm not mocking your truck at all. Just what a previous owner did to it. If you're the one who did that rtv job, well...I can't say I agree with your methods, but if you know what you're doing, I won't argue!
12-13-2013, 07:50 PM
#12
Registered User
Join Date: Oct 2009
Posts: 52
Likes: 0
Received 0 Likes
on
0 Posts
Golly batman, looks like the joker smeared RTV over everything!
Lol jk man.....don't feel bad, when I rebuilt the motor in my mustang whoever had done anything on it used red rtv on everything....needless to say I had a lot of cleaning up to do.
Thankfully the 2 P/O of my truck were pretty smart.....the rebuild job whoever did on my motor is pretty clean, plus they already deleted all the emissions and such
Good luck with the truck, at least yours is in one piece....mine is in about 4378 right now
01-08-2014, 05:57 PM
#13
Registered User
Thread Starter
Throwing some in...
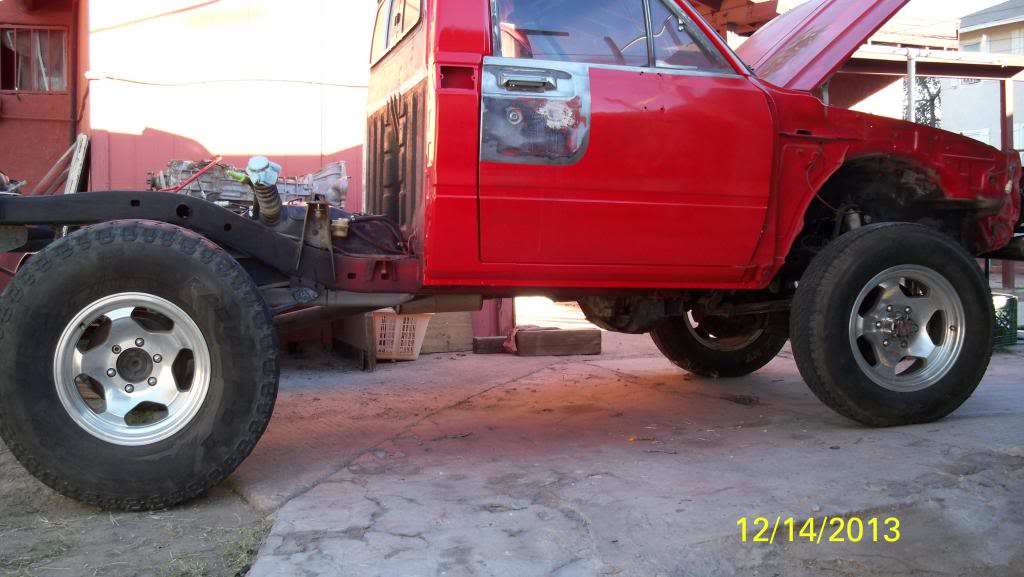
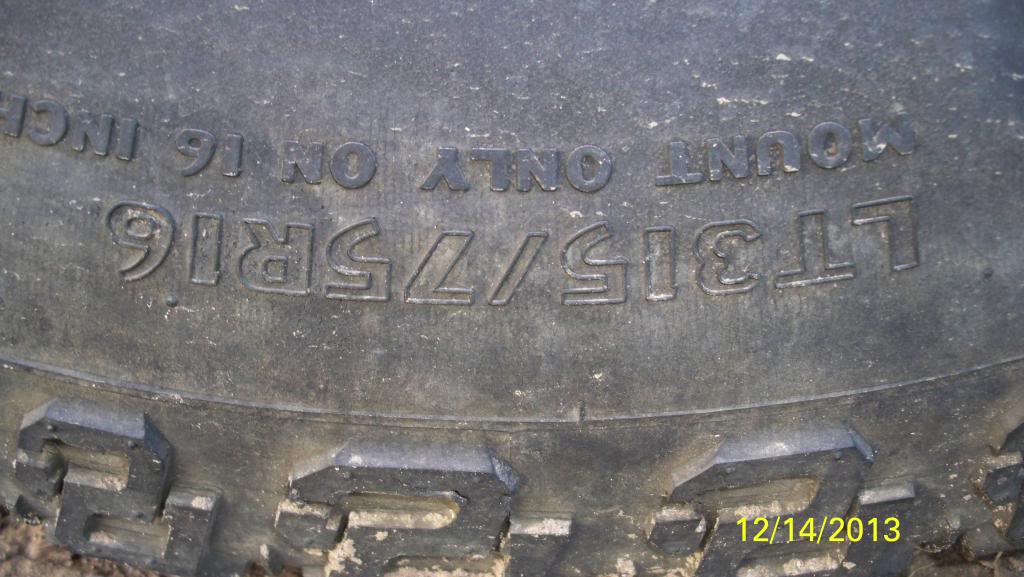
So continuing from the wheels, i bought these wheels from a guy that had them on a dodge diesel truck lifted. The ones from above images, they're aluminum with 2 different sets of tires front and rear. Rear has Mickey's and front Dunlop.
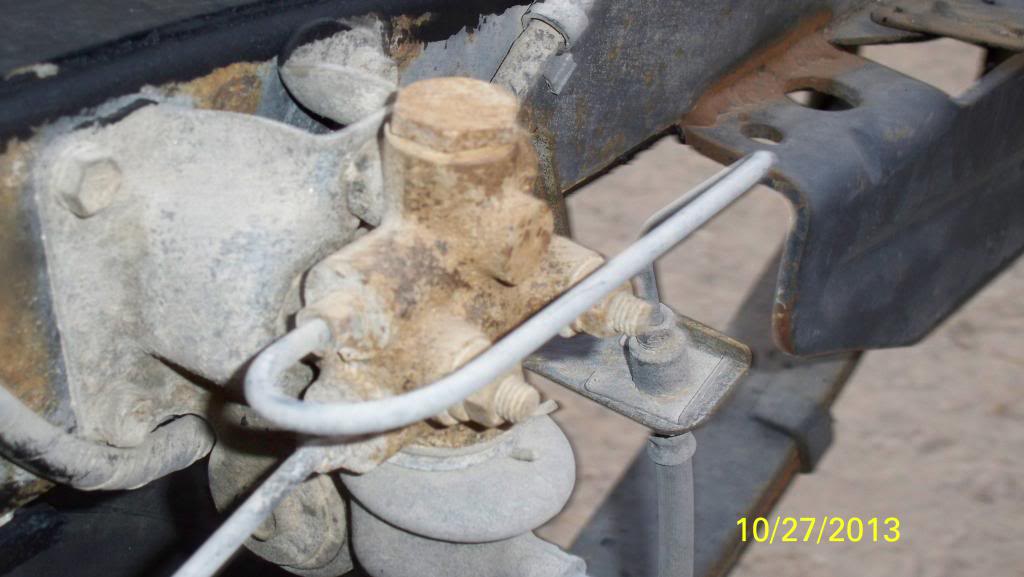
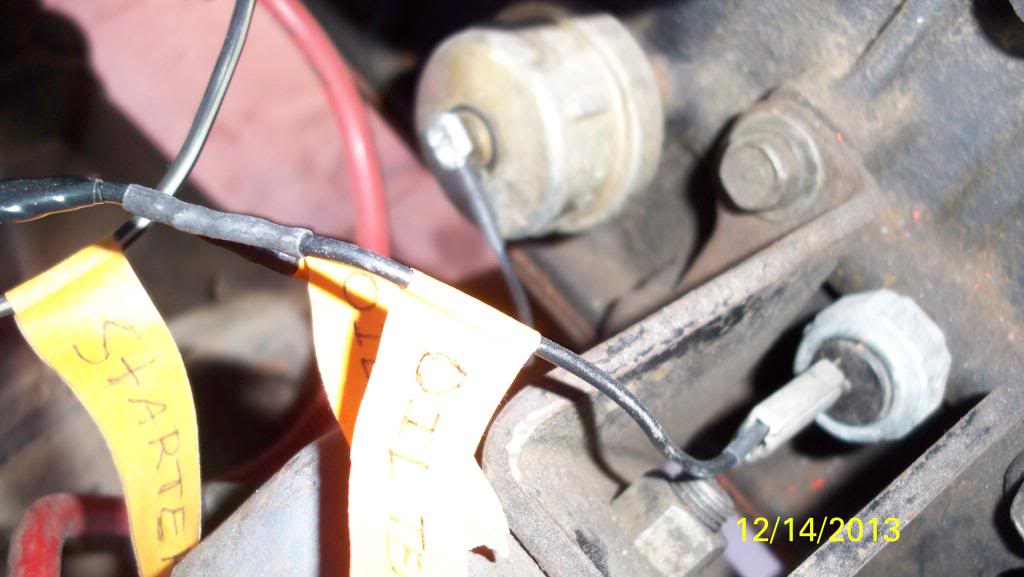
Here's the rigged fuel filter redone with two brass fittings, and correct rubber lines to fit the filter and factory metal lines and fuel pump. Can see the redone wires in the back.
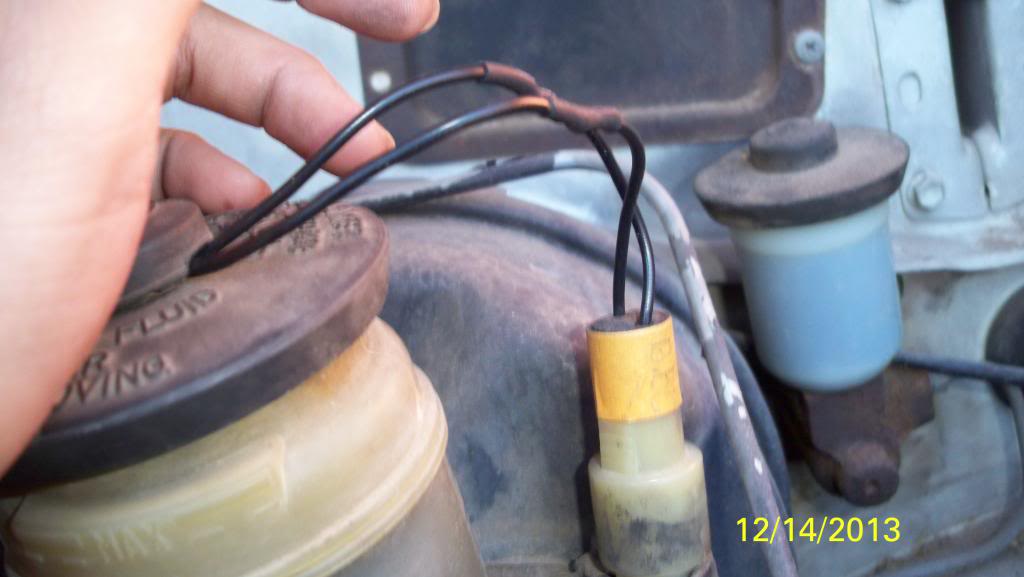
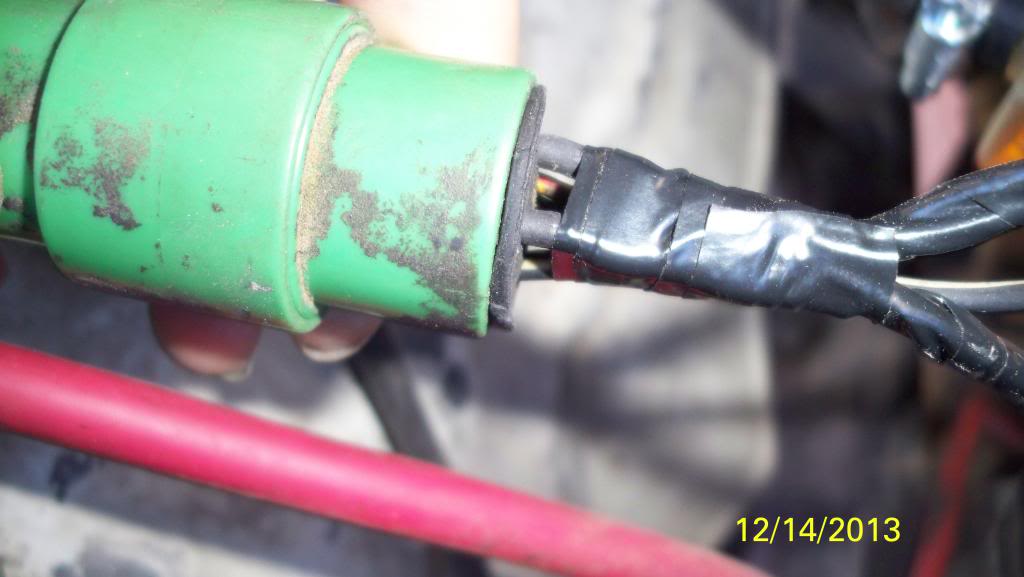
I also re-did some wires on the brake fluid container and plug, plug for four sensors and starter all wires done with 18-gauge.
To give and idea, i take the paint all the way to the metal and then do and final 400/320grit wipe down to the surface and clean with mineral spirits, then add the Rustoleum rattle can.
Here's the two pieces of drilled aluminum sheets and 1" piping on the heat shield to reduce the muffler heat on the drivers side. Double tacked on four screws.
And the plate i had to rig.

and just hold my methods, i apply rtv on the outer half of the gasket to prevent any from entering any open inside areas of the engine. Think as thick as your thumb nail as a layer applied.
And so about 3-weeks ago i bought a 20r engine complete except exhaust header. From a 78 p/u, and since i have the perfect 22r block to match, i'm going to do the hybrid job to it and get a propane kit from gotpropane.com
Hand port the intake/exhaust and hand machine the surfaces but have a shop machine the head to block surface. Will add de-smog plates, use the 20r duel-chains instead on the 22r single. everything else will be from the 22r, nice and simple. If any one's looking for a 20r carb. that needs a overhaul, give a pm.

Here's the rigged fuel filter redone with two brass fittings, and correct rubber lines to fit the filter and factory metal lines and fuel pump. Can see the redone wires in the back.
I also re-did some wires on the brake fluid container and plug, plug for four sensors and starter all wires done with 18-gauge.
To give and idea, i take the paint all the way to the metal and then do and final 400/320grit wipe down to the surface and clean with mineral spirits, then add the Rustoleum rattle can.
Here's the two pieces of drilled aluminum sheets and 1" piping on the heat shield to reduce the muffler heat on the drivers side. Double tacked on four screws.
And the plate i had to rig.
and just hold my methods, i apply rtv on the outer half of the gasket to prevent any from entering any open inside areas of the engine. Think as thick as your thumb nail as a layer applied.
And so about 3-weeks ago i bought a 20r engine complete except exhaust header. From a 78 p/u, and since i have the perfect 22r block to match, i'm going to do the hybrid job to it and get a propane kit from gotpropane.com
Hand port the intake/exhaust and hand machine the surfaces but have a shop machine the head to block surface. Will add de-smog plates, use the 20r duel-chains instead on the 22r single. everything else will be from the 22r, nice and simple. If any one's looking for a 20r carb. that needs a overhaul, give a pm.

Thread
Thread Starter
Forum
Replies
Last Post
RedRunner_87
95.5-2004 Tacomas & 96-2002 4Runners (Build-Up Section)
84
06-01-2021 01:51 PM
MMA_Alex
86-95 Trucks & 4Runners (Build-Up Section)
25
04-18-2017 05:07 AM


