
Writeup: removal of third and locker install
 12-10-2008, 10:13 PM
#1
Registered User
Thread Starter
Writeup: removal of third and locker install
The differential found in the back of many Japanese trucks (and certain domestic axles such as the Ford 9") is mounted in a removable housing that allows for it to be set up at a work bench. This is the case for the rear end of all Toyota trucks and 4Runners. One benefit of this is the ability to swap gear ratios around between trucks. While this isn't difficult to do, it helps to know the steps involved, if for no other reason than to plan how much time to set aside. First time I did this it took me about 4 hours, stopping for break, and cleaning the underside of the truck at the same time. Your mileage my vary.
Note: Sorry, I don't know torque values. They are available in the FSM link, or by searching.
Tools:
Fluids
PART I- Third member removal procedure:
The install is basically the same as the removal, with a few extra steps.
You must scrape the gasket material off the mating surfaces of the axle housing and third member. They must also be free of oil. I use break cleaner on the surfaces once most of the oil is gone. Once this is done, apply a 1/4" bead of RTV gasket material on the third member making sure to go completely around each bolt hole. Then place the third member into position and bolt into place. Only tighten the nuts a little more than finger tight just yet. Let the RTV sealant dry (vulcanize actually) for an hour or two then tighten the bolts to (the appropriate torque).
Apply liberal amounts of blue (medium strength) thread locker on the driveshaft-third member bolts and the 4 bolts which bolt each end of the axle housing to the hub.
Reattach the rear brake lines after removing the plastic bags, and tighten the bolts to 7ft-lbs (not much at all, even with a 6 inch long box wrench. Finally bleed the brakes. There are plenty of writeups on this, so I'll let you search. Here's one: http://www.4x4wire.com/toyota/mainte...leedingbrakes/
If any grease/oil got on the rear brake shoes, spray it with brake cleaner.
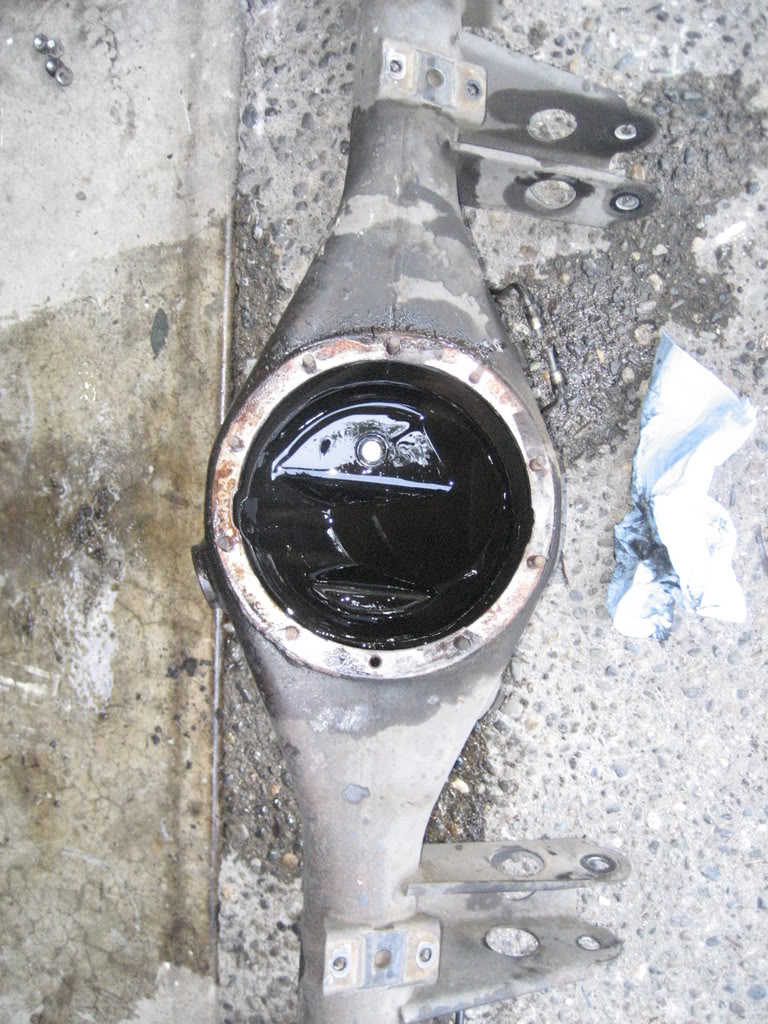
REMEMBER to refill the axle with oil. The thinnest oil I'd use is a 80W90.
All done:

PART II- Installing the a lunchbox locker
Note: this is the procedure fir a 4 cylinder rear diff, although many of the more difficult steps are the same.
Here's another install link, where I got a lot of my knowledge: http://gearinstalls.com/bill.htm
Locker test
After the locked third is re-installed in the axle and the axle filled with gear oil. Jack both rear wheels off the ground and put the tranny in neutral. Spin the tires by hand one way then jerk it the other way, it should unlock from the other tire, and make a clicking sound. If so, the locker is good to go for a drive.
I did a review of the Aussie Locker, it has lots of info on driving a lunchbox (spider replacement) locker in general though. Here's the thread: https://www.yotatech.com/forums/f105...review-143163/
Note: Sorry, I don't know torque values. They are available in the FSM link, or by searching.
Tools:
- 10, 12, 14mm wrenches
- 10, 12, 14mm sockets and socket wrench
- 24mm socket for diff drain and fill plugs
- >3" socket extension
- razor blade or gasket scraper, steel wool is also helpful
- empty beer bottle or jar, as well as 3 feet clear 1/4" tubing for bleeding brakes
- a wheeled creeper is helpful
- 2 jackstands
- some sort of jack
- oil container to drain oil into.
Fluids
- 3 quarts (actually 2.3 quarts) 80W90 gear oil (or thicker- I use 85W140 to quiet my locker down)
- minimum a quart of DOT 3 brake fluid
- oil resistant RTV sealant (I've used black, ultra grey and ultra copper, none leaked)
- blue (med strength) thread locker.
PART I- Third member removal procedure:
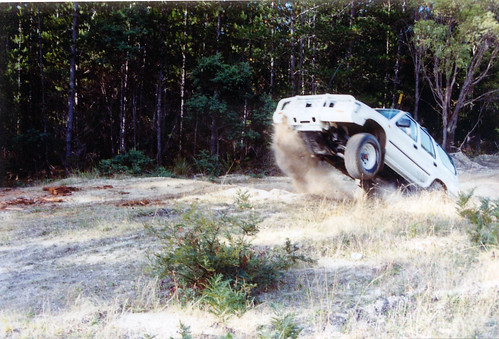
- Take the truck for a spirited drive to warm up the gear oil.
- Disconnect the 4 14mm bolts securing the rear driveshaft to the third member. Sometimes you need to get a chisel in there to separate the driveshaft from the pinion flange on the third member.
- loosen the lug nuts
- jack up the truck and support it with jack stands
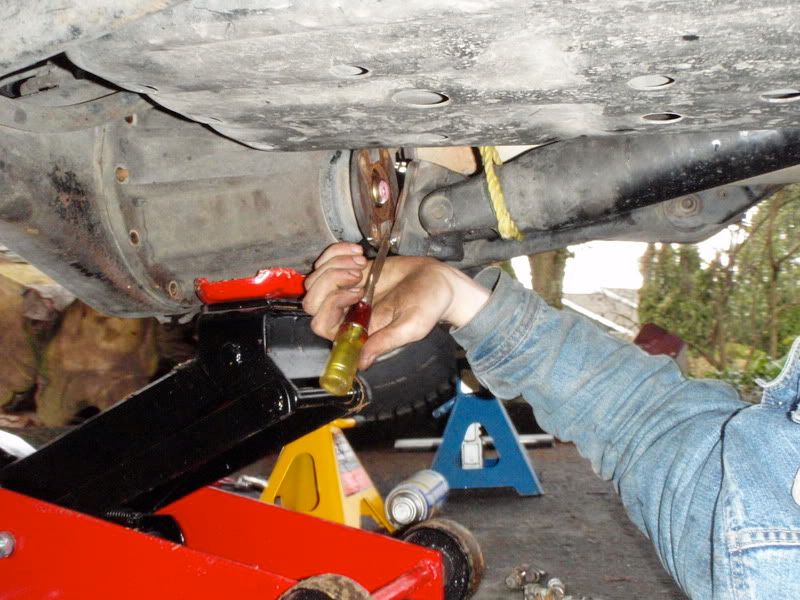
P4050034.jpg?t=1211307465 - open the differential fill plug bolt, THEN undo the drain plug. The rational behind this is that if you drain the oil, then find out there is no way to refill it, you're looking at hiring a flat bed to take your truck to a mechanic to get the fill plug open
- Remove the wheels, then the drums. The drums are simply sandwhiched between the wheel and the hub.
- With your fingers or a set of pliers, undo the parking brake cable.
P4050036.jpg?t=1211307557 - Undo the 4 bolts securing the hub to the axle housing.

- Undo the brake line where it enters the back of the backing plate (not sure what exactly its called, please correct me if you do).
- Get a plastic bag and put it over the open end of the brake line. Secure with an elastic. This prevents the brake fluid from gravity bleeding out of the line. THis is quite important as is all the brake fluid drains out (over several hours) and the master cylinder drains dry, then you've got to bleed the MC (lots more work).
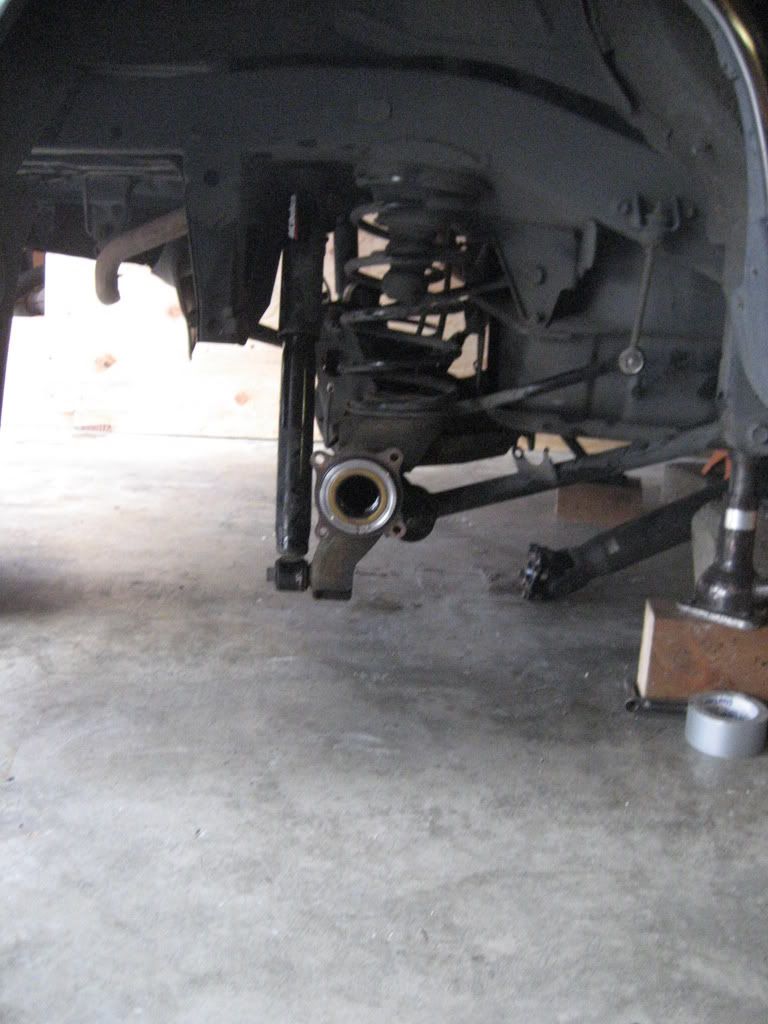
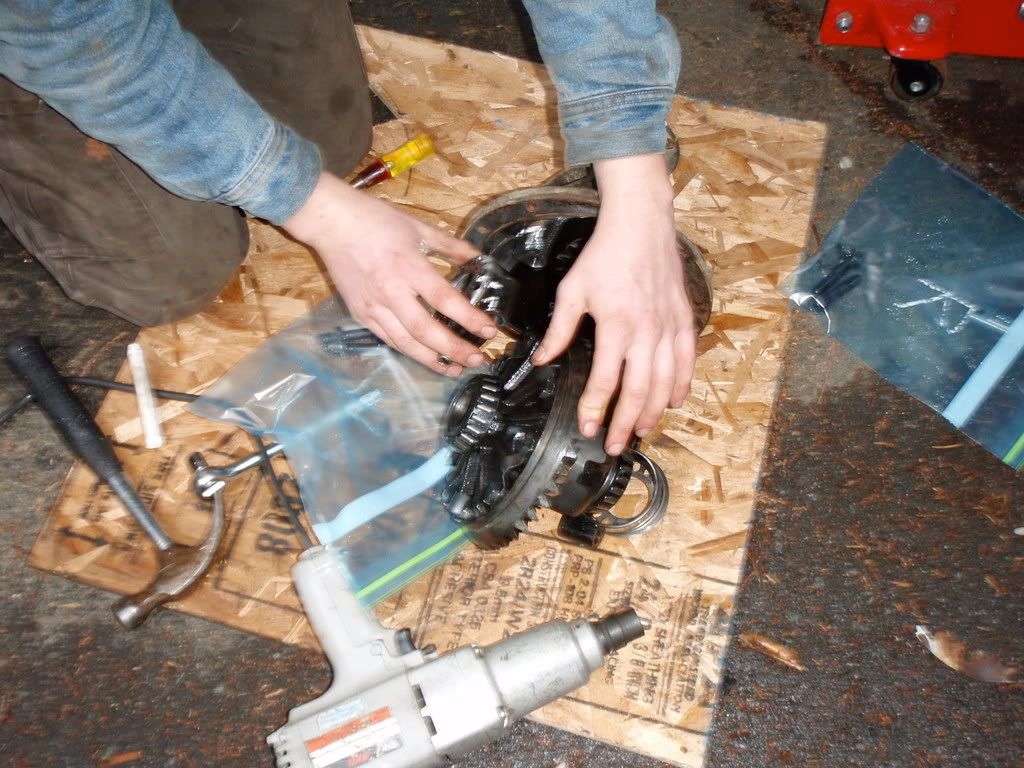
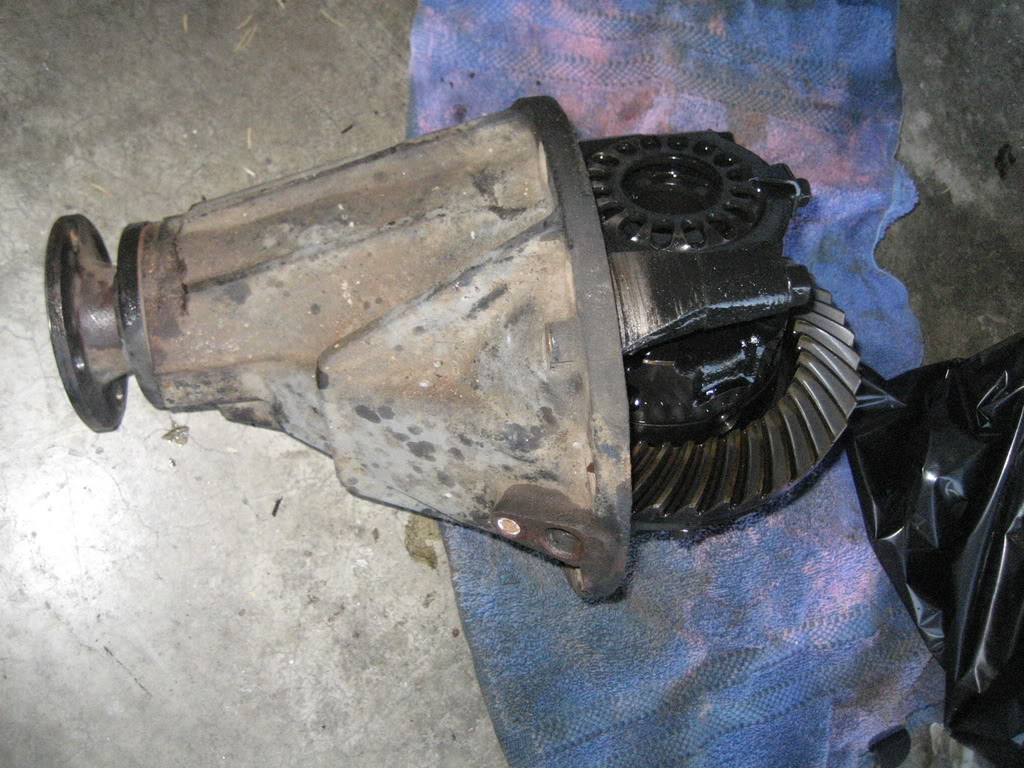
- the axles should pull out freely from the axle housing now. Remove them completely (best not let rest them on the axle seal, as the axle may start leaking) and set them aside. Here is the seal you are trying to avoid damaging.
- REmove the ABS pigtail from the diff as so, it comes out the top of the diff and extends to the body.:
... all that is required to remove the pigtail from the housing is a 12mm socket to undo the 1 support bracket from the 3rd member outer ring, and 1 bolt holding the sensor down... then get a big long flat head screw driver and work your way under the sensor and slowly keep prying up on it till it pops out...
took me about 3 mins to pry mine out...
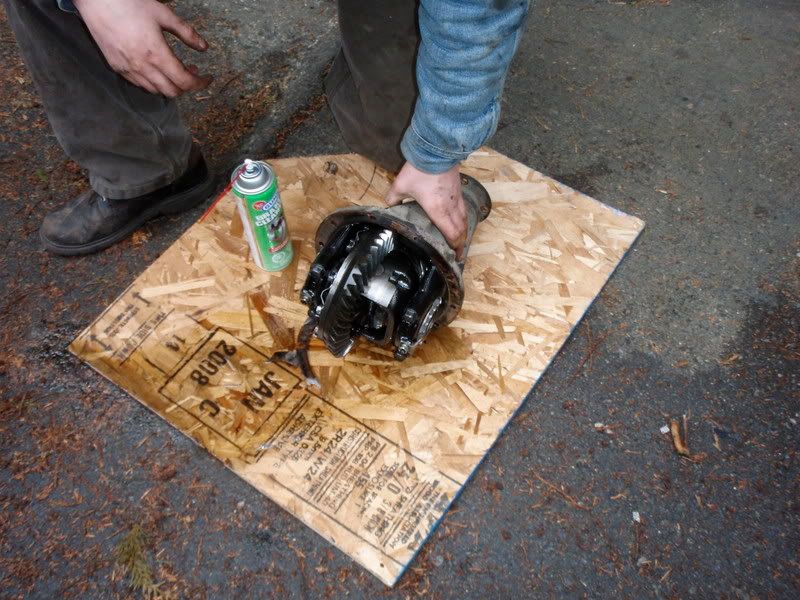
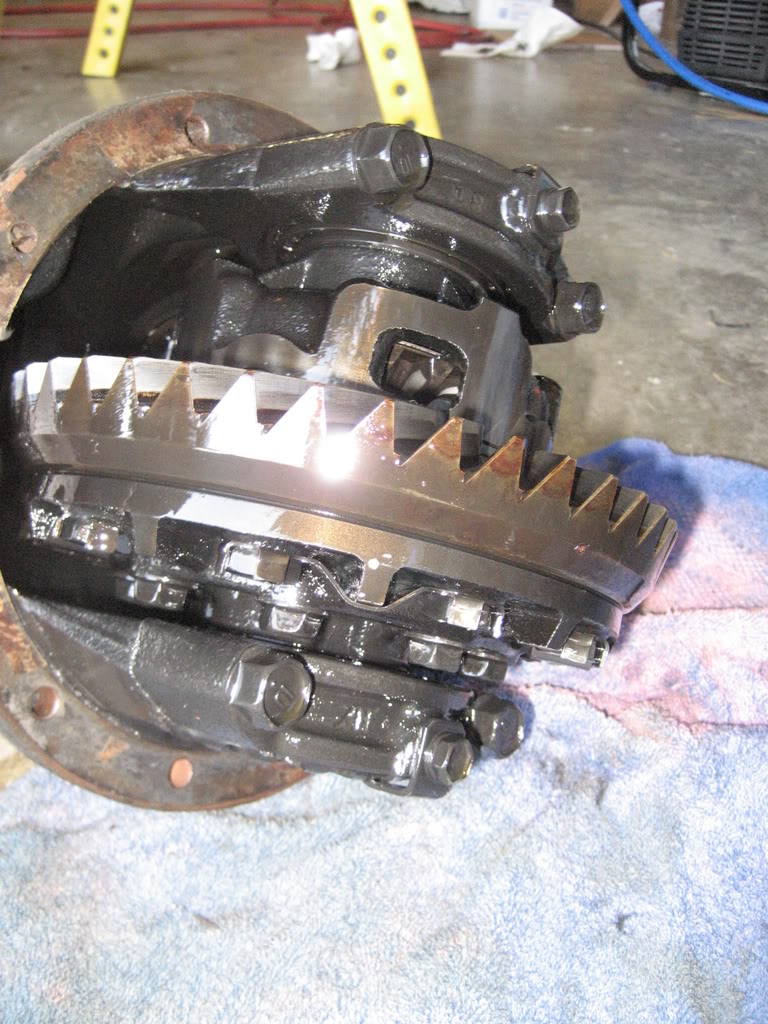
also, its prolly best to do that after you have the dif out on the jack... makes it easier to turn the wrench... - Unbolt the third member from the axle housing. I think there are ten 12mm nuts to remove. Its 60lbs or so, but it won't just drop on you as it will hang up on the studs. You do have to wrestle is out a bit. Putting a floor jack under the pinion flange will break the diff-axle housing seal (that RTV holds really well).
- I find it easiest to position myself under the axle laying on a creeper and wrestle it out onto my chest. If you have a rear swaybar, the diff may catch on this. To remedy this, you can unbolt the swaybar end links from the frame.
The install is basically the same as the removal, with a few extra steps.
You must scrape the gasket material off the mating surfaces of the axle housing and third member. They must also be free of oil. I use break cleaner on the surfaces once most of the oil is gone. Once this is done, apply a 1/4" bead of RTV gasket material on the third member making sure to go completely around each bolt hole. Then place the third member into position and bolt into place. Only tighten the nuts a little more than finger tight just yet. Let the RTV sealant dry (vulcanize actually) for an hour or two then tighten the bolts to (the appropriate torque).
Apply liberal amounts of blue (medium strength) thread locker on the driveshaft-third member bolts and the 4 bolts which bolt each end of the axle housing to the hub.
Reattach the rear brake lines after removing the plastic bags, and tighten the bolts to 7ft-lbs (not much at all, even with a 6 inch long box wrench. Finally bleed the brakes. There are plenty of writeups on this, so I'll let you search. Here's one: http://www.4x4wire.com/toyota/mainte...leedingbrakes/
If any grease/oil got on the rear brake shoes, spray it with brake cleaner.
REMEMBER to refill the axle with oil. The thinnest oil I'd use is a 80W90.
All done:
PART II- Installing the a lunchbox locker
Note: this is the procedure fir a 4 cylinder rear diff, although many of the more difficult steps are the same.
Here's another install link, where I got a lot of my knowledge: http://gearinstalls.com/bill.htm
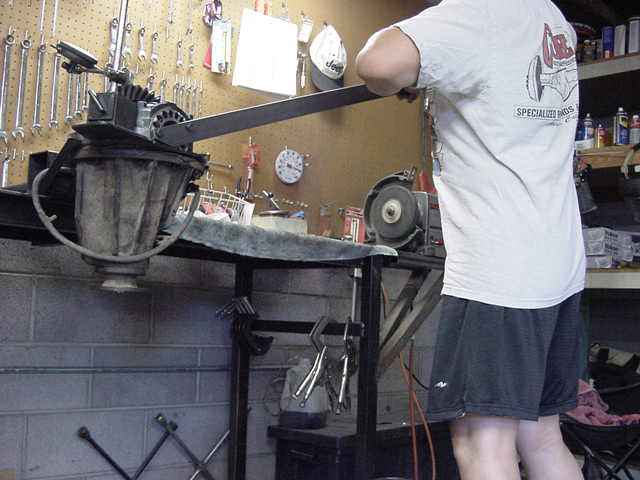
- spray down the third member with brake cleaner to make the job less messy
- place the third member in some home-made jig to hold it still.


- Mark the adjuster nuts relative to the bearing caps, use different markings for each side (ie: I used a double punch mark on one side, and a single one on the other)
- Its crucial to make sure the bearing races and marked bearing caps go back on the side of the carrier they came off of. I used to marked plastic bags- one for each side.
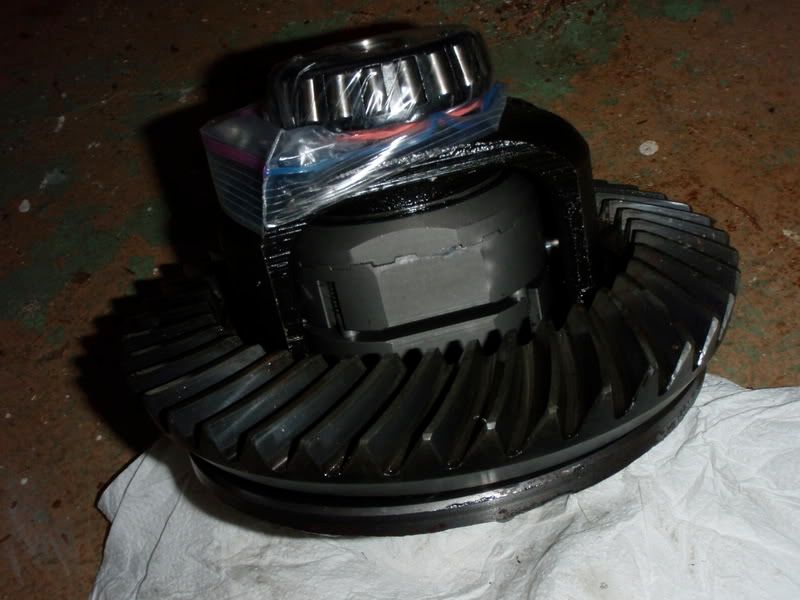
- Mark the ring gear relative to the carrier.
- Remove the ring gear from the carrier with an impact wrench or use whatever you have (do not apply a torch).
- With a drill bit about the size of the roll pin, drill out the dented toll pin hole
- tap out the roll pin using a nail or sacrifical punch or drill bit.
- the cross pin, spacers and spider gears should fall out. Keep track of which shim washer came from which side as these are re-installed with the locker
- Assemble the locker (really simple to do, no explanation necessary), take the measurements its asks for with a $3 feeler gauge from an autoparts store. Note bags used to prevent grit from getting in the bearings.

- Put the roll pin back in and dimple the opening with a punch to prevent the pin from backing out
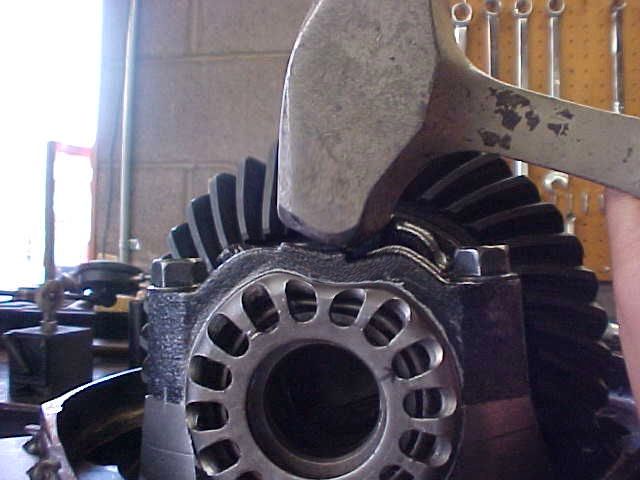
- tap the ring gear back on with a piece of wood. Remember to lined it up so it is the same orientation as when you removed it. If it is too tight, warm it up until it is too hot to hold for long, but not long enough that it burns you (or else you may ruin the metal temper). Bolts ring gear back on to carrier. Use red thread locker and torque to spec.
- Apply aluminum-based anti-seize compound to the treads of the bearing cap, third member and the outside of the bearing races
- Place races in on the bearings (on their respective sides- don't mix them up!!!) and lower the carrier into the third member.
- Place adjuster wheels in position on their respective sides (or else markings will be useless)
- Place the bearing caps in positions (again, on their respective sides) and hand tighten the bolts.
IMPORTANT STEPS that I misread the first time: - Make sure the adjuster wheel thread aren't cross-threaded, then tighten the ring gear-side adjuster (teeth pointing AWAY from this adjuster wheel) until the backlash is zero, then back the adjuster out until the punch marks lines up. This should be less than one full turn. Tap on the bearing cap as you're doing this to make sure the treads settle properly.


^ maybe not
- Tighten the pinion-side adjuster wheel (the side being faced by the ring gear teeth) until it reaches it's mark and has some resistance to turning any tighter. Tap on the bearing caps while doing this, after the adjusters have reached their mark, hold the pinion flange (where the driveshaft bolts to) and try to turn the ring gear back and forth. It should make a tiny tapping noise indicating that there is the tiniest bit of play between the gear. The amount of play should be small enough that you should be barely able to notice it with the naked eye.
I copied Zuk's adjuster tool. Its just a flat piece of metal with two bolts going through it that line up with the holes in the adjuster wheel.
- Once the BL is reset, torque both bearing caps down and bolt on the little adjuster wheel lock.
- Re install the third member as described above.
Locker test
After the locked third is re-installed in the axle and the axle filled with gear oil. Jack both rear wheels off the ground and put the tranny in neutral. Spin the tires by hand one way then jerk it the other way, it should unlock from the other tire, and make a clicking sound. If so, the locker is good to go for a drive.
I did a review of the Aussie Locker, it has lots of info on driving a lunchbox (spider replacement) locker in general though. Here's the thread: https://www.yotatech.com/forums/f105...review-143163/
Last edited by Matt16; 12-13-2010 at 10:17 AM.
 12-11-2008, 02:04 PM
#6
Contributing Member

I like the fact that you noted to pull the axels ALL THE WAY OUT and not to rest them in the axel housing!
Also, once you get those axels pulled out, if your rear-wheel bearings look and act like this:
[YOUTUBE]http://www.youtube.com/watch?v=drNNsdHWAeM&feature=channel_page[/YOUTUBE]
REPLACE THEM!
and those outter seals...
excellent write up man!
12-11-2008, 10:18 PM
#7
Registered User
Thread Starter
Trending Topics
12-11-2008, 10:29 PM
#8
Registered User
 12-12-2008, 06:01 AM
#9
Registered User
The plastic bag trick on the brake lines is messy. Use a couple of rubber caps that are used to block unused vacuum lines to stop the fluid from leaking out.
BTW: I'm curious about the suggestion of using 140W oil to help quiet the locker. I have a detroit and it's noisy when coasting. Anyone else experience this?
BTW: I'm curious about the suggestion of using 140W oil to help quiet the locker. I have a detroit and it's noisy when coasting. Anyone else experience this?
12-12-2008, 07:01 AM
#10
Registered User
12-12-2008, 08:54 AM
#11
Registered User
Thread Starter
12-12-2008, 08:58 AM
#12
Registered User
Thread Starter
The plastic bag trick on the brake lines is messy. Use a couple of rubber caps that are used to block unused vacuum lines to stop the fluid from leaking out.
BTW: I'm curious about the suggestion of using 140W oil to help quiet the locker. I have a detroit and it's noisy when coasting. Anyone else experience this?
BTW: I'm curious about the suggestion of using 140W oil to help quiet the locker. I have a detroit and it's noisy when coasting. Anyone else experience this?
12-18-2008, 12:21 AM
#13
Registered User
Thread Starter
To the mods: I added a second part- installing a locker- could you change the title to reflect that please? Thanks.
See original post for locker install instructions.
See original post for locker install instructions.
Last edited by Matt16; 12-18-2008 at 12:22 AM.
12-18-2008, 08:35 AM
#14
Registered User

Join Date: Oct 2008
Location: Murrells Inlet, SC
Posts: 45
Likes: 0
Received 0 Likes
on
0 Posts
...
Good write-up! I have a question...in the pictures that you and SR5 posted, the middle part of the third(where the locker/spider gears go) looks different. Yours has a big hole to slide in the locker and his only has 4 little hole that you can look in and see the spider gears. What is the difference?? Mine is like the one that SR5 posted.
Please, forgive the ignorance.
Mike
Please, forgive the ignorance.
Mike
Last edited by MKW; 12-18-2008 at 08:36 AM.
12-18-2008, 09:18 AM
#15
Registered User
Join Date: May 2007
Location: Shoreline, Wa
Posts: 775
Likes: 0
Received 0 Likes
on
0 Posts
Good write-up! I have a question...in the pictures that you and SR5 posted, the middle part of the third(where the locker/spider gears go) looks different. Yours has a big hole to slide in the locker and his only has 4 little hole that you can look in and see the spider gears. What is the difference?? Mine is like the one that SR5 posted.
Please, forgive the ignorance.
Mike
Please, forgive the ignorance.
Mike
 12-18-2008, 01:31 PM
#18
The plastic bag trick on the brake lines is messy. Use a couple of rubber caps that are used to block unused vacuum lines to stop the fluid from leaking out.
BTW: I'm curious about the suggestion of using 140W oil to help quiet the locker. I have a detroit and it's noisy when coasting. Anyone else experience this?
BTW: I'm curious about the suggestion of using 140W oil to help quiet the locker. I have a detroit and it's noisy when coasting. Anyone else experience this?
Matt16---You did such a nice job of 3rd member removal/Aussie install that when I get home in a couple hours I will add this thread to one of my Aussie install links. Your write-up will 'enhance' or give a breathe of fresh air to my Aussie install link. I might put your write up on this one shown near the bottom of this page....

http://aussielocker.com/install.php/TM7c35fd/f8a2/.html
ZUK


