
How To Replace Your Shackles: A Pictorial
 Mar 9, 2010 | 07:15 AM
#1
Thread Starter
Registered User
Joined: Feb 2009
Posts: 60
Likes: 0
How To Replace Your Shackles: A Pictorial
Alright, I know this is basic to most folks, but sometimes a little picture tutorial
is all someone needs to attempt something they wouldn't otherwise have the
confidence to do! So, that being said, I will document below how I changed the rear
leaf spring shackles and bushings on my 1988 XtraCab Pickup.
Alright, for a little background, I was looking to get the back of the truck up a
little bit. Also, I didn't know what condition my current shackles and bushings were
so I figured after 22 years they could probably use a change. The stock shackles on
my truck are 3.5" long, from center of hole to center of hole. Now, after spending
some time review 4Crawler's website, I came to understand the physics of the leaf
spring better and realized that if my shackles were normally at roughly 45 degrees
from vertical I would need a 2" longer shackle to achieve the desired 1" of lift.
After looking at my shackles, I figured they were actually at probably closer to 30
degrees from vertical so I would net a little more than 50% of the shackle length
increase in height. I considered making my own shackles as I have some access to
material, but after adding up the cost of buying the hardware, 9/16" or 5/8"
drillbits (harder to find than you think, and $$$), and spending the time it was no
longer practical. So, I figured I would go with the ultra heavy duty TrailGear 5.5"
shackles as they are actually about the only aftermarket shackle I could find. On a
last minute whim, I checked the eBay and found a set of used TG 5" shackles and
bolts and got them to my door for around $35. Not Bad! Ok, now for the install!
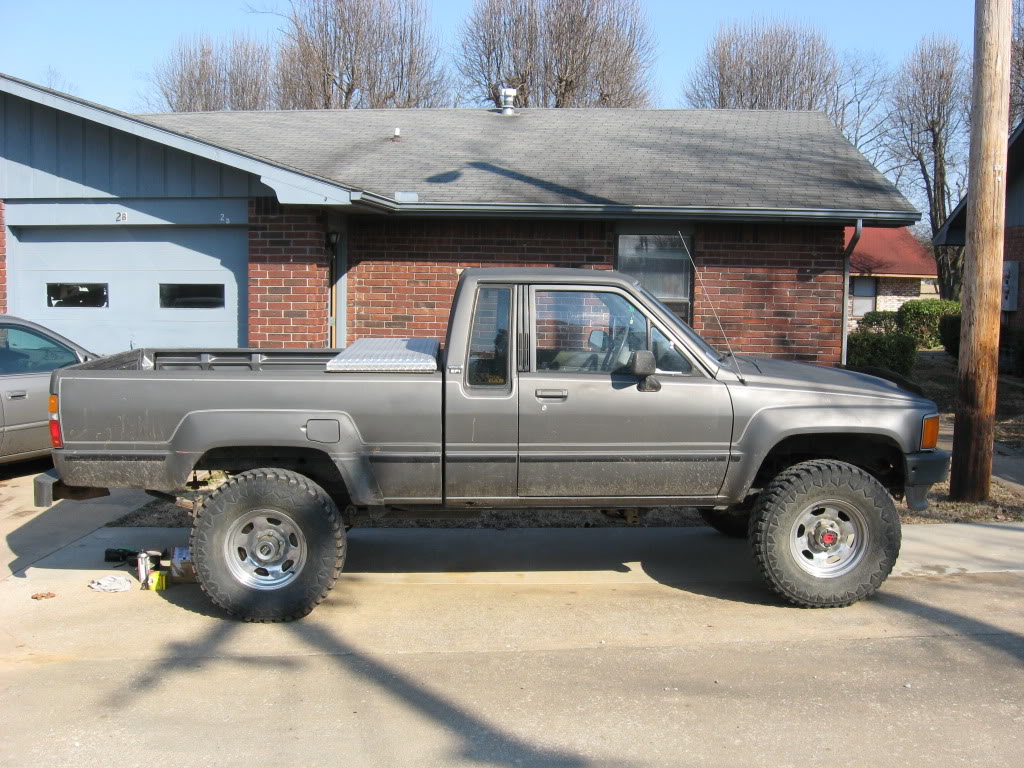
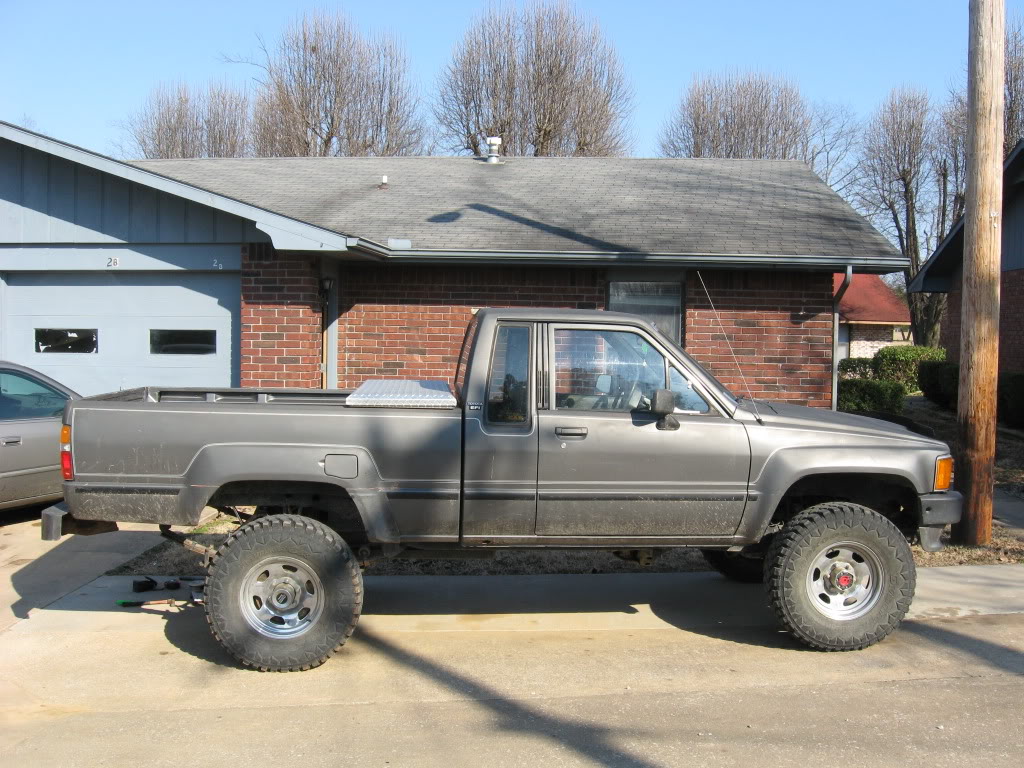
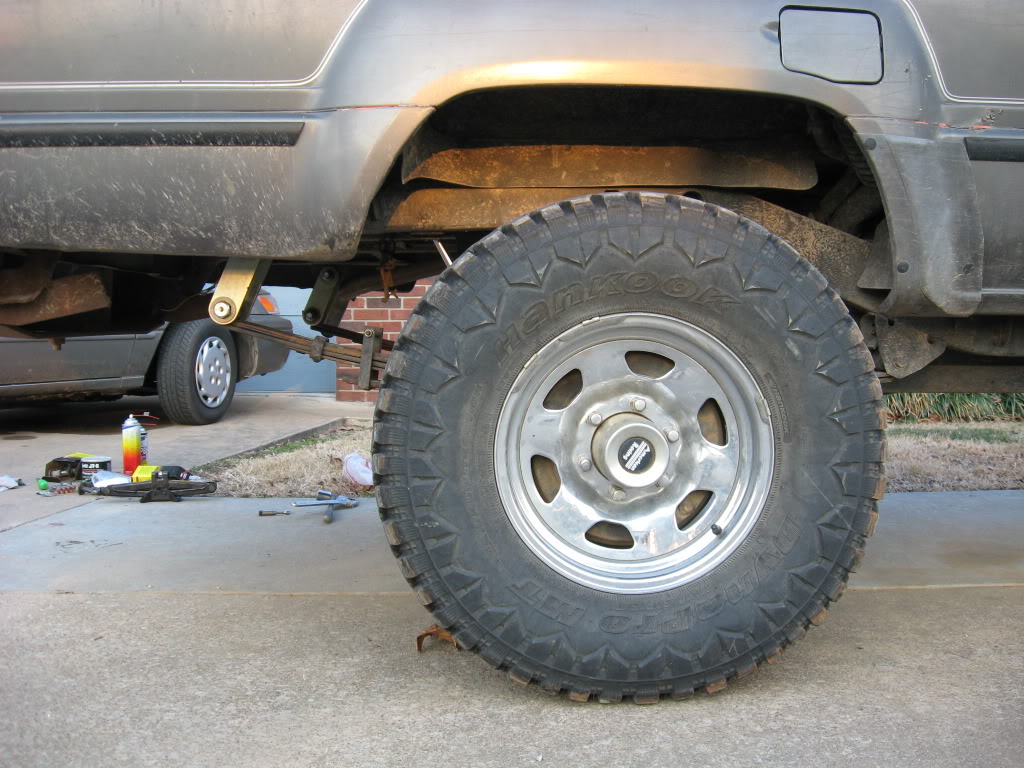
Ok, lets start with the 'ol before shot. For reference, those are 31" Hankooks:
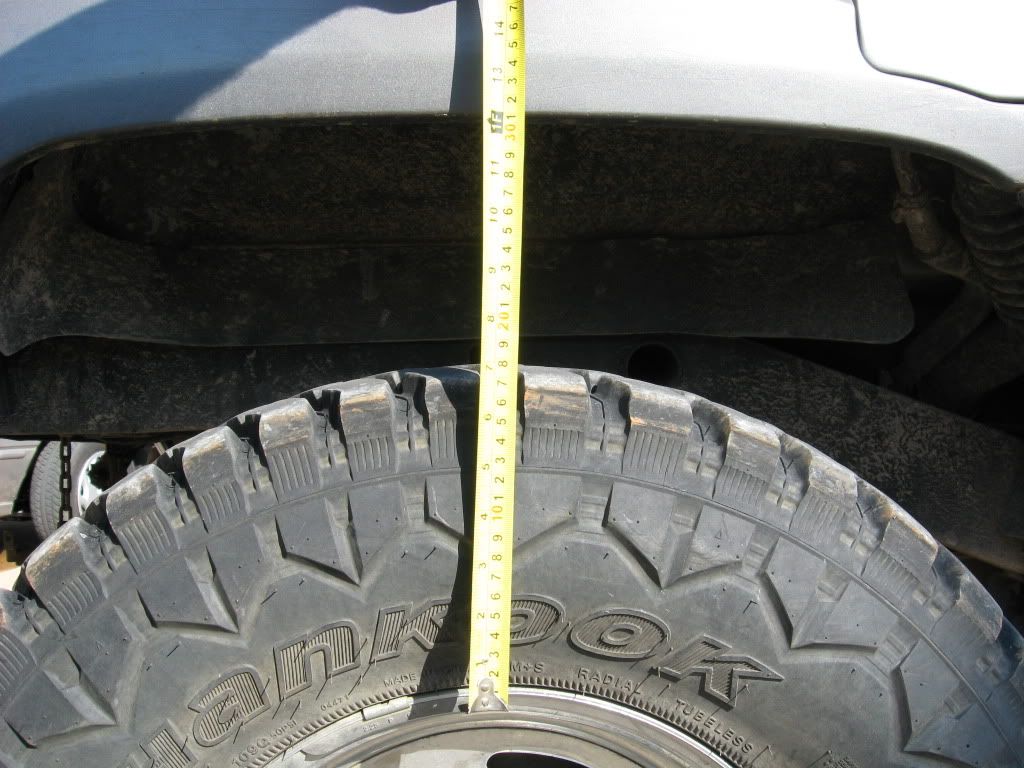
Take a measurement for comparison later, I've got 12" initially between the rim and
the fender:
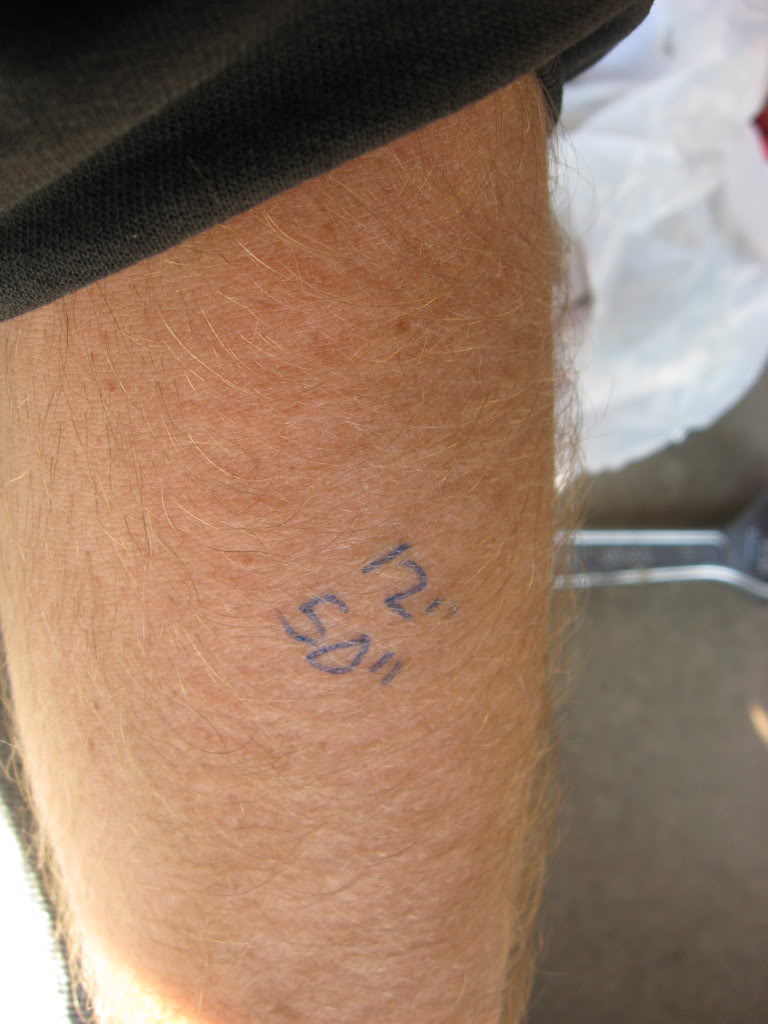
Record it somewhere safe (above your sleeve):
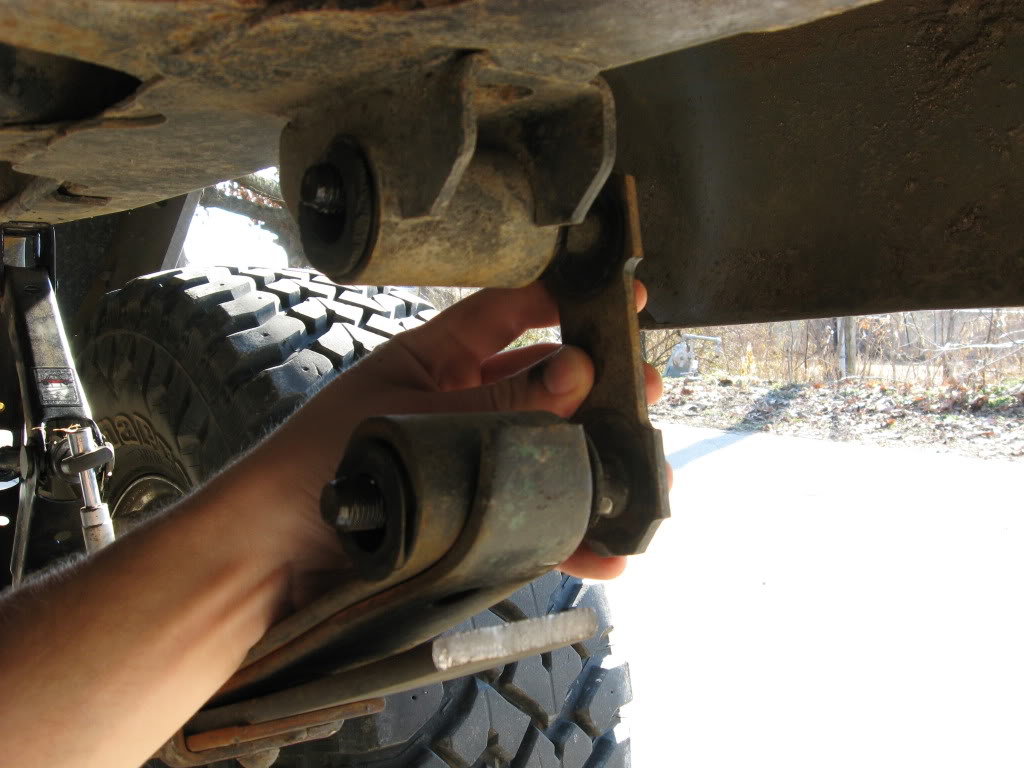
Alright, now to the nitty gritty, to make life easier, lower the spare tire and get
it out of there. I can sit upright comfortably under the bed doing this, nice! Spray
your shackle bolts with a pentrating oil in advance if they look like they will be
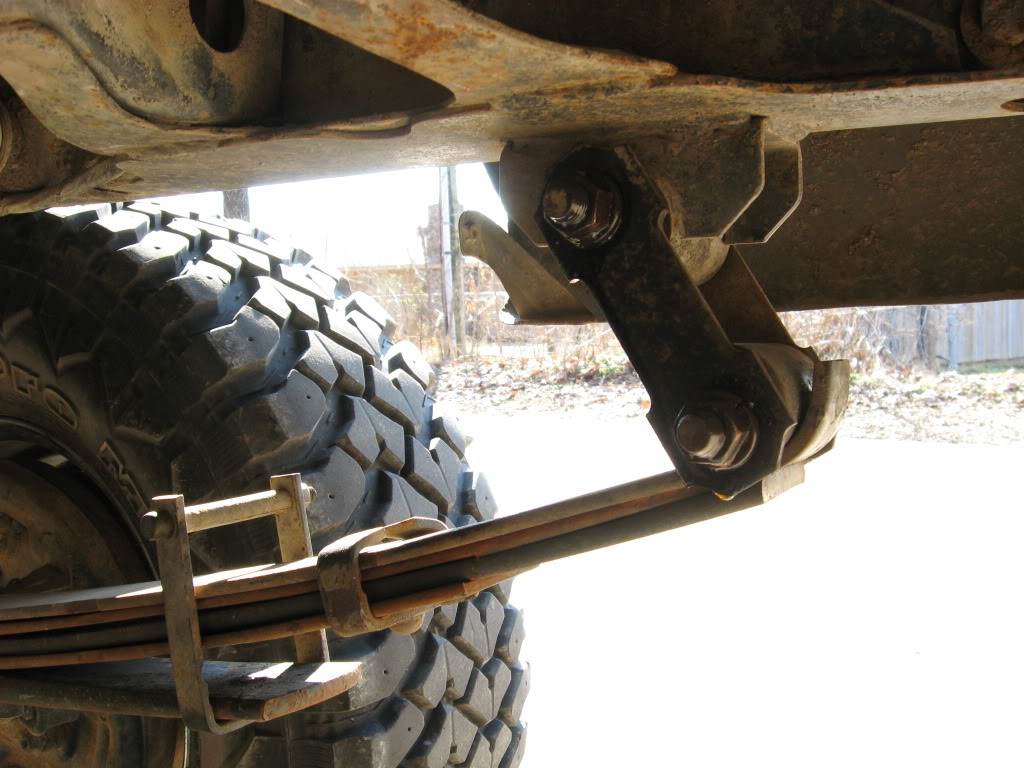
trouble. You will notice in this picture that it does not appear that my shackle
bolts are centered in the leaf spring eye or shackle mount. This is a very good
indication that the bushings are completely worn out and possibly gone:
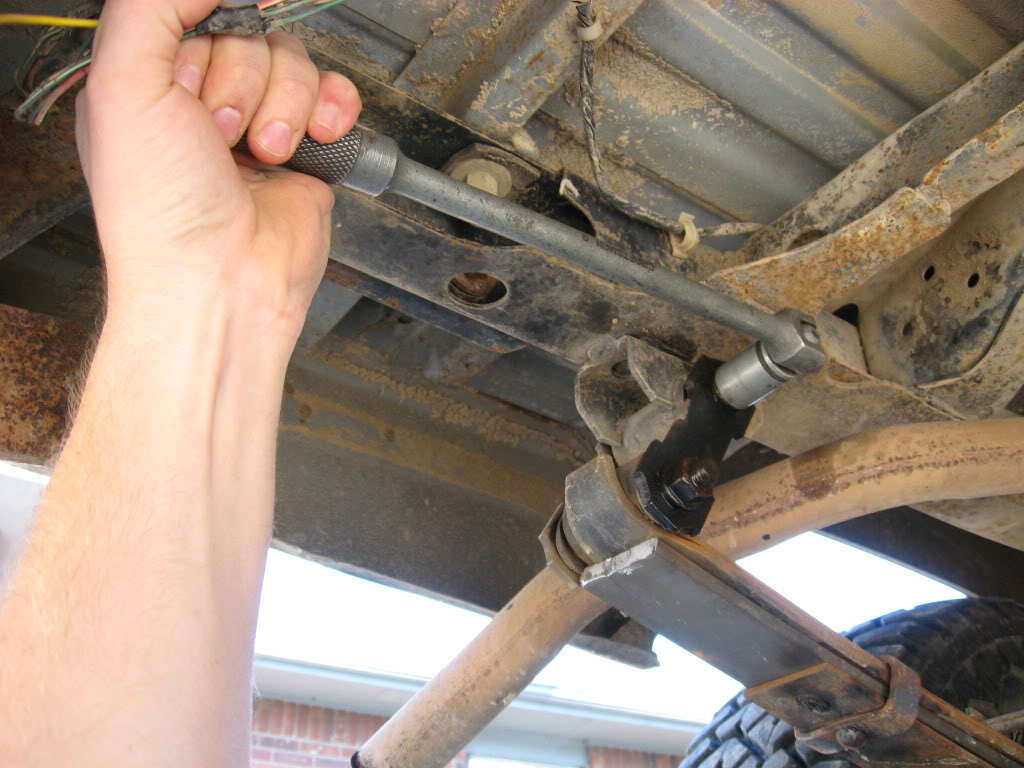
Then get out your breaker bar and crack the nuts loose on both sides:
Next, get a car jack, I'm using a scissor jack out of my camry and slide it onto the
leafspring, getting as close to the axle as possible:
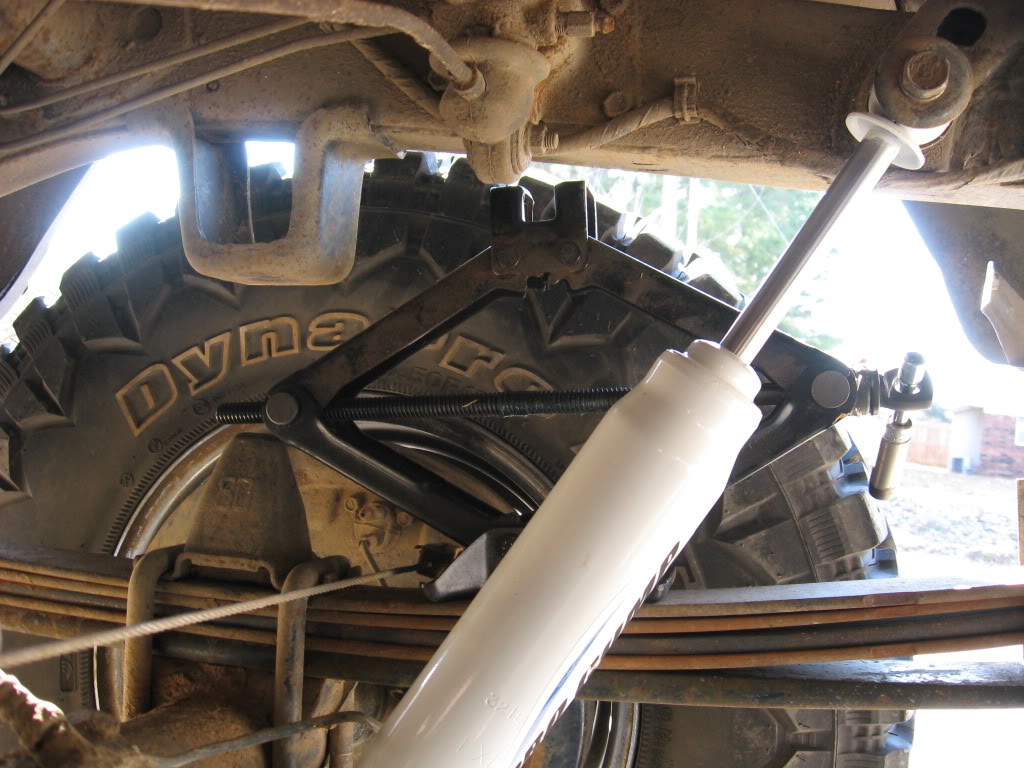
Once, you get it positioned, raise the jack up slowly, all the while keeping an eye
on the shackles. You will have to go a little ways but you will soon see the shackle
begin to relax and you will be able to wiggle it with you hand:
Now, just for fun, hop out from under to see what your truck would look like with a
3" lift:
Ok, finish unscrewing the nuts on the shackles on the side you are working and pull
them off with the lock washers. If you have raised your jack the right amount you
should be able to just pull the shackle out:
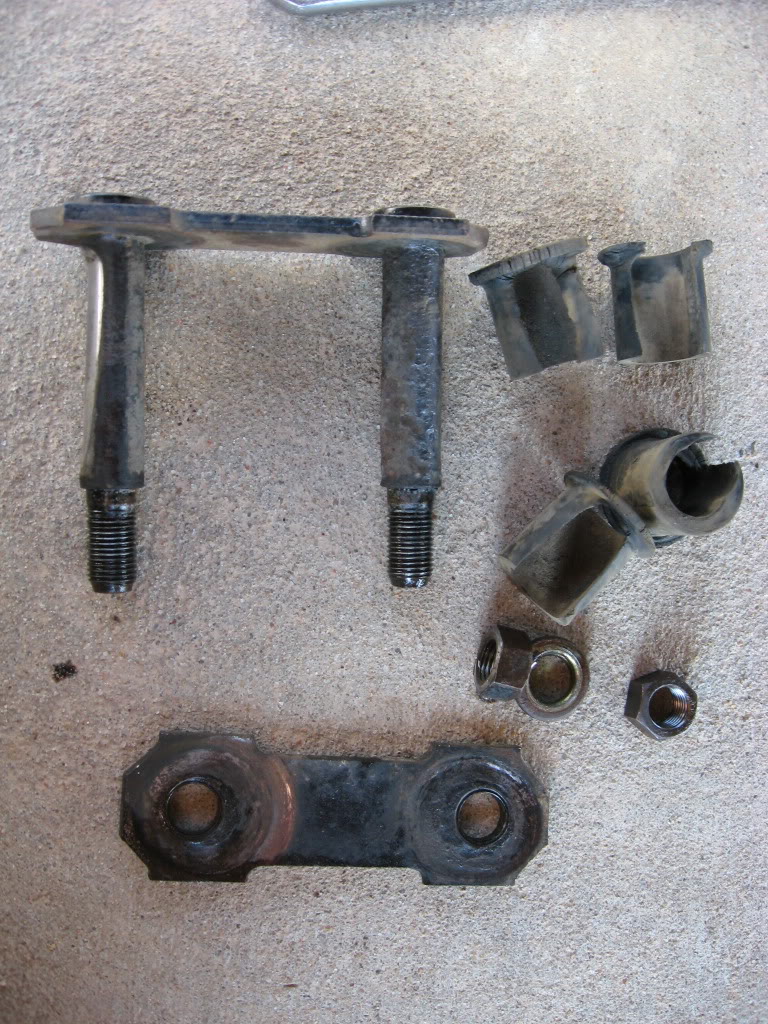
Alright, now for the carnage shots. Here you can see that all of my original rubber
bushings are destroyed. You can also see the shackles have been considerably worn.
Of particular note is the shackle bolt on the left of the picture. You can see that
due to the metal to metal contact it has had for the past who knows how many years,
about an 1/8" of material has been worn away:
Now, set the Trail Gear 5" greasable shackles next to them and laugh:
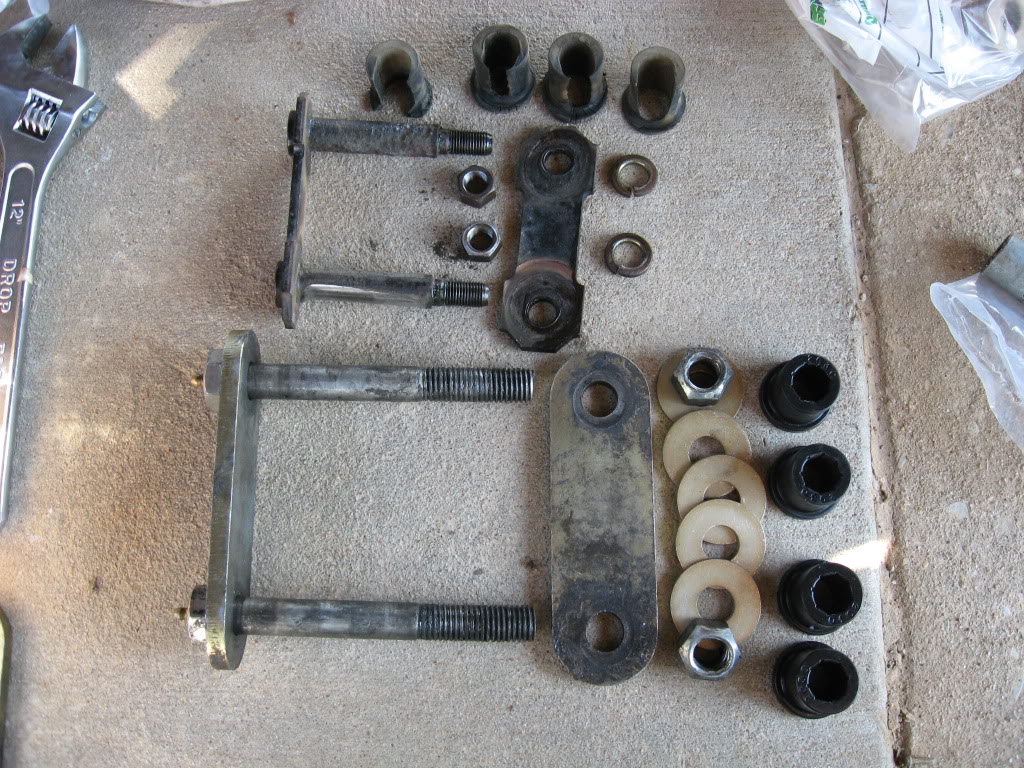
I hadn't cleaned them up yet and they were still greasy. Also, shackles off eBay did
not come with new bushings so I picked up a set of polyurethane bushings, made by
Energy Suspension I believe, from Autozone. You can see those also in the above
picture. Also because these shackles were designed for a wider spring, I decided to
go get some grade 8 washers to space them a bit as well as provide replaceable wear
surfaces. Alright, time for a test fit. I had to pull down on the leaf spring to get
it to slide into place. There is a washer on each side of both shackles, and the
bushings are in. Looks good:
And, pull them back off and grease all surfaces, including the leaf springs eye and
shackle mount and put it back together. Then, start tightening the nuts down. With
Trail Gears castle nuts, they recommend putting anti-seize on the threads before
putting them on. This type of locking nut doesn't hand tighten! I wedged my crescent
on nut and the leafspring, and tightened the other side with my breaker bar and 27mm
socket:
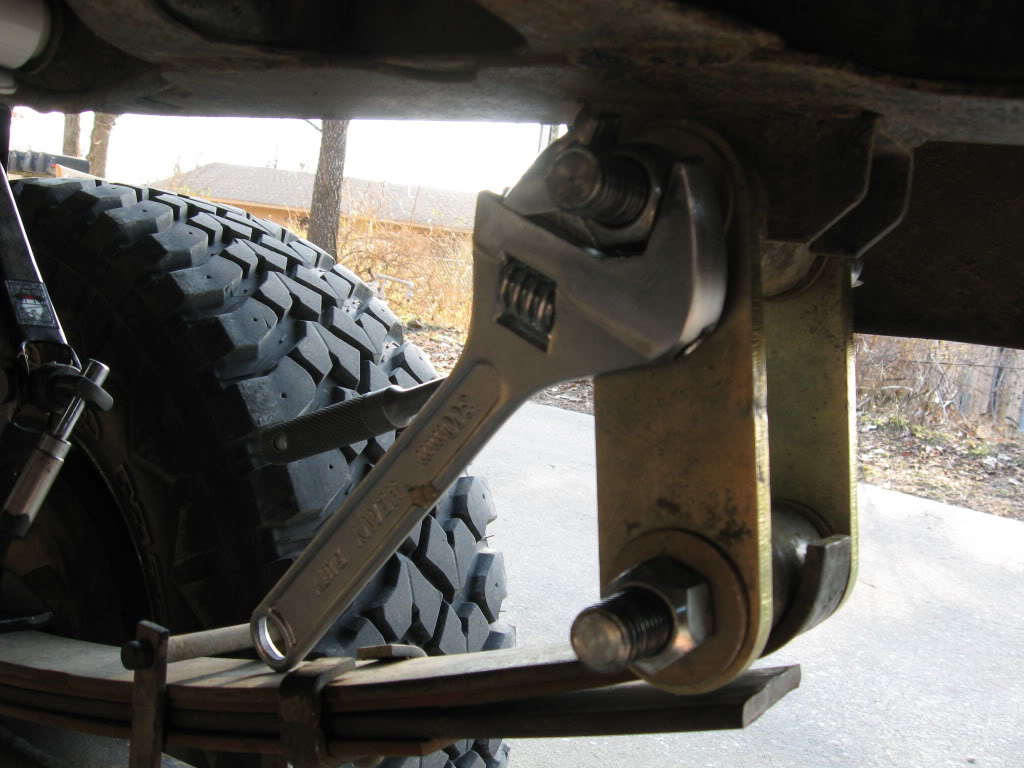
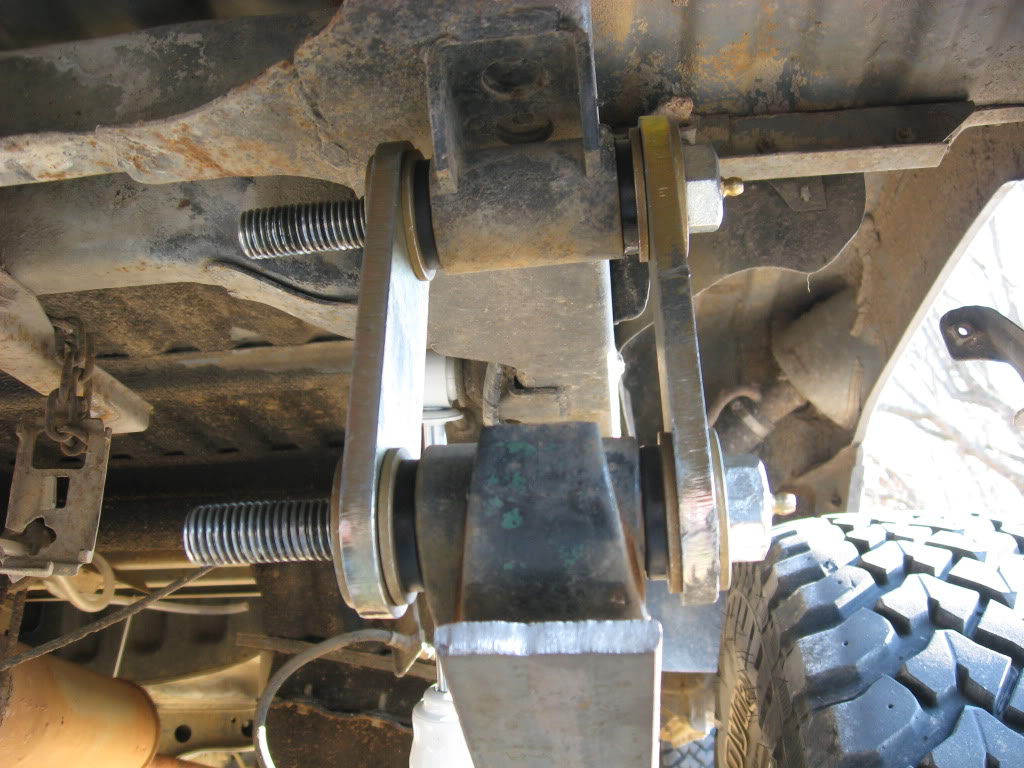
Be careful not to over tighten these nuts as you will compress the bushings and they
will not turn easily. Ok, and here is the final product. Like I said earlier, these
bolts were actually designed for a wider spring so there is a fair amount of extra
thread, but it ain't hurtin anything:
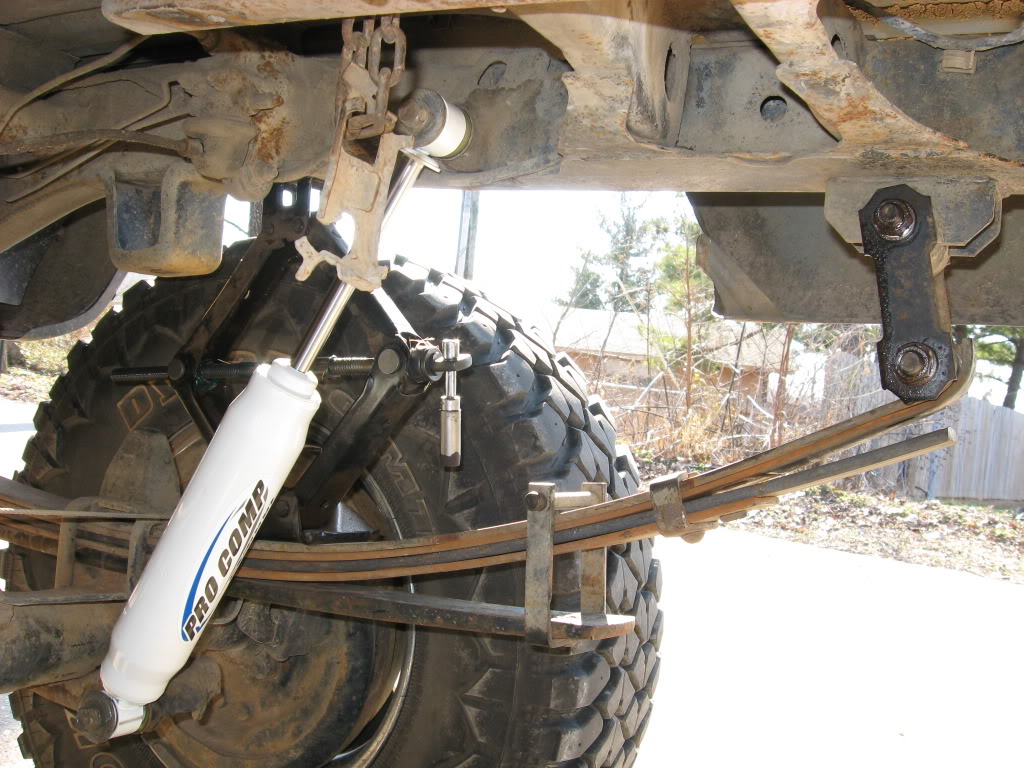
Now, lower the jack slowly, rinse and repeat on the other side, and you are done!
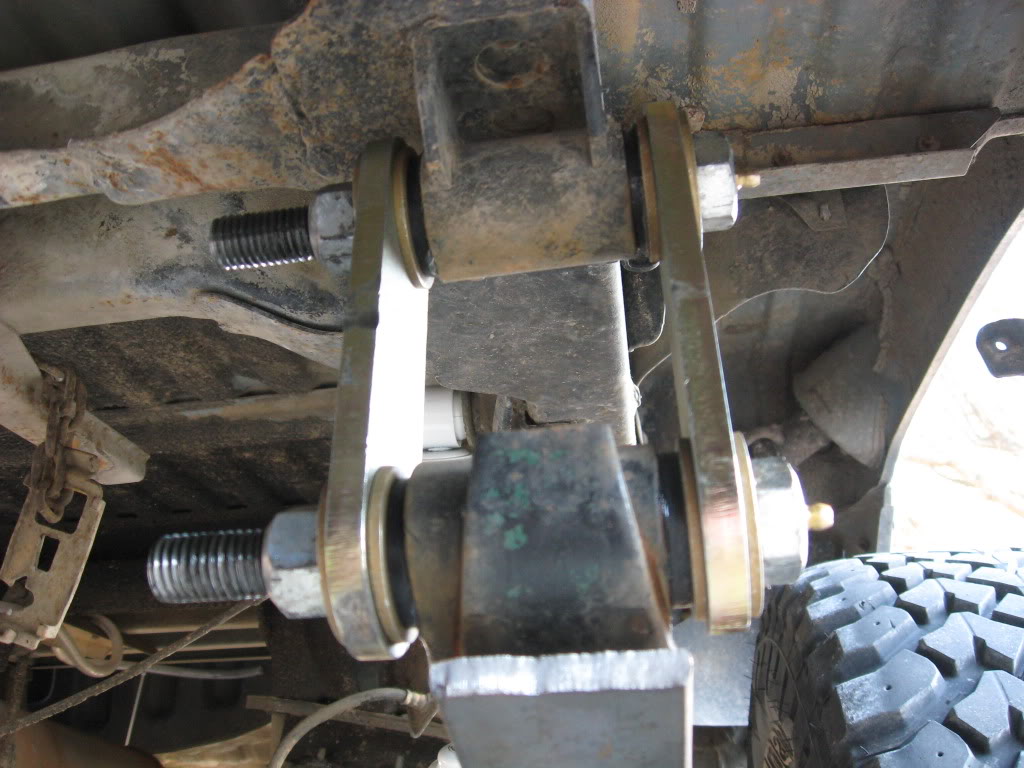
Well, unless you want to pump the grease zerks right away! Here it is from behind
and under:

From the side:
And finally, the overall sideview:
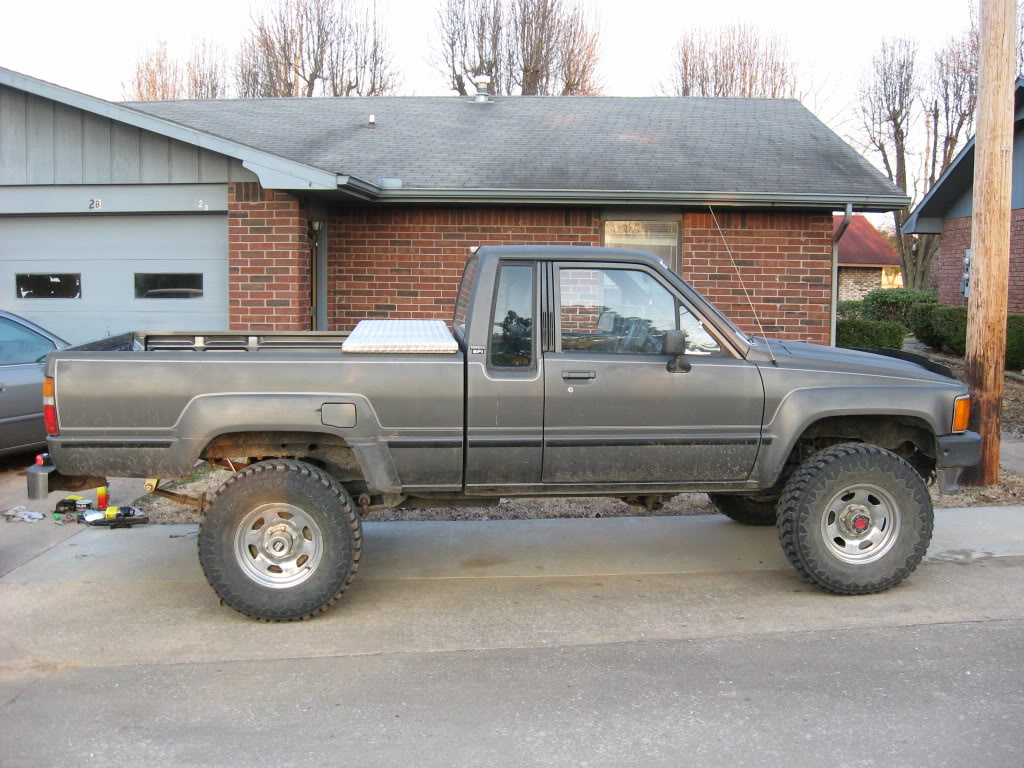
Conclusion: I forgot to get the last measurement, but the rear lift 1" and now my
suspension actually cycles as it is supposed to! Between the new shackles, rearched
springs, long AAL, and functional shocks, this thing feels like a sports car in
comparison to its original feel a month ago!
Its a easy job, and once gain, unless you have access to cheap heavy duty bolts,
nuts and washers, as well as a drill press and a variety of large drill bits, you
will probably find that buying a set from TG or AOR will actually be cheaper and
much better! Now, I wouldn't really mind if they made a non-greasable variety with
maybe 1/4" plates to give us less hardcore guys a cheaper option that is still
completely viable.... but thats another story.
Experts, feel free to chime in and correct or comment.
is all someone needs to attempt something they wouldn't otherwise have the
confidence to do! So, that being said, I will document below how I changed the rear
leaf spring shackles and bushings on my 1988 XtraCab Pickup.
Alright, for a little background, I was looking to get the back of the truck up a
little bit. Also, I didn't know what condition my current shackles and bushings were
so I figured after 22 years they could probably use a change. The stock shackles on
my truck are 3.5" long, from center of hole to center of hole. Now, after spending
some time review 4Crawler's website, I came to understand the physics of the leaf
spring better and realized that if my shackles were normally at roughly 45 degrees
from vertical I would need a 2" longer shackle to achieve the desired 1" of lift.
After looking at my shackles, I figured they were actually at probably closer to 30
degrees from vertical so I would net a little more than 50% of the shackle length
increase in height. I considered making my own shackles as I have some access to
material, but after adding up the cost of buying the hardware, 9/16" or 5/8"
drillbits (harder to find than you think, and $$$), and spending the time it was no
longer practical. So, I figured I would go with the ultra heavy duty TrailGear 5.5"
shackles as they are actually about the only aftermarket shackle I could find. On a
last minute whim, I checked the eBay and found a set of used TG 5" shackles and
bolts and got them to my door for around $35. Not Bad! Ok, now for the install!
Ok, lets start with the 'ol before shot. For reference, those are 31" Hankooks:
Take a measurement for comparison later, I've got 12" initially between the rim and
the fender:
Record it somewhere safe (above your sleeve):
Alright, now to the nitty gritty, to make life easier, lower the spare tire and get
it out of there. I can sit upright comfortably under the bed doing this, nice! Spray
your shackle bolts with a pentrating oil in advance if they look like they will be
trouble. You will notice in this picture that it does not appear that my shackle
bolts are centered in the leaf spring eye or shackle mount. This is a very good
indication that the bushings are completely worn out and possibly gone:
Then get out your breaker bar and crack the nuts loose on both sides:
Next, get a car jack, I'm using a scissor jack out of my camry and slide it onto the
leafspring, getting as close to the axle as possible:
Once, you get it positioned, raise the jack up slowly, all the while keeping an eye
on the shackles. You will have to go a little ways but you will soon see the shackle
begin to relax and you will be able to wiggle it with you hand:
Now, just for fun, hop out from under to see what your truck would look like with a
3" lift:
Ok, finish unscrewing the nuts on the shackles on the side you are working and pull
them off with the lock washers. If you have raised your jack the right amount you
should be able to just pull the shackle out:
Alright, now for the carnage shots. Here you can see that all of my original rubber
bushings are destroyed. You can also see the shackles have been considerably worn.
Of particular note is the shackle bolt on the left of the picture. You can see that
due to the metal to metal contact it has had for the past who knows how many years,
about an 1/8" of material has been worn away:
Now, set the Trail Gear 5" greasable shackles next to them and laugh:
I hadn't cleaned them up yet and they were still greasy. Also, shackles off eBay did
not come with new bushings so I picked up a set of polyurethane bushings, made by
Energy Suspension I believe, from Autozone. You can see those also in the above
picture. Also because these shackles were designed for a wider spring, I decided to
go get some grade 8 washers to space them a bit as well as provide replaceable wear
surfaces. Alright, time for a test fit. I had to pull down on the leaf spring to get
it to slide into place. There is a washer on each side of both shackles, and the
bushings are in. Looks good:
And, pull them back off and grease all surfaces, including the leaf springs eye and
shackle mount and put it back together. Then, start tightening the nuts down. With
Trail Gears castle nuts, they recommend putting anti-seize on the threads before
putting them on. This type of locking nut doesn't hand tighten! I wedged my crescent
on nut and the leafspring, and tightened the other side with my breaker bar and 27mm
socket:
Be careful not to over tighten these nuts as you will compress the bushings and they
will not turn easily. Ok, and here is the final product. Like I said earlier, these
bolts were actually designed for a wider spring so there is a fair amount of extra
thread, but it ain't hurtin anything:
Now, lower the jack slowly, rinse and repeat on the other side, and you are done!
Well, unless you want to pump the grease zerks right away! Here it is from behind
and under:
From the side:
And finally, the overall sideview:
Conclusion: I forgot to get the last measurement, but the rear lift 1" and now my
suspension actually cycles as it is supposed to! Between the new shackles, rearched
springs, long AAL, and functional shocks, this thing feels like a sports car in
comparison to its original feel a month ago!
Its a easy job, and once gain, unless you have access to cheap heavy duty bolts,
nuts and washers, as well as a drill press and a variety of large drill bits, you
will probably find that buying a set from TG or AOR will actually be cheaper and
much better! Now, I wouldn't really mind if they made a non-greasable variety with
maybe 1/4" plates to give us less hardcore guys a cheaper option that is still
completely viable.... but thats another story.
Experts, feel free to chime in and correct or comment.
Last edited by bikedave99; Mar 9, 2010 at 07:25 AM.
 good pics to! wish my shackles were that easy to take out!


 Mar 9, 2010 | 11:32 AM
#6
Registered User
Joined: Oct 2009
Posts: 1,499
Likes: 1
From: Downtown Heckronto, Ontario, Soviet Canuckistan
Wow, and I thought -my- shackles were in bad shape after the hour and a half of swearing/banging-with-5lb-hammer it took to take off each one. The bolts were bent but at least there was still material on the bushings!
I can't tell that well from the pictures, and it doesn't look like it, but if you replaced the two hanger bolts and bushing for your leafs, how the heck did you get the bolts out? The bushings just keep absorbing my hammer blows and I have neither a bolt puller or the right kind of blade for my sawsall to cut them. My 3" grinder decided it wasn't up for the job either.
I can't tell that well from the pictures, and it doesn't look like it, but if you replaced the two hanger bolts and bushing for your leafs, how the heck did you get the bolts out? The bushings just keep absorbing my hammer blows and I have neither a bolt puller or the right kind of blade for my sawsall to cut them. My 3" grinder decided it wasn't up for the job either.
Mar 9, 2010 | 11:45 AM
#7
Thread Starter
Registered User
Joined: Feb 2009
Posts: 60
Likes: 0
Trending Topics
Mar 9, 2010 | 11:49 AM
#8
Thread Starter
Registered User
Joined: Feb 2009
Posts: 60
Likes: 0
Wow, and I thought -my- shackles were in bad shape after the hour and a half of swearing/banging-with-5lb-hammer it took to take off each one. The bolts were bent but at least there was still material on the bushings!
I can't tell that well from the pictures, and it doesn't look like it, but if you replaced the two hanger bolts and bushing for your leafs, how the heck did you get the bolts out? The bushings just keep absorbing my hammer blows and I have neither a bolt puller or the right kind of blade for my sawsall to cut them. My 3" grinder decided it wasn't up for the job either.
I can't tell that well from the pictures, and it doesn't look like it, but if you replaced the two hanger bolts and bushing for your leafs, how the heck did you get the bolts out? The bushings just keep absorbing my hammer blows and I have neither a bolt puller or the right kind of blade for my sawsall to cut them. My 3" grinder decided it wasn't up for the job either.
Now, if you are referring to the bolts going through the shackles, mine basically just fell out. I had one bushing that was a little sticky, but a big screwdriver and a smack with the hand popped it out.
Mar 9, 2010 | 12:09 PM
#9
Registered User
Joined: Oct 2009
Posts: 1,499
Likes: 1
From: Downtown Heckronto, Ontario, Soviet Canuckistan
The two front hanger mounts for the rear leafs, the ones that only have one bolt each. I've heard about burning them out, but I'm too worried to try something like that so close to the gas tank. I'm thinking about just drilling and tapping the heads of each bolt and jury-rigging a bolt puller because that's about the only way I can think of to get them out without dropping the gas tank and using some sort of high-test burnination, I just hope I don't bend the mounts or something. When you go to do them, make sure there are no small children around because you -will- be swearing up a storm trying to get them out.
The bolts going through the shackles for me were slightly bent and therefore a real PITA to get out, but the bushings came out easy with the help of a screwdriver once I'd managed to get the shackles off.
Also, I don't know if this is a difference between 4wd and 2wd, but I've noticed on 4wd trucks at least there seem to be two extra, cylindrical, bump-stops on the stock leafs near the front and back. My leafs lack these, and I've seen nothing on the frame or the leafs themselves to indicate they ever had them. Is this just a difference between 4wd and 2wd or do I have more parts to order? Also, my leaf packs are 3 leaves each, 2 full-length and one overload, I'd thought there was supposed to be at least one more leaf but I do know that my rear suspension was entirely factory (unless someone did some work and reused everything without leaving tool marks) until I started ripping it apart, complete with original shocks (one of which actually still works! The other uses air at ambient pressure.).
Last edited by Magnusian; Mar 9, 2010 at 12:11 PM.
 Mar 9, 2010 | 01:33 PM
#11
Great write up. two things that I would consider adding:
-blocking the wheels (had one roll on me when I thought the ebrake was set )
)
-adding a jackstand as extra insurance under the corner of the truck where the work is taking place--again just in case the jack used to lift between the frame and the spring slips.
yeah I am a paranoid old fart but seen a few things happen--200+ stitches and too many E-Room co pays
-blocking the wheels (had one roll on me when I thought the ebrake was set
)-adding a jackstand as extra insurance under the corner of the truck where the work is taking place--again just in case the jack used to lift between the frame and the spring slips.
yeah I am a paranoid old fart but seen a few things happen--200+ stitches and too many E-Room co pays
Mar 9, 2010 | 01:50 PM
#12
Thread Starter
Registered User
Joined: Feb 2009
Posts: 60
Likes: 0
Hey.... just trying to give you guys another reason to ask the number one question: "Did you use the search button first?" Haha, it takes practice with the little things to get the confidence you need to attempt what you probably shouldn't!
Mar 9, 2010 | 01:53 PM
#13
Thread Starter
Registered User
Joined: Feb 2009
Posts: 60
Likes: 0
Great write up. two things that I would consider adding:
-blocking the wheels (had one roll on me when I thought the ebrake was set)
-adding a jackstand as extra insurance under the corner of the truck where the work is taking place--again just in case the jack used to lift between the frame and the spring slips.
yeah I am a paranoid old fart but seen a few things happen--200+ stitches and too many E-Room co pays
-blocking the wheels (had one roll on me when I thought the ebrake was set
)-adding a jackstand as extra insurance under the corner of the truck where the work is taking place--again just in case the jack used to lift between the frame and the spring slips.
yeah I am a paranoid old fart but seen a few things happen--200+ stitches and too many E-Room co pays

Thread
Thread Starter
Forum
Replies
Last Post
TURBOrunnerNM
86-95 Trucks & 4Runners
4
Jul 22, 2015 11:01 AM
rushw
General Electrical & Lighting Related Topics
4
Jul 18, 2015 01:46 PM


