90 4runner SAS W/37's


 02-09-2006, 09:51 PM
#22
Contributing Member
Join Date: May 2002
Location: Wandering around Phoenix
Posts: 6,033
Likes: 0
Received 3 Likes
on
3 Posts
Originally Posted by 85badger
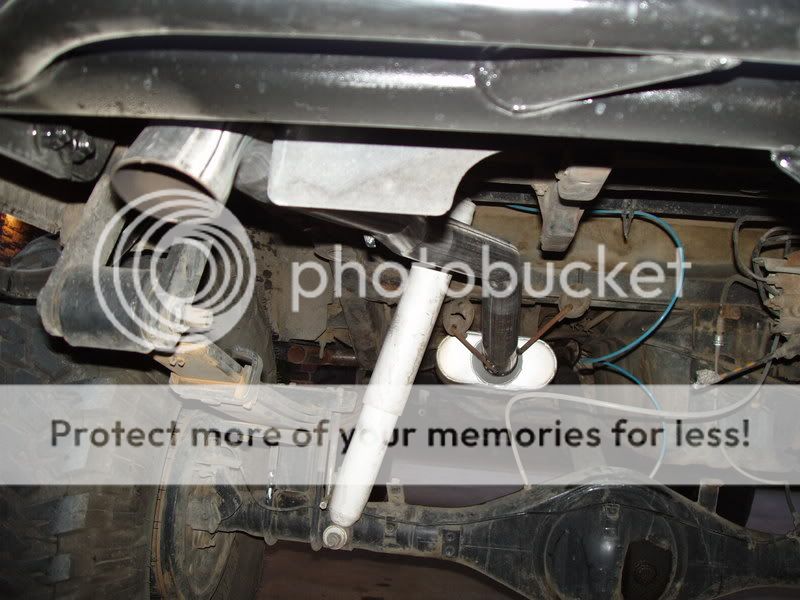
The shocks 1999 F-350 Rear Shocks all 4 corners.....$21ea w/lifetime wty. Not sure how long they are but they are very long extended.
RS5254 = 18.125 compressed, 30.75 extended, 12.625 travel
RS5273 = 16.625 compressed, 28.00 extended, 11.375 travel
02-10-2006, 09:07 AM
#23
Registered User
Join Date: Nov 2005
Location: Cali
Posts: 13
Likes: 0
Received 0 Likes
on
0 Posts
Hey did you make those shock mounts (the upper cross bar and lower axle mounts ? or they prefabed. If you did make them can you give me some specs (like the lenght of the tubing, wall thickness and what bolts that were used) and what did you use for bump stops? thanks, your info on this is greatly appreciated!
 02-10-2006, 09:58 PM
#26
Contributing Member
Originally Posted by JRunner90
Nice looking runna dude!!! What SAS kit you did you use?? How much taller are you now from stock?? I need to get some ideas for my future SAS!!
02-13-2006, 04:49 AM
#27
Registered User
Thread Starter

Join Date: Apr 2004
Location: wichita, ks
Posts: 190
Likes: 0
Received 0 Likes
on
0 Posts
Originally Posted by joebruva25
Hey did you make those shock mounts (the upper cross bar and lower axle mounts ? or they prefabed. If you did make them can you give me some specs (like the lenght of the tubing, wall thickness and what bolts that were used) and what did you use for bump stops? thanks, your info on this is greatly appreciated!

 02-13-2006, 04:57 AM
#28
Registered User
Thread Starter
Join Date: Apr 2004
Location: wichita, ks
Posts: 190
Likes: 0
Received 0 Likes
on
0 Posts
Originally Posted by Flygtenstein
Springs and hanger?
Shackle angle looks awesome. Must ride like a Caddy.
Shackle angle looks awesome. Must ride like a Caddy.
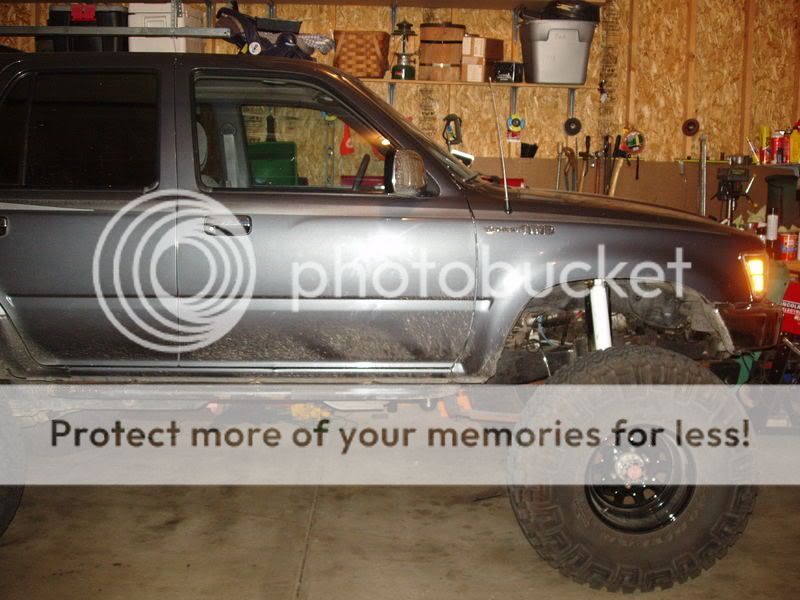
I would have preferred more shackle angle but when your running 37's, the axle needs to be as far forward as possible, with time and some wheeling it should improve. As far as riding like a Caddy.......I wish, it's a far cry from stock that's for sure. I built this to wheel and as a DD, so now I have the best of both worlds!! IMHO
 02-13-2006, 05:57 AM
#30
Registered User
Thread Starter
Join Date: Apr 2004
Location: wichita, ks
Posts: 190
Likes: 0
Received 0 Likes
on
0 Posts
Originally Posted by Cebby
Sweet blocks. Those temporary?
 02-13-2006, 07:42 AM
#32
Registered User
Thread Starter
Join Date: Apr 2004
Location: wichita, ks
Posts: 190
Likes: 0
Received 0 Likes
on
0 Posts
Originally Posted by JHupp
damn dude nice looking truck, I am a n00b but I dont think Ive ever seen anything larger than 35s on a Runner before, sweet looking.
 02-13-2006, 08:53 AM
#33
Registered User
Join Date: Feb 2004
Location: Portland, OR
Posts: 193
Likes: 0
Received 0 Likes
on
0 Posts
Originally Posted by 85badger
As of now......including the price of the rig, I have less than $6 in it. I guess this is my version of a budget build up.
02-13-2006, 09:05 AM
#34
Registered User
Thread Starter
Join Date: Apr 2004
Location: wichita, ks
Posts: 190
Likes: 0
Received 0 Likes
on
0 Posts
Originally Posted by 4x4taco
Damn man! Please tell me how you did all that for 6 bucks! I woulda done a SAS a long time ago if I knew it was so cheap! Seriously though, nice looking rigs.
02-17-2006, 07:57 AM
#36
Registered User
Thread Starter
Join Date: Apr 2004
Location: wichita, ks
Posts: 190
Likes: 0
Received 0 Likes
on
0 Posts
Originally Posted by yotaman
Can you take a picture looking down the side to get a shot of the protruding tires. I'm trying to get an idea of what 2" BS looks like on a 2nd Gen.
05-11-2006, 04:31 AM
#37
Registered User
Thread Starter
Join Date: Apr 2004
Location: wichita, ks
Posts: 190
Likes: 0
Received 0 Likes
on
0 Posts
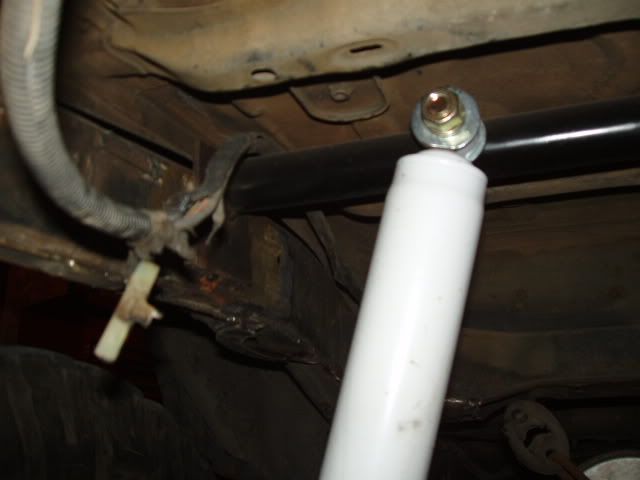
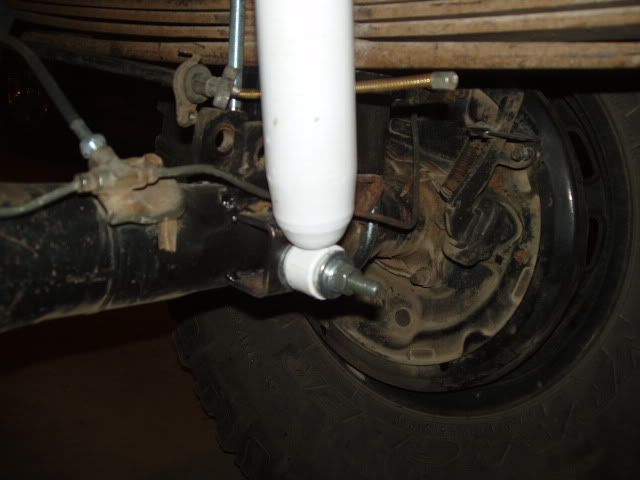
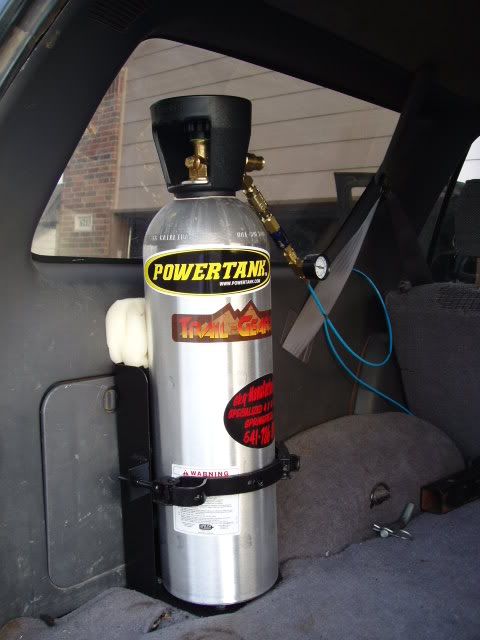
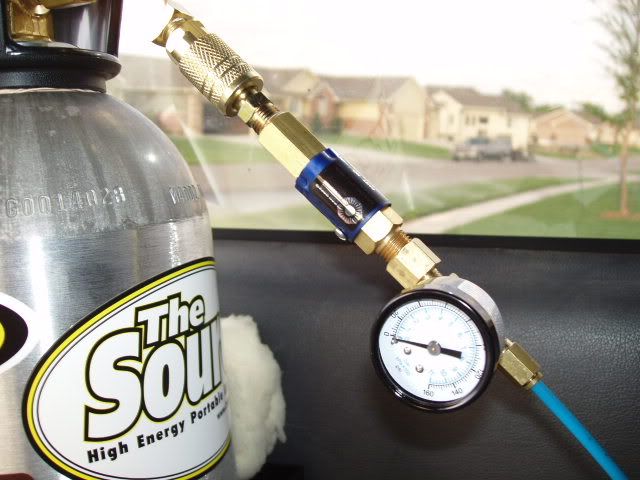
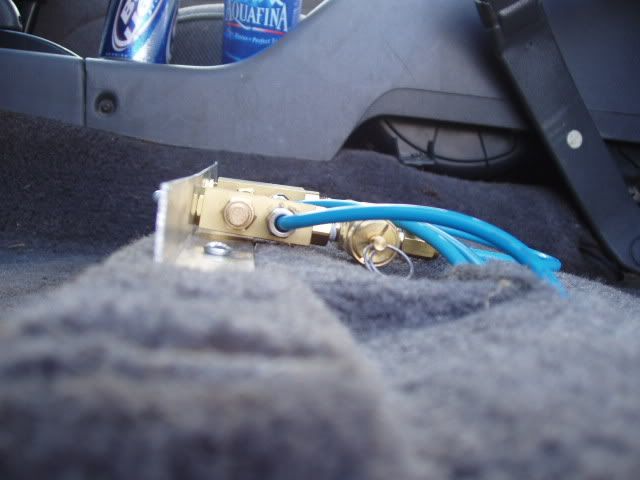
Update.....(Running ARB's off of CO2 tank) finally got the ARB's plumbed. Instead of using an air compressor I decided to use my CO2 bottle, less electrical, no elec switchs or solenoids. I opted to use the Non-electric switches (I got mine from gulfcoastrovers.com) I also couldn't find a decent spot to locate the switches so I made a mount and put them under the drivers seat. If ever there is a problem pull (4) 14mm bolts and the seat is out, easy access to the lines and switches.
Gotta Thank Steve @ powertank.com. He was a great help, I told him what I wanted, he put it together and even drew up a diagram to help with installation. (bad pic)
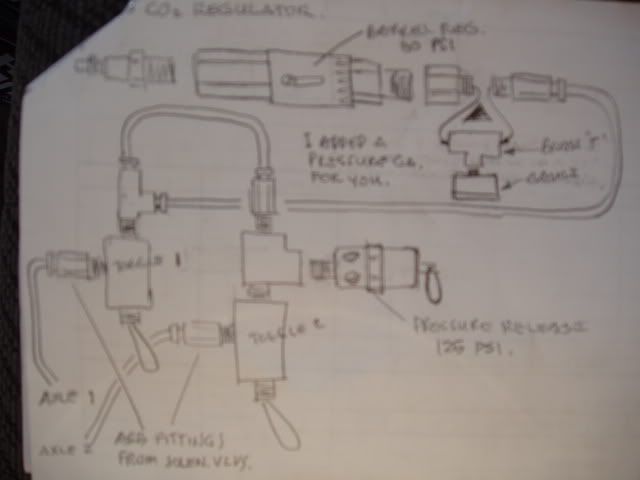
80 psi barrel reg and pressure gauge (adjustable more like 94psi)
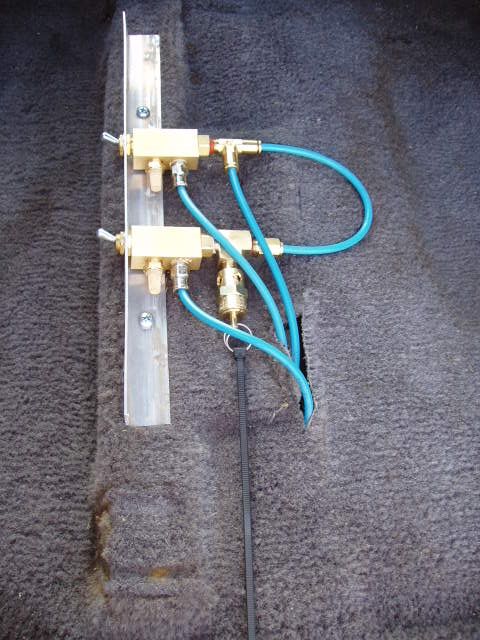
Made bracket extra long incase I decide to add other swithes (rock lights, NOS switch, rocket launcher switch, ejection seat switch)
The seat installed

Hopefully this info will help someone down the road, I had trouble finding write-ups on this type of installation. I'll post up some flex pics as soon as I figure out my front drive shaft issue.
Gotta Thank Steve @ powertank.com. He was a great help, I told him what I wanted, he put it together and even drew up a diagram to help with installation. (bad pic)
80 psi barrel reg and pressure gauge (adjustable more like 94psi)
Made bracket extra long incase I decide to add other swithes (rock lights, NOS switch, rocket launcher switch, ejection seat switch)
The seat installed
Hopefully this info will help someone down the road, I had trouble finding write-ups on this type of installation. I'll post up some flex pics as soon as I figure out my front drive shaft issue.
Last edited by 85badger; 05-11-2006 at 04:38 AM.
11-16-2006, 09:22 AM
#38
Registered User
Thread Starter
Join Date: Apr 2004
Location: wichita, ks
Posts: 190
Likes: 0
Received 0 Likes
on
0 Posts
Finally getting with the program....New awesome Marlin Rear Bumper (worth the wait 6 months)
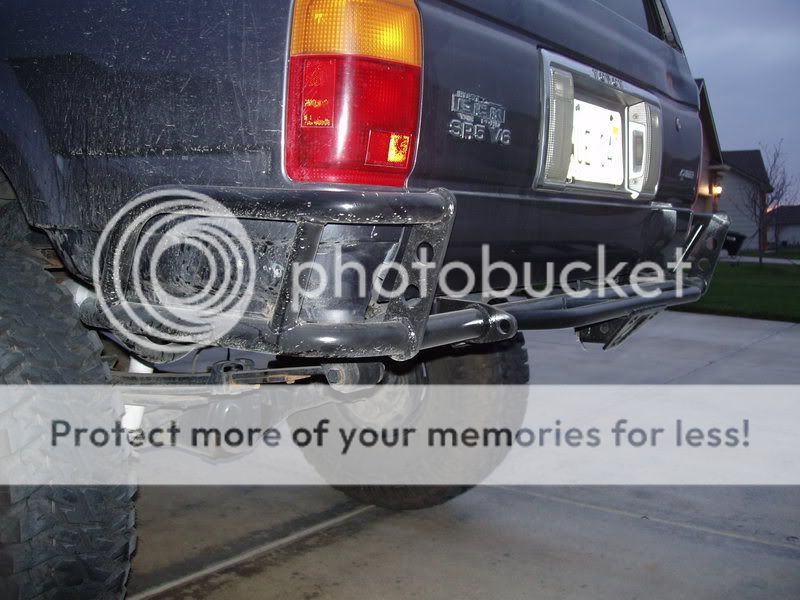
New exhaust (Exhaust Pros in wichita) excellent job. Abit too loud though
Rock Sliders thanks to 85ondubs for his skills!!
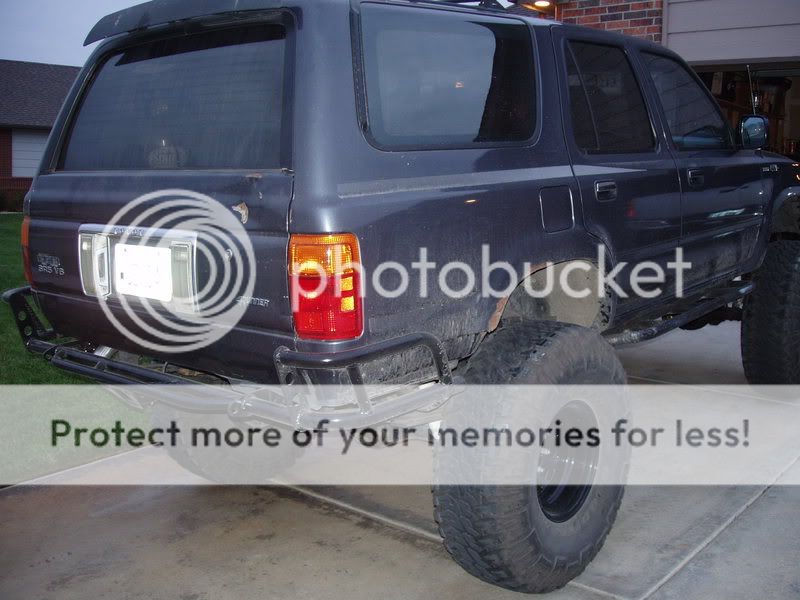

Got bored...had these laying around from an old 80's truck

New exhaust (Exhaust Pros in wichita) excellent job. Abit too loud though
Rock Sliders thanks to 85ondubs for his skills!!
Got bored...had these laying around from an old 80's truck
11-16-2006, 09:51 AM
#40
Registered User
For the rear, lose the overload or cut it down to a block, put in a long AAL and lose the block, it will give you some lift and let you flex more than the overload will whole.
What are you running for a shackle in the back? You could possibly put a longer shackle in if you needed more height after that.
You are going to have to do something about that front shackle angle, that is horrible. Maybe you can make some sort of a new shackle hanger farther forwards or something. Otherwise, sell those TG springs, build yourself some rears up front out of 51" yota rears and that should give you enough length to get your shackle right and keep the axle forwards.
I agree that you may need some trimming, it isn't the regular driving that will be a problem it will be when you are flexed...otherwise perhaps some bumpstoppage is in order.


