
 03-11-2016, 02:59 PM
Last edit by: IB Advertising
See related guides and technical advice from our community experts:
Browse all: Exterior Guides
- Toyota 4Runner, Tacoma and Tundra How to Plasti Dip Rims
Step by step instructions for do-it-yourself repairs
Browse all: Exterior Guides

afartinthewind's 1999 4runner SR5 build thread
03-25-2013, 07:55 PM
#1
Registered User
Thread Starter
Join Date: Feb 2013
Location: Portland OR
Posts: 48
Likes: 0
Received 0 Likes
on
0 Posts
afartinthewind's 1999 4runner SR5 build thread
Hey everyone! Just adding my build to the pile. Enjoy!
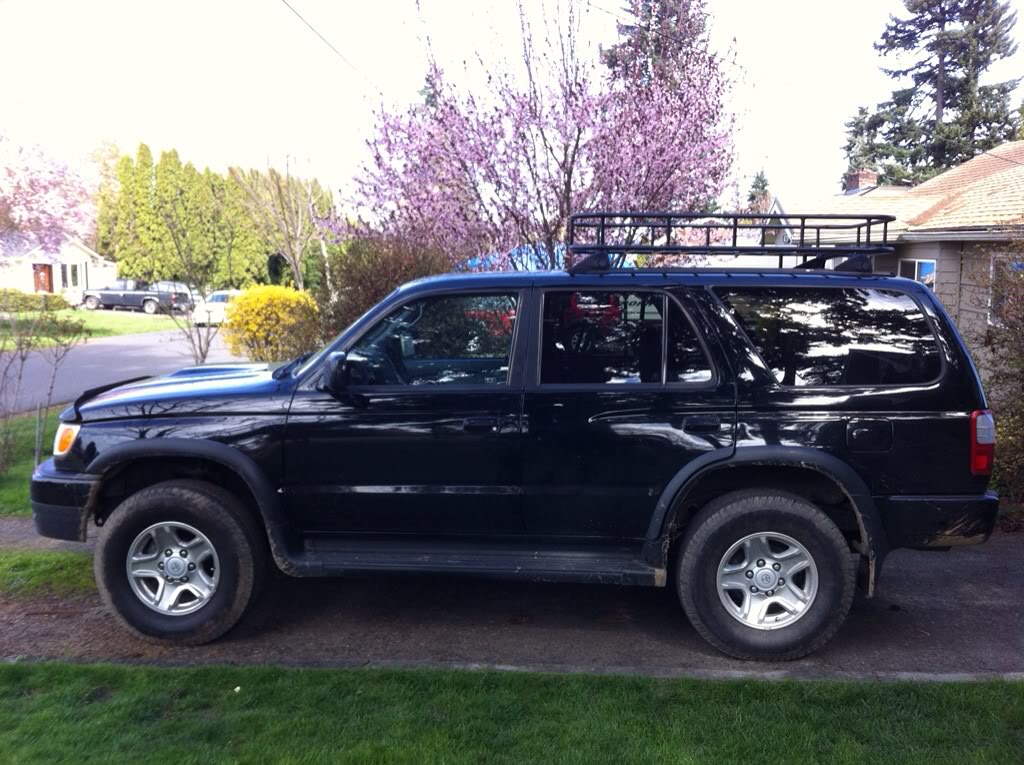
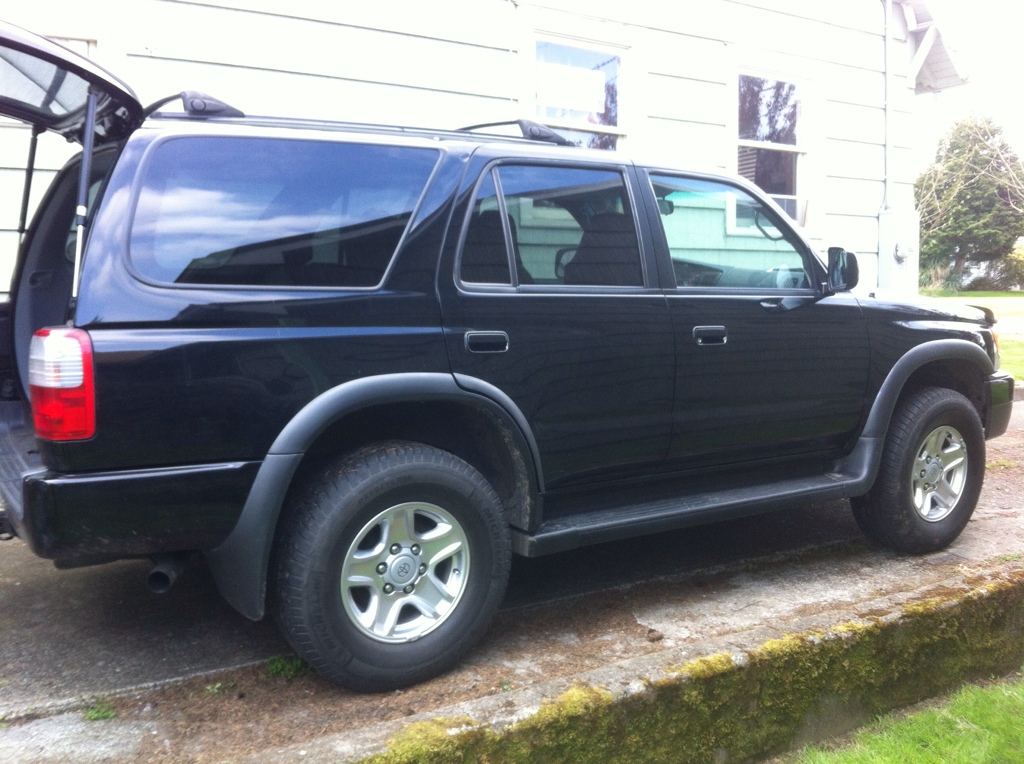
First pic is about 30 min after I bought her from Ron Tonkin Toyota, Portland Oregon @ 218xxx mi. All stock.
First pic is about 30 min after I bought her from Ron Tonkin Toyota, Portland Oregon @ 218xxx mi. All stock.
Last edited by afartinthewind; 03-25-2013 at 07:58 PM.
 03-25-2013, 08:08 PM
#2
Registered User
Thread Starter
Join Date: Feb 2013
Location: Portland OR
Posts: 48
Likes: 0
Received 0 Likes
on
0 Posts
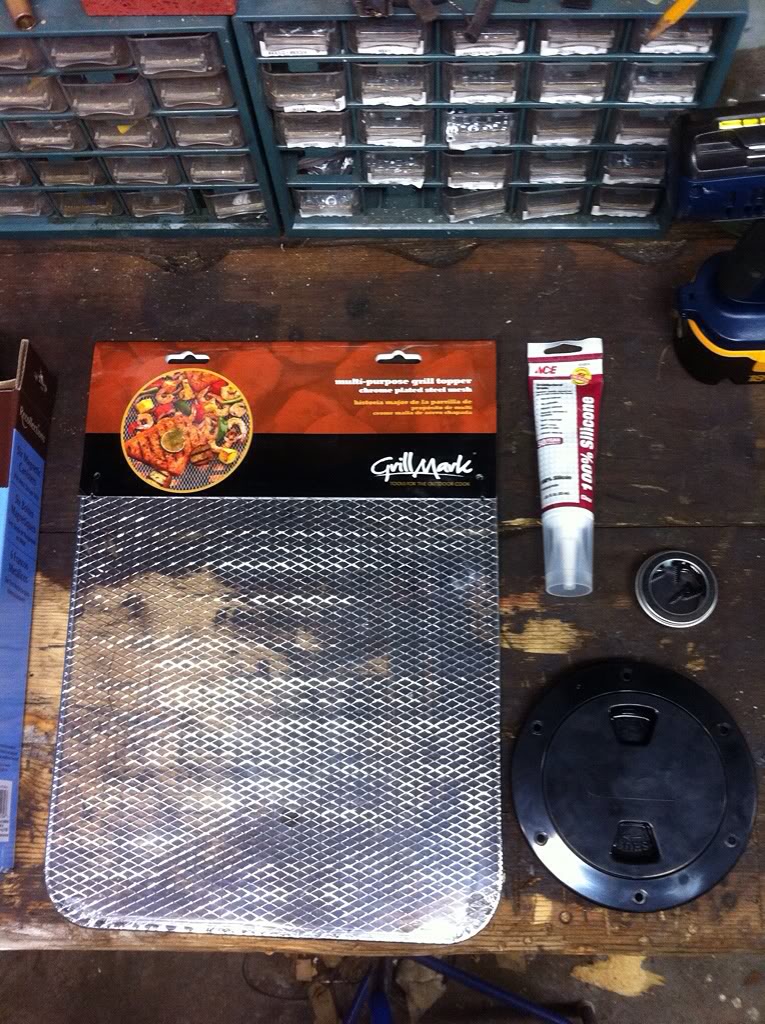
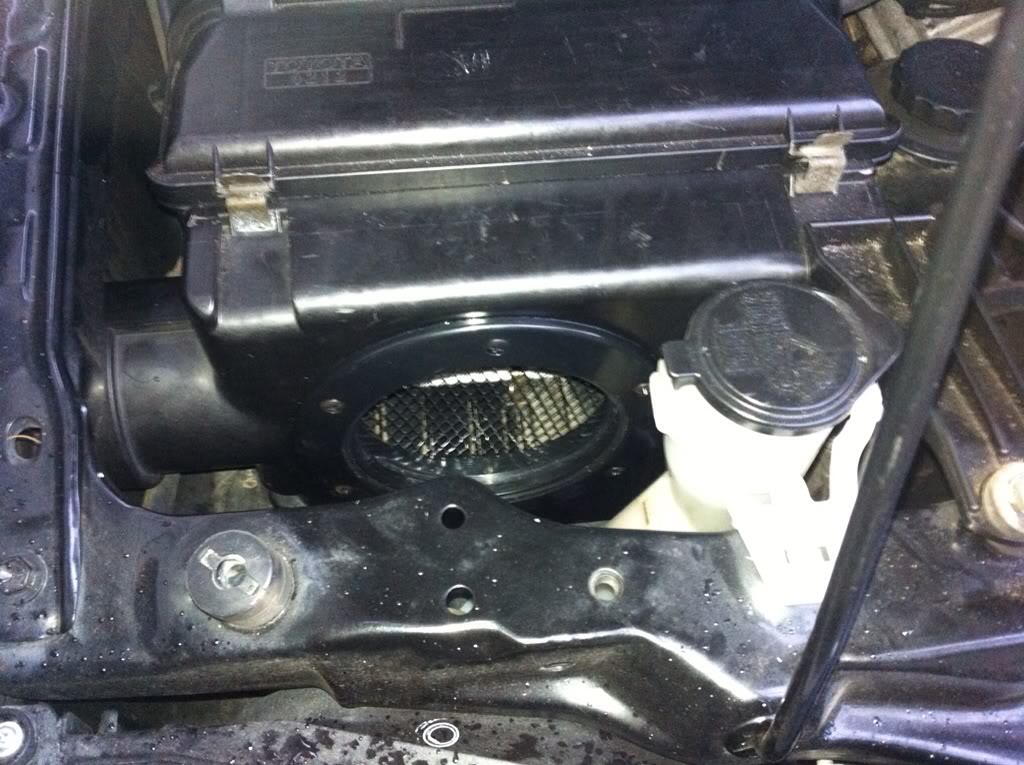
First item? Deck plate.
]Here are the parts used in my mod. Searching the forum I came across the idea of a screen to keep debris out and I liked it. I found a cheap stainless screen for a BBQ at my local hardware stood for about $4. Also grabbed a cheap tube of 100% silicon sealant and 6 black screws. Deck plate was from my local marine supply shop. Was a buck more than amazon but worth getting it sooner. Total cost was about $15. Fast, cheap AND easy power. YOTATECH FTW!
Parts
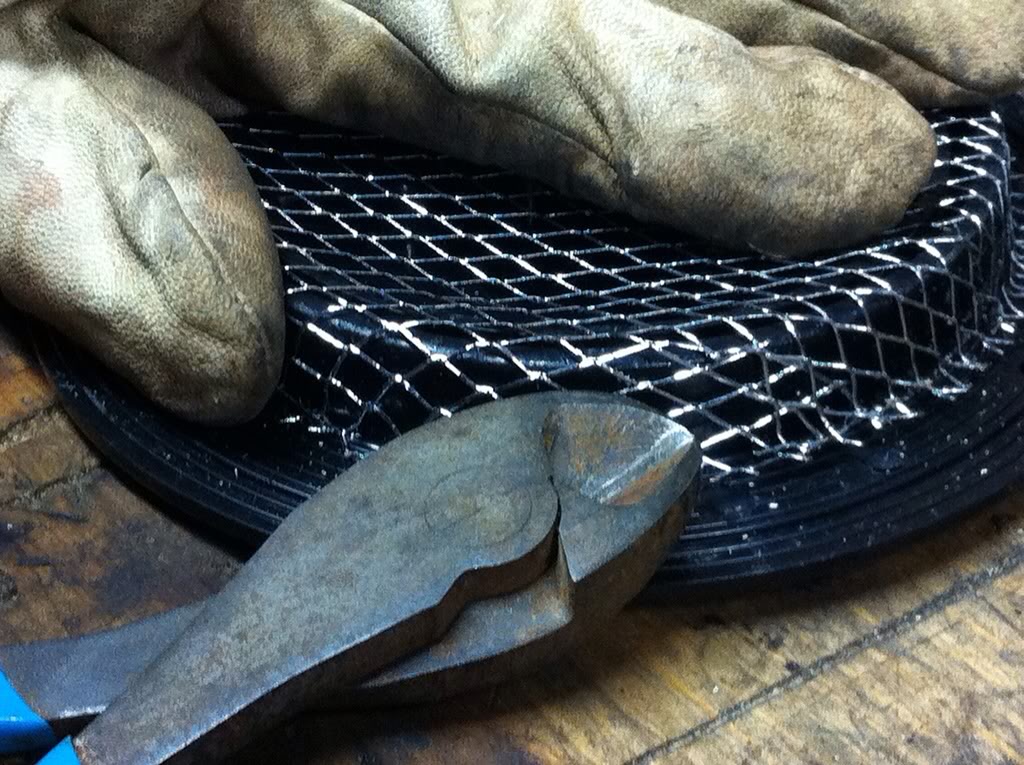
screen shaping
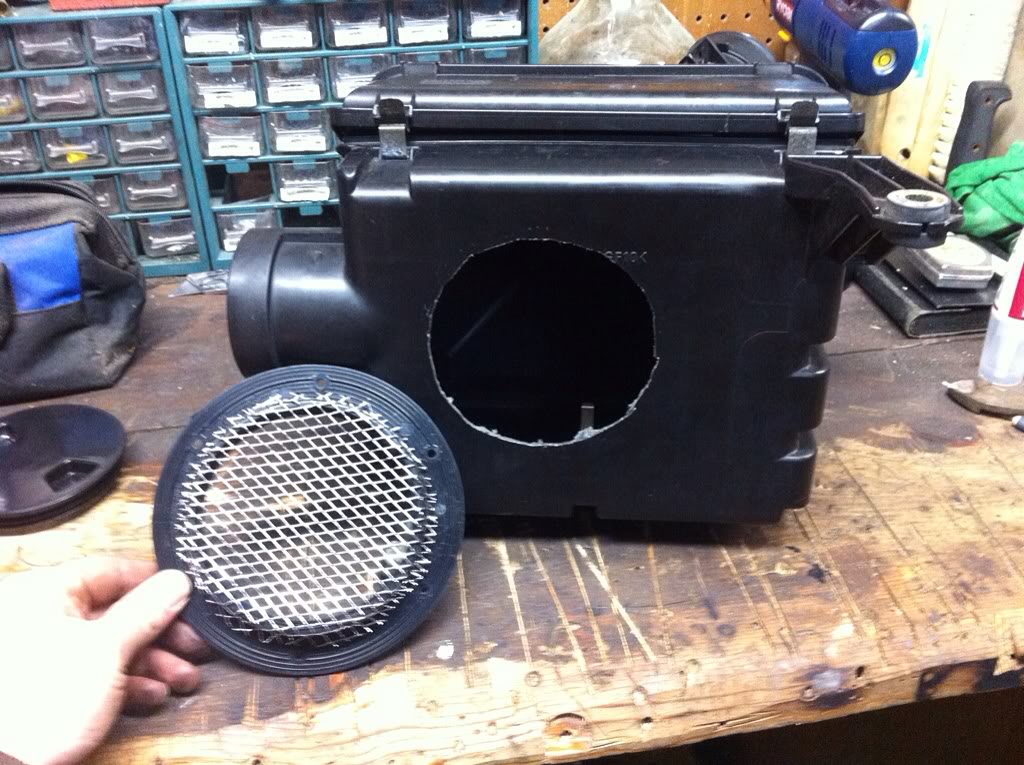
Dry Fit
Screws and sealant
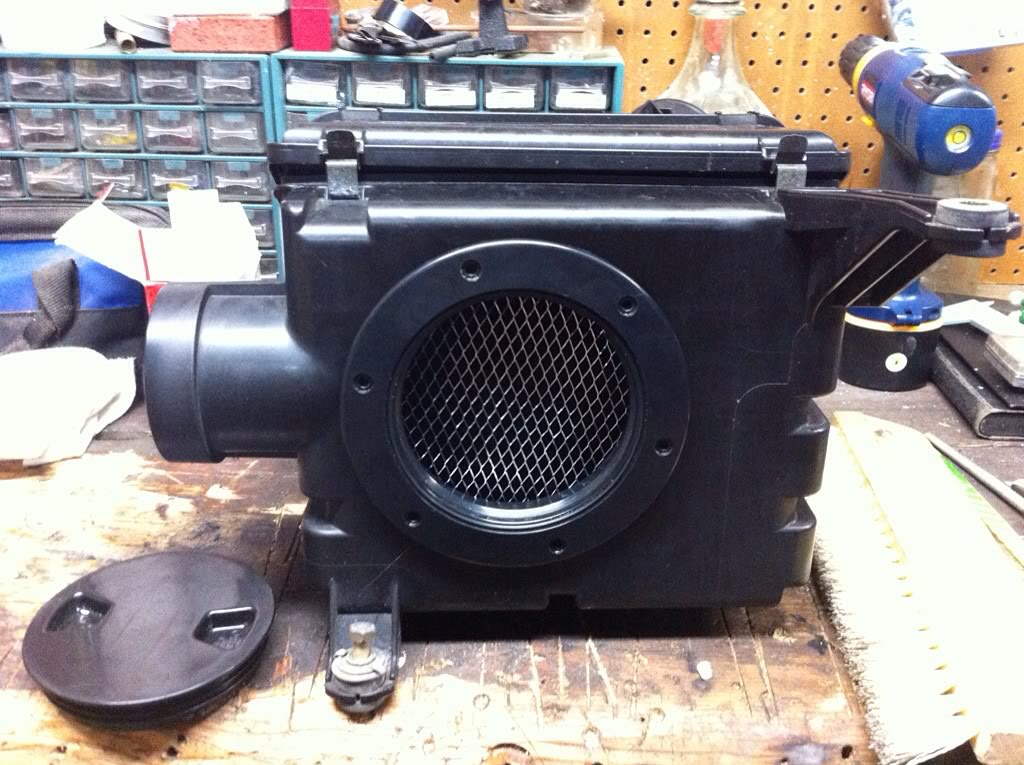
Back in the rig
Parts
screen shaping
Dry Fit
Screws and sealant
Back in the rig
Last edited by afartinthewind; 03-30-2013 at 06:27 PM. Reason: figured out photobucket
03-25-2013, 10:11 PM
#3
Registered User
Thread Starter
Join Date: Feb 2013
Location: Portland OR
Posts: 48
Likes: 0
Received 0 Likes
on
0 Posts
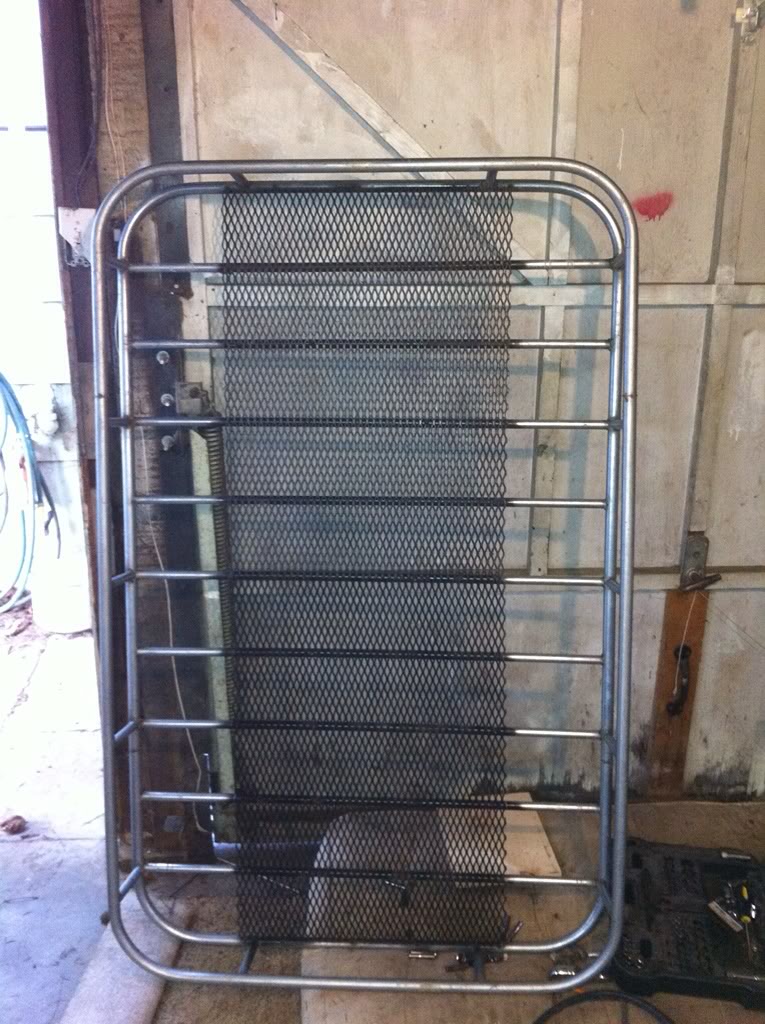
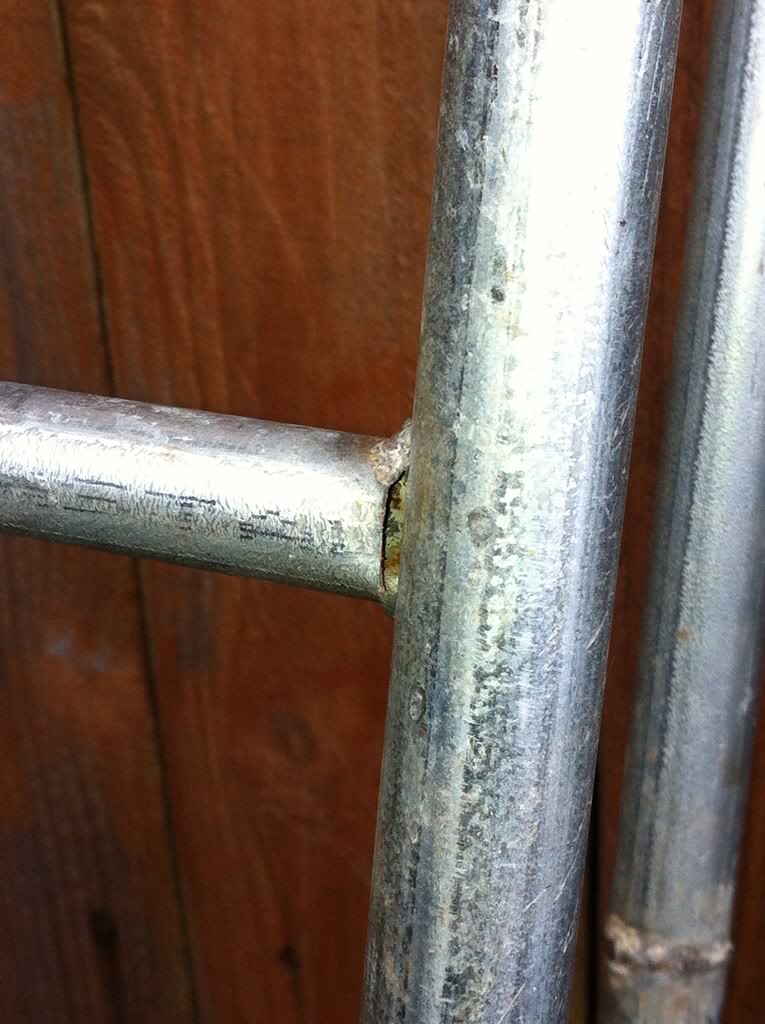
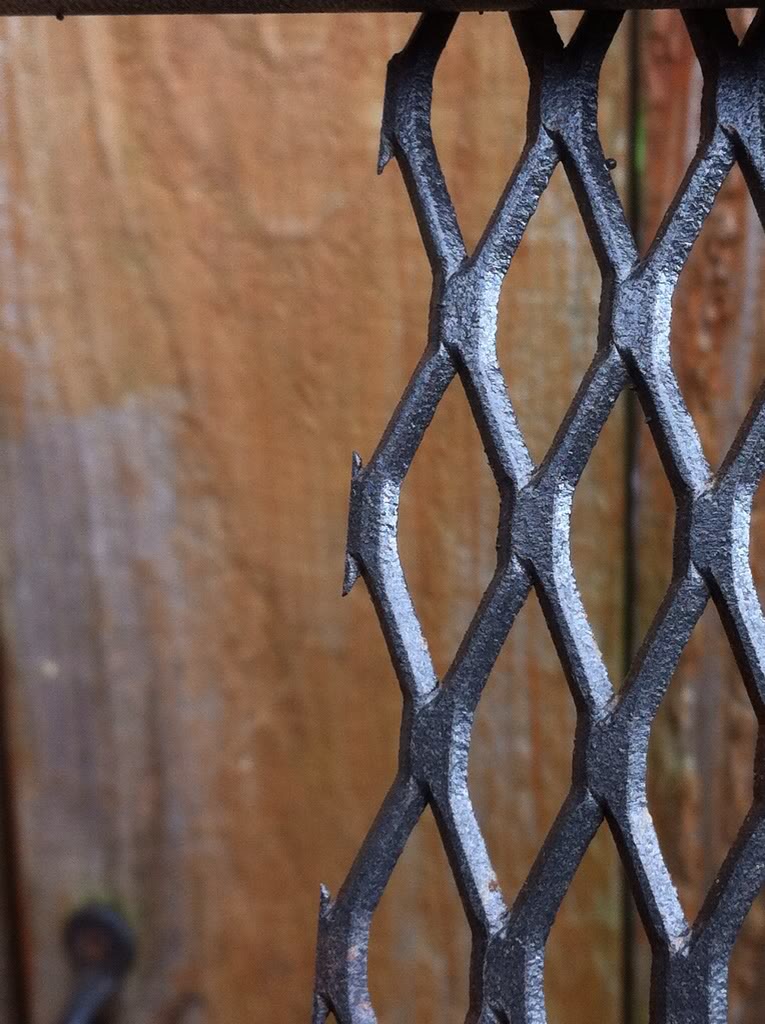
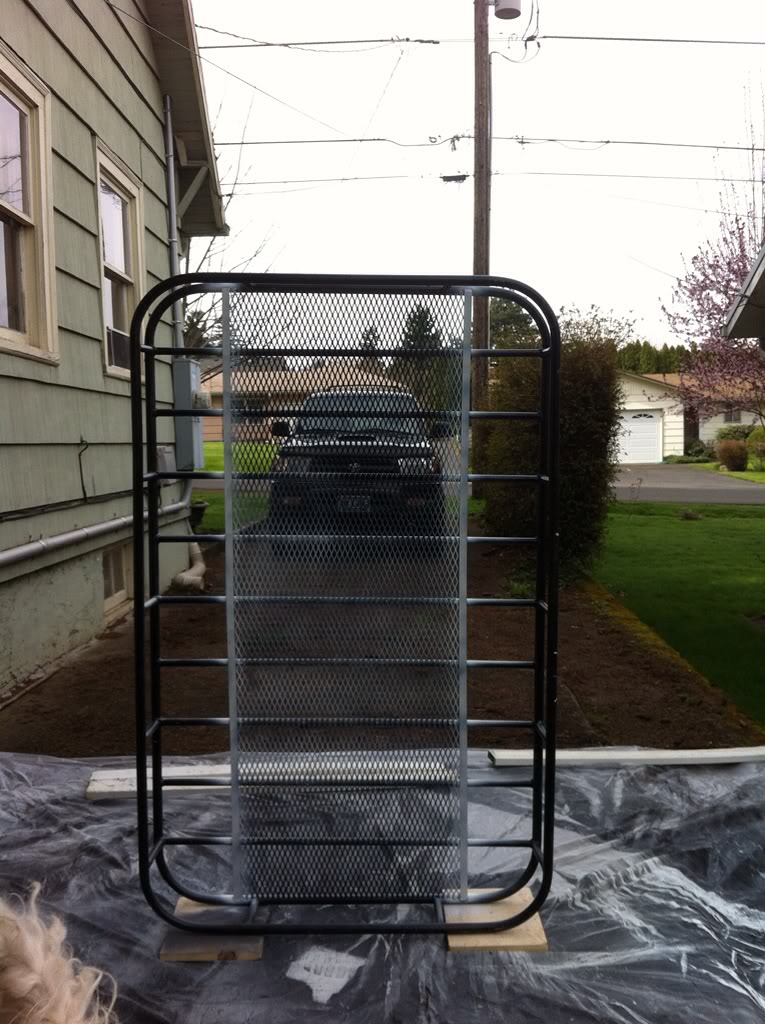
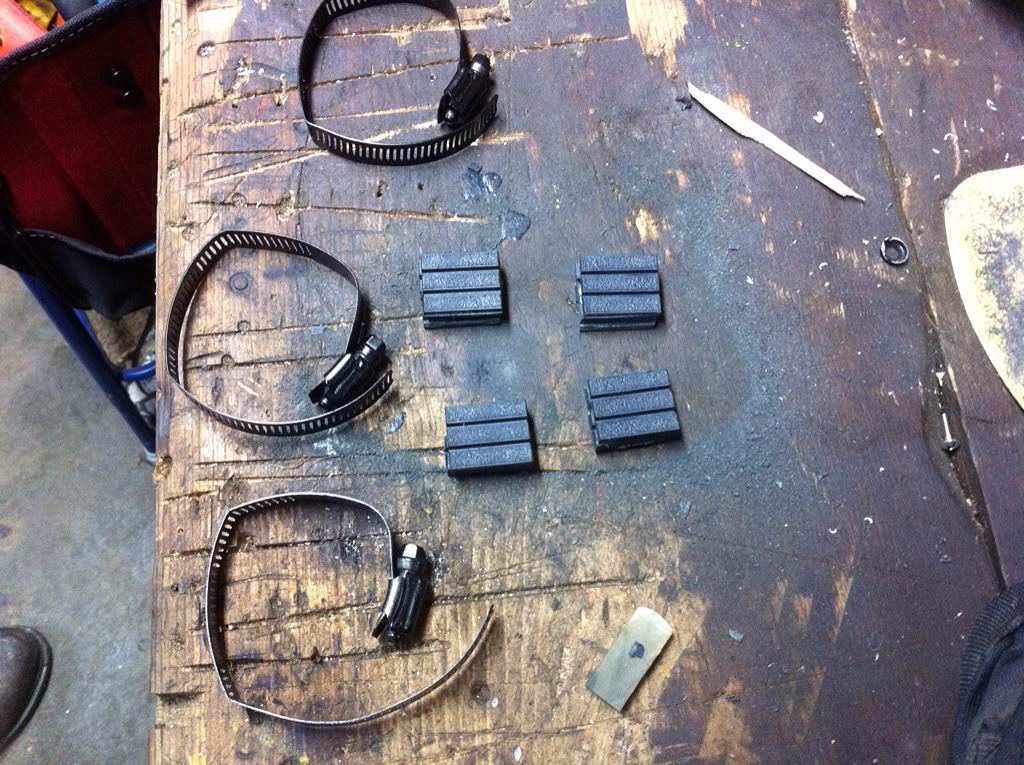
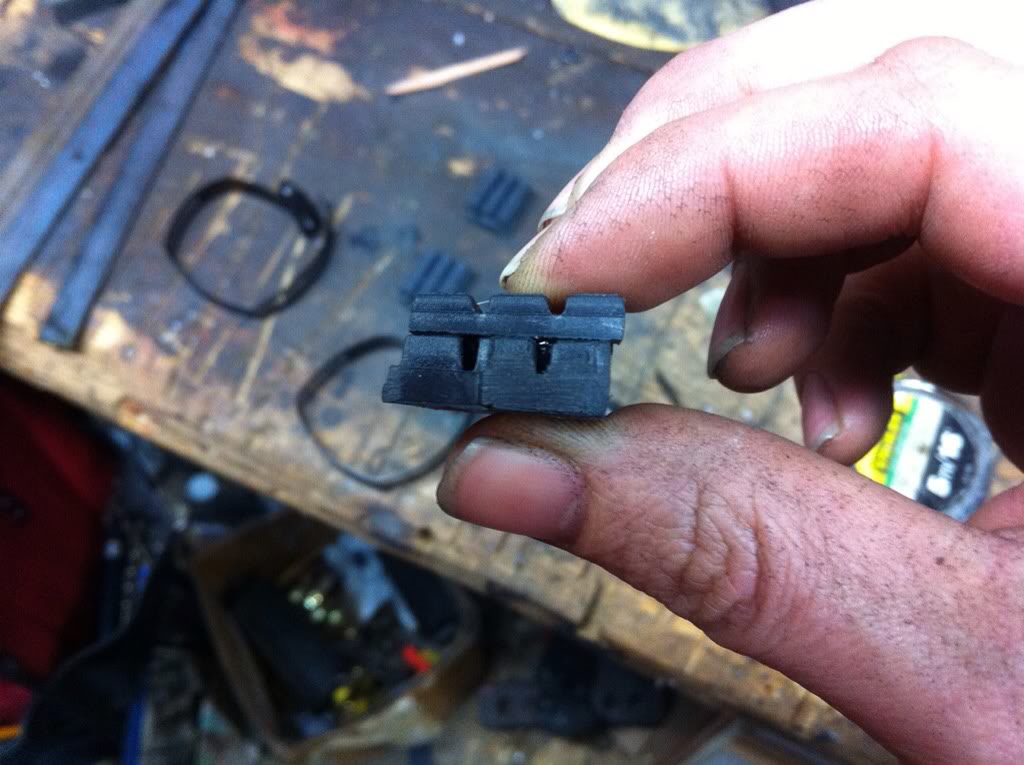
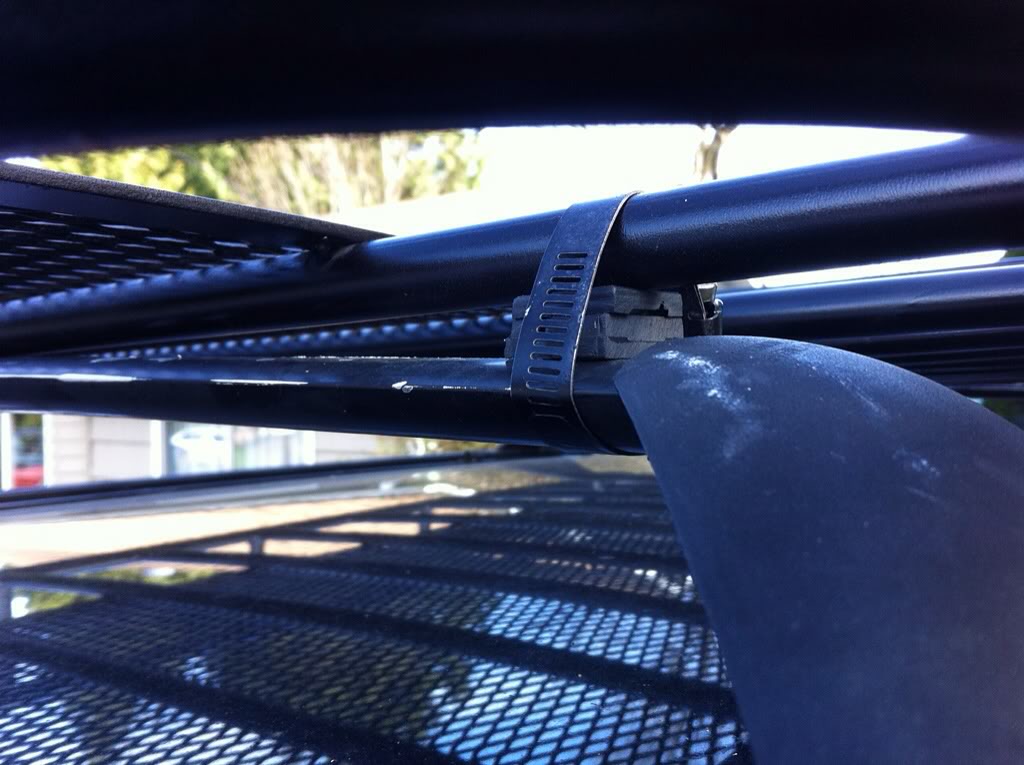
Next up, roof rack
I found this hand made rack on craigslist for $100, picked it up for $75. After welding on some 1/8" flatbar to edge the diamond mesh ( I thought it looked unfinished without it) I beefed up the welds and slapped a few coats of metal primer and semi-gloss on. Ghetto mounted it with hose clamps and leveled out with black plasic shims
Naked Rack
Poor welds that needed some metal

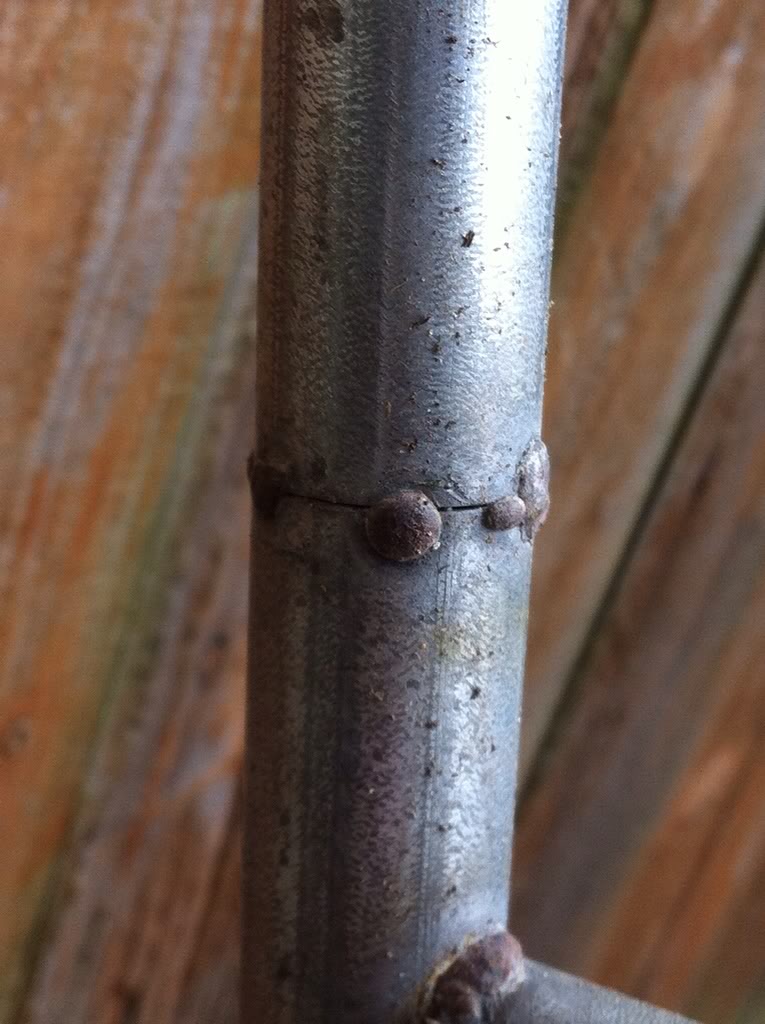
Sharp edge that grabbed everything
Added the flatbar
Wood test blocks for the curved to straight mount

Painted clamps and the plastic shim pieces.
And the actual mount
Naked Rack
Poor welds that needed some metal
Sharp edge that grabbed everything
Added the flatbar
Wood test blocks for the curved to straight mount
Painted clamps and the plastic shim pieces.
And the actual mount
Last edited by afartinthewind; 04-06-2013 at 12:04 AM. Reason: Pic Update
03-25-2013, 10:20 PM
#4
Registered User
Thread Starter
Join Date: Feb 2013
Location: Portland OR
Posts: 48
Likes: 0
Received 0 Likes
on
0 Posts
IRC mod
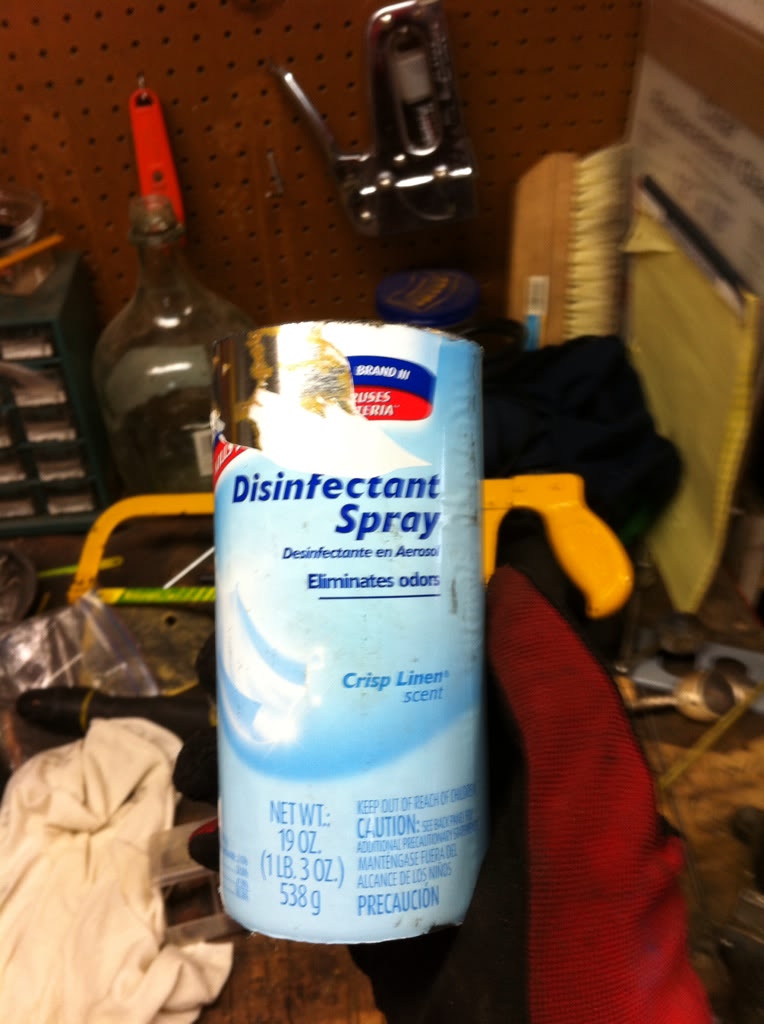
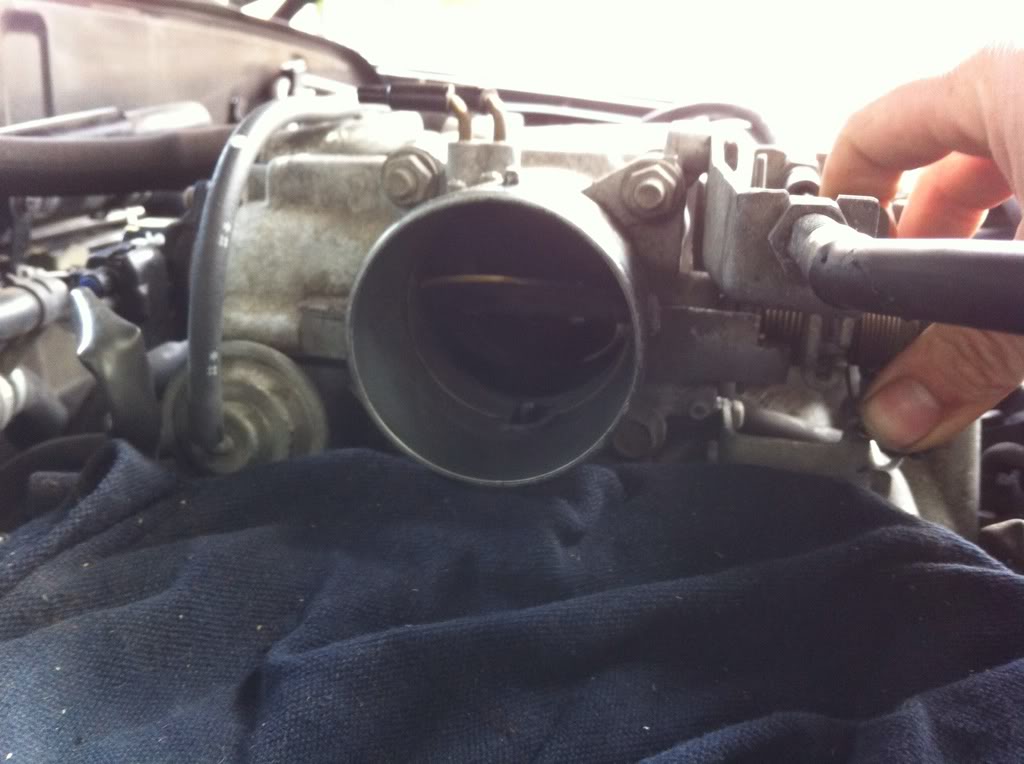
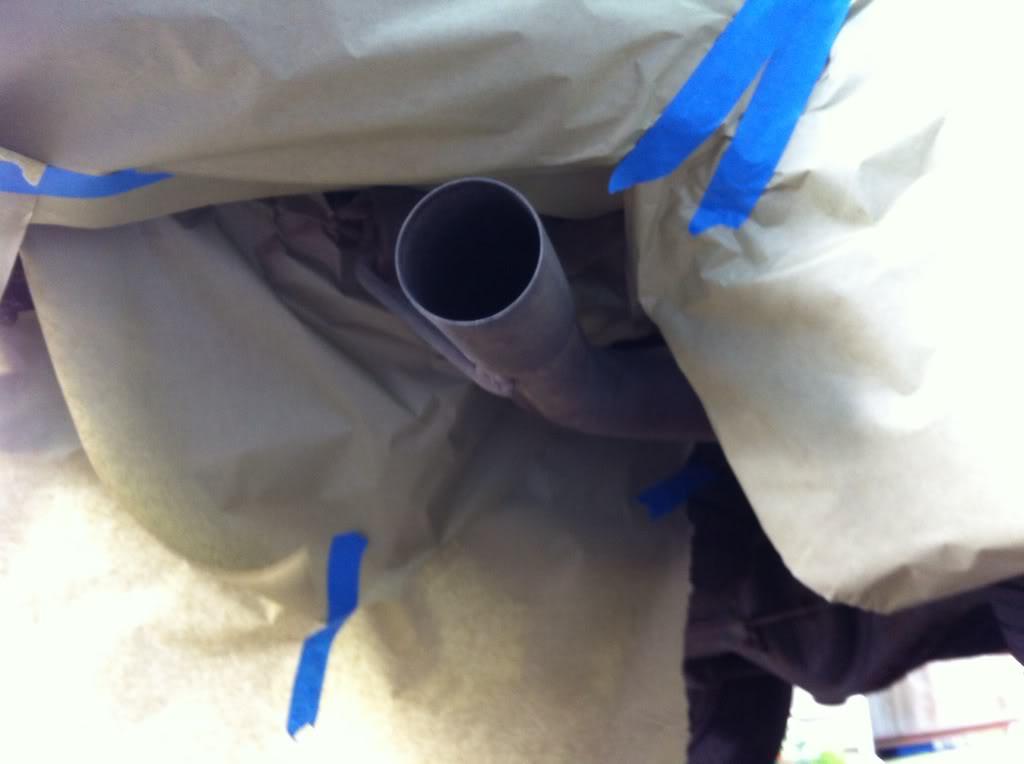
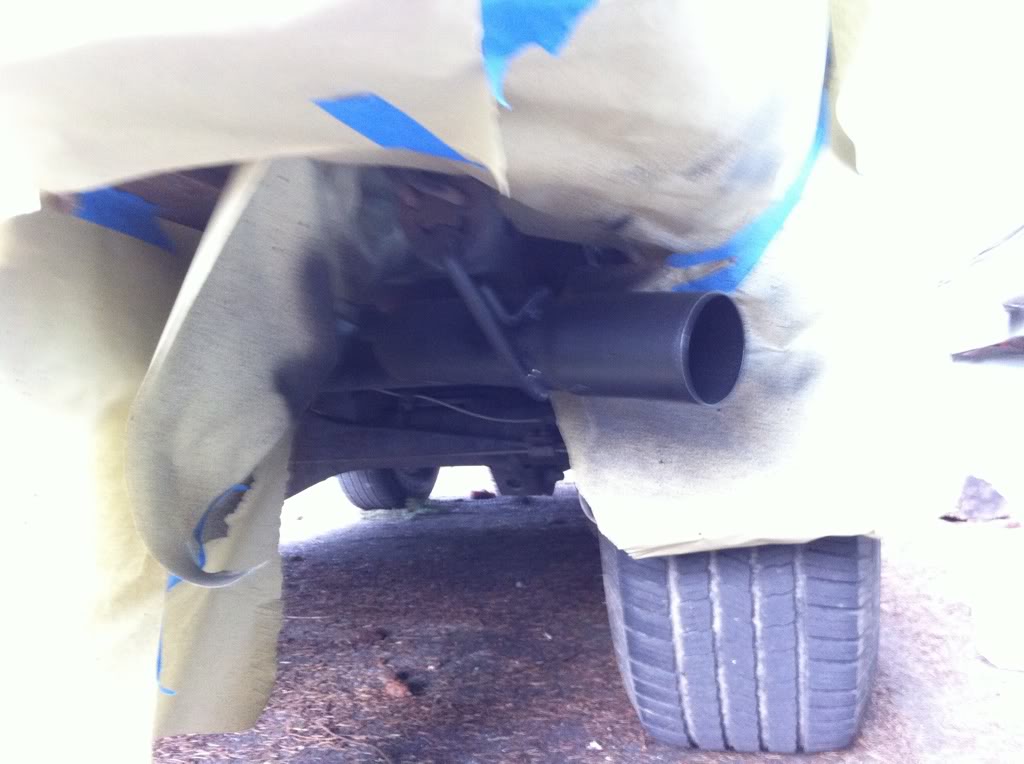
Followed the standard setup for my year, I searched the forum for info and decided to go with Bob_98SR5's vacuume setup. The pipe is made from a Lysol spray can as I had trouble finding 2 3/4'' diameter pipe. My only concern with the can was the thinness of the metal but it worked out fine. I ran my Fuel Pressure Regulator vacuume line into a tee I spliced into the vacuume line running from the nipple post Throttle Body, but after a few drives I didnt like the slight variation I noticed in my idle speed as well as a constant middle A pitch whistle I couldnt locate. I began to wonder why toyota would go through the trouble of running the FPR hose under the manifold via built in hardline and then run another 6" to the back of the silencer box unless they wanted this hose to be upstream from the TB, so I decided to install a nipple in the new pipe to troubleshoot the idle speed. Presto! Right back to pre-mod behavior(fuel use is up, I tend to rev it more to hear it). Sounds beefy (especially in the mid range) and gives it a nice tone when on the cruising on the highway. Sounds like a V8 and has more perk. Don't forget to reset the EFI.
Here's the can after I cut to length. mine measured 5 1/2"
While i'm here, clean the TB
The original setup with raw pipe and tee'd vacuume line
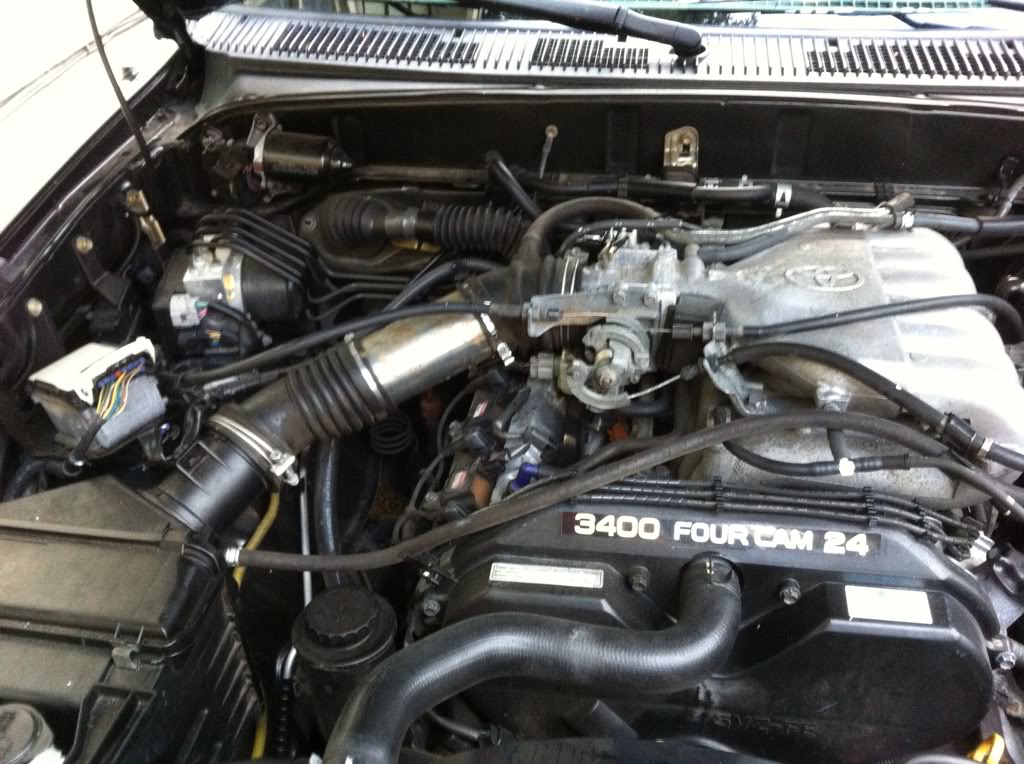
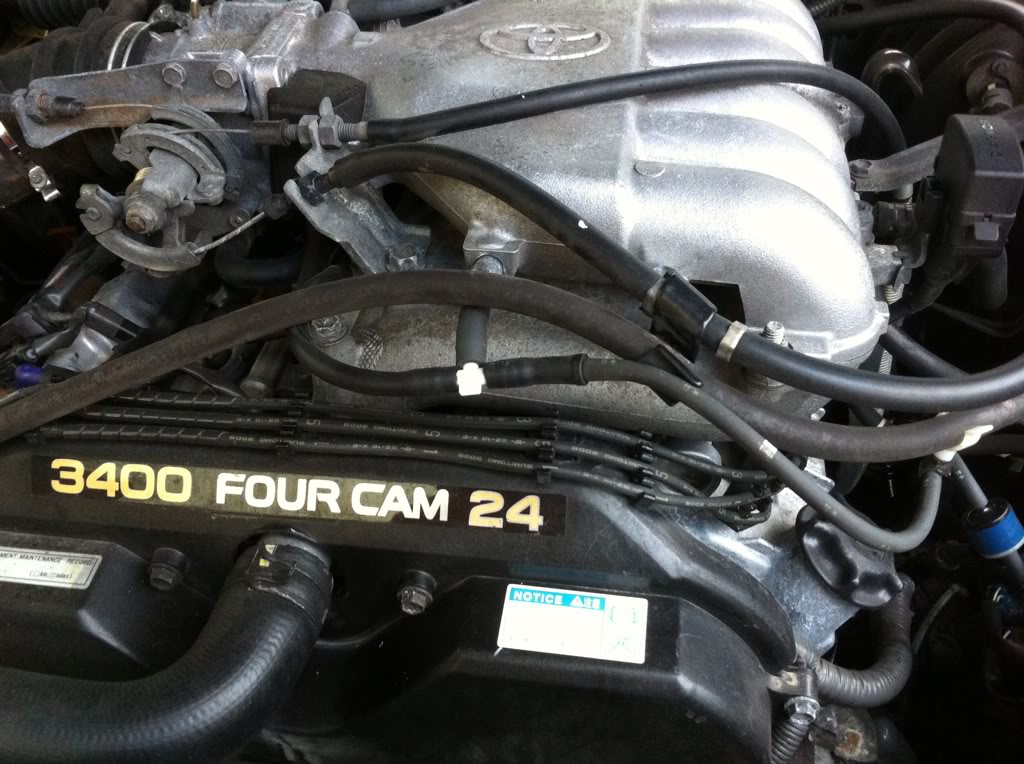
This is the setup that I ended up changing into the pre-TB line
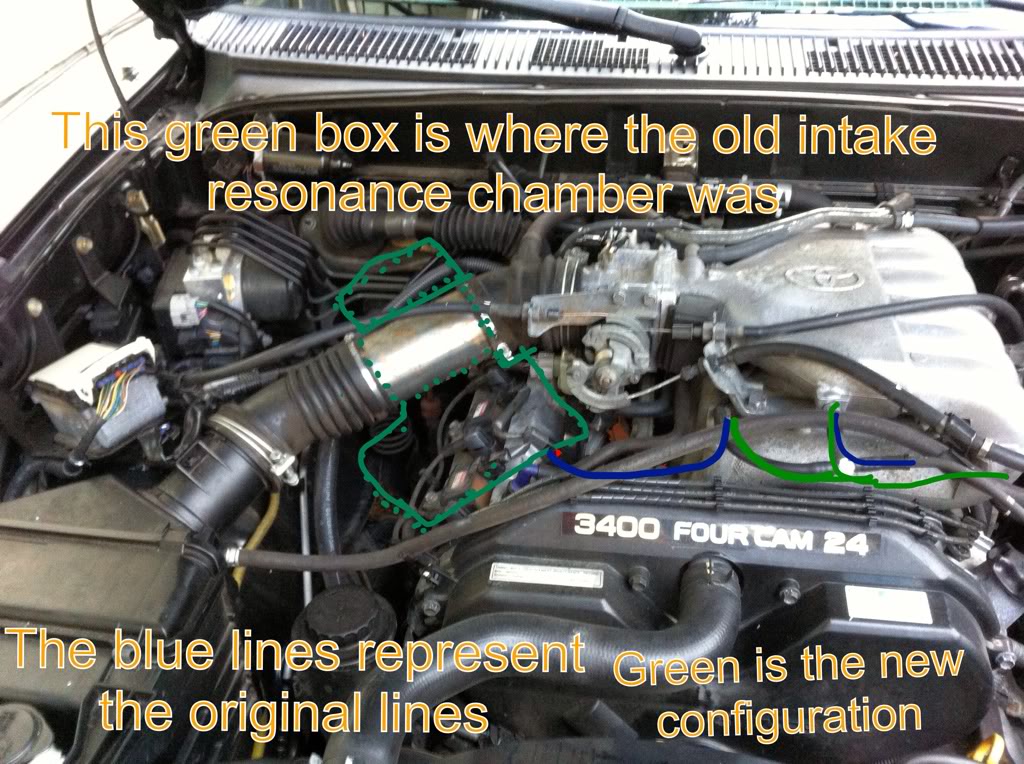
This is the new pipe with Hi-temp BBQ paint and brass nipple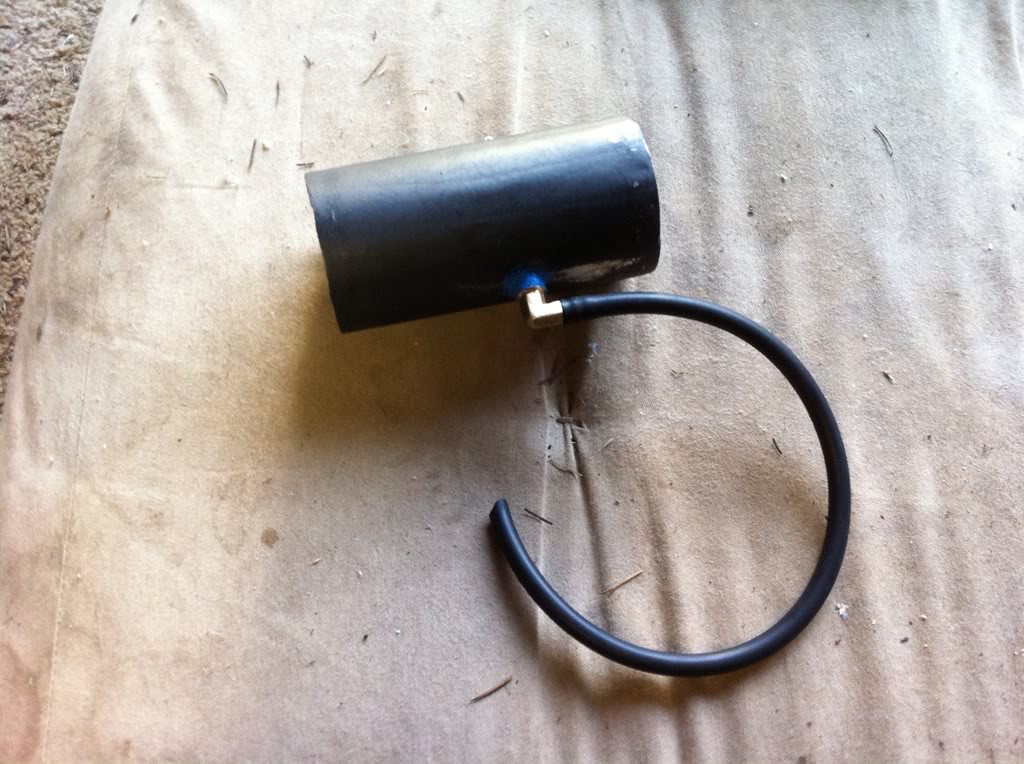
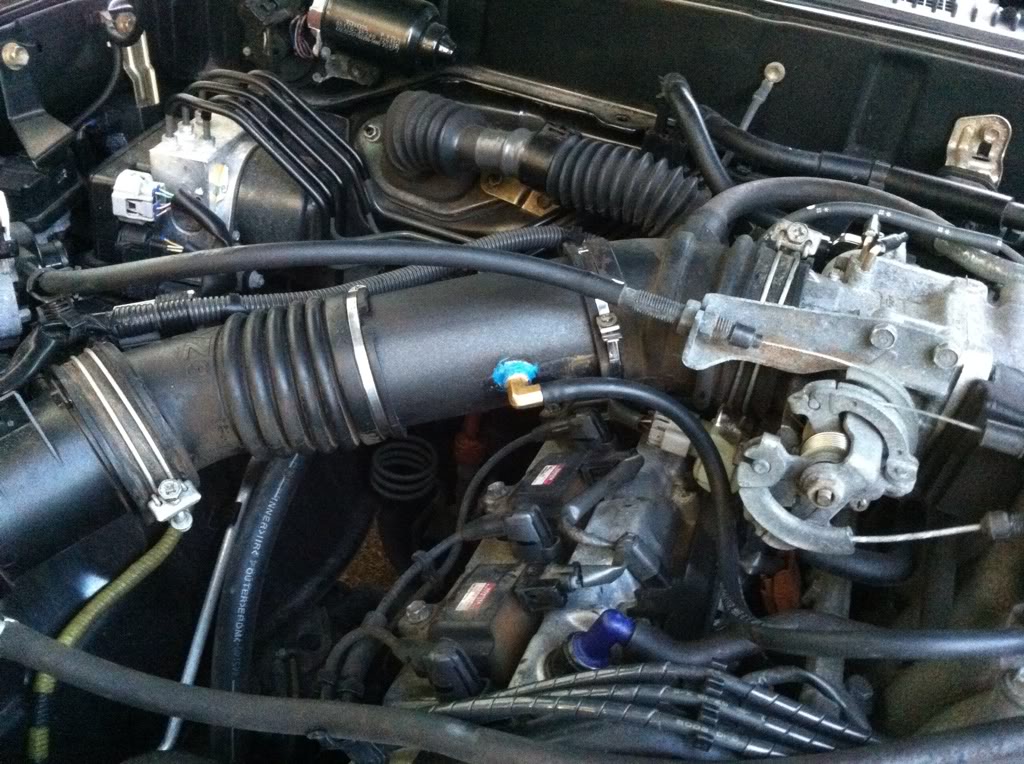
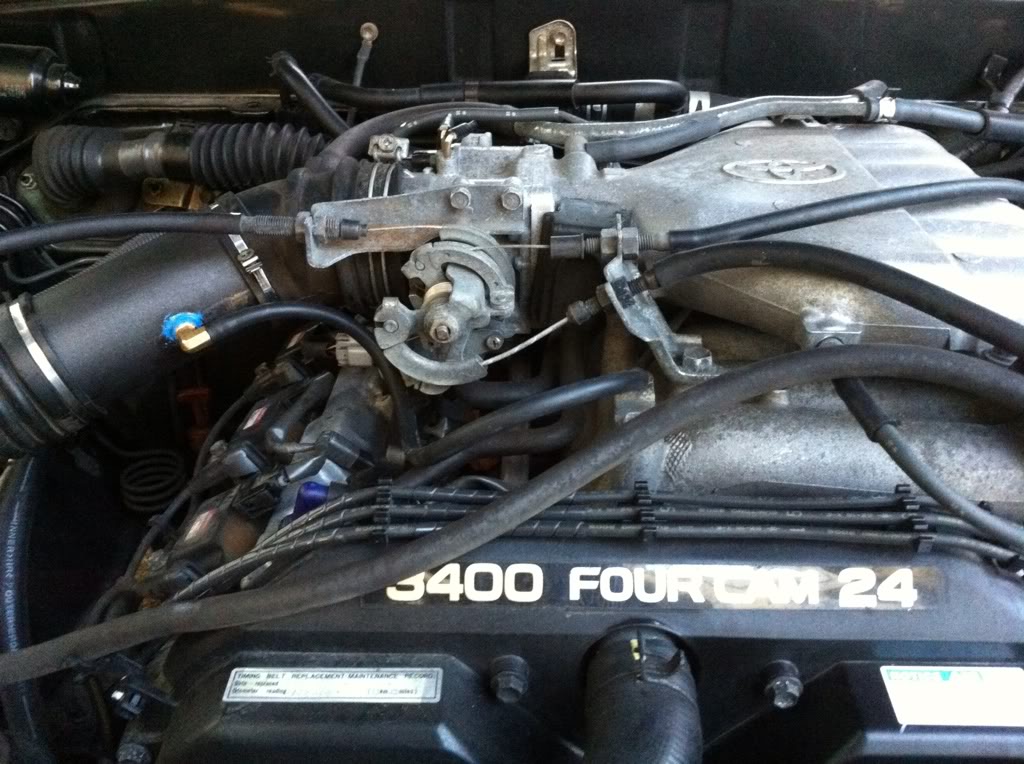
Here's the can after I cut to length. mine measured 5 1/2"
While i'm here, clean the TB
The original setup with raw pipe and tee'd vacuume line
This is the setup that I ended up changing into the pre-TB line
This is the new pipe with Hi-temp BBQ paint and brass nipple
Last edited by afartinthewind; 03-31-2013 at 08:39 PM. Reason: Pics
03-30-2013, 09:50 PM
#5
Registered User
Thread Starter
Join Date: Feb 2013
Location: Portland OR
Posts: 48
Likes: 0
Received 0 Likes
on
0 Posts
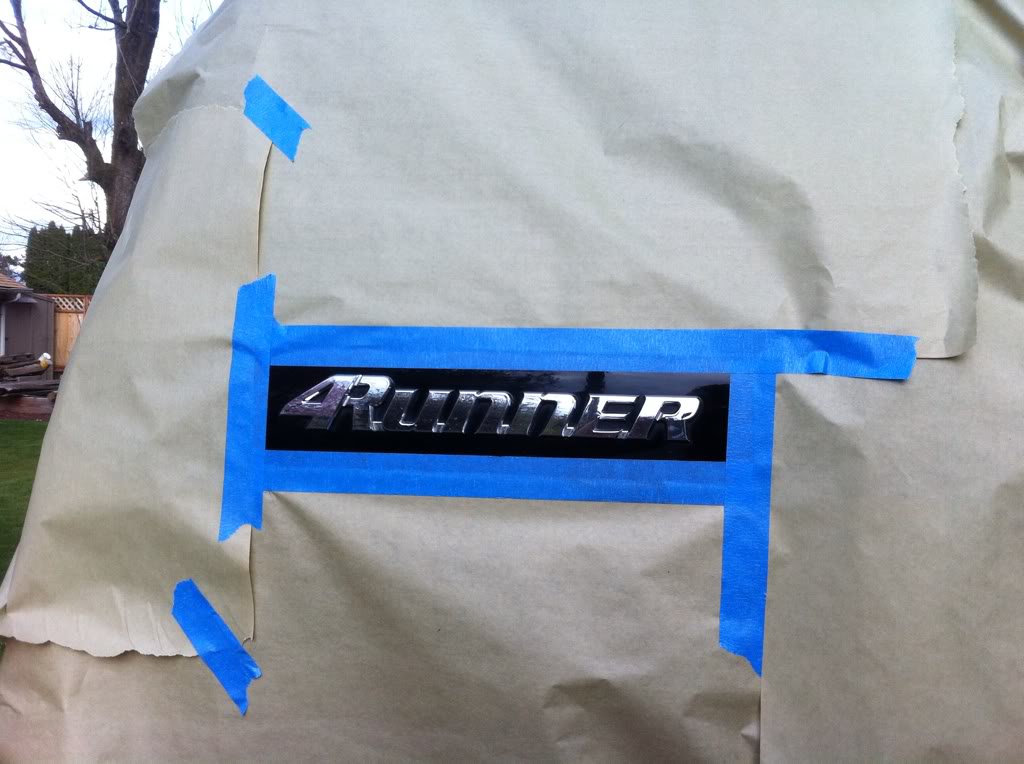
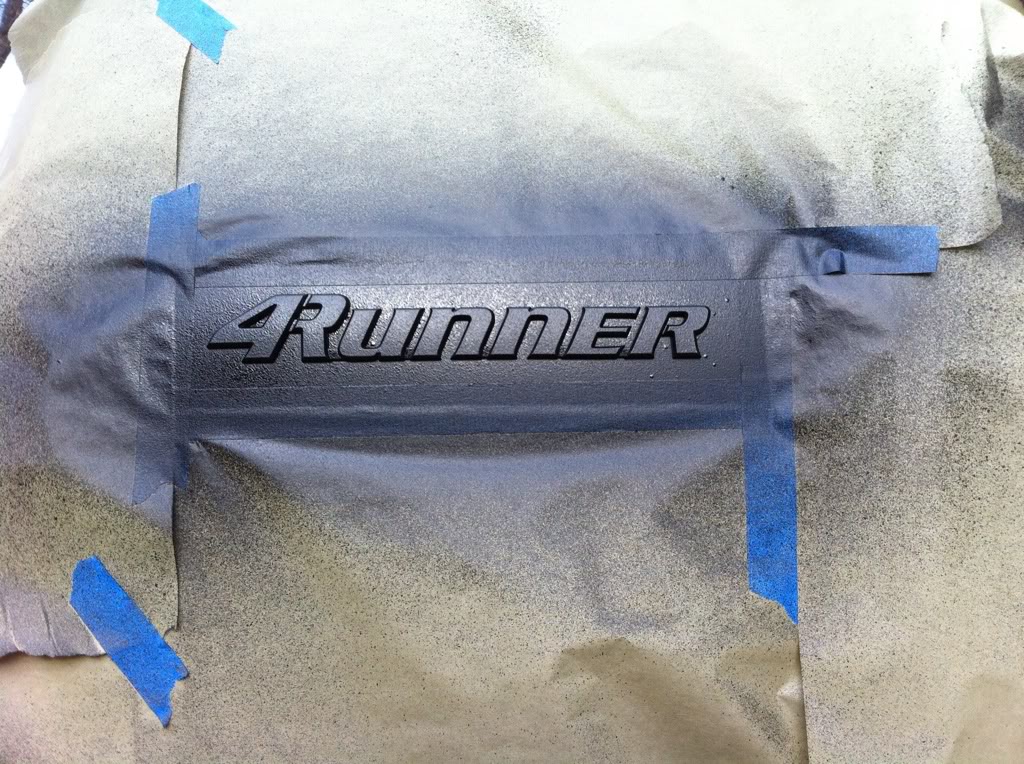
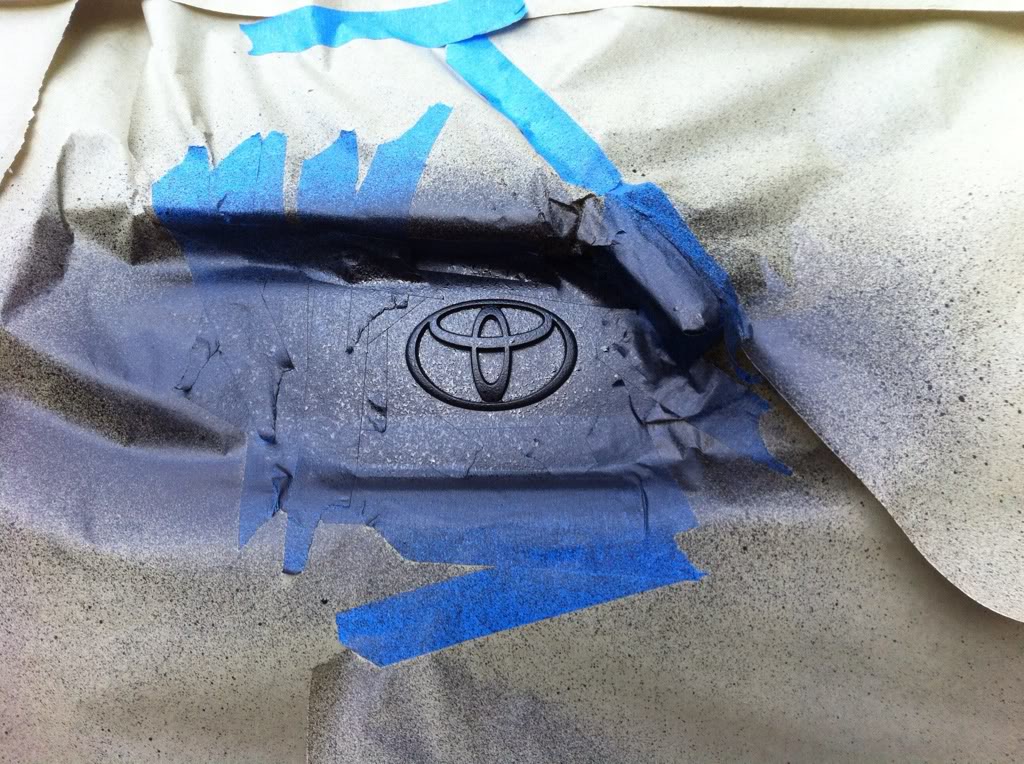
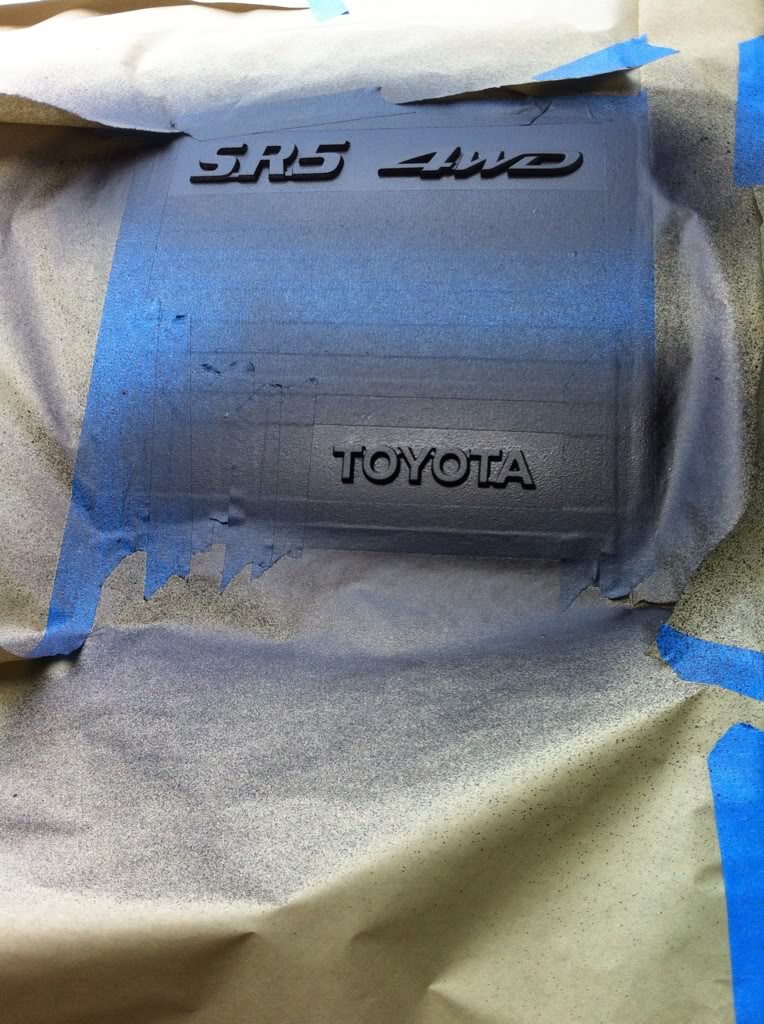
Plastidip. Mana from God Herself.
After endless threads of plastidip pics i decided to do it. I was nervous to spray some ˟˟˟˟ on my new truck but after watching a few videos on youtube(dipyourcar.com's channel) I had some confidence. Snooped around and found some old masking tape from painting my son's room and half a roll of butcher paper we also used for masking his room. The prosess is straight forward. Wash it, mask it, spray\wait (x4) and peel. If anything it comes off too easy when peeling. It pulled away from seams like it was cut however on my front emblem, the convex curve was to blunt to form a seam at the edge and I lost the whole thing (meh). Also did my exhaust tip and hood scoop. Wife liked it so much she asked me to do her Highlander the next day, said it helped take away some of the grandma feel of her maroon crossover. Now im hooked on the stuff, im doing the rims next and the back of my rear view so you dont see this giant blue (interior color) thing floating inside an otherwise black winshield. Both cars and a few tools with 1 1/2 cans. Gonna use the rest on all my box end wrenches.
All masked up
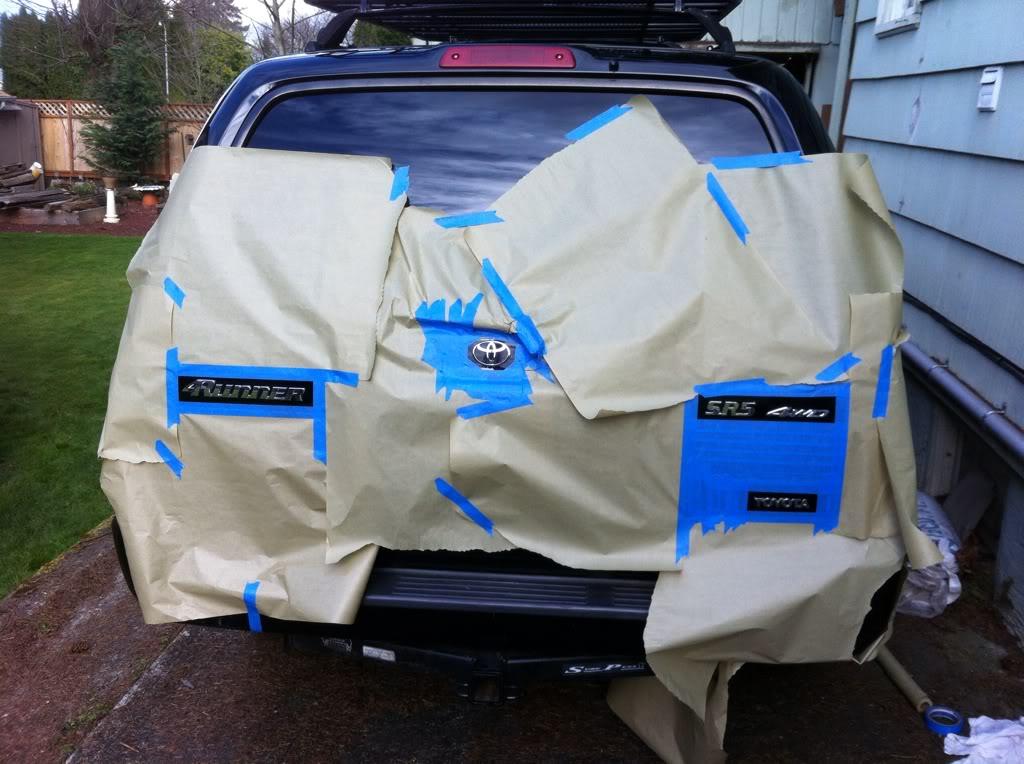

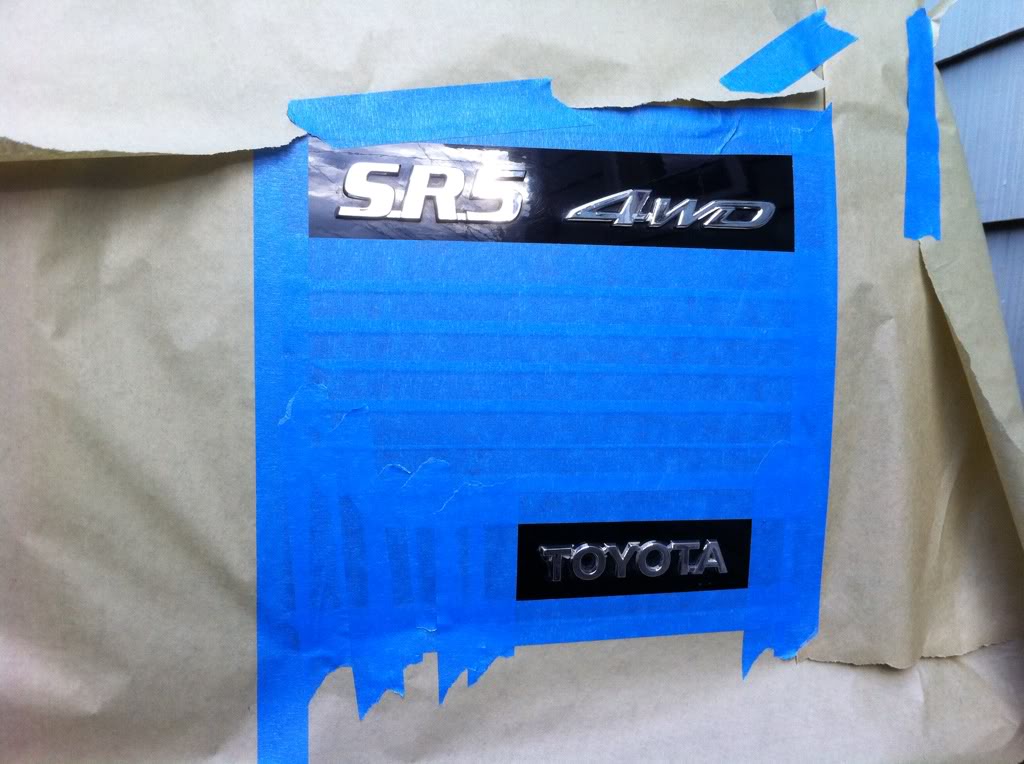
I forgot to download pics of the after, ill get them up soon
All masked up
I forgot to download pics of the after, ill get them up soon
03-30-2013, 10:01 PM
#6
Registered User
Thread Starter
Join Date: Feb 2013
Location: Portland OR
Posts: 48
Likes: 0
Received 0 Likes
on
0 Posts
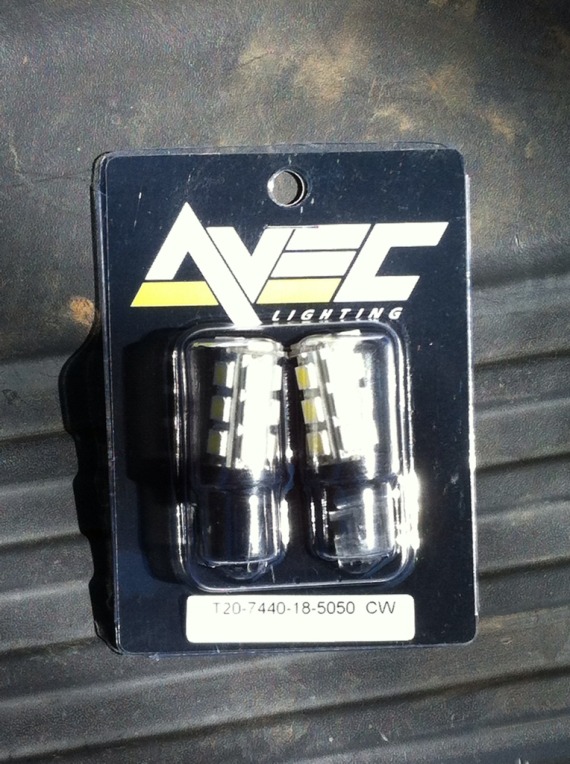
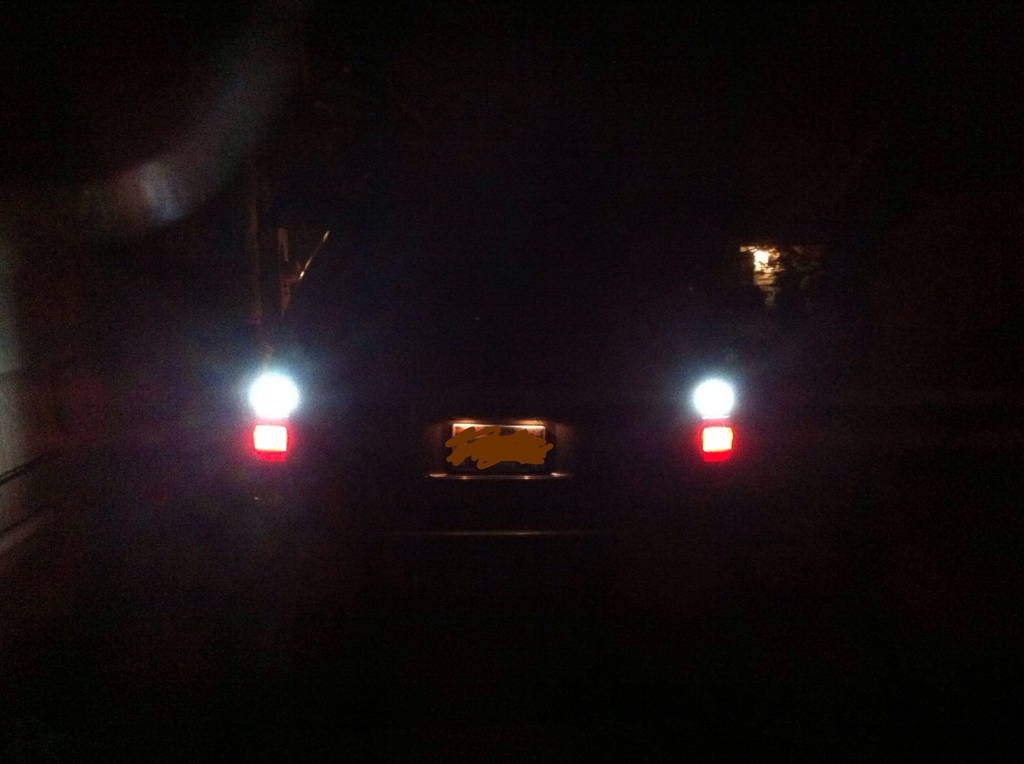
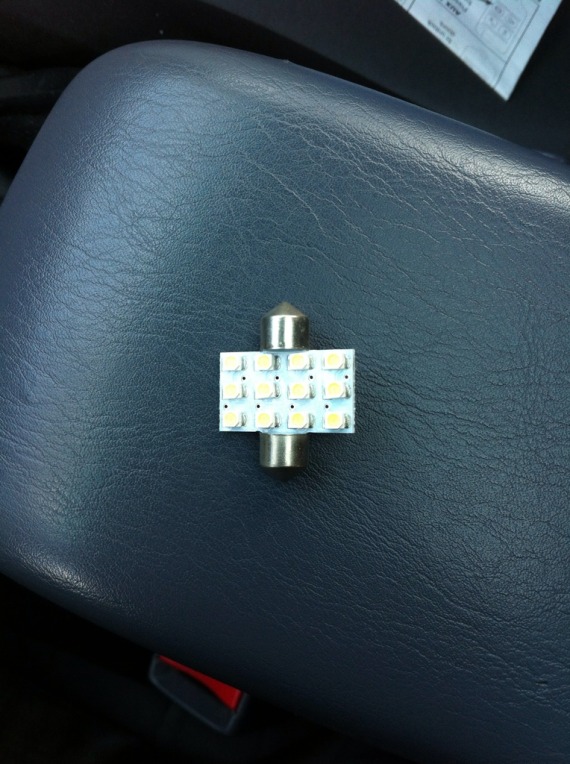
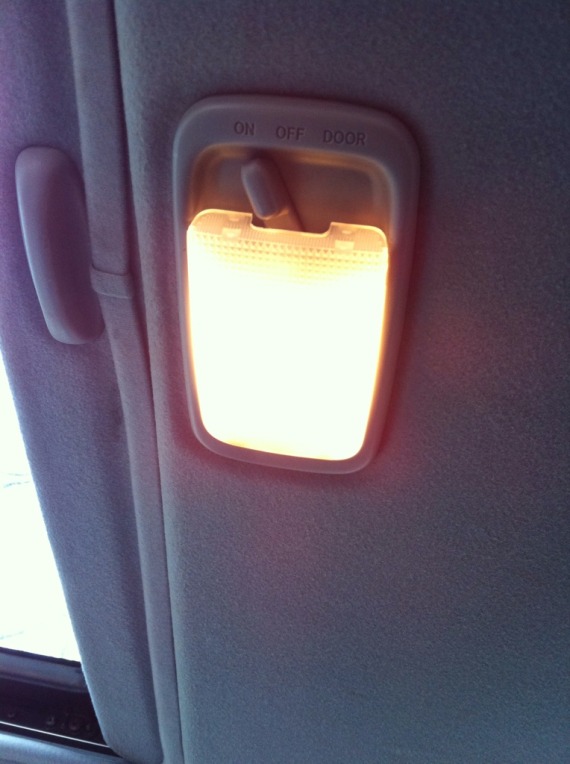
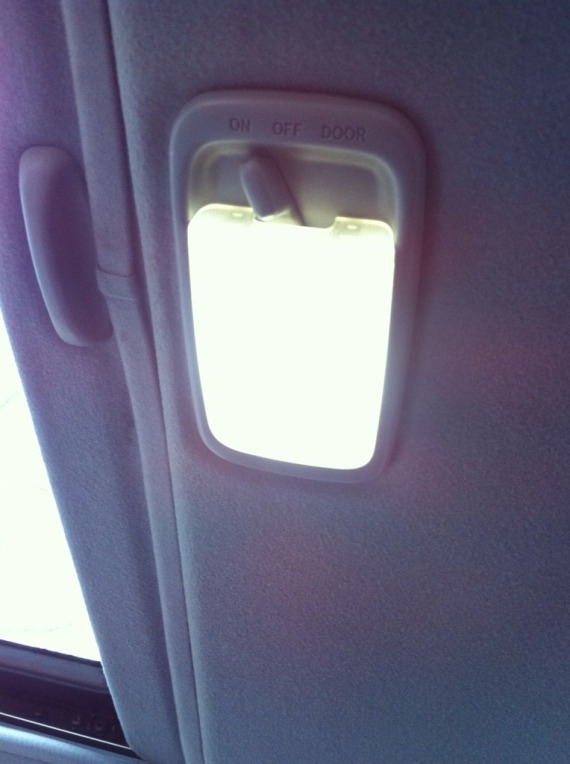
LED Reverse lights
Purchased some LED's for my reverse lights, I drive alot at night and would prefer to not to hit things. Used 4Ripchord's LED light chart for my parts. I just plugged in the part number and picked the one with the best overall rating(duh). All of the ratings mentioned rather fast burnout times(7month av.) but I accepted that as a tradeoff for lumens and just keep the stock bulbs in the glove box. They are much brighter and have a nice white/cool blue look. I just installed them today, pics pending
Trending Topics
04-21-2013, 07:12 PM
#8
Registered User
Thread Starter
Join Date: Feb 2013
Location: Portland OR
Posts: 48
Likes: 0
Received 0 Likes
on
0 Posts
Plastidip on the rims
So I got tired of the classic silver and wanted a flat black instead of gloss so I went with the plastidip. I did my runner and the wife's highlander with 4 cans (about 25 bucks). I also picked up a cheap plastic drop cloth and cut it into 2 ft wide strips to thread into the rim to mask the rotors. Applied as per usual although I would advise using a good tire shine before hand to help removal. Definitely an easy upgrade but if I did it again I'd remove the rims altogether for better coverage (you can see silver inside of the rim if you look close). I need to service the brakes soon so I plan on doing a more complete touch up then.
Before
After
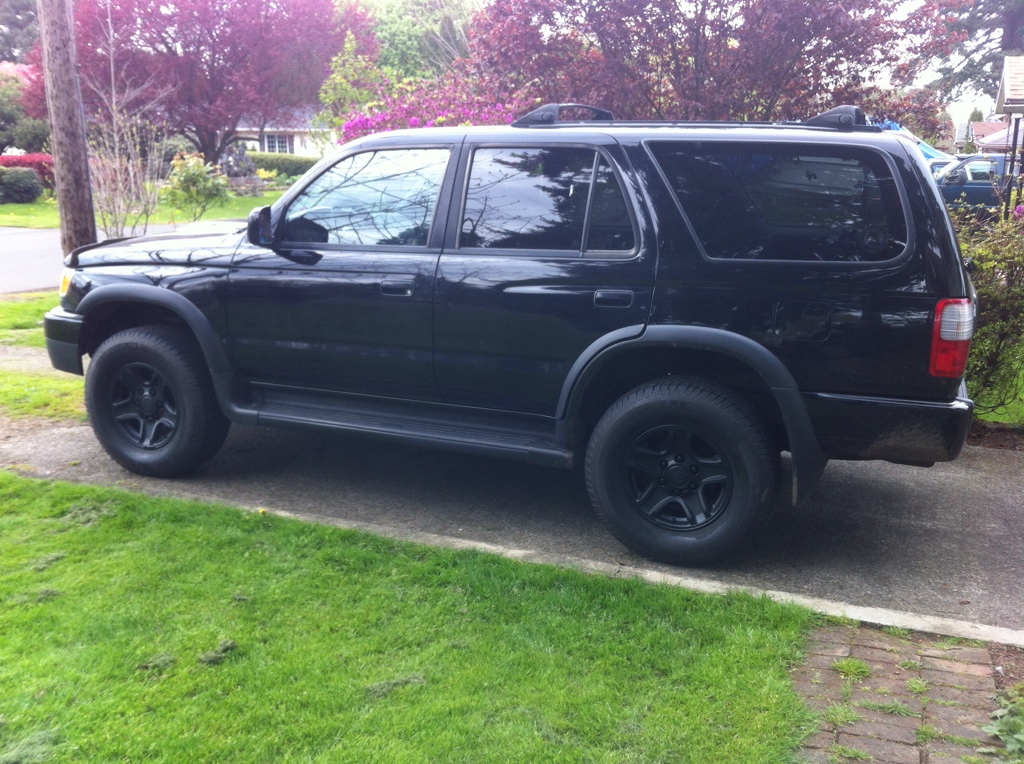
Before

After
 04-21-2013, 07:44 PM
#9
Registered User
Thread Starter
Join Date: Feb 2013
Location: Portland OR
Posts: 48
Likes: 0
Received 0 Likes
on
0 Posts
No Milkshake For Me!
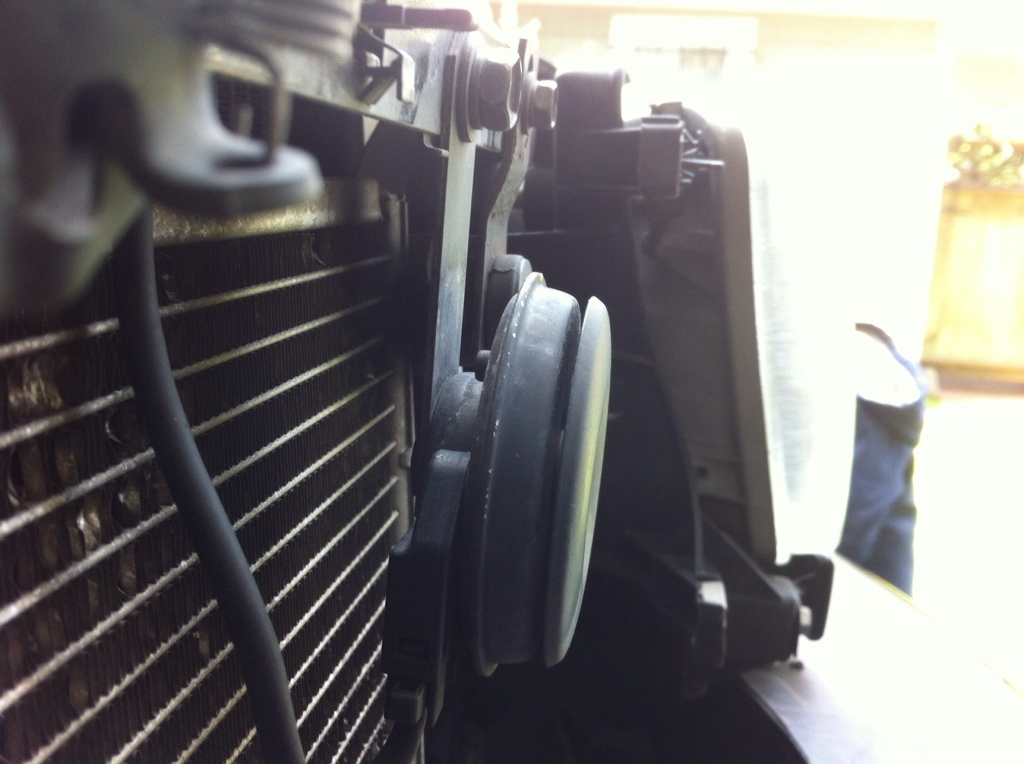
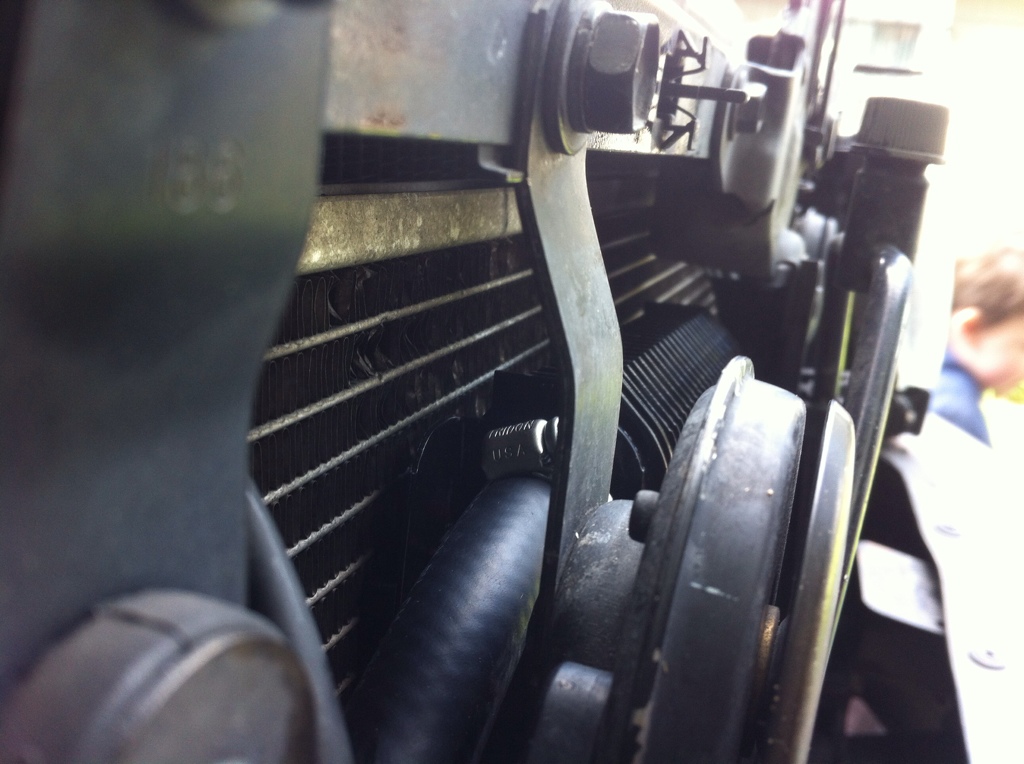
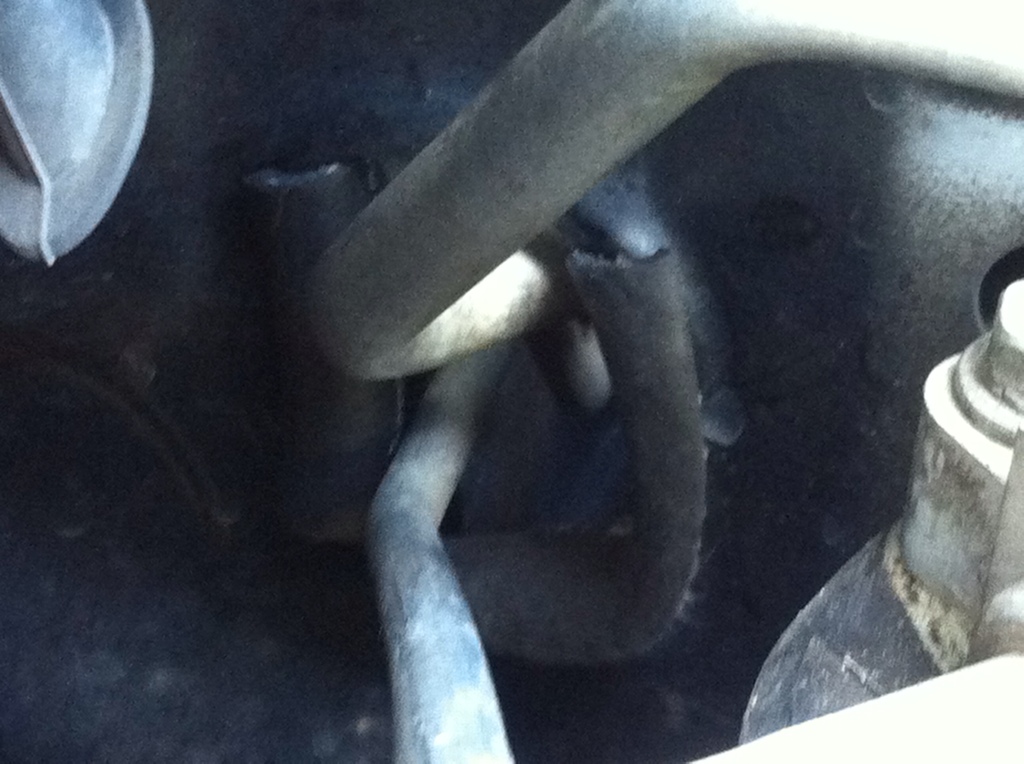
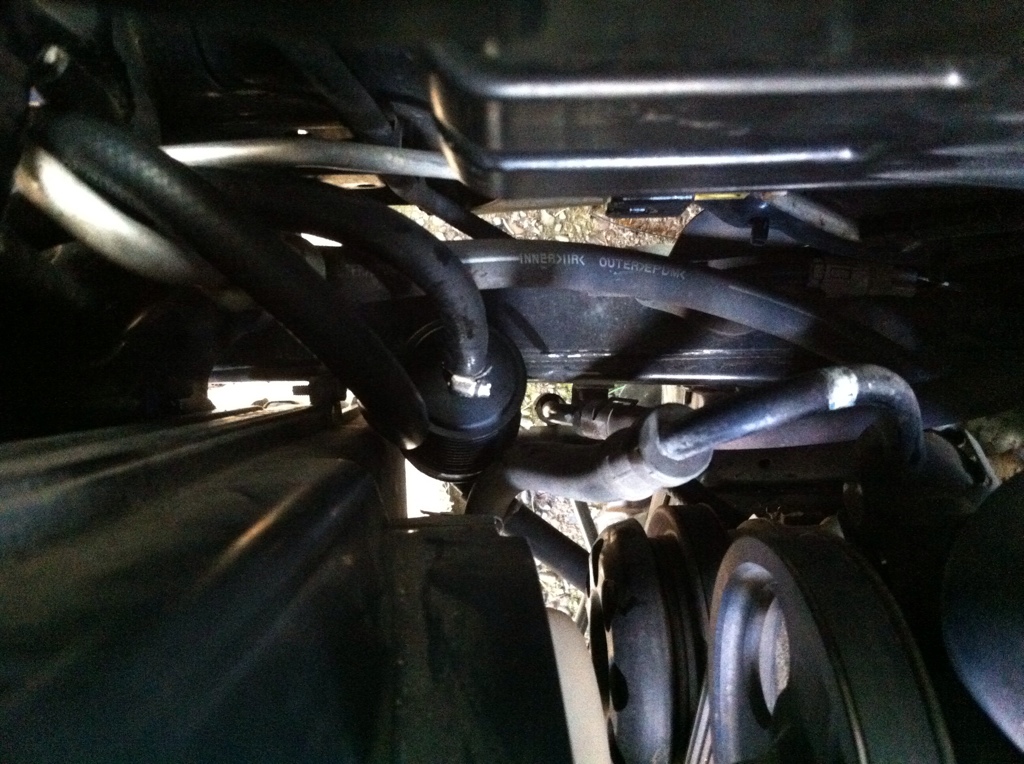
After countless hours reading about the dreaded Milkshake I decided $60 was a fair one time insurance payment against it. Ordered the B&M 70264 over the xxx68 because, after failing to find the btu rating for the stock cooler, I wanted the extra 1500 btu's and felt that it was worth another $10. I also dropped in the raybestos inline transmission filter as added protection and picked up a 4 pack of hose clamps and about 8 feet of extra hose. Another easy job, just pop off the grill and shield, install on the radiatior and swap the lines. I left my old trans to cooler hose as a jumper to the new filter(pain in the a$$ to remove and was in good condition) and had to use my box knife to GENTLY cut the return line off the hardline nipple. I ran my lines up from the hard lines behind the radiator and through the hole that the A/C lines use to pass the radiator. I used extra line to cover the edges of the hole. Finished up by linking the stock radiator cooler together to prevent drainage and topping off the 1/4 cup of fluid loss.
NOTE: I had to removed my passenger side horn and reshaped the bracket to make room for the wider 70264(see image) and had to unbolt and retract the fan shroud to access the back of the zip ties. A smaller hand could probably fit in the fan with some effort.
Grill Removed
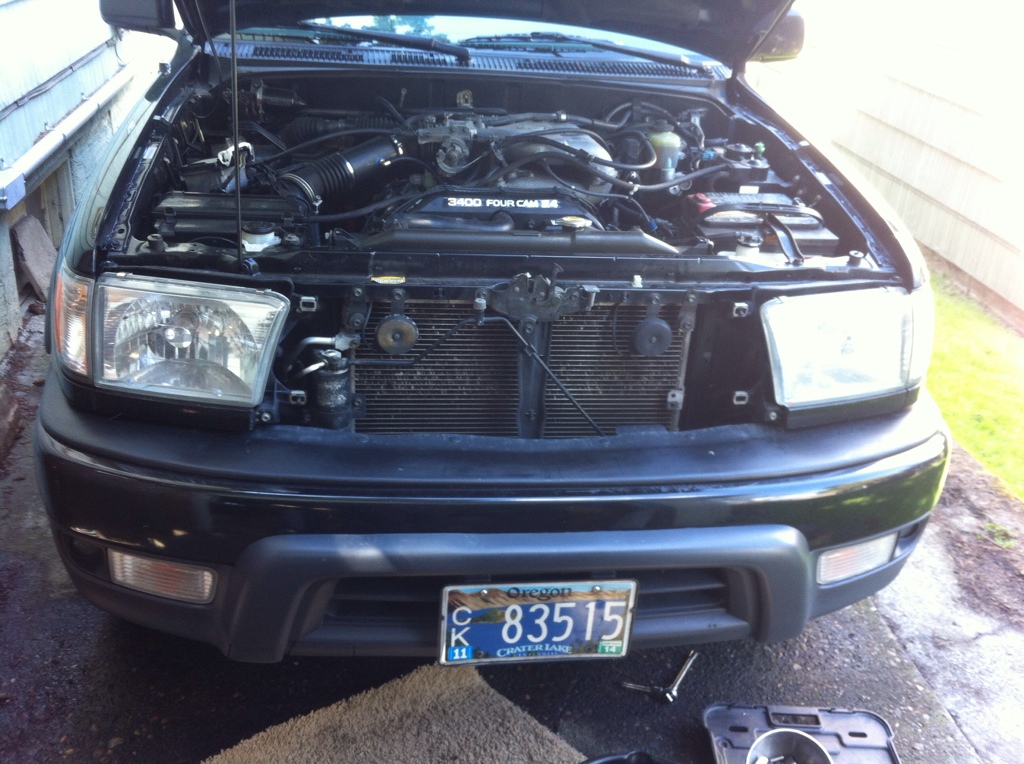
Cooler mounted(note the horn)
This is as close to the side as it will fit. I didn't want to run more hose than I need to.
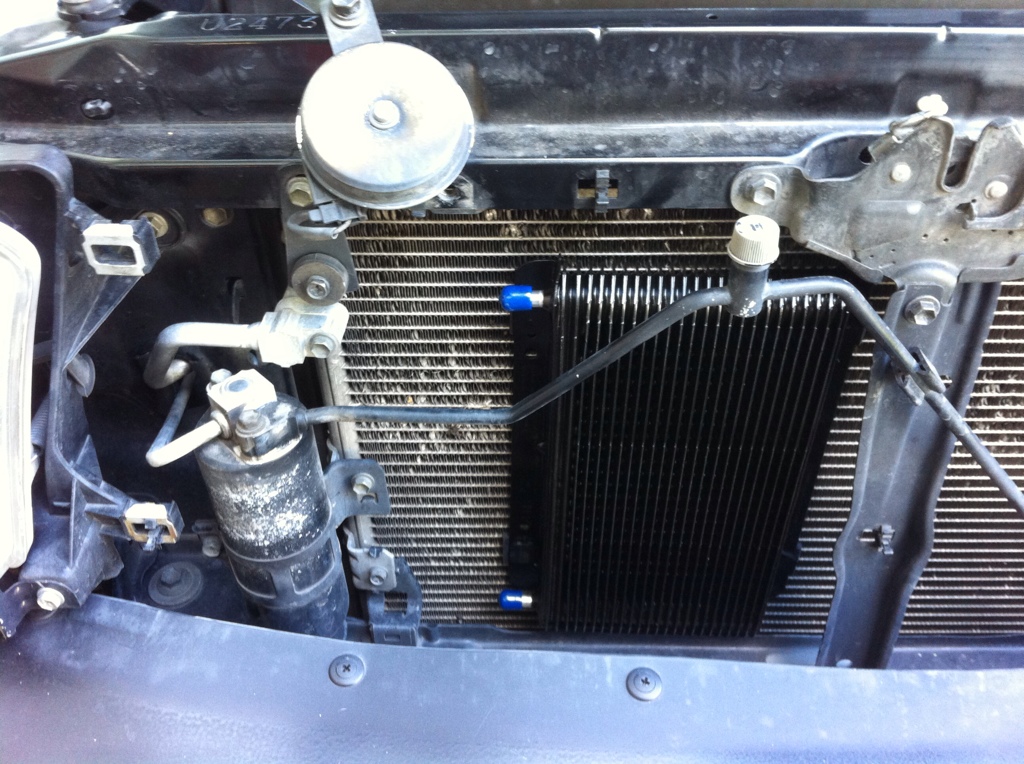
Horn Bracket BEFORE
AFTER(note the bend)
Hole for the hoses
I used extra hose to line the hole. Spring pressure holds it in place.
Inline Filter Placement
Looking down into the engine compartment.
NOTE: I had to removed my passenger side horn and reshaped the bracket to make room for the wider 70264(see image) and had to unbolt and retract the fan shroud to access the back of the zip ties. A smaller hand could probably fit in the fan with some effort.
Grill Removed

Cooler mounted(note the horn)
This is as close to the side as it will fit. I didn't want to run more hose than I need to.

Horn Bracket BEFORE

AFTER(note the bend)

Hole for the hoses
I used extra hose to line the hole. Spring pressure holds it in place.

Inline Filter Placement
Looking down into the engine compartment.

Last edited by afartinthewind; 04-22-2013 at 12:17 PM. Reason: Pics

Thread
Thread Starter
Forum
Replies
Last Post
RedRunner_87
95.5-2004 Tacomas & 96-2002 4Runners (Build-Up Section)
84
06-01-2021 01:51 PM


