xxxtreme22r's 1987 Pickup Build-Up Thread

 09-06-2010, 10:22 AM
#63
Registered User
Thread Starter
 09-06-2010, 10:25 AM
#64
Registered User
Thread Starter
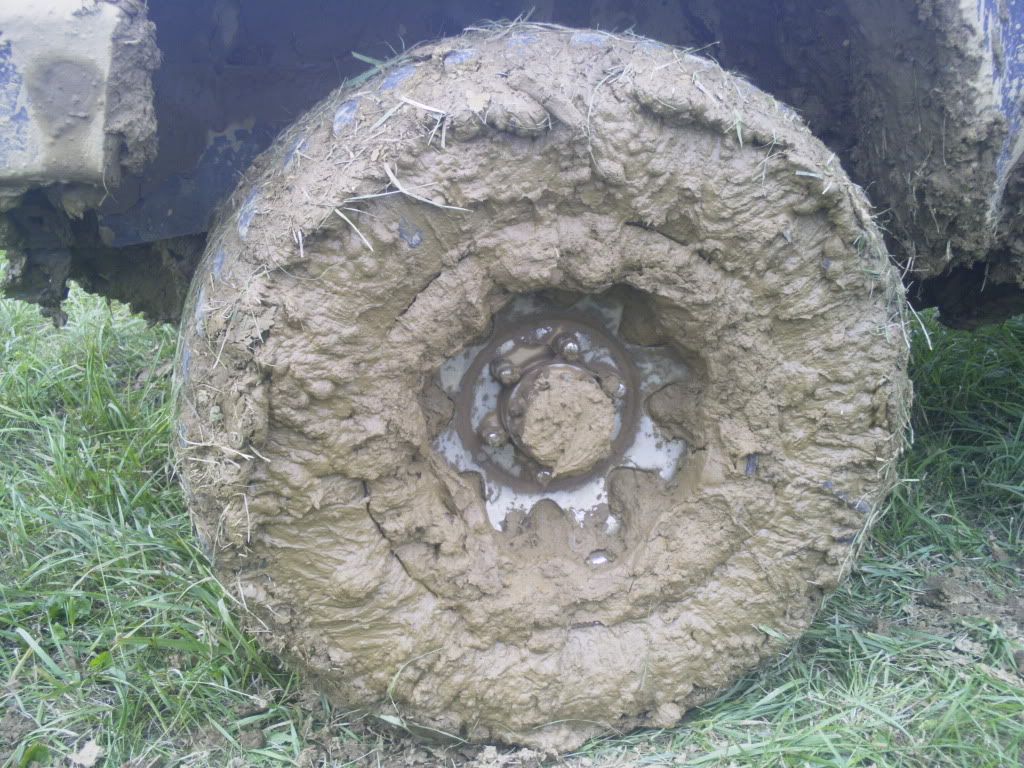
DING DING DING, Looks like we got ourselves a Winner.
That and then some. Standby for some photos. I originally thought it was just 1 or 2 large "rocks" but they aren;t rocks at all, they are "clayballs" that hardened when the mud dried from the pits.
I might have to take the rotors off to clean them out. Gonna definitely take the calipers off though. At least on this side.
You remember this photo anyone? Well now you can see the aftermath. lol.
 09-06-2010, 10:37 AM
#65
Registered User
Thread Starter
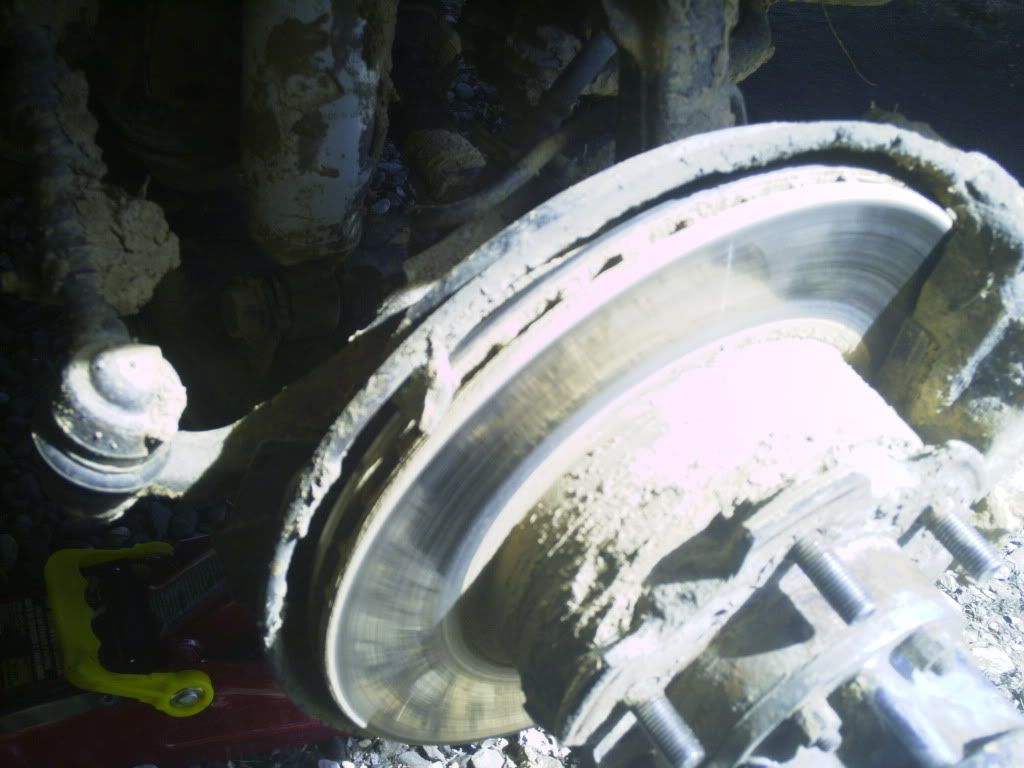
better photo of the rotor with the tire off. Can you see what I thought was the original culprit?
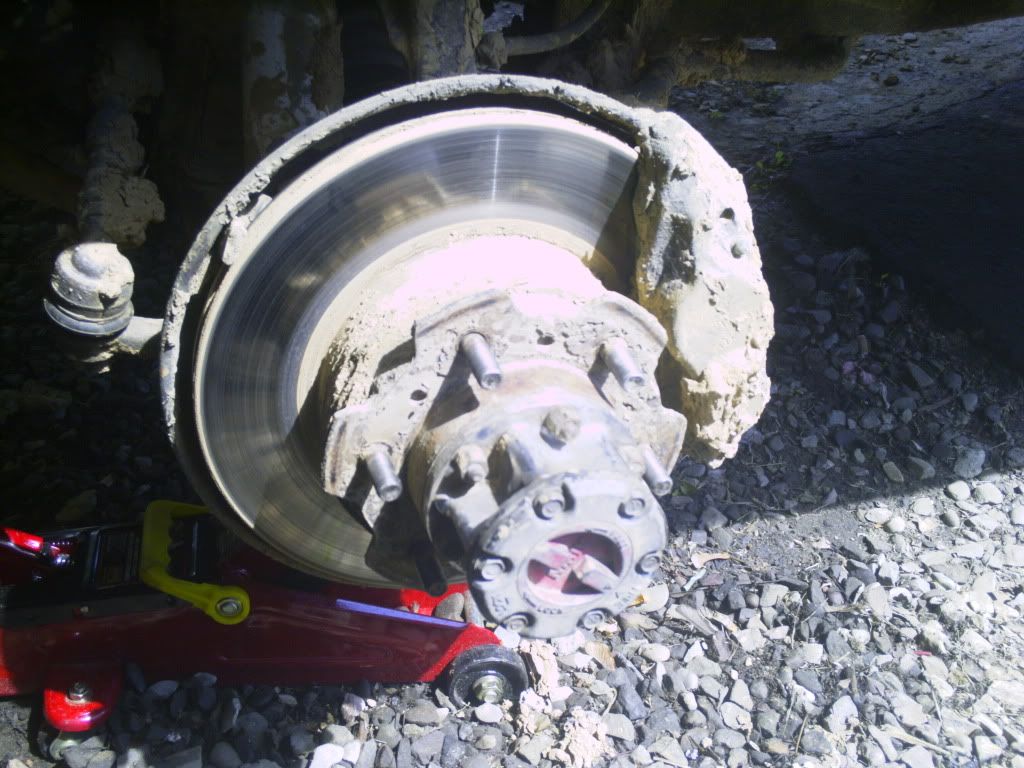
And now what the caliper looks like:
The original culprit?
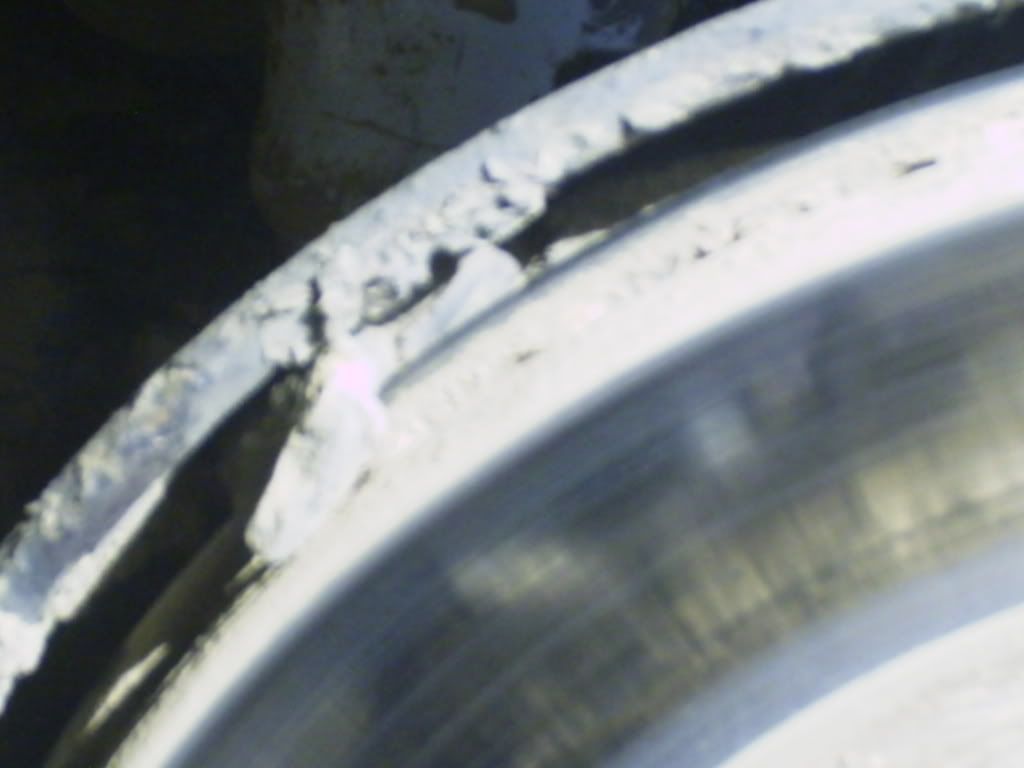
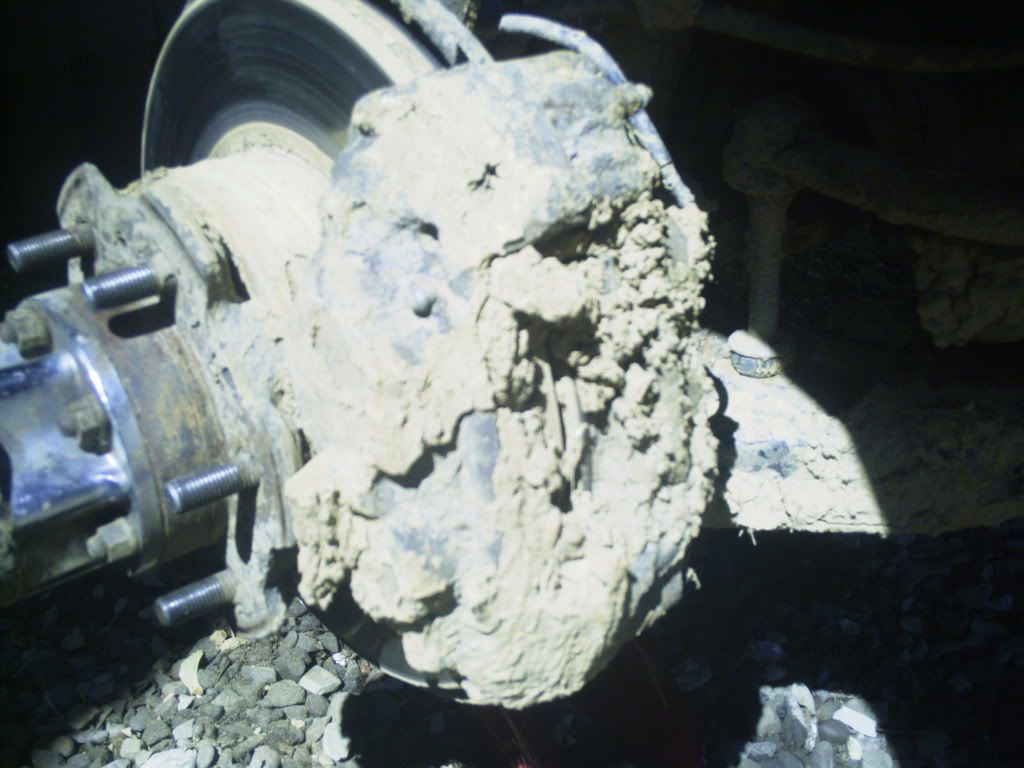
Not so fast I say, after further inspection, the whole area between the rotor and the dust "shield" was full of this stuff. Just a little bit of light knocking on the dust "shield" with my BFH yielded this:

And now what the caliper looks like:
The original culprit?
Not so fast I say, after further inspection, the whole area between the rotor and the dust "shield" was full of this stuff. Just a little bit of light knocking on the dust "shield" with my BFH yielded this:
Last edited by xxxtreme22r; 09-06-2010 at 10:38 AM.

 09-06-2010, 10:51 AM
#68
Registered User
Thread Starter
I knew someone was gonna say that. haha. not worried though, not gonna cost me a penny in repair. Just maybe $10 at the local car wash. lol.
09-06-2010, 12:03 PM
#70
Registered User
Thread Starter
09-19-2010, 05:58 AM
#71
Registered User
Thread Starter
well, with the help of 92 TOY, I got the chance to fix the valve stem on my tire that broke during the last mud bog, 3 more to go. I picked up a Milton Industries S409 Hi Performance Tire Valve from A&A Autoparts to try it. Gonna pick up 3 more now. They were a little over $5 a piece.

This is how us rednecks in PA pop the bead to change a valve stem:
http://www.youtube.com/watch?v=LgtQl9WiaiA
After getting the tire valve bolted in next was seating the bead. Again this is how us rednecks in PA seat the bead. A little carb cleaner and a BBQ lighter.
http://www.youtube.com/watch?v=eR8FQf1dFCs
09-19-2010, 06:14 AM
#73
Registered User
Thread Starter
doing it this way, you always got to be a little on yur toes, I think Jerry was more scared than I was. hahha. I was just surprised it didn't go up right away, the bead itself caught fire and had to give it a little "kick" to blow it on. If anyone has seen this way of doing it on youtube there are some idiots who use entirely too much spray and either launch their tire into outer space or blow the bead on and right back off the other side. lol. You can hear me at the end say "not as dramatic as some of them on there" referring to that very thing.
Last edited by xxxtreme22r; 09-19-2010 at 06:16 AM.
09-20-2010, 11:27 AM
#75
Registered User
Thread Starter
Rebuild Health Check Time
so here it is 11 months later and I have about 6500 miles on the rebuild.
duplicate thread here: https://www.yotatech.com/forums/f116...k-time-202969/. please refer your posts regarding vacuum/compression there instead of this thread. As it might help someone else out in the future.
here are the compression results using an Actron Compression gauge borrowed from 92 Toy:
#1 173 psi
#2 170 psi
#3 170 psi
#4 173 psi
Pretty darn good (almost perfect even) I would assume for a rebuild to 20 over and a milled block. Looks like I got my quench just right as I think the numbers would be higher or lower across the board. Maybe someone can chime in if I am thinking incorrectly.
Still curious as to what I should be seeing for a vacuum level though on this carbed motor at idle.
I have put new plugs in maybe 600-700 miles ago and it looks like #1 and #3 are running a little leaner than the other 2. As evidence by the white(ish) color. Not sure what is going on there as the other two look perfect.
BTW I got 150 on #1 when I first started and I remember someone saying something about having to do the compression with the cyls "wet" ie pump the gas pedel to get some fuel in there. That's when the comp went to 170.
09-22-2010, 02:54 PM
#76
YotaTech Milestone-Two Millionth Post
so the skid plate is a good thing and a bad thing when it comes to running through mud.
Better handling and gas mileage after removing about 80lbs of dried mud.


Better handling and gas mileage after removing about 80lbs of dried mud.


