Toms 87 4Runner Build
 10-22-2014, 03:10 PM
#1
Super Moderator
Staff
Thread Starter
iTrader: (1)
Join Date: Aug 2008
Location: Anderson Missouri
Posts: 11,788
Likes: 0
Received 21 Likes
on
19 Posts
Toms 87 4Runner Build
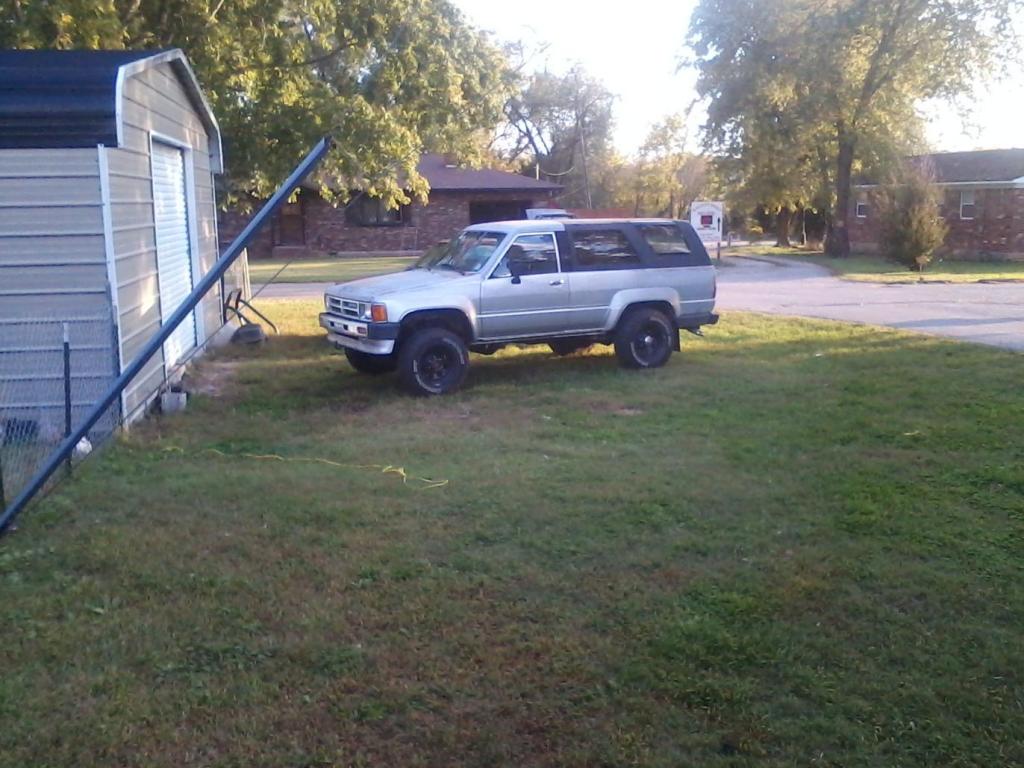
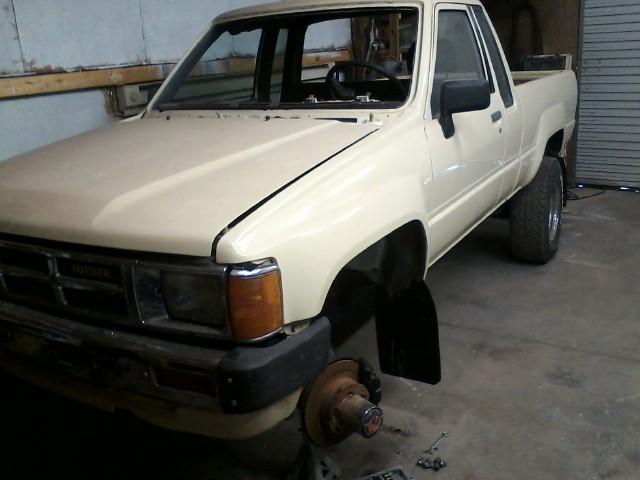
I did a pickup for an 86 extra cab pickup for Tom and he wants to get this runner in the same shape as his pick up. The runner is in great shape but as all old trucks, there are going to be issues. It has a noisey transmission or transfer case, one rust spot, a few dents in the roof, a dent in the right bumper area. It is a base model and will be adding several SR5 options. I will go thru the ventilations system, painting the top to match the body color, and I have already found a wire crimp in the horn wiring and sure there is other issues that will pop up.
Front and side view.
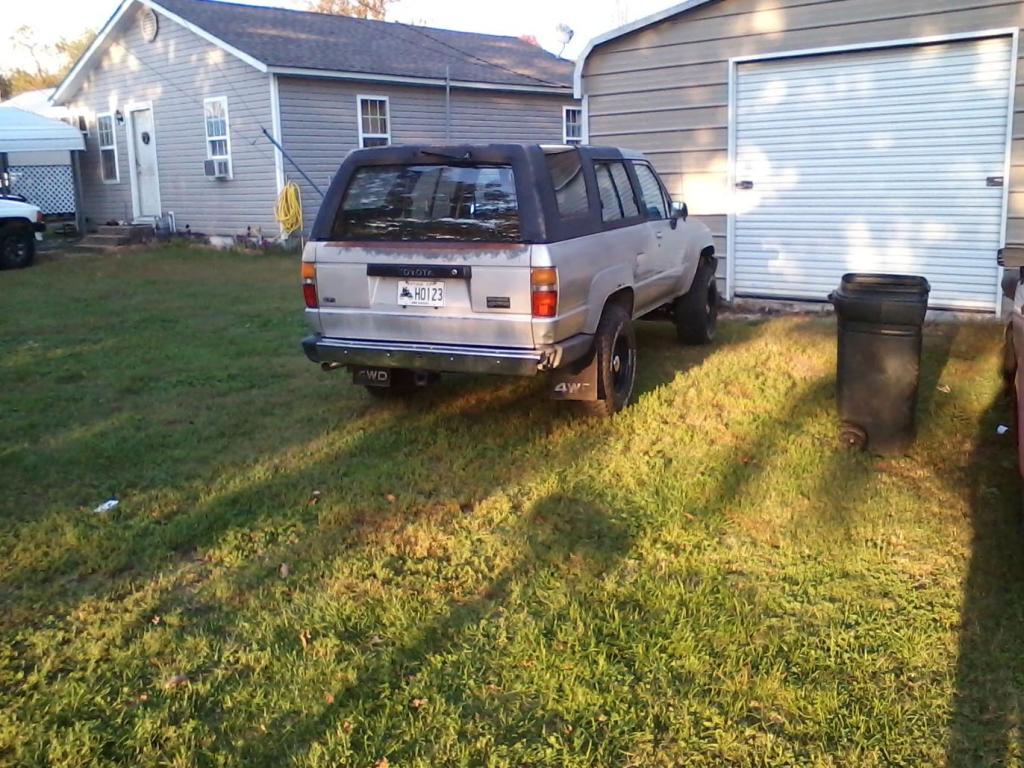
Rear view
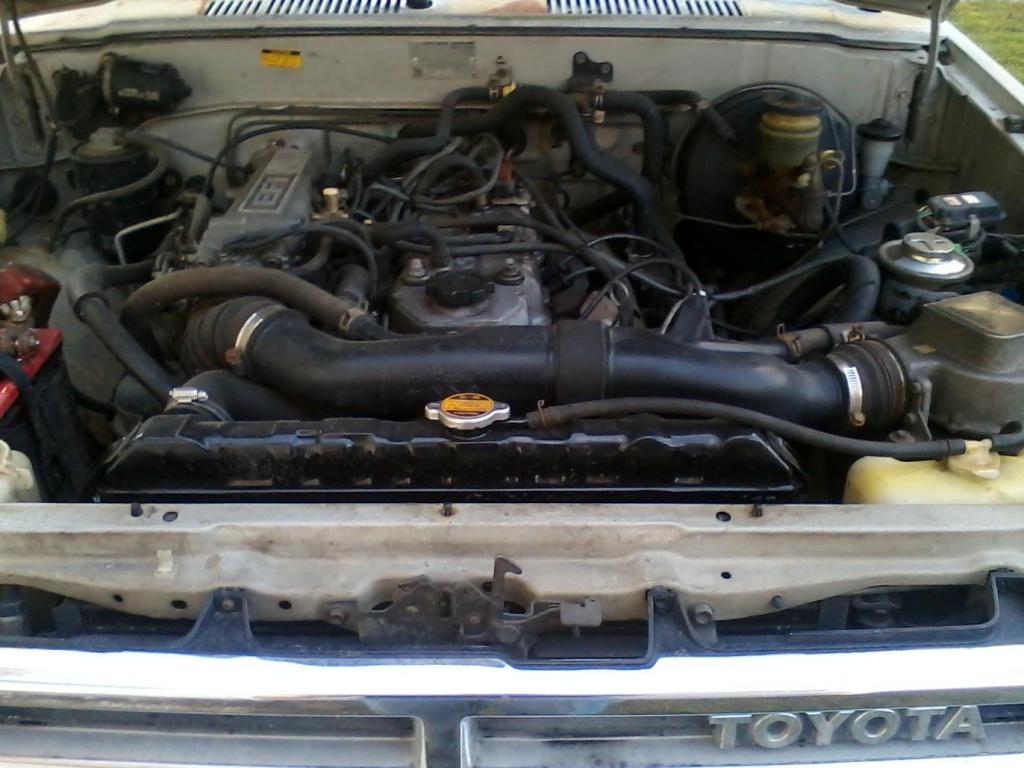
Engine view. I will be doing some motor work but truck runs great. Cleaning out the EGR, ect...
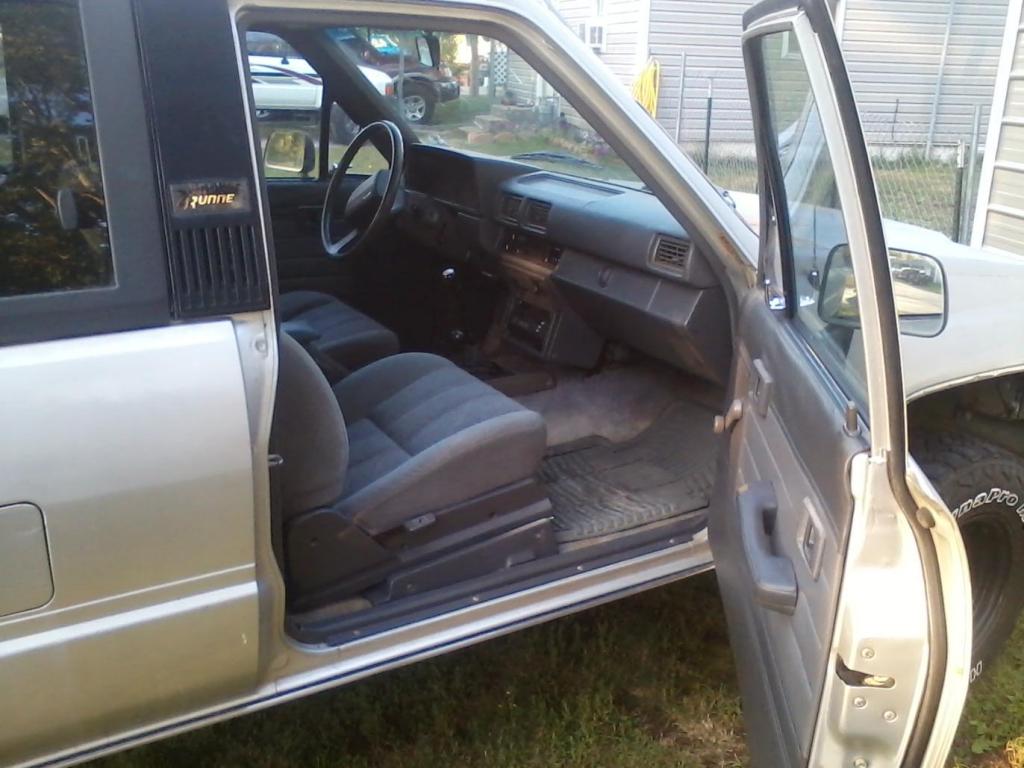
Interior
Worse area.
Page 1, Post #17 Cleaning Ventilation System......................https://www.yotatech.com/forums/f199.../#post52253936
Page 2 Post #27 Cleaning the Intake System.......................https://www.yotatech.com/forums/f199...l#post52262532
Page 3 Post #37 Cleaning Starter Relay...............................https://www.yotatech.com/forums/f199...l#post52263288
Page 4 Post #64 Adding Maplight.........................................https://www.yotatech.com/forums/f199...l#post52303641
Page 4 Post #68 Electrical Connections for Inclineometer....https://www.yotatech.com/forums/f199...l#post52305779
Front and side view.

Rear view

Engine view. I will be doing some motor work but truck runs great. Cleaning out the EGR, ect...

Interior

Worse area.

Page 1, Post #17 Cleaning Ventilation System......................https://www.yotatech.com/forums/f199.../#post52253936
Page 2 Post #27 Cleaning the Intake System.......................https://www.yotatech.com/forums/f199...l#post52262532
Page 3 Post #37 Cleaning Starter Relay...............................https://www.yotatech.com/forums/f199...l#post52263288
Page 4 Post #64 Adding Maplight.........................................https://www.yotatech.com/forums/f199...l#post52303641
Page 4 Post #68 Electrical Connections for Inclineometer....https://www.yotatech.com/forums/f199...l#post52305779
Last edited by Terrys87; 12-23-2016 at 03:49 AM.
 10-23-2014, 11:52 AM
#3
Registered User
I can't wait. I notice you don't have a link in your signature for his last truck. How do you link a build? I can't get mine to work.
12-27-2014, 11:28 PM
#4
Registered User
Hey Terry! Any updates on this thread? I've always been partial to the Silver Runners from this generation. Is this the same guy that you did the '86 White Extra Cab for? Really like how that one turned out!
I've been away from the forum for a while and it's been fun catching up on all of your builds!!!
I've been away from the forum for a while and it's been fun catching up on all of your builds!!!
01-04-2015, 11:39 PM
#5
Super Moderator
Staff
Thread Starter
iTrader: (1)
Join Date: Aug 2008
Location: Anderson Missouri
Posts: 11,788
Likes: 0
Received 21 Likes
on
19 Posts
Thanks Mark... It is in great shape overall. Will be one of the easier ones that I have worked on.
Hello Nervo19... I PMed some information that I hope works for you. I eventually will create a whole thread just for the 86 pickup that I just did. I need to get it in one thread showing start to finish. We got some cold days coming and if it is to cold to work in the shop I will get it done.
Hello 86Toy.. Got your PM and thanks for the compliments. I am hoping very soon to get started on this project. Last summer and winter the temperature was just to miserable to work in the shop. Lately I have been spending a lot of time getting the shop to where I can work in it and as much as I don't care for winter, I am liking it when in the shop.
Also I wanted to get my 85 project truck that I have been working on to where I can at least move it under its own power and that just happened lately. It was a basket case and is finally starting to get closer to being done. It is in the link below, the 84-85 tend to get overlooked on here and took me along time before I found the 84-85 build section when I first joint YT.
I will be taking some vacation time soon and plan on spending a good solid 3 or 4 days on it and it should move quick if all goes as planned. Not sure how soon I could paint it depending on how warm I can get the shop. It needs to be in the mid 70s to paint.
01-04-2015, 11:44 PM
#6
Super Moderator
Staff
Thread Starter
iTrader: (1)
Join Date: Aug 2008
Location: Anderson Missouri
Posts: 11,788
Likes: 0
Received 21 Likes
on
19 Posts
With a stove in the shop now, and getting the 85 to move under its own power to where I can move it out of the shop and out of the way will make working on this runner so much easier. I think I have all the supplies I need and parts as well. Hope to be on this project with in a week as soon as I get my time off. It has been a slow start but should go quick once I get on it. Got some of the other things out of the way that I wont get distracted on it.
I can do some detailed steps on repairs or upgrades if interested. Most are on other builds I have done but always room for improvement. Any that might interest you let me know. Plan on fuel system, ventilation system, SR5 Options, Intake system that I can think of right off.
I can do some detailed steps on repairs or upgrades if interested. Most are on other builds I have done but always room for improvement. Any that might interest you let me know. Plan on fuel system, ventilation system, SR5 Options, Intake system that I can think of right off.

Trending Topics
01-21-2015, 10:57 AM
#9
Super Moderator
Staff
Thread Starter
iTrader: (1)
Join Date: Aug 2008
Location: Anderson Missouri
Posts: 11,788
Likes: 0
Received 21 Likes
on
19 Posts
Thanks Robb... This one wont be as deep of a build as I have done in the past. All the pieces are there and just a few that need replaced, lol. This will be a nice change for once not having to hunt down all the pieces. If things go well. I am hoping to have it done a couple of months.
Thanks Ed..This one will be going to a good home and I think it is going to be one of the easiest one I have done. I will need to replacea a tranny or tcase on it but Jason in tn is going to be coming here in a few weeks and his runner will be torn down and back up in two days. No painting on his or motor work but we only have two days to get his to the way he wants it, that will be some pressure. I am looking forward to it.
Thanks Ed..This one will be going to a good home and I think it is going to be one of the easiest one I have done. I will need to replacea a tranny or tcase on it but Jason in tn is going to be coming here in a few weeks and his runner will be torn down and back up in two days. No painting on his or motor work but we only have two days to get his to the way he wants it, that will be some pressure. I am looking forward to it.
01-21-2015, 11:20 AM
#10
Super Moderator
Staff
Thread Starter
iTrader: (1)
Join Date: Aug 2008
Location: Anderson Missouri
Posts: 11,788
Likes: 0
Received 21 Likes
on
19 Posts
My 88 is having a Cherry Manifold issue and has taken ALOT of my time tinkering with it trying to get it figured out and some parts are on order for the 85. I wanted a break from mechanical work and enjoy doing body work more so decided to the Silver Bullet in the shop and start on it.
I have had the truck since October and this is the first time I have touched it and cant believe how long it has been already. Last year I did not have insulation in the shop for heat and cold and the 86 truck I did went a lot longer then I had planned. I do get several request for repairs but they want it nearly overnite. Hope to have this one done fairly quick.
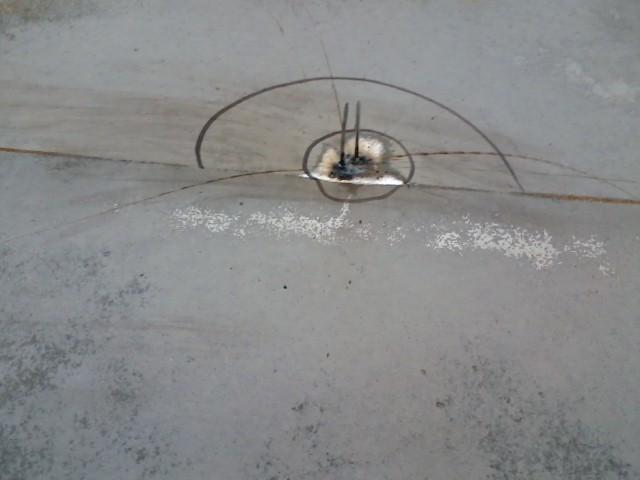
Got the infamous hood dent. Not sure what causes it. The small circle is what you see, the big circle is what you cant see. I welded some nails to the dent and used vise grips and a hammer to pull the dent.
I am unable to work the dent out from the back side with a hammer and dolly due to the bracing. Dent is circled.
After grinding the nails off, you cant even get a dime under there. If I was unable to get the dent out, I was going to replace the hood. That much body filler would eventually just come out and I dont make new panels out of body filler.
I like chrome but not when it is a rust magnet. Luckily these fenders dont have any damage to them. The chrome will be going back on but this truck has an easy life ahead of it so rust should not be an issue.
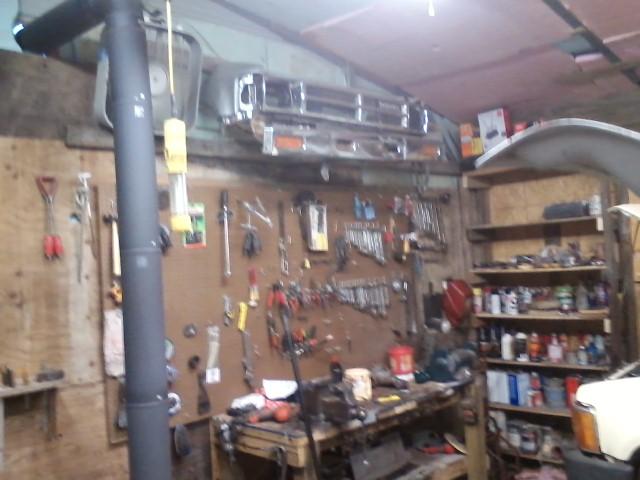
My overhead lighting (eventually is what the front end is going to hide) is made up of front end pieces that were damaged from rust. The fenders I used were from fender that the tabs that held the inner fenders on were rusted off. I will scrap fender just for that reason.
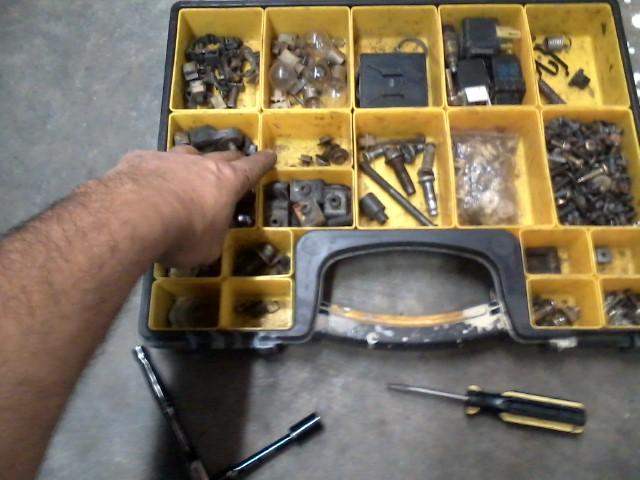
I know which screws and bolts go where and have plenty of extras. For some one that is doing a restore for the first time, do a better job of keeping track of your trim pieces then I am at this time. Harbor Freight sells these container that is great for this stuff. I have several more of these containers full as well. Extra tabs for inner fenders that I grab when in the yards.
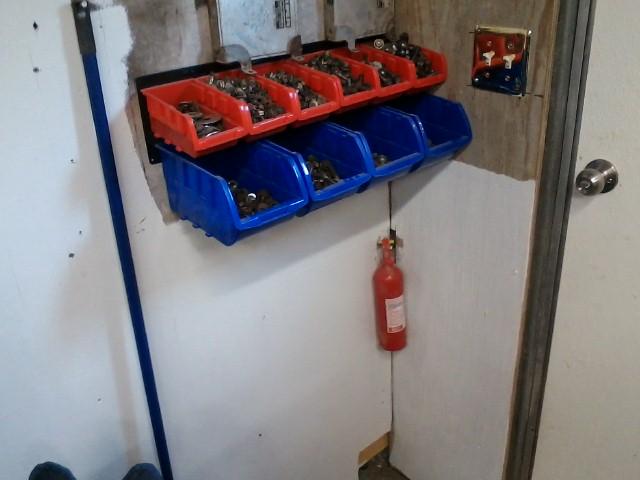
More spare nuts and bolts. I got these from Orschliens. Organizes well and holds a ton of nuts and bolts.
Some trucks have no vent covers, some have just the black vent cover and some have the black vent cover with the screen over them. When I pull the inner fender off, this truck had very little debris from the windshield cowl behind the mud flap. ( Mudflap is missing on this truck). One job that I wont do on these is pull the windshield trim. It is a royal pain and the trim will damage easily. I take it to my local windshield shop and let them pull it. They even struggle with it.
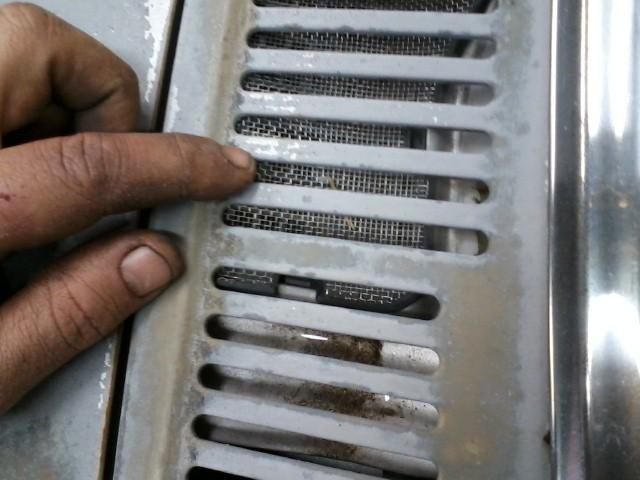
Another small dent I was able to tap out with a pecking hammer. Notice there is very little debris in the inner fender. I will eventually pull the windshield cowl and the dash and clean up any debris from the blower assembly. This is usually bad on trucks with no cowl screens in them RAD has a great replacement for trucks with out screens. I will eventually get to that stage and post those as well.
First hack I have found. 8mm bolts holding the passenger inner fender on. Toyota uses 10mm course thread. Missing both front mudflaps. Always some thing is hacked on these trucks. I have not seen one yet.
I think this is the first truck I have seen the starter access panel and an intact inner spash guard not ripped or missing.
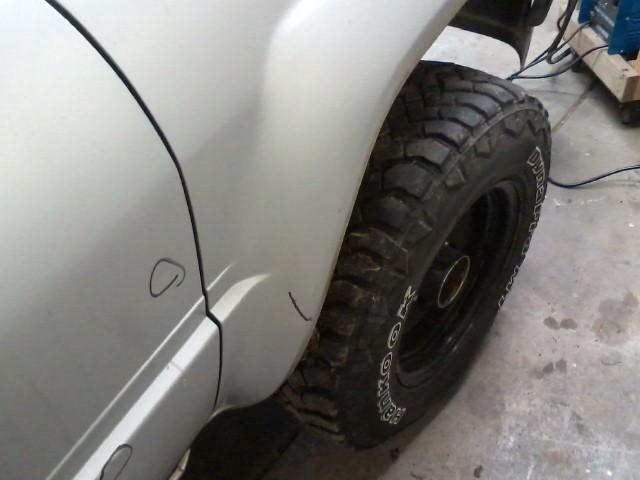
One small crease in the rear of passenger fender. Not bad. One dent in each fender and one in the hood. The door does have 7 door dings in it and they are very minor. I will post a picture of it later. Always good to mark the dents as once it is in primer, filler and such dents disappear but show up with first coat of paint. Also good to have a picture to know where they were.
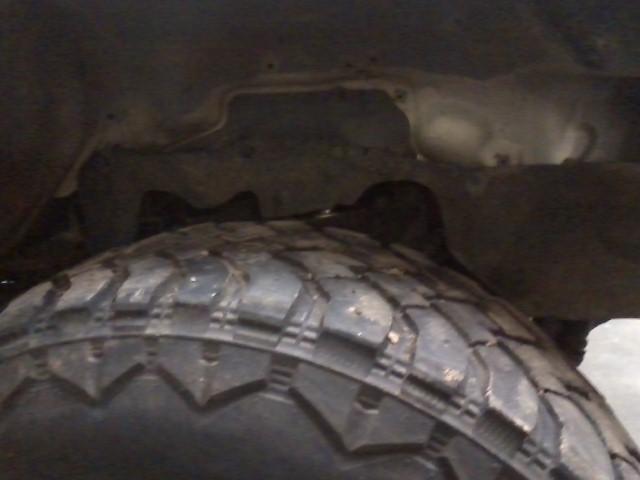
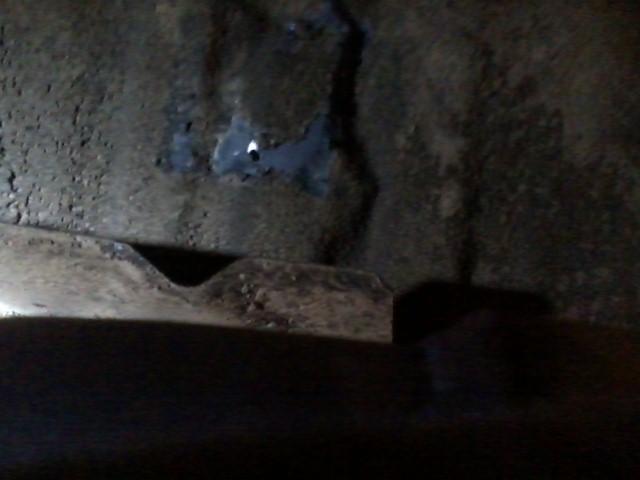
Best picture I can get, but at one time this truck has fallen off of a lift or jack and put a BIG dent in the rear floor board just above the floor mat. I took the big hammer to it and got in pretty good shape.
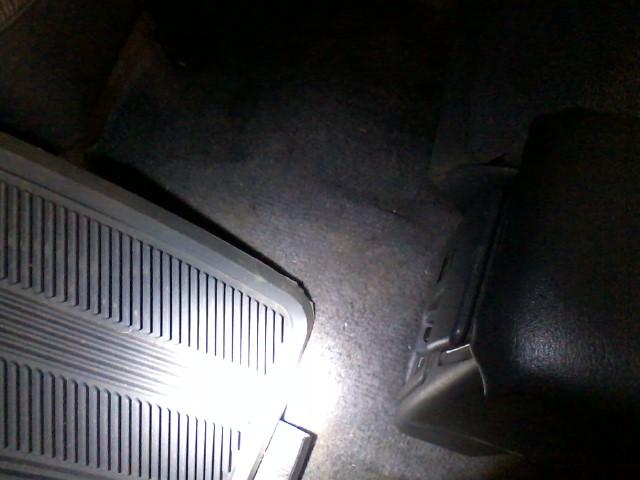
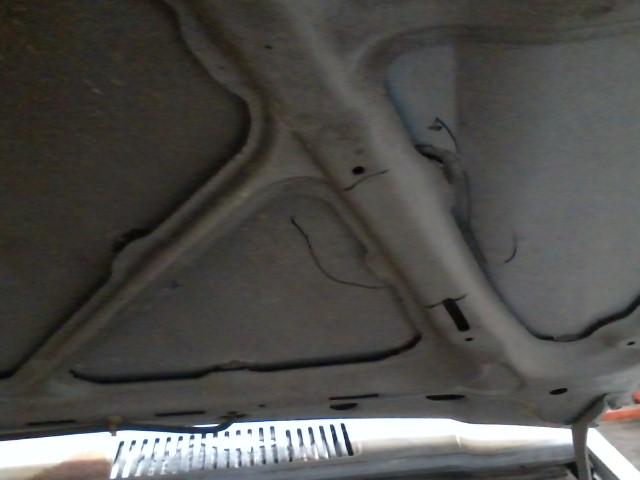
A view from the bottom side. For what it was and the condition it was in, I am really happy with how level it is. The factory ridges make the floor strong and helps to hide any damgages. Not perfect but if you didnt know it was there, not sure you would ever find it other then the little crease in the hump.
I have had the truck since October and this is the first time I have touched it and cant believe how long it has been already. Last year I did not have insulation in the shop for heat and cold and the 86 truck I did went a lot longer then I had planned. I do get several request for repairs but they want it nearly overnite. Hope to have this one done fairly quick.
Got the infamous hood dent. Not sure what causes it. The small circle is what you see, the big circle is what you cant see. I welded some nails to the dent and used vise grips and a hammer to pull the dent.

I am unable to work the dent out from the back side with a hammer and dolly due to the bracing. Dent is circled.

After grinding the nails off, you cant even get a dime under there. If I was unable to get the dent out, I was going to replace the hood. That much body filler would eventually just come out and I dont make new panels out of body filler.

I like chrome but not when it is a rust magnet. Luckily these fenders dont have any damage to them. The chrome will be going back on but this truck has an easy life ahead of it so rust should not be an issue.

My overhead lighting (eventually is what the front end is going to hide) is made up of front end pieces that were damaged from rust. The fenders I used were from fender that the tabs that held the inner fenders on were rusted off. I will scrap fender just for that reason.

I know which screws and bolts go where and have plenty of extras. For some one that is doing a restore for the first time, do a better job of keeping track of your trim pieces then I am at this time. Harbor Freight sells these container that is great for this stuff. I have several more of these containers full as well. Extra tabs for inner fenders that I grab when in the yards.

More spare nuts and bolts. I got these from Orschliens. Organizes well and holds a ton of nuts and bolts.

Some trucks have no vent covers, some have just the black vent cover and some have the black vent cover with the screen over them. When I pull the inner fender off, this truck had very little debris from the windshield cowl behind the mud flap. ( Mudflap is missing on this truck). One job that I wont do on these is pull the windshield trim. It is a royal pain and the trim will damage easily. I take it to my local windshield shop and let them pull it. They even struggle with it.

Another small dent I was able to tap out with a pecking hammer. Notice there is very little debris in the inner fender. I will eventually pull the windshield cowl and the dash and clean up any debris from the blower assembly. This is usually bad on trucks with no cowl screens in them RAD has a great replacement for trucks with out screens. I will eventually get to that stage and post those as well.

First hack I have found. 8mm bolts holding the passenger inner fender on. Toyota uses 10mm course thread. Missing both front mudflaps. Always some thing is hacked on these trucks. I have not seen one yet.

I think this is the first truck I have seen the starter access panel and an intact inner spash guard not ripped or missing.

One small crease in the rear of passenger fender. Not bad. One dent in each fender and one in the hood. The door does have 7 door dings in it and they are very minor. I will post a picture of it later. Always good to mark the dents as once it is in primer, filler and such dents disappear but show up with first coat of paint. Also good to have a picture to know where they were.

Best picture I can get, but at one time this truck has fallen off of a lift or jack and put a BIG dent in the rear floor board just above the floor mat. I took the big hammer to it and got in pretty good shape.

A view from the bottom side. For what it was and the condition it was in, I am really happy with how level it is. The factory ridges make the floor strong and helps to hide any damgages. Not perfect but if you didnt know it was there, not sure you would ever find it other then the little crease in the hump.

Last edited by Terrys87; 01-21-2015 at 01:24 PM.
01-22-2015, 05:52 AM
#11
Super Moderator
Staff
Thread Starter
iTrader: (1)
Join Date: Aug 2008
Location: Anderson Missouri
Posts: 11,788
Likes: 0
Received 21 Likes
on
19 Posts
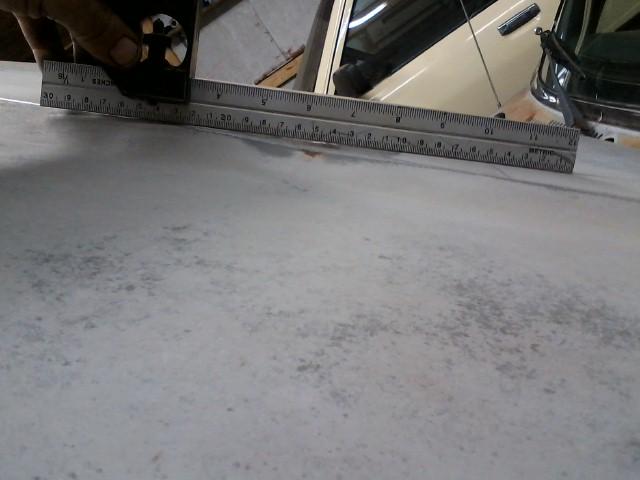
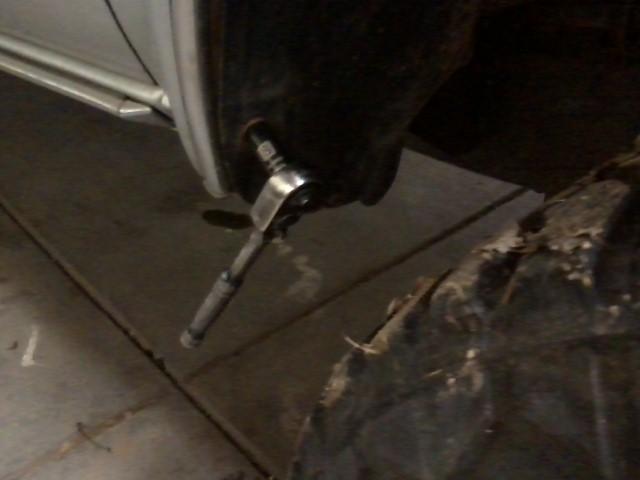
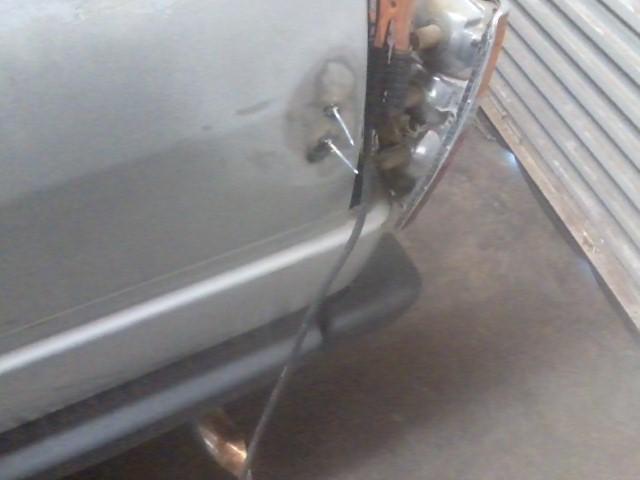
I worked on the biggest dent. My welder wont reach to that side of the shop where I dont have a power outlet so I still use the drill and pull style when is needed. I have two small holes there and will be filled up and be ok. This is on the right rear quarter panel.

I am working on a dent on the drivers rear side. There are braces on the inside that will not let me push the dent from the inside to the outside. It is not deep at all. There is a deep dent scratch at the bottom so will be treating this as one single dent when appying filler.
When removing the interior to try and access the dent, I found some wire crimps on the wiring. Later on I will be adding insulation inside the panels and will see what is going on at that time. I have yet to see one of these trucks with some kind of wiring butchering on them and this is a well cared for truck.
Silver paint in the 80s and older tradionally was the least durable paint. Someone in the past tried to cover the metal with primer. Primer is not a long term protective cover. It is porous and will eventually come back with a vengenace. The roof top is all primer and I will get some pictures later showing that it was cover in primer and where rust is starting to come thru. The surface rust on this truck has not done any damage. Would not of went much longer until some bad damage would of happened.
Here you can see where they masked it off and primed the A pillar and roof.

Here the rust looks bad, but a few minutes with 180 grit sand paper got to good clean metal.
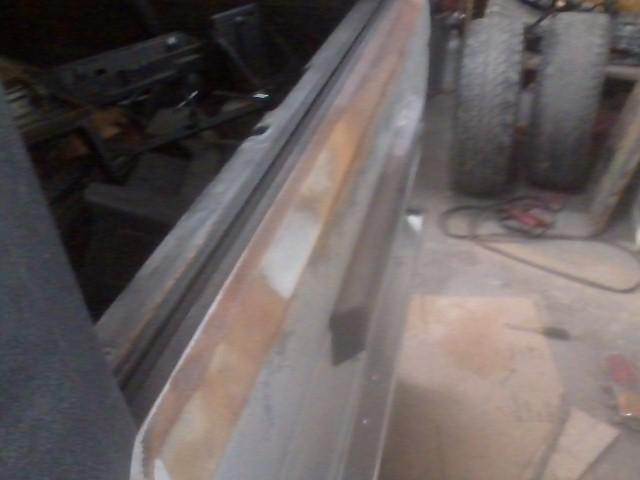
Here the rear quarter the paint is dead and falling off. The door is still good solid paint.
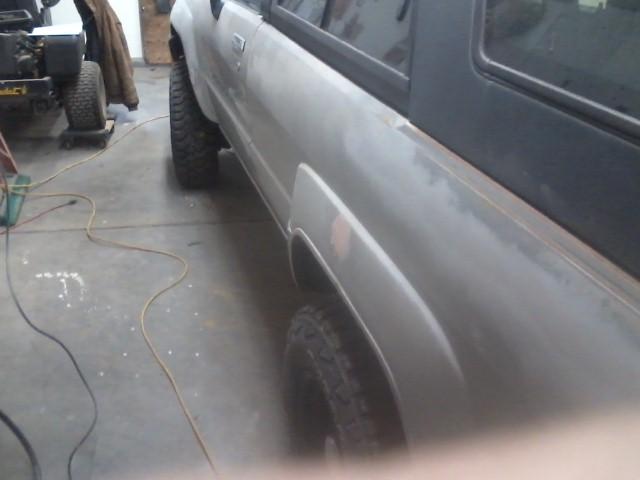
Most dents are on this door. I will need to send it to someone that can repair the rust above the rear wheel well. I am not able to weld a patch panel in just yet or will see if I can get a friend that had more experience to do that for me. Not very many more dents to fix. One of the more easier trucks I have worked on. Will be a while til paint and will do some mechanical work. Still will have to wait til I get my 85 to where I can park it outside due to the weather we have been getting to where I can block and prime.
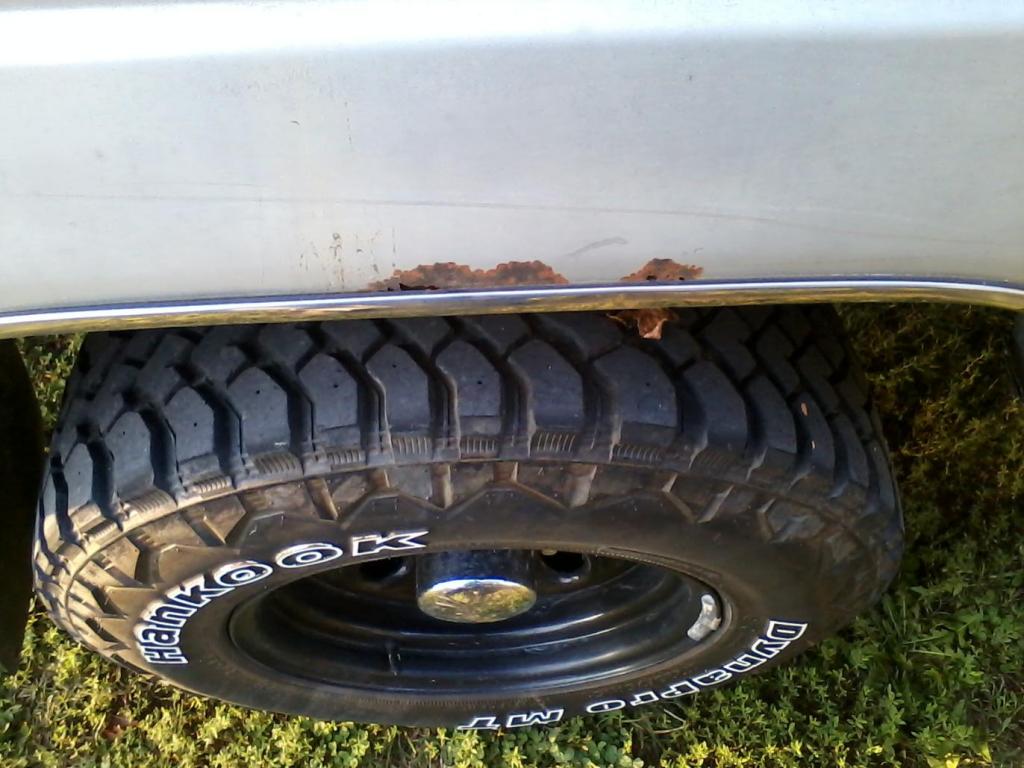
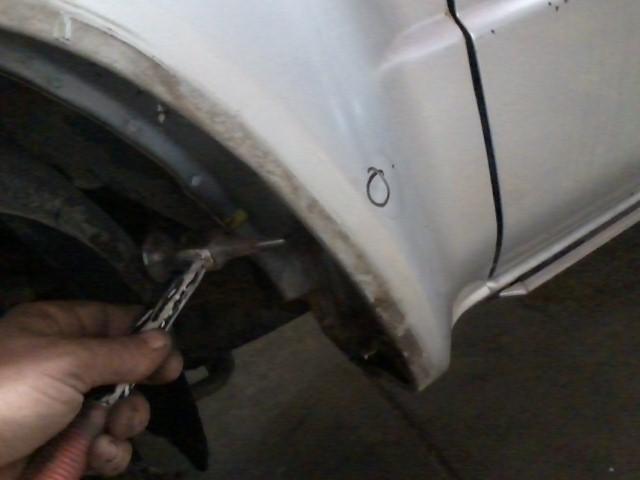
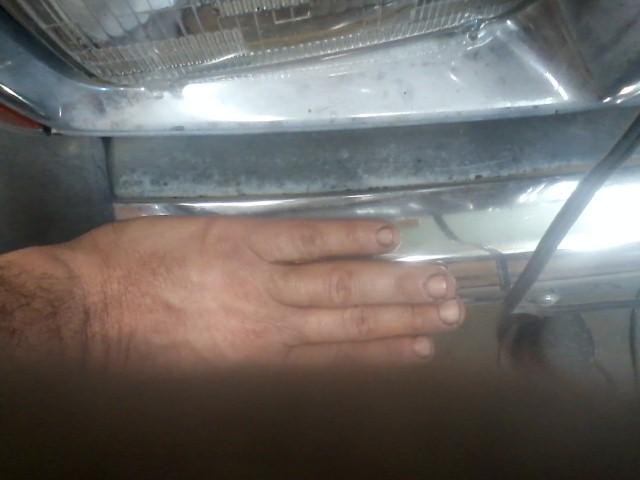
Just posting up some minor damage I have found. It took a bump on the drivers side bumper. There is a small crease below my fingers and the drivers side filler panel is showing 1/4 of it. Meaning the I will need to pull the bumper bracket out a little or replace it.
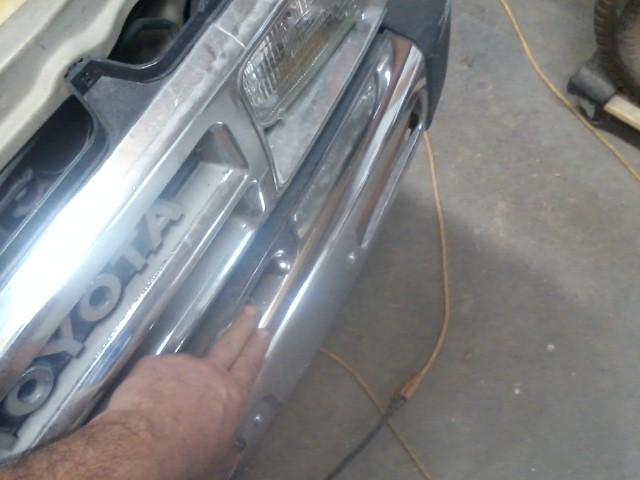
Here I am showing where the bumper is supposed to be out and is showing about 1 inch of the filler pad.
The valance, I think I can get straightened out. If not they are not to much to replace. I get mine off of ebay and they work great.
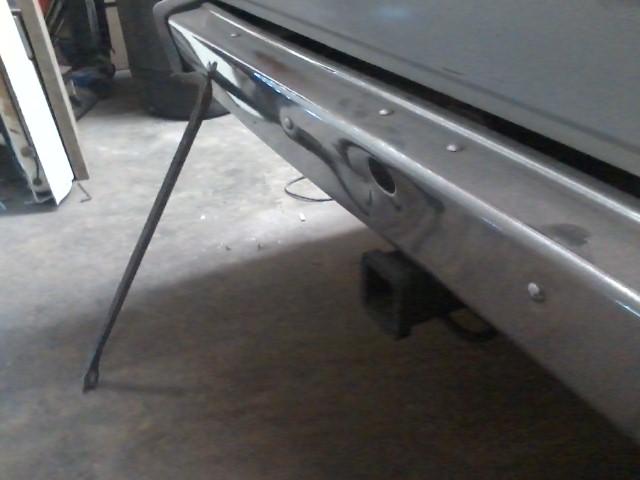
I didnt think the rear bumper was damaged to bad but it is and will probably get replaced. Will see if I can straighten it first. Not holding my breath on this bumper. I do like having the tow hitch on these trucks. Anytime I find one in the yards I grab it. A hard option to find.
I can not tear it down to far as I have an appointment next week to get the windshield trim pulled off of the runner. It will be on hold for a while longer as I have to get a windshield installed in my pickup, exhaust, and my brake parts are due to be done next week. If all goes well I will have my truck legal and on the road by the end of next week. (Fingers crossed) After I get it to where my truck can sit out side, I will need to strip the runners interior and pull the top off from the tail gate up to the front seats to start priming and getting ready for paint. A realistic goal is going to be 2-4 weeks. Could be more as then I will have to have some warm days to paint. Just see how things go.
Here is the hold up, no windshield on my 85. Hope to be legal soon.

I am working on a dent on the drivers rear side. There are braces on the inside that will not let me push the dent from the inside to the outside. It is not deep at all. There is a deep dent scratch at the bottom so will be treating this as one single dent when appying filler.

When removing the interior to try and access the dent, I found some wire crimps on the wiring. Later on I will be adding insulation inside the panels and will see what is going on at that time. I have yet to see one of these trucks with some kind of wiring butchering on them and this is a well cared for truck.

Silver paint in the 80s and older tradionally was the least durable paint. Someone in the past tried to cover the metal with primer. Primer is not a long term protective cover. It is porous and will eventually come back with a vengenace. The roof top is all primer and I will get some pictures later showing that it was cover in primer and where rust is starting to come thru. The surface rust on this truck has not done any damage. Would not of went much longer until some bad damage would of happened.
Here you can see where they masked it off and primed the A pillar and roof.

Here the rust looks bad, but a few minutes with 180 grit sand paper got to good clean metal.

Here the rear quarter the paint is dead and falling off. The door is still good solid paint.

Most dents are on this door. I will need to send it to someone that can repair the rust above the rear wheel well. I am not able to weld a patch panel in just yet or will see if I can get a friend that had more experience to do that for me. Not very many more dents to fix. One of the more easier trucks I have worked on. Will be a while til paint and will do some mechanical work. Still will have to wait til I get my 85 to where I can park it outside due to the weather we have been getting to where I can block and prime.

Just posting up some minor damage I have found. It took a bump on the drivers side bumper. There is a small crease below my fingers and the drivers side filler panel is showing 1/4 of it. Meaning the I will need to pull the bumper bracket out a little or replace it.

Here I am showing where the bumper is supposed to be out and is showing about 1 inch of the filler pad.

The valance, I think I can get straightened out. If not they are not to much to replace. I get mine off of ebay and they work great.

I didnt think the rear bumper was damaged to bad but it is and will probably get replaced. Will see if I can straighten it first. Not holding my breath on this bumper. I do like having the tow hitch on these trucks. Anytime I find one in the yards I grab it. A hard option to find.

I can not tear it down to far as I have an appointment next week to get the windshield trim pulled off of the runner. It will be on hold for a while longer as I have to get a windshield installed in my pickup, exhaust, and my brake parts are due to be done next week. If all goes well I will have my truck legal and on the road by the end of next week. (Fingers crossed) After I get it to where my truck can sit out side, I will need to strip the runners interior and pull the top off from the tail gate up to the front seats to start priming and getting ready for paint. A realistic goal is going to be 2-4 weeks. Could be more as then I will have to have some warm days to paint. Just see how things go.
Here is the hold up, no windshield on my 85. Hope to be legal soon.

Last edited by Terrys87; 01-22-2015 at 10:17 AM.
01-24-2015, 04:01 PM
#12
Registered User
Join Date: Jun 2013
Location: Ohio
Posts: 97
Likes: 0
Received 0 Likes
on
0 Posts
Wow, I would have been stoked just to have that 4runner the way it was found! I can tell you take pride in your work though, and I'm sure it's gonna look amazing when it's done!
02-09-2015, 08:12 AM
#13
Super Moderator
Staff
Thread Starter
iTrader: (1)
Join Date: Aug 2008
Location: Anderson Missouri
Posts: 11,788
Likes: 0
Received 21 Likes
on
19 Posts
Thanks JunkFanatic..I got the windshield in my truck and will be putting it on the back burner for a little bit so am getting back on this runner. It should look alot different and have some other SR5 features when I get it done. Going slower then I would like but they all do. It will eventually get done.
02-09-2015, 08:21 AM
#14
Super Moderator
Staff
Thread Starter
iTrader: (1)
Join Date: Aug 2008
Location: Anderson Missouri
Posts: 11,788
Likes: 0
Received 21 Likes
on
19 Posts
Got to set my 85 aside for a while but I can now sit it outside so I can start priming in areas. I was going to keep it all together so I could drive it but I have access to a trailer now so I am tearing it down to start work on it.
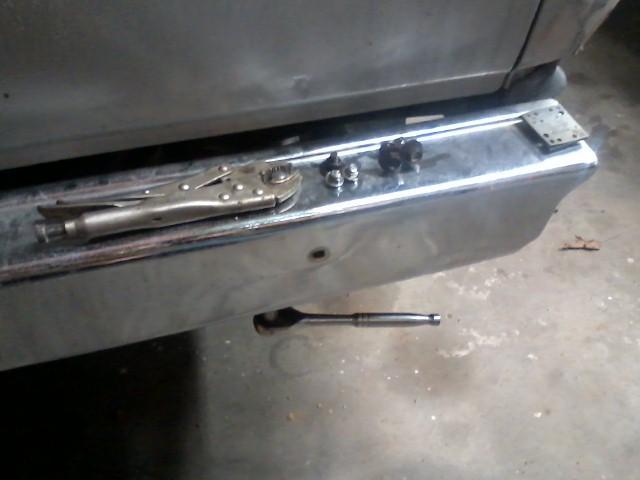
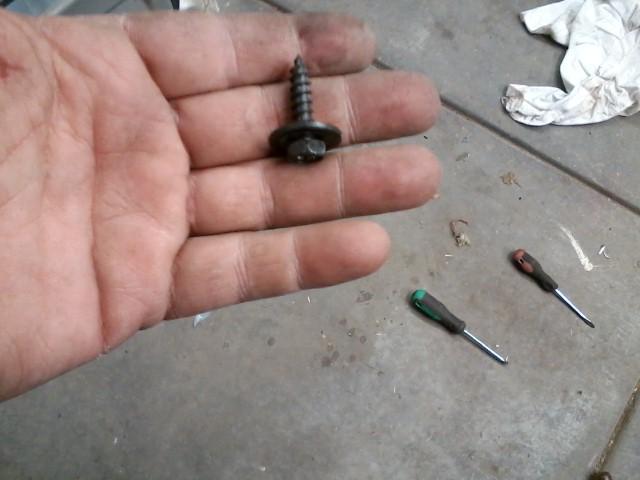
Started on the bumper. Even after soaking the bolts in rust dissolver some still broke which is common. Toyota metal is not the greatest. I would rather the bumper bolts break then when I have to get them out with vise grips. The square shoulder will wallow the hole in the bumper and then you can just remove the nut.
I like chrome but will not use it on my trucks. I took the chrome trim off and the rust isnt as bad as I thought it was going to be.
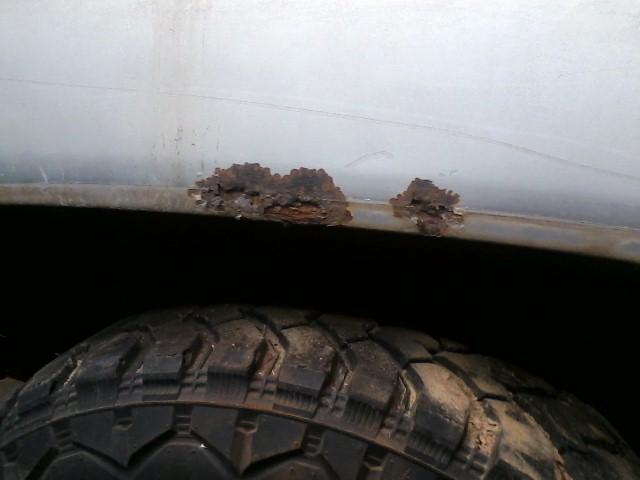
Here is what will probably get all cut out. I am not good enough at welding yet so will have it done. It just has surface rust on the inner panel. Somethings it is better to have done if it is over my head. One day I will get there. I hear Toyota metal is a pain to weld anyways.
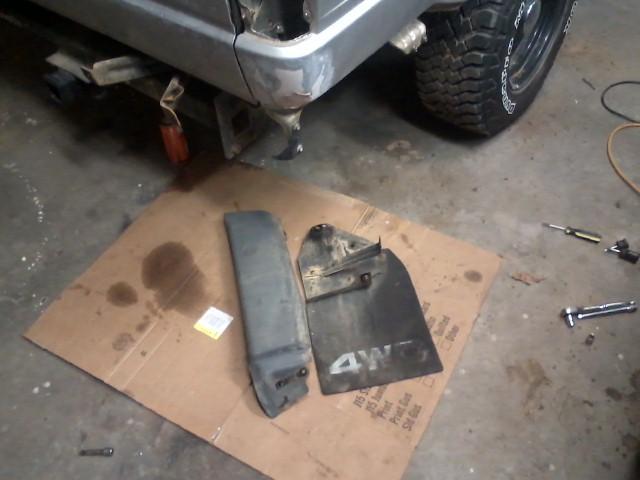
If you are having one painted, to get better results, remove as much as possible. It saves on disassembly, masking and reassembly. There is a lot of time involved in these steps. You can also detail the parts at a later time. It all adds up for a much better look when done. I keep all of the mud flaps pieces together as it has been awhile since I have painted the back half of a runner. Also I put all of the bolts that will be hidden back in their places. I will take a wire brush to them after paint when I reinstall the pieces.
Started on the bumper. Even after soaking the bolts in rust dissolver some still broke which is common. Toyota metal is not the greatest. I would rather the bumper bolts break then when I have to get them out with vise grips. The square shoulder will wallow the hole in the bumper and then you can just remove the nut.

I like chrome but will not use it on my trucks. I took the chrome trim off and the rust isnt as bad as I thought it was going to be.

Here is what will probably get all cut out. I am not good enough at welding yet so will have it done. It just has surface rust on the inner panel. Somethings it is better to have done if it is over my head. One day I will get there. I hear Toyota metal is a pain to weld anyways.

If you are having one painted, to get better results, remove as much as possible. It saves on disassembly, masking and reassembly. There is a lot of time involved in these steps. You can also detail the parts at a later time. It all adds up for a much better look when done. I keep all of the mud flaps pieces together as it has been awhile since I have painted the back half of a runner. Also I put all of the bolts that will be hidden back in their places. I will take a wire brush to them after paint when I reinstall the pieces.

Last edited by Terrys87; 08-30-2016 at 07:17 AM.
02-10-2015, 04:00 AM
#15
Super Moderator
Staff
Thread Starter
iTrader: (1)
Join Date: Aug 2008
Location: Anderson Missouri
Posts: 11,788
Likes: 0
Received 21 Likes
on
19 Posts
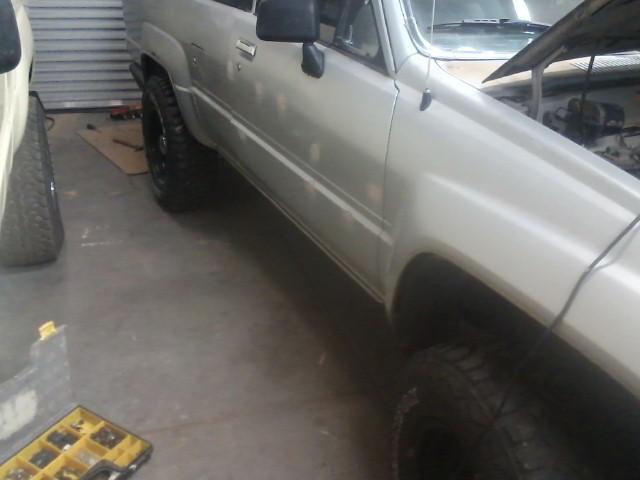
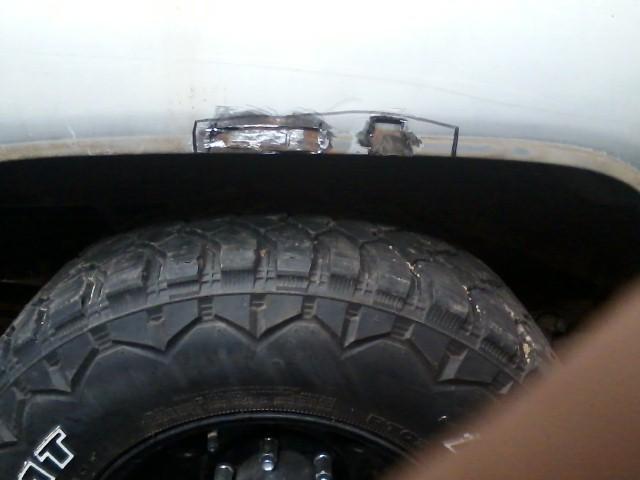
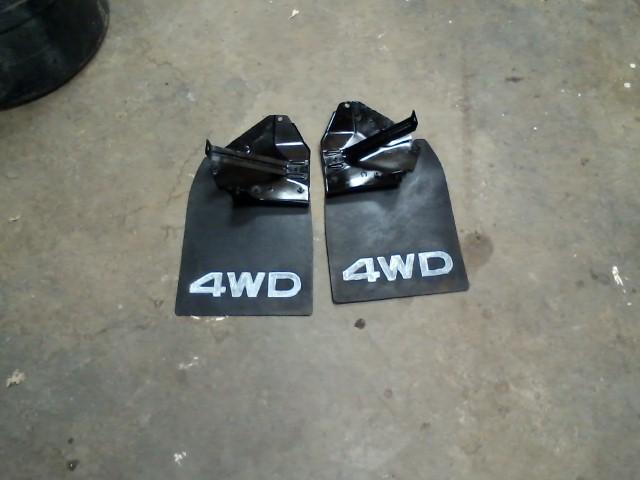
I was going for the wet tire look and tried using rubber and trim paint and it just looked dry. I then got the mud flaps wet and used rattle can black paint and rubbed the paint into the mud flap. Looks better then the trim paint.
 02-11-2015, 07:16 AM
#16
Super Moderator
Staff
Thread Starter
iTrader: (1)
Join Date: Aug 2008
Location: Anderson Missouri
Posts: 11,788
Likes: 0
Received 21 Likes
on
19 Posts
I am sure some think that because I start out with junk trucks that a mess is to be expected. The more I work on these, the more I am convinced to start with a junk truck and assemble it from scratch. I have owned and worked on nice trucks and have mentioned it in the past about how bad used trucks in general get. This one is no exception and it has had an easy life in its past. I am not knocking it just want to make aware of things you cant see. Carpet, fuel system, EGR, dirty sensors, and the list could go on if I thought about it and I havent even see those systems in this truck and would not be surprised.
There is a thread on the 89-95 on how to clean the air conditioning system on those and I might make a thread on it later using the following pics.
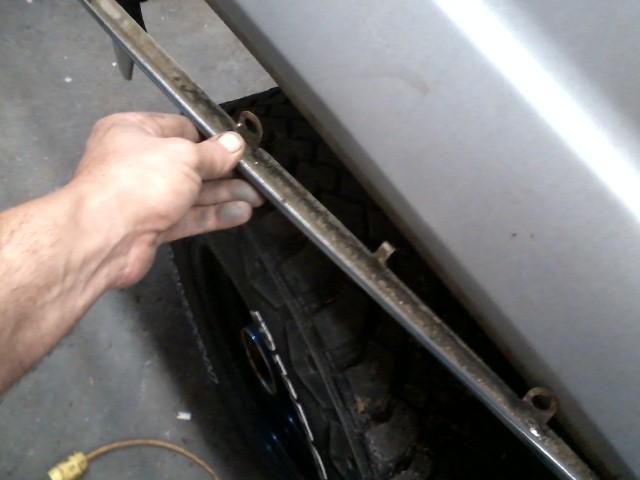
Remove the nut and bolt that is holding the smaller line to the inner fender for movement in next step.
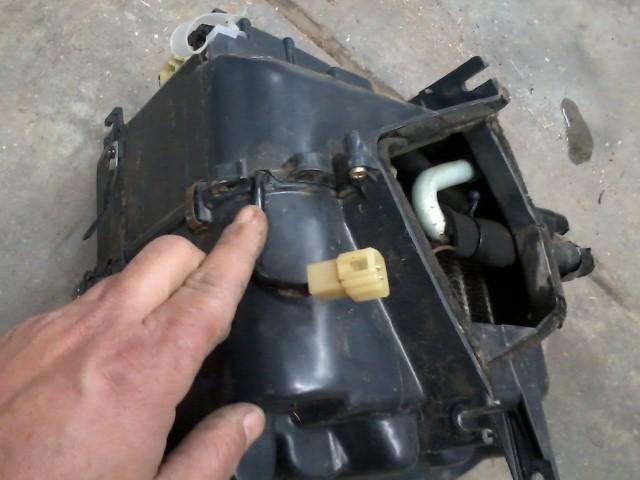
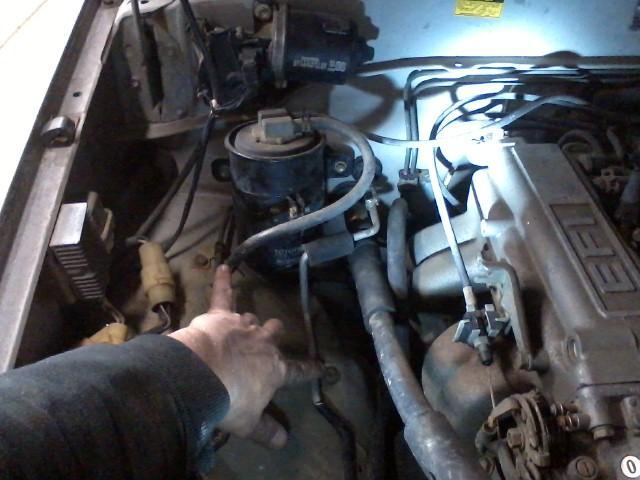
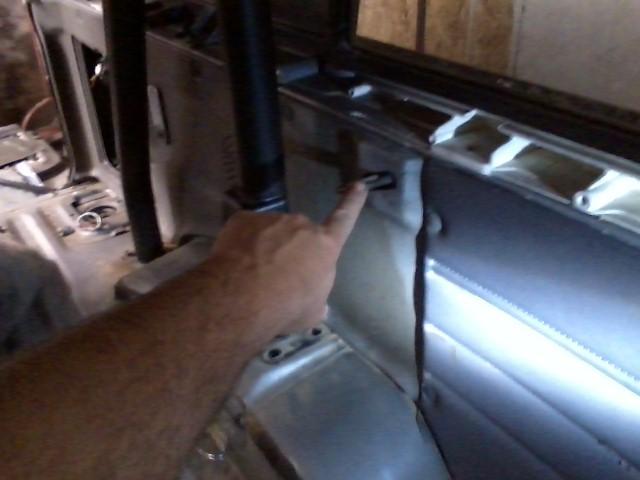
Loosen the bolt that my thumb is pointing at and remove the fuel charcoal canister.
Remove Canister bracket. This will give you access to the AC Lines.

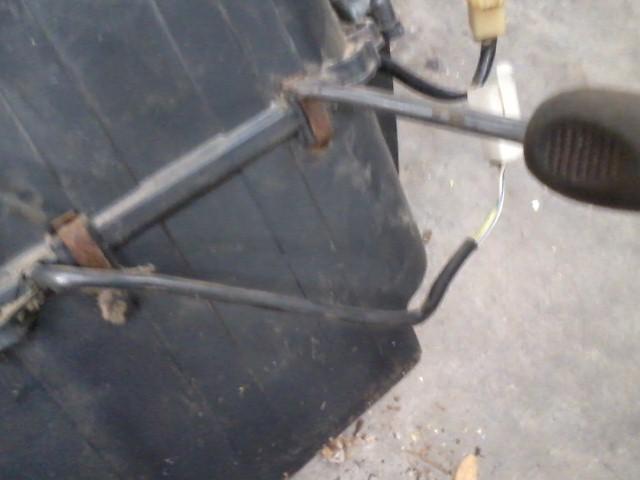
For the top lines use a 14mm and a 17mm wrench and seperate the top ac line.
The following picture is for the lower lines. I do not have wrenches this big in the meteric size but these will work. 1 1/8th and a 15/16th.
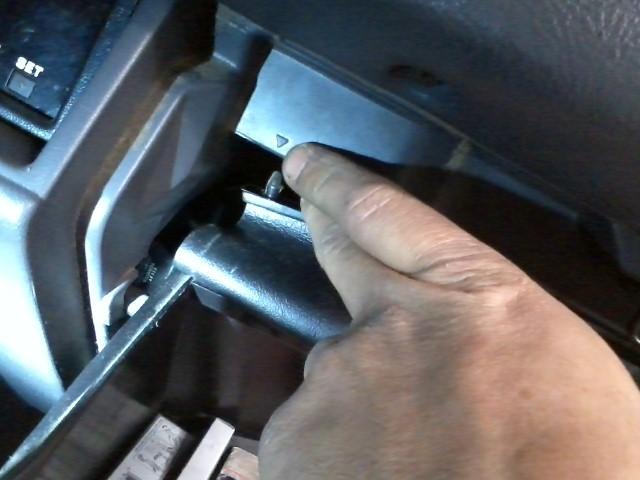
Remove glove box and then remove the lower black bracket.
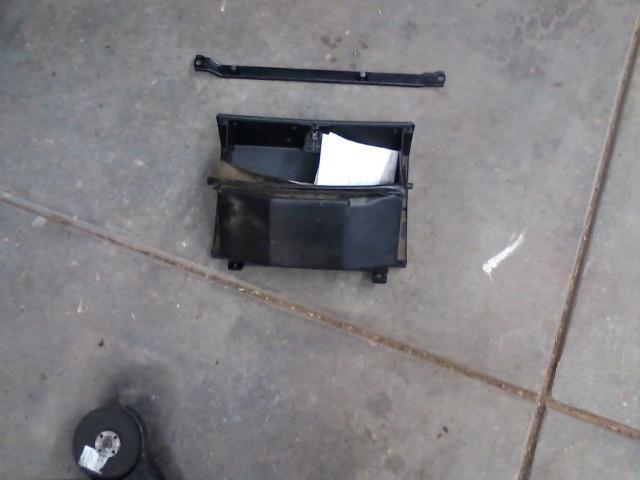
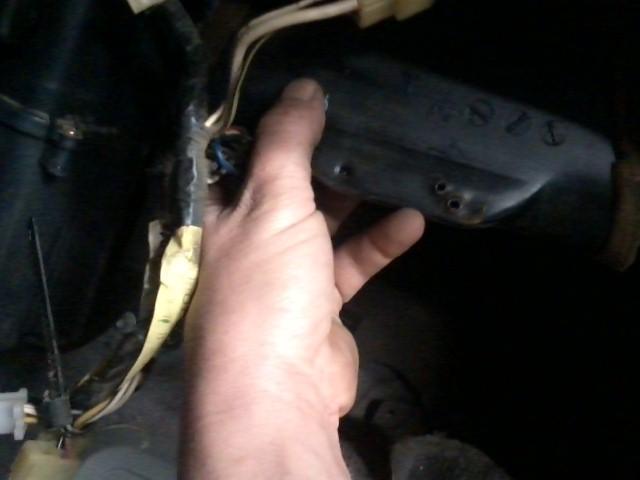
Remove PE pipe. Above my thumb will say PE. Remove the screw by my pinky to get the pipe out. Slide to the right, tilt down and pull left.
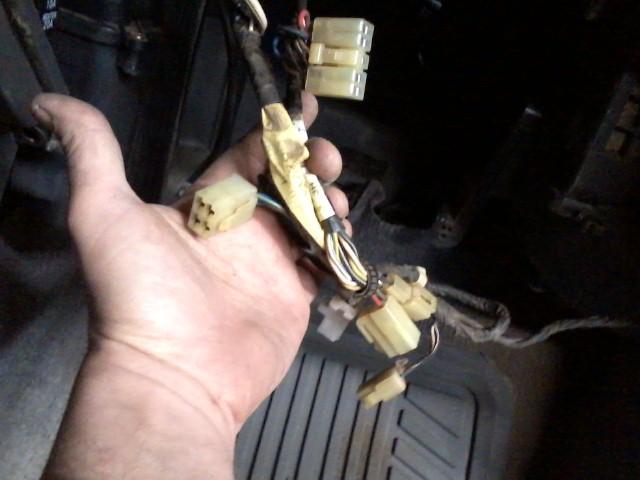
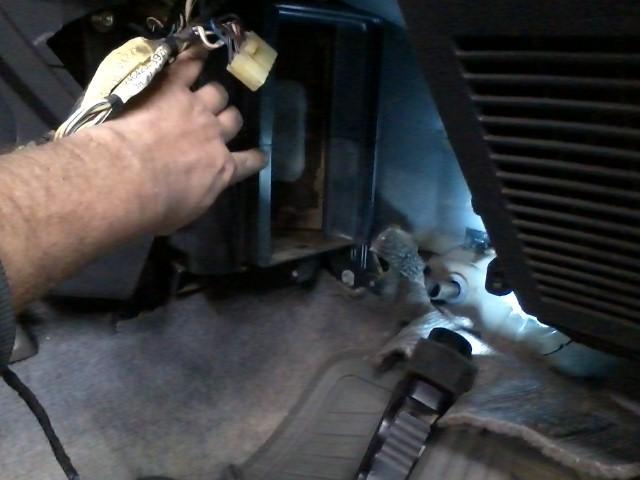
Disconnect 6 or so power connectors to the ac evaporator (Evaporator or condenser, someone correct me and I will edit the name to what it should be) and I use electric tape to cover ends of metal lines and to the below named part.
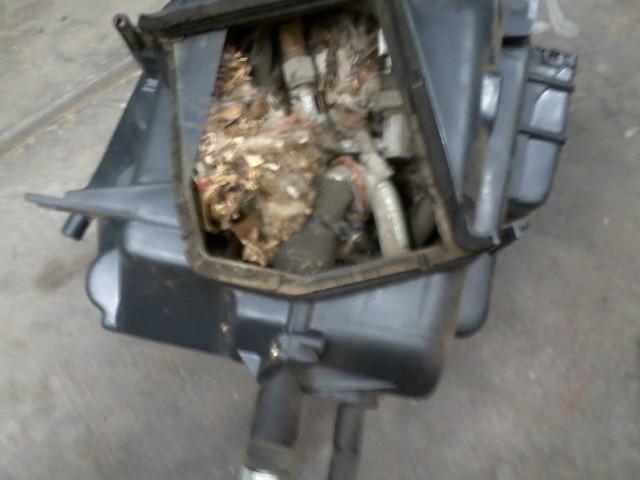
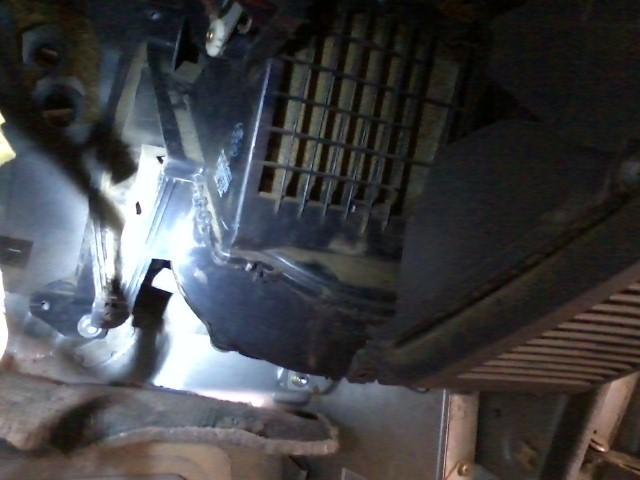
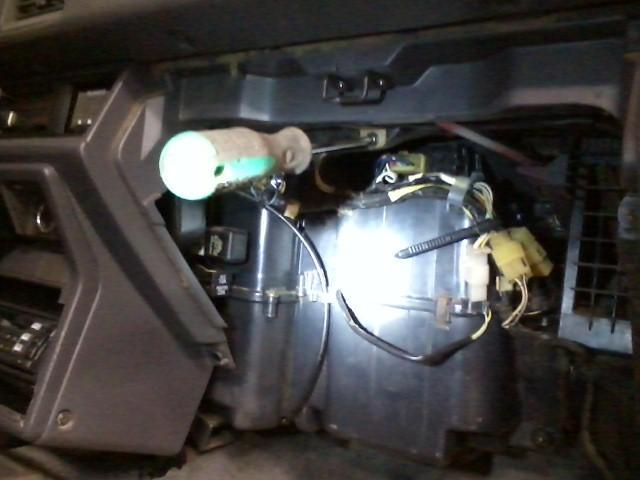
Pull the assembly out of the dash. There is a drain hose attached that is not showing. This is common of what you are going to find in the ac system.
With a screwdriver in the slot of the metal clip, just pry down. There is 4 or so clips and remove the 5 or so gold screws that hold the plastic box togheter.
Seperate the box and I use an air hose to get as much of the dirt out as possible and then wash the coils with hot soapy water. Here you can see I have the lines covered in electrical tape.
There is a thread on the 89-95 on how to clean the air conditioning system on those and I might make a thread on it later using the following pics.
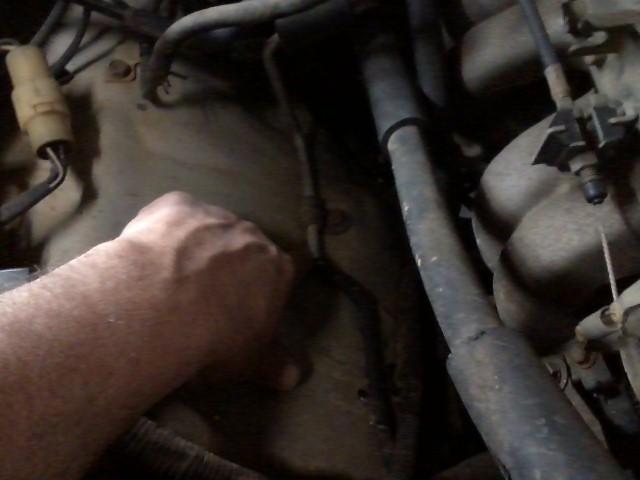
Remove the nut and bolt that is holding the smaller line to the inner fender for movement in next step.

Loosen the bolt that my thumb is pointing at and remove the fuel charcoal canister.
Remove Canister bracket. This will give you access to the AC Lines.

For the top lines use a 14mm and a 17mm wrench and seperate the top ac line.
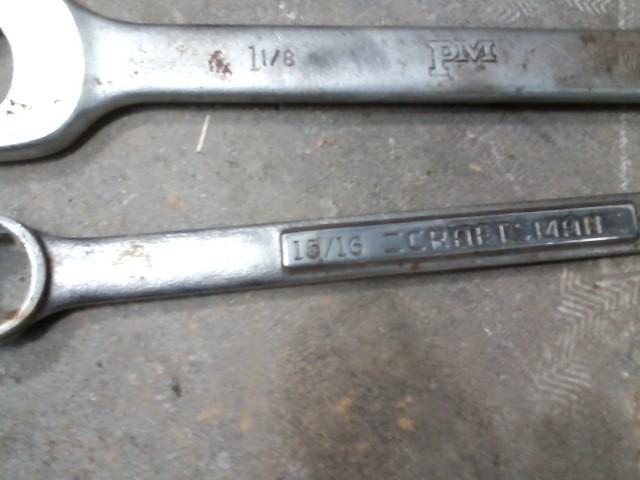
The following picture is for the lower lines. I do not have wrenches this big in the meteric size but these will work. 1 1/8th and a 15/16th.

Remove glove box and then remove the lower black bracket.

Remove PE pipe. Above my thumb will say PE. Remove the screw by my pinky to get the pipe out. Slide to the right, tilt down and pull left.

Disconnect 6 or so power connectors to the ac evaporator (Evaporator or condenser, someone correct me and I will edit the name to what it should be) and I use electric tape to cover ends of metal lines and to the below named part.

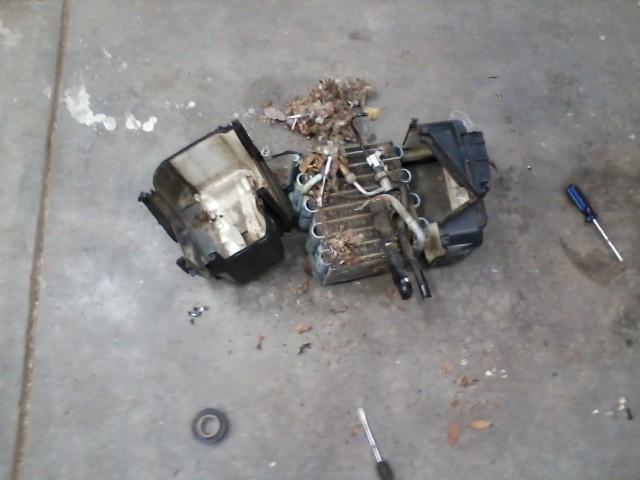
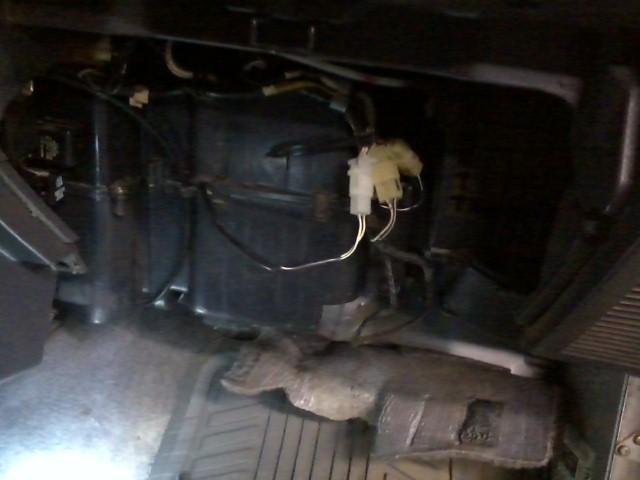
Pull the assembly out of the dash. There is a drain hose attached that is not showing. This is common of what you are going to find in the ac system.

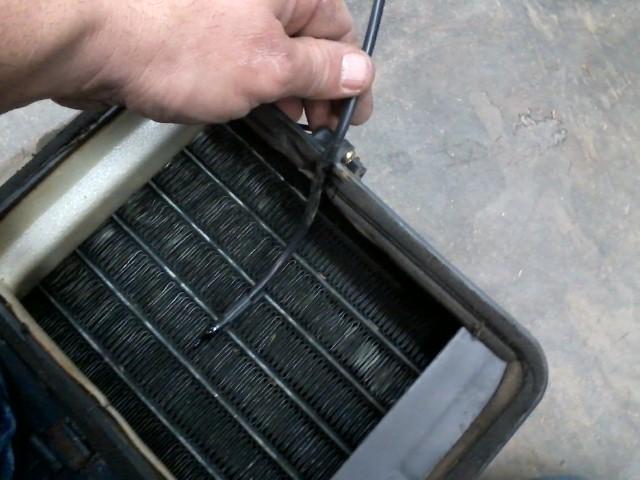
With a screwdriver in the slot of the metal clip, just pry down. There is 4 or so clips and remove the 5 or so gold screws that hold the plastic box togheter.

Seperate the box and I use an air hose to get as much of the dirt out as possible and then wash the coils with hot soapy water. Here you can see I have the lines covered in electrical tape.

Last edited by Terrys87; 02-11-2015 at 03:09 PM.
02-11-2015, 10:11 AM
#17
Super Moderator
Staff
Thread Starter
iTrader: (1)
Join Date: Aug 2008
Location: Anderson Missouri
Posts: 11,788
Likes: 0
Received 21 Likes
on
19 Posts
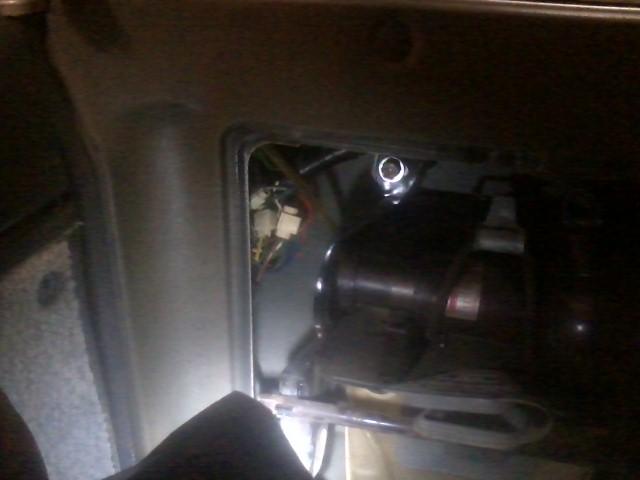
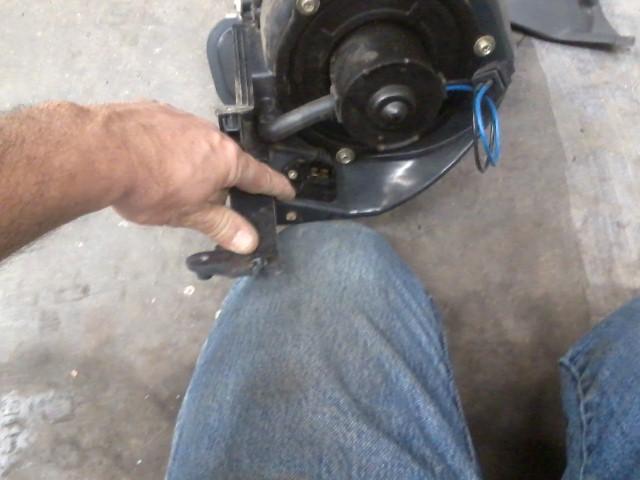
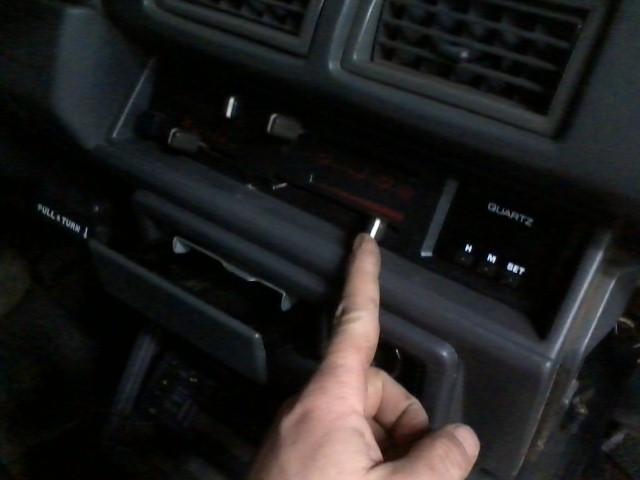
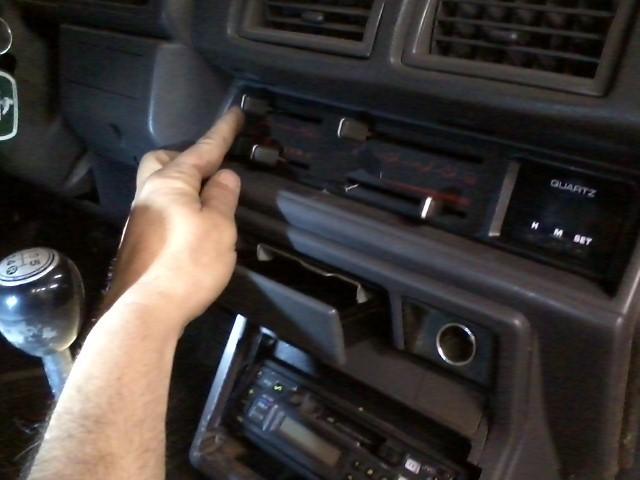
Before you pull the blower assembly out, using some spray paint or similar will make getting the cable to where it needs to be when reinstalling later. It will be covered up so it can stay on for the next time you need to remove components.
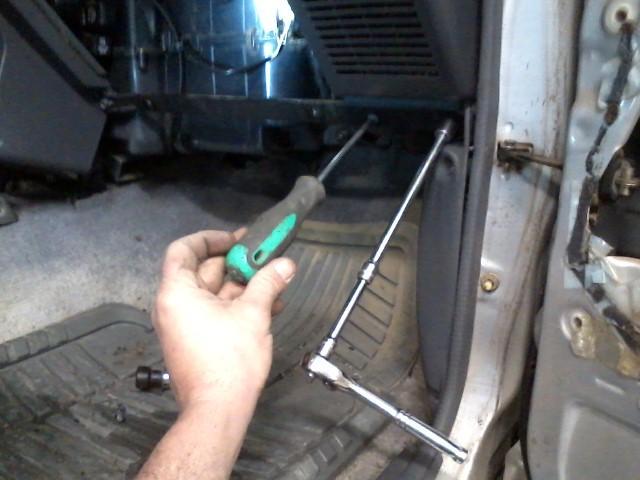
To remove the blower assembly, remove the passenger kick panel. Where my top two fingers are, you will need to get a 10mm wrench and get two gold nuts off. This will be the hardest part to do but is easily seen. Then there is one screw under the carpet you need remove and the assembly can be worked out.
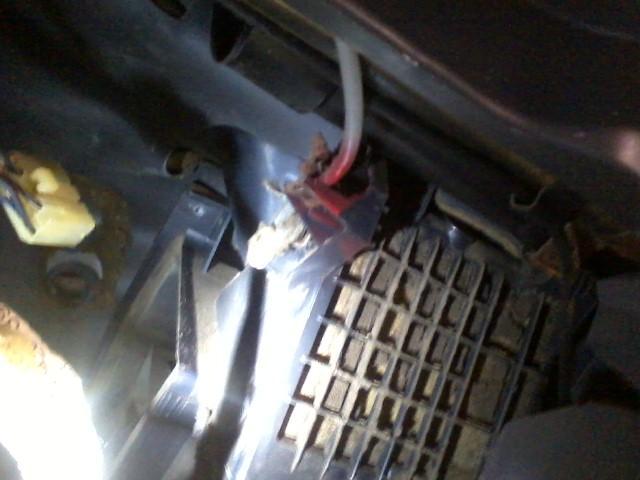
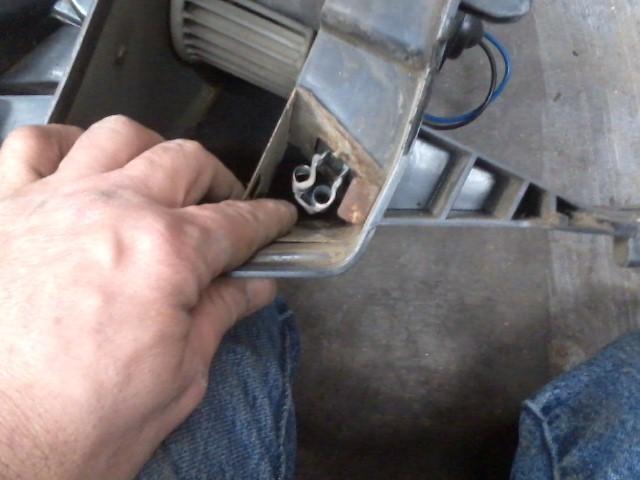
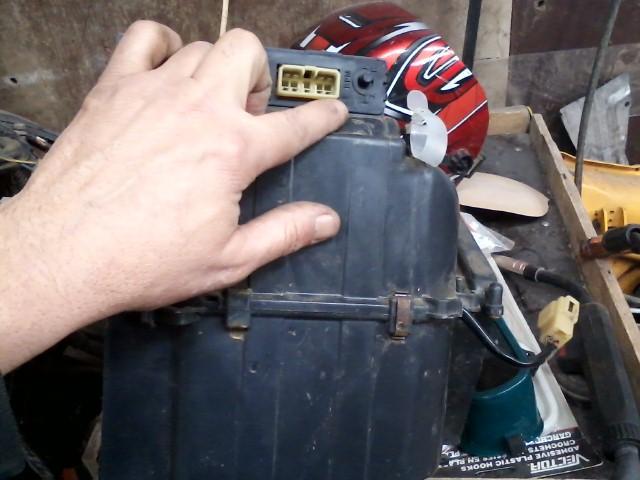
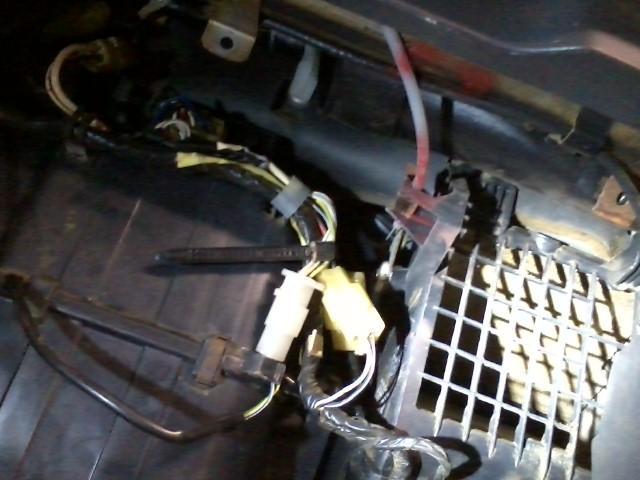
Once the blower assembly is out. Check to see if you have a 3 or 4 pronged blower resistor. This one is a four pronged and it does make a difference as to which resistor you need.
This resistor has been replaced recently. Most will turn to dust when touched if it is worn out. I did not touch with my fingers to keep from getting body oil on it and causing a hot spot on it and wearing it out faster. It should be solid. Will disentigrate if bad,
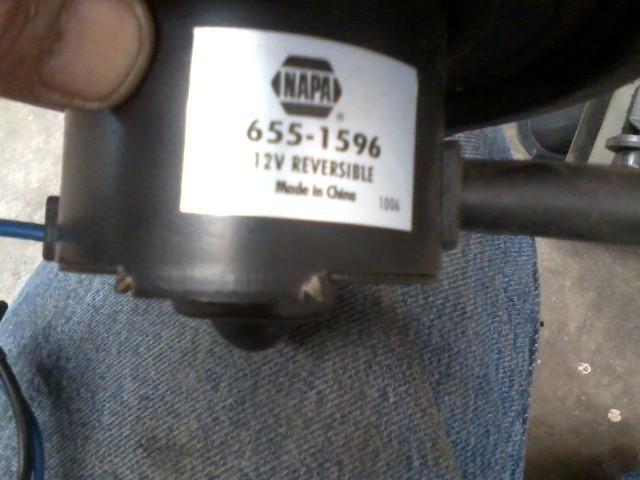
This motor has the correct connector on it but is not a Toyota blower. It is a part store blower and I will reuse it.

Besides the wire and connectors looks, I see the part store name on it.
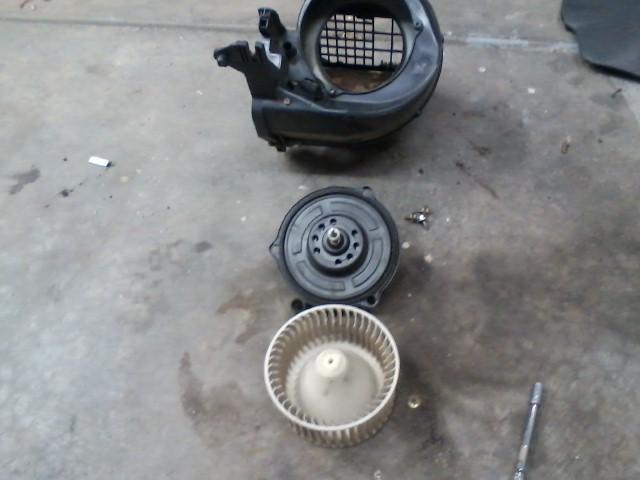
Remove one nut that holds the fan blade on and the three holding the fan assembly in and just use an air hose to get all of the dirt out of the blades and the motor will have dust in it as well.

To remove the blower assembly, remove the passenger kick panel. Where my top two fingers are, you will need to get a 10mm wrench and get two gold nuts off. This will be the hardest part to do but is easily seen. Then there is one screw under the carpet you need remove and the assembly can be worked out.

Once the blower assembly is out. Check to see if you have a 3 or 4 pronged blower resistor. This one is a four pronged and it does make a difference as to which resistor you need.

This resistor has been replaced recently. Most will turn to dust when touched if it is worn out. I did not touch with my fingers to keep from getting body oil on it and causing a hot spot on it and wearing it out faster. It should be solid. Will disentigrate if bad,

This motor has the correct connector on it but is not a Toyota blower. It is a part store blower and I will reuse it.

Besides the wire and connectors looks, I see the part store name on it.

Remove one nut that holds the fan blade on and the three holding the fan assembly in and just use an air hose to get all of the dirt out of the blades and the motor will have dust in it as well.

Last edited by Terrys87; 02-11-2015 at 03:10 PM.
02-11-2015, 11:49 AM
#18
Super Moderator
Staff
Thread Starter
iTrader: (1)
Join Date: Aug 2008
Location: Anderson Missouri
Posts: 11,788
Likes: 0
Received 21 Likes
on
19 Posts
An easy upgrade. A while back I was asked about switching arm rest. You dont need to move the plugs the screws go into, just switch armrest.
Plugs I am talking about.
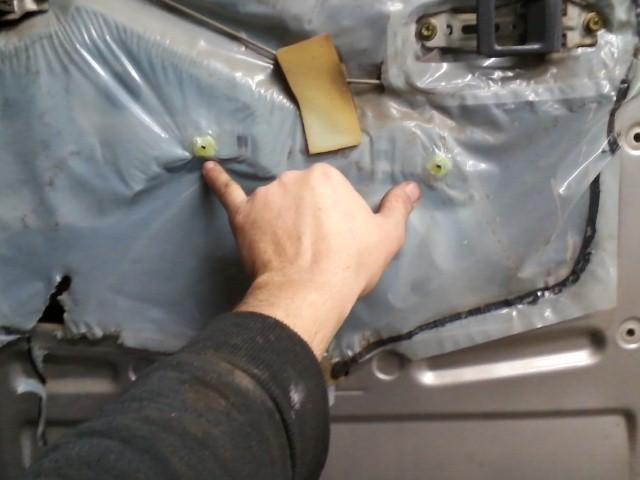
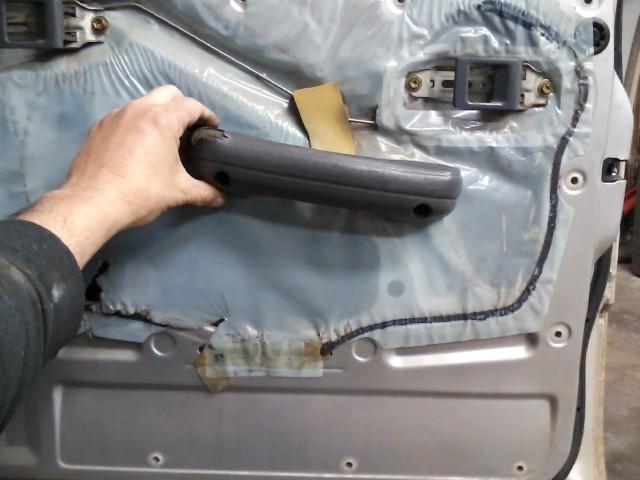
Small armrest.
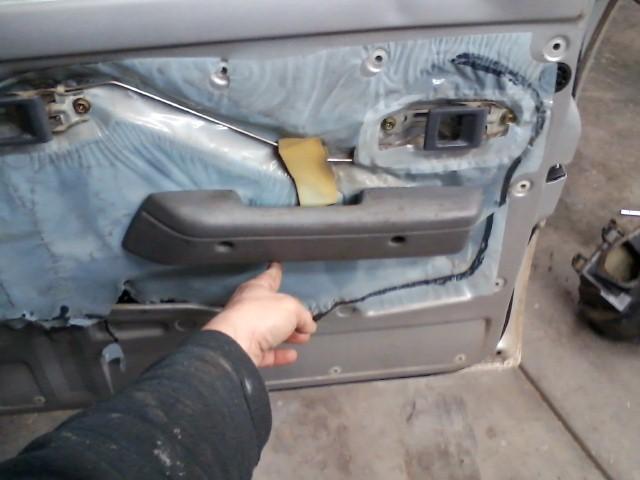
Big armrest. On a runner on the passenger door, the back of the arm rest will be flush with the rear passenger door handle.
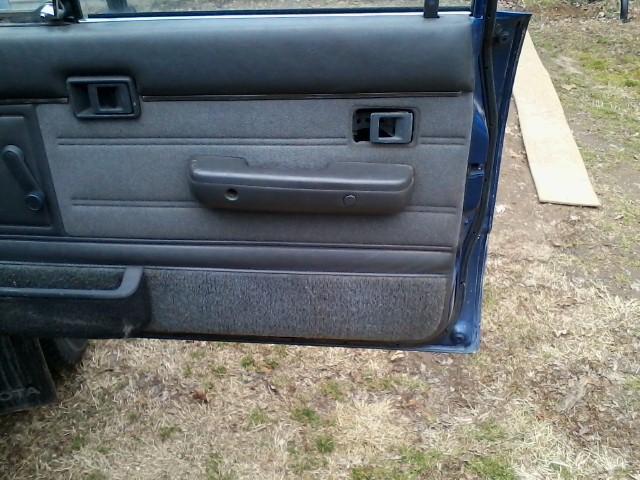
This is my 86 but what it would look like installed.
Plugs I am talking about.

Small armrest.

Big armrest. On a runner on the passenger door, the back of the arm rest will be flush with the rear passenger door handle.

This is my 86 but what it would look like installed.

Last edited by Terrys87; 02-11-2015 at 12:28 PM.
02-11-2015, 12:37 PM
#19
Super Moderator
Staff
Thread Starter
iTrader: (1)
Join Date: Aug 2008
Location: Anderson Missouri
Posts: 11,788
Likes: 0
Received 21 Likes
on
19 Posts
To reassemble, the blower assembly is just held in with the two gold nuts at the top and one screw at the bottom. Getting the blower assembly can be a little tricky getting over the studs that the gold nuts go to.
After cleaning and reassembling the ac evaporator, make sure this cable is routed out of the box. It actually goes inside and there is a cutout for it.
Same for this one.
Dont mess with this, not sure what it does and it is hidden behind the dash where it is not easily accessible. Your ac guy might know what to do with it. I think it has to do with idle speed but am not sure.
When sticking the evaporator back in, dont forget to hook up this drain hose or you will have a wet floorboard.

Here is where the drain hose hooks to.

Before putting the evaporator in, slide the botton cotroller to the right to get access to the heater core and see if there is any dirt there. The evaporator caught the dirt on this one but is still worth checking.
With the lever to the right, you can get access to the heater core. I could not get a good picture of it you can see inside with the right angle and feel in there as well.
If I recall right, it is 2 of these screws on top and 3 on the bottom that hold the evaporator in.
Re connect all power cables and screws are located below carpet.
Reconnect your white cable and passenger kick panel.
To check and see if your cable is installed correctly, operate this lever from one side to the other and make sure the fresh door is functioning correctly.
The screw driver is showing the PE pipe with the phillips screw that holds it in.
Install two 10mm bolts on each end of the black bar and the one phillips screw that holds it to the main frame.
Install the glovebox with two screws on the bottom of the black bar. ( will get pic later)
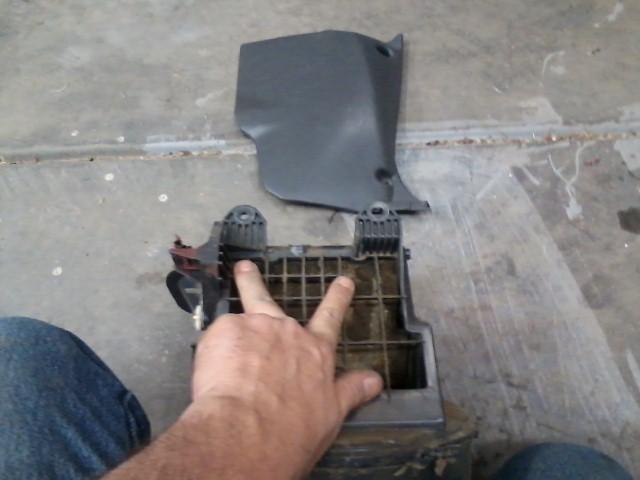
Once the glovebox is installed, the arrows show where the glovebox dust cover goes. They just snap into place. (I use a flatblade screwdriver next to the tabs to pop them out when disassembling)
Install bolt that supports the ac line.
Reconnect the ac lines to the firewall.
Reinstall your charcoal canister making sure the vent tube is routed correctly.
These trucks came with R12, most likely you will need to upgrade to 134 or the newest freon out there. At the beginning I did have a ac mechanic to vacuum the system. They will give you credit for what they remove from your system. At this point I would suggest having an ac shop to complete the ac system.

After cleaning and reassembling the ac evaporator, make sure this cable is routed out of the box. It actually goes inside and there is a cutout for it.

Same for this one.

Dont mess with this, not sure what it does and it is hidden behind the dash where it is not easily accessible. Your ac guy might know what to do with it. I think it has to do with idle speed but am not sure.

When sticking the evaporator back in, dont forget to hook up this drain hose or you will have a wet floorboard.

Here is where the drain hose hooks to.

Before putting the evaporator in, slide the botton cotroller to the right to get access to the heater core and see if there is any dirt there. The evaporator caught the dirt on this one but is still worth checking.

With the lever to the right, you can get access to the heater core. I could not get a good picture of it you can see inside with the right angle and feel in there as well.

If I recall right, it is 2 of these screws on top and 3 on the bottom that hold the evaporator in.

Re connect all power cables and screws are located below carpet.

Reconnect your white cable and passenger kick panel.

To check and see if your cable is installed correctly, operate this lever from one side to the other and make sure the fresh door is functioning correctly.

The screw driver is showing the PE pipe with the phillips screw that holds it in.

Install two 10mm bolts on each end of the black bar and the one phillips screw that holds it to the main frame.

Install the glovebox with two screws on the bottom of the black bar. ( will get pic later)
Once the glovebox is installed, the arrows show where the glovebox dust cover goes. They just snap into place. (I use a flatblade screwdriver next to the tabs to pop them out when disassembling)

Install bolt that supports the ac line.
Reconnect the ac lines to the firewall.
Reinstall your charcoal canister making sure the vent tube is routed correctly.
These trucks came with R12, most likely you will need to upgrade to 134 or the newest freon out there. At the beginning I did have a ac mechanic to vacuum the system. They will give you credit for what they remove from your system. At this point I would suggest having an ac shop to complete the ac system.

Last edited by Terrys87; 02-11-2015 at 03:02 PM.
02-12-2015, 06:45 AM
#20
Super Moderator
Staff
Thread Starter
iTrader: (1)
Join Date: Aug 2008
Location: Anderson Missouri
Posts: 11,788
Likes: 0
Received 21 Likes
on
19 Posts
I am pulling the interior from behind the front seats to the tail gate. So much easier to paint and work on when the interior is out. I plan on pulling the top off and it will be stored outside. My tops have sat outside all summer long and it wont take long to prep it for paint. This truck has a rear heater in it and that can be a problem with the water hoses and having leaks.
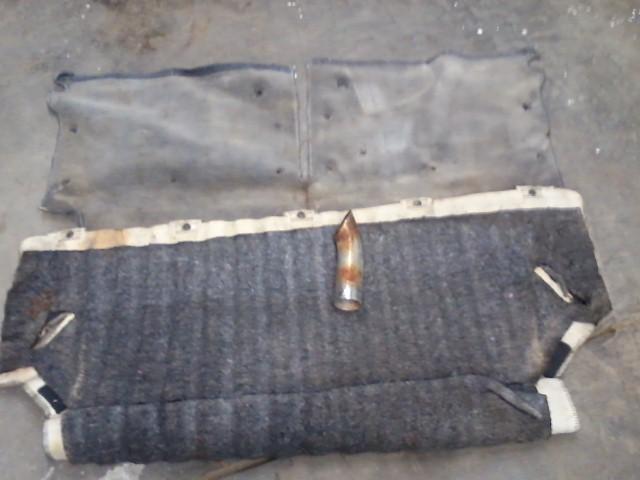
First I pull the rear seats and the rear carpet. The rear passenger carpet I just roll up to the front seats. The muffler tip has a future as a soup can, glad to see it go. I thought it just looked terrible from day one. You can buy a rear carpet kit but I get a scrap piece from a carpet store for about $20. The kits are $100 plus and you still have to trim them.
Start by pulling the panels from the front to the rear as they overlap.
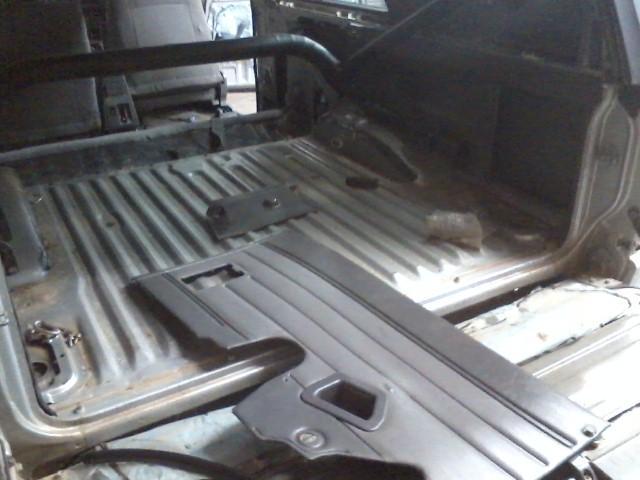
Do NOT try and pull the rear side panels with out loosening the roll bar and sliding all the way to the rear and then tilt forward. The panels are so brittle that they will snap when you try to get them off of the seat latch.
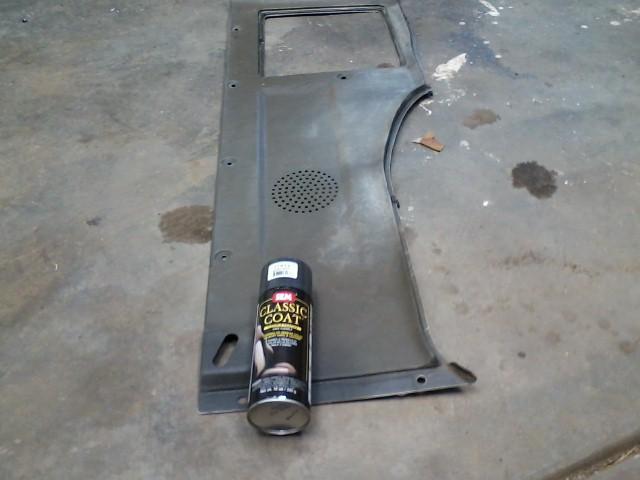
These panels fade and bleach and start to look white and green. For dark gray interiors I use SEM brand paint that is off of the shelf and is close to Toyotas color. Bottom left corner is a test spray to see if this is the color I will use. I will need to look at one of my other threads to find if this is the correct color.
First I pull the rear seats and the rear carpet. The rear passenger carpet I just roll up to the front seats. The muffler tip has a future as a soup can, glad to see it go. I thought it just looked terrible from day one. You can buy a rear carpet kit but I get a scrap piece from a carpet store for about $20. The kits are $100 plus and you still have to trim them.

Start by pulling the panels from the front to the rear as they overlap.

Do NOT try and pull the rear side panels with out loosening the roll bar and sliding all the way to the rear and then tilt forward. The panels are so brittle that they will snap when you try to get them off of the seat latch.

These panels fade and bleach and start to look white and green. For dark gray interiors I use SEM brand paint that is off of the shelf and is close to Toyotas color. Bottom left corner is a test spray to see if this is the color I will use. I will need to look at one of my other threads to find if this is the correct color.

Last edited by Terrys87; 02-12-2015 at 06:47 AM.


