LifterCatcher's 1993 4Runner Build-Up Thread
 08-08-2010, 10:01 AM
#1
Registered User
Thread Starter
LifterCatcher's 1993 4Runner Build-Up Thread
Im going to call this "Operation Make it Mine." It seems that every vehicle that I own I have to do something to give it my personal touch, I cannot just leave it as is, not meaning that I have to customize every inch of the vehicle.
Well I just picked up this 93 last Wed with 138K. Overall the truck is in pretty good shape, but like all it could use some work.
It just had the T-Belt replaced, water pump, spark plugs, wires, Heads rebuilt, new valves (shimmed), new head gaskets. So it should be good to go for a while.
The interior is pretty rought and the guy I purchased it from told me he bought it from someone who installed some audio equipment (subs, amp, speakers etc.) and I could see what was left of wires leading to the back to hook up a sub box and amp. No biggie............so I thought
First plans for the truck is to GUT the interior and Herculine it. All interior paneling is dark blue and some parts are faded, the rear hatch area was used by the previous owner to transport his tools (he is a mechanic) in a larger plastic slide out bin, leaving some minor scuff marks here and there to some of the rear panels. I plan to sand the panels and repaint them black, also plan to sand and repaint the majority of the interior black.
Ok onto the pics
Here she is when I bought her last week.
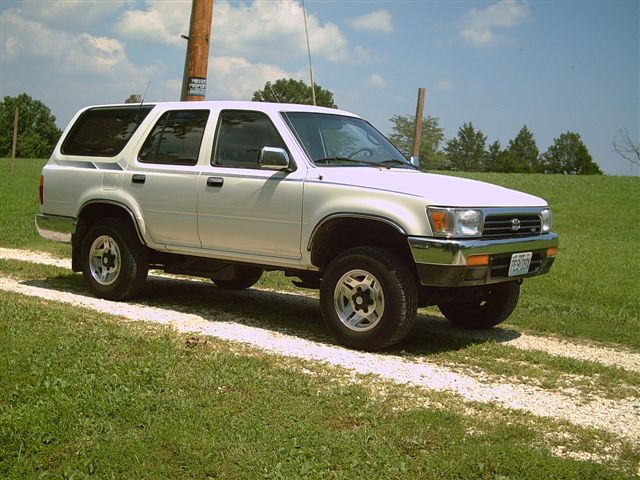
(Time for a wash, and to clean the windows)

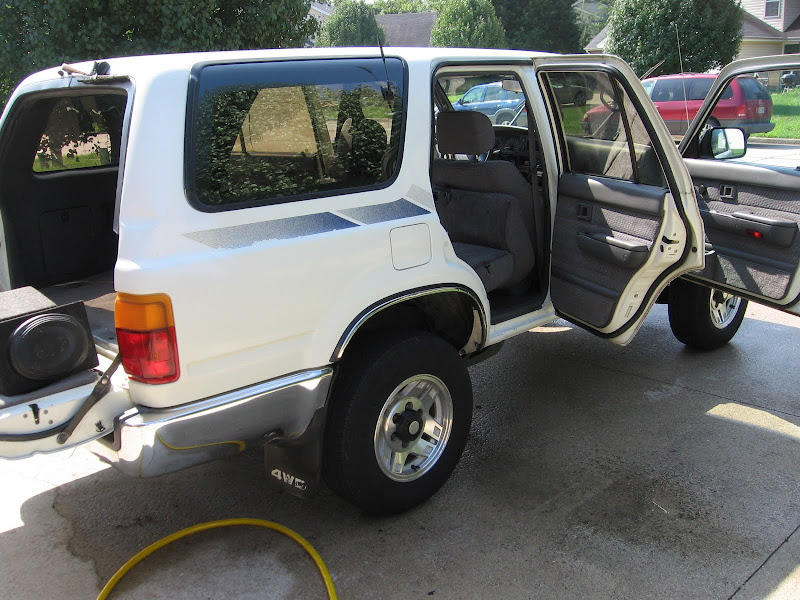
(Out side washed and now its time to tackle the interior)
LET THE FUN BEGIN!!!
(NASTY!! Dirty)
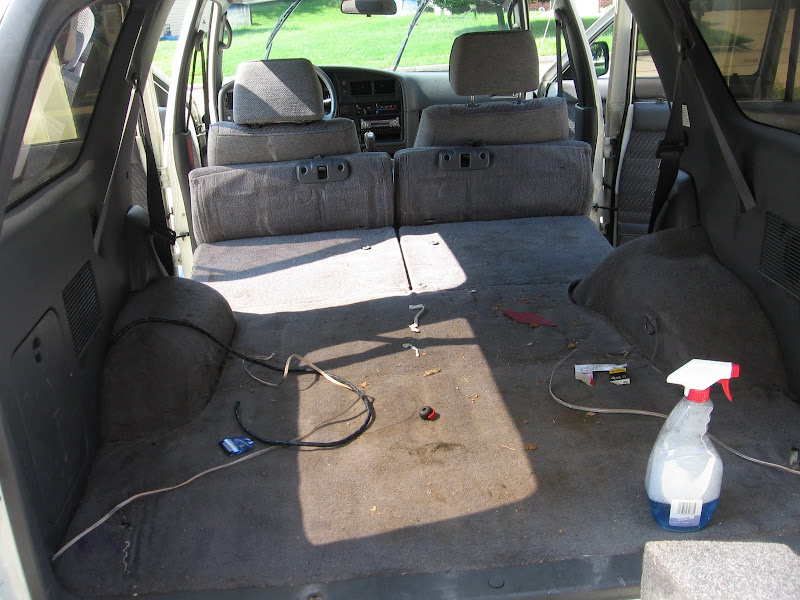
(Ok I have had enough looking at this nasty carpet time to take it out)
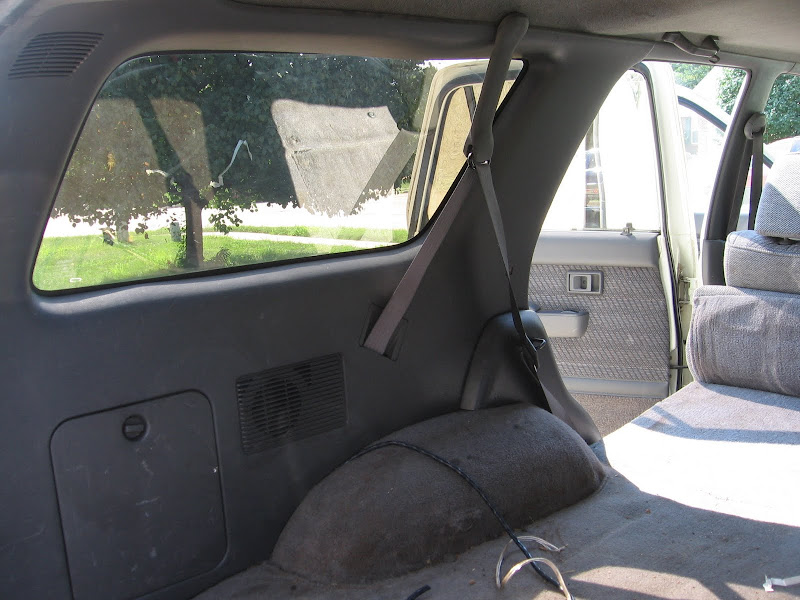
(Side panels need to come out first)
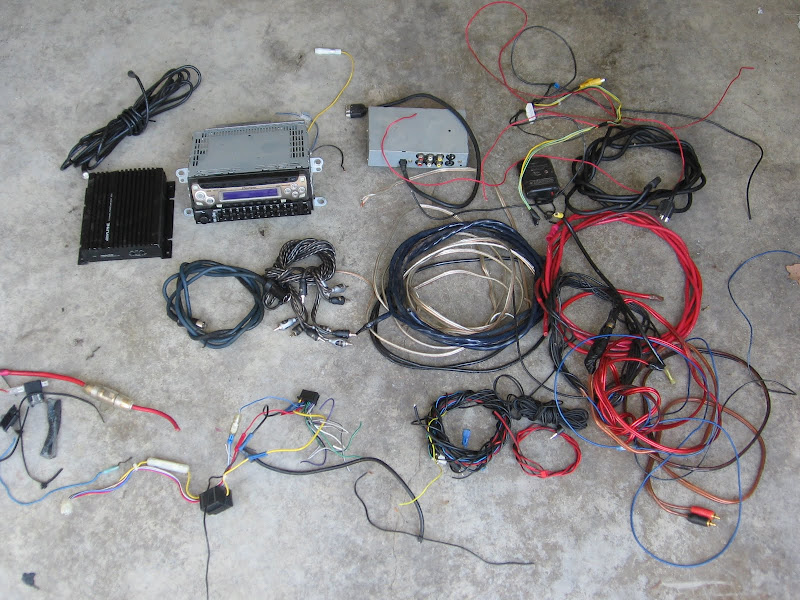
It started to become clear that who ever installed the audio/video (yup video) equipment was a freakin idiot! I let the pics do the talking.
Well I just picked up this 93 last Wed with 138K. Overall the truck is in pretty good shape, but like all it could use some work.
It just had the T-Belt replaced, water pump, spark plugs, wires, Heads rebuilt, new valves (shimmed), new head gaskets. So it should be good to go for a while.
The interior is pretty rought and the guy I purchased it from told me he bought it from someone who installed some audio equipment (subs, amp, speakers etc.) and I could see what was left of wires leading to the back to hook up a sub box and amp. No biggie............so I thought
First plans for the truck is to GUT the interior and Herculine it. All interior paneling is dark blue and some parts are faded, the rear hatch area was used by the previous owner to transport his tools (he is a mechanic) in a larger plastic slide out bin, leaving some minor scuff marks here and there to some of the rear panels. I plan to sand the panels and repaint them black, also plan to sand and repaint the majority of the interior black.
Ok onto the pics
Here she is when I bought her last week.
(Time for a wash, and to clean the windows)
(Out side washed and now its time to tackle the interior)
LET THE FUN BEGIN!!!
(NASTY!! Dirty)
(Ok I have had enough looking at this nasty carpet time to take it out)
(Side panels need to come out first)
It started to become clear that who ever installed the audio/video (yup video) equipment was a freakin idiot! I let the pics do the talking.
 08-08-2010, 10:17 AM
#2
Registered User
Thread Starter
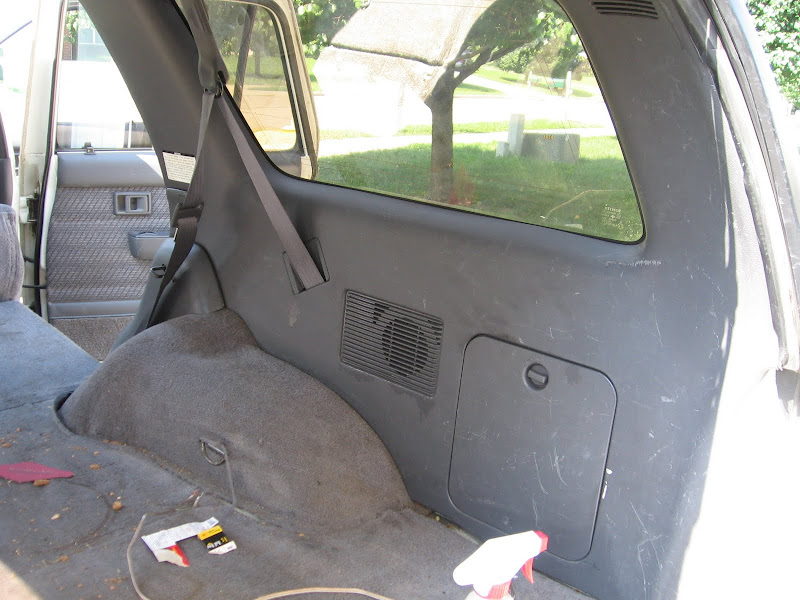
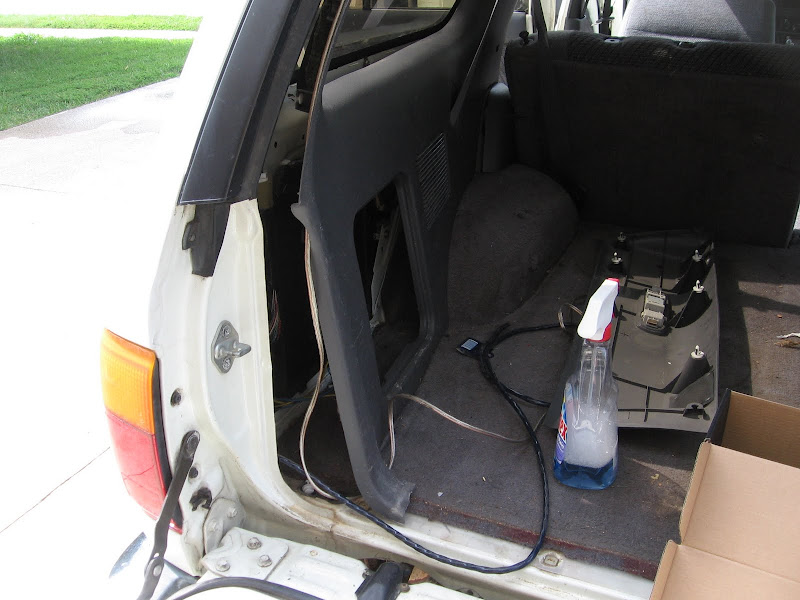
(rear side panels off)
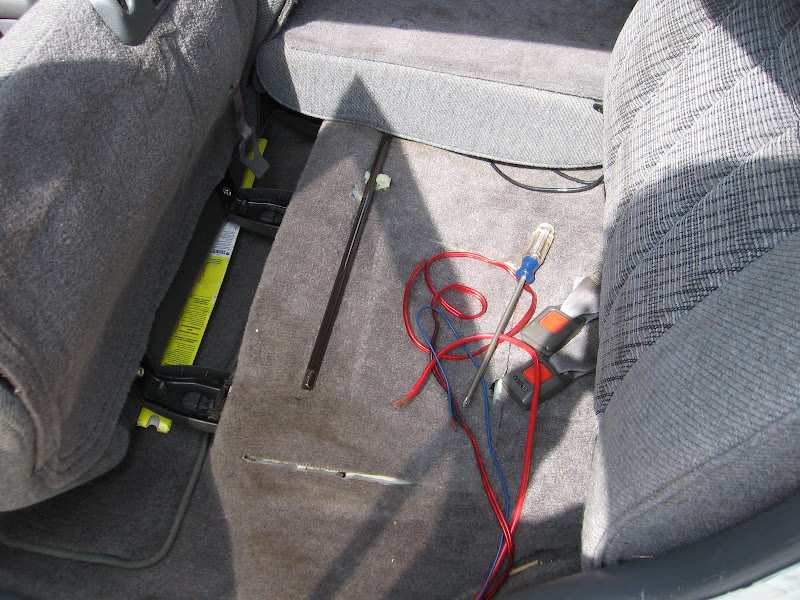
(Found some wires under the rear seat, just a few of the many I find later)
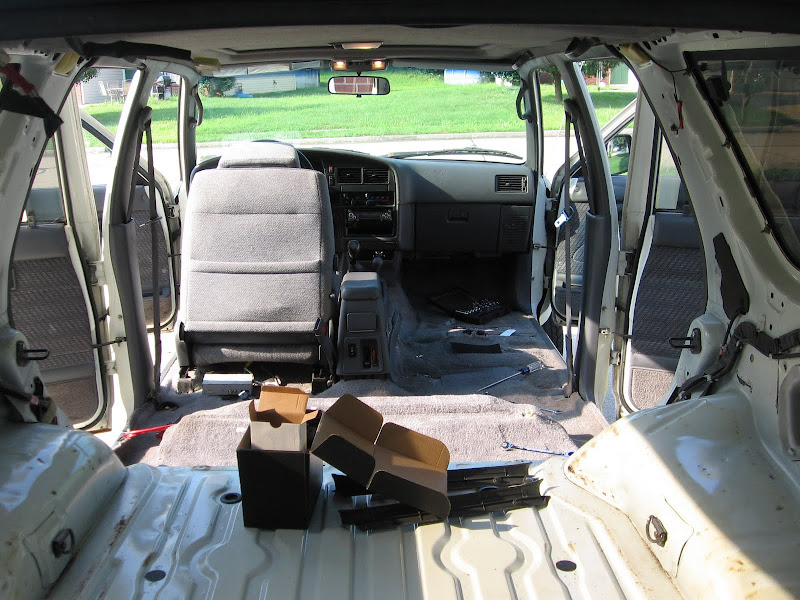
(Rear seats out and starting to pull up the carpet in the rear.)
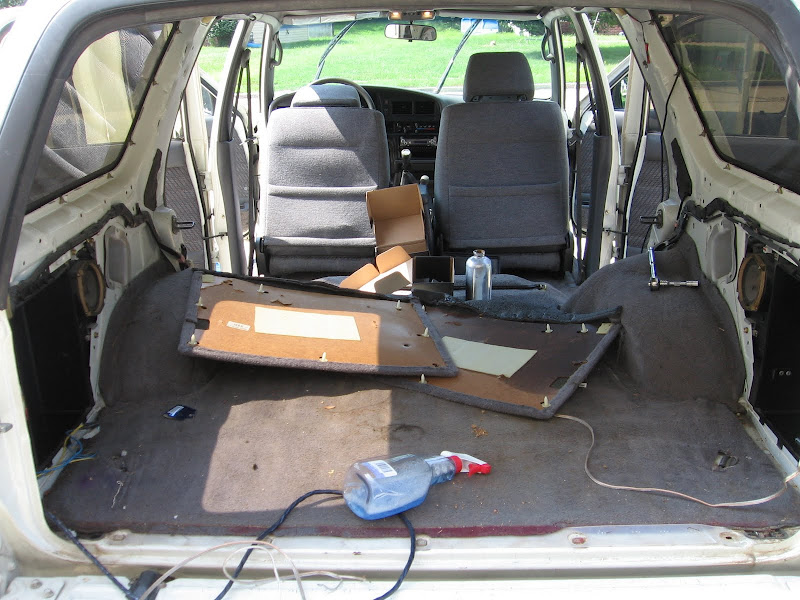
(PULLLLLLLLL)
(Rear carpets out, it seems that the sound deadning crap got a little hot and melted a bit, its nasty like tar!)
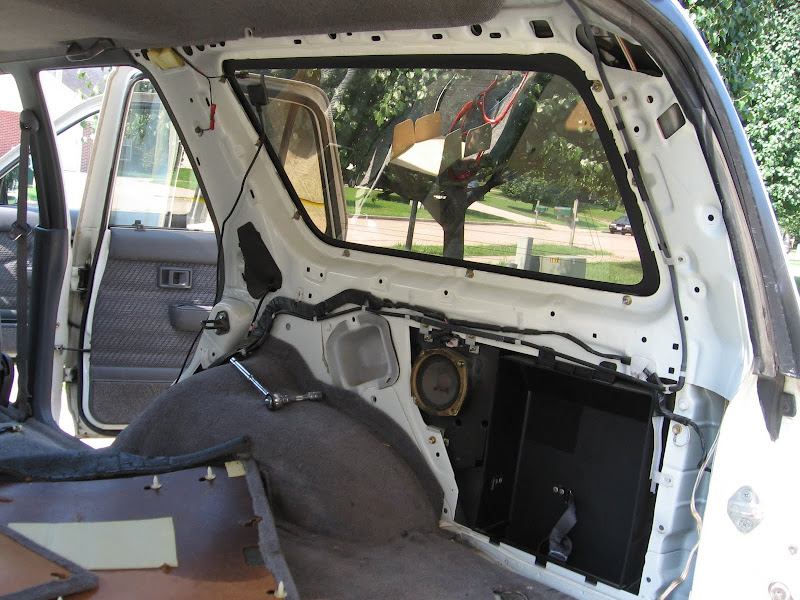
(Long shot to show the carpet removed and the HUGE IDIOT holes that are cut into the tail gate for speakers, gonna have to figure something out to fix that.)

DAY 2, and its time to pull everything from the rear seats to the dash.
(This is where the real fun starts)
( Pass seat out)

(Starting to pull the dash...hmmm this does not look stock)
(started to pull the drivers seat and the two rear bolts are a bit rusty and very tight. I Let um soak in PB blaster for a bit while I worked on the dash.) Well I got three of the four out and finally broke the the fourth loose
 )
)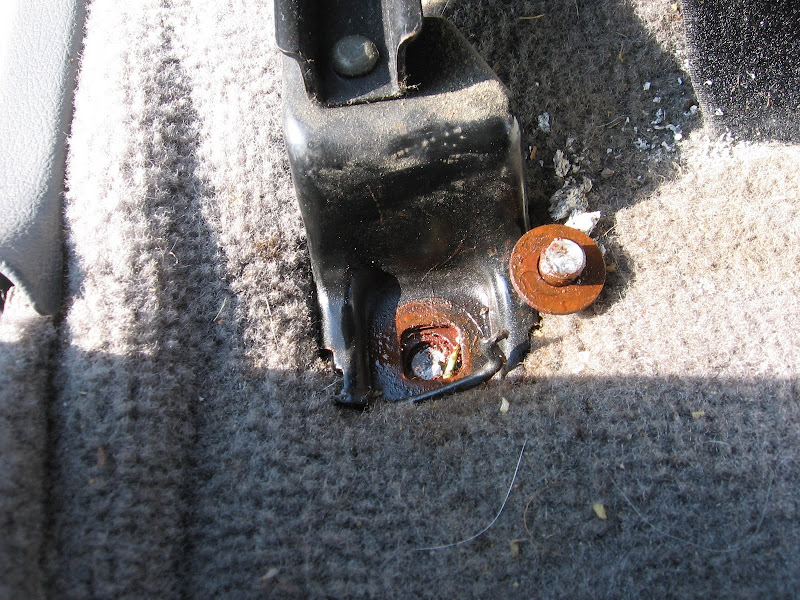
(Awesome! The good news it will be pretty easy to drill out, and I will use a longer grade 8 bolt and nut to fix her up. You can get to the nut from uneder the rig.)
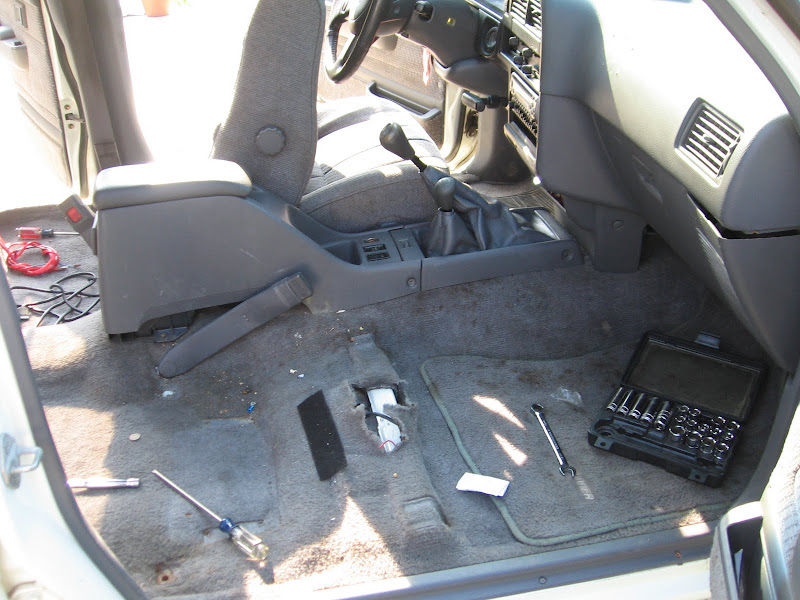
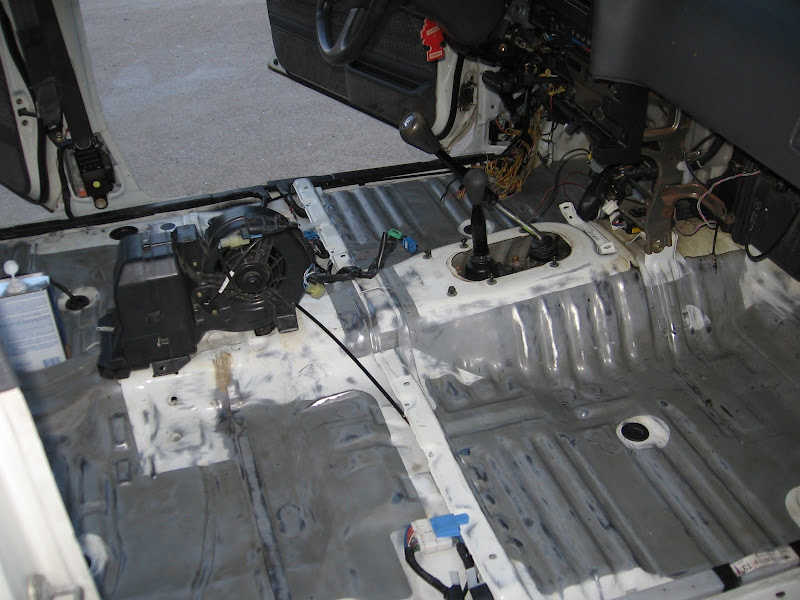
(seats out and center console out, went to remove the center console blower unit to find that it has a small condensor to cool the back of the Rig, guess Ill just have to work around it no biggie.)

(condensor for rear AC)

(better pic)
Last edited by LifterCatcher; 08-08-2010 at 10:22 AM.
08-08-2010, 10:33 AM
#3
Registered User
Thread Starter
HOLY CRAP WIRES & JUNK
This is just a tiny preview of the HUGE mess that I am in for!
Behind center ashtray
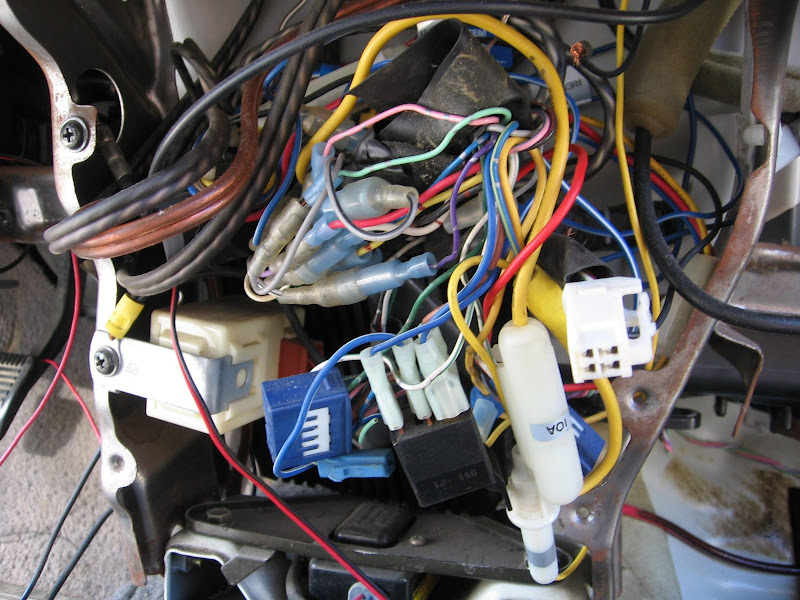
(Relays to god knows what, splicers, cut not protected wires arrrrrr)
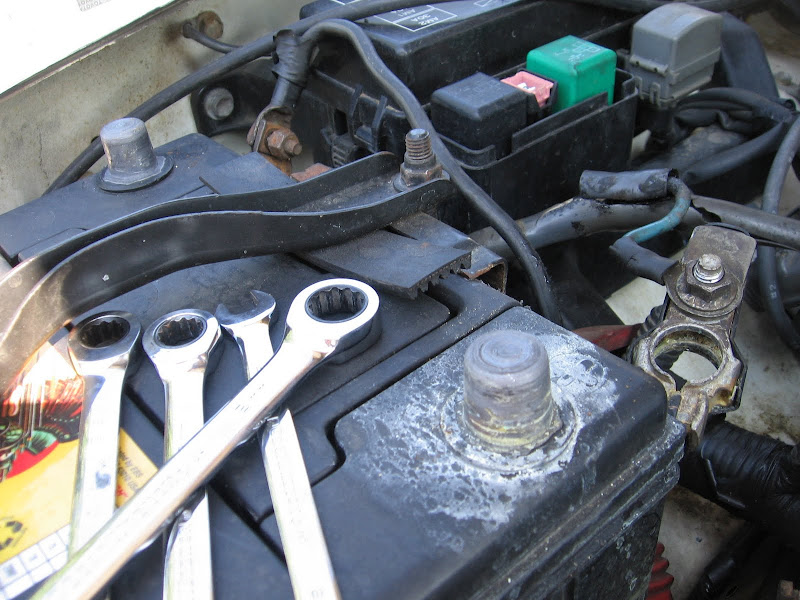
At this point I am starting to get a little scared and worried that the rig may never start again. Due to the huge amount of cut wires that have NO protection, Hot wires, ground wires you name it.) So before I short something and catch the rig on fire Its time to unhook the battery
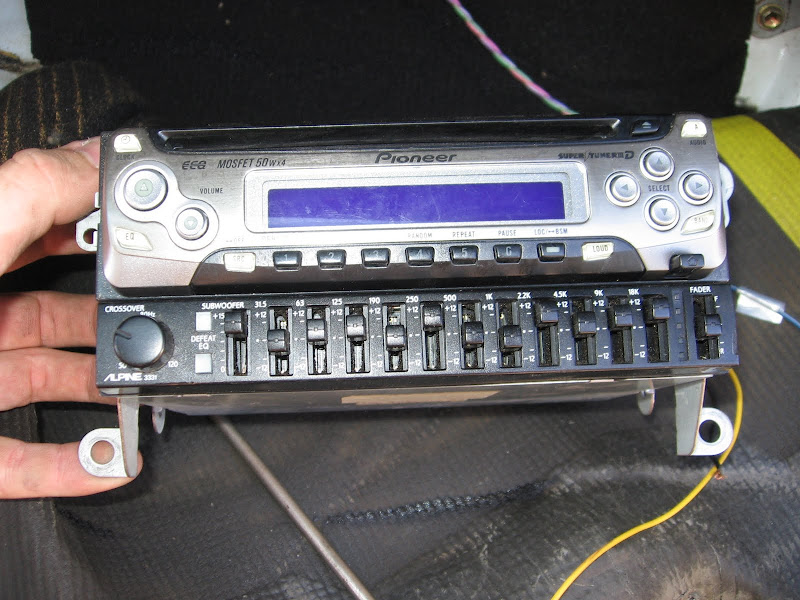
(Head Unit & Equalizer out!)
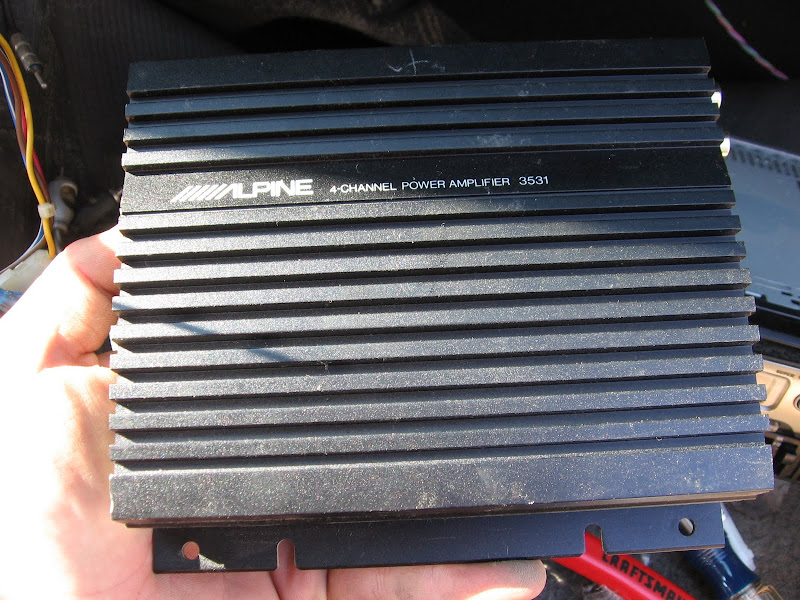
(ALPINE Amp from behind the ash tray out.)
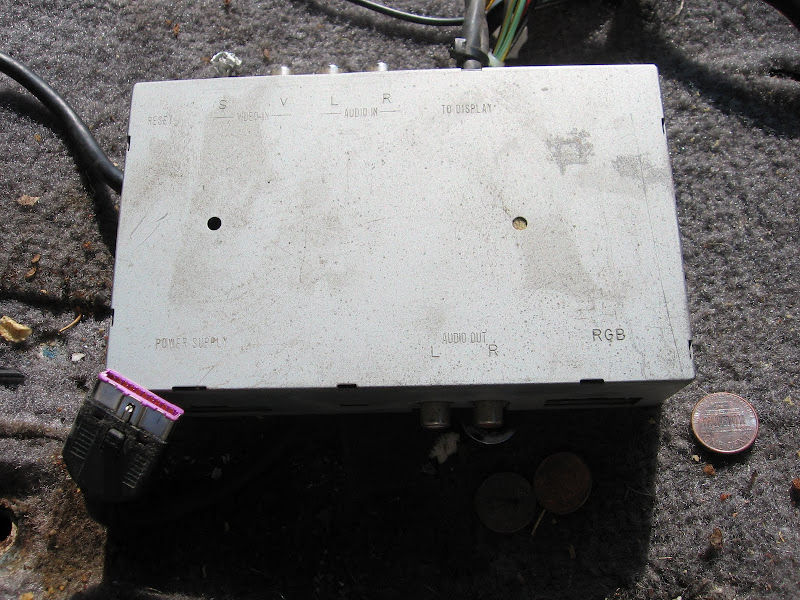
(Audio Video Conversion something that was mounted under the drivers seat OUT)
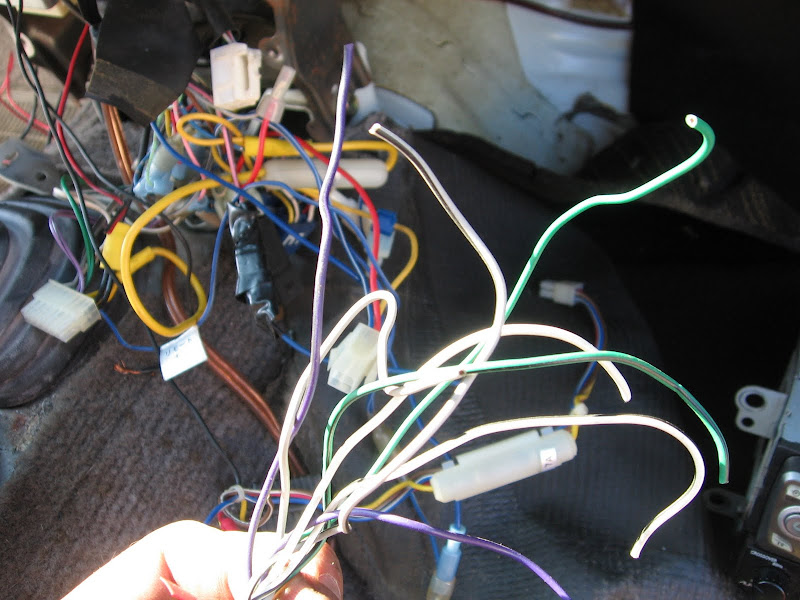
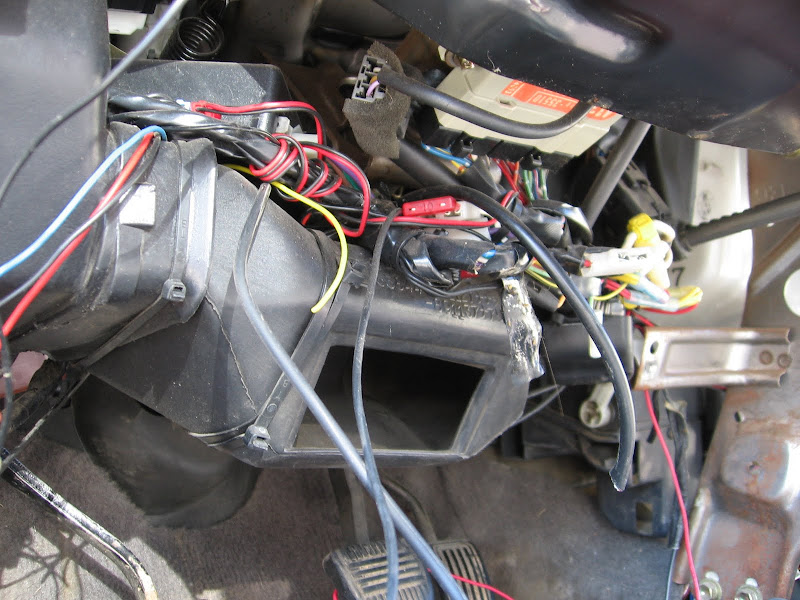
(some cut wires leading to who knows that I found tucked behind the glove box.) At this point I have cut nothing just finding wires everywhere!
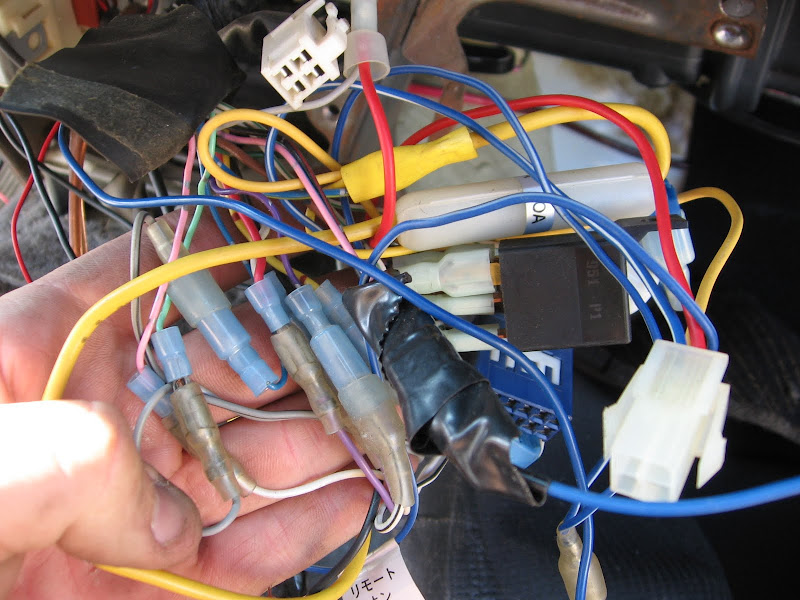
(some more wires and splicers and connectors and relays from behind the glove box.)
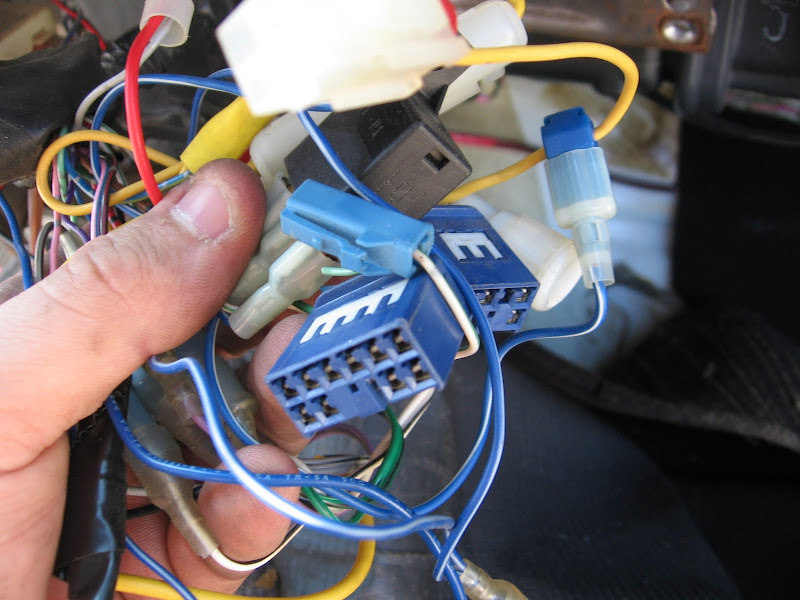
(Plugs to who the hell knows....LOL)
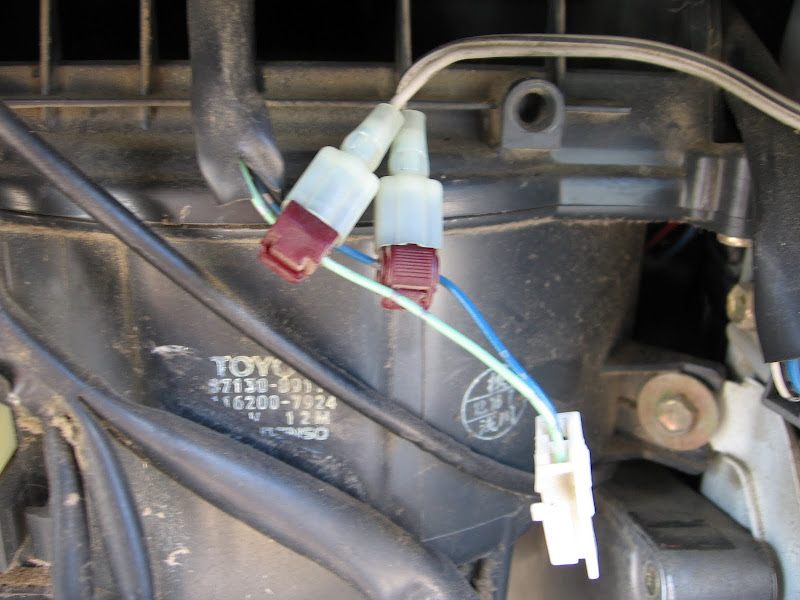
(This is how he spliced in the rear speakers)
This is just a tiny preview of the HUGE mess that I am in for!
Behind center ashtray
(Relays to god knows what, splicers, cut not protected wires arrrrrr)
At this point I am starting to get a little scared and worried that the rig may never start again. Due to the huge amount of cut wires that have NO protection, Hot wires, ground wires you name it.) So before I short something and catch the rig on fire Its time to unhook the battery
(Head Unit & Equalizer out!)
(ALPINE Amp from behind the ash tray out.)
(Audio Video Conversion something that was mounted under the drivers seat OUT)
(some cut wires leading to who knows that I found tucked behind the glove box.) At this point I have cut nothing just finding wires everywhere!
(some more wires and splicers and connectors and relays from behind the glove box.)
(Plugs to who the hell knows....LOL)
(This is how he spliced in the rear speakers
)
08-08-2010, 10:52 AM
#4
Registered User
Thread Starter
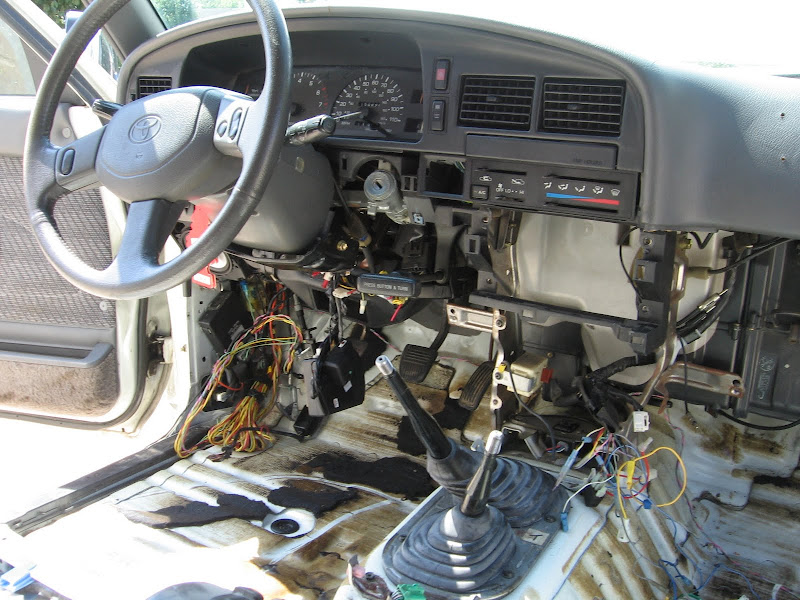
Pulled the lower trim from under the steering wheel to find.....wait for it..............MORE WIRES!!!)
(Note the red wires wrapped around the bigger miss of wires to hold it all)
Pulled the lower drivers side kick panel to find a HUGE bundle of wires
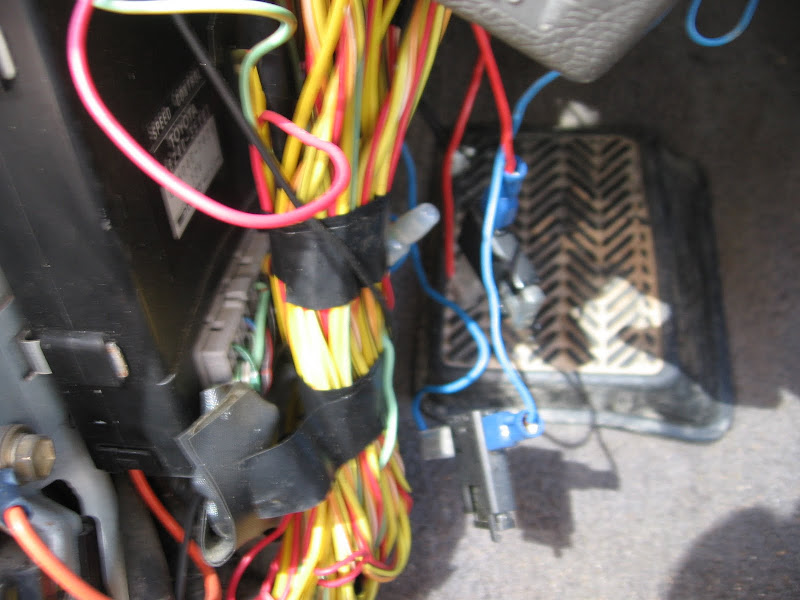
(does anyone know if the yellow and red bundle of wires are stock?)
Just when I was really starting to get frustrated and worried I lost all HOPE when I found this!!!
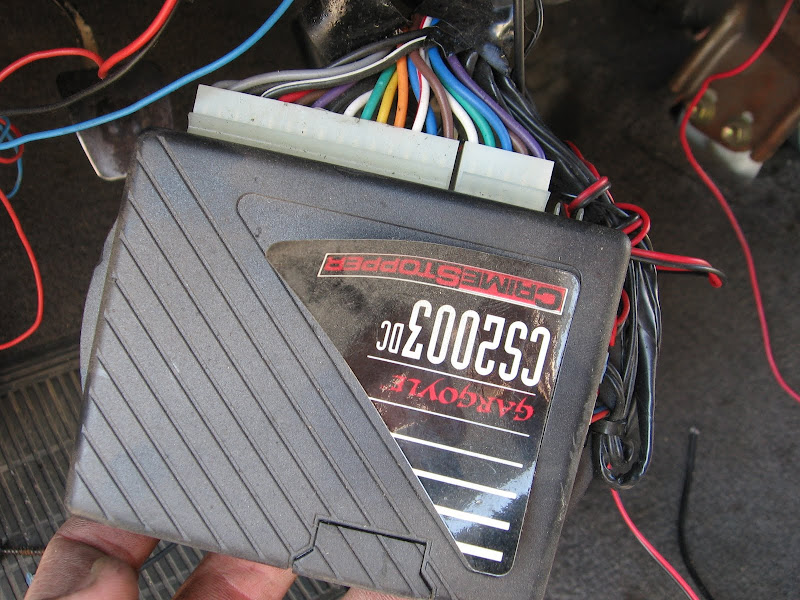
( A nasty old juny, cheap alarm system that is still pluged in but no longer working, I have no idea where the main plug come from and I am scared to remove it in fear that the truck will never start again.) Anyone ever removed a alam system before?
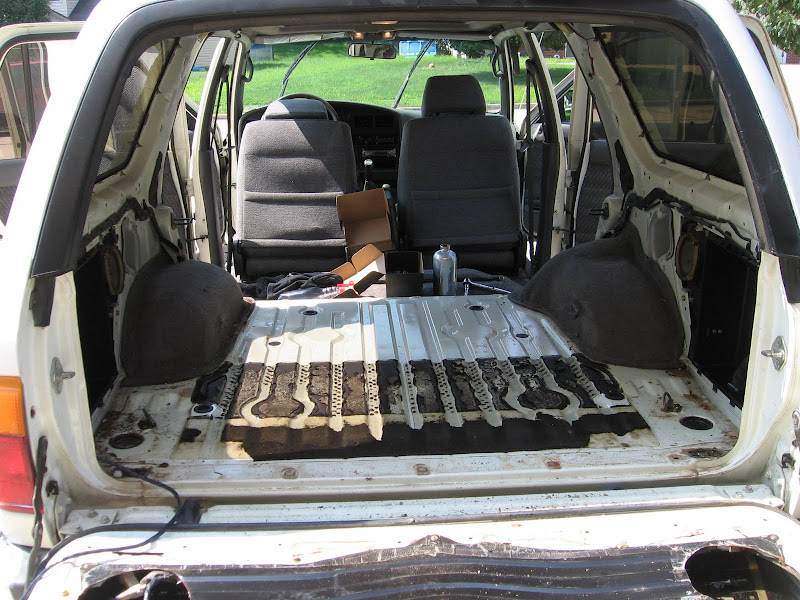
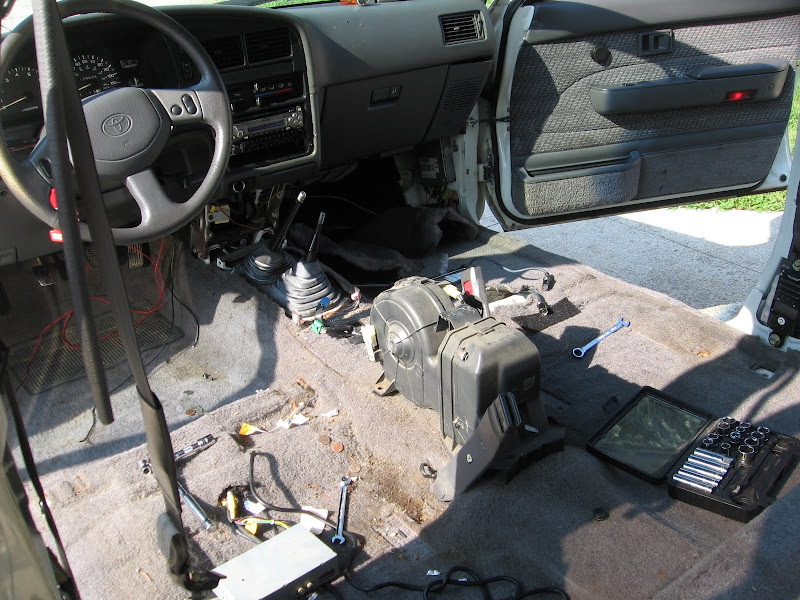
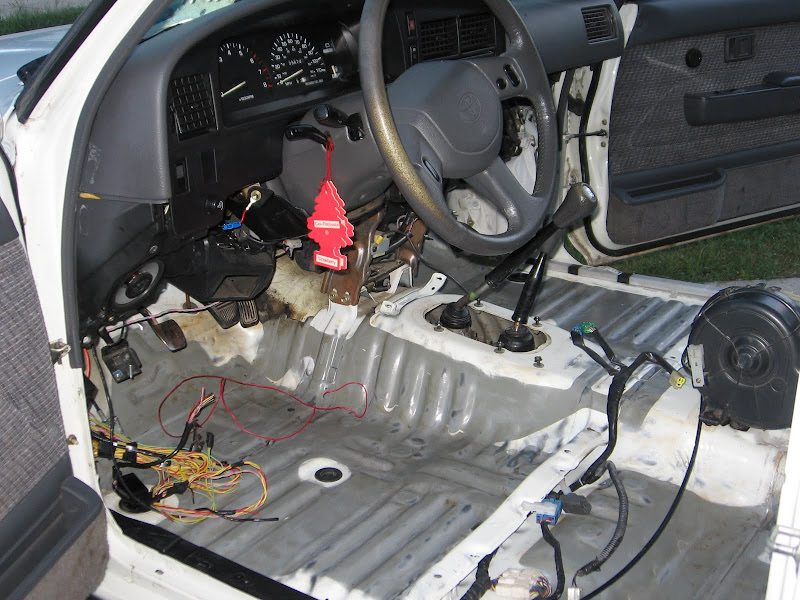
I spent the next 2 hours pulling and removing cut wires that I tracked back to nothing. This shot will give you an idea of what I have removed so far.
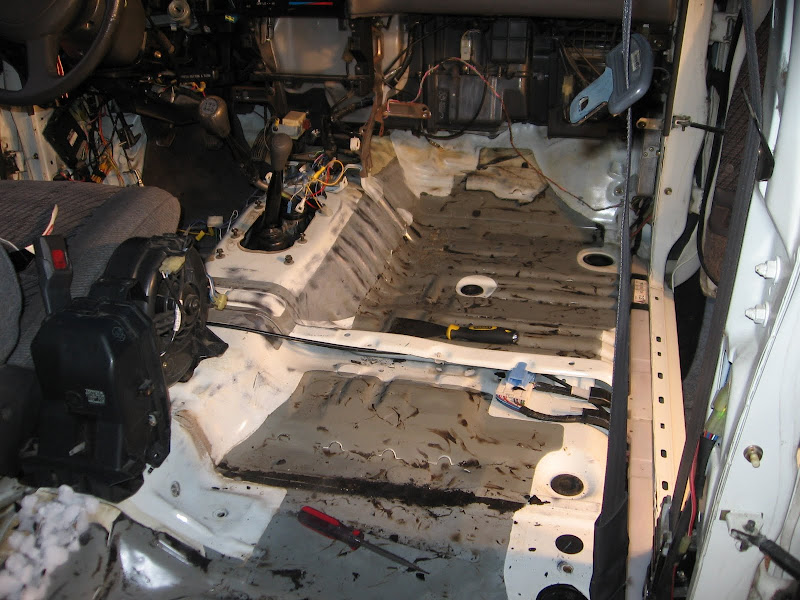
(Here is how the rig sits now, the brown is not rust its the tar sound deadning stuff)
Crossed my fingers and prayed it started right up but the blinkers no longer work! Gotta track that down.
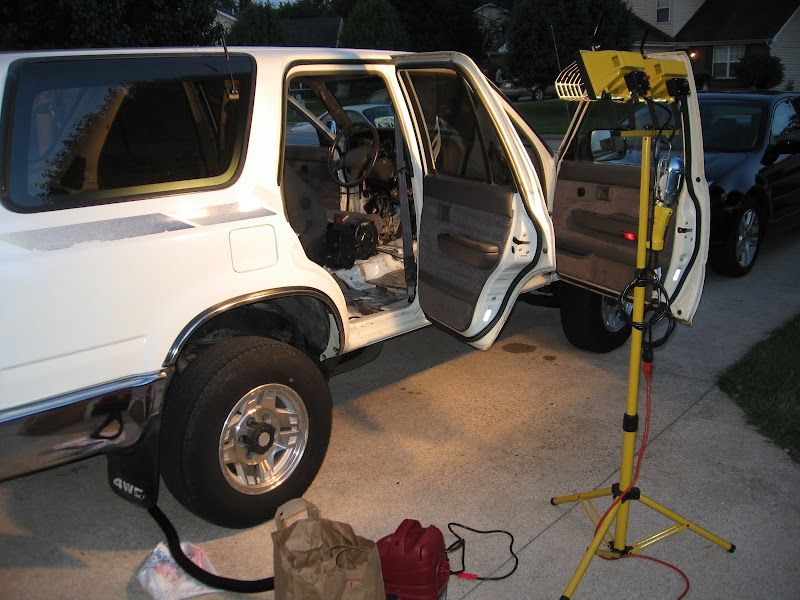
Time to put the drivers seat back in so I can drive it to work
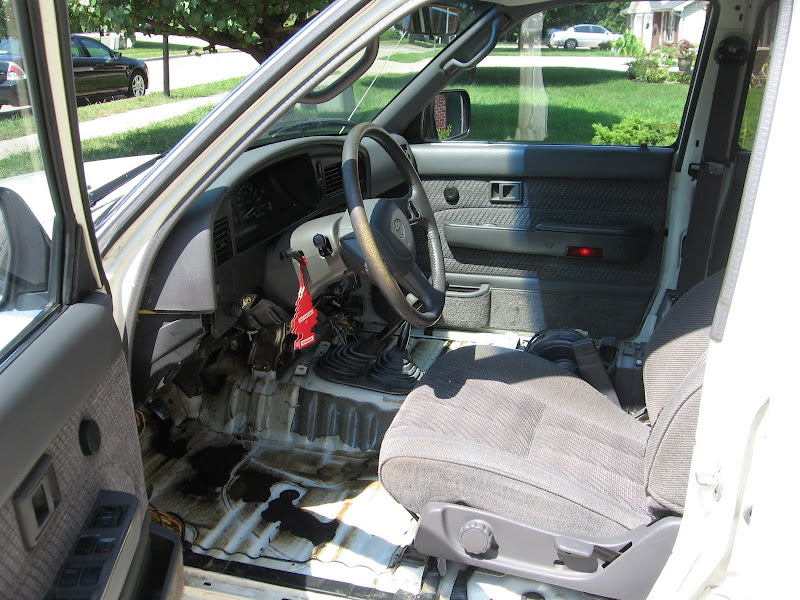
(Off to work will start working on the rig again tomrrow and keep everyone updated)

Chris
(Note the red wires wrapped around the bigger miss of wires to hold it all)
Pulled the lower drivers side kick panel to find a HUGE bundle of wires
(does anyone know if the yellow and red bundle of wires are stock?)
Just when I was really starting to get frustrated and worried I lost all HOPE when I found this!!!
( A nasty old juny, cheap alarm system that is still pluged in but no longer working, I have no idea where the main plug come from and I am scared to remove it in fear that the truck will never start again.) Anyone ever removed a alam system before?
I spent the next 2 hours pulling and removing cut wires that I tracked back to nothing. This shot will give you an idea of what I have removed so far.
(Here is how the rig sits now, the brown is not rust its the tar sound deadning stuff)
Crossed my fingers and prayed it started right up
but the blinkers no longer work! Gotta track that down.Time to put the drivers seat back in so I can drive it to work
(Off to work
will start working on the rig again tomrrow and keep everyone updated) Chris
08-08-2010, 11:12 AM
#6
Registered User
Thread Starter
Thanks Crimson, Ya speakers in the tail gate = bad idea lol, currently looking for some sheet metal to replace the black metal over that area of the tail gate to cover the holes.
08-08-2010, 11:24 AM
#7
Registered User
So far has it been hard to remove the carpeting? I'm thinking of removing mine and Herculining since the previous owner kept their dogs in the back so my carpet is very dirty and torn up. Are you planning on changing the backs of the rear seats since their carpet?
Trending Topics
08-09-2010, 08:24 AM
#9
Registered User
Thread Starter
Carpet is super easy to remove, took me about 30-45 minutes. The time consuming part is the prep work for the herculiner and removing the sound deadening tar (if you have to), I do not plan to remove it all but some of it is very goooey and has to be removed (see pics). Yes I am planing on changing the rear seat backs as well, I have some ideas in the works are we shall see how they pan out.
08-09-2010, 08:31 AM
#10
Registered User
Thread Starter
Well I got some more work done on the rig today. All the interior parts are out and I have been prepping for the herculiner. I have a lot of work cut out for me but I want this done right the first time and I want it to look as good as it possibly can. Here are some pics.
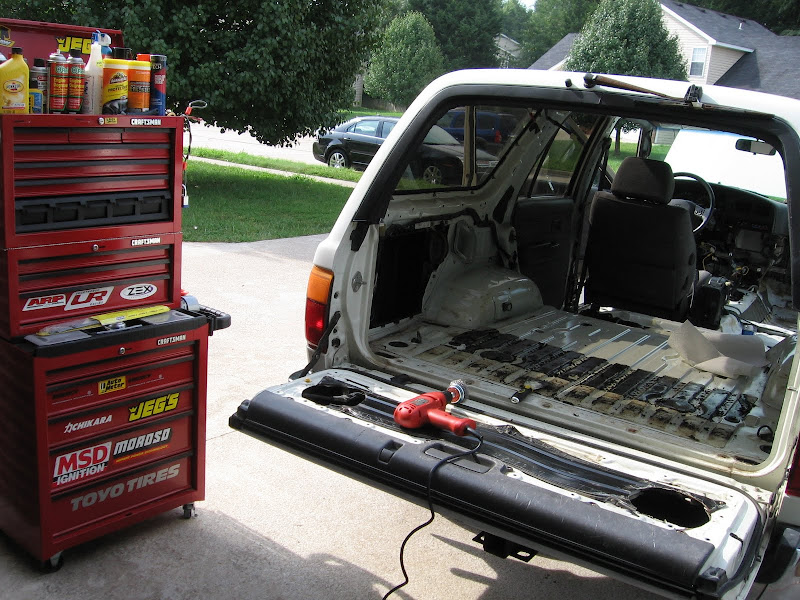
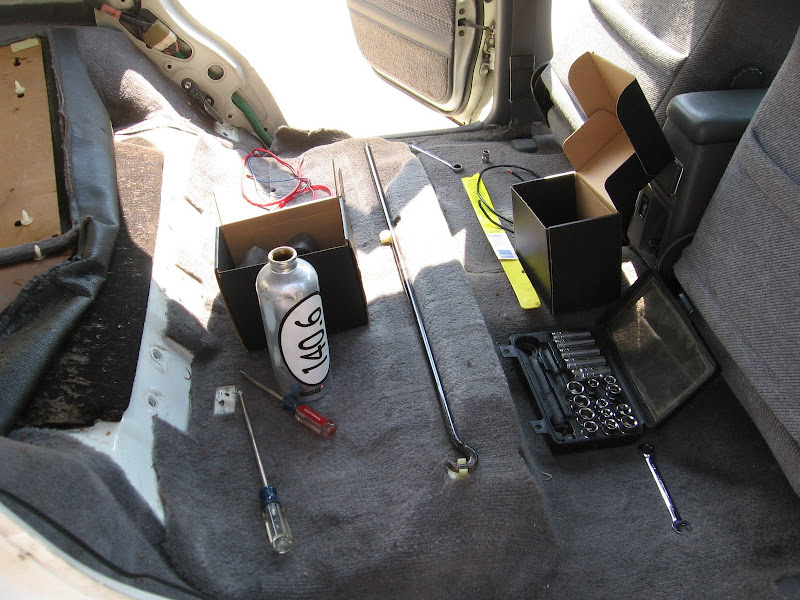
(tool box and wire wheel ready to get to work.)
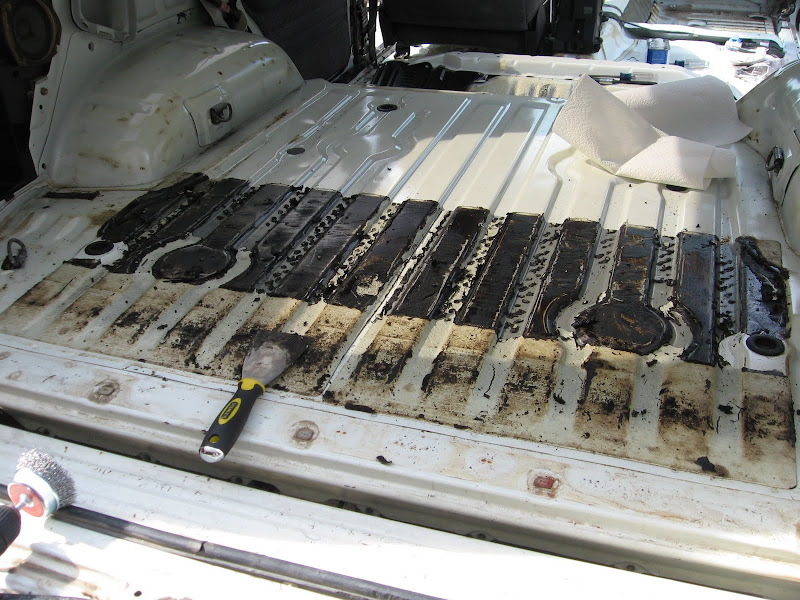
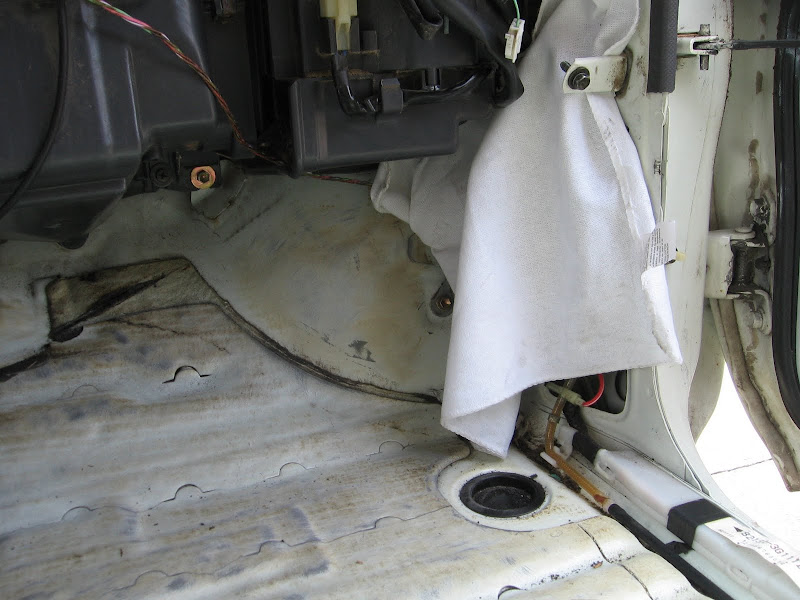
(Sound Deadening stuff is NASTY in this area it is not hard like it should be but a super sticky gooey mess, no idea why?) Using a pudy knife for the majority of the gooey stuff and the rest that is hard I will use dry ice. Works WONDERS, used to use it all the time when building race cars and gutting all interior parts. Will post some pics of the dry ice in action.
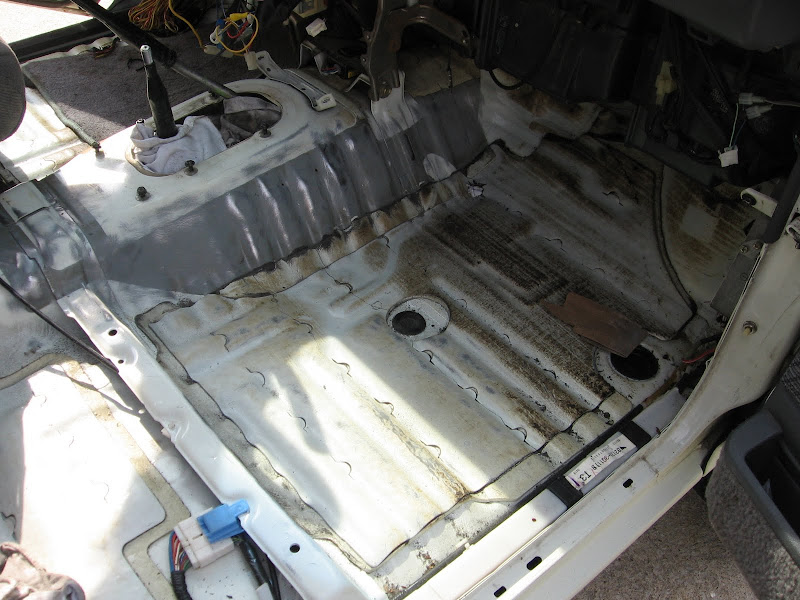
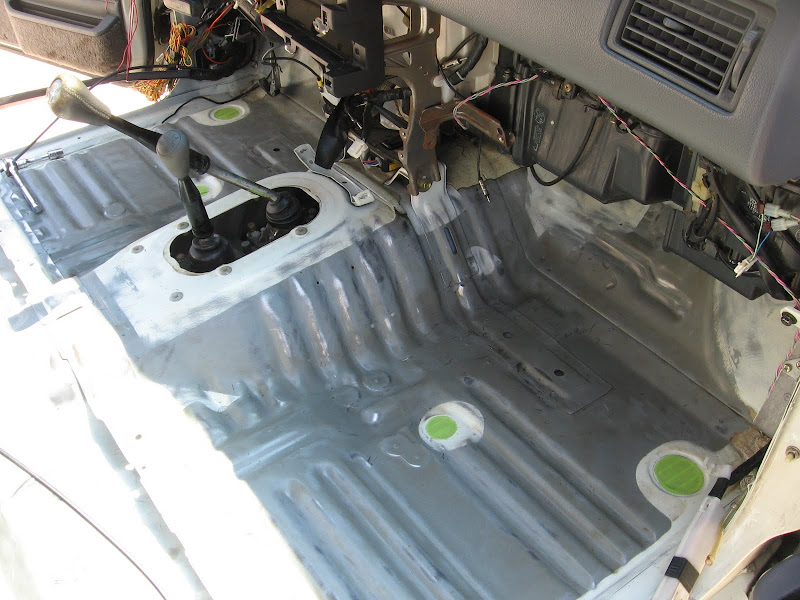
(got the sound deadening cut and removed from the tranny tube starting to look better.)

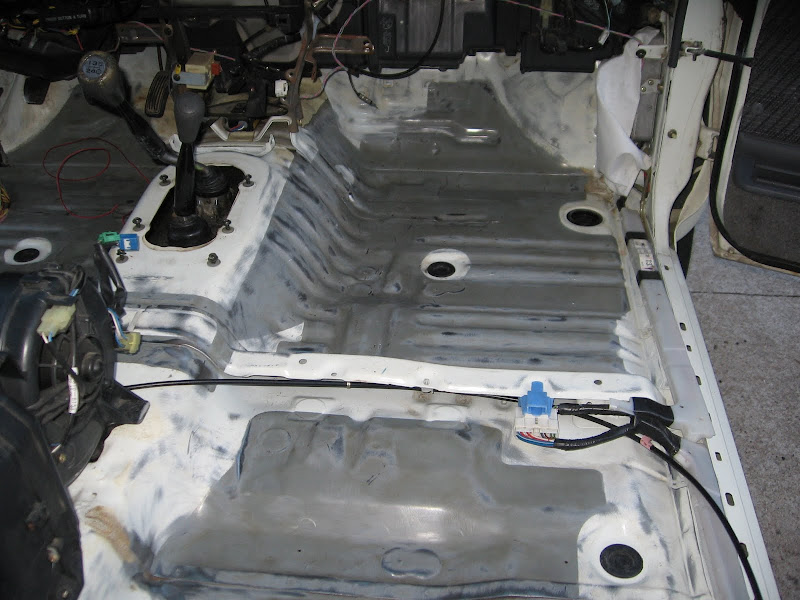
(better shot of the tranny tube and prepped surface.)
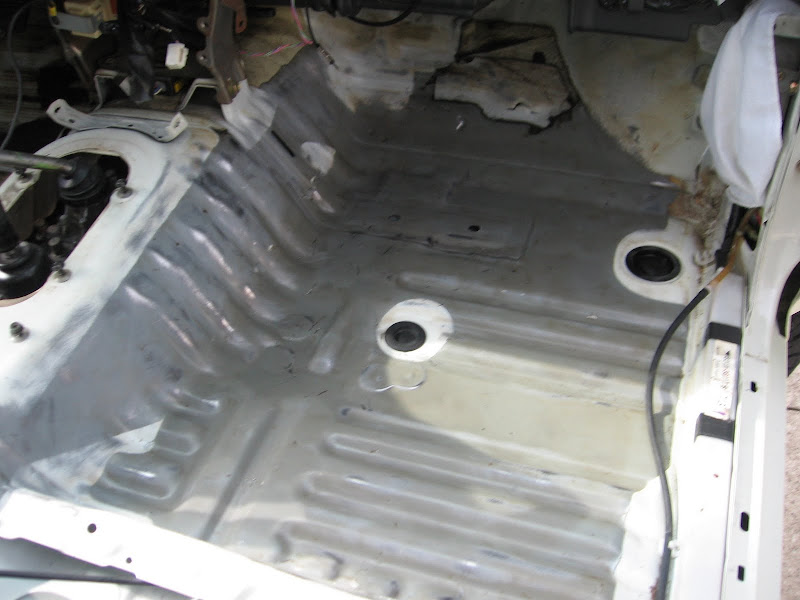
(rear seat area prep work)

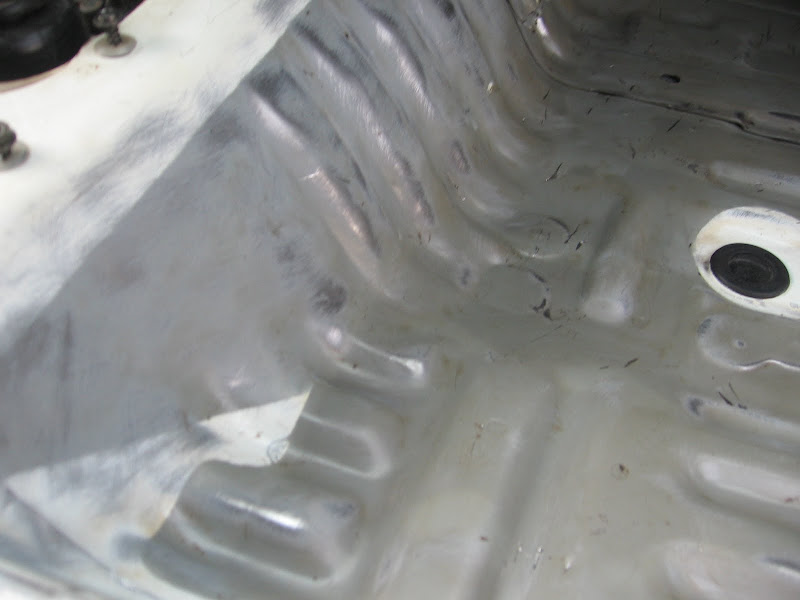
(passenger side almost done still needs a little more work, this is about 2 hours of prep time for the passenger seat area.)
Till tomorrow
Chris R.
(tool box and wire wheel ready to get to work.)
(Sound Deadening stuff is NASTY in this area it is not hard like it should be but a super sticky gooey mess, no idea why?) Using a pudy knife for the majority of the gooey stuff and the rest that is hard I will use dry ice. Works WONDERS, used to use it all the time when building race cars and gutting all interior parts. Will post some pics of the dry ice in action.
(got the sound deadening cut and removed from the tranny tube starting to look better.)
(better shot of the tranny tube and prepped surface.)
(rear seat area prep work)
(passenger side almost done still needs a little more work, this is about 2 hours of prep time for the passenger seat area.)
Till tomorrow
Chris R.
08-09-2010, 08:34 AM
#11
Registered User
Looks good... Dont worry, I had to pull all of that to get my rear window to work... most stressful thing I had to do... with tracking wires and cleaning the plugs... it was ridiculous.
Damn i wish my 4runner was white :/
Damn i wish my 4runner was white :/
08-09-2010, 11:58 AM
#12
Registered User
Thread Starter
I am not to worried about the stero wires, what worries me the most is the alarm system that is plugged in. I have never installed or removed a alarm system before so I am nervous to start trying to remove it.
I think I have figured out that the yellow and red bundle of wires behind the driver side kick panel is for the towing/trailer lights, but not 100% sure. Still trying to figure out the Alarm system
Thanks for the comments fellas.
Chris
 08-11-2010, 07:54 AM
#14
Registered User
Thread Starter
Thanks buddy I am doing a little here and there when I have time, I don't want to rush the job and it turn out half-A$$ed.
Day 3 Update.
Yesterday I planed to only remove the gooey nasty sound deadening material and leave the majority of it in the truck. After thinking on it for a day or so I decided to remove all of the sound deadening material in the truck, reason being is that it never lays 100% flat on any vehicle, there is always little nooks and crannies that can trap moisture and cause rust problems.
I remember helping a buddy remove his sound deadening material in his civic and the entire floor board area had massive rust problems due to moisture being trapped. I plan to wheel my truck a lot and any way to lesson the chances of rust is worth the extra effort.
So I went to the grocery store after work and picked up 8lbs of dry ice and got to work
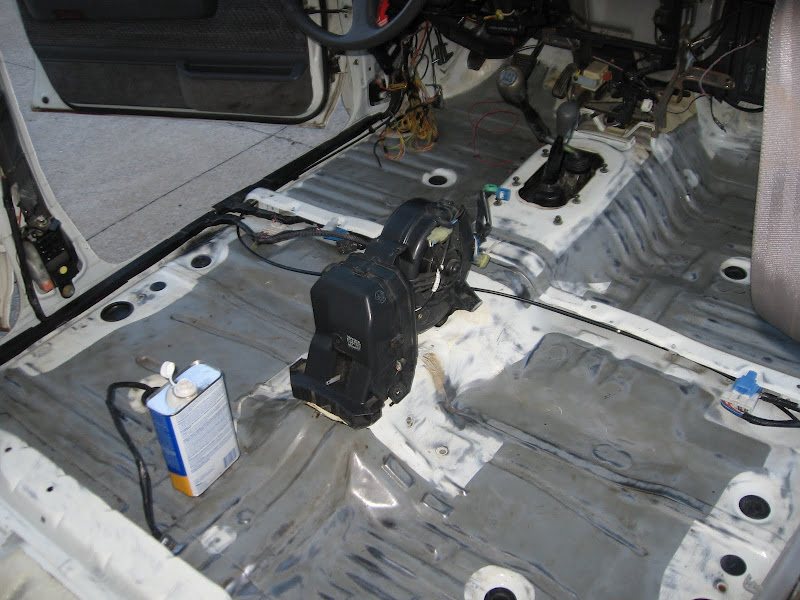
(ECU protected from any flying crap)
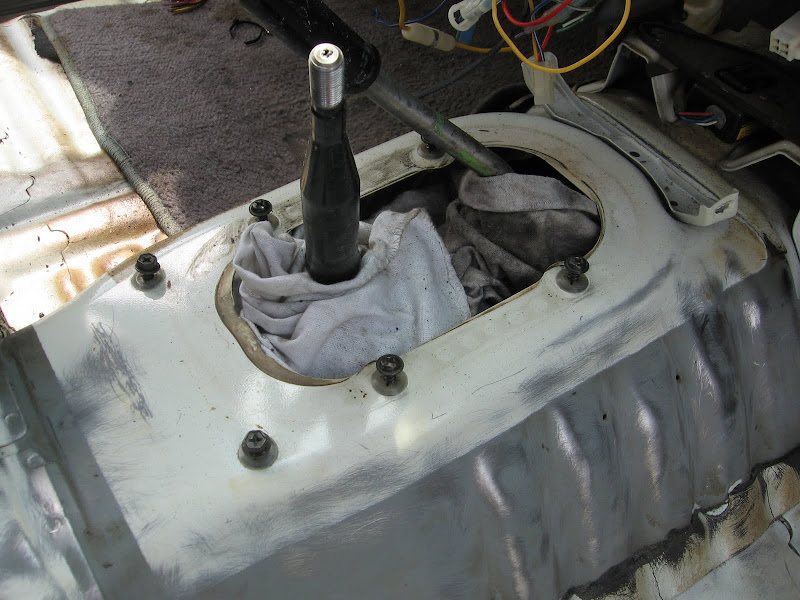
(Shifter area hole stuffed with rags and ready to beat the crap out of this sound deadening junk)
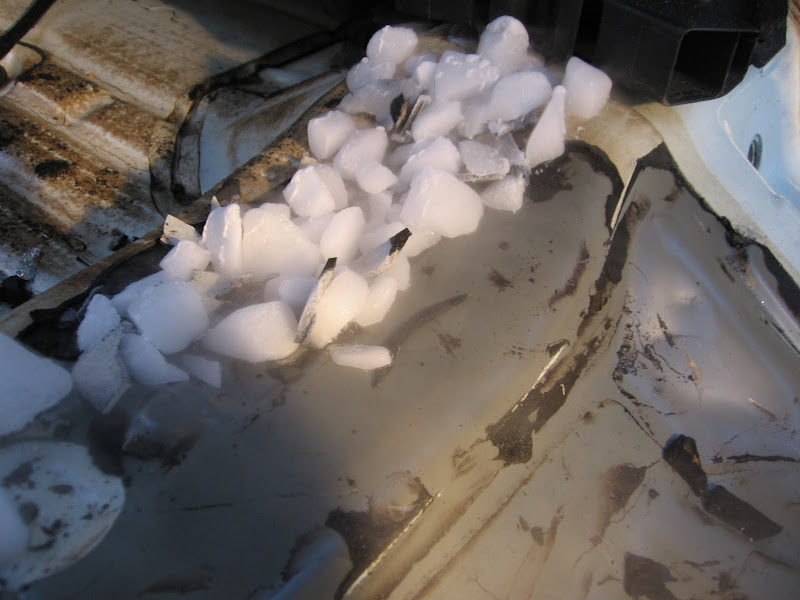
(The Dry ice doing its thang, make sure to break up the dry ice into small pieces allowing it to cover more area, let it sit for at least 2-3 min, then move the dry ice to the next area and hit the sound deadening material a couple of times with a hammer to get it to separate from the metal floor. Then you can use a flat head screw driver and a hammer to chisel under the material and it will break away from the metal floor.)
(over time the dry ice will get a shell of frozen moisture around it so make sure to give the dry ice a hit with your hammer to break off the shell.)
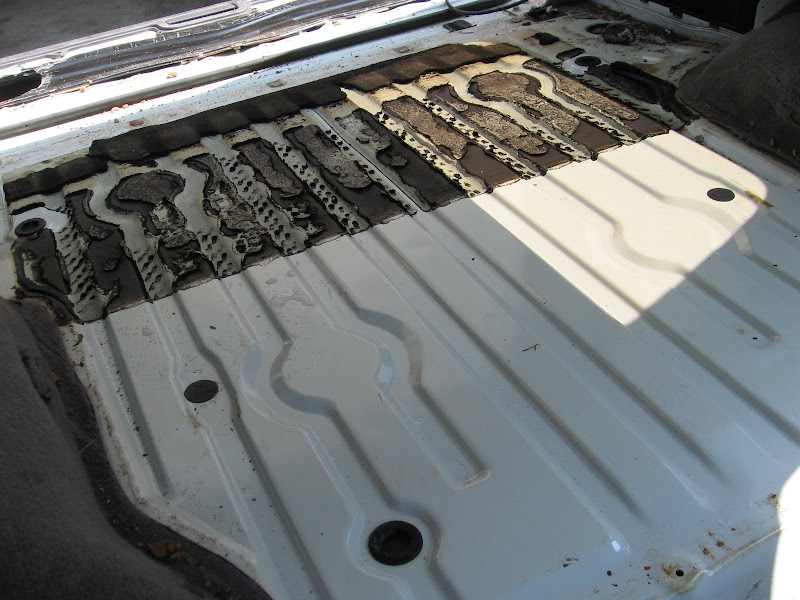
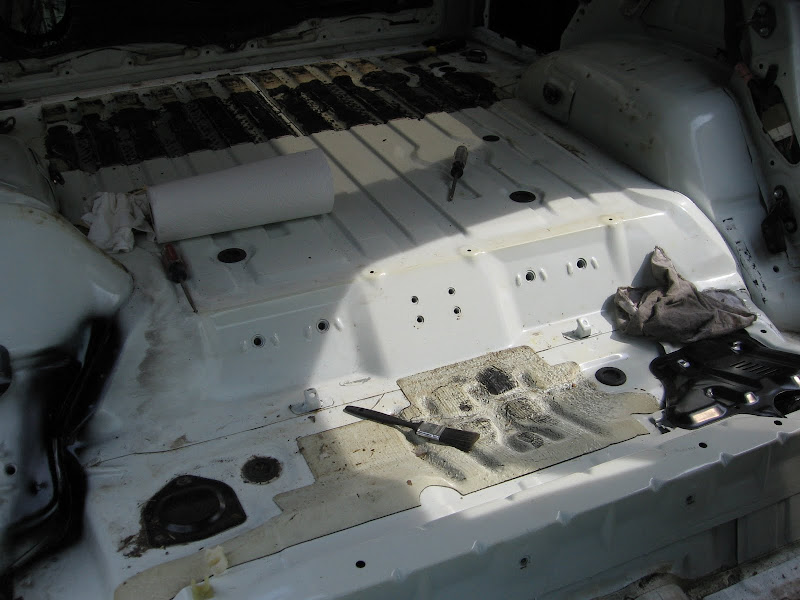
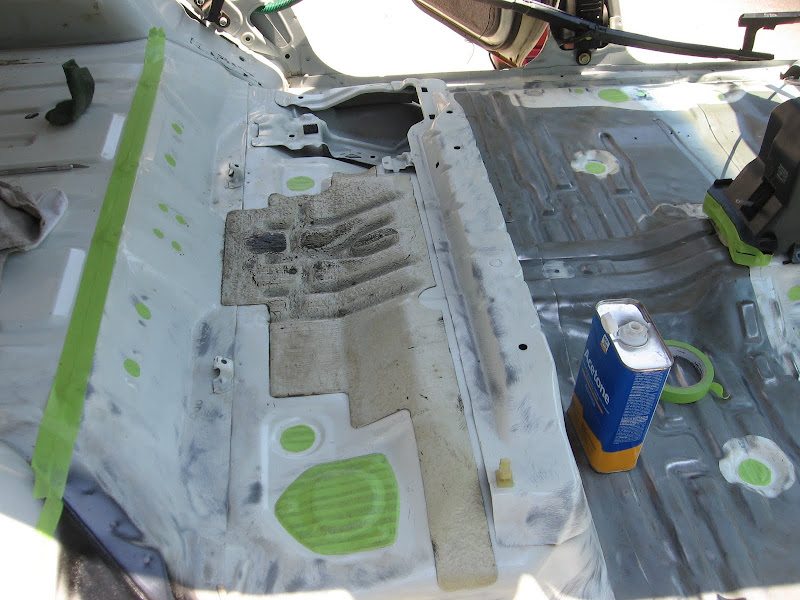
(Almost done with the passenger side of the truck. You can see one large piece of material left under the glove box area. I didn't have enought dry ice to keep in contact with that piece of material due to the angle of the floor board. Will pick up some more dry ice today after work and get that last piece out. Also the metal seams on the floor tend to cause the material to not come up easy, you can see this right in front of the screw driver.)
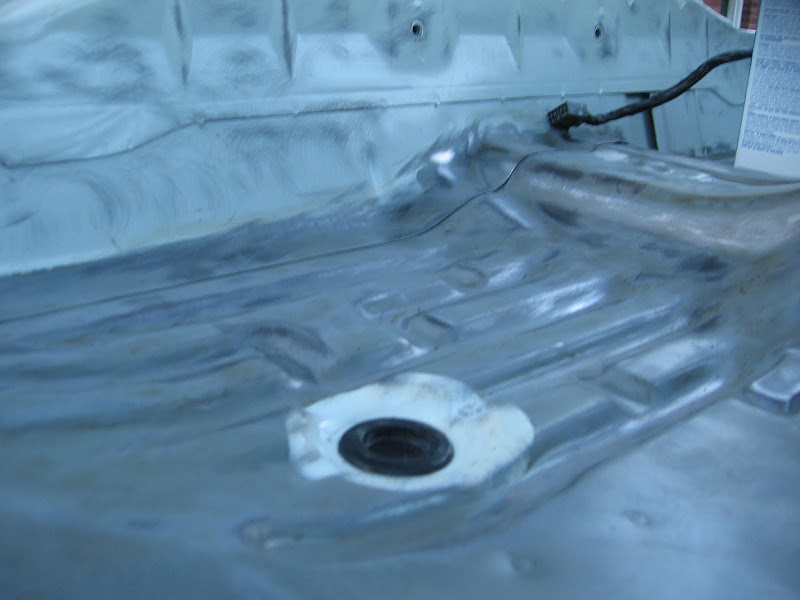
(Took the wire wheel to what little material was left, and it looks amazing)
(Bling Bling)
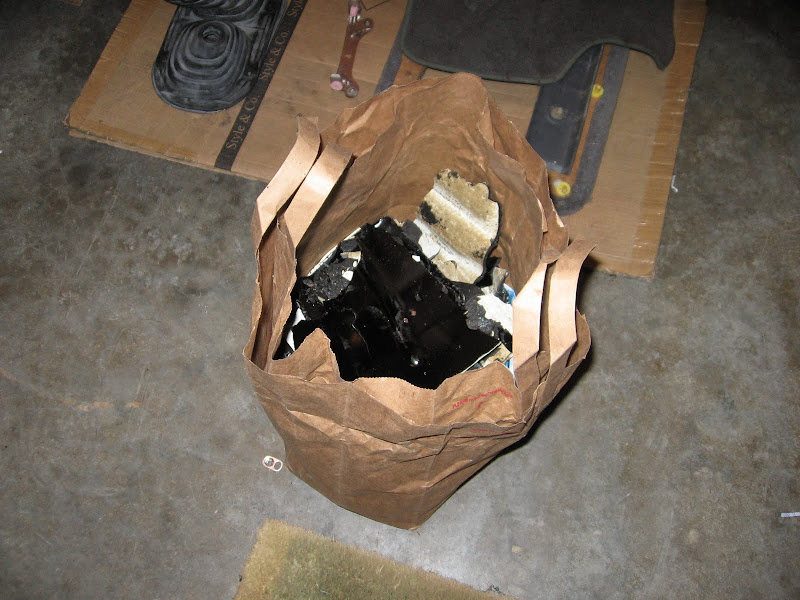
(This is the amount of material that I have removed so far, you would not believe how much this stuff weights, I have already removed 35lbs of sound deadening material )
)
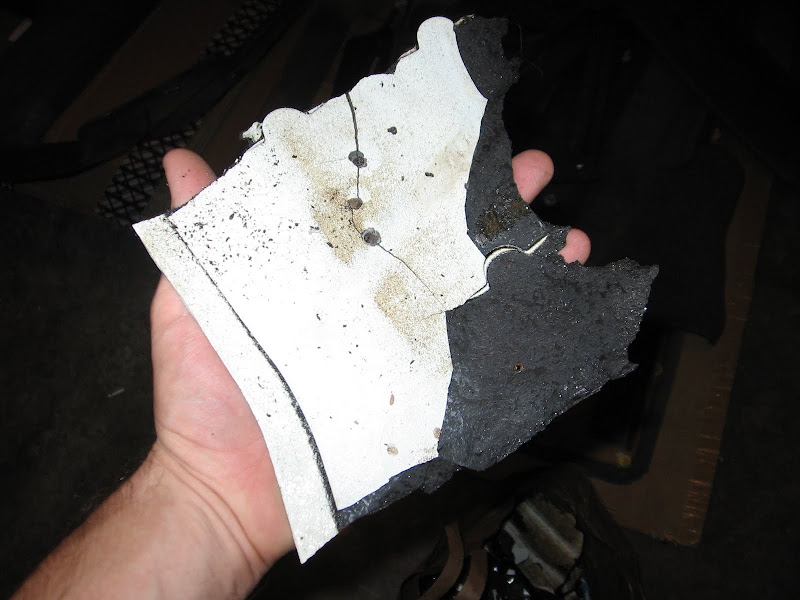
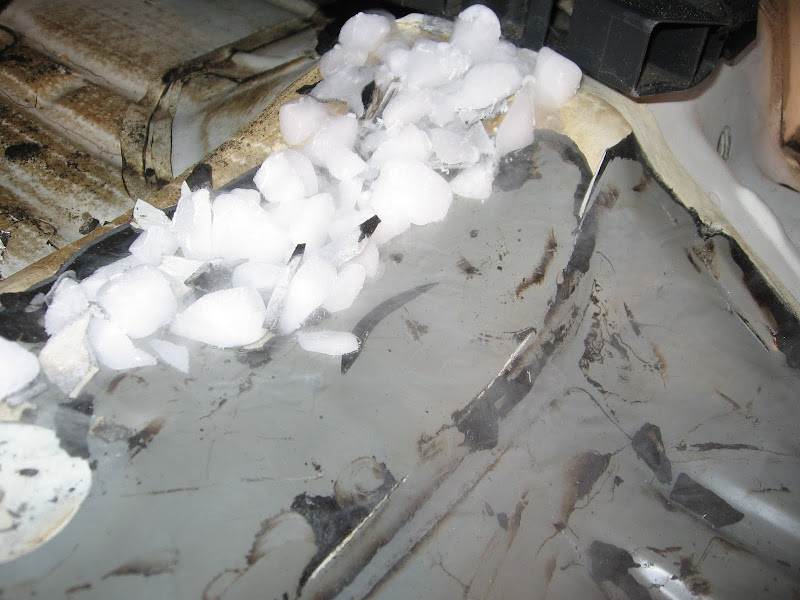
(This is why dry ice ROCKS, it allows pieces this big to get removed with no residue left over, nothing better than hitting the floor board with a hammer and pieces this big pop loose and you can just pick them up.)
Thats it for now more to follow tonight
Chris
Day 3 Update.
Yesterday I planed to only remove the gooey nasty sound deadening material and leave the majority of it in the truck. After thinking on it for a day or so I decided to remove all of the sound deadening material in the truck, reason being is that it never lays 100% flat on any vehicle, there is always little nooks and crannies that can trap moisture and cause rust problems.
I remember helping a buddy remove his sound deadening material in his civic and the entire floor board area had massive rust problems due to moisture being trapped. I plan to wheel my truck a lot and any way to lesson the chances of rust is worth the extra effort.
So I went to the grocery store after work and picked up 8lbs of dry ice and got to work
(ECU protected from any flying crap)
(Shifter area hole stuffed with rags and ready to beat the crap out of this sound deadening junk)
(The Dry ice doing its thang, make sure to break up the dry ice into small pieces allowing it to cover more area, let it sit for at least 2-3 min, then move the dry ice to the next area and hit the sound deadening material a couple of times with a hammer to get it to separate from the metal floor. Then you can use a flat head screw driver and a hammer to chisel under the material and it will break away from the metal floor.)
(over time the dry ice will get a shell of frozen moisture around it so make sure to give the dry ice a hit with your hammer to break off the shell.)
(Almost done with the passenger side of the truck. You can see one large piece of material left under the glove box area. I didn't have enought dry ice to keep in contact with that piece of material due to the angle of the floor board. Will pick up some more dry ice today after work and get that last piece out. Also the metal seams on the floor tend to cause the material to not come up easy, you can see this right in front of the screw driver.)
(Took the wire wheel to what little material was left, and it looks amazing)
(Bling Bling)
(This is the amount of material that I have removed so far, you would not believe how much this stuff weights, I have already removed 35lbs of sound deadening material
)(This is why dry ice ROCKS, it allows pieces this big to get removed with no residue left over, nothing better than hitting the floor board with a hammer and pieces this big pop loose and you can just pick them up.)
Thats it for now more to follow tonight
Chris
Last edited by LifterCatcher; 08-11-2010 at 08:05 AM.
08-11-2010, 08:02 AM
#15
Registered User
Thread Starter
I wanted to add that I plan to add the Herculiner in sections instead of prepping the entire truck and then Herculining the entire inside. Since I have limited blocks of time to work on the truck. This route should help to reduce the amount of time the metal floors will be exposed.
Does anyone see a issue with this besides having to smell the Herculiner for a longer amount of time
Chris
Does anyone see a issue with this besides having to smell the Herculiner for a longer amount of time
Chris
08-11-2010, 11:30 AM
#16
Registered User

Join Date: Apr 2010
Location: Kansas:but soon to be in Colorado
Posts: 158
Likes: 0
Received 0 Likes
on
0 Posts
Nice work man,Im subscribed.Ive got the same exact truck(except mines a 90).Im particularly interested since mine is also a white 5SPD.Nice work with the dry ice.
08-13-2010, 07:34 AM
#17
Registered User
Thread Starter
Yesterday I was able to get the majority of the truck prepped and ready for the Herculiner, here are some picks of the prep work. It took me forever!
(Wire wheeled every inch, then used a shop vac to suck up all the paint dust and then she got a acetone bath to remove any last dust and residue.)

(now its time to protect the holes and mask off the sections that I don't want the Herculiner on.)
Heading to the store now to pick up the Herculiner and get this going.
More pics to follow.
Chris
08-13-2010, 05:52 PM
#18
Registered User
Thread Starter
Update time:
From the rear seats forward is complete and it turned out awesome. I am very impressed with the Herculiner. I do feel that prep is the most important, also its very important to make sure the Herculiner is mixed really good. I bought a mixer that uses a drill and it did a great job.
Onto the pics:
(Tapped and ready for the Herc)
(Rear Seat area)
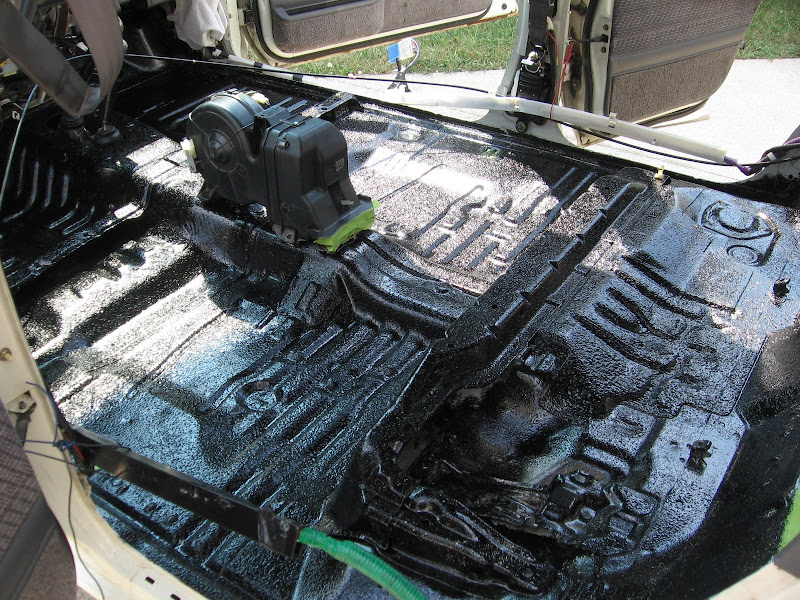
(First coat)
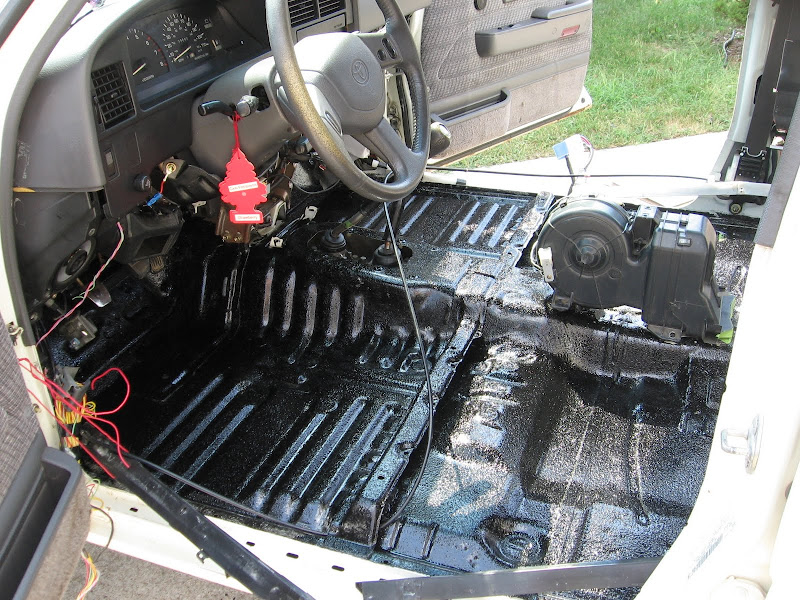
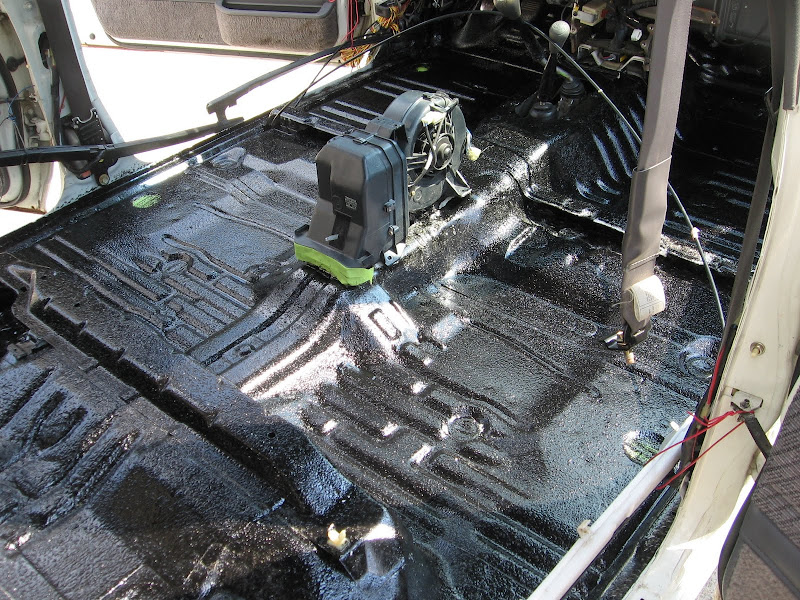
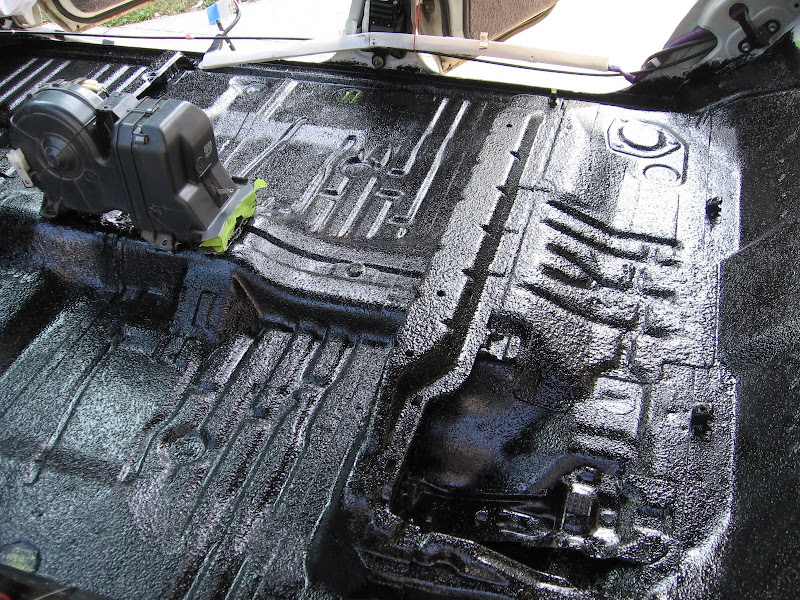
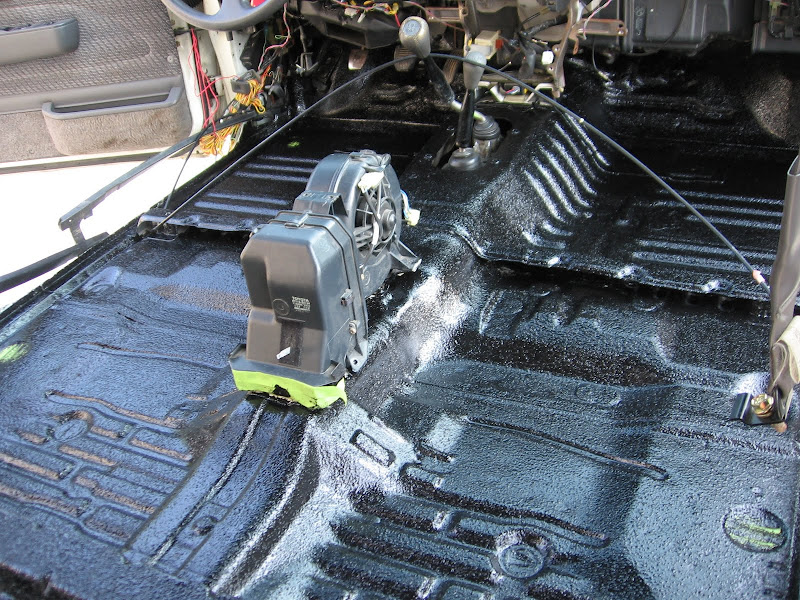
(I did a total of three coats nice and thick it looks amazing)
Since I had the seats out of the truck I decided to dismantle them and give the covers a thorough washing
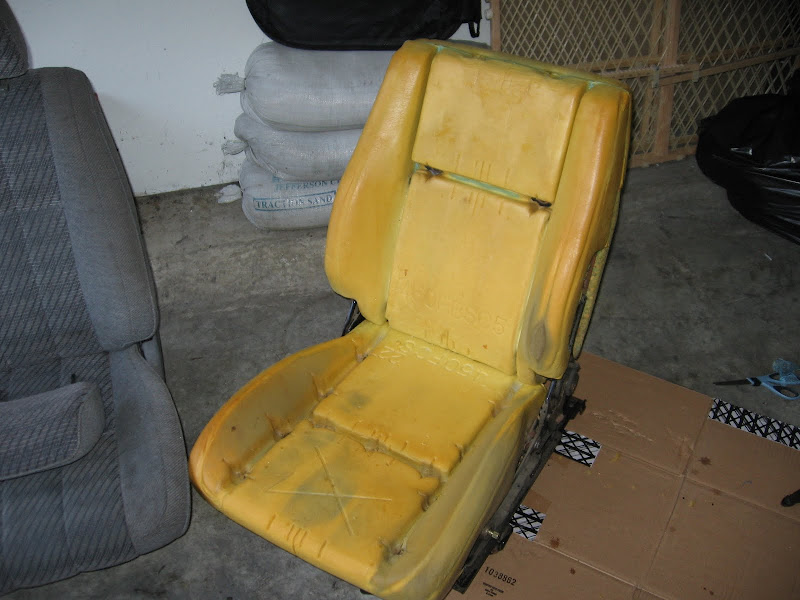
(Seat with covers removed.)

(covers washed and drying, excited to have clean fresh smelling seats)
I am also working on painting the interior parts black and will post some pics of the painted parts tomorrow.
More to follow tomorrow.
Chris
From the rear seats forward is complete and it turned out awesome. I am very impressed with the Herculiner. I do feel that prep is the most important, also its very important to make sure the Herculiner is mixed really good. I bought a mixer that uses a drill and it did a great job.
Onto the pics:
(Tapped and ready for the Herc)
(Rear Seat area)
(First coat)
(I did a total of three coats nice and thick it looks amazing)
Since I had the seats out of the truck I decided to dismantle them and give the covers a thorough washing
(Seat with covers removed.)
(covers washed and drying, excited to have clean fresh smelling seats)
I am also working on painting the interior parts black and will post some pics of the painted parts tomorrow.
More to follow tomorrow.
Chris
08-13-2010, 07:04 PM
#20
Registered User
Join Date: Apr 2010
Location: Kansas:but soon to be in Colorado
Posts: 158
Likes: 0
Received 0 Likes
on
0 Posts
Im in wichita,but would much rather be in colorado springs.You can actually wash the seat covers in the wash machine? Wow,I wonder if my 90 has that ability.Great job on the herculiner! looks tuff.


