Crazydubman's 88 pickup build
 05-19-2011, 11:08 AM
#1
Registered User
Thread Starter

Join Date: Jul 2010
Location: Fremont, CA
Posts: 40
Likes: 0
Received 0 Likes
on
0 Posts
Crazydubman's 88 pickup build
hey everyone. I thought i would introduce myself and my new to me truck.
picked it up about 2 months ago with a bad fuel pump for 400 bucks. bought it from a coworker who is the original owner. Looking to build a daily driver crawler with it. figured rather than spend 9k on a front long travel setup on the 06 runner i could build a crawler
It had been sitting for about 4 years untouched so spiderwebs were a plenty.
specs are 88 standard cab short bed 4x4 v6 5 speed.
i changed out the fuel pump, tank, filter, and fuel gauge sending unit (stopped working when i first got it running). Got it running and besides a little valvetrain noise on initial startup it runs smooth. Figured while i was in there i might as well make everything new and reliable.
swapped the original steel wheels to the polished ones (picked up wheels and tires for 500 on craigslist. 31x10.50x15 BFG's
master cylinder went out so i swapped to a 1" bore unit off the newer trucks (in prep for disc rear brakes)
just picked up a cobra 75WXST and wilson 5000 roof mount combo, blue sea 12 slot fuse block (for 4 hella 500's, additional gauges (out of my racecar) oil temp, mechanical oil pressure, volts, and water temp, along with electric fans, CB, etc. should be getting all that mounted up in the next week before pismo.
needs shocks, and will be swapping all bushings to poly and considering a 1" body lift to help with tire clearance and ease of working in tight spots.
This will be an ongoing project as its in the planning stages now. trying to get a solid daily driver now then start working on the aftermarket. I will update my build thread in the garage forum as things are added.
all in all its a great starting point and the price puts me way ahead.
best part is with both the trucks now having a multicar discount its costing me 33 cents a month to insure hahaha. thats right my premium is only going up 4 dollars a year now having the pickup on the policy.
talking with my insurance agent to set up the policy she stated that my policy will be prorated through the end of the policy term $1. :rolleyes::lmao:
anyways on with the pictures.


and a picture next to my '06


enjoy guys.
picked it up about 2 months ago with a bad fuel pump for 400 bucks.
bought it from a coworker who is the original owner. Looking to build a daily driver crawler with it. figured rather than spend 9k on a front long travel setup on the 06 runner i could build a crawler It had been sitting for about 4 years untouched so spiderwebs were a plenty.
specs are 88 standard cab short bed 4x4 v6 5 speed.
i changed out the fuel pump, tank, filter, and fuel gauge sending unit (stopped working when i first got it running). Got it running and besides a little valvetrain noise on initial startup it runs smooth. Figured while i was in there i might as well make everything new and reliable.
swapped the original steel wheels to the polished ones (picked up wheels and tires for 500 on craigslist. 31x10.50x15 BFG's
master cylinder went out so i swapped to a 1" bore unit off the newer trucks (in prep for disc rear brakes)
just picked up a cobra 75WXST and wilson 5000 roof mount combo, blue sea 12 slot fuse block (for 4 hella 500's, additional gauges (out of my racecar) oil temp, mechanical oil pressure, volts, and water temp, along with electric fans, CB, etc. should be getting all that mounted up in the next week before pismo.
needs shocks, and will be swapping all bushings to poly and considering a 1" body lift to help with tire clearance and ease of working in tight spots.
This will be an ongoing project as its in the planning stages now. trying to get a solid daily driver now then start working on the aftermarket. I will update my build thread in the garage forum as things are added.
all in all its a great starting point and the price puts me way ahead.
best part is with both the trucks now having a multicar discount its costing me 33 cents a month to insure hahaha. thats right my premium is only going up 4 dollars a year now having the pickup on the policy.
talking with my insurance agent to set up the policy she stated that my policy will be prorated through the end of the policy term $1. :rolleyes::lmao:
anyways on with the pictures.
and a picture next to my '06
enjoy guys.


 05-19-2011, 11:09 AM
#3
Registered User
Thread Starter
Join Date: Jul 2010
Location: Fremont, CA
Posts: 40
Likes: 0
Received 0 Likes
on
0 Posts
well its been a while since i updated this thread. this is some updates from another forum.
Might as well show you how the truck is coming so far.
UPDATE:
pulled the alternator and it will be shipped out tomorrow for rebuilding kewl
Also had some time today to get the new seats at least sitting in the cab. It looks like they are going to work out well. I will have to figure someway for the harness bar to be put in but other than that there is plenty of space. i have over 5 inches above my head now. waycool
also i can use the factory sholder belts with the seats too which will make life a lot easier for daily driving.
here are some shots of them in the truck. the bottom of the door window sits about half way between my nipple and collar bone and im 5'10".
who likes side bolsters... i do i do!!! bounce
Before:


After:


roughly the clearances on each side (still need to figure exactly how they are going to sit side to side)


and roughly eye level for me looking down the road

and a couple with a harness in there


enjoy
Might as well show you how the truck is coming so far.
UPDATE:
pulled the alternator and it will be shipped out tomorrow for rebuilding kewl
Also had some time today to get the new seats at least sitting in the cab. It looks like they are going to work out well. I will have to figure someway for the harness bar to be put in but other than that there is plenty of space. i have over 5 inches above my head now. waycool
also i can use the factory sholder belts with the seats too which will make life a lot easier for daily driving.
here are some shots of them in the truck. the bottom of the door window sits about half way between my nipple and collar bone and im 5'10".
who likes side bolsters... i do i do!!! bounce
Before:
After:
roughly the clearances on each side (still need to figure exactly how they are going to sit side to side)
and roughly eye level for me looking down the road
and a couple with a harness in there
enjoy
05-19-2011, 11:10 AM
#4
Registered User
Thread Starter
Join Date: Jul 2010
Location: Fremont, CA
Posts: 40
Likes: 0
Received 0 Likes
on
0 Posts
UPDATE:
just put my order for lights in to ORW in socal. Aaron down there helped me out big time. gone through him for other stuff before and he is a great guy to deal with. kewl
lights ordered
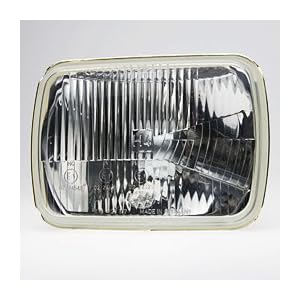
Hella H4 conversion Euro beam pattern headlights with 100/80 hella bright white bulbs
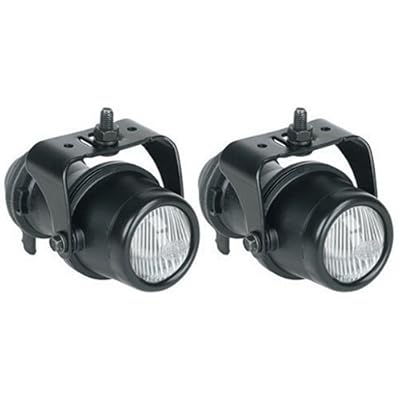
Hella micro DE projector fogs upgraded with 100watt White H3's
fantastic fog lights with great cutoff beam and spread
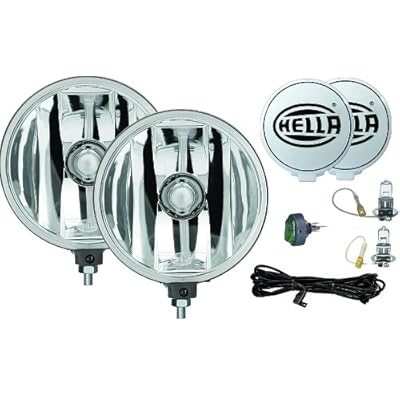
and 2 pairs of the hella 500FF's. 3 of them upgraded with 100watt White H3's (3 will be on the bumper and I will install one on the corner of the bed for lighting it up at night (that one will stay 55watt).
just put my order for lights in to ORW in socal. Aaron down there helped me out big time. gone through him for other stuff before and he is a great guy to deal with. kewl
lights ordered
Hella H4 conversion Euro beam pattern headlights with 100/80 hella bright white bulbs
Hella micro DE projector fogs upgraded with 100watt White H3's
fantastic fog lights with great cutoff beam and spread
and 2 pairs of the hella 500FF's. 3 of them upgraded with 100watt White H3's (3 will be on the bumper and I will install one on the corner of the bed for lighting it up at night (that one will stay 55watt).
05-19-2011, 11:11 AM
#5
Registered User
Thread Starter
Join Date: Jul 2010
Location: Fremont, CA
Posts: 40
Likes: 0
Received 0 Likes
on
0 Posts
UPDATES:
1" Body lift is finished up. install went smooth. for sure a little more work than on my 4runner but all in all went well.
bumper and frame reinforcement is here. did a mock up to see how everything lined up and i think it looks great and will work out well. waycool
sorry for the shotty pictures but its just my camera phone.


still have to get it to the shop and have them weld up the light bar/stinger and the light tabs for the fogs and driving lights.
also wire wheeled the bumper mounting surface and cleaned up the threads on the bolt holes. the old bolts were rusted and half the threads were no longer there. Painted it with some some primer and flat black paint so its all clean and rust free. (got painted after the pictures)
still waiting on the lights...... they were shipped out from san diego friday and still don't have them. waiting for a call back from Aaron to see where they are at.
And waiting on Drew to get a shipping quote for the winch so he can get it shipped up to me.
after that its off to the shop to get it all installed. waycool
1" Body lift is finished up. install went smooth. for sure a little more work than on my 4runner but all in all went well.
bumper and frame reinforcement is here. did a mock up to see how everything lined up and i think it looks great and will work out well. waycool
sorry for the shotty pictures but its just my camera phone.
still have to get it to the shop and have them weld up the light bar/stinger and the light tabs for the fogs and driving lights.
also wire wheeled the bumper mounting surface and cleaned up the threads on the bolt holes. the old bolts were rusted and half the threads were no longer there. Painted it with some some primer and flat black paint so its all clean and rust free. (got painted after the pictures)
still waiting on the lights...... they were shipped out from san diego friday and still don't have them. waiting for a call back from Aaron to see where they are at.
And waiting on Drew to get a shipping quote for the winch so he can get it shipped up to me.
after that its off to the shop to get it all installed. waycool
05-19-2011, 11:11 AM
#6
Registered User
Thread Starter
Join Date: Jul 2010
Location: Fremont, CA
Posts: 40
Likes: 0
Received 0 Likes
on
0 Posts
truck is has been at anysevenoffroad since monday. here is a quick shot of the first hoop being added to the bumper. i decided to go further with the tubing work on the rest of the truck so its getting the full bed cage as well as bumper, sliders, seat mounts etc.
i should be posting more pictures later on today of a hopfully completed bumper, lights, winch, fairlead, and sliders. waycool

i should be posting more pictures later on today of a hopfully completed bumper, lights, winch, fairlead, and sliders. waycool
05-19-2011, 11:12 AM
#7
Registered User
Thread Starter
Join Date: Jul 2010
Location: Fremont, CA
Posts: 40
Likes: 0
Received 0 Likes
on
0 Posts
Thought I would post some updated pictures of the truck.
Tires were swapped out for some 32x11.5's (picked them up for cheap so why not right)
Front bumper is finished and waiting on me to pull the gearset out and clock the clutch lever straight up so that it clears the bumper.
Lights are mounted but still need wiring up. Will be doing that when I get the truck back to my house and can lay out how I want the fuse block, circuit breaker, relays, switches etc.
waiting on the H4 converted headlights still.
Seat brackets are almost finished. the should be done tomorrow.
sliders are finished (fish plated frame and welded nice and tight)
back half of the exo is being started. main hoop was finished today and should have the rear tubes and main horizontal support tube all bent and notched up tomorrow.
still on the list:
finish up rear half of cage
Gas can holders,
Hilift mounts on the cage
CB antenna mount moved to center of main hoop on cage.
Bracket for mounting the 20mm ammo case in place for a center console.
mount the two dual 50mm ammo case holders in the bed next to gas can holders
plasma cut name plates for each of the 50 cal cases for "tools" "straps" "spares" "recovery gear"
cover for winch to keep synthetic winch line out of sun and elements
and probably a couple other things im forgetting
Trending Topics
05-19-2011, 11:14 AM
#8
Registered User
Thread Starter
Join Date: Jul 2010
Location: Fremont, CA
Posts: 40
Likes: 0
Received 0 Likes
on
0 Posts
here are some updates on the truck. still at any7 but they are working on a couple more things while its there just to get it to the point of being comfortable with it for the time being till the axles get slid underneath. waycool1
so i showed up at the shop last Thursday expecting the cage to be almost done. as i walk in i say whats up to all the guys and Adam turns to me and says "dude we need to talk". im like awe ˟˟˟˟ what now hahaha.
turns out where the diagonal tube that runs down to the passenger side frame rail on the main hoop needs to land right where there is a fuel line running across. right behind where the tank sits high and tight to the bed. Sooooooo the only option was having to pull the bed to access it, get a letter look, and relocate it. I had inquired on wednesday about getting a rough estimate on bobbing the bed. Adam brought up that if they were going to bob the bed, it would be waaaay easier with the bed off the frame. Furthermore..... they would only be able to get the bed off prior to welding in the rest of the cage for obvious reasons.
So the decision was made to have the shop bob the bed 14" so that they could finish the cage and i could get it out and wheel it. waycool1


Saturday i stopped by the shop and spent about 5 hours grinding and wire wheeling the surfaces clean so that Orlando could just hammer it out quick without the need for a ton of prep work.


so expecting it to take a few days to accomplish i wasn't expecting too much when i walked into the shop today after work. Walk in say my hellos glance over at the bed and see that it didn't seem like anything was done and figured they were busy.
i walked up to the guys spent a few minutes talking shop then looked over and suddenly realized that there was only one grinded out strip not two.... almost fell over in shock when i realized that Orlando had totally buckled down all sunday and most of monday and finished up the bed completely already. jawdrop1 jawdrop1
everything is all set and ready for LineX. it will be getting coated on the whole rear section to about 2" in front of the seam and the inside of the bed. figured it was easiest to hide what little imperfections there would be from the bed bob.
enough with the talk and on with the pictures. should be getting the bed back on in a few days. still want to clean up the frame before it gets put back on. also working on a solid rear brace and bumper with the shop as well. also still need to cut down the inner bed panels down about 14"


keep in mind the rear lower corners will be getting comp cut so we are taking out everything below about 1" lower than the body line and most of the roll pan will be removed. bondo didn't feel the need to take the time and make those lower sections perfect or finish the welding completely.
stay tuned for more pictures. kewl1
so i showed up at the shop last Thursday expecting the cage to be almost done. as i walk in i say whats up to all the guys and Adam turns to me and says "dude we need to talk". im like awe ˟˟˟˟ what now hahaha.
turns out where the diagonal tube that runs down to the passenger side frame rail on the main hoop needs to land right where there is a fuel line running across. right behind where the tank sits high and tight to the bed. Sooooooo the only option was having to pull the bed to access it, get a letter look, and relocate it. I had inquired on wednesday about getting a rough estimate on bobbing the bed. Adam brought up that if they were going to bob the bed, it would be waaaay easier with the bed off the frame. Furthermore..... they would only be able to get the bed off prior to welding in the rest of the cage for obvious reasons.
So the decision was made to have the shop bob the bed 14" so that they could finish the cage and i could get it out and wheel it. waycool1
Saturday i stopped by the shop and spent about 5 hours grinding and wire wheeling the surfaces clean so that Orlando could just hammer it out quick without the need for a ton of prep work.
so expecting it to take a few days to accomplish i wasn't expecting too much when i walked into the shop today after work. Walk in say my hellos glance over at the bed and see that it didn't seem like anything was done and figured they were busy.
i walked up to the guys spent a few minutes talking shop then looked over and suddenly realized that there was only one grinded out strip not two.... almost fell over in shock when i realized that Orlando had totally buckled down all sunday and most of monday and finished up the bed completely already. jawdrop1 jawdrop1
everything is all set and ready for LineX. it will be getting coated on the whole rear section to about 2" in front of the seam and the inside of the bed. figured it was easiest to hide what little imperfections there would be from the bed bob.
enough with the talk and on with the pictures. should be getting the bed back on in a few days. still want to clean up the frame before it gets put back on. also working on a solid rear brace and bumper with the shop as well. also still need to cut down the inner bed panels down about 14"
keep in mind the rear lower corners will be getting comp cut so we are taking out everything below about 1" lower than the body line and most of the roll pan will be removed. bondo didn't feel the need to take the time and make those lower sections perfect or finish the welding completely.
stay tuned for more pictures. kewl1
05-19-2011, 11:15 AM
#9
Registered User
Thread Starter
Join Date: Jul 2010
Location: Fremont, CA
Posts: 40
Likes: 0
Received 0 Likes
on
0 Posts
Woohoo i have updates. jawdrop1jawdrop1jawdrop1 truck cage is is done and bed is back on. They will be working on the rear bumper and bed side supports this week. kewl1


stay tuned for more welder1
stay tuned for more welder1
05-19-2011, 11:15 AM
#10
Registered User
Thread Starter
Join Date: Jul 2010
Location: Fremont, CA
Posts: 40
Likes: 0
Received 0 Likes
on
0 Posts
heres a quick picture of the rear bumper.
super stout for sure.
they threw a little but of a logo on the plating too which was cool.

got the new headlights installed yesterday and man they are bright waycool1 need to adjust them down so once i get it back home tomorrow ill be able to line it up with my garage door and get them dialed.
next week ill be working on replacing engine gaskets to get rid of the leaks and make sure everything is nice and tight.
also gonna start on building the harness for the driving lights and getting the fuse block and circuit breaker wired up so its just a plug and play setup for the switches, relays, fogs, driving lights, etc. kewl1
need to figure somthing out with the exhaust too. might just cut it back up under the bed so that its not hanging so low in the back.
really need to get that clutch lever on the winch rotated so i can get the synthetic line installed and get the winch hooked up and ready to use.
i think im gonna have to pull all the syncros and cover plates off to get to the clutch plate and can rotate it from there.....
super stout for sure.
they threw a little but of a logo on the plating too which was cool.
got the new headlights installed yesterday and man they are bright waycool1 need to adjust them down so once i get it back home tomorrow ill be able to line it up with my garage door and get them dialed.
next week ill be working on replacing engine gaskets to get rid of the leaks and make sure everything is nice and tight.
also gonna start on building the harness for the driving lights and getting the fuse block and circuit breaker wired up so its just a plug and play setup for the switches, relays, fogs, driving lights, etc. kewl1
need to figure somthing out with the exhaust too. might just cut it back up under the bed so that its not hanging so low in the back.
really need to get that clutch lever on the winch rotated so i can get the synthetic line installed and get the winch hooked up and ready to use.
i think im gonna have to pull all the syncros and cover plates off to get to the clutch plate and can rotate it from there.....
05-19-2011, 11:16 AM
#11
Registered User
Thread Starter
Join Date: Jul 2010
Location: Fremont, CA
Posts: 40
Likes: 0
Received 0 Likes
on
0 Posts
here are a couple pictures of when i finally got it home after being at the shop for over a month. really excited to get everything buttoned up and painted. waycool1


it fits a little nicer on the trailer now rofl1 kewl1 before the rear was almost hanging off the end.
it fits a little nicer on the trailer now rofl1 kewl1 before the rear was almost hanging off the end.


 05-19-2011, 11:17 AM
#13
Registered User
Thread Starter
Join Date: Jul 2010
Location: Fremont, CA
Posts: 40
Likes: 0
Received 0 Likes
on
0 Posts
So its been a little while since I have updated.
After I got the truck back I took it out to hollister to get a little muddy and actually wheel it for the first time.


yay for pathetic stock IFS flex rofl1


Truck did great till i decided to enter the water hole and it was a tad too deep and submerged the intake causing it to hydrolock doh
pulled the plugs when I got be back home (I towed it out there on my trailer just in case), flushed the cylinders, cranked it over and low and behold its back firing out the intake like a sumbitch banghead banghead banghead bent valves.........
which brings us on to the current status.
motor was pulled


and a new motor was picked up yesterday fresh and clean from the machine shop ready to put together waycool1


sitting in the garage is a new marlin HD competition clutch with 6 puck disc, new flywheel and grade 8.8 PP bolts.
hoping to have it all together and back in the truck in a couple weeks.
Cool part about the new motor is that it actually has the factory oil cooler which the old one didn't have. should help with keeping the temps down a bit. Also before it goes back in ill be looking for places to hook up the mechanical oil pressure and temp gauge fittings, and water temp gauge fitting.
Along with that ill be looking into getting the fuse block mounted up for the lights etc and work on the Intake silencer delete to free up some space in the bay.
After I got the truck back I took it out to hollister to get a little muddy and actually wheel it for the first time.
yay for pathetic stock IFS flex rofl1
Truck did great till i decided to enter the water hole and it was a tad too deep and submerged the intake causing it to hydrolock doh
pulled the plugs when I got be back home (I towed it out there on my trailer just in case), flushed the cylinders, cranked it over and low and behold its back firing out the intake like a sumbitch banghead banghead banghead bent valves.........
which brings us on to the current status.
motor was pulled
and a new motor was picked up yesterday fresh and clean from the machine shop ready to put together waycool1
sitting in the garage is a new marlin HD competition clutch with 6 puck disc, new flywheel and grade 8.8 PP bolts.
hoping to have it all together and back in the truck in a couple weeks.
Cool part about the new motor is that it actually has the factory oil cooler which the old one didn't have. should help with keeping the temps down a bit. Also before it goes back in ill be looking for places to hook up the mechanical oil pressure and temp gauge fittings, and water temp gauge fitting.
Along with that ill be looking into getting the fuse block mounted up for the lights etc and work on the Intake silencer delete to free up some space in the bay.
05-19-2011, 11:18 AM
#14
Registered User
Thread Starter
Join Date: Jul 2010
Location: Fremont, CA
Posts: 40
Likes: 0
Received 0 Likes
on
0 Posts
quick update.
Motor is coming along. have everthing buttoned up but the timing set. will hopefully be getting back on that in a few days when i have some free time. hopeing to maybe get the motor set back in the truck memorial day weekend so i can take it for a test drive.
Also picked up some 33x12.5's from my buddy to rock until the swap happens. Figured if i can get them to fit i might as well right? have all 5 and i picked up a 15x8 american racing AR62 as well to go with the spare. Not exactly the same but close enough


Also got some new front shocks and rear 1.5" lift daystar shackles. once its running and i have a chance to flex it out ill get shock lengths for the rear and replace those too.
gonna mess with the rear shackle hanger a bit to utilize more of the compression on the springs with the new shackles. see if i can gain a bit of travel that way.
Motor is coming along. have everthing buttoned up but the timing set. will hopefully be getting back on that in a few days when i have some free time. hopeing to maybe get the motor set back in the truck memorial day weekend so i can take it for a test drive.
Also picked up some 33x12.5's from my buddy to rock until the swap happens. Figured if i can get them to fit i might as well right? have all 5 and i picked up a 15x8 american racing AR62 as well to go with the spare. Not exactly the same but close enough
Also got some new front shocks and rear 1.5" lift daystar shackles. once its running and i have a chance to flex it out ill get shock lengths for the rear and replace those too.
gonna mess with the rear shackle hanger a bit to utilize more of the compression on the springs with the new shackles. see if i can gain a bit of travel that way.
06-17-2011, 11:08 AM
#15
Registered User
Thread Starter
Join Date: Jul 2010
Location: Fremont, CA
Posts: 40
Likes: 0
Received 0 Likes
on
0 Posts
UPDATE:
Well motor is running finally.
However when accelerating it sounds like its missing.
Already ruled out the distributor as i played with that last night and adjusted it back and forth 1 tooth each and played with the adjustment within those settings. The timing is on with that. wires are new. plugs are in good shape.
Given that i hydrolocked it, could that be the O2 sensor or MAF going bad? Didn't think a bad MAF or O2 would cause it to misfire, only run rough or super rich, etc.
When i accelerate it back fires and pops.
My thought was that it might be a tooth off on one of the cams. any other thoughts?
Otherwise motor is great. fired up first try after I let the fuel system prime.
Feels great to have it at least running again
Help me out guys. :confused:
07-08-2011, 12:07 PM
#16
Registered User
Thread Starter
Join Date: Jul 2010
Location: Fremont, CA
Posts: 40
Likes: 0
Received 0 Likes
on
0 Posts
Just got a couple storage bins today to mount on the basket thats being made for above the spare in the bed. Military medical field chests. Full aluminum and water proof.
They measure 31x19x12"
Basket will be made to mount two small coolers and the two storage bins. It will have to hang over above the tail gate about 4-5 inches but should still work fine.


Stay tuned for updates on the basket over the next couple weeks. Should be starting on it next week.
They measure 31x19x12"
Basket will be made to mount two small coolers and the two storage bins. It will have to hang over above the tail gate about 4-5 inches but should still work fine.
Stay tuned for updates on the basket over the next couple weeks. Should be starting on it next week.
07-08-2011, 09:34 PM
#18
Registered User
Thread Starter
Join Date: Jul 2010
Location: Fremont, CA
Posts: 40
Likes: 0
Received 0 Likes
on
0 Posts


