93toy's 1985 4Runner Build-Up Thread
 03-07-2010, 07:24 PM
#1
Registered User
Thread Starter
Join Date: Jul 2003
Location: Asheville, NC
Posts: 383
Likes: 0
Received 0 Likes
on
0 Posts
93toy's 1985 4Runner Build-Up Thread
Here's the back story. Always loved Toyotas. I've had multiple Toyota 4x4's over the years and loved them all, but I always had a soft spot for the 1st gen 4runners. In 2009 I decided it was time to track one down for a build.
The first one I bought was a really rough 1987 SR5. It had a 3.0 auto (that had been removed by the previous owner) and quite a bit of body rust. But I picked it up dirt cheap, so I bought it. Here's Fred:
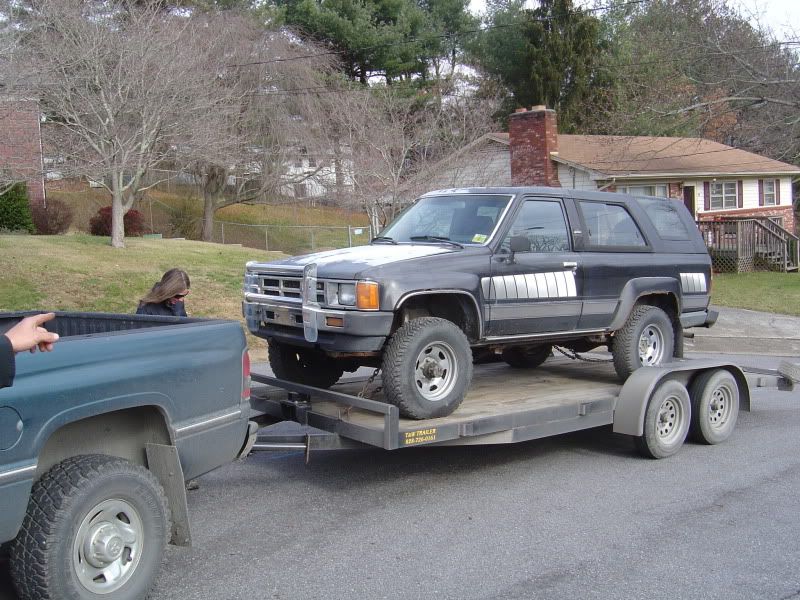
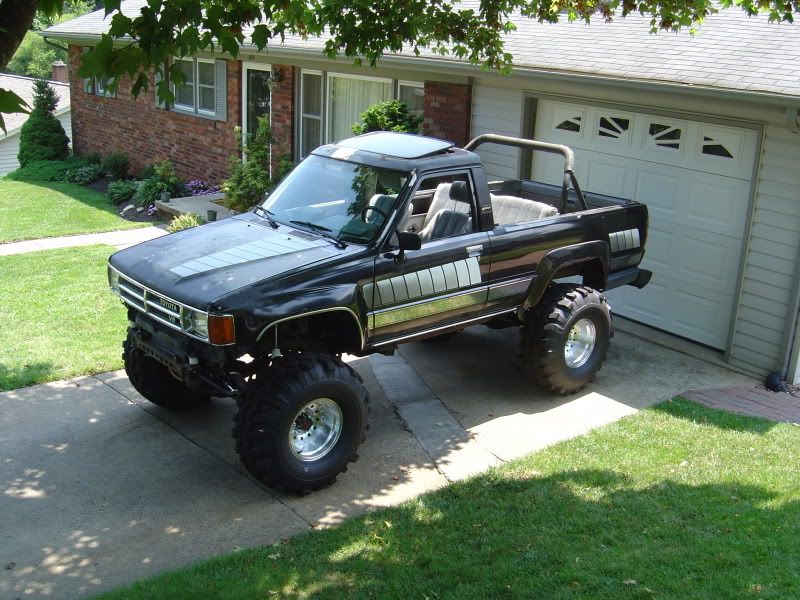
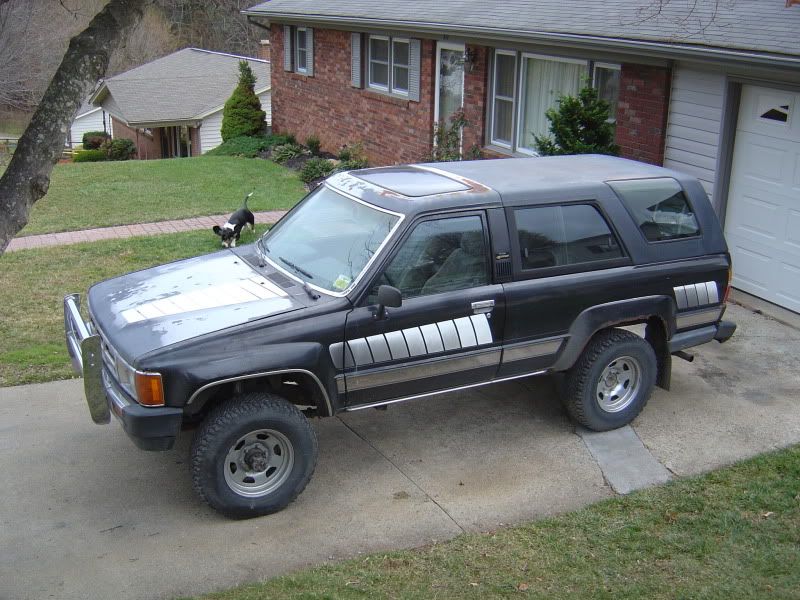
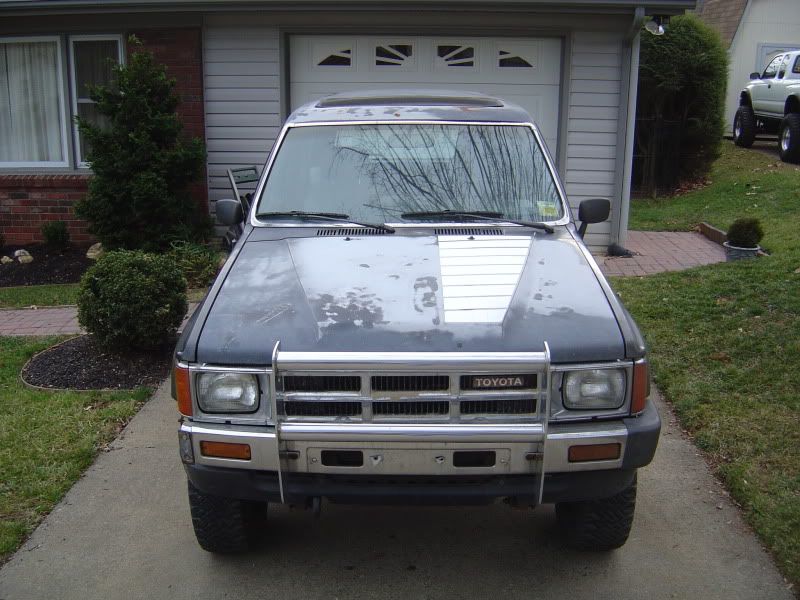
Fred was great, and he's gonna make a great trail beater, but I wanted something a little nicer and something I could semi-restore. So I watched Craigslist and some of the local auto trading papers for a few months until I found what I REALLY wanted. A 1985 4runner SR5. Found it locally with 307,000 miles. Solid frame, fair amount of body rust but not too far gone. Needed some little things but the rear window worked, the original SR5 interior was in great shape, it ran good, and I loved it from day one. Factory A/C, factory sunroof, power windows, etc. It was pretty loaded for 1985. Here's Tyrone the day he came home:

Here he is after his first bath:
So here was the plan. To build a 4runner the way I would have in 1985. I was 15 in 1985 and it wasn't gonna happen then, but it could now. I won't lie to you guys. I love capable off road trucks, but I also love BIG, lifted trucks. And while Tyrone is being built to take off road on occasion, there was no need for lockers and twin sticks because he won't get into anything that rough. That's what Fred is for. So call it what you want, but he's being built how I want him. I guess you could call it 1/2 restoration, 1/2 built for forest service/fire roads.
So first things first. I did all of the tune-up and maintenance needs. Plugs, plug wires, distributor cap, rotor, new radiator, hoses, pcv valve, filters, oil pump seal, front main seal, vacuum lines, etc. (Previous owner had changed the head gasket recently) Now he was running pretty good. So I went inside and gutted the interior. Put a basic Kenwood stereo in, changed all dash lights to blue LED, steam cleaned all of the seats, removed the carpet and replaced with a new gray vinyl floor kit, and scrubbed like crazy. Then back outside again for all new front brake rotors and pads.
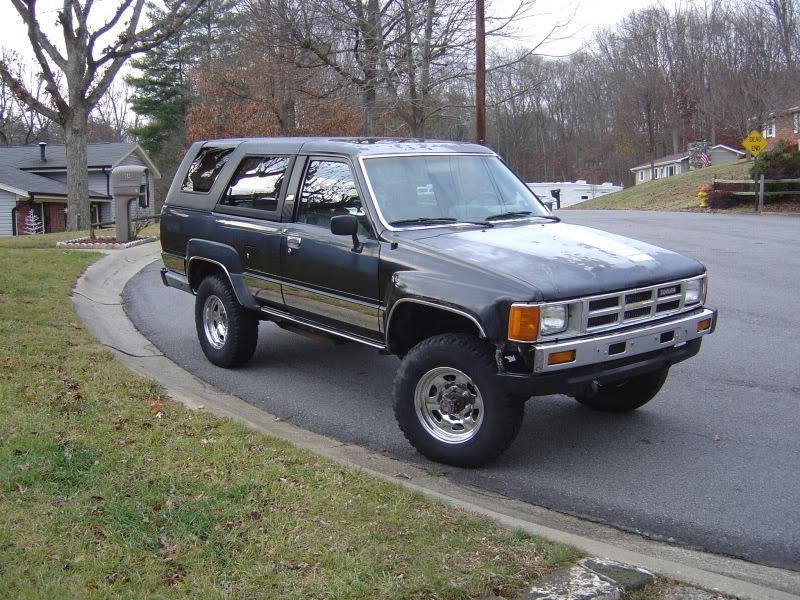
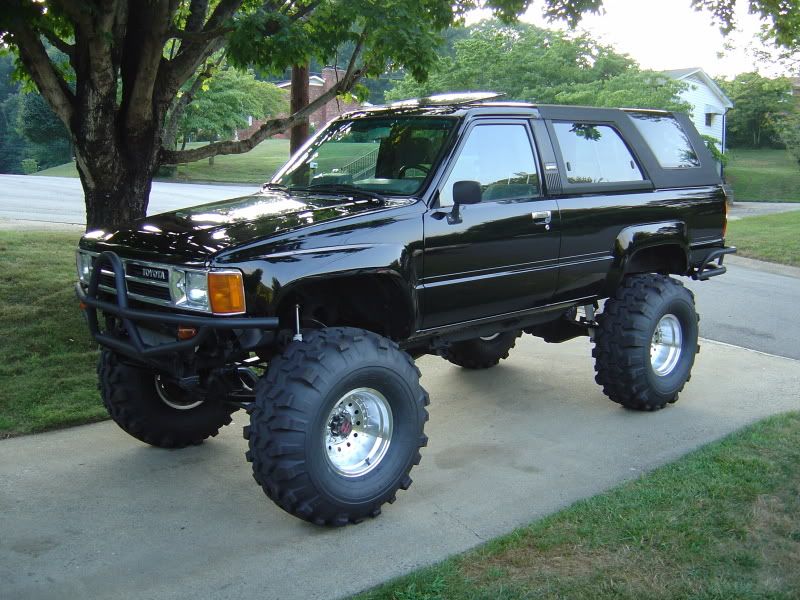
Eveything was going pretty good so it was time for a few mods. First up was a 4 inch Pro Comp suspension lift. Tyrone got a little attitude:
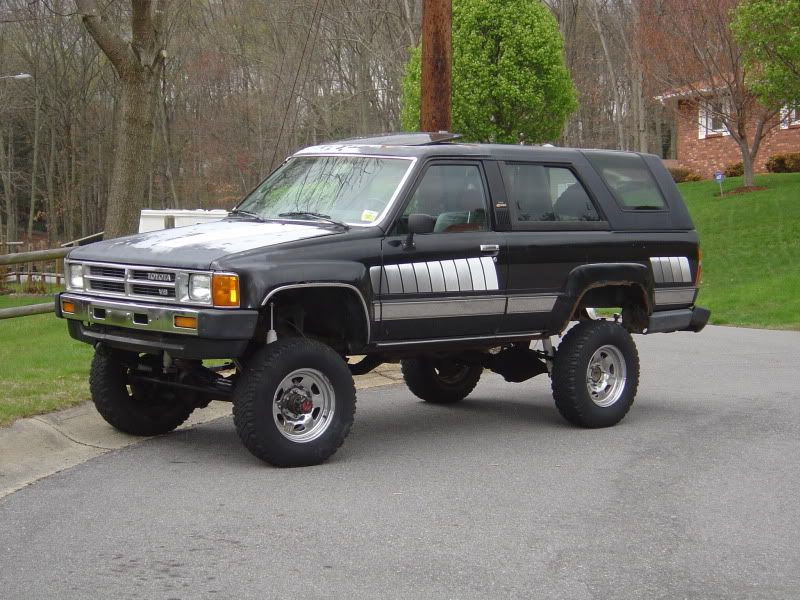
Then I added a 2 inch RB body lift and some 5.29 gears. So it was time for some rubber in the form of 35x15x15 bias Swampers on 15x10 AR Outlaw II's. (Doesn't get more 80's than that!!)
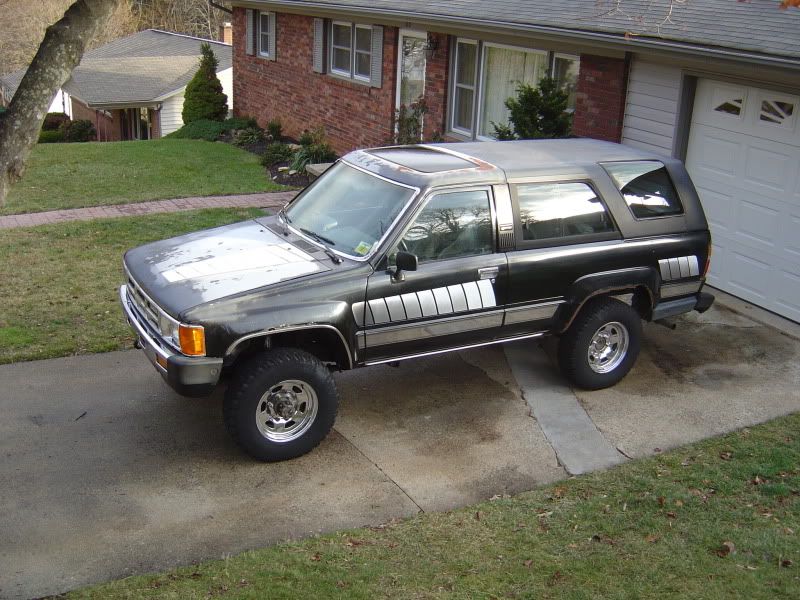
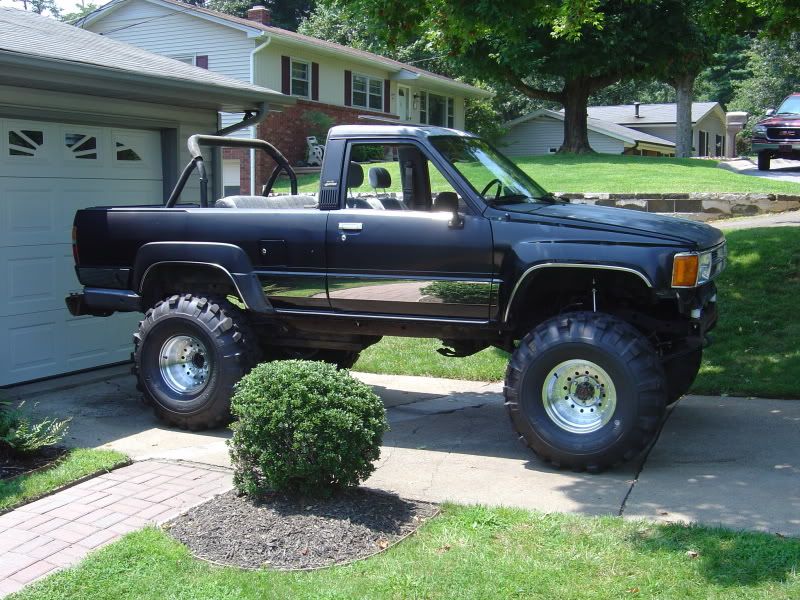
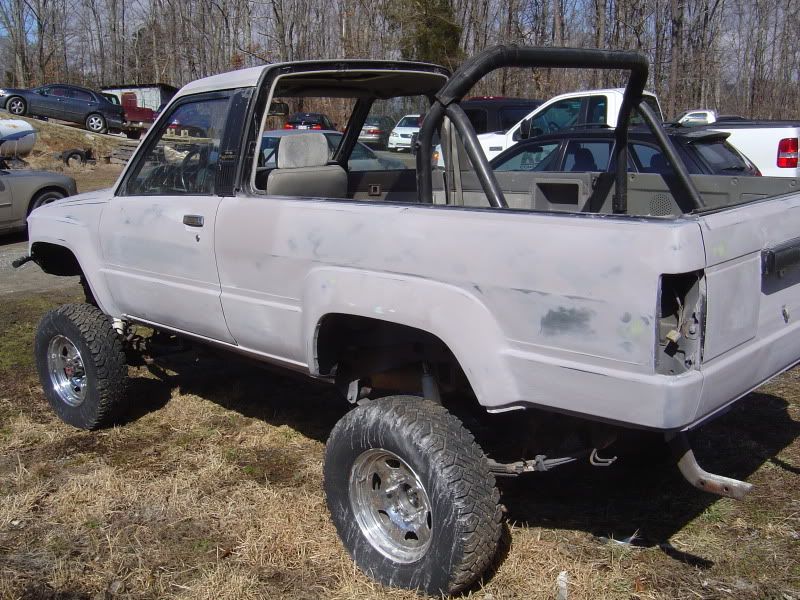
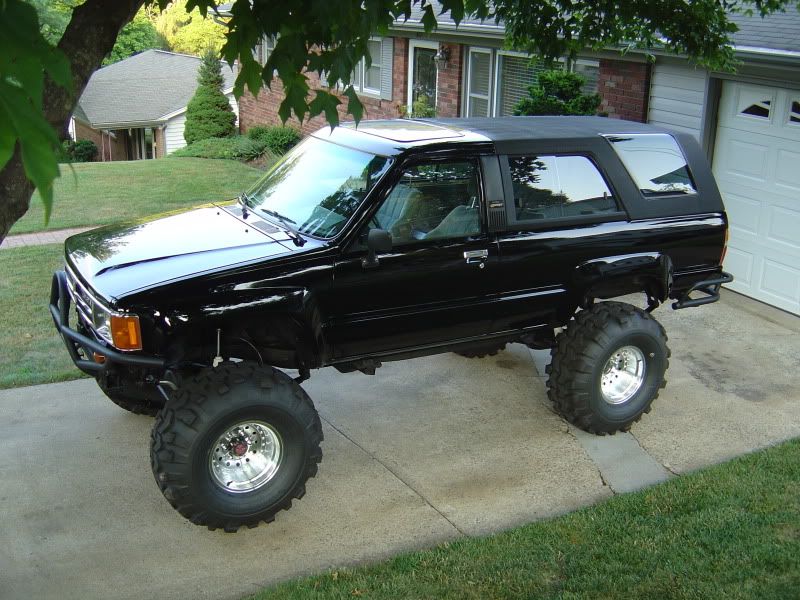
And his first time with the top off:
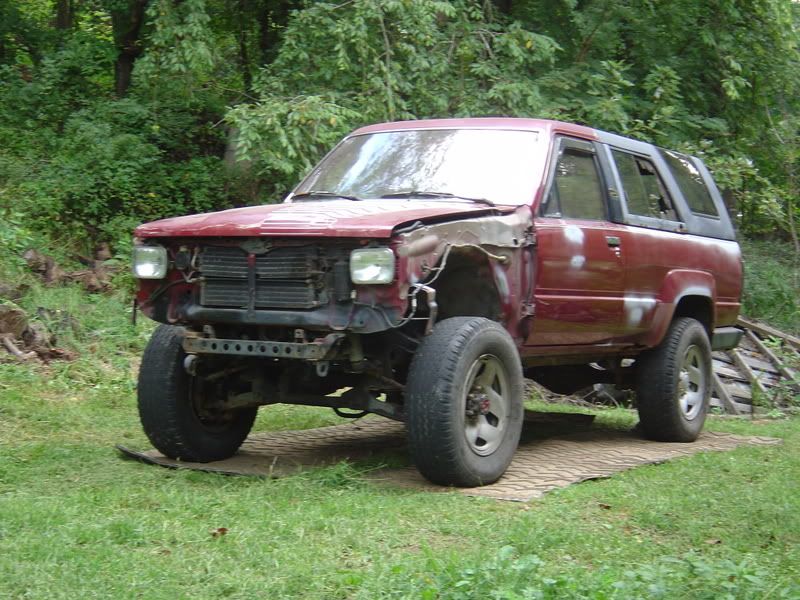
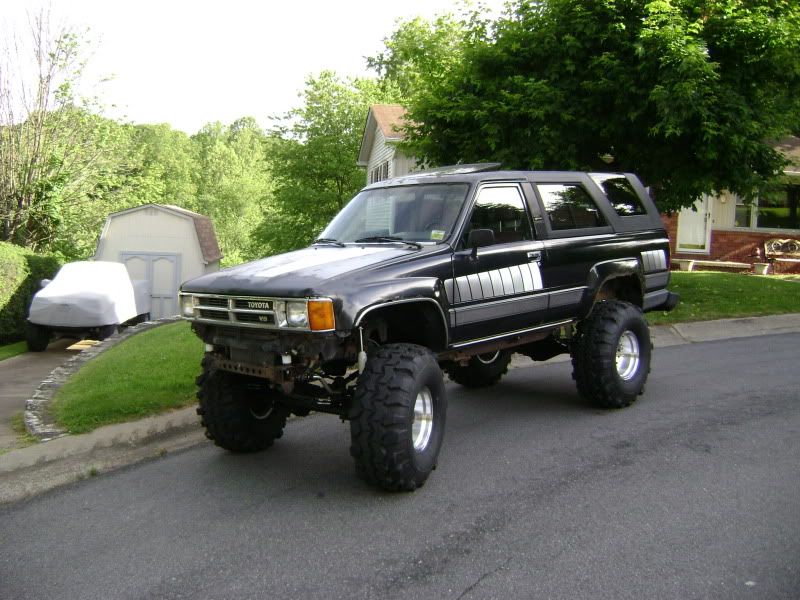
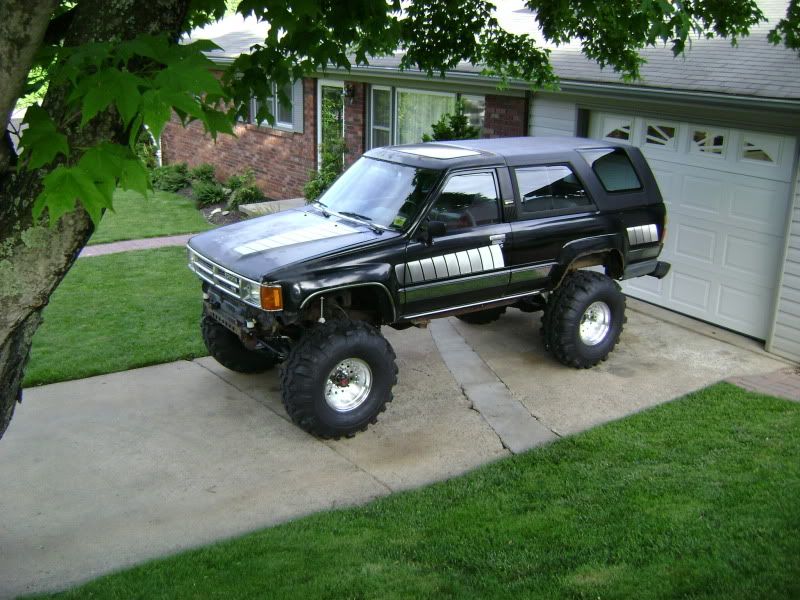
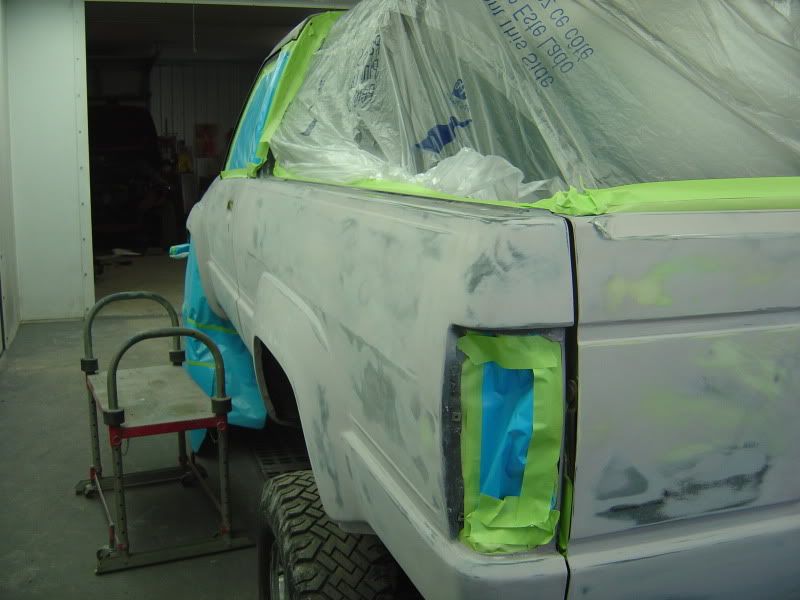
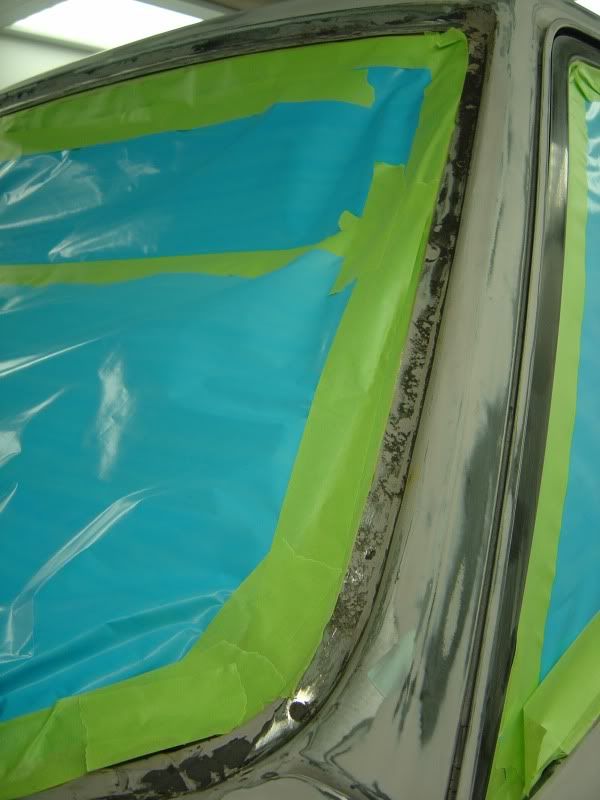
You'll also notice the rust around the left rear quarter and front fenders. I knew it was time to address it. The entire right rear quarter had been replaced at some point which explains the lack of SR5 striping on the right. So I made a few calls and tracked down a solid left rear quarter. Had a friend cut out the old and put in the new. Then in preparation for paint I got two new (re-pop) fenders and a new hood. I took off all of the fender trim, the windshield trim, the horrid (see 1990's) stainless rocker trim and the other trim at the very bottom of the body and sent it in to the body man. He worked on the dents and straightend Tyrones panels out. I had him remove the rock guards ahead of the rear tires and weld shut the holes where they mounted. (3M clear bra will go in it's place later) The windshield was pulled and extensive work was done around the opening to fix mild rust. Once the windshield is replace it will have a universal rubber trim piece installed. Anyway, here he is after bodywork:
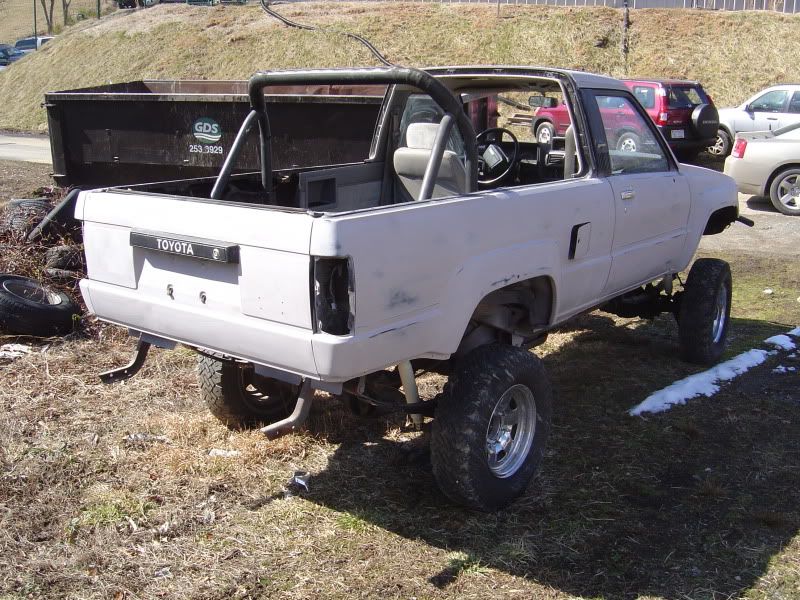

He's gettin there!
(By the way, that's a 4xinnovations front bumper.)
And here he was this past Saturday in the paint booth for final prep:
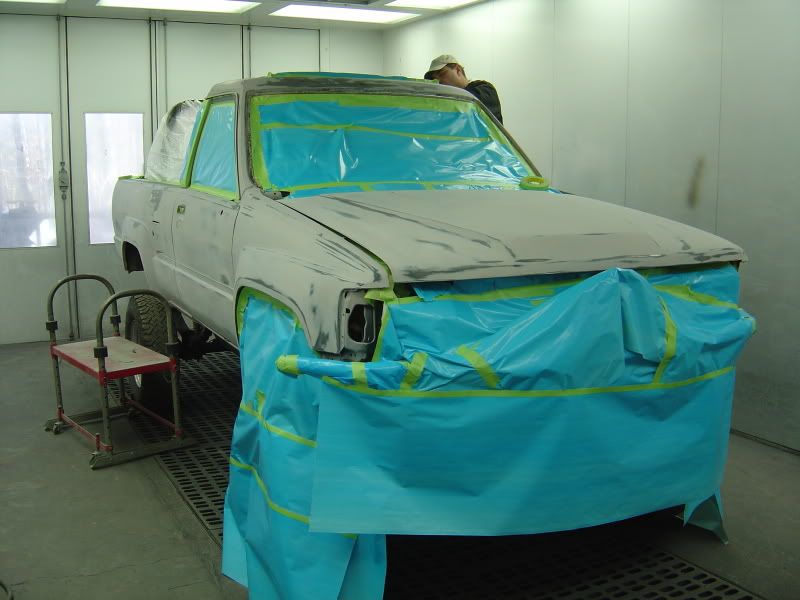
Windshield detail:
He got painted Saturday night but I only have cell phone pics so far. Teaser huh? But he turned out great. Mid summer I'll be calling on James Dean Creations for the original SR5 stripe kit to finish off the body.
As soon as he gets home I'll post "after" paint pics. Then it's time for a full front axle rebuild and I'll strip the entire frame and coat it with POR-15. It never ends...............
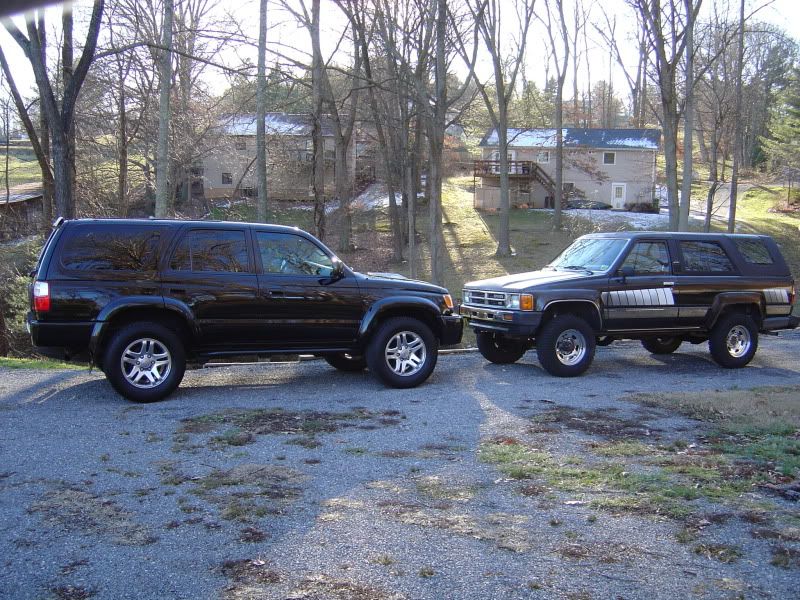
A few more pics. One with his brother:
And the evolution:
The first one I bought was a really rough 1987 SR5. It had a 3.0 auto (that had been removed by the previous owner) and quite a bit of body rust. But I picked it up dirt cheap, so I bought it. Here's Fred:
Fred was great, and he's gonna make a great trail beater, but I wanted something a little nicer and something I could semi-restore. So I watched Craigslist and some of the local auto trading papers for a few months until I found what I REALLY wanted. A 1985 4runner SR5. Found it locally with 307,000 miles. Solid frame, fair amount of body rust but not too far gone. Needed some little things but the rear window worked, the original SR5 interior was in great shape, it ran good, and I loved it from day one. Factory A/C, factory sunroof, power windows, etc. It was pretty loaded for 1985. Here's Tyrone the day he came home:
Here he is after his first bath:
So here was the plan. To build a 4runner the way I would have in 1985. I was 15 in 1985 and it wasn't gonna happen then, but it could now. I won't lie to you guys. I love capable off road trucks, but I also love BIG, lifted trucks. And while Tyrone is being built to take off road on occasion, there was no need for lockers and twin sticks because he won't get into anything that rough. That's what Fred is for. So call it what you want, but he's being built how I want him. I guess you could call it 1/2 restoration, 1/2 built for forest service/fire roads.
So first things first. I did all of the tune-up and maintenance needs. Plugs, plug wires, distributor cap, rotor, new radiator, hoses, pcv valve, filters, oil pump seal, front main seal, vacuum lines, etc. (Previous owner had changed the head gasket recently) Now he was running pretty good. So I went inside and gutted the interior. Put a basic Kenwood stereo in, changed all dash lights to blue LED, steam cleaned all of the seats, removed the carpet and replaced with a new gray vinyl floor kit, and scrubbed like crazy. Then back outside again for all new front brake rotors and pads.
Eveything was going pretty good so it was time for a few mods. First up was a 4 inch Pro Comp suspension lift. Tyrone got a little attitude:
Then I added a 2 inch RB body lift and some 5.29 gears. So it was time for some rubber in the form of 35x15x15 bias Swampers on 15x10 AR Outlaw II's. (Doesn't get more 80's than that!!)
And his first time with the top off:
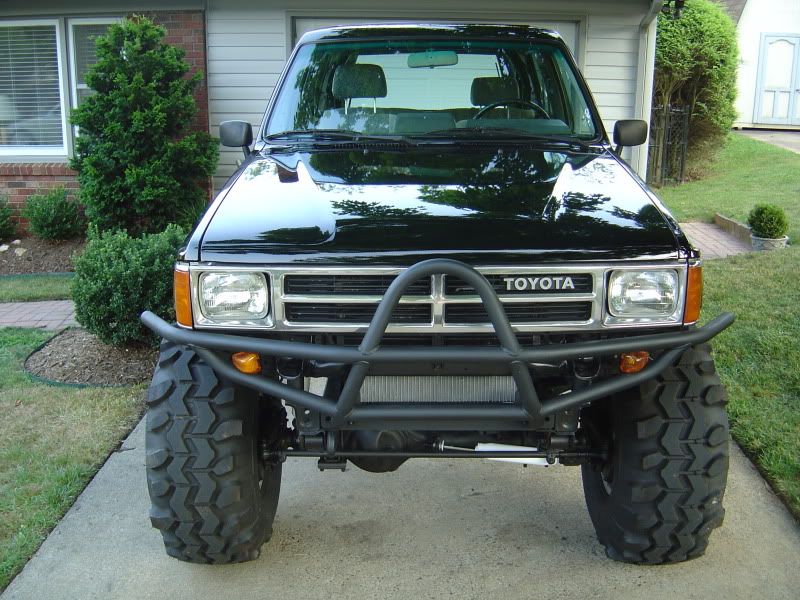
You'll also notice the rust around the left rear quarter and front fenders. I knew it was time to address it. The entire right rear quarter had been replaced at some point which explains the lack of SR5 striping on the right. So I made a few calls and tracked down a solid left rear quarter. Had a friend cut out the old and put in the new. Then in preparation for paint I got two new (re-pop) fenders and a new hood. I took off all of the fender trim, the windshield trim, the horrid (see 1990's) stainless rocker trim and the other trim at the very bottom of the body and sent it in to the body man. He worked on the dents and straightend Tyrones panels out. I had him remove the rock guards ahead of the rear tires and weld shut the holes where they mounted. (3M clear bra will go in it's place later) The windshield was pulled and extensive work was done around the opening to fix mild rust. Once the windshield is replace it will have a universal rubber trim piece installed. Anyway, here he is after bodywork:
He's gettin there!
(By the way, that's a 4xinnovations front bumper.)
And here he was this past Saturday in the paint booth for final prep:
Windshield detail:
He got painted Saturday night but I only have cell phone pics so far. Teaser huh? But he turned out great. Mid summer I'll be calling on James Dean Creations for the original SR5 stripe kit to finish off the body.
As soon as he gets home I'll post "after" paint pics. Then it's time for a full front axle rebuild and I'll strip the entire frame and coat it with POR-15. It never ends...............
A few more pics. One with his brother:
And the evolution:
 03-15-2010, 02:45 AM
#6
Registered User
Nice story! When he's back on the road, perhaps I can come up and join you out at Hurricane Creek! 'Got some other friends in the Asheville area that like to ride a bit.
Why did you put an 88 grille on Tyrone? Did that come off Fred? Are you still going to get Fred running?
Why did you put an 88 grille on Tyrone? Did that come off Fred? Are you still going to get Fred running?
03-15-2010, 07:38 AM
#7
Registered User
Thread Starter
Join Date: Jul 2003
Location: Asheville, NC
Posts: 383
Likes: 0
Received 0 Likes
on
0 Posts
Did some trading with a friend of mine to get the 5.29's installed, so I couldn't really tell you a price. Gotta love bartering!
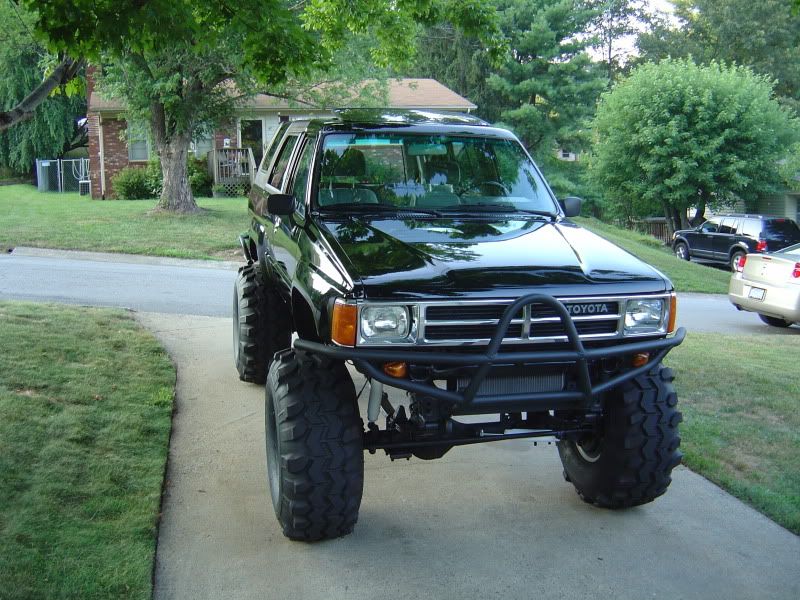
Yes, Fred donated his grille to Tyrone! (Sharp eye!) The chrome on Tyrones grille was rough. I just got done refurbishing the Fred grille for Tyrone so when he comes back from paint it will look sharp too. Dropped the V6 emblem too. I've always been a fan of the black grilles, but I wanted to keep his stock look......well, to some degree.
A friend of mine did the paint/bodywork. Paint and gears are the only thing I haven't done myself. I know my limits! Not sure how much time is in it right now.
Can't wait to post some pics of the new windshield gasket. No more crap factory trim!!!
Trending Topics
07-02-2010, 04:39 PM
#9
Registered User
Thread Starter
Join Date: Jul 2003
Location: Asheville, NC
Posts: 383
Likes: 0
Received 0 Likes
on
0 Posts
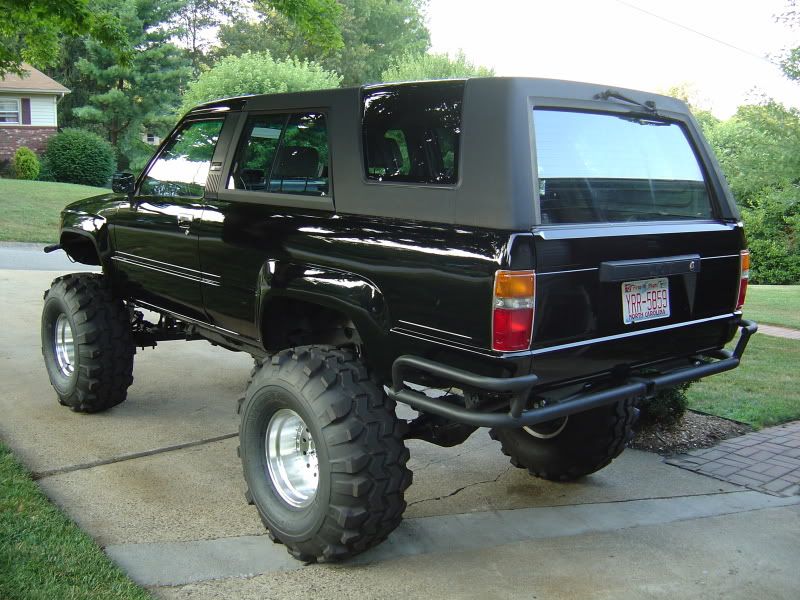
Been a while, fixing lots of little mechanical issues (pinion seal, output seal, new exhaust, replacing weatherstrips, picked up another sunroof, new tail lights, etc). Got the All-Pro rear bumper on, rebuilt front axle. Got s new windshield installed with rubber gasket too. Still have to install temp, oil pressure gauges on the A-pillar mount and rebuild Aisin hubs. It will never be done, but I love it! First coat of wax (after clay-barred) today. Mall crawler driveway shots, but I haven't had him out yet!
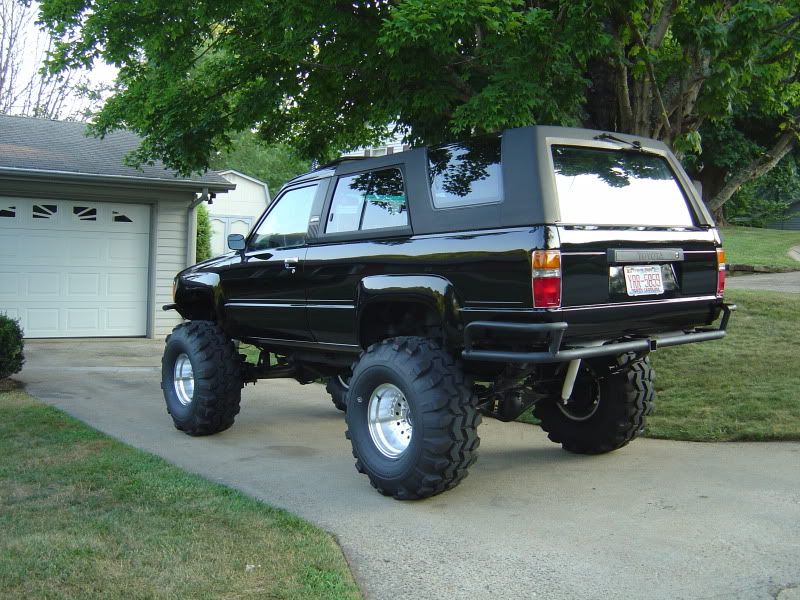
And some before and after shots.....same angle
More to come!
And some before and after shots.....same angle
More to come!
07-02-2010, 04:58 PM
#11
Registered User
iTrader: (2)
Join Date: Dec 2009
Location: Pleasanton, CA - SF Bay Area
Posts: 2,159
Likes: 0
Received 7 Likes
on
5 Posts
That is the most awesome truck I've seen in a long long time - great work, and documentation!
Do you mind showing some of the interior stuff? I'm especially curious about the LED conversiomn for the dash...there's a TON of info here about the 2nd and 3rd gen conversions, but NOTHING on first gens....and my dash lights are dim dim DIM! Would love to know what you did, what parts you used, and what it cost to convert over (and pics of course!!!).
again, amazing looking truck - love the gloss/flat black combo.
Phil
07-02-2010, 05:00 PM
#12
Registered User
iTrader: (2)
Join Date: Dec 2009
Location: Pleasanton, CA - SF Bay Area
Posts: 2,159
Likes: 0
Received 7 Likes
on
5 Posts
BTW, I know you probably like your turn signals where they are on that bumper, but if you don't there's a DIY lurking around here or on 4crawler.com that shows you how to combine your parlking lights and turn signals into the same parking light housing next to each headlight....would looks clean 
07-02-2010, 05:13 PM
#13
Registered User
Thread Starter
Join Date: Jul 2003
Location: Asheville, NC
Posts: 383
Likes: 0
Received 0 Likes
on
0 Posts
Give me a couple of days and I'll get some interior pics including nighttime LED shots. I got the LED's from superbrightLEDs.com. Easy conversion. Learned part numbers etc, from a guy who posts on here. Username "MountainTom" maybe? I'll have to look for the thread. They did it on his sons 85. That's where I got the info for the vinyl floor too.
07-02-2010, 05:29 PM
#14
07-02-2010, 06:10 PM
#17
Registered User

Join Date: Mar 2010
Posts: 3
Likes: 0
Received 0 Likes
on
0 Posts
Sweet runner man! One day I hope for mine to be just as nice.
Did you get the hook up on the paint or did you go all out? If you don't mind me asking. Just curious because I plan on doing a semi restoration myself...
Did you get the hook up on the paint or did you go all out? If you don't mind me asking. Just curious because I plan on doing a semi restoration myself...
07-03-2010, 01:24 AM
#19
Registered User
Thread Starter
Join Date: Jul 2003
Location: Asheville, NC
Posts: 383
Likes: 0
Received 0 Likes
on
0 Posts
I kind of got the hookup. I wasn't looking for anything too fancy, just wanted basecoat/clearcoat and something that would last. Happened to meet an Allstate insurance adjuster one day who used to paint for a living (in Florida) and he's trying to build a name again to paint as a side gig. He's the one who painted it. He actually painted it better than what I had anticipated.
07-03-2010, 01:04 PM
#20
Registered User
Thread Starter
Join Date: Jul 2003
Location: Asheville, NC
Posts: 383
Likes: 0
Received 0 Likes
on
0 Posts
https://www.yotatech.com/forums/f115...s-85-a-145072/
Philbert - That is the thread to the LED writeup. I went with what he said and it worked like a charm.
Philbert - That is the thread to the LED writeup. I went with what he said and it worked like a charm.


