IGotTheTime - 1983 Pickup Rebuild
 03-30-2014, 04:50 PM
#1
Registered User
Thread Starter

Join Date: Jan 2014
Location: Asheville, NC
Posts: 11
Likes: 0
Received 0 Likes
on
0 Posts
IGotTheTime - 1983 Pickup Rebuild
This is my first post, but I have been reading the forum for several months and I have gotten tons of great info from this site. Thanks to everyone for posting all of your pictures, rebuilds, and advice - this is an amazing resource!
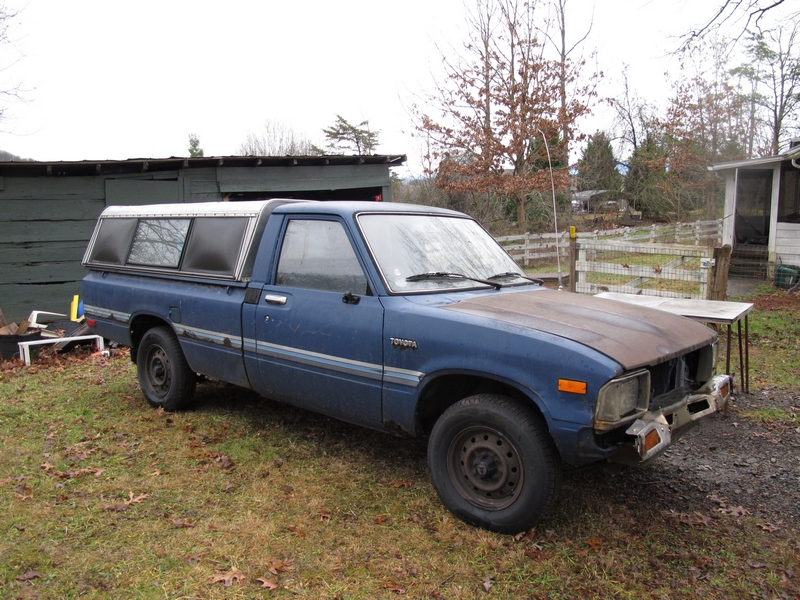
I am reviving an old family heirloom - a 1983 long bed pickup that my parents bought new before my oldest sister was born. I grew up with the truck, learned to drive stick shift on it, etc. I tried to talk them into selling it to me when I was 16, but they weren't ready to part with it. They finally sold it a couple of years ago, to my little brother. Last summer he called me and asked for a ride, said the truck was making a horrible noise and he had called a tow truck. I drove down there, asked him to start it up for me, and it made the worst noise i've ever heard an engine make - a loud RAT-A-LAT-A-LAT-A-LAT-A, metal-on-metal. I offered him $100 bucks for it on the spot. He asked me what I was going to do with it and I said "I'm gonna put a new motor in it." He said, "Maybe I'll put a new motor in it." I said, "Like hell you will, but let me know if you change your mind." 6 months later he called and said "Do you still want the truck?" I said absolutely.
I should tell you that I have NO experience working on motors, aside from spraying carburetor cleaner in my lawnmower. I've done some minor repairs but nothing like this. Guess I just figured I didn't have much to lose, and I might end up with a really good truck.
Here she is. Not the best lookin thing around, but she's a pleasure.
I'll try to catch you up quickly on the progress thus far.
I am reviving an old family heirloom - a 1983 long bed pickup that my parents bought new before my oldest sister was born. I grew up with the truck, learned to drive stick shift on it, etc. I tried to talk them into selling it to me when I was 16, but they weren't ready to part with it. They finally sold it a couple of years ago, to my little brother. Last summer he called me and asked for a ride, said the truck was making a horrible noise and he had called a tow truck. I drove down there, asked him to start it up for me, and it made the worst noise i've ever heard an engine make - a loud RAT-A-LAT-A-LAT-A-LAT-A, metal-on-metal. I offered him $100 bucks for it on the spot. He asked me what I was going to do with it and I said "I'm gonna put a new motor in it." He said, "Maybe I'll put a new motor in it." I said, "Like hell you will, but let me know if you change your mind." 6 months later he called and said "Do you still want the truck?" I said absolutely.
I should tell you that I have NO experience working on motors, aside from spraying carburetor cleaner in my lawnmower. I've done some minor repairs but nothing like this. Guess I just figured I didn't have much to lose, and I might end up with a really good truck.
Here she is. Not the best lookin thing around, but she's a pleasure.


I'll try to catch you up quickly on the progress thus far.


 03-30-2014, 05:05 PM
#3

Great story and it looks like you live in a really nice place, my type of place! If you have the interest, you'll see that no job is too hard on these things, plenty of room to work on everything.
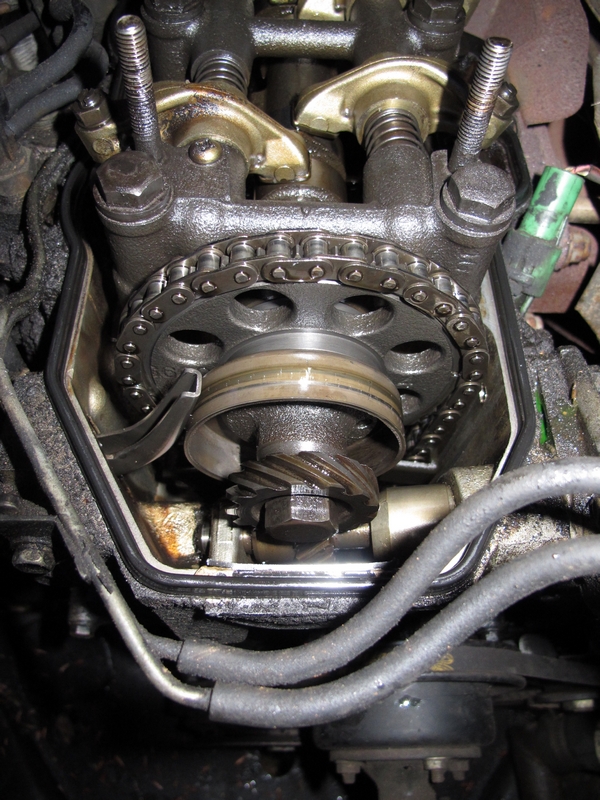
And the sound you were hearing might be timing chain slap, they sound like the worse mecanical noise once they grind on the timing cover. It would be worth it to remove the timing cover and check, if the engine ran good everything there can be replaced and she would be good to go again keeping its original engine.
And the sound you were hearing might be timing chain slap, they sound like the worse mecanical noise once they grind on the timing cover. It would be worth it to remove the timing cover and check, if the engine ran good everything there can be replaced and she would be good to go again keeping its original engine.
Last edited by gillesdetrail; 03-30-2014 at 05:08 PM.
03-30-2014, 05:19 PM
#4
Registered User
Thread Starter
Join Date: Jan 2014
Location: Asheville, NC
Posts: 11
Likes: 0
Received 0 Likes
on
0 Posts
A few highlights:
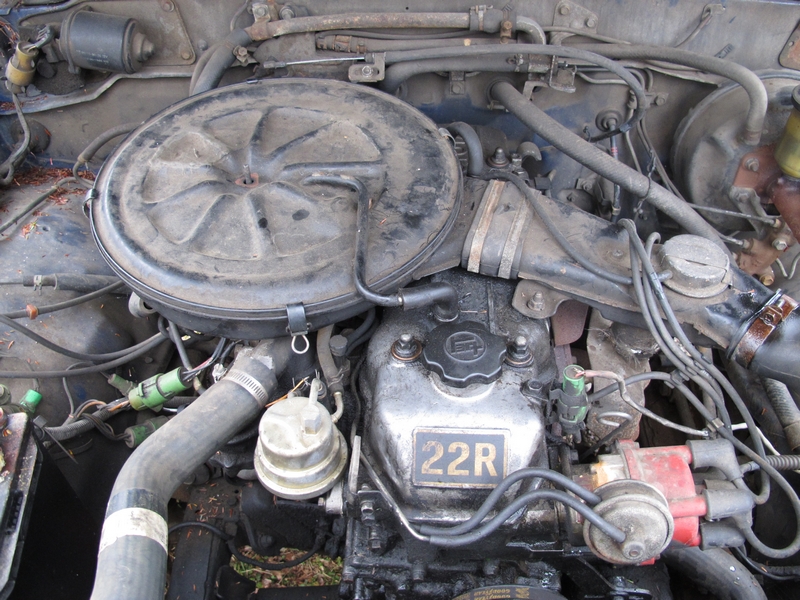
An oily mess. They'd been running heavy-weight oil in it for several years in an attempt to keep the leaks at bay.

Can you see the alternator under there?
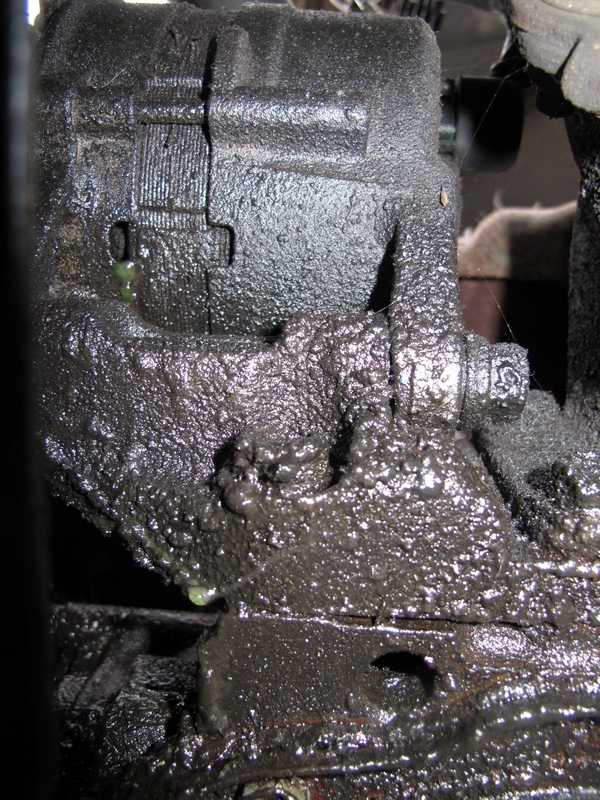

An oily mess. They'd been running heavy-weight oil in it for several years in an attempt to keep the leaks at bay.

Can you see the alternator under there?
 03-30-2014, 05:26 PM
#5
Registered User
Thread Starter
Join Date: Jan 2014
Location: Asheville, NC
Posts: 11
Likes: 0
Received 0 Likes
on
0 Posts
Ok, now fast forward to taking the oil pan off. Took some elbow grease and I sacrificed a putty kinfe.
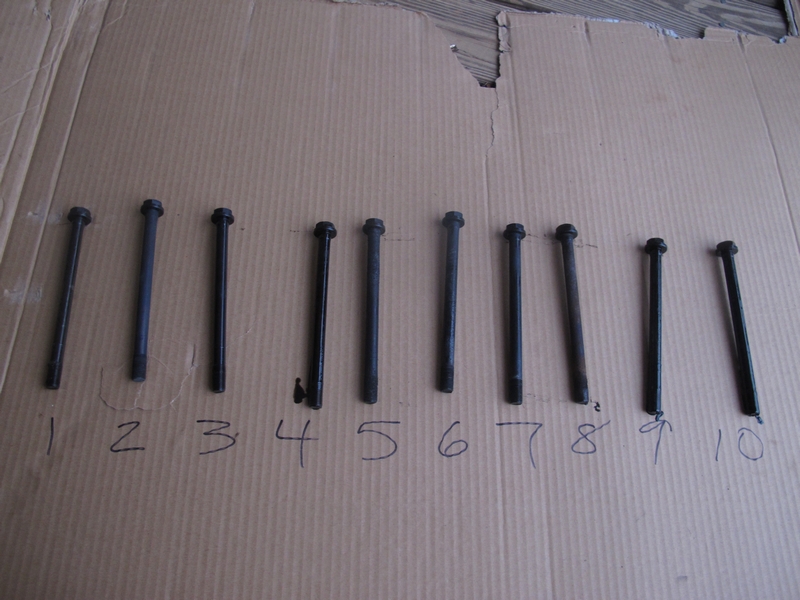
Here are the head bolts. The #8 bolt was hard to get out, but no real problems. Some have oil, some are dry.
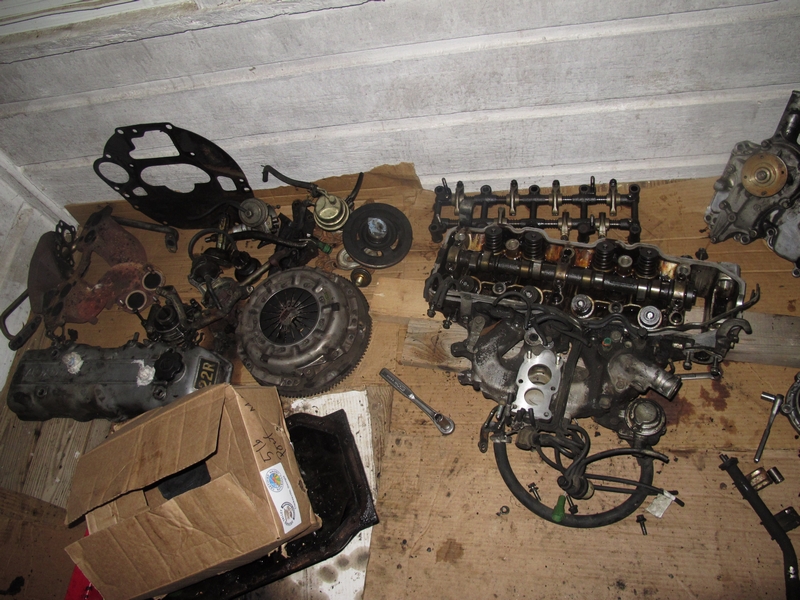
Some of the guts:
Some more of the guts:
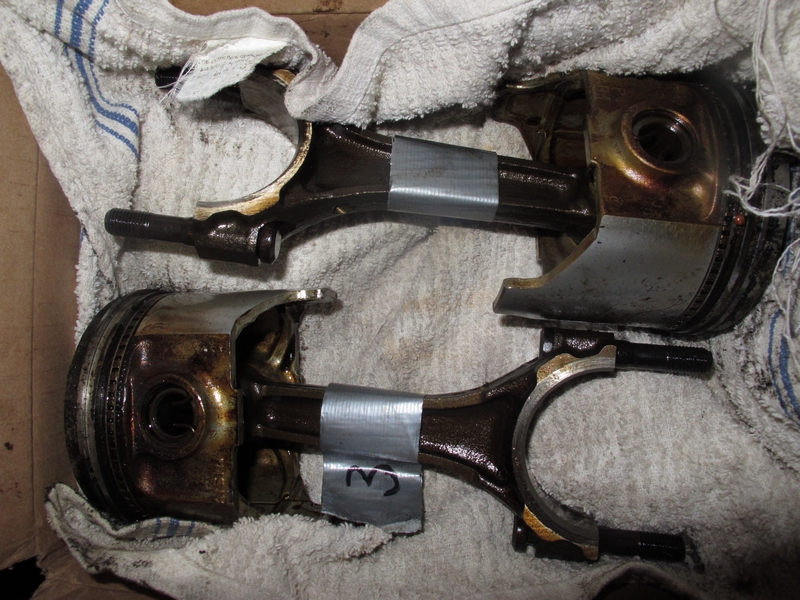
A couple of the rods:
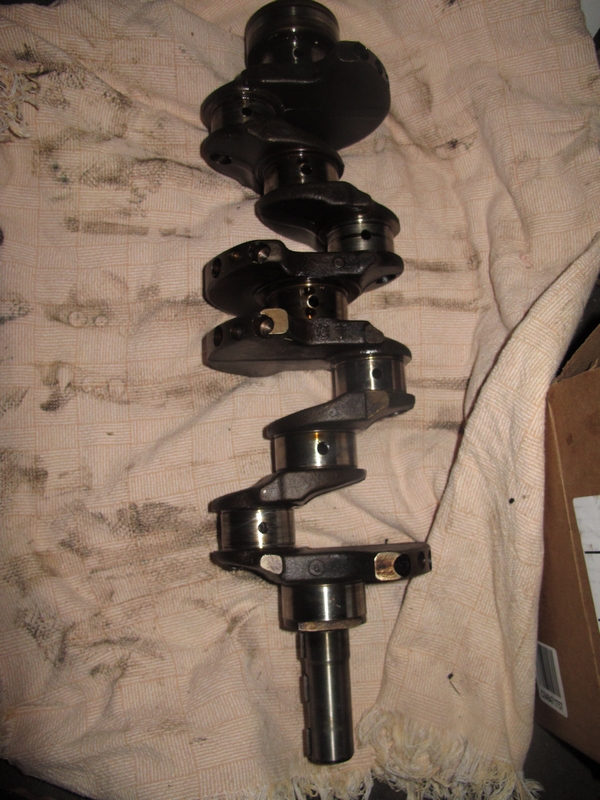
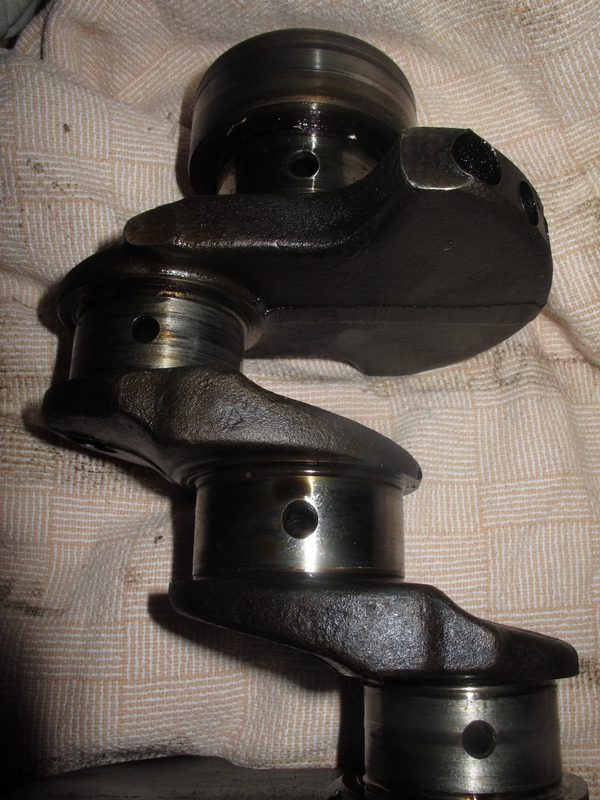
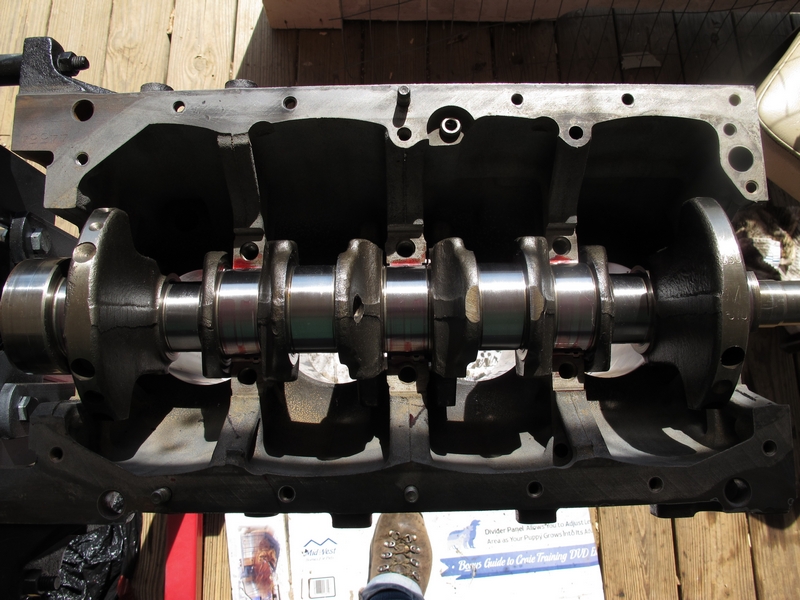
And finally, the crank:

Here are the head bolts. The #8 bolt was hard to get out, but no real problems. Some have oil, some are dry.

Some of the guts:

Some more of the guts:

A couple of the rods:

And finally, the crank:
 03-30-2014, 05:43 PM
#6
Registered User
Thread Starter
Join Date: Jan 2014
Location: Asheville, NC
Posts: 11
Likes: 0
Received 0 Likes
on
0 Posts
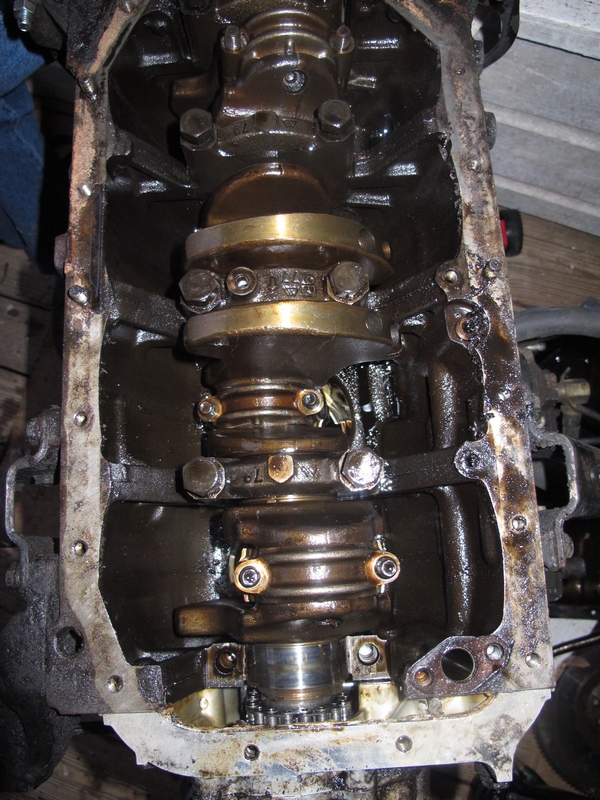
I am really kicking myself for not getting better pictures of the crankshaft and the worn bearings. The whole point of taking this apart was to find out what condition the crankshaft was in! But, you can see some of the scoring on the rod journals in this picture.
Took it to a great machine shop down the road, and they were able to grind the crankshaft. Things were starting to look good...my goal was to do the rebuild for $1000. With this news, I was pretty sure I could stay within budget!
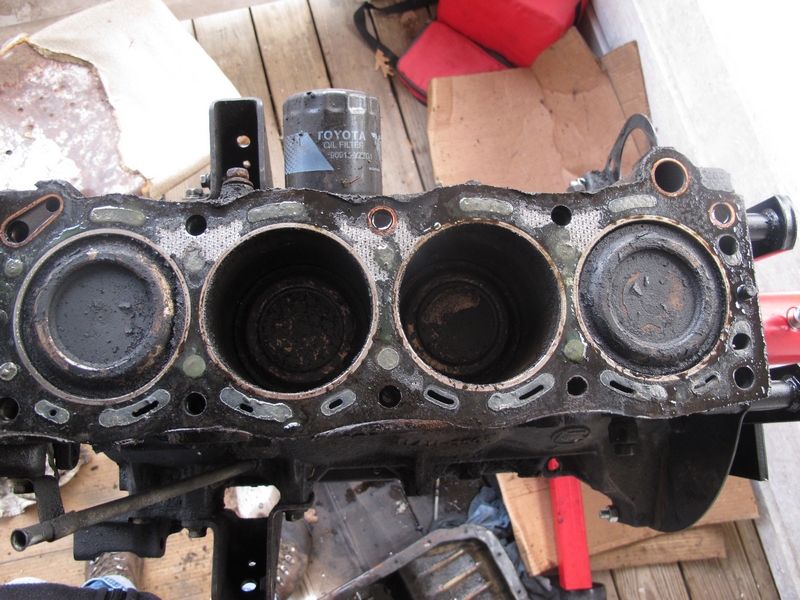
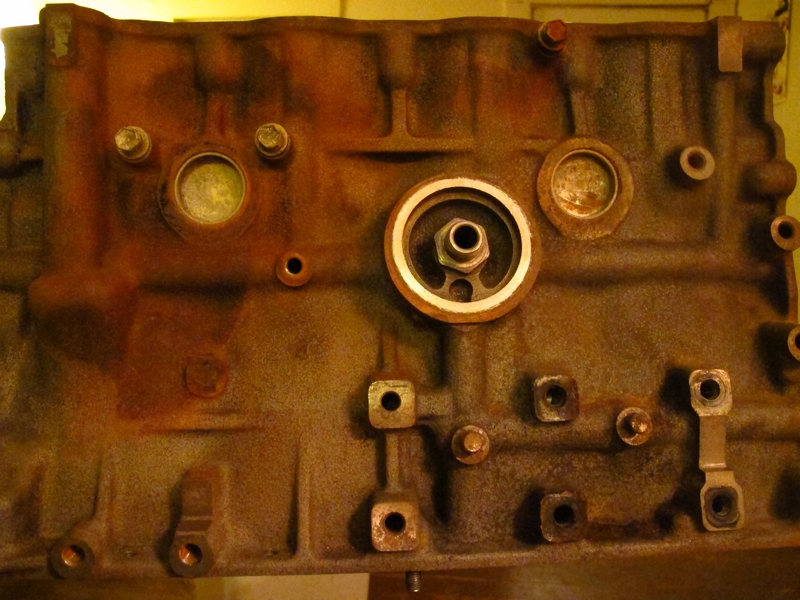
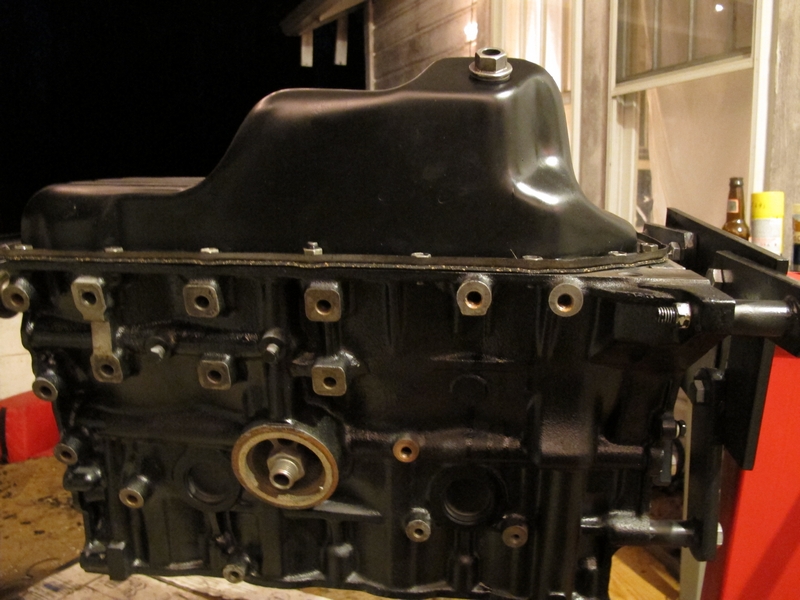
Again, I didn't take pictures of the crank when I got it back, but here is the block, all cleaned up.
For those who are curious, this was the bill at the machine shop:
Clean Block - $40
Hone Block - $30
Grind Crankshaft - $80
Valve Job - $100
Recondition Rods - $40
Grand Total at machine shop - $290

Took it to a great machine shop down the road, and they were able to grind the crankshaft. Things were starting to look good...my goal was to do the rebuild for $1000. With this news, I was pretty sure I could stay within budget!
Again, I didn't take pictures of the crank when I got it back, but here is the block, all cleaned up.

For those who are curious, this was the bill at the machine shop:
Clean Block - $40
Hone Block - $30
Grind Crankshaft - $80
Valve Job - $100
Recondition Rods - $40
Grand Total at machine shop - $290
03-30-2014, 06:08 PM
#7
Registered User
Thread Starter
Join Date: Jan 2014
Location: Asheville, NC
Posts: 11
Likes: 0
Received 0 Likes
on
0 Posts
So that brings us to the beginning of February - and I found a few things to work on inside while I was waiting for warmer weather.
With info from SuperBleeder's thread on the SR5 cluster swap, as well as this thread: on another site, I started working on the stuck odometer.
I guess this little cup is to keep you from tampering with the odometer, I just flattened the edges out so I could get to the clip.
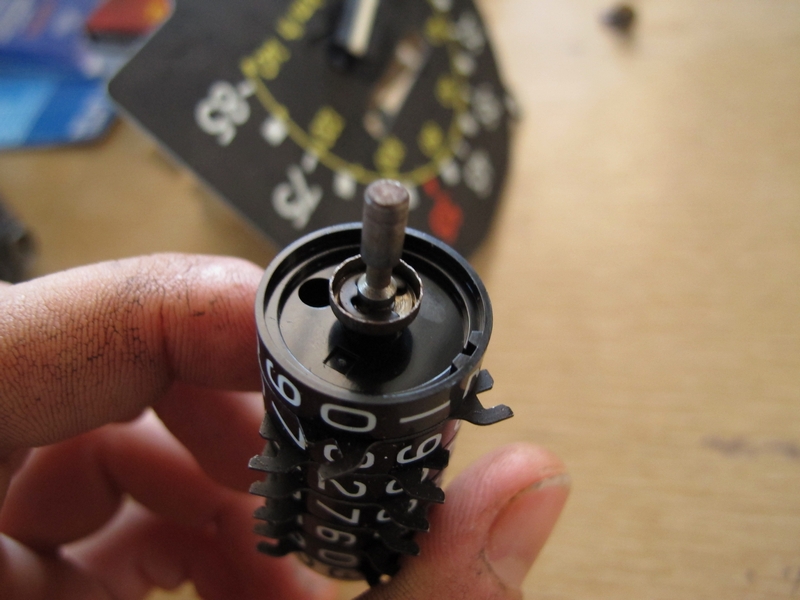
Then pulled apart the wheels and cleaned the little cogs with some solvent and a toothbrush.

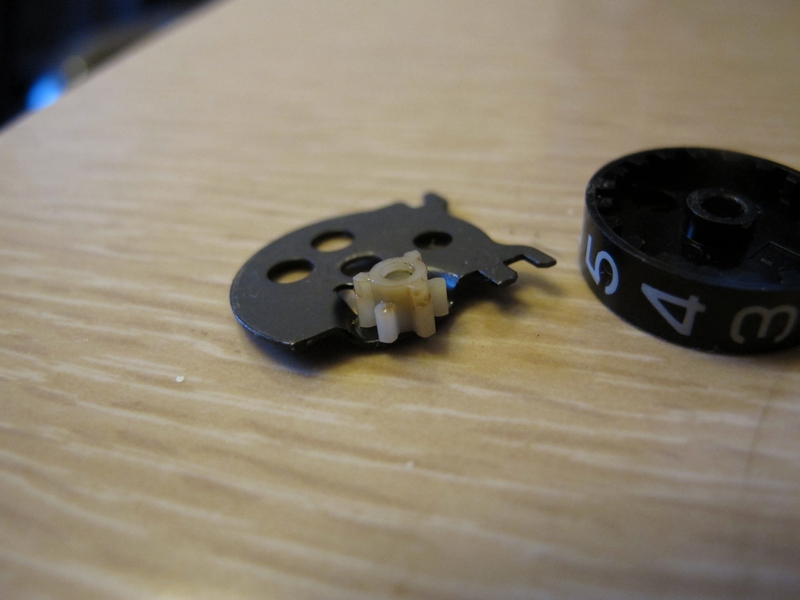
Also cleaned the plastic gears that turn the odometer - wish I had taken more pictures, there was a lot of dried gunk in there! Put some fresh grease in it, and put it all back together (with one or two fingerprints on the faceplate, of course). My dad was pretty psyched when I told him I'd fixed the odometer.
Trending Topics


 03-30-2014, 06:42 PM
#9
Registered User
Thread Starter
Join Date: Jan 2014
Location: Asheville, NC
Posts: 11
Likes: 0
Received 0 Likes
on
0 Posts
Another big fast-forward here. I feel like I spent WEEKS cleaning.

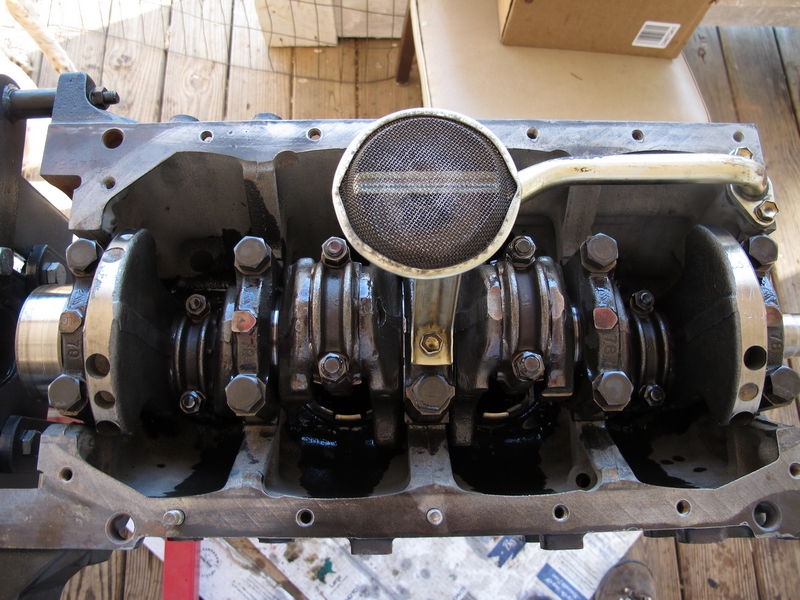
Here's the crankshaft back in the block. I was trying to remember to stop and take pictures!
All bearings in, caps on, and oil strainer (cleaned and) installed.
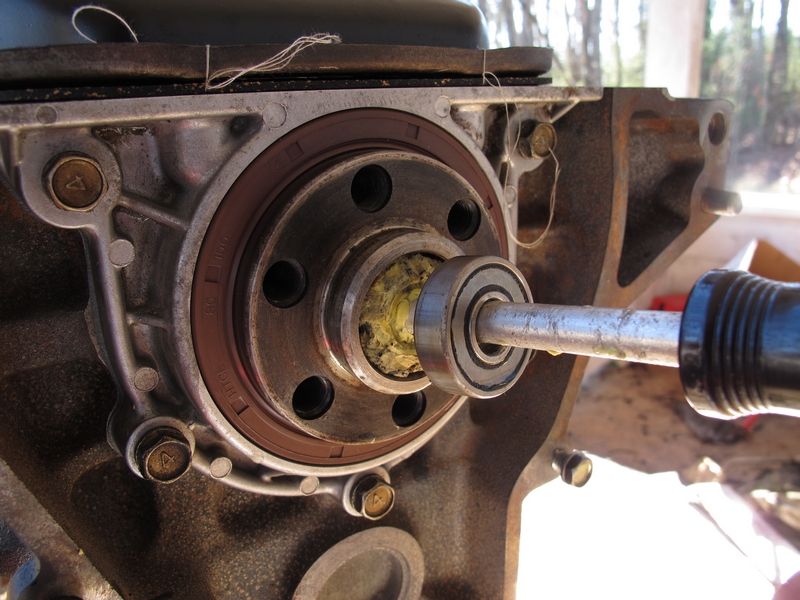
Used the old
to remove the old pilot bearing.
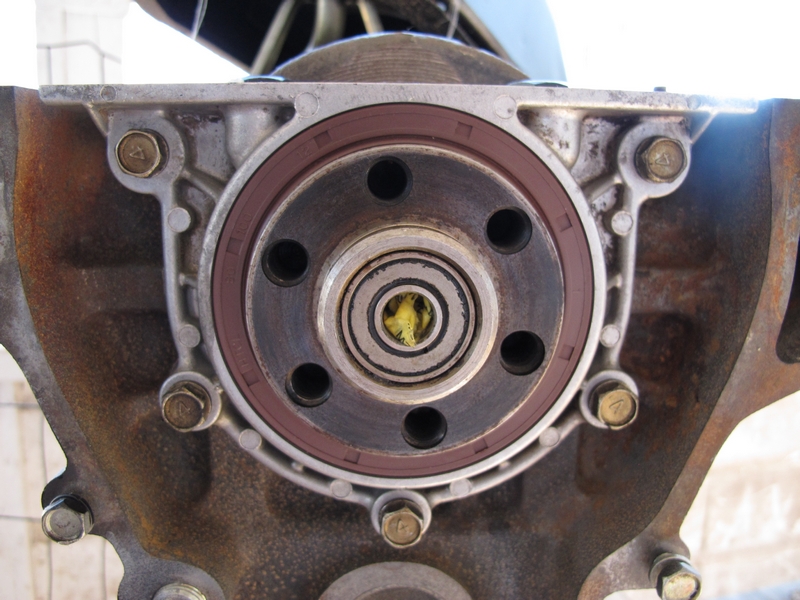
For a while I didn't think it was going to work, but once I got enough paper in there, and found the right sized tool to fill the hole, it popped right out.
http://s1067.photobucket.com/user/ig...ml?sort=2&o=37
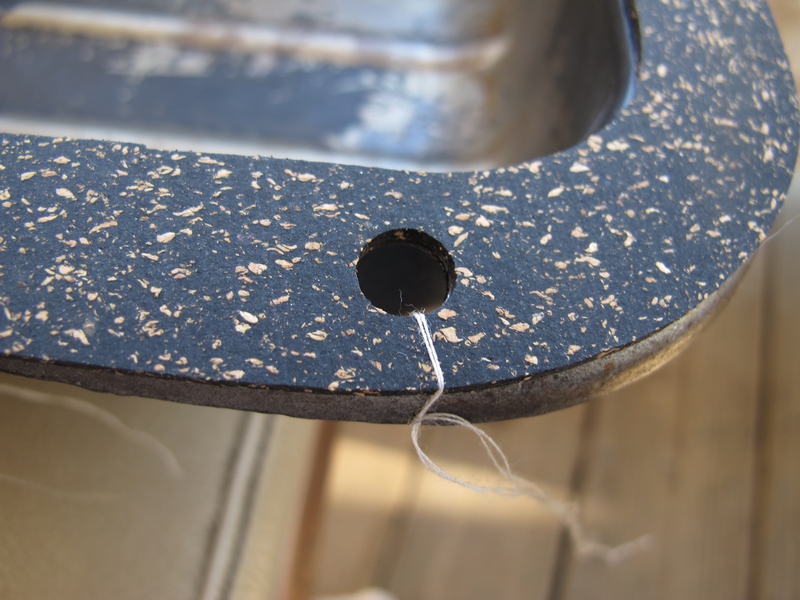
My neighbor taught me this great trick for holding the oil pan gasket in place with sewing thread:
And the pan on:
Almost caught up, will try to get back to posting tomorrow.

Here's the crankshaft back in the block. I was trying to remember to stop and take pictures!

All bearings in, caps on, and oil strainer (cleaned and) installed.

Used the old

For a while I didn't think it was going to work, but once I got enough paper in there, and found the right sized tool to fill the hole, it popped right out.
http://s1067.photobucket.com/user/ig...ml?sort=2&o=37

My neighbor taught me this great trick for holding the oil pan gasket in place with sewing thread:

And the pan on:

Almost caught up, will try to get back to posting tomorrow.
Last edited by IGotTheTime; 03-30-2014 at 06:44 PM.
03-30-2014, 06:46 PM
#10
Registered User
Thread Starter
Join Date: Jan 2014
Location: Asheville, NC
Posts: 11
Likes: 0
Received 0 Likes
on
0 Posts
Great story and it looks like you live in a really nice place, my type of place! If you have the interest, you'll see that no job is too hard on these things, plenty of room to work on everything.
And the sound you were hearing might be timing chain slap, they sound like the worse mecanical noise once they grind on the timing cover. It would be worth it to remove the timing cover and check, if the engine ran good everything there can be replaced and she would be good to go again keeping its original engine.
And the sound you were hearing might be timing chain slap, they sound like the worse mecanical noise once they grind on the timing cover. It would be worth it to remove the timing cover and check, if the engine ran good everything there can be replaced and she would be good to go again keeping its original engine.
03-31-2014, 04:53 AM
#12
Registered User
Join Date: Jan 2011
Location: Memphis, TN
Posts: 1,051
Likes: 0
Received 0 Likes
on
0 Posts
This little truck has potential! I like it. And I like your persistence with that naaaasty engine. What did you do to clean it? Wire wheel, wire brush, kitchen rags, sponge? I've cleaned a little, but I've never seen anything that horrendously unclean.
03-31-2014, 05:27 PM
#14
Registered User
Thread Starter
Join Date: Jan 2014
Location: Asheville, NC
Posts: 11
Likes: 0
Received 0 Likes
on
0 Posts
Ha! Pressure washer, degreaser, rags, wire brush, toothbrush, wire cup brush for the exhaust manifold, a tiny flat head screwdriver to chip off some of the carbon on the pistons...and then, of course, the machine shop cleaned up the head and the block. I don't know what they do to make that sludge melt away, but it's magic. I actually still need to wipe down that alternator...dang, forgot all about it.
03-31-2014, 05:48 PM
#15
Registered User
Thread Starter
Join Date: Jan 2014
Location: Asheville, NC
Posts: 11
Likes: 0
Received 0 Likes
on
0 Posts

Thread
Thread Starter
Forum
Replies
Last Post
FS[PacSouthWest]: 2- 8"3rd members:4.88 ratchet lockers,new setup kit, rear axle rebuild kit,diff armor
jerusry
Axles - Suspensions - Tires - Wheels
1
10-19-2015 05:28 PM


