
Tims 1990 4Runner 5-speed 1JZ engine swap guide
 Feb 16, 2012 | 12:37 PM
#1
Thread Starter
Registered User
Joined: Nov 2011
Posts: 49
Likes: 7
From: Annapolis, MD
Tims 1990 4Runner 5-speed 1JZ engine swap guide
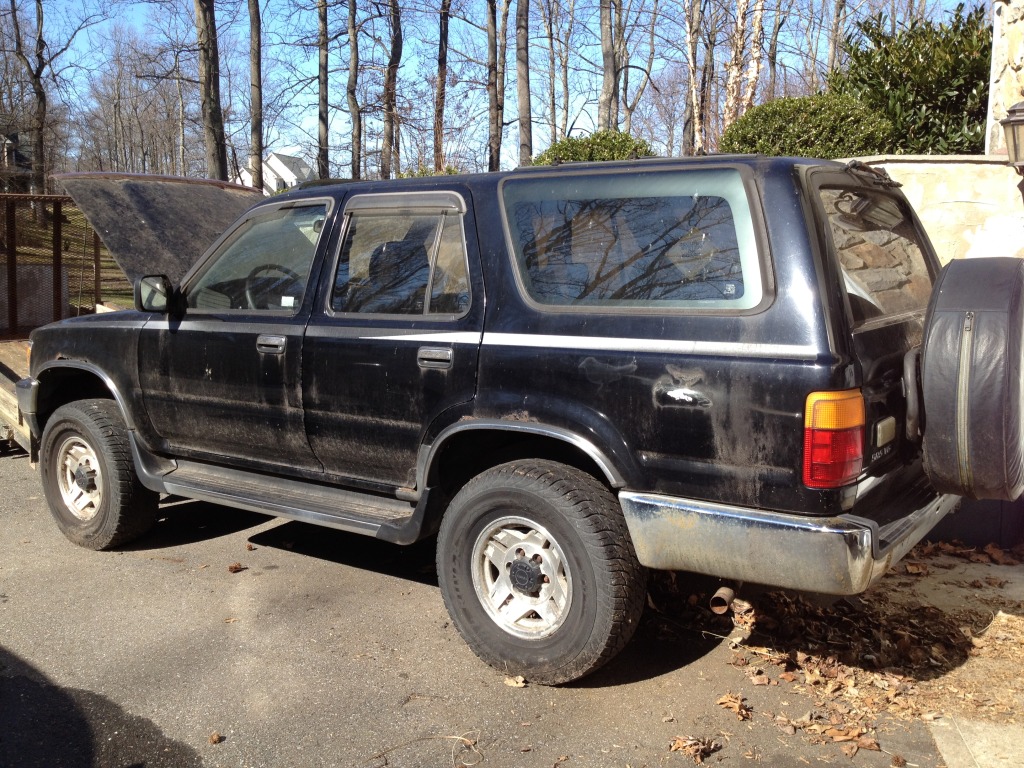
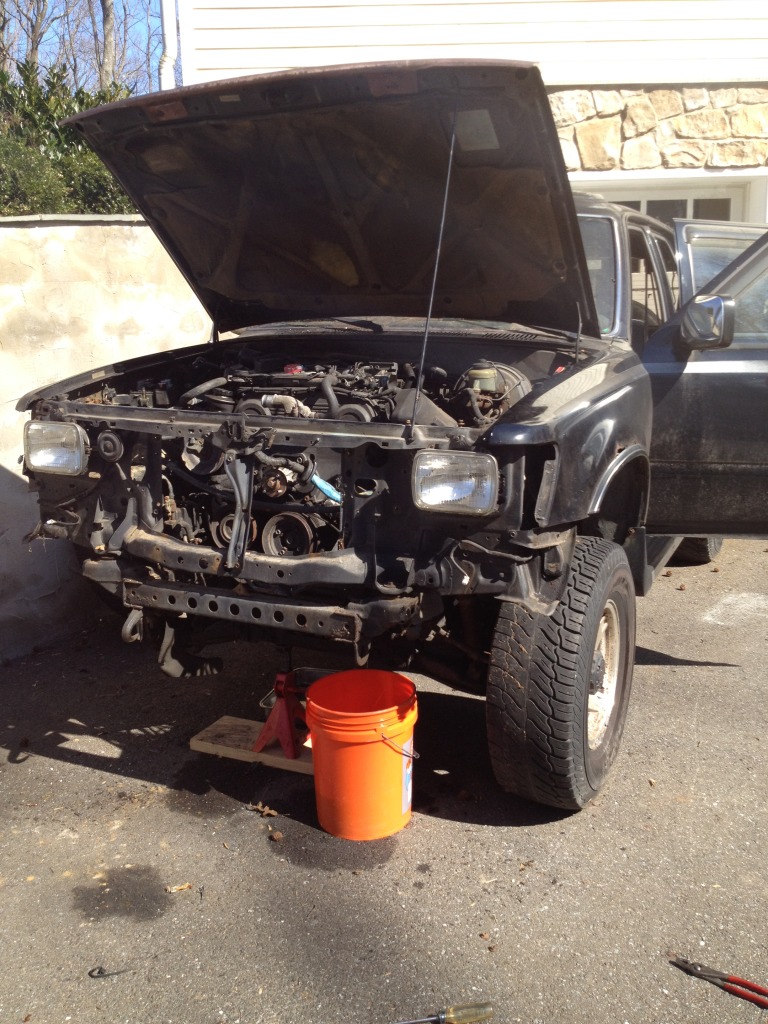
Hi everyone, my name is Tim and I recently bought a 1990 4Runner for $300 with blown headgaskets on the stock and very tired 3vz. The only reason I bought the car was because it is a 5-speed with the R150F. The frame is not as badly rusted out as you would expect from an old Toyota truck that has been sitting for the past 2 years. Given that I have a history with Toyota Supras and have completed numerous 1JZ swaps into MK3 Supras; I have decided that rather than try to salvage the 270k, 150hp, ˟˟˟˟ for gas millage, V6, I am going to swap in a 1JZ from a Toyota Chaser JZX90. I’ve gathered a lot of parts and knowledge and am hoping that this thread will answer many questions people may have about this type of engine swap.
Here’s my truck…
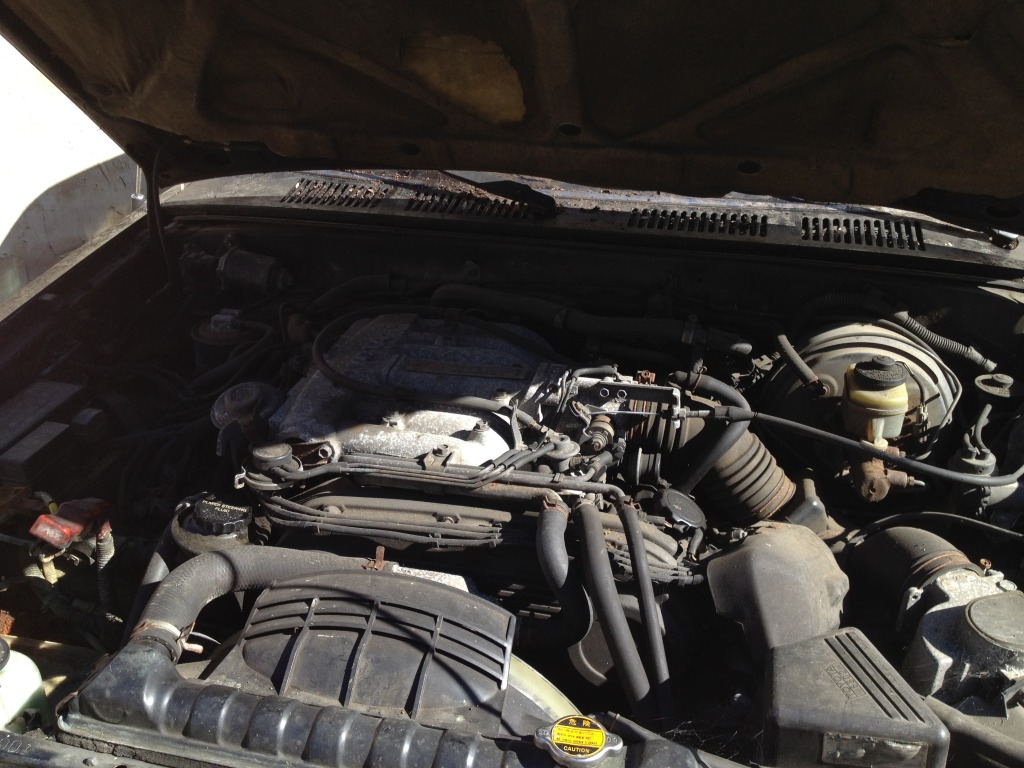
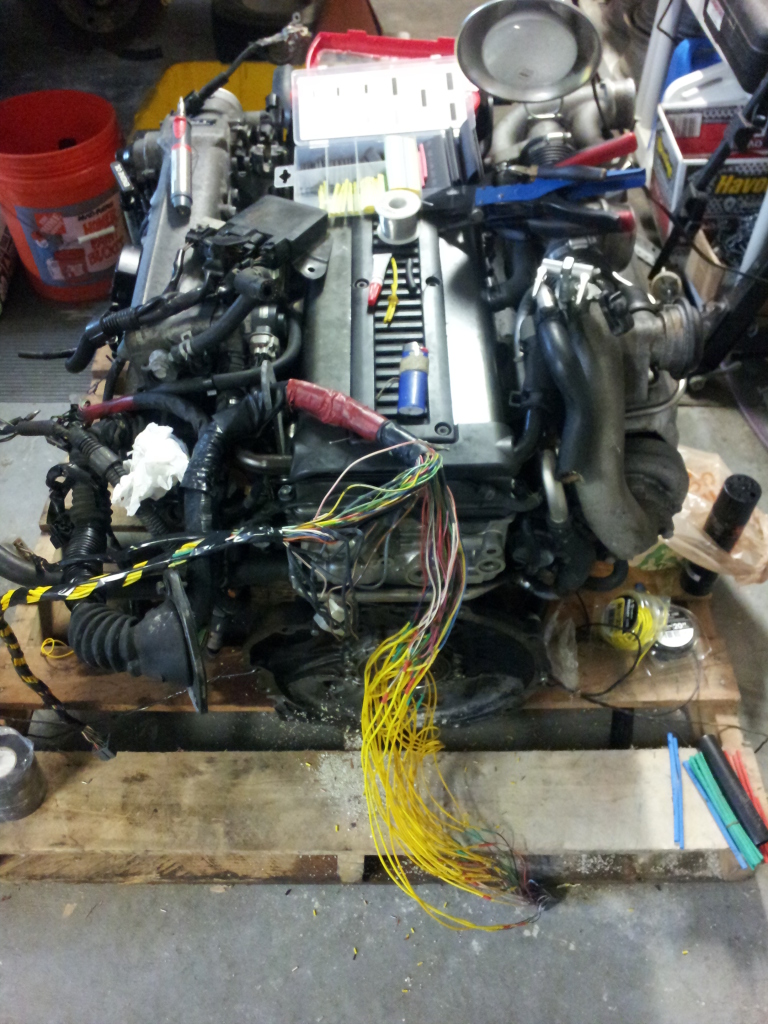
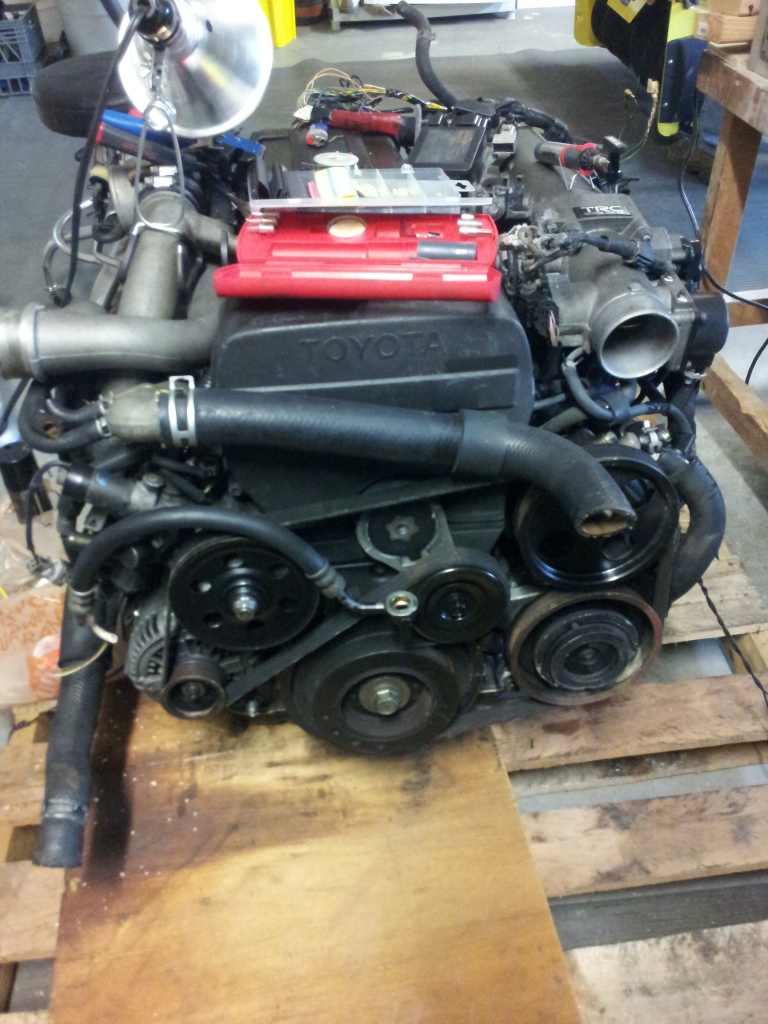
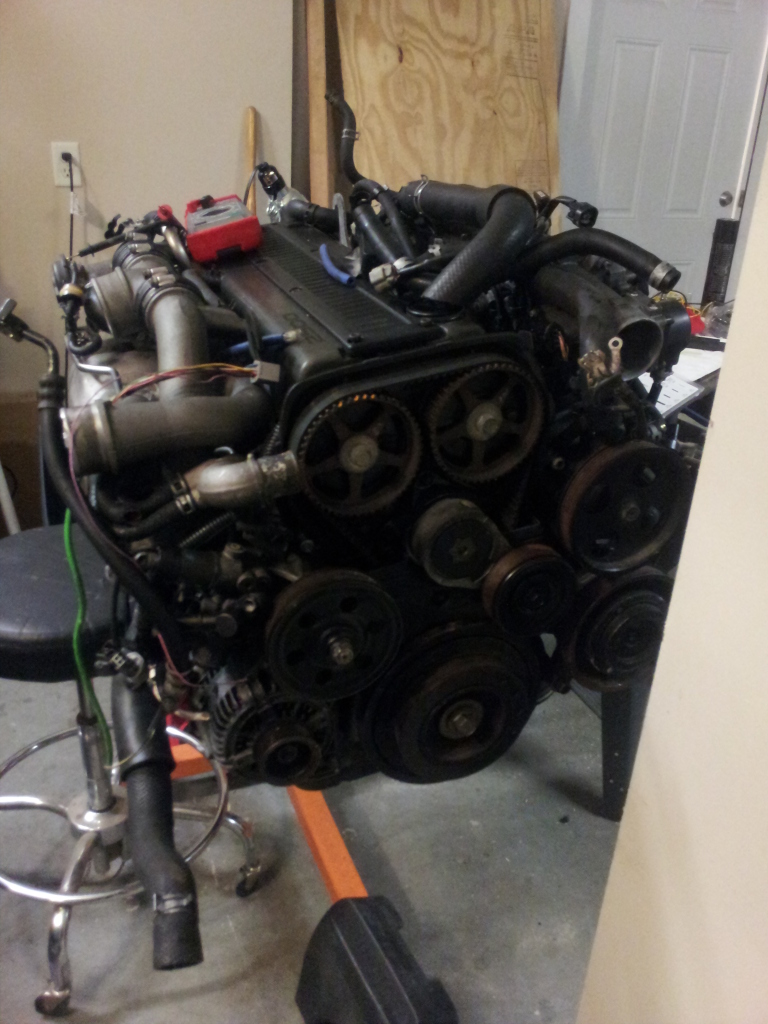
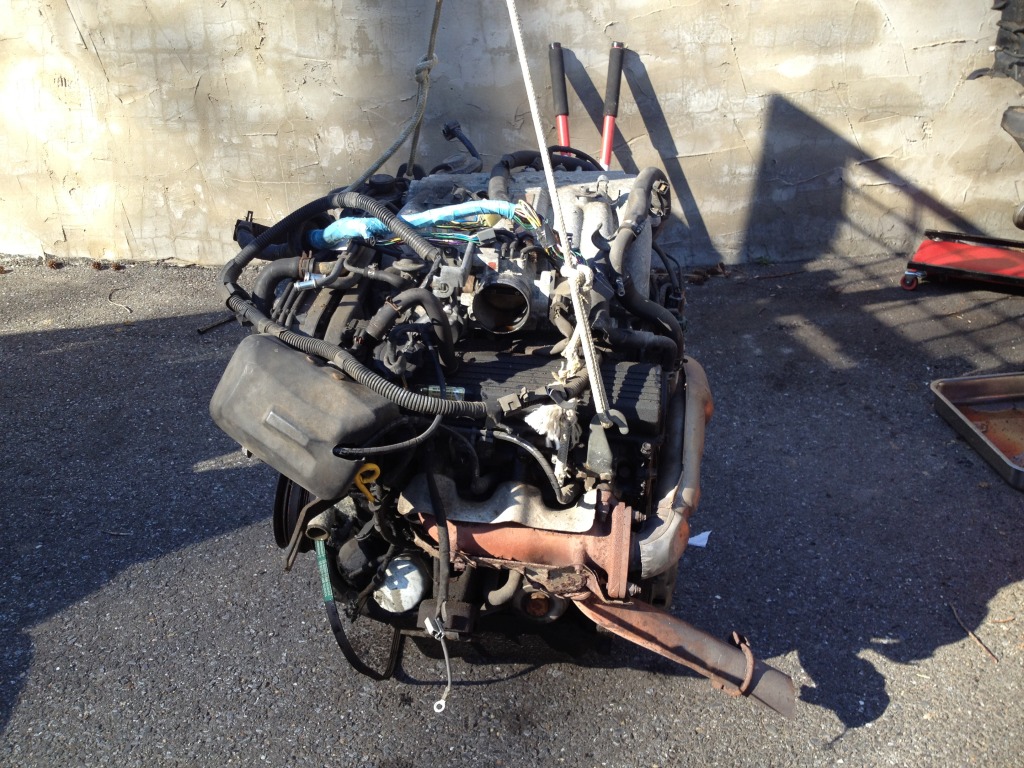
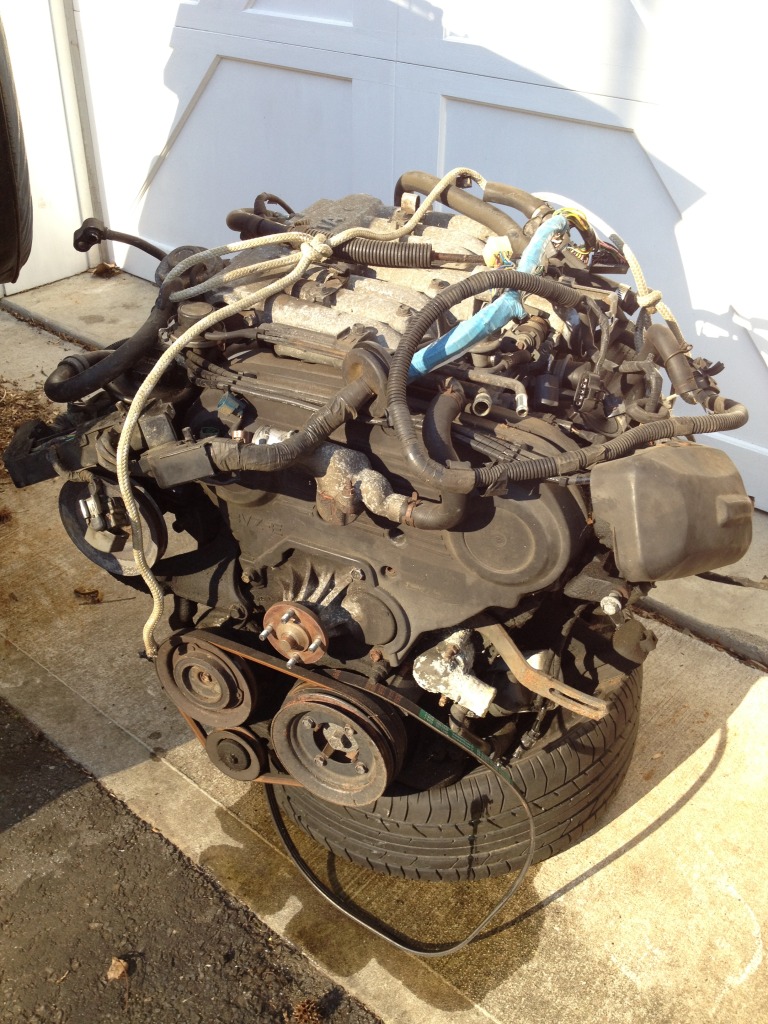
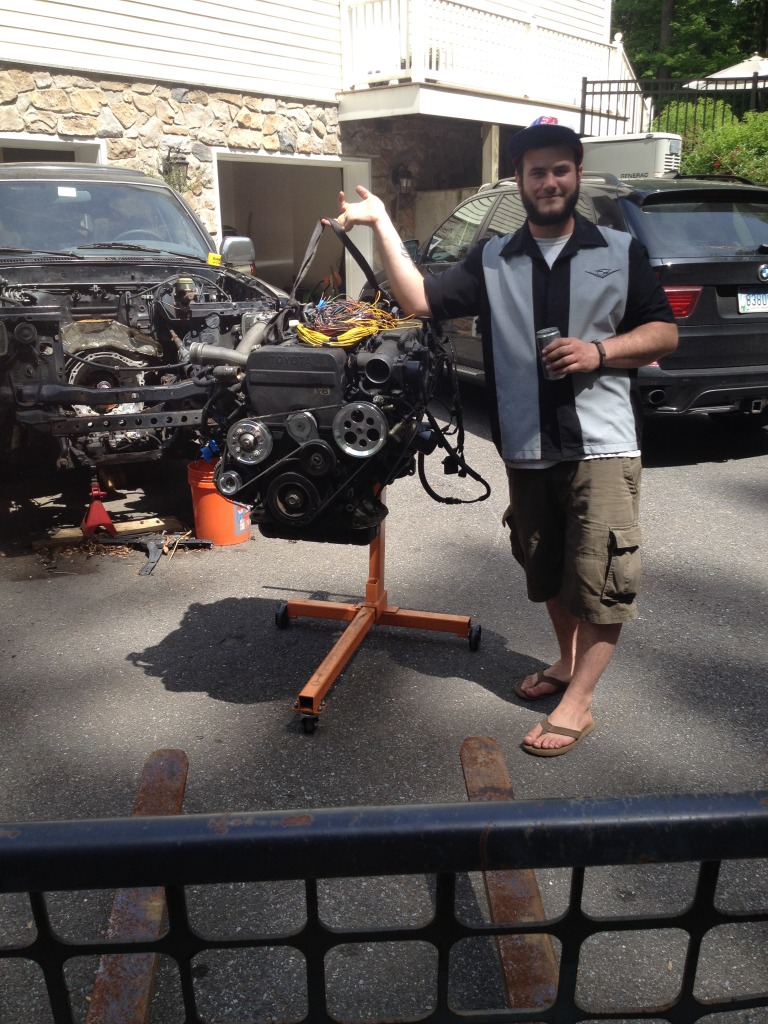
And on to the fun stuff! I bought a 1JZ from a Toyota Chaser JZX90 on eBay for $1400 shipped. It came with the complete wiring harness, ECU, Map sensor, Igniter, and complete engine…obviously. The most import thing here is that it be FRONT SUMP oil pan in order to clear the front differential. While the engine is on the engine stand in my garage…and it still is there, I decided it would be a good time to replace the spark plugs, coil pack connectors (they get very brittle), rear main seal, front main seal, cam seals, waterpump, thermostat, timing belt, timing belt tensioner and roller, serpentine belt, serpentine belt tensioner and a few of the pulleys I replaced with billet aluminum pulleys. Oh and I sourced all these engine parts from driftmotion.com, they are an awesome resource.
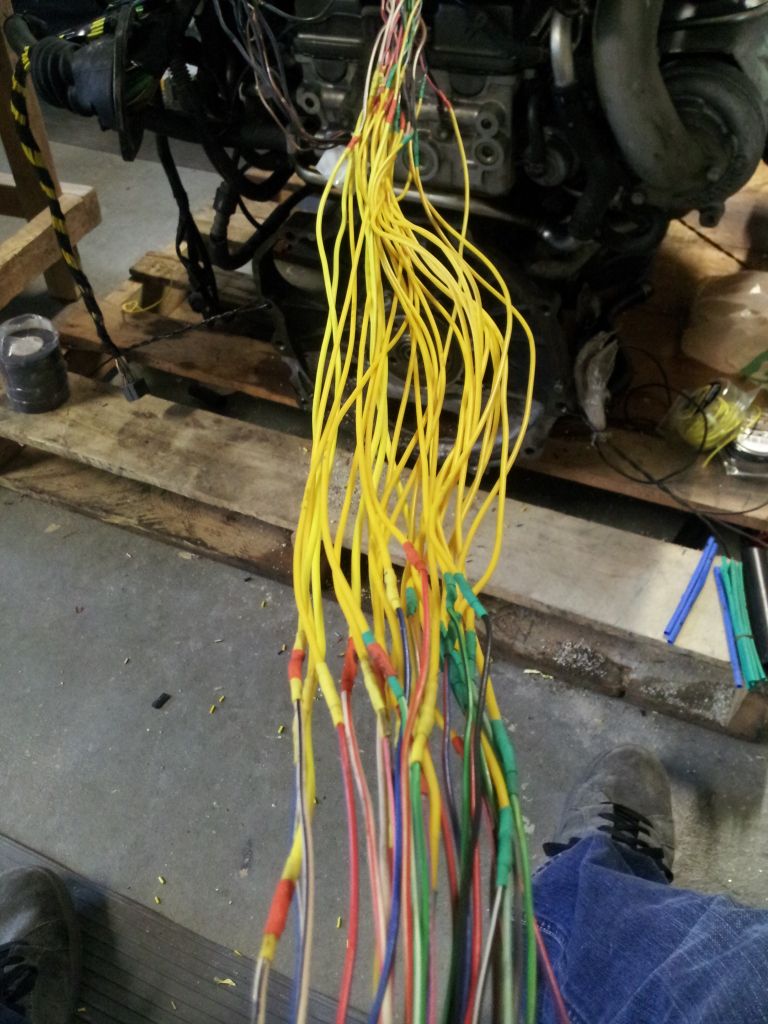
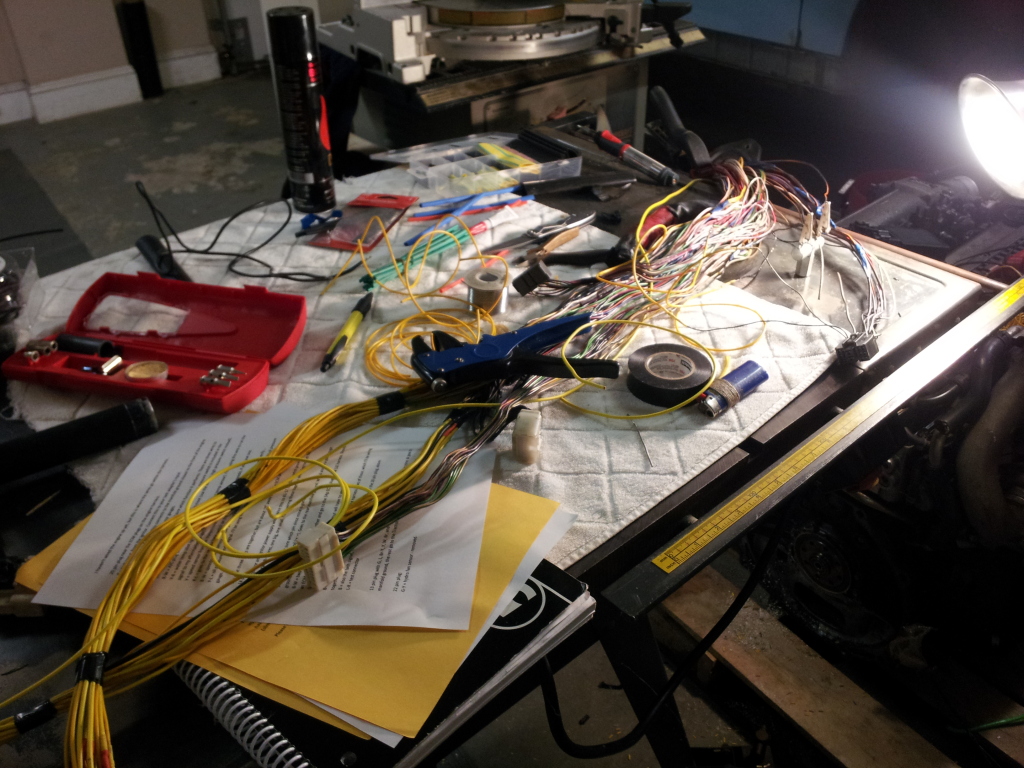
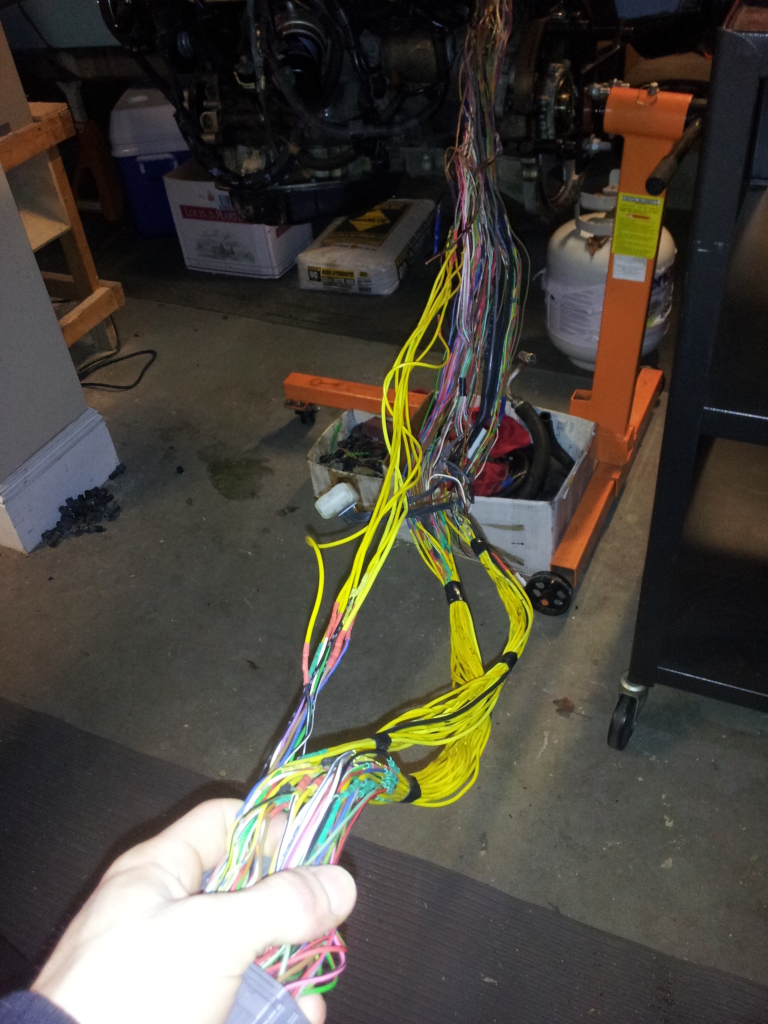
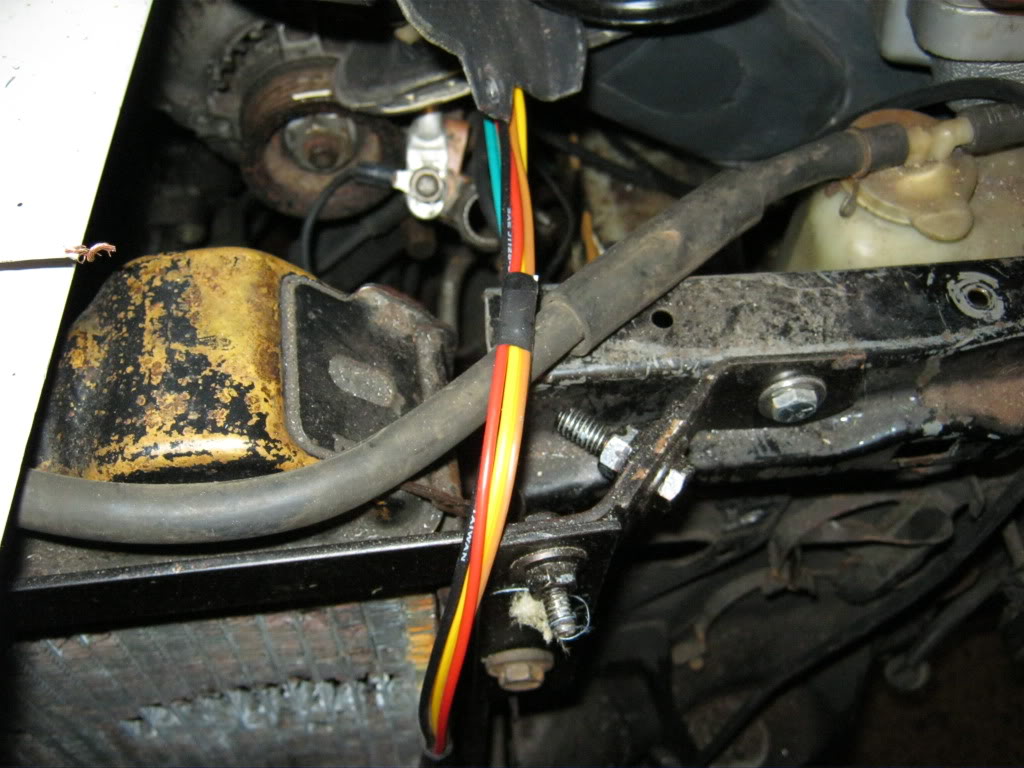
Because the 1JZ was only produced in Japan, it was only used in Right Hand Drive cars. This means the wiring harness had to be extended by 18” in order for the ECU to be mounted in the stock location of the 4Runner. I did all this and ill post up much more information on all things wiring related later.
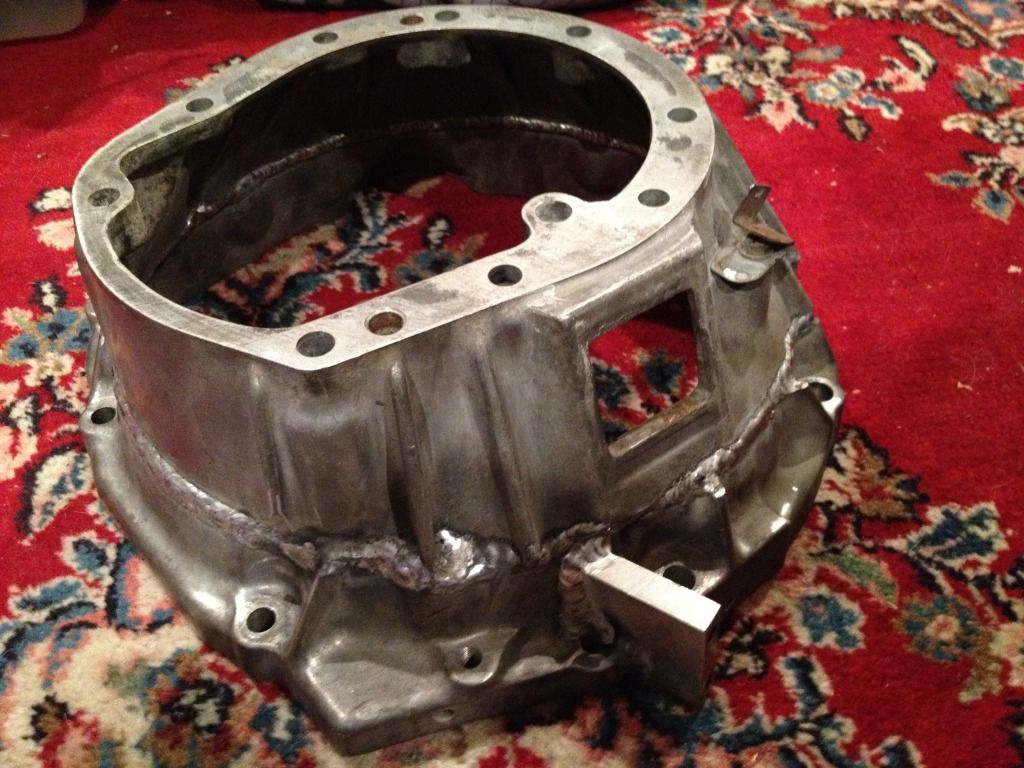
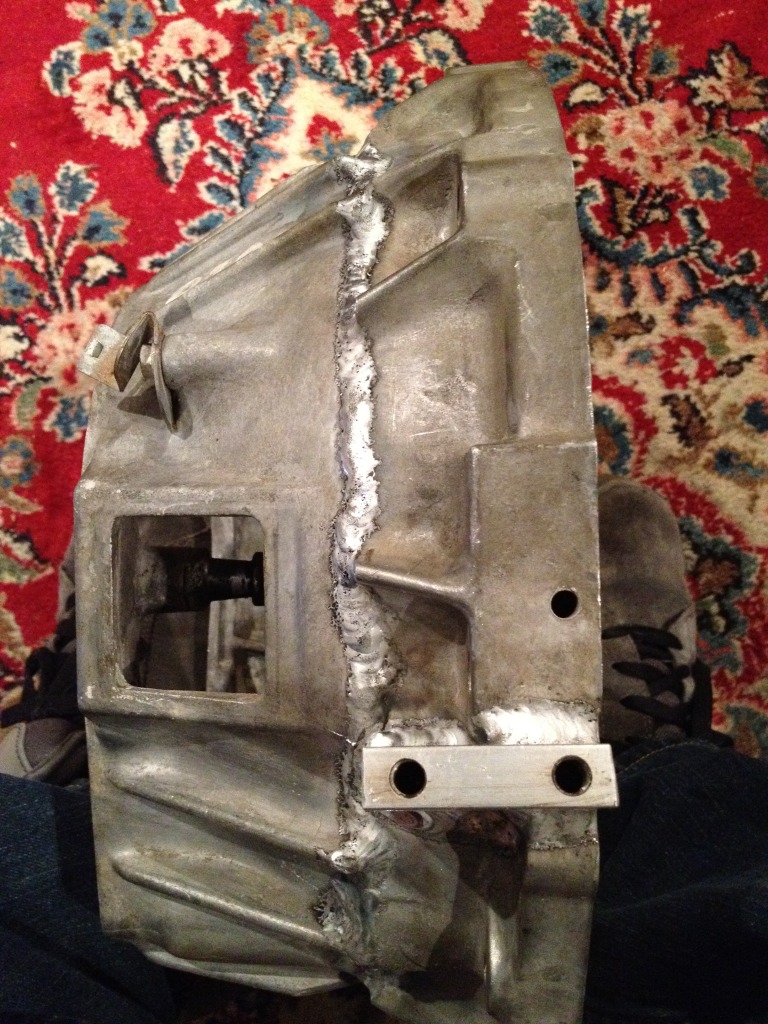
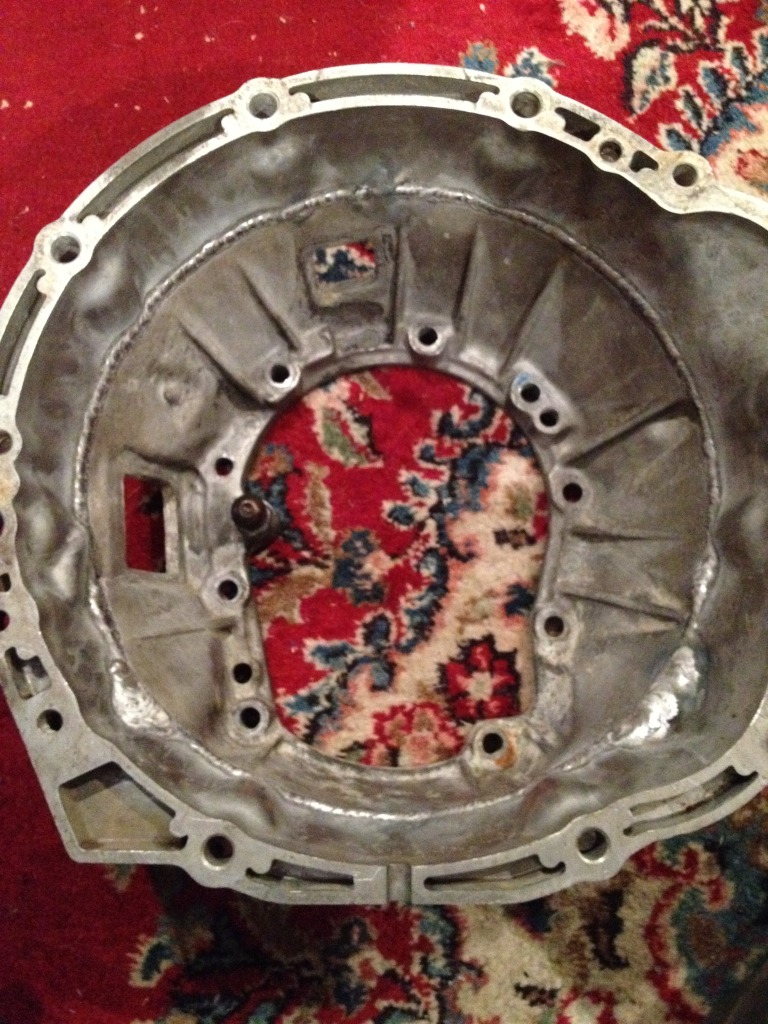
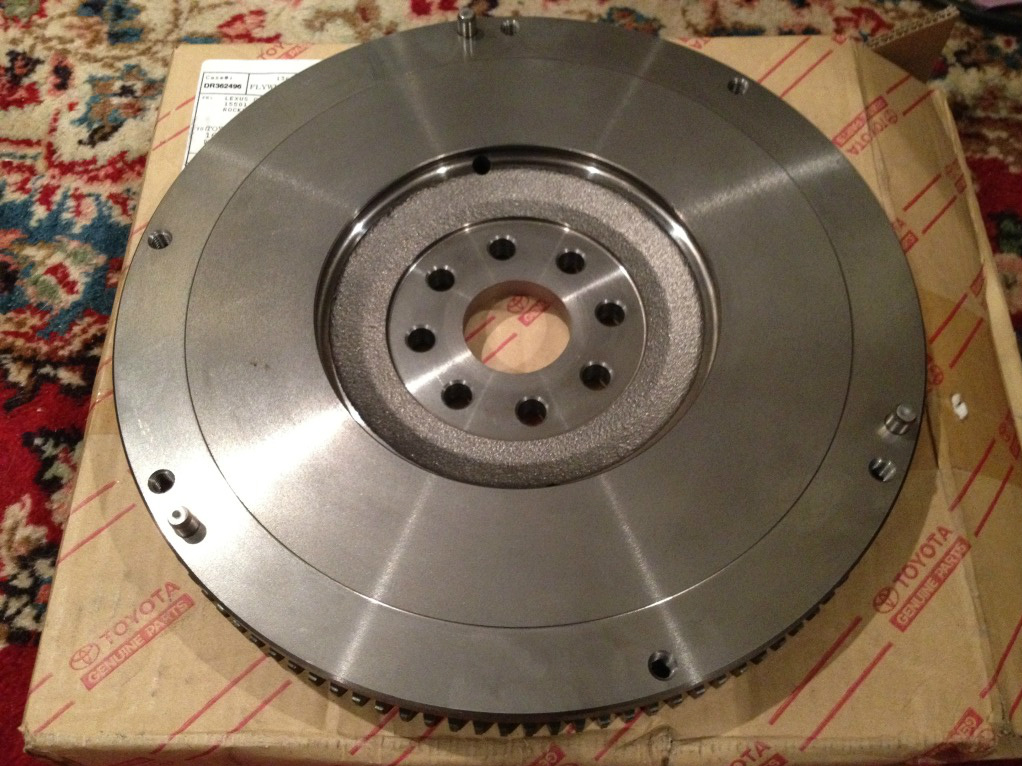
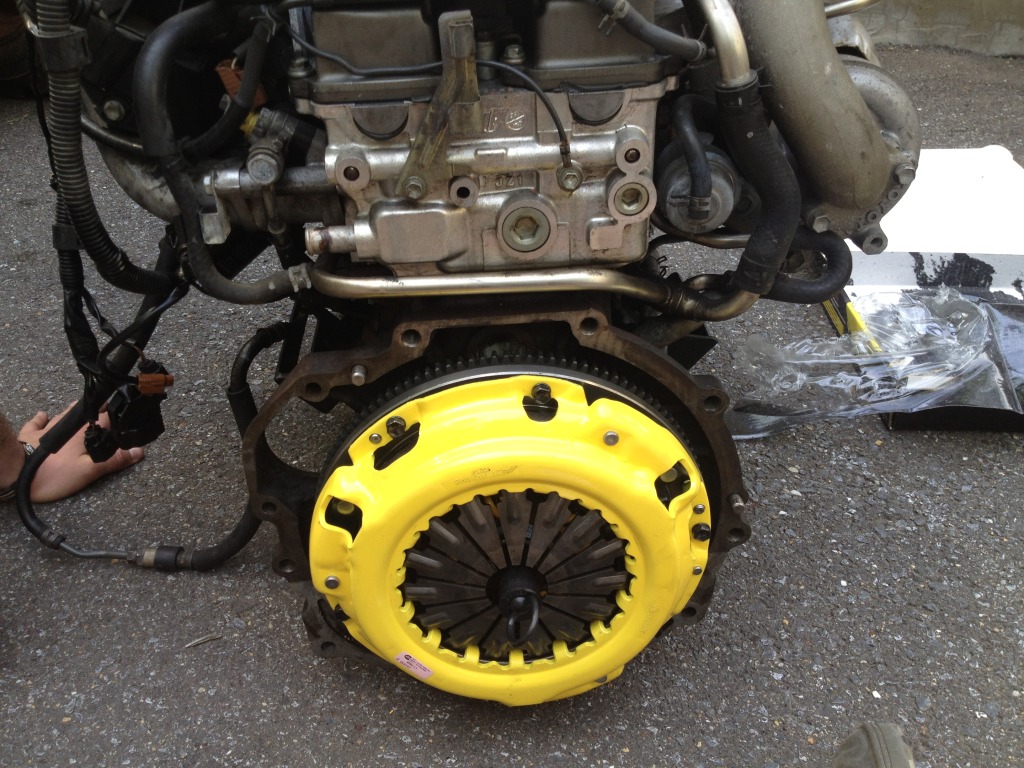
It seems that the biggest hurdle with this swap is the issue of mating the 1JZ/2JZ engine to the R150 transmission. There are a few solutions to this issue and the one I decided to use was to have a bellhousing made. The 1JZ engine was offered in Japan in the 89-92 Toyota Supra and was mated to the R154 rear wheel drive transmission. The R150 and R154 share the same bell housing side bolt pattern but the input shafts are different lengths, thus not allowing you to use a standard 1JZ/R154 bellhousing from Toyota. The R150F input shaft is roughly 30mm shorter than the R154. To overcome this I got in contact with a member on Supraforums that posted his 2JZ-4Runner swap and made his jig for this bellhousing. For $500 he made me a bellhousing that was the correct length to mate the Supra engine to the 4Runner transmission. Due to the smaller bellhousing I has limited to using a clutch from a NON-TURBO MK4 Supra, a W58 clutch if you will. I bought a new Toyota W58 Flywheel, ARP bolts and a ACT Extreme pressure plate utilizing a full face street/strip clutch disc for easy engagement. With this combination, you will use the W58 flywheel, clutch, pressure plate, throwout/release bearing, and pilot bearing. You will still use the R150F clutch fork, master and slave cylinder.
That’s what I’ve got for pictures as of now. Ill update with more pictures and information tonight and as this project progresses!
Here’s my truck…
And on to the fun stuff! I bought a 1JZ from a Toyota Chaser JZX90 on eBay for $1400 shipped. It came with the complete wiring harness, ECU, Map sensor, Igniter, and complete engine…obviously. The most import thing here is that it be FRONT SUMP oil pan in order to clear the front differential. While the engine is on the engine stand in my garage…and it still is there, I decided it would be a good time to replace the spark plugs, coil pack connectors (they get very brittle), rear main seal, front main seal, cam seals, waterpump, thermostat, timing belt, timing belt tensioner and roller, serpentine belt, serpentine belt tensioner and a few of the pulleys I replaced with billet aluminum pulleys. Oh and I sourced all these engine parts from driftmotion.com, they are an awesome resource.
Because the 1JZ was only produced in Japan, it was only used in Right Hand Drive cars. This means the wiring harness had to be extended by 18” in order for the ECU to be mounted in the stock location of the 4Runner. I did all this and ill post up much more information on all things wiring related later.
It seems that the biggest hurdle with this swap is the issue of mating the 1JZ/2JZ engine to the R150 transmission. There are a few solutions to this issue and the one I decided to use was to have a bellhousing made. The 1JZ engine was offered in Japan in the 89-92 Toyota Supra and was mated to the R154 rear wheel drive transmission. The R150 and R154 share the same bell housing side bolt pattern but the input shafts are different lengths, thus not allowing you to use a standard 1JZ/R154 bellhousing from Toyota. The R150F input shaft is roughly 30mm shorter than the R154. To overcome this I got in contact with a member on Supraforums that posted his 2JZ-4Runner swap and made his jig for this bellhousing. For $500 he made me a bellhousing that was the correct length to mate the Supra engine to the 4Runner transmission. Due to the smaller bellhousing I has limited to using a clutch from a NON-TURBO MK4 Supra, a W58 clutch if you will. I bought a new Toyota W58 Flywheel, ARP bolts and a ACT Extreme pressure plate utilizing a full face street/strip clutch disc for easy engagement. With this combination, you will use the W58 flywheel, clutch, pressure plate, throwout/release bearing, and pilot bearing. You will still use the R150F clutch fork, master and slave cylinder.
That’s what I’ve got for pictures as of now. Ill update with more pictures and information tonight and as this project progresses!
Last edited by suppra87; Feb 16, 2012 at 12:44 PM.

 Feb 27, 2012 | 09:04 AM
#3
Thread Starter
Registered User
Joined: Nov 2011
Posts: 49
Likes: 7
From: Annapolis, MD
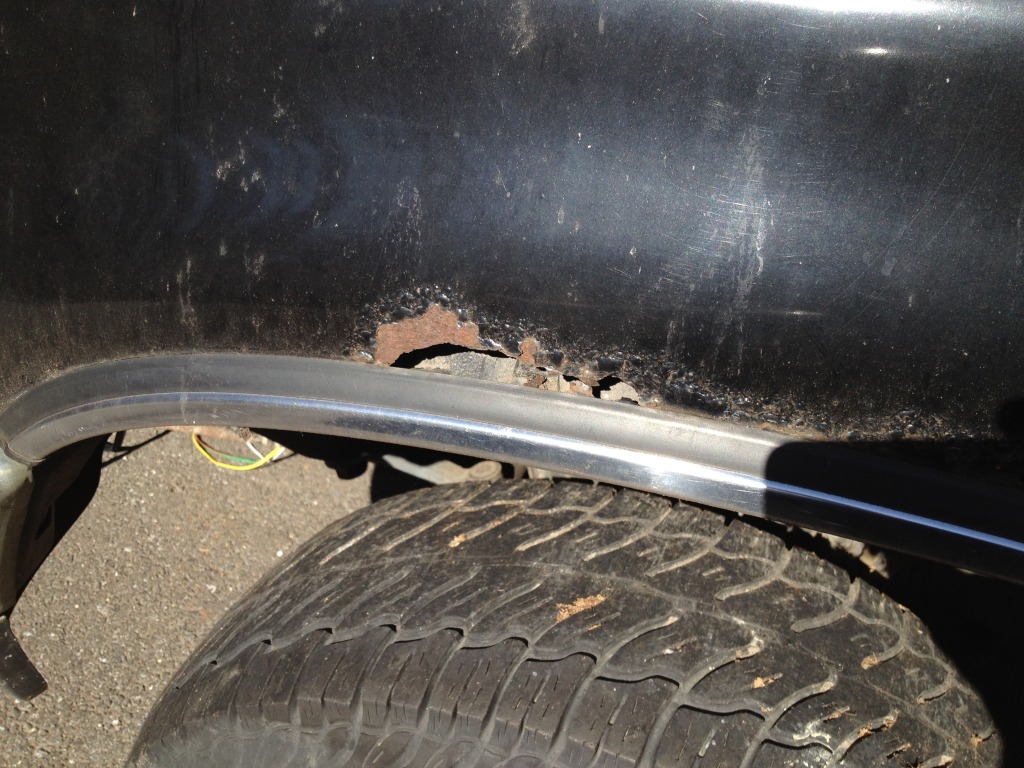
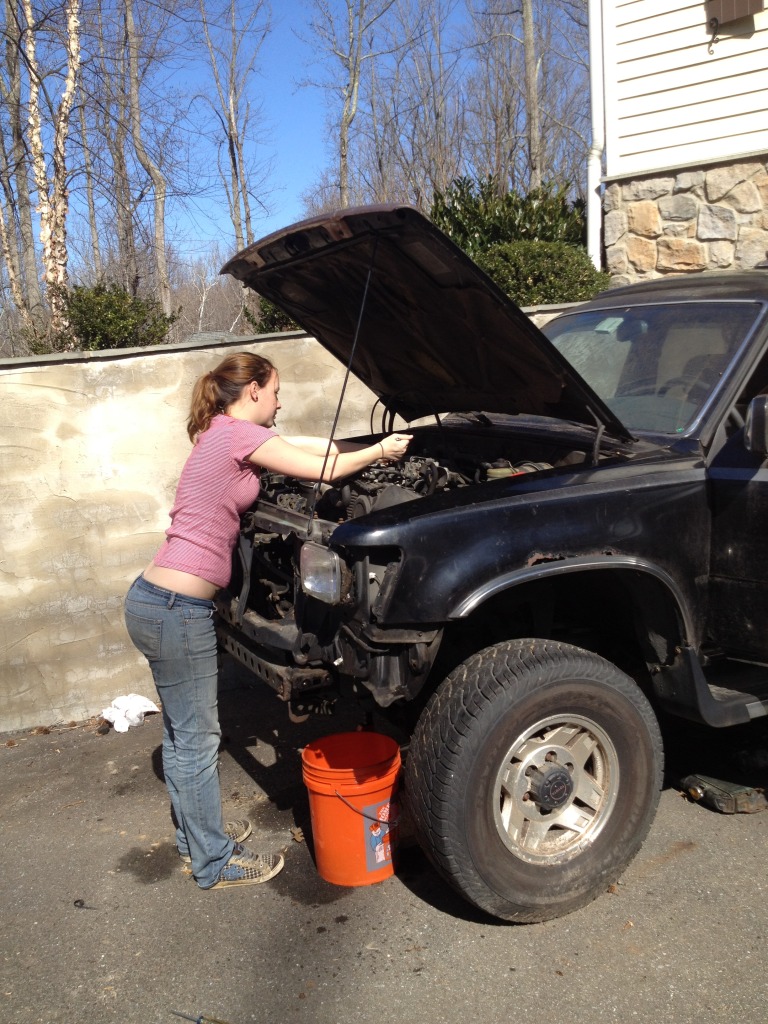
This weekend I was able to pull the 3.slow out in one piece. I thought it would be easier to leave the transmission in the truck and just pull the engine. And I even got my girlfriend to help turn some wrenches. I was really impressed too; she took the whole front end off, unbolted the motor mounts and removed the AC components by herself with very little instruction!
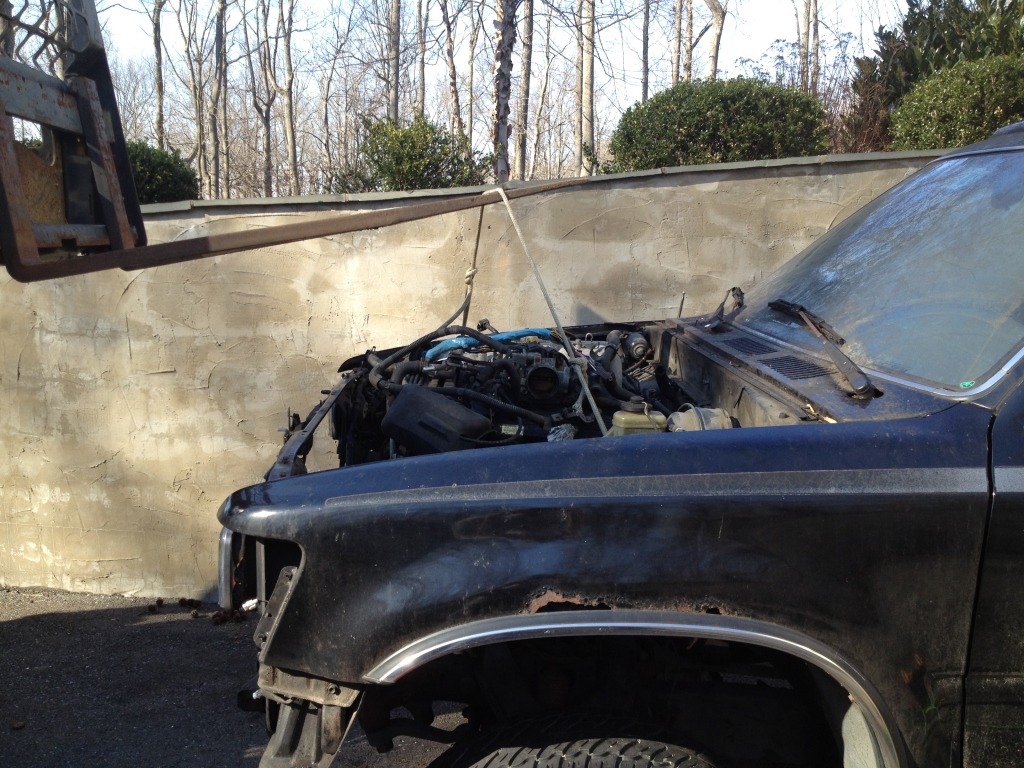
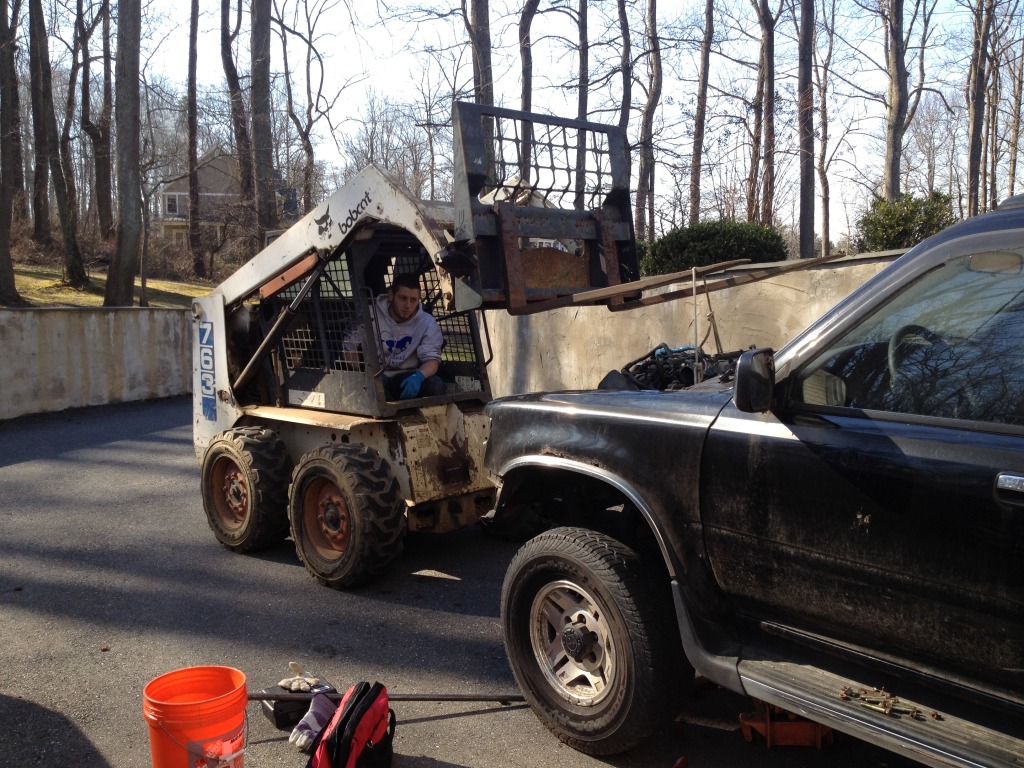
Logistics for borrowing my shops engine crane were complicated so I decided to just use a bobcat to pull the engine. The bobcat engine pull was incredibly easy and painless, ill have to use this method more often!
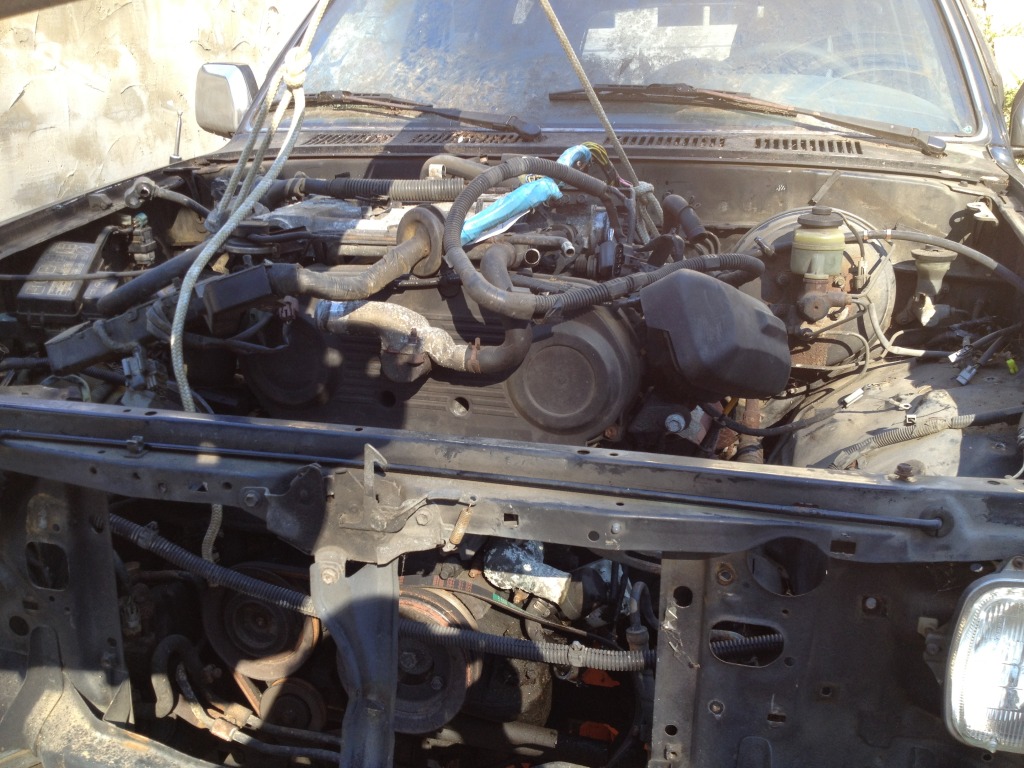
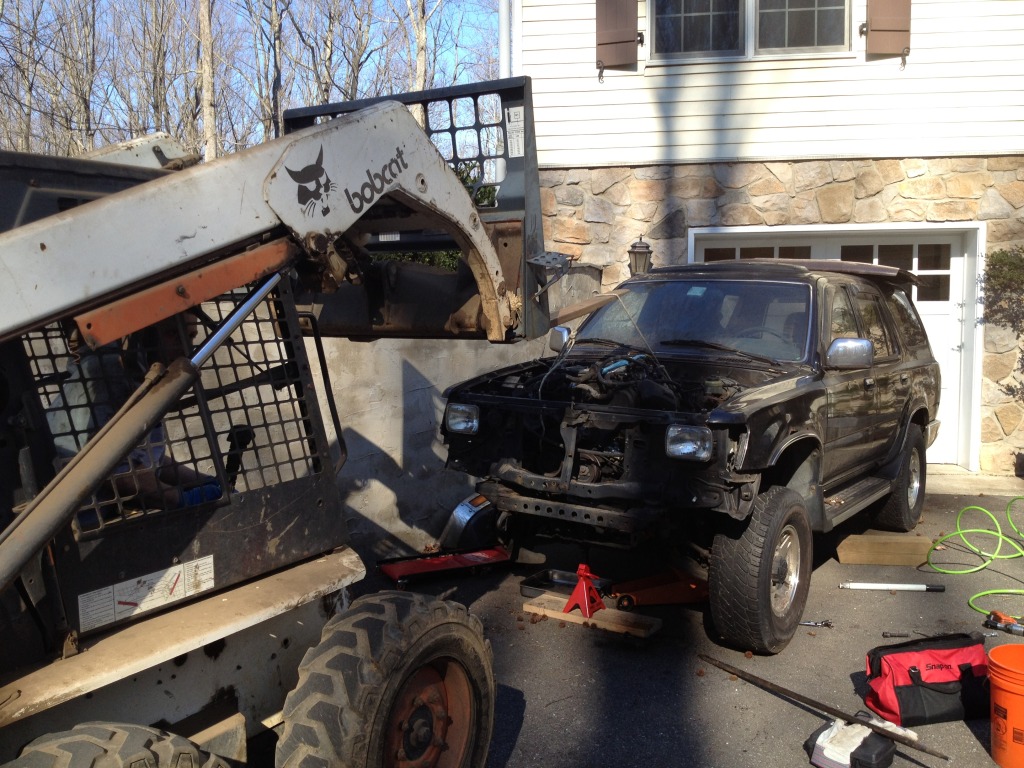
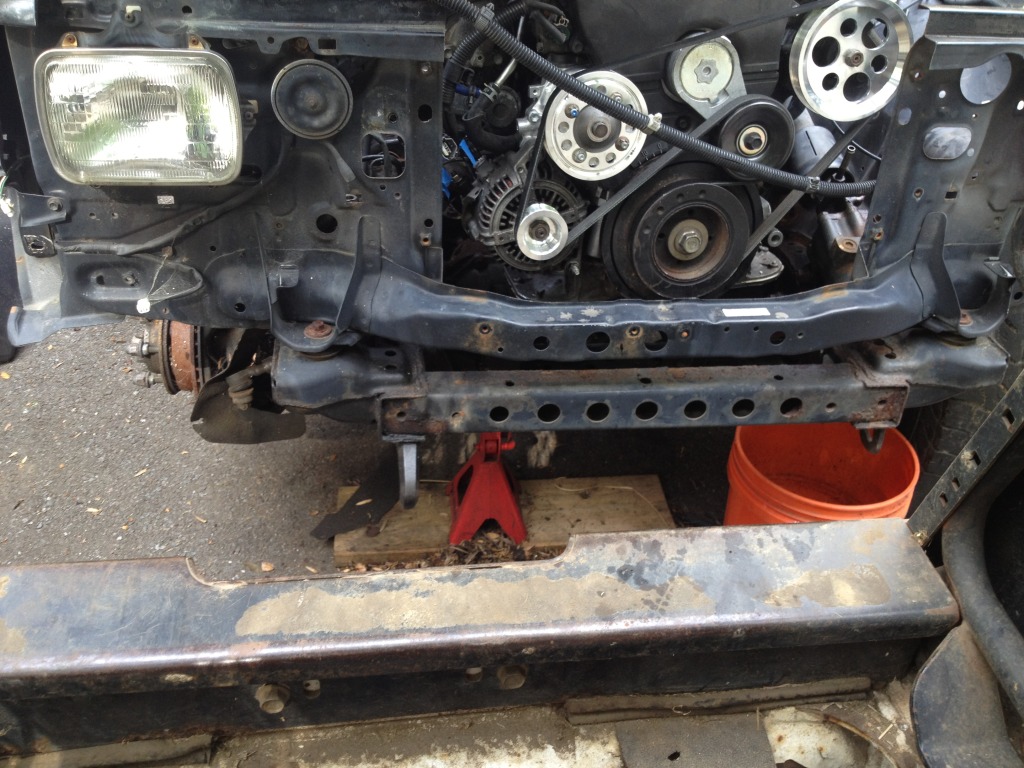
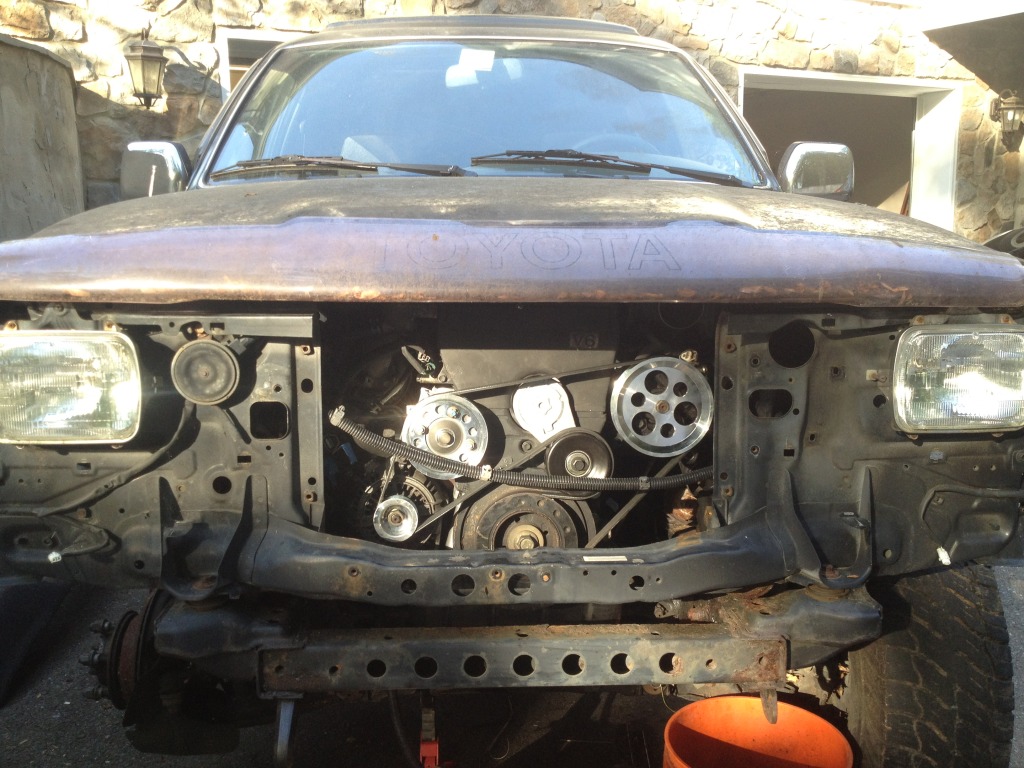
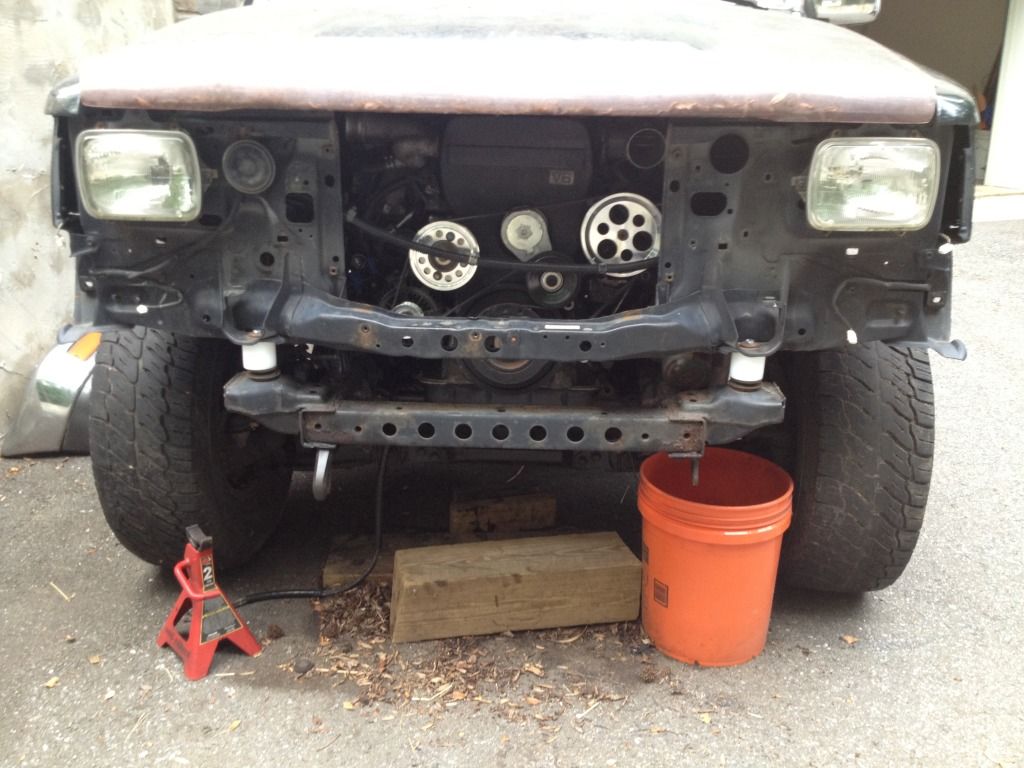
Today I got the chance to give the engine bay a nice cleaning. Nice and clean, ready for the 1JZ.
Anyone interested in buying the 3.0 with 270k on it? Its got at least one blown head gasket and is 90% complete. $200 OBO

Logistics for borrowing my shops engine crane were complicated so I decided to just use a bobcat to pull the engine. The bobcat engine pull was incredibly easy and painless, ill have to use this method more often!
Today I got the chance to give the engine bay a nice cleaning. Nice and clean, ready for the 1JZ.
Anyone interested in buying the 3.0 with 270k on it? Its got at least one blown head gasket and is 90% complete. $200 OBO
Mar 9, 2012 | 05:59 AM
#4

Registered User

Joined: Feb 2007
Posts: 63
Likes: 0
There was a guy in FLA whose web page is gone (I saved it locally, he was Cronius here) who put one in and took the rwd trans from the 1j and combined it with the back bits from the 4wd trans to make one that fit both the engine and truck...in that I like the idea of this swap and might want to try it after I get my 7mge out of the shop and on the road, would that not have been the easier solution?
Mar 9, 2012 | 06:55 AM
#5
Thread Starter
Registered User
Joined: Nov 2011
Posts: 49
Likes: 7
From: Annapolis, MD
I've read about swapping the tail shaft from the R150 into the R154 supra transmission to overcome the input shaft length issue and still retain 4WD. I decided against it for a couple of reasons. Its really just another way, a good way at that, to make this swap work. I decided against it and instead had a custom bell housing welded because it was much less expensive, meant I didn't have to pull the trans out of the 4runner, and meant I didn't have to disassemble 2 transmissions. Plus I wanted to keep the r150 gear ratios. Swapping the tail housing would mean that I'd be stuck with R154 ratios.
Mar 10, 2012 | 02:40 AM
#6
Registered User
Joined: Feb 2007
Posts: 63
Likes: 0
Fair enough...are you going to use the BIC mounts? They are made for a 2wd swap, but might make mounting easier.
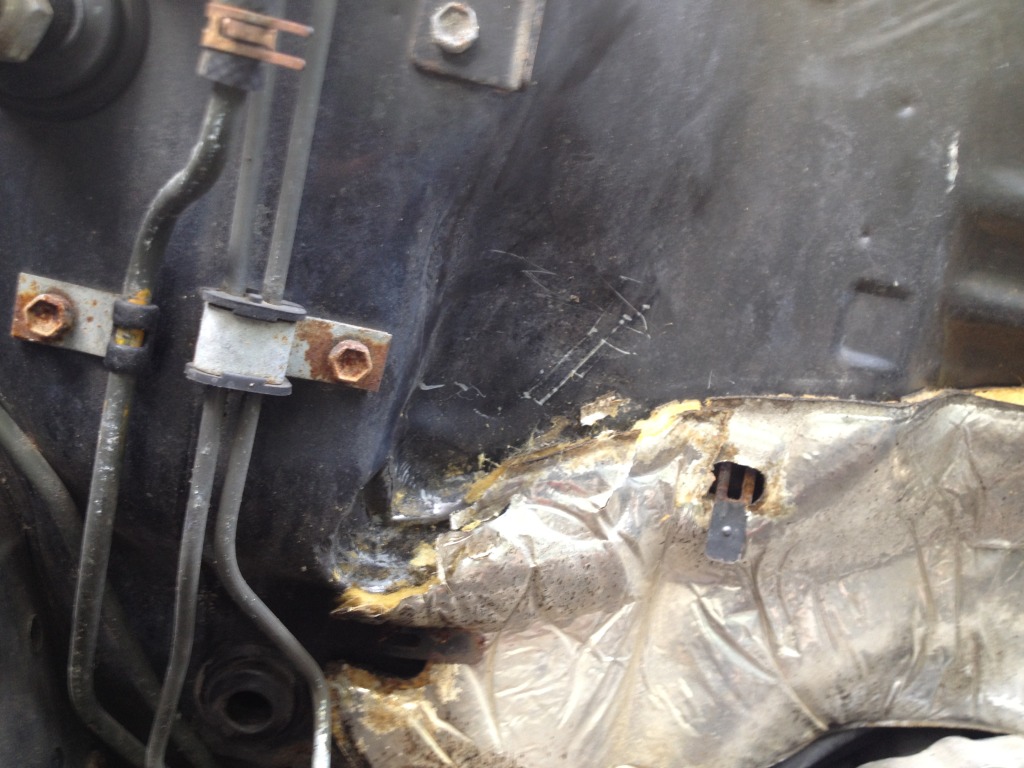
Also interested in your rad mounting...I trimmed the mounts for the grille, cut out the top of the rad support and put a 3-cored stock rad in front, using the ac bolts in through the front of the rad into the stock holes. Then I bent up some flat bar from the rad support across the front of the rad to carry the front of the bolts and reduce the strain on the original holes.
Also interested in your rad mounting...I trimmed the mounts for the grille, cut out the top of the rad support and put a 3-cored stock rad in front, using the ac bolts in through the front of the rad into the stock holes. Then I bent up some flat bar from the rad support across the front of the rad to carry the front of the bolts and reduce the strain on the original holes.
Mar 13, 2012 | 02:03 AM
#7
Thread Starter
Registered User
Joined: Nov 2011
Posts: 49
Likes: 7
From: Annapolis, MD
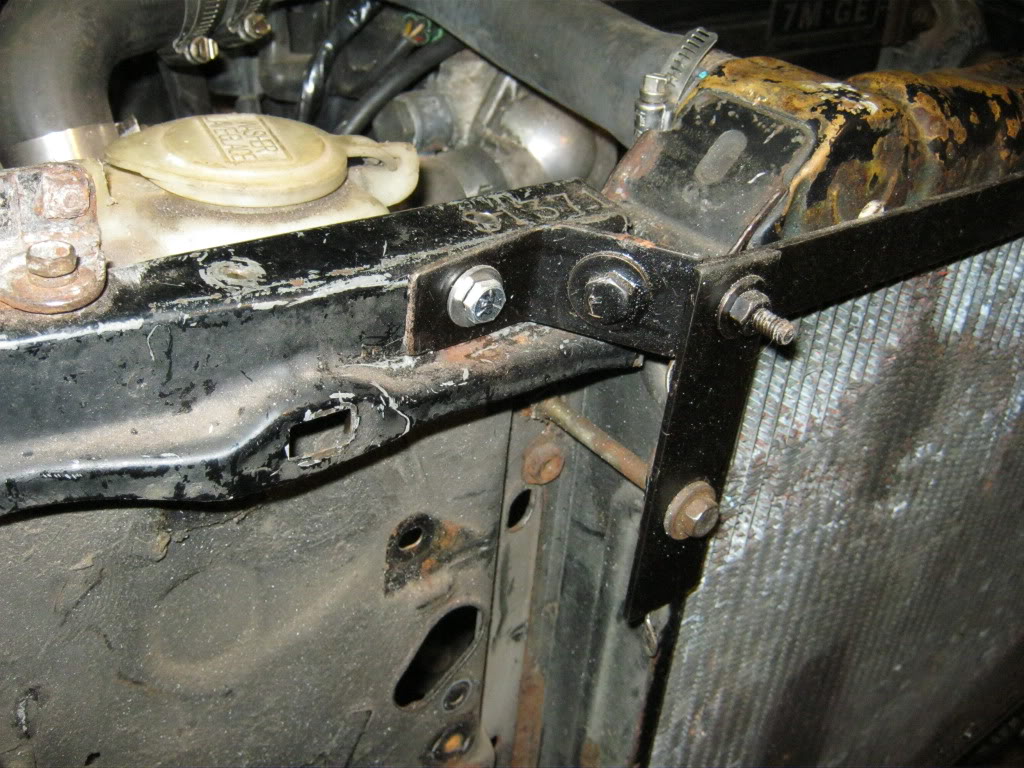
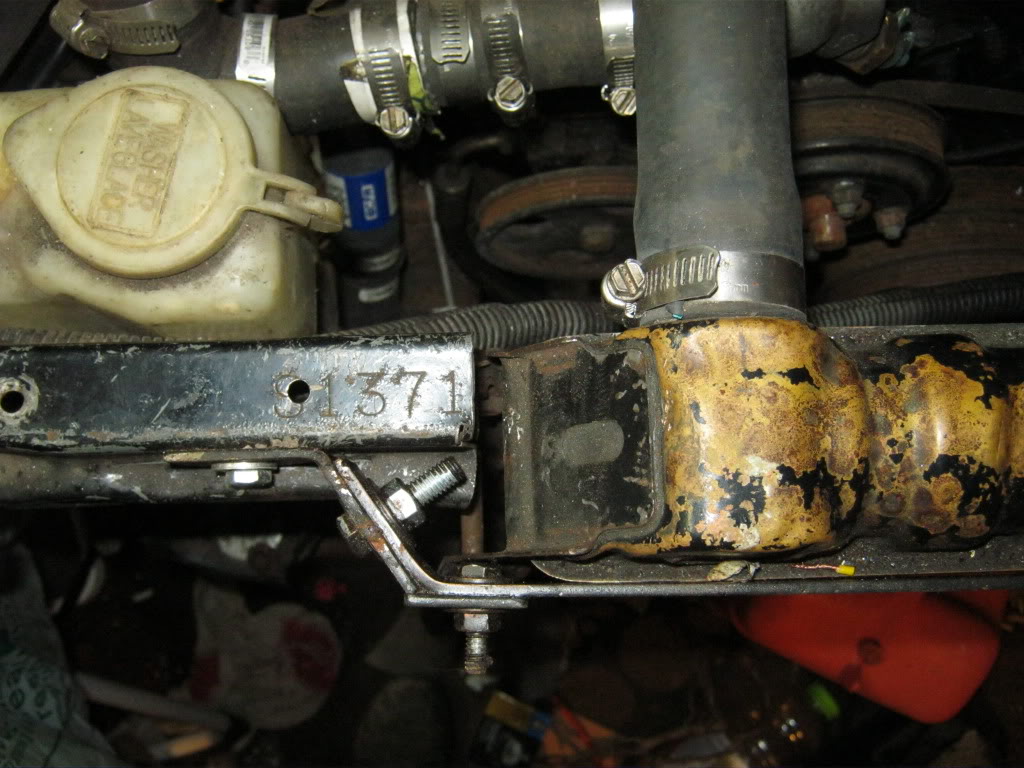
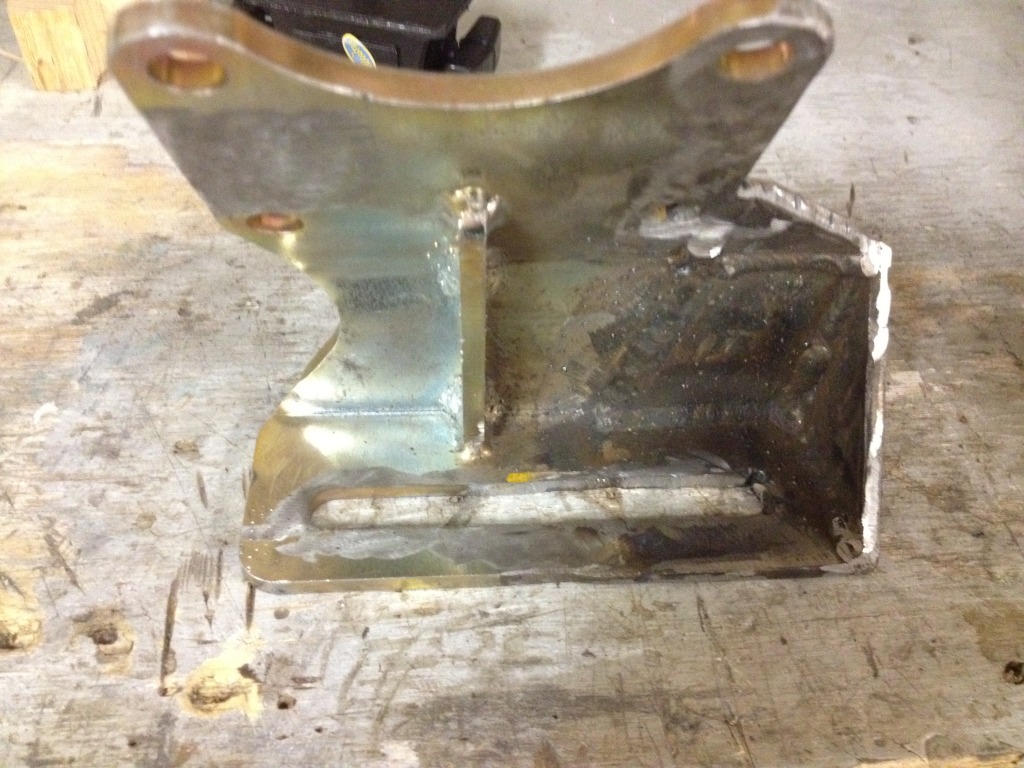
For mounts I'm using a set of mounts from excessive engineering that are designed to bolt the 1JZ/2JZ directly into a MA60 MK2 supra. Logic says they will work perfectly for a few reasons. The 1JZ and 7M both share the same mounting holes on the block and were both offered in the MK3 supra (1JZ Japan only). And using 5M (MK2 supra) motor mount brackets allow you to bolt a 7M directly into a 4runner. So logic says that 1JZ MK2 supra brackets would allow me to bolt in the 1JZ. Since I won't be using the 22R trans crossmember, I will likely have to move my mounts forward slightly but that is easy since the brackets from Excessive Engineering will preset the correct height and angle of mount.
As for the radiator, I'm undecided but I will very likely do something very similar to your setup. I'm not running any AC so I can put the radiator where the condenser was. I've just gotta figure out intercooler mounting and charge pipe routing. How did you locate and mount the stock hood latch after cuting front upper crossbar? Do you have any pictures?
As for the radiator, I'm undecided but I will very likely do something very similar to your setup. I'm not running any AC so I can put the radiator where the condenser was. I've just gotta figure out intercooler mounting and charge pipe routing. How did you locate and mount the stock hood latch after cuting front upper crossbar? Do you have any pictures?
Trending Topics
Mar 18, 2012 | 08:57 AM
#8
Registered User
Joined: Feb 2007
Posts: 63
Likes: 0
I decided right off that I wasn't attached to the idea of a factory latch and, ricer as it may look, that hood pins would suffice and actually perform a function. I'll try to get a few shots of the front with the grill on, but keep in mind that this is a run-what-you-brung, super-ghetto swap in a garage best described as utter chaos, with no frills, and that the truck is more or less terminal; it's essentially my test mule for the swap and to teach me how to weld body panel metal once I buy a welder...the only things I really splurged on were things that I did not want to deal with twice like clutch, master and slave, brake and fuel lines and that's about it. The rest thus far is either what I had or the least expensive method I could think of.
 better then duct tape...any day
 Mar 28, 2012 | 02:57 PM
#12
Thread Starter
Registered User
Joined: Nov 2011
Posts: 49
Likes: 7
From: Annapolis, MD
I really like that idea for mounting the radiator. I just ordered a Silla all aluminum radiator last night, ill get some pictures up when it arrives and how I mount it exactly.
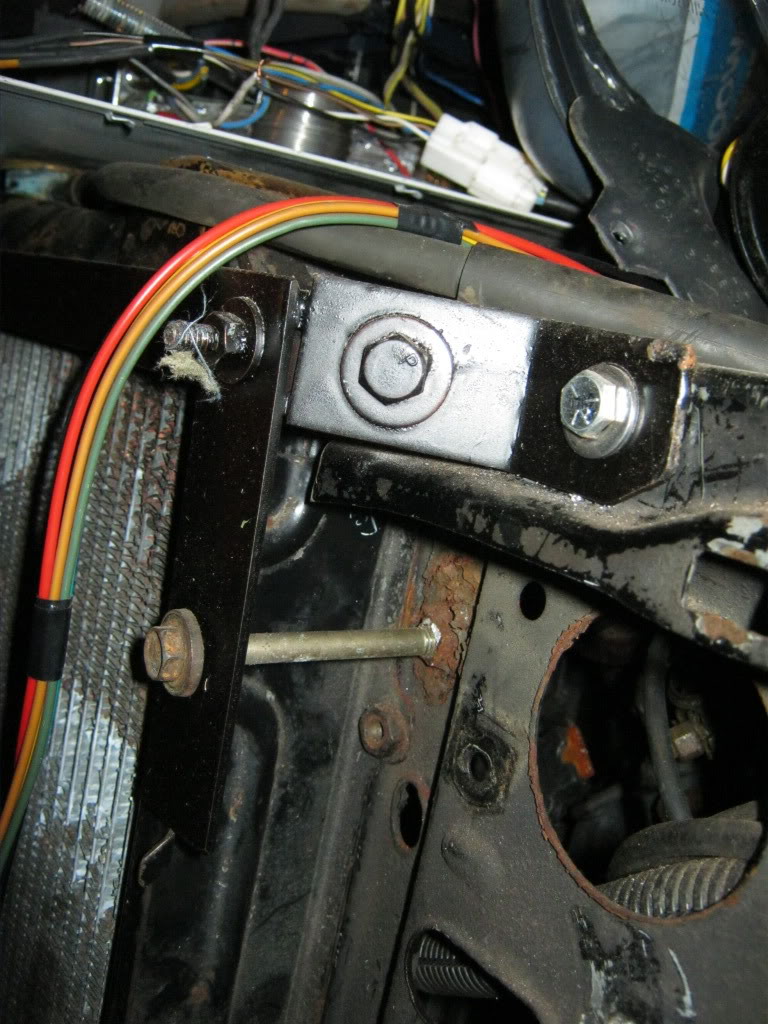
Also my motor mount brackets arrived today! I'm real excited to finally get this damn 1JZ dropped into my 4Runner. The brackets I bought were a great deal at only $113 shipped. Made by Xcessive Manufacturing, they are very well made and a simple design that allows for adjustment. They even came with bolts, instructions and....a free sticker!!!!

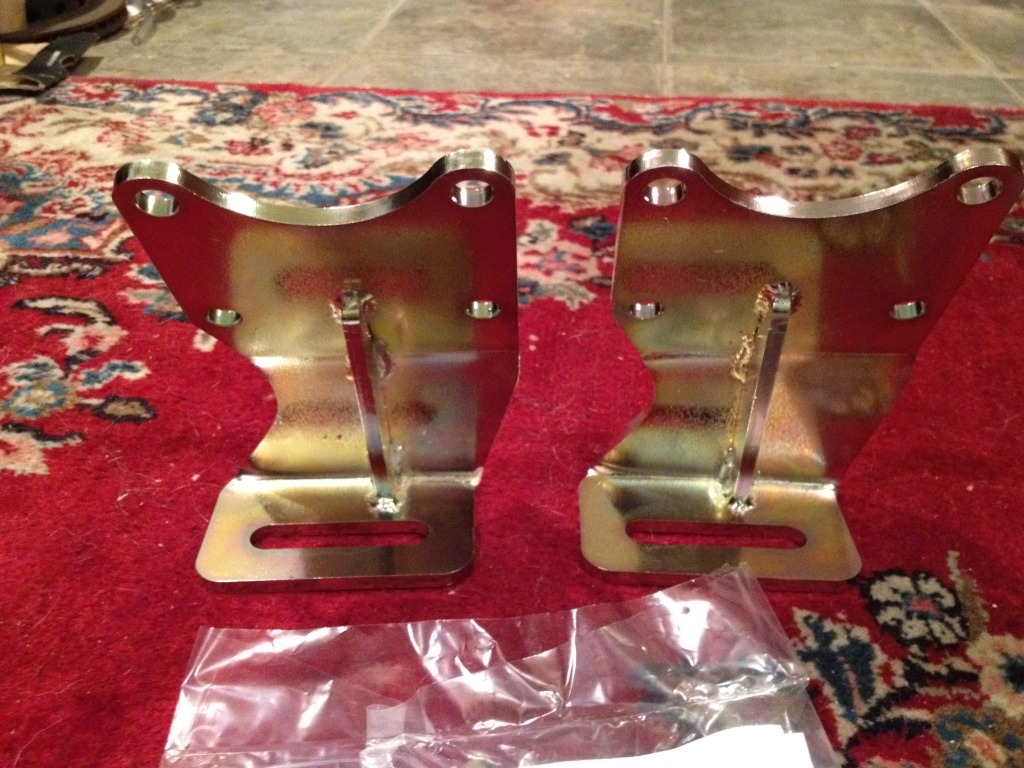
I may have mentioned it previously but these mounts are designed to bolt a 1JZ/2JZ into a MKII Supra (MA60) or a Cressida (MX73). The research I've done says that these will almost if not perfectly bolt the same engine into the 4Runner.
Also my motor mount brackets arrived today! I'm real excited to finally get this damn 1JZ dropped into my 4Runner. The brackets I bought were a great deal at only $113 shipped. Made by Xcessive Manufacturing, they are very well made and a simple design that allows for adjustment. They even came with bolts, instructions and....a free sticker!!!!
I may have mentioned it previously but these mounts are designed to bolt a 1JZ/2JZ into a MKII Supra (MA60) or a Cressida (MX73). The research I've done says that these will almost if not perfectly bolt the same engine into the 4Runner.
Mar 28, 2012 | 03:07 PM
#13
Thread Starter
Registered User
Joined: Nov 2011
Posts: 49
Likes: 7
From: Annapolis, MD
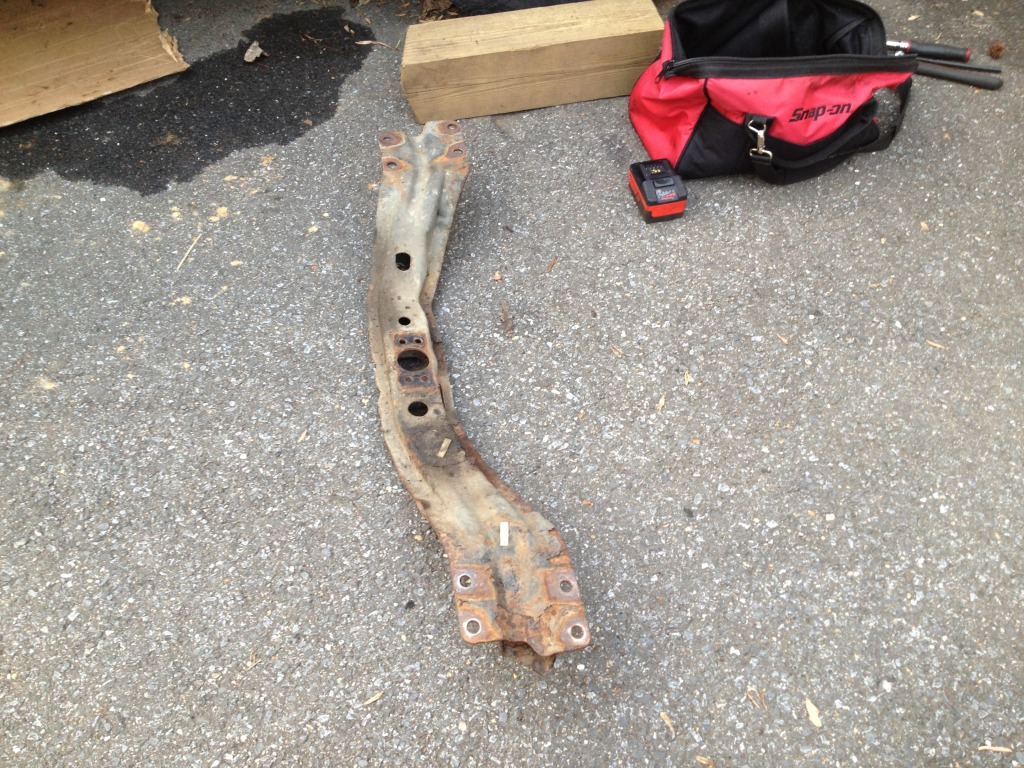
Oh and I forgot to mention that I opted to swap out my transmission crossmember and driveshafts for those from a 22r 4Runner. The front driveshaft is longer and the rear is shorter to accommodate for the 3" that it move the drivetrain back.
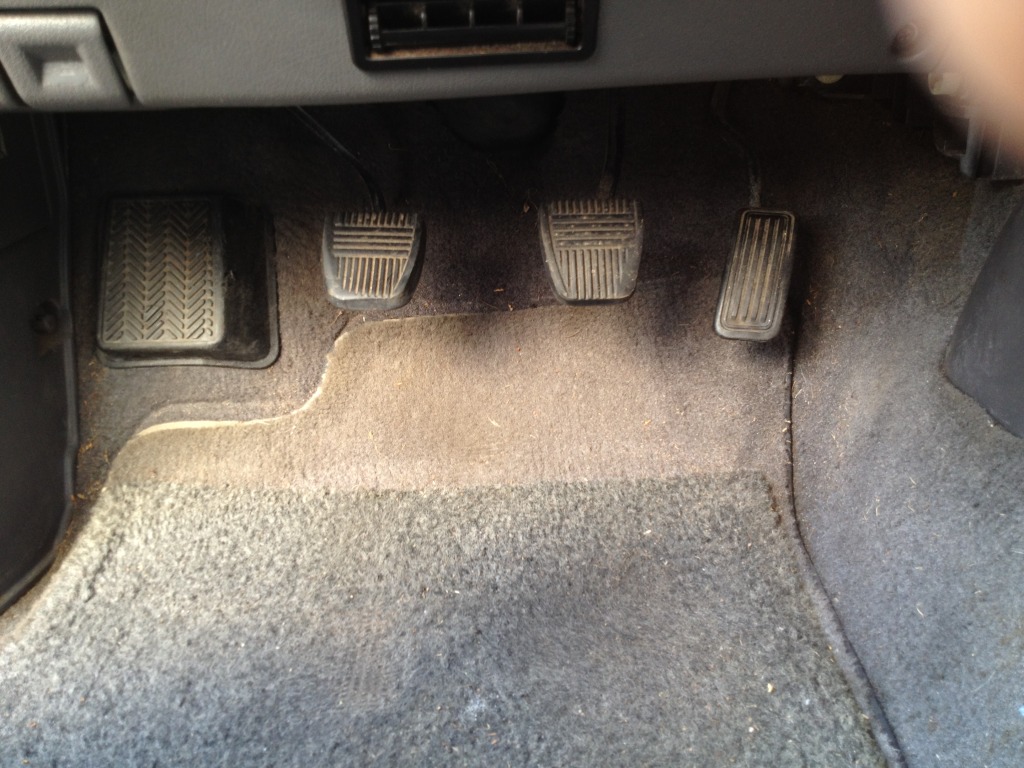
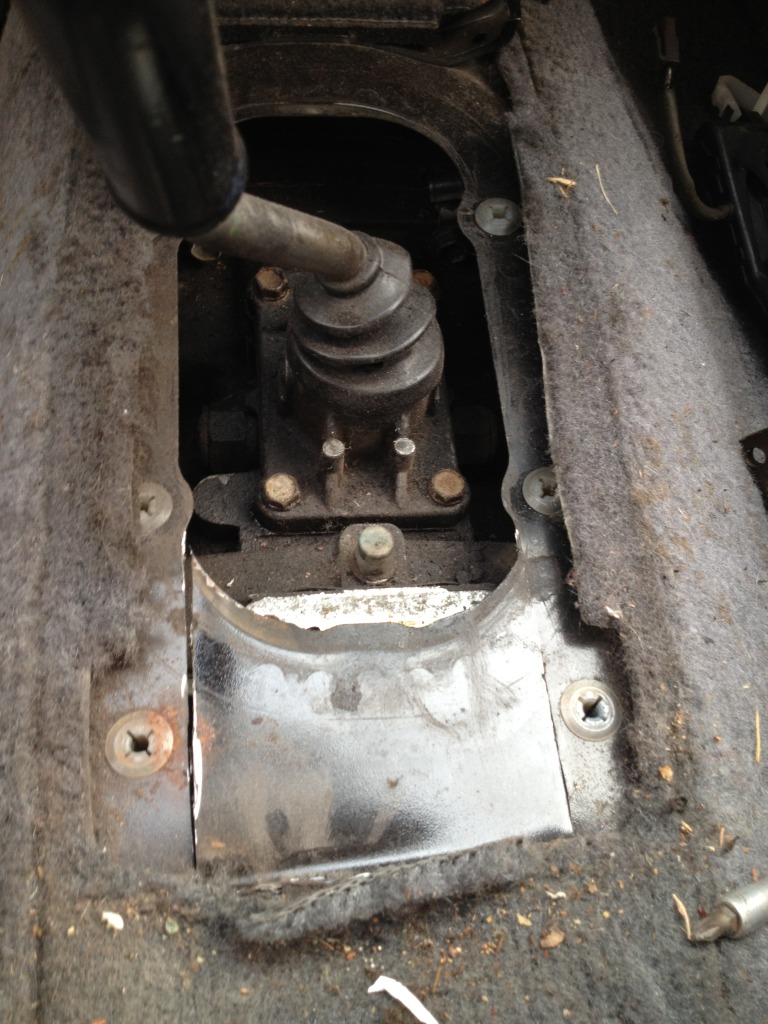
Since everything is moved back 3", I had to cut my transmission tunnel at the rear of the shifters so that the transfer case shifter could be used.
The 22R driveshafts are the muddy ones haha. I forgot to take a comparison picture of the crossmembers. One other important note...the studs on the transfer case output shaft going to the front drive shaft are spaced about 1mm farther apart on the 3.0 vs. the 22R so I used a carbide bit to slightly widen the outside of the holes on the 22R front driveshaft to make it fit. The rear is a perfect match though.
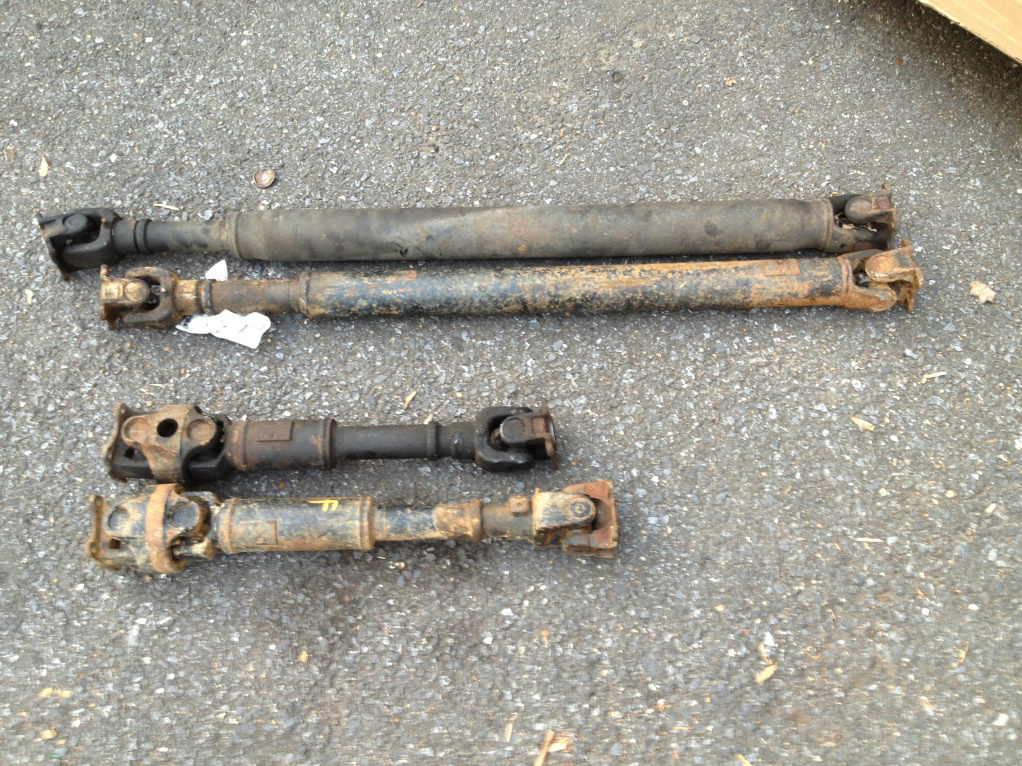

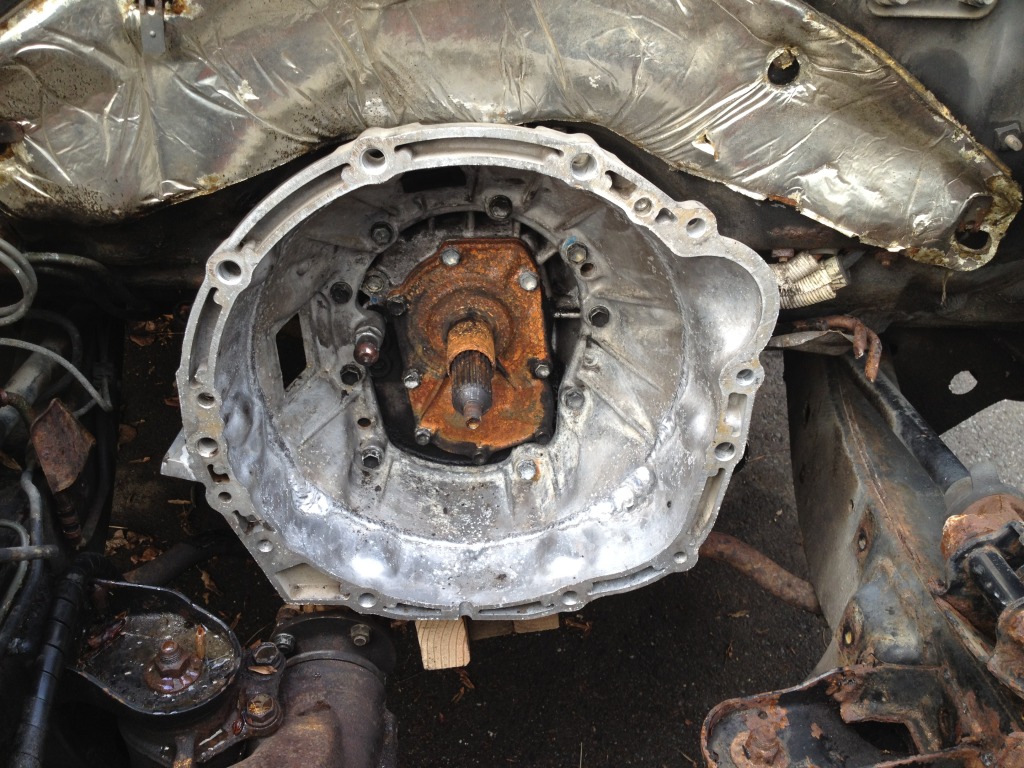
Not too much in the way of clearance for the 3" downpipe ill be making....I'm sure I can make it work though.
Since everything is moved back 3", I had to cut my transmission tunnel at the rear of the shifters so that the transfer case shifter could be used.
The 22R driveshafts are the muddy ones haha. I forgot to take a comparison picture of the crossmembers. One other important note...the studs on the transfer case output shaft going to the front drive shaft are spaced about 1mm farther apart on the 3.0 vs. the 22R so I used a carbide bit to slightly widen the outside of the holes on the 22R front driveshaft to make it fit. The rear is a perfect match though.
Not too much in the way of clearance for the 3" downpipe ill be making....I'm sure I can make it work though.
Mar 28, 2012 | 05:05 PM
#14
Registered User
Joined: Feb 2007
Posts: 63
Likes: 0
At first I was skeptical, but after looking at the BIC mounts for the 2wd truck the BIC ones for the supra, and the ones you have, you may definitely be on to something...they have a fair range of adjustment from what I can see in the photos. Corax used a polyurethane chevy transmission mount in his driver's side motor mount and it might work well in your application. I plan to grab two for mine...
a bit past halfway down...
https://www.yotatech.com/forums/f161...38/index2.html
a bit past halfway down...
https://www.yotatech.com/forums/f161...38/index2.html
Apr 17, 2012 | 07:09 AM
#15
Thread Starter
Registered User
Joined: Nov 2011
Posts: 49
Likes: 7
From: Annapolis, MD
So I know this has been moving kinda slowly but I work on the this project when I have time between finishing college and my full time job as a mechanic at a European specialty shop in Annapolis.
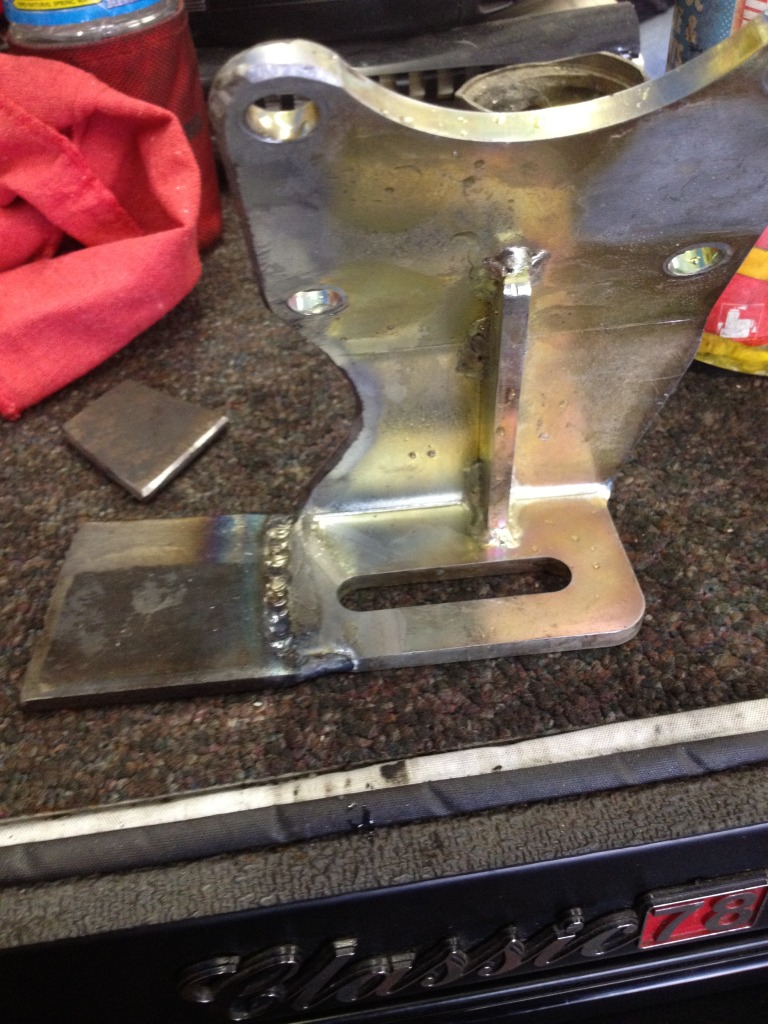
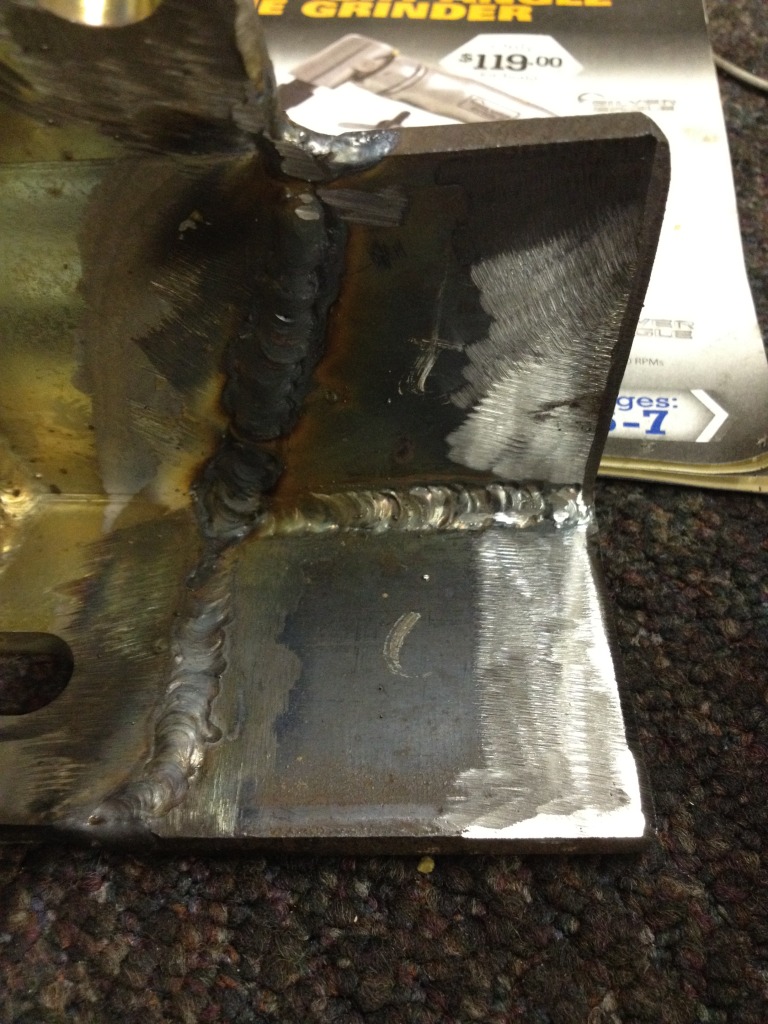
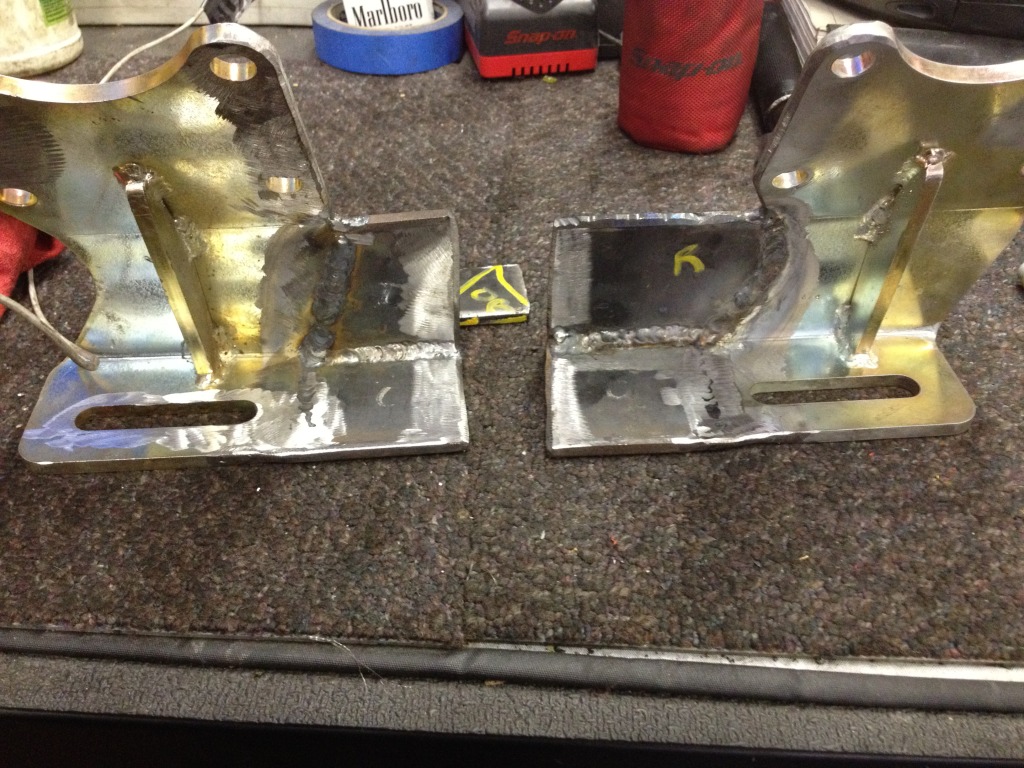
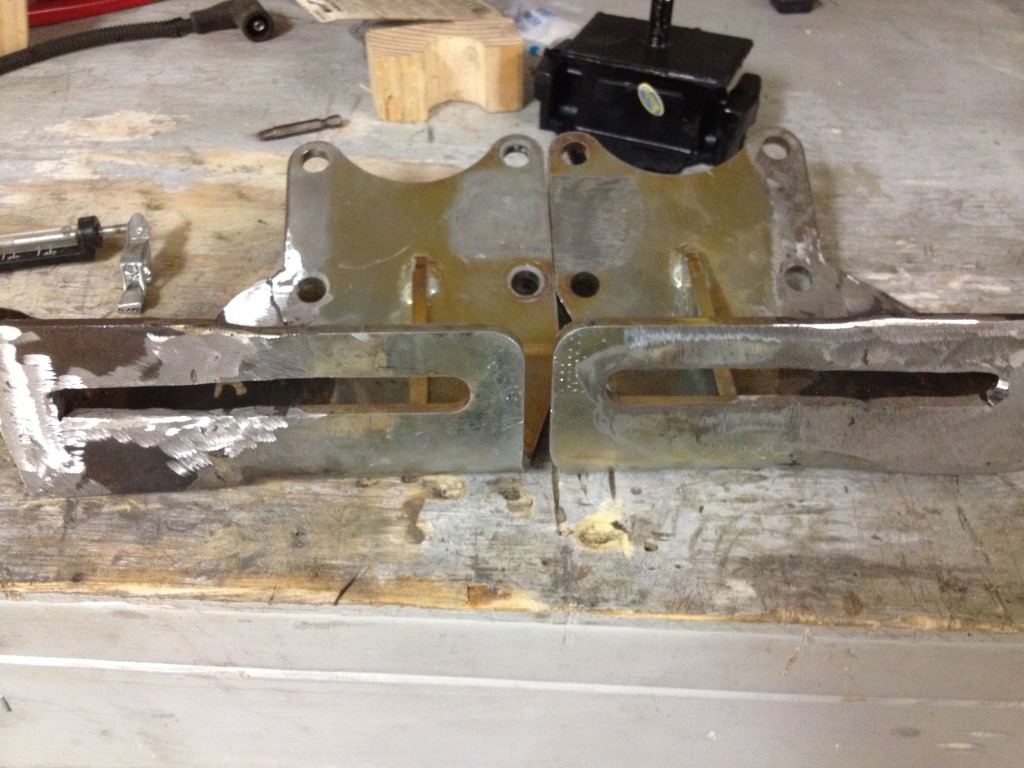
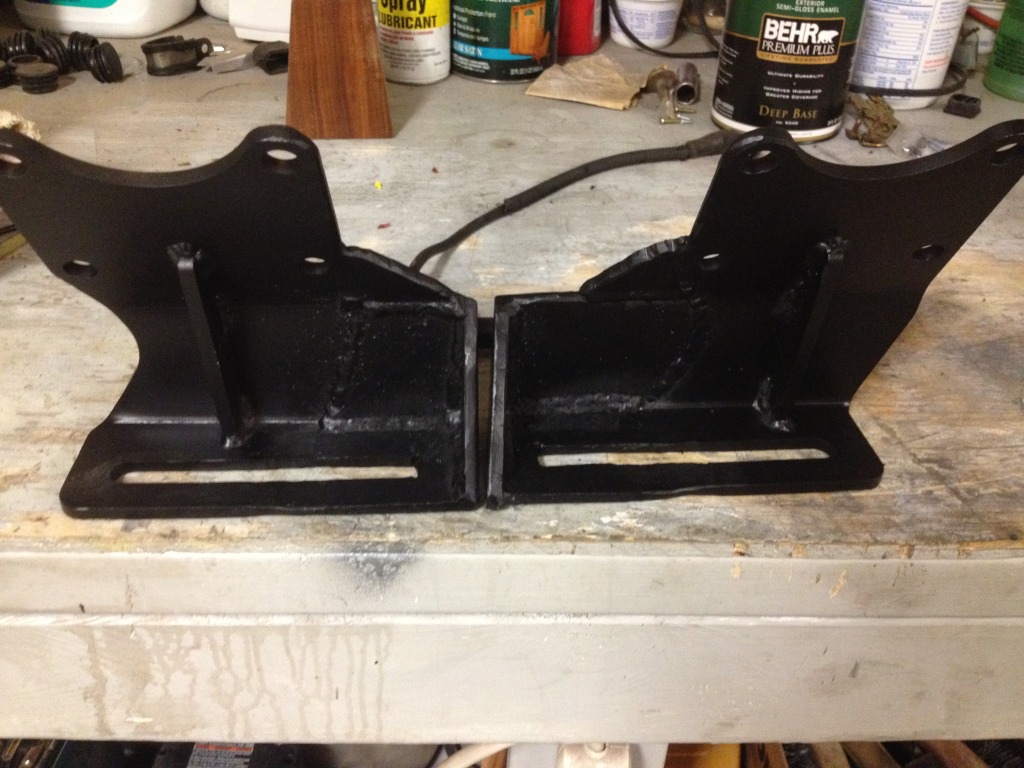
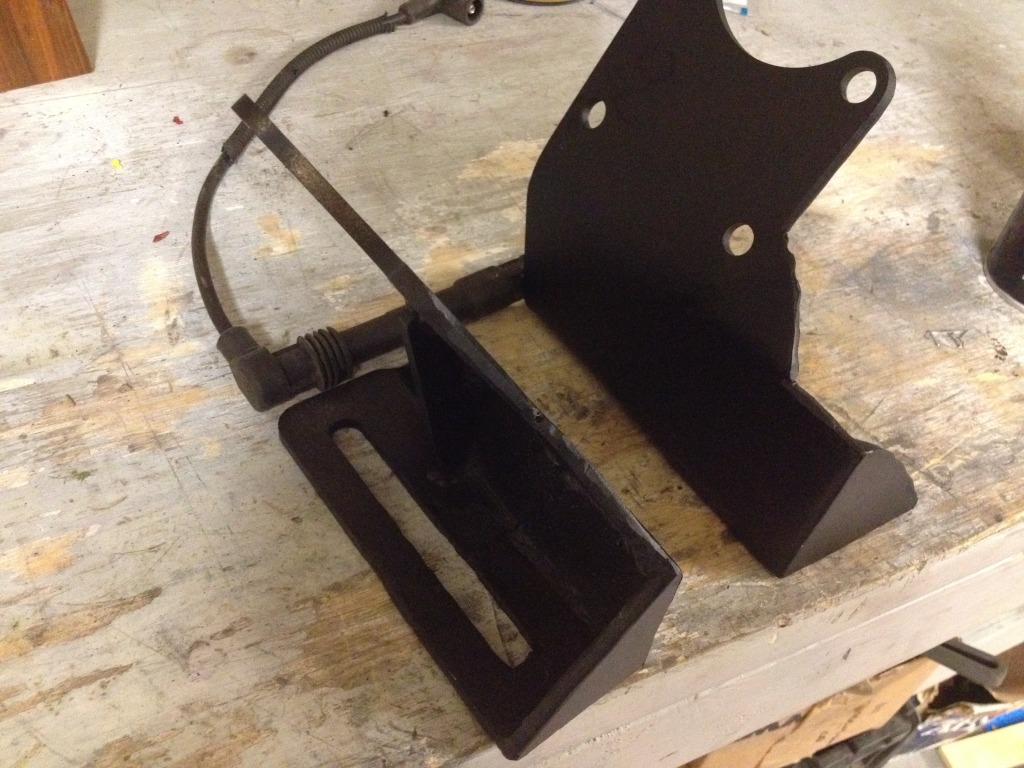
I finished up modifying the motor mounts. When using the 22R transmission crossmember and driveshafts on a V6 truck frame, the center stud on the motormounts sits 12.5" forward from the bellhousing flange. Using those measurements, I fabricated extentions to the motormounts I bought using 1/4" steel plate.
I've still got to grab some pictures of the mounts on the engine. The last hurdle before engine installation will be rerouting the turbo oil drain lines as they currently interfere with the motor mount brackets.
May 14, 2012 | 08:47 AM
#16
Registered User
Joined: Dec 2011
Posts: 63
Likes: 1
From: Ontario
Excellent build. So you had to modify your Xcessive Manufacturing motor mounts because your truck frame has mounts for the V6. Do you know if it would have been a bolt in if your truck frame was for the 4cyl?
Aug 3, 2012 | 08:57 AM
#17
Thread Starter
Registered User
Joined: Nov 2011
Posts: 49
Likes: 7
From: Annapolis, MD
Progress has been very slow but things are certainly still rolling along even though I haven't updated this thread in months...sorry guys! I finally graduated from college so I have been able to put a lot more time into this money pit. I'm still uploading pictures to photobucket so pictures will be up shortly but in the mean time ill do my best to explain a few of the issues that I have encountered.
Doitzel Kaiser, to answer your question, yes I had to modify my mount brackets from Xcessive because my truck had a V6 in it. If my truck were a 4cyl then I would not have had to extend the mounts lengthwise. However as you will see in the pictures, I still need to finalize the mounting situation because the mounts bolt up but don't sit centered in the engine bay. I have a plan to make it work using Trail Gear Bullet Proof mounts that I will change slightly.
Doitzel Kaiser, to answer your question, yes I had to modify my mount brackets from Xcessive because my truck had a V6 in it. If my truck were a 4cyl then I would not have had to extend the mounts lengthwise. However as you will see in the pictures, I still need to finalize the mounting situation because the mounts bolt up but don't sit centered in the engine bay. I have a plan to make it work using Trail Gear Bullet Proof mounts that I will change slightly.
Aug 3, 2012 | 09:26 AM
#18
Thread Starter
Registered User
Joined: Nov 2011
Posts: 49
Likes: 7
From: Annapolis, MD
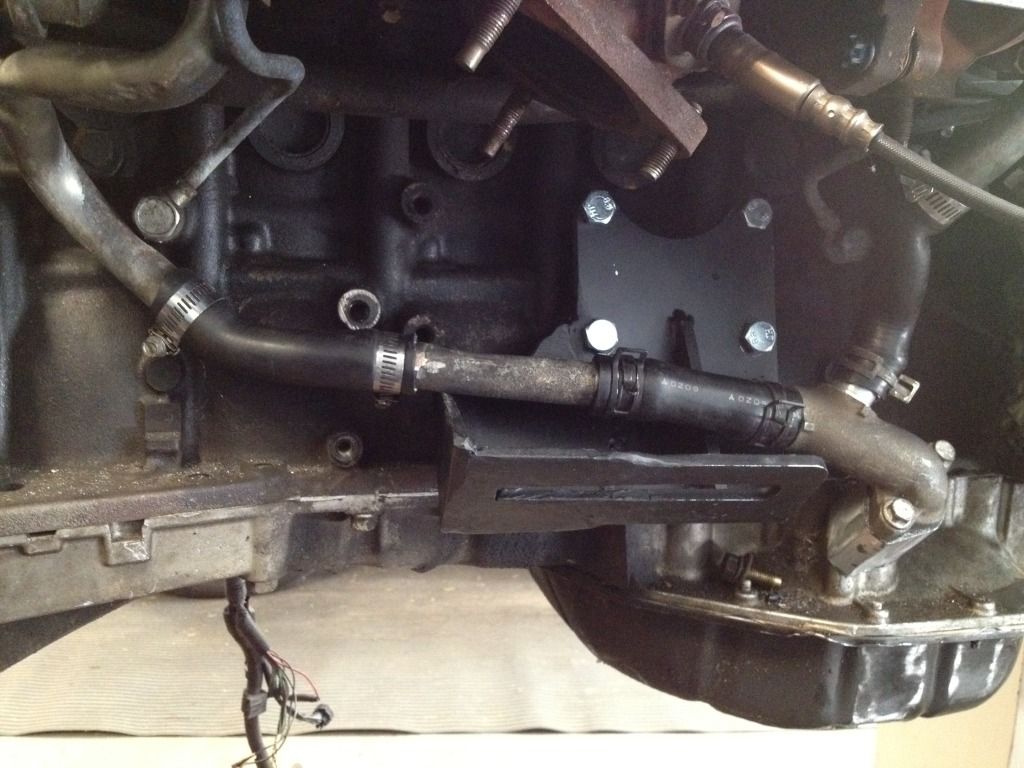
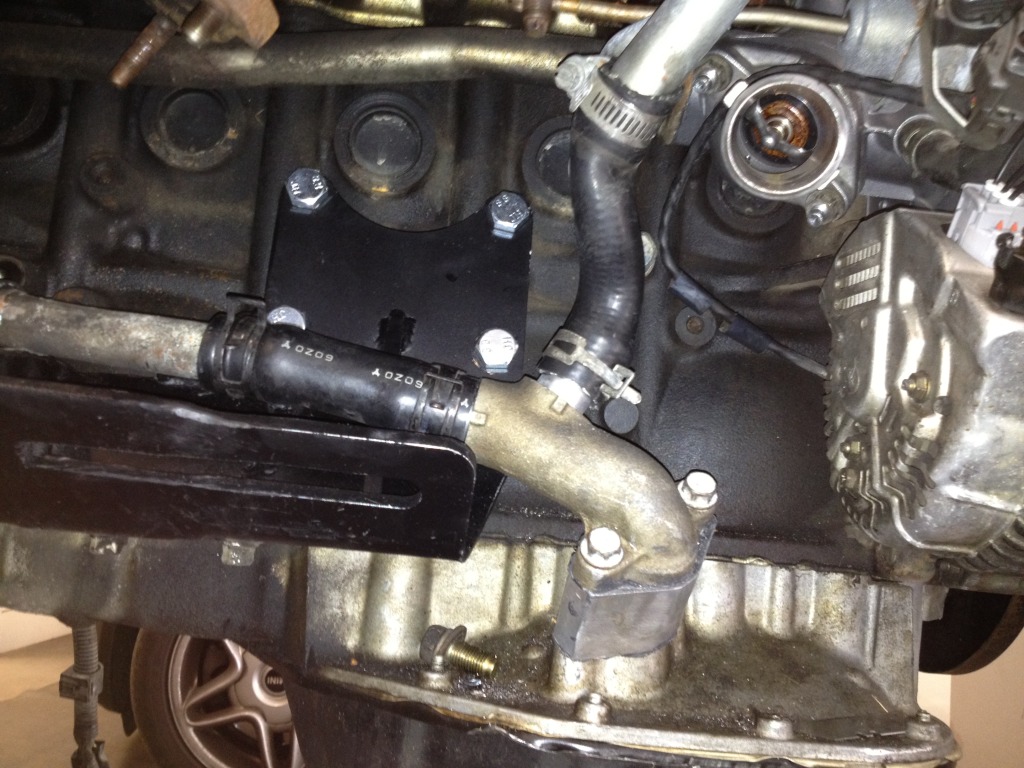
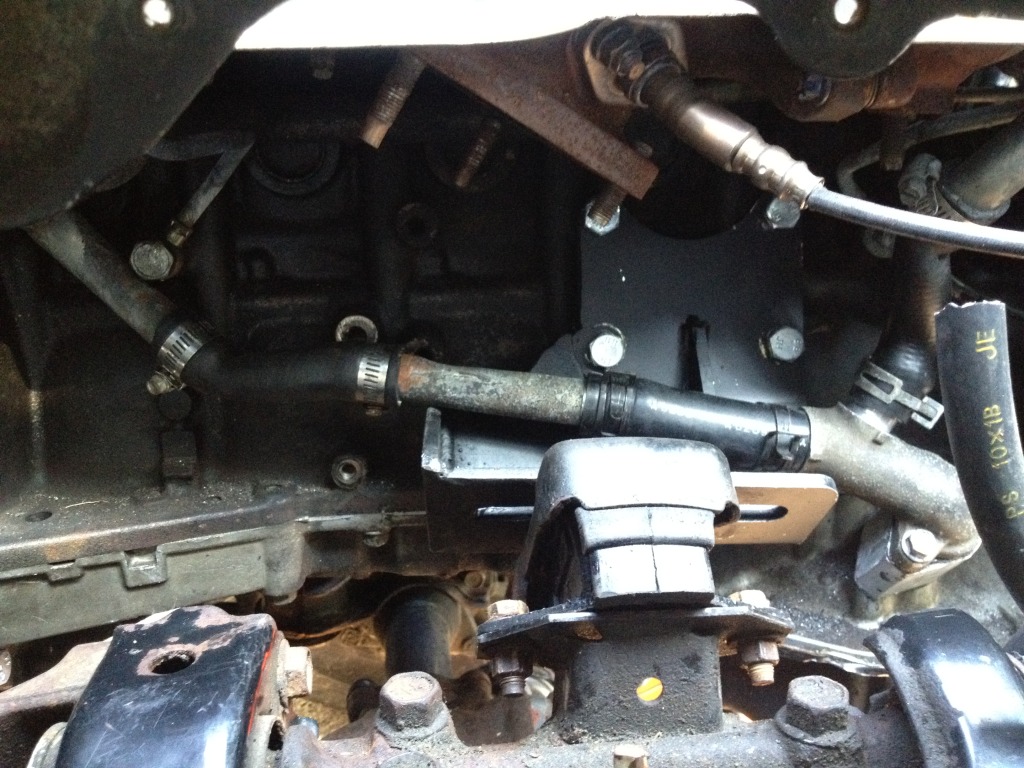
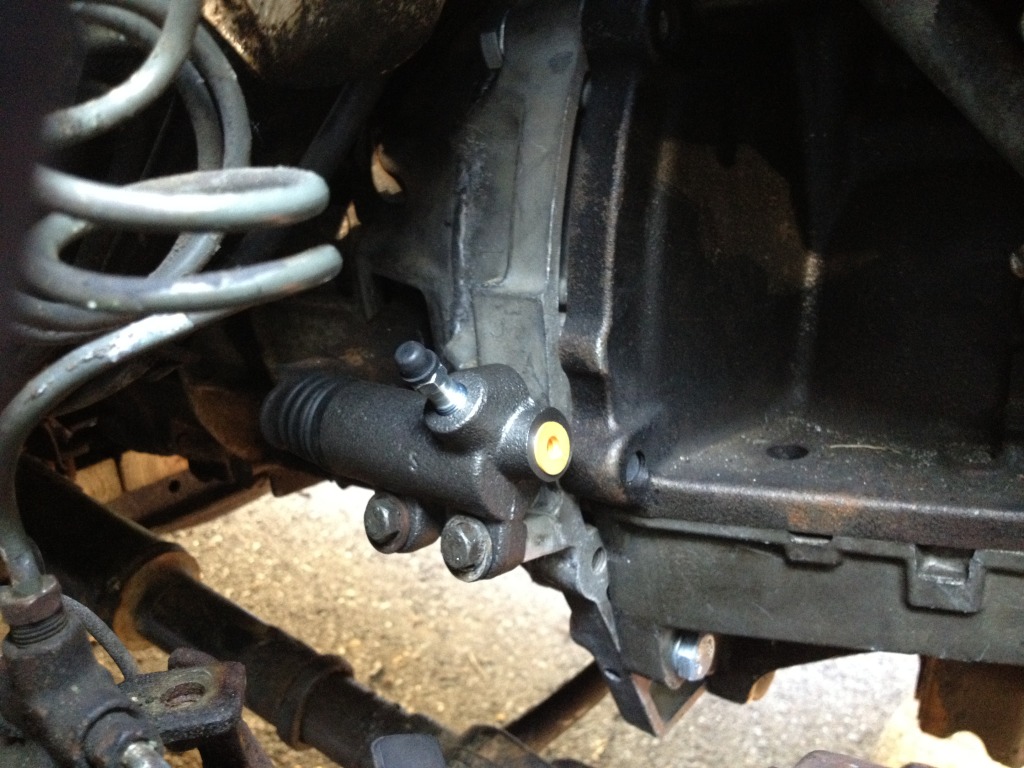
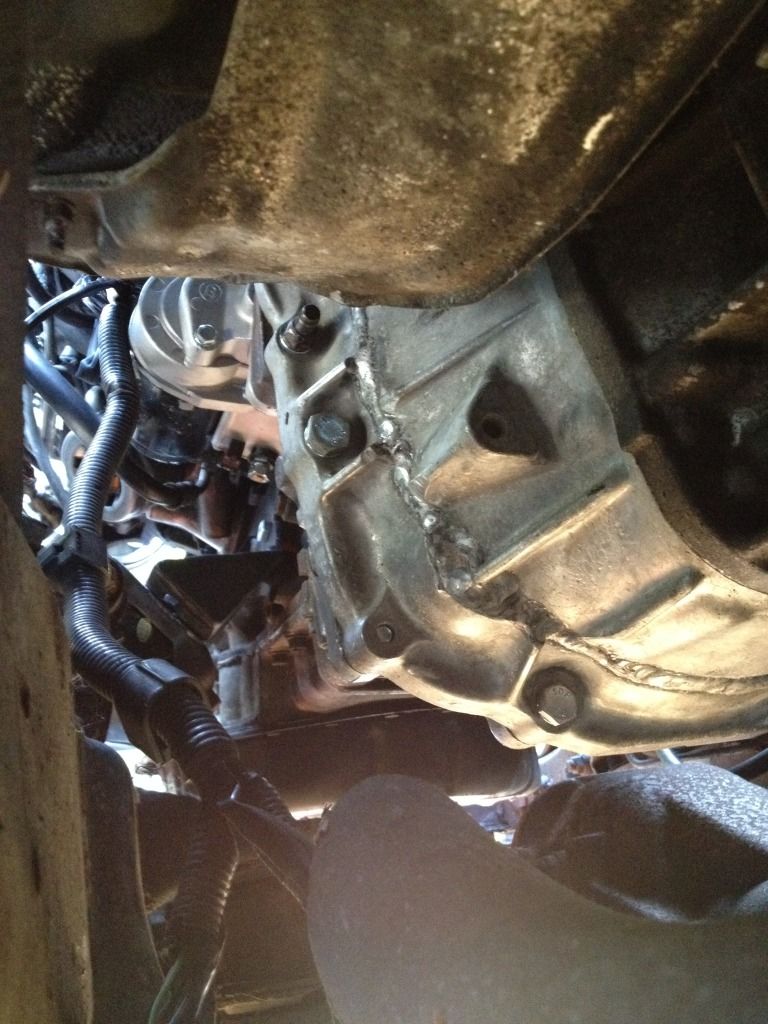
The next issue I had to tackle was that my new motor mount bracket was directly in the way of my turbo oil return line where the Y collector meets the oil pan. To solve this I had a piece of aluminum machined to raise the oil return collector 1.5" off my upper oil pan. A gasket on each side of the newly machined piece, 2 longer 8x1.25mm bolts and a pieced together oil return for both turbos and that problem is solved.
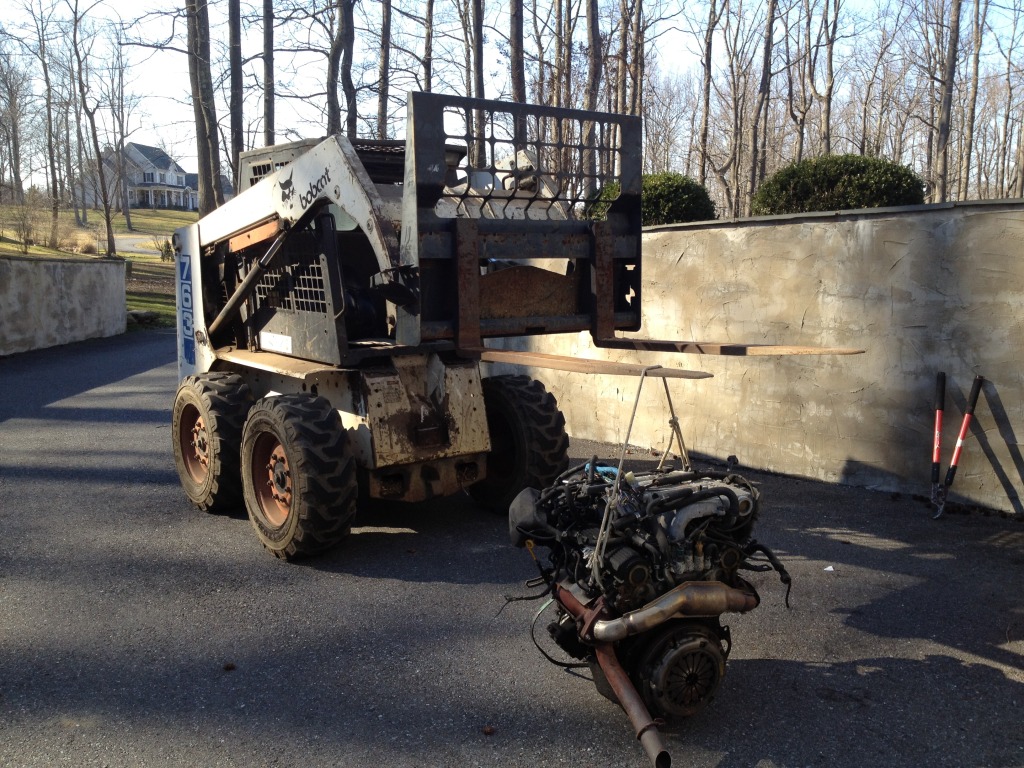
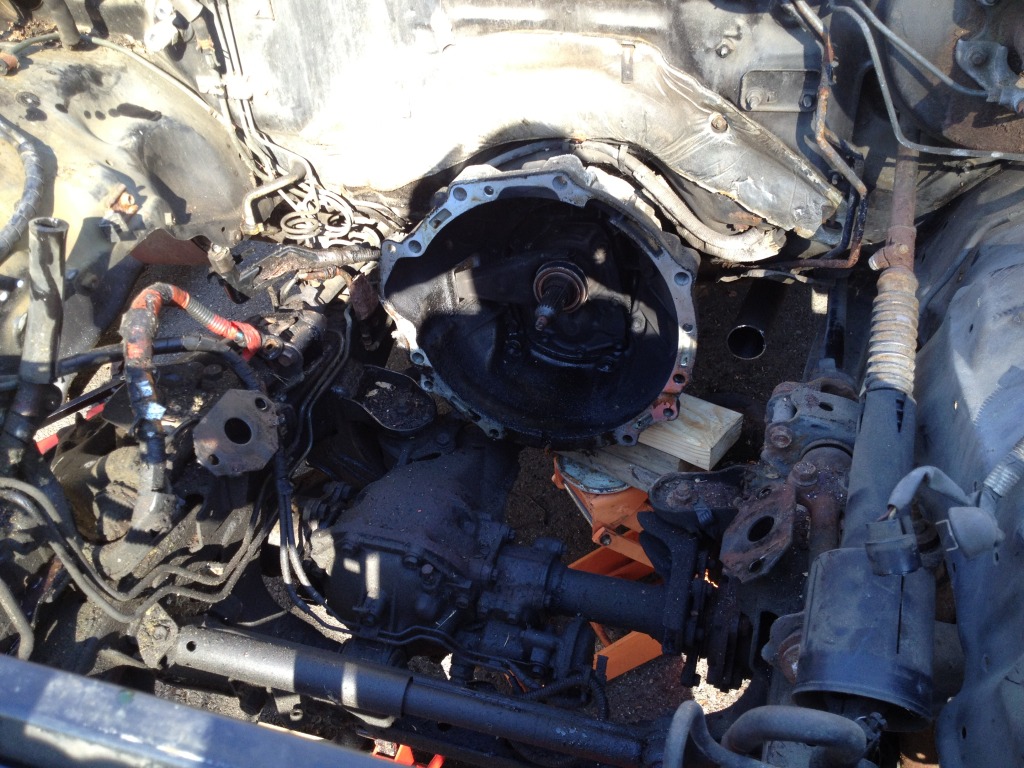
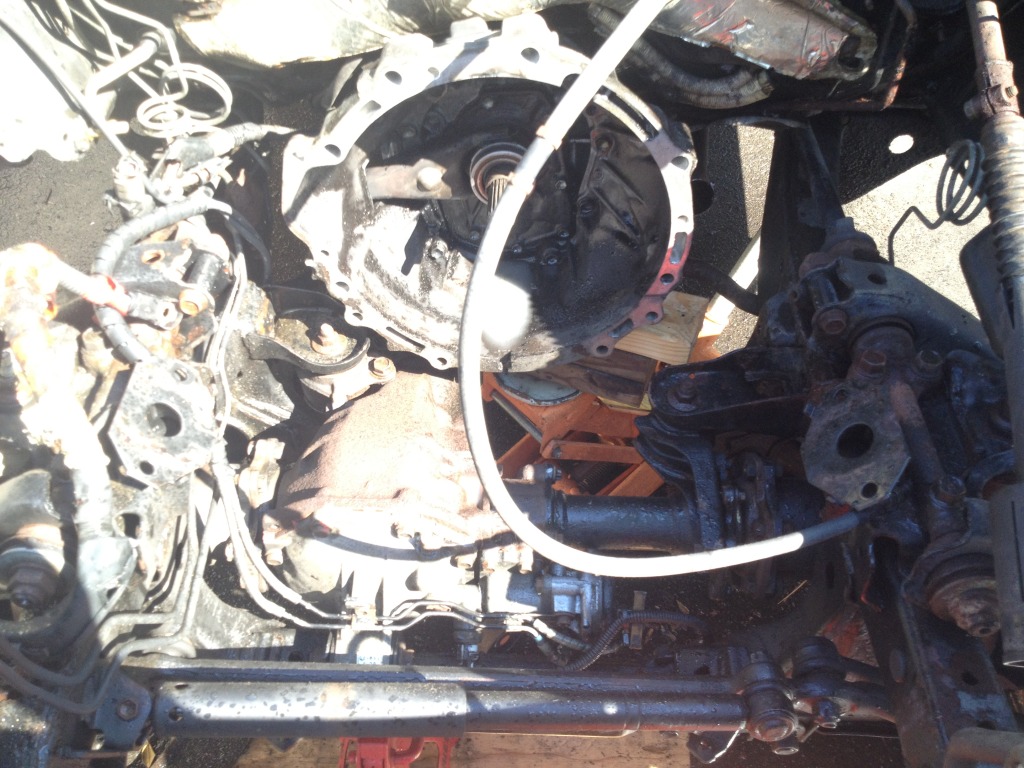
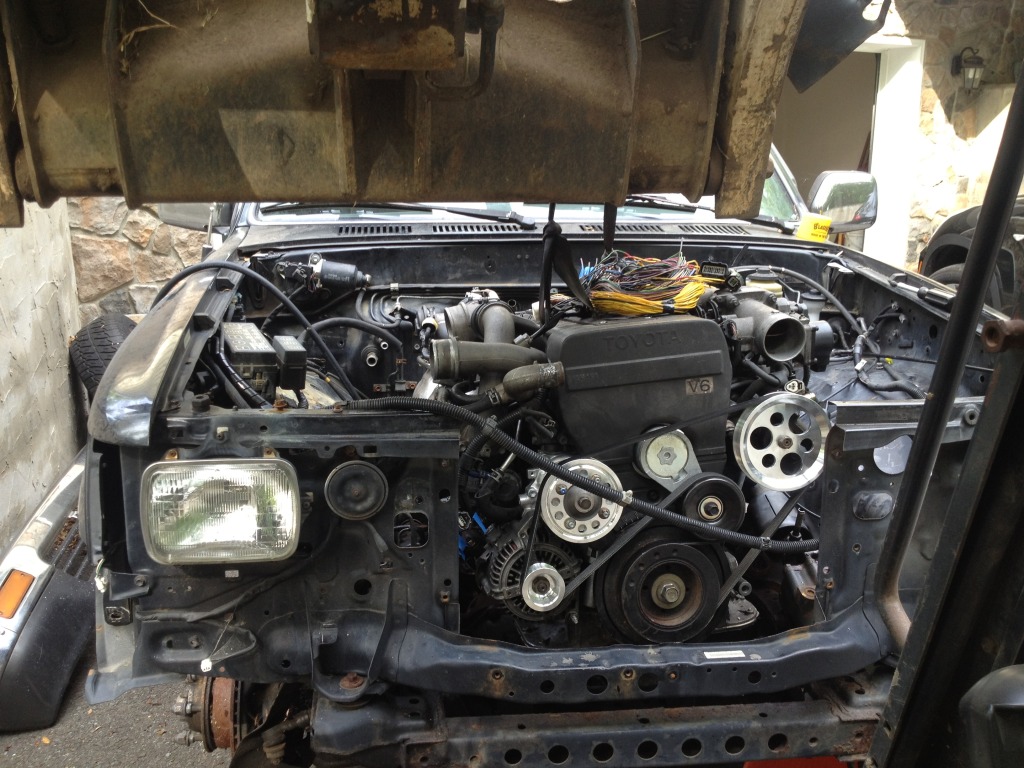
My buddy Josh helped me get the 1JZ into its new home, once again using the bobcat, and mated with the custom bellhousing. New pilot bearing, throwout bearing, clutch and flywheel included!
I had to give the firewall some slight persuasion with a hammer so that the rear turbo would have some clearance. Only had to beat is about 1/2" inward with a 2" diameter.
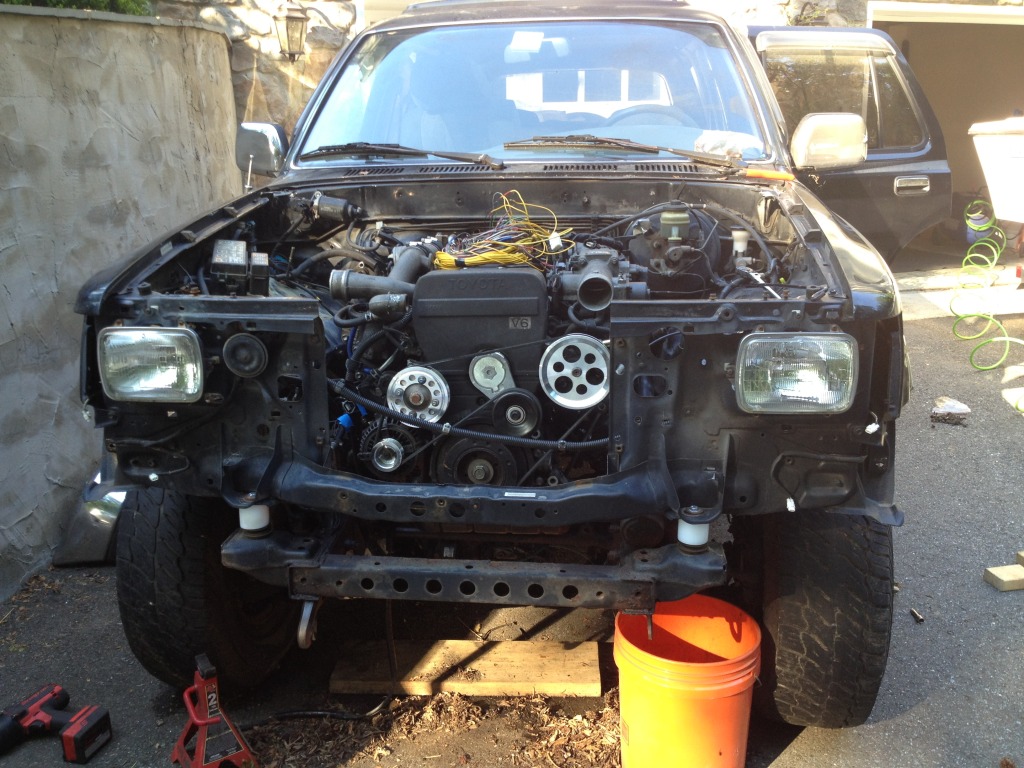
In its new home.
My buddy Josh helped me get the 1JZ into its new home, once again using the bobcat, and mated with the custom bellhousing. New pilot bearing, throwout bearing, clutch and flywheel included!
I had to give the firewall some slight persuasion with a hammer so that the rear turbo would have some clearance. Only had to beat is about 1/2" inward with a 2" diameter.
In its new home.
Aug 3, 2012 | 09:37 AM
#19
Thread Starter
Registered User
Joined: Nov 2011
Posts: 49
Likes: 7
From: Annapolis, MD
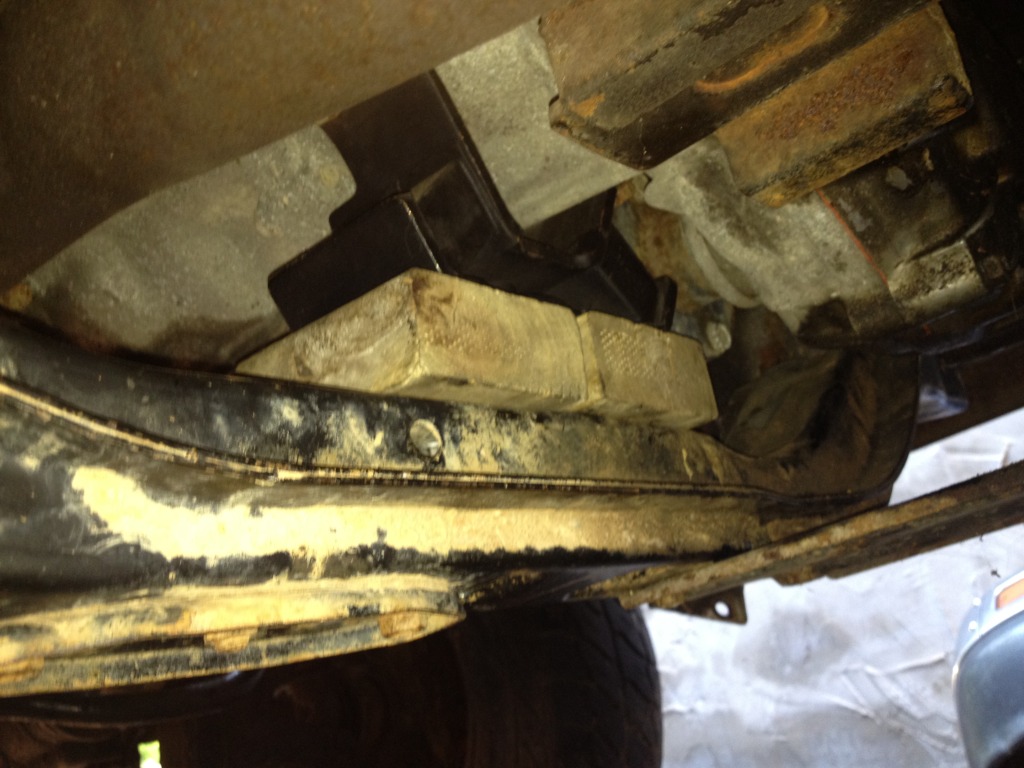
Once the engine was in I realized that I had some serious clearance issues between the motor, transmission, and body. When I jacked the motor up enough to meet the motor mounts, the top of the transmission hit the trans tunnel on the body and the rear of the motor hit the firewall. To solve this I got a 2" body lift from 4crawler with new stainless hardware. This helped immensely with clearance issues above the trans tunnel but not with the firewall so I then had to make a 1.5" spacer lift transmission/transfercase. I made a temporary spacer form pressure treated 2x4 and through bolted it. Key word here is TEMPORARY haha. I've got some square tube steal to replace the wood once everything else is finished. Once the body and trans lifts were in place the motor bolted to the mounts fairly well...but not perfect.
Aug 3, 2012 | 09:42 AM
#20
Thread Starter
Registered User
Joined: Nov 2011
Posts: 49
Likes: 7
From: Annapolis, MD
Notice how the motor is pulling the rubber of the motor mounts down and inward? That was something I didn't expect to encounter with my mount brackets I modified. I just ordered a set of Trail Gear Bullet Proof mounts that I'm going to cut and reweld to solve the motor mount issue. Ill explain more once I get those in the mail.


