
1989 Pickup 1uz-fe/auto/dual t-case swap
 Mar 23, 2010 | 06:34 PM
#1
Thread Starter
Registered User
Joined: Jan 2008
Posts: 601
Likes: 1
From: St. Louis, MO
1989 Pickup 1uz-fe/auto/dual t-case swap **Completed**
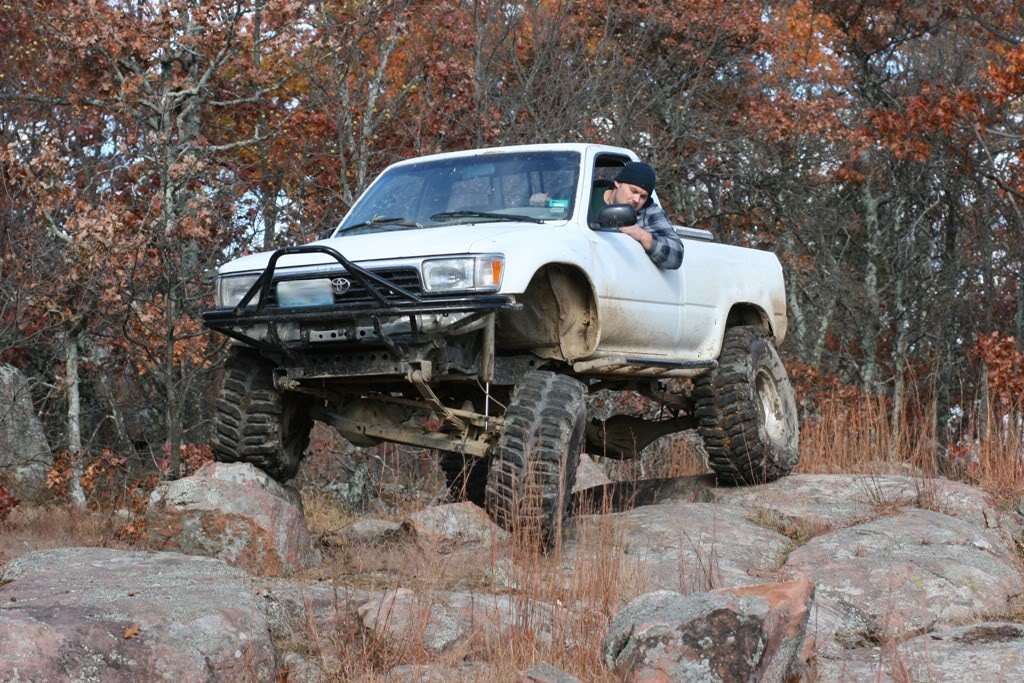
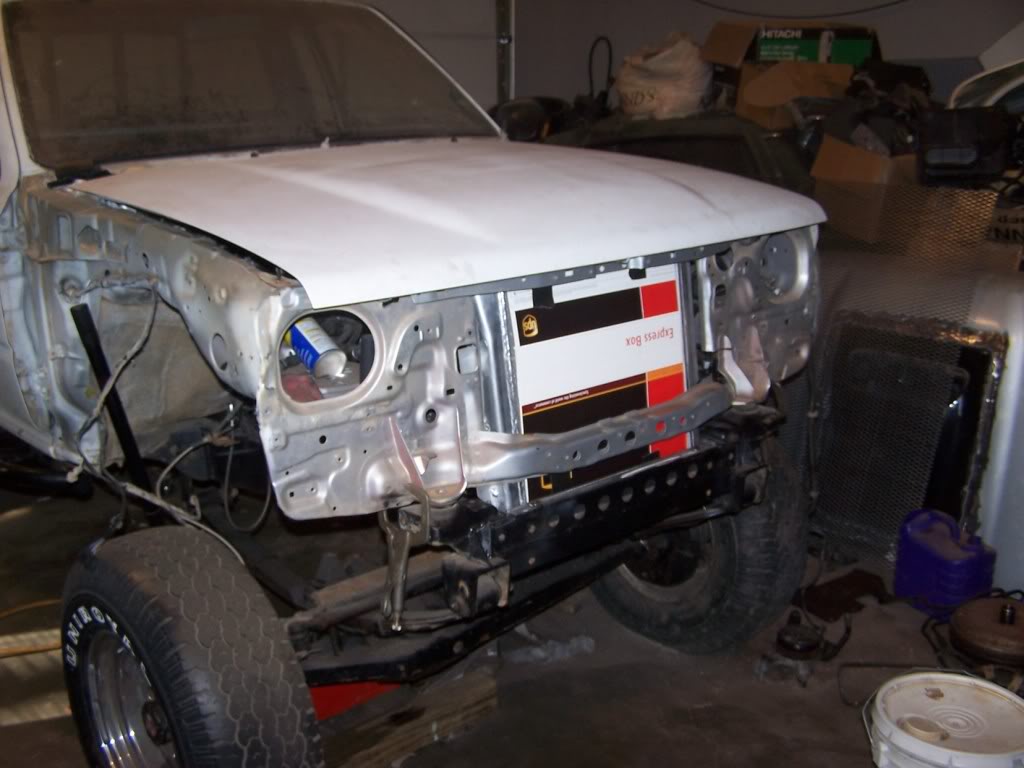
Finally getting around to makeing build thread for my swap. Here is the truck it will be going in.
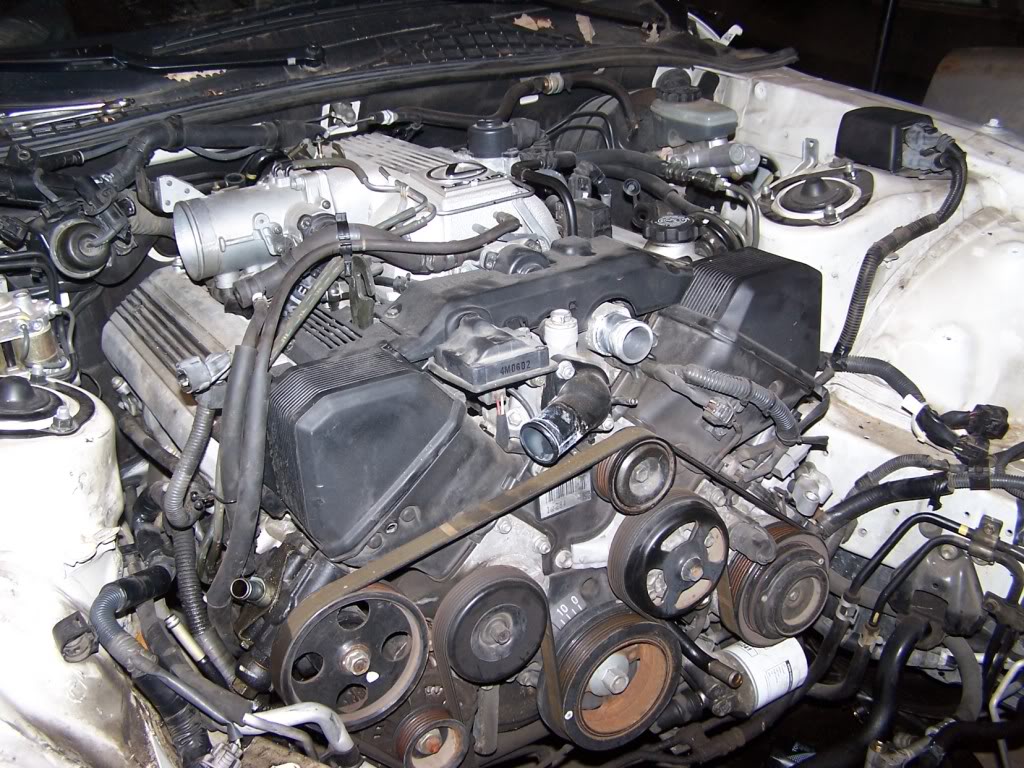
My 22re had just clicked over 250,000 miles and was tired. In the midwest sometimes wheel speed is necessary because the rocks are wet and muddy and my 4cyl just didn't have it. It was either a rebuild or upgrade. I was contemplating installing a Ford 5.0 from a wrecked parts 88 Mustang GT that I got cheap when I stumbled upon a Lexus SC400. I bought it for my GF but it had a few mechanical problems but I bought it anyway. I was looking on some lexus forums for help fixing the problems when I saw that the Lexus engien was a popular swap in Australia and New Zealand. I have to say that until then the thought of a Toyota v8 had never occured to me. Its just that American mentality that only the "big 3 make v8's" Oh well. I starting researching it and found that it could be done with all bolt on stuff. I started looking on craigslist and found that I could get whole lexus parts cars for under $1000. and some of their shipable parts sell for lots of money on Ebay. All in all I acquired 3 parts cars, all for $600.00 or less each. 2 LS400's and 1 SC400. There are slight differences in the 2 versions of the 1uzfe, all of them external. Researching other swaps told me that there are components of both versions that are needed to make this swap using all toyota parts. For a solid axle truck the SC400 version is the most desirable. for IFS then the LS400 is what you want. I will cover the other differences later on.
I started this swap last february. Yes its been a year but I've had a lot a crap going on and...well you older guys who own homes will know what I'm talking about.
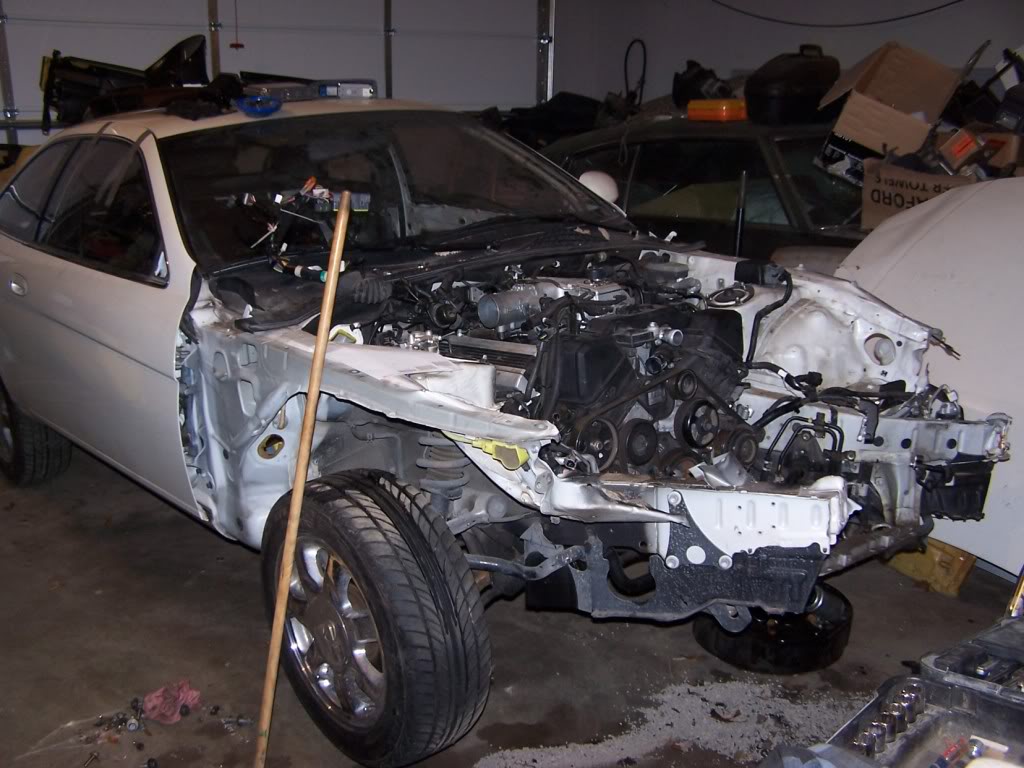
Here we go. Hereis the doner car. Its a 1992 SC400 It had 95,xxx miles on it as was owned since new by a middle aged woman. Very well kept car. I was luck and scored one without traction control. The traction control adds more extra junk to the engine and electronics issues.
My 22re had just clicked over 250,000 miles and was tired. In the midwest sometimes wheel speed is necessary because the rocks are wet and muddy and my 4cyl just didn't have it. It was either a rebuild or upgrade. I was contemplating installing a Ford 5.0 from a wrecked parts 88 Mustang GT that I got cheap when I stumbled upon a Lexus SC400. I bought it for my GF but it had a few mechanical problems but I bought it anyway. I was looking on some lexus forums for help fixing the problems when I saw that the Lexus engien was a popular swap in Australia and New Zealand. I have to say that until then the thought of a Toyota v8 had never occured to me. Its just that American mentality that only the "big 3 make v8's"
Oh well. I starting researching it and found that it could be done with all bolt on stuff. I started looking on craigslist and found that I could get whole lexus parts cars for under $1000. and some of their shipable parts sell for lots of money on Ebay. All in all I acquired 3 parts cars, all for $600.00 or less each. 2 LS400's and 1 SC400. There are slight differences in the 2 versions of the 1uzfe, all of them external. Researching other swaps told me that there are components of both versions that are needed to make this swap using all toyota parts. For a solid axle truck the SC400 version is the most desirable. for IFS then the LS400 is what you want. I will cover the other differences later on. I started this swap last february. Yes its been a year but I've had a lot a crap going on and...well you older guys who own homes will know what I'm talking about.
Here we go. Hereis the doner car. Its a 1992 SC400 It had 95,xxx miles on it as was owned since new by a middle aged woman. Very well kept car. I was luck and scored one without traction control. The traction control adds more extra junk to the engine and electronics issues.
Last edited by toyminator2000; Jun 12, 2010 at 04:00 PM.
Mar 23, 2010 | 06:38 PM
#2
Thread Starter
Registered User
Joined: Jan 2008
Posts: 601
Likes: 1
From: St. Louis, MO
Out comes the tired 22re. ran perfect, just tired.
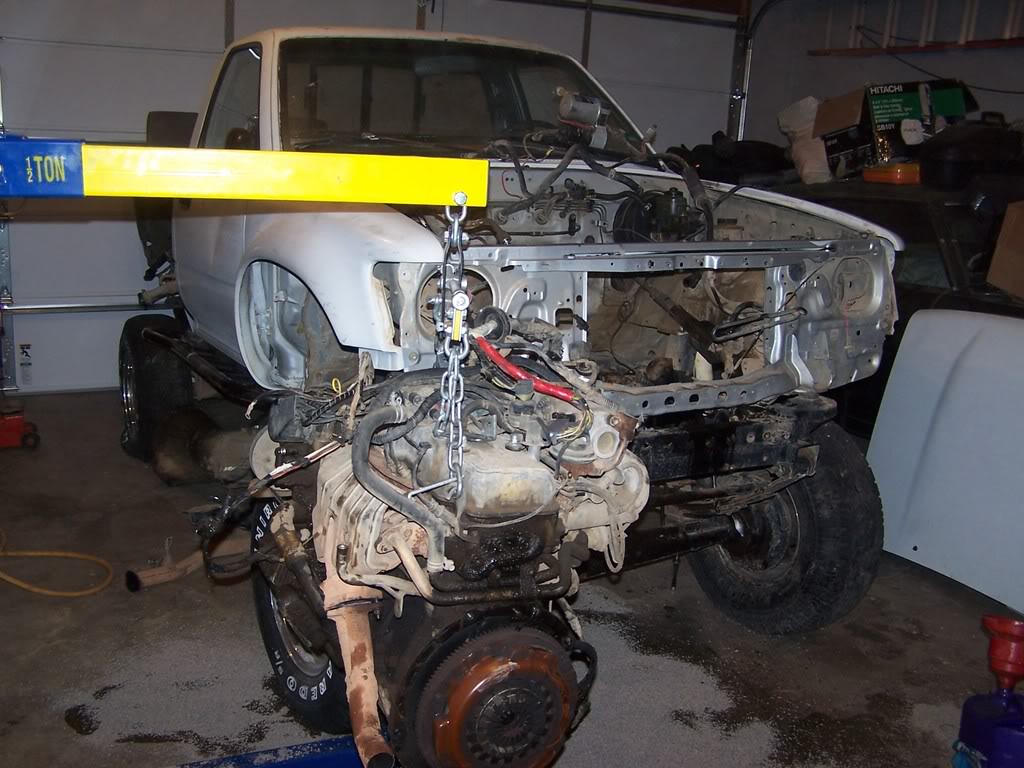
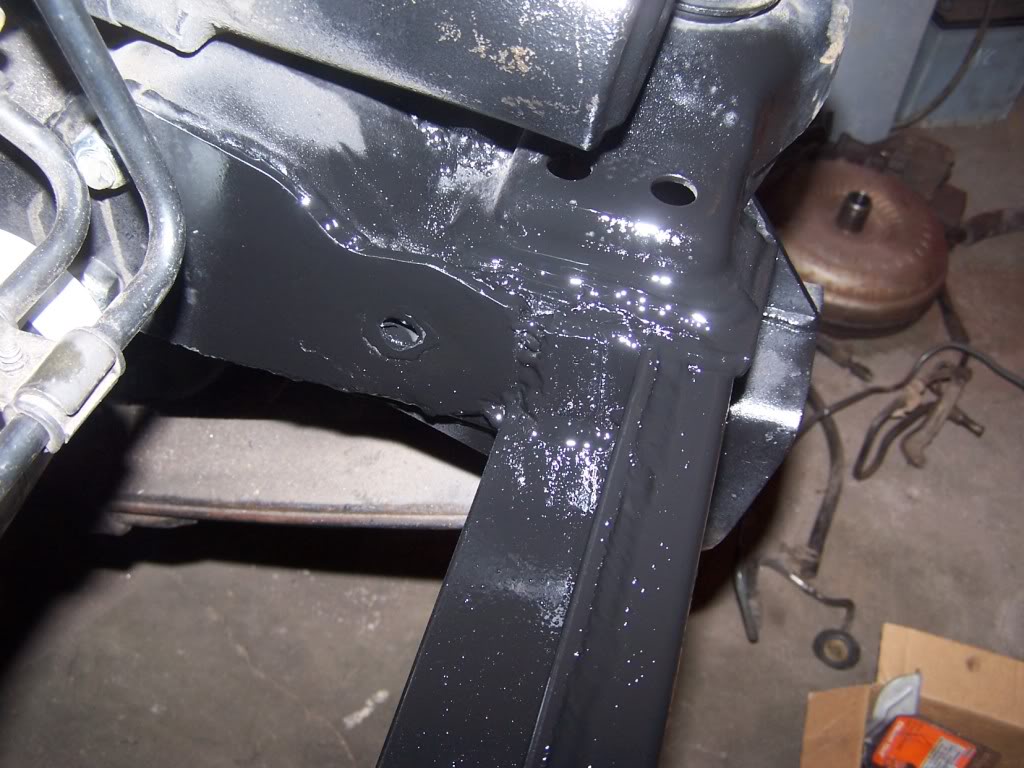
I went ahead and cut off the rest of the remaining IFS crap that you can't get too with an engine in it. I made new motor mounts anyway.
I also decided to move the steering box forward while I had the chance.

I went ahead and cut off the rest of the remaining IFS crap that you can't get too with an engine in it. I made new motor mounts anyway.
I also decided to move the steering box forward while I had the chance.
Mar 23, 2010 | 06:40 PM
#3
Thread Starter
Registered User
Joined: Jan 2008
Posts: 601
Likes: 1
From: St. Louis, MO
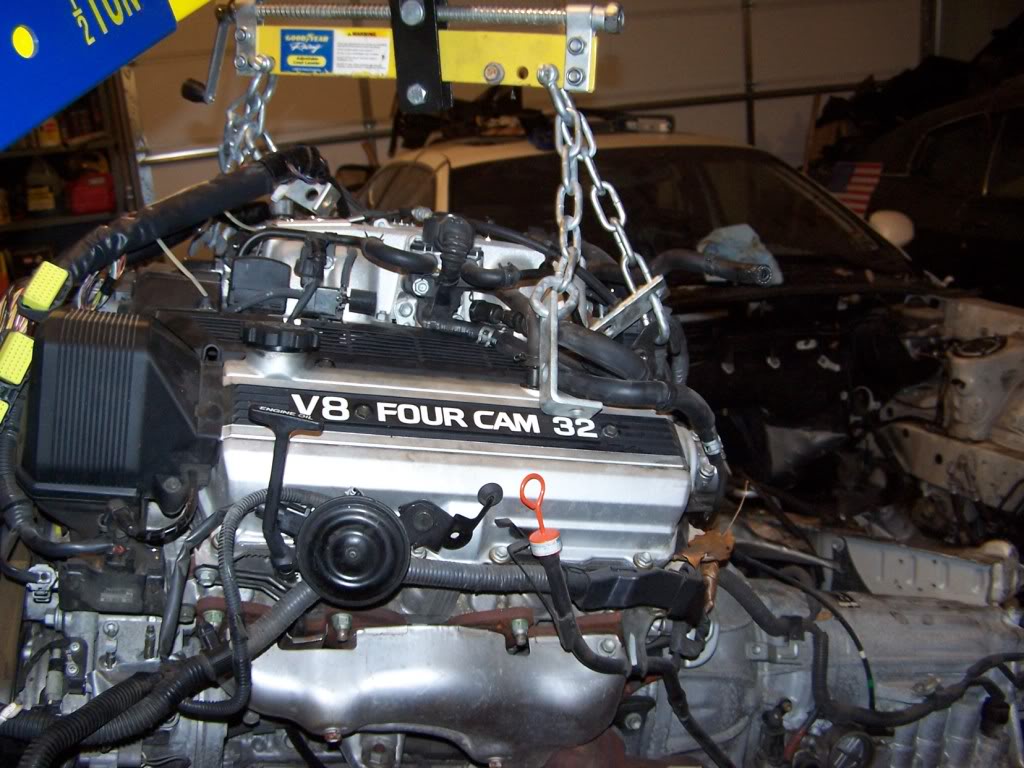
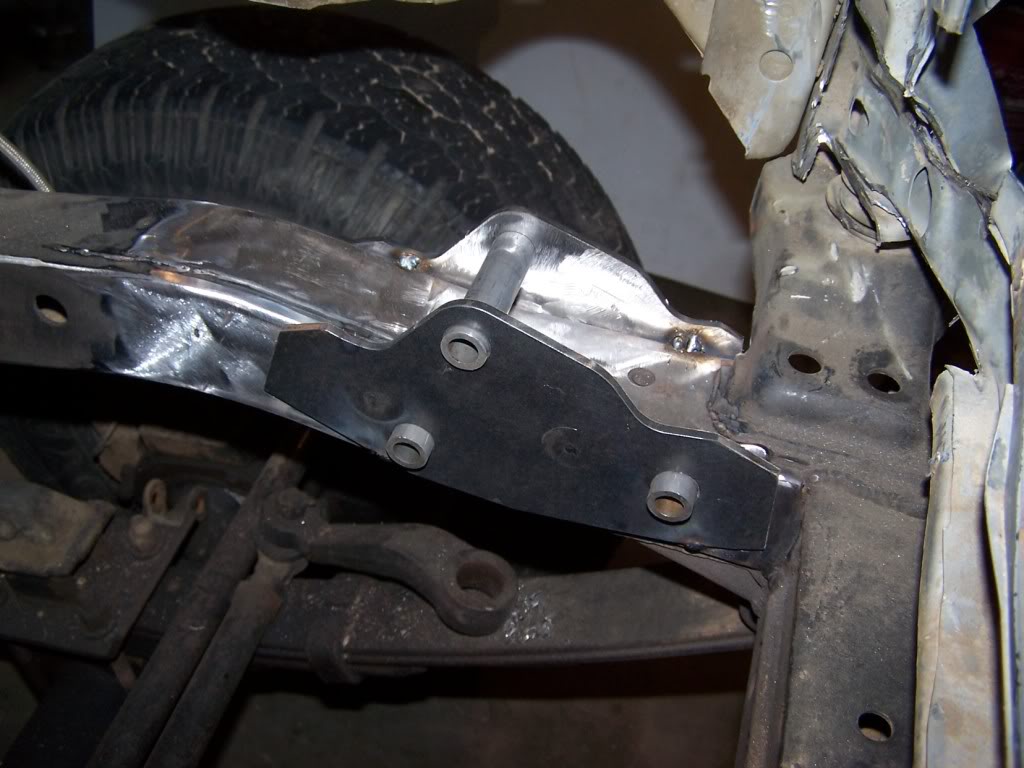
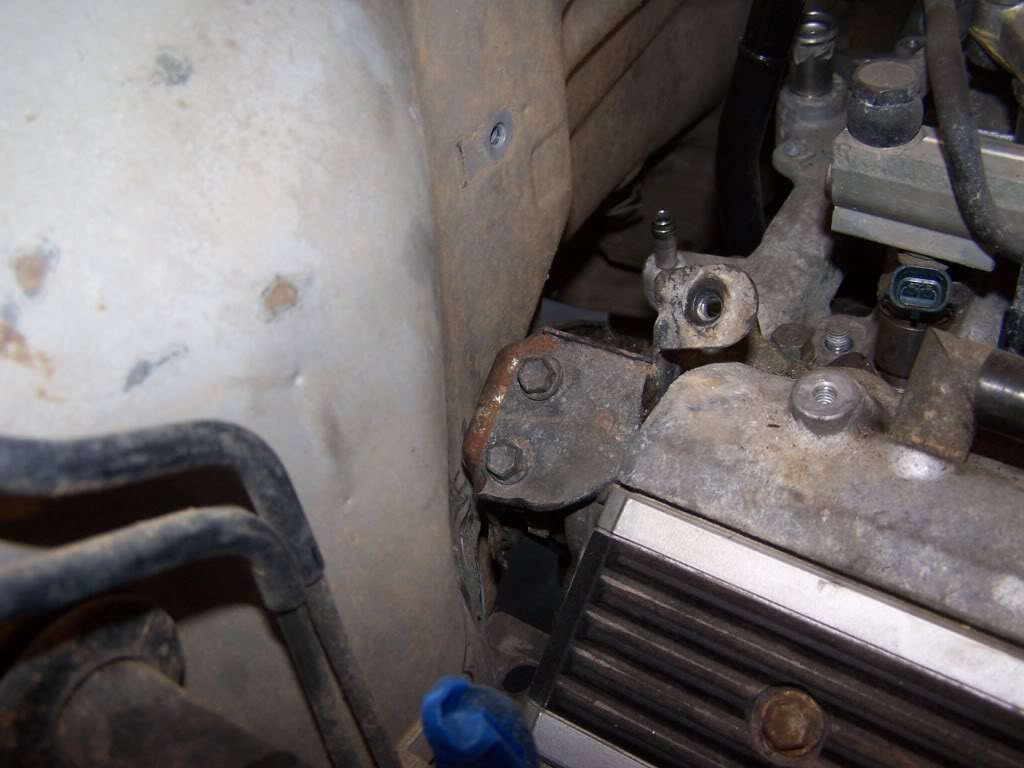
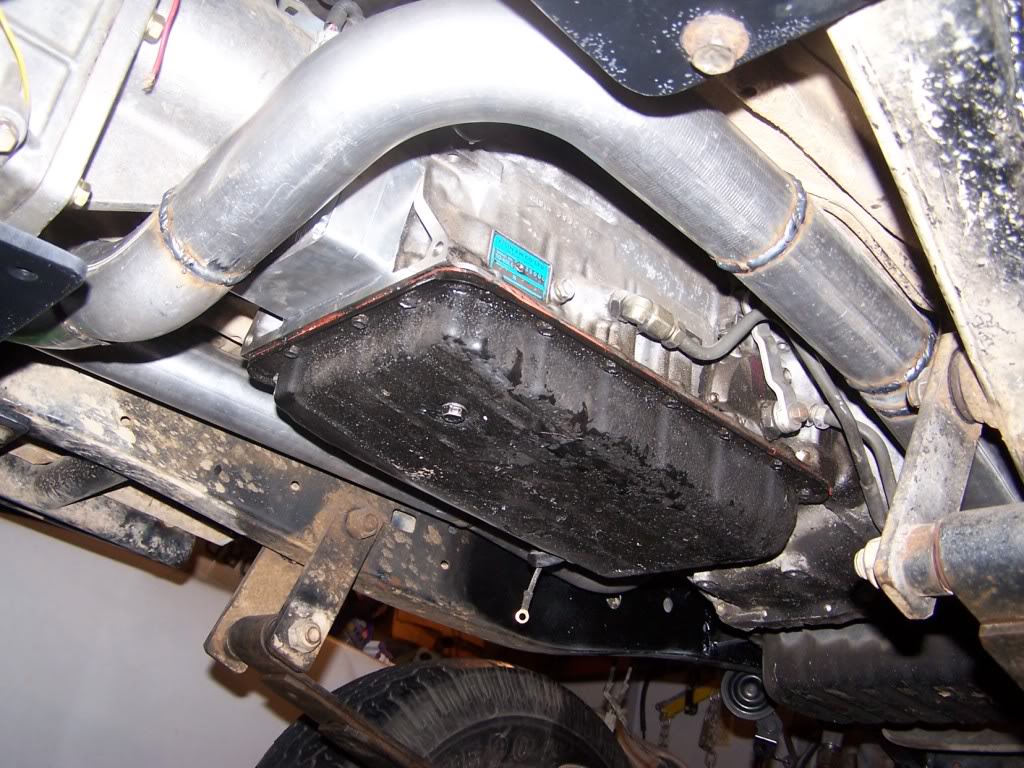
Its a tight fit. Dementionally the engine is big...as big as a big block Chevy.
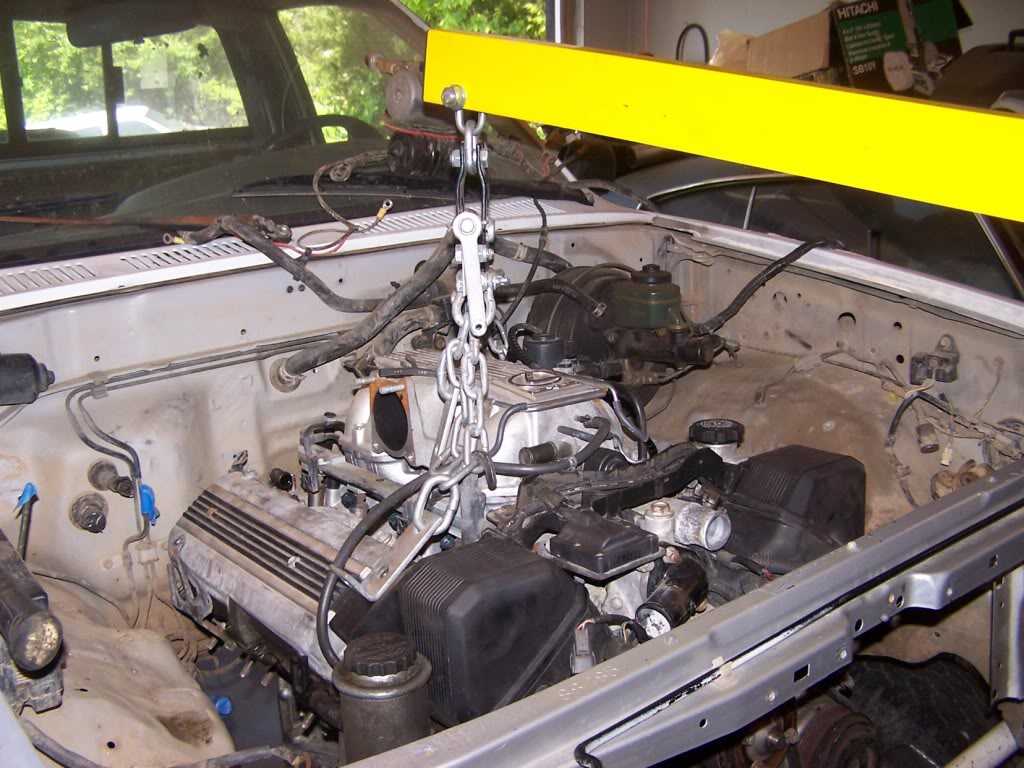
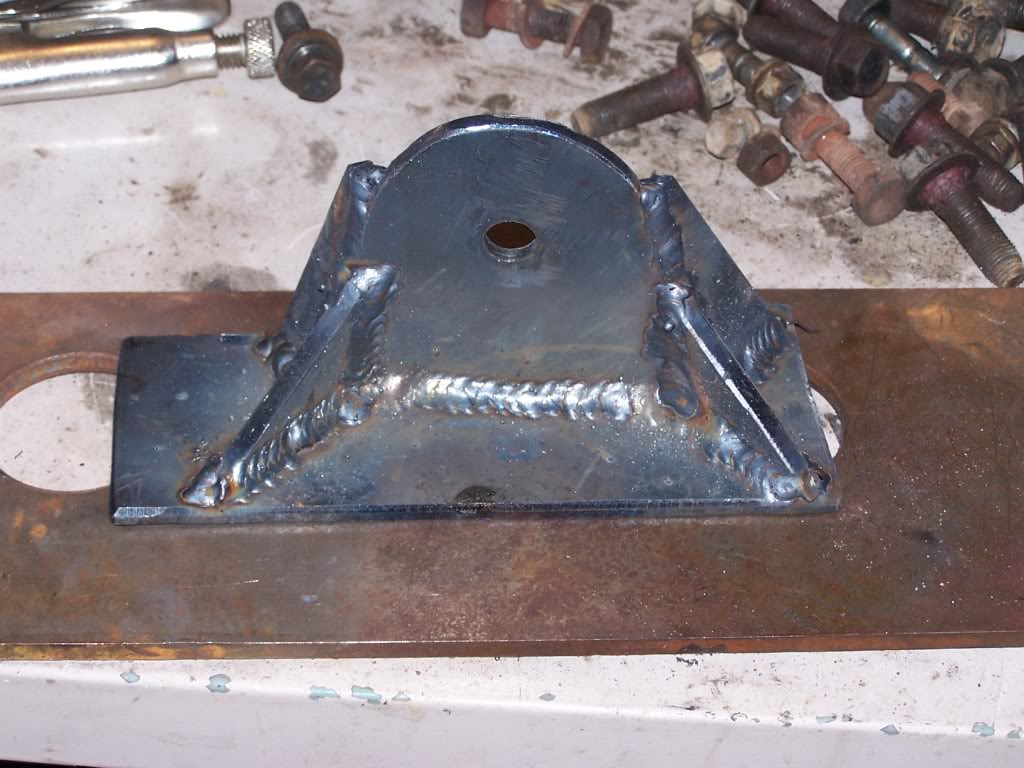
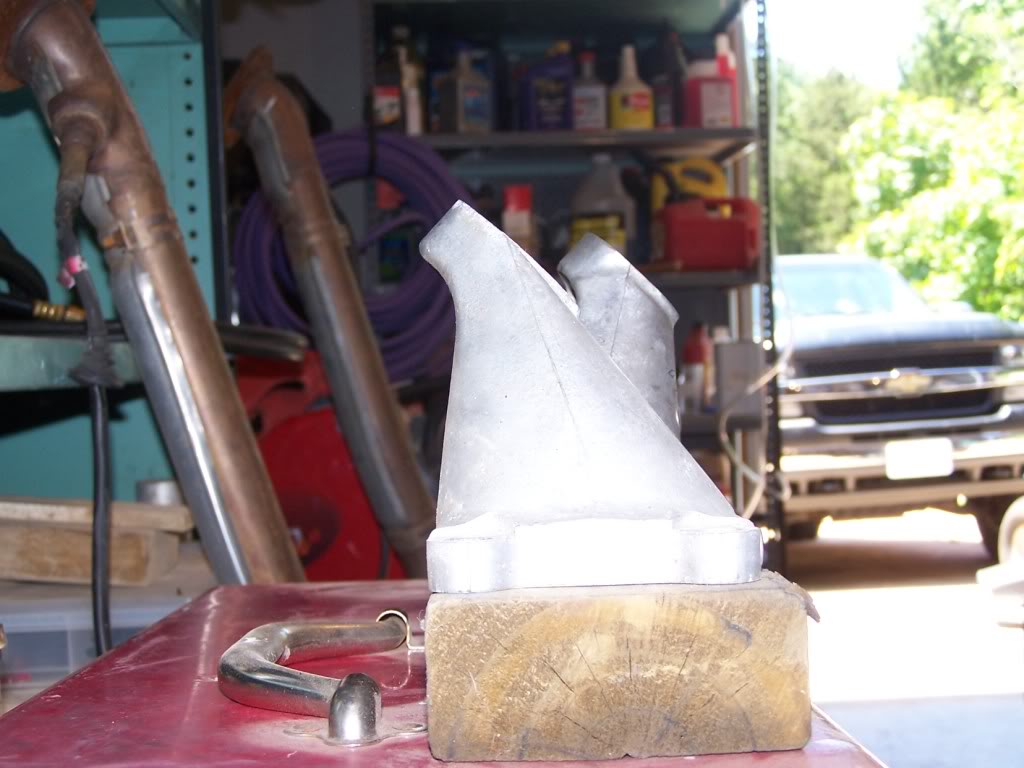
I read several build threads with this engine and have seen just about as many motor mount designs. Most of the people were trying to make engine side mounts to fit the factory toyota truck frame mounts. The angles make it kind of a challenge. The Lexus uses a simple design and I saw no reason to re-invent the wheel so I just got a custom Urethane mount (Since nobody makes one for the Lexus.) and made the frame side mounts. It turned out to be really easy that way and the design allows me to adjust the height of the engine if I need to.
The Urethane mount
Mar 23, 2010 | 06:43 PM
#4
Thread Starter
Registered User
Joined: Jan 2008
Posts: 601
Likes: 1
From: St. Louis, MO
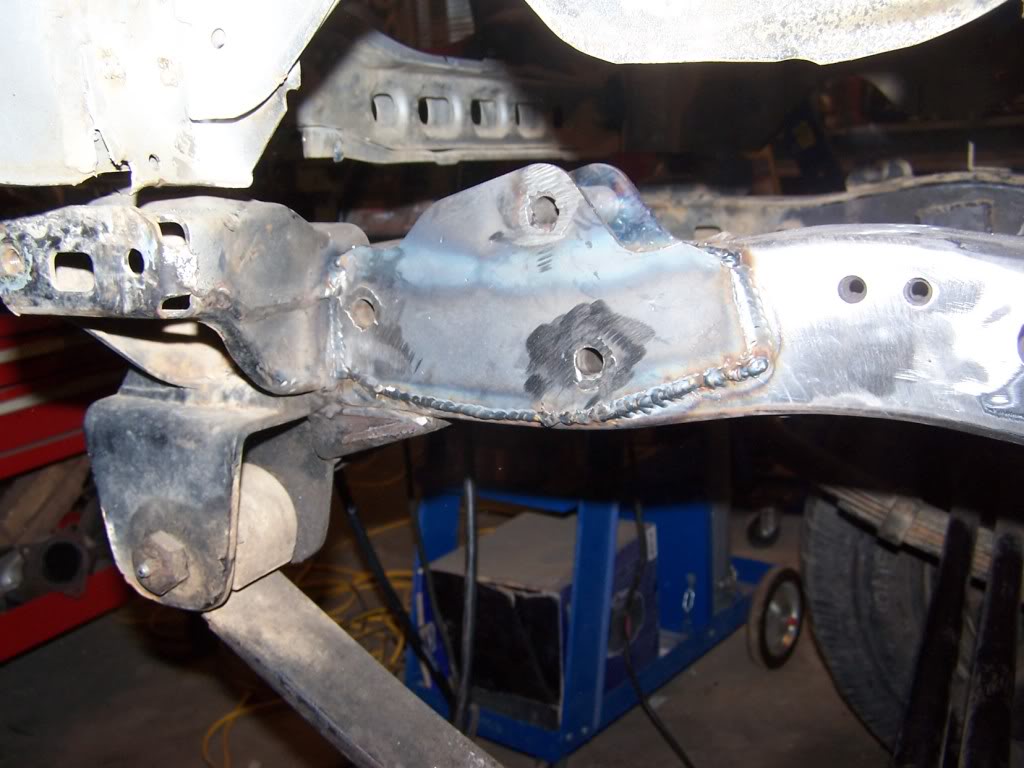
Here is the mount I made. It's kind of crappy looking but you can't see it once everything is in place anyway.
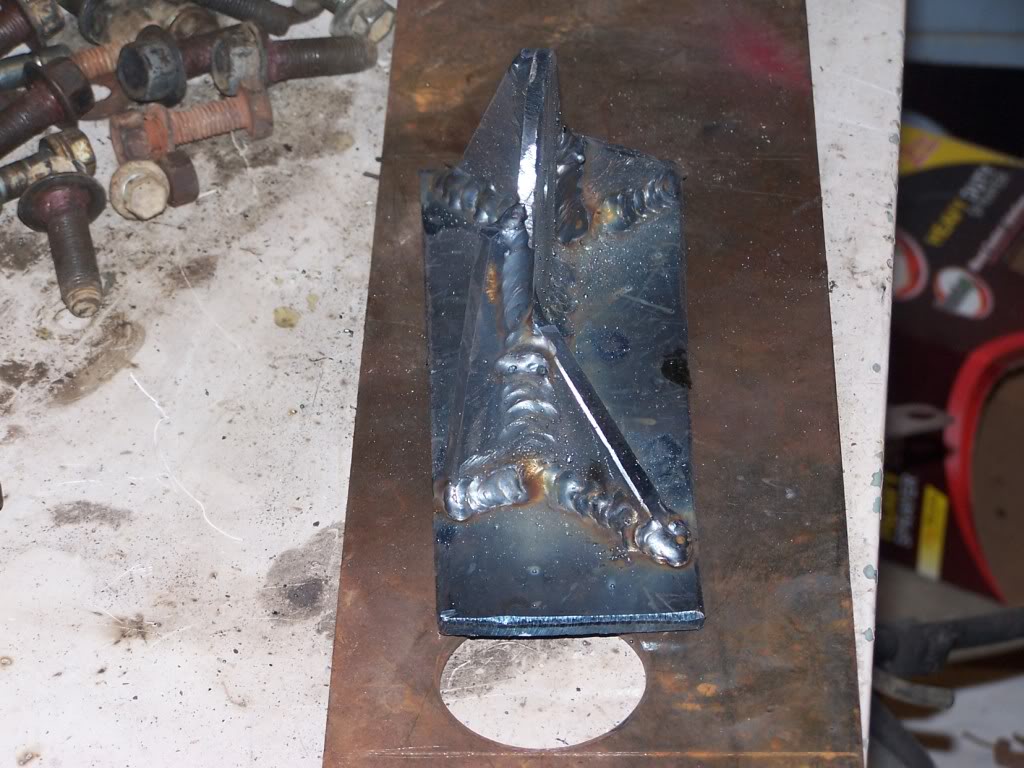
This is where I discovered that the engine side mounts on the LS400 are different than the SC400. The LS400's stick out farther and won't fit betweent the Truck's framrails. You could still make it work if you mount the engine up high enough.
Here are the mounts with the motor in place.
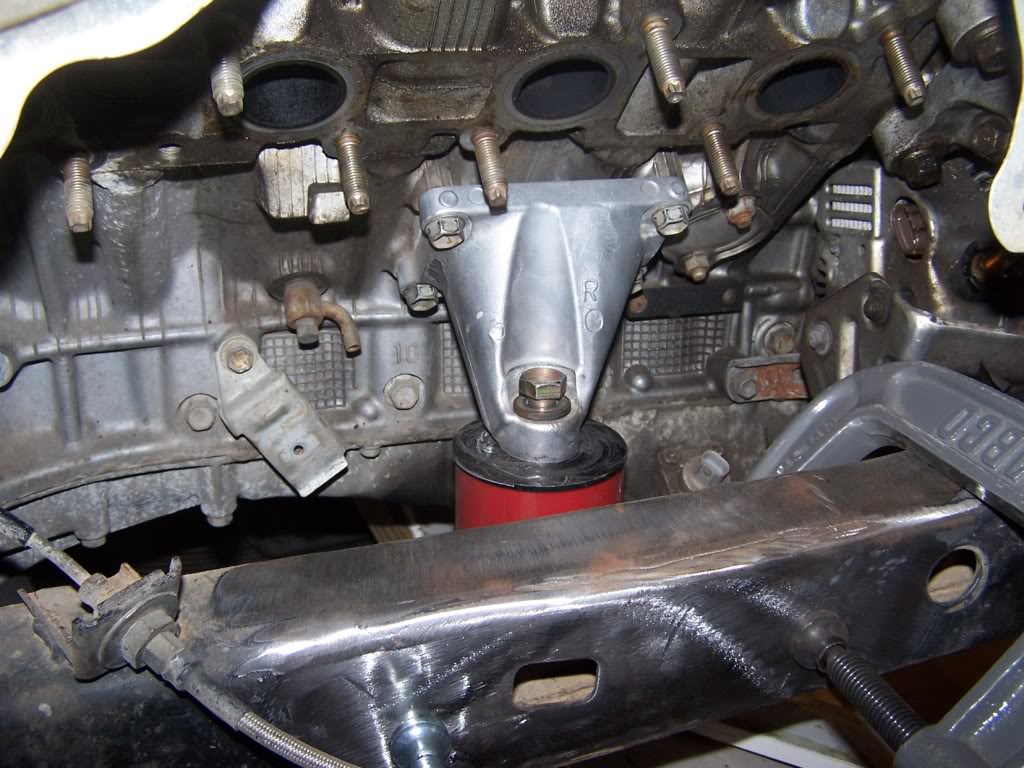
This is where I discovered that the engine side mounts on the LS400 are different than the SC400. The LS400's stick out farther and won't fit betweent the Truck's framrails. You could still make it work if you mount the engine up high enough.
Here are the mounts with the motor in place.
Mar 23, 2010 | 06:44 PM
#5
Thread Starter
Registered User
Joined: Jan 2008
Posts: 601
Likes: 1
From: St. Louis, MO
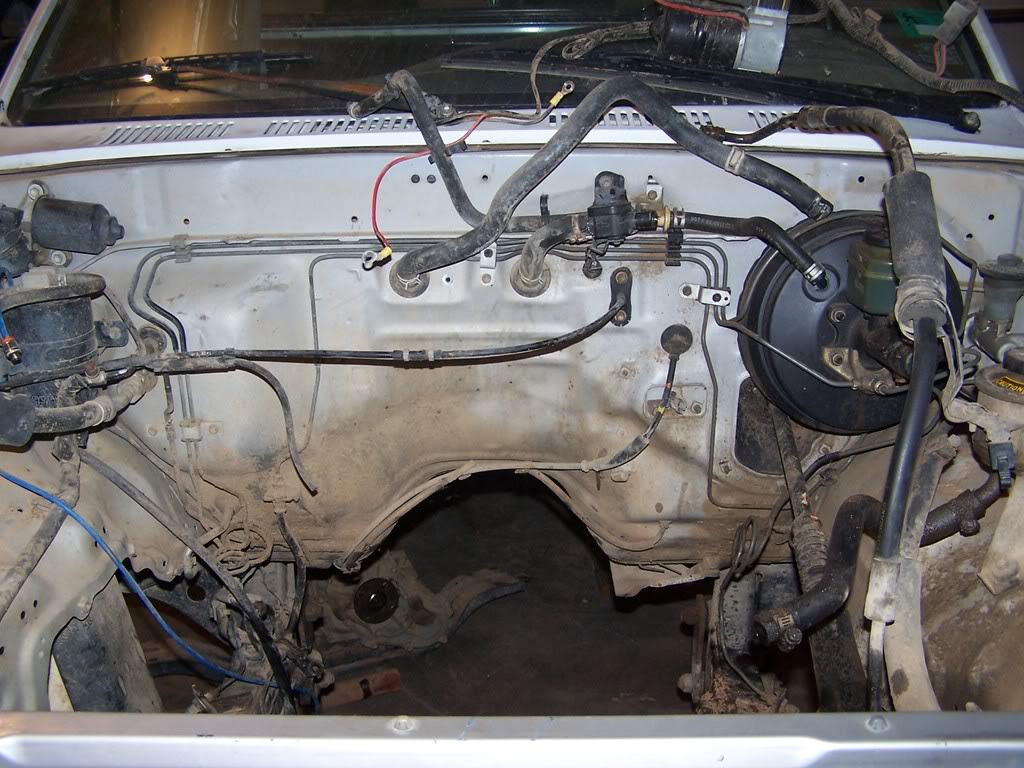
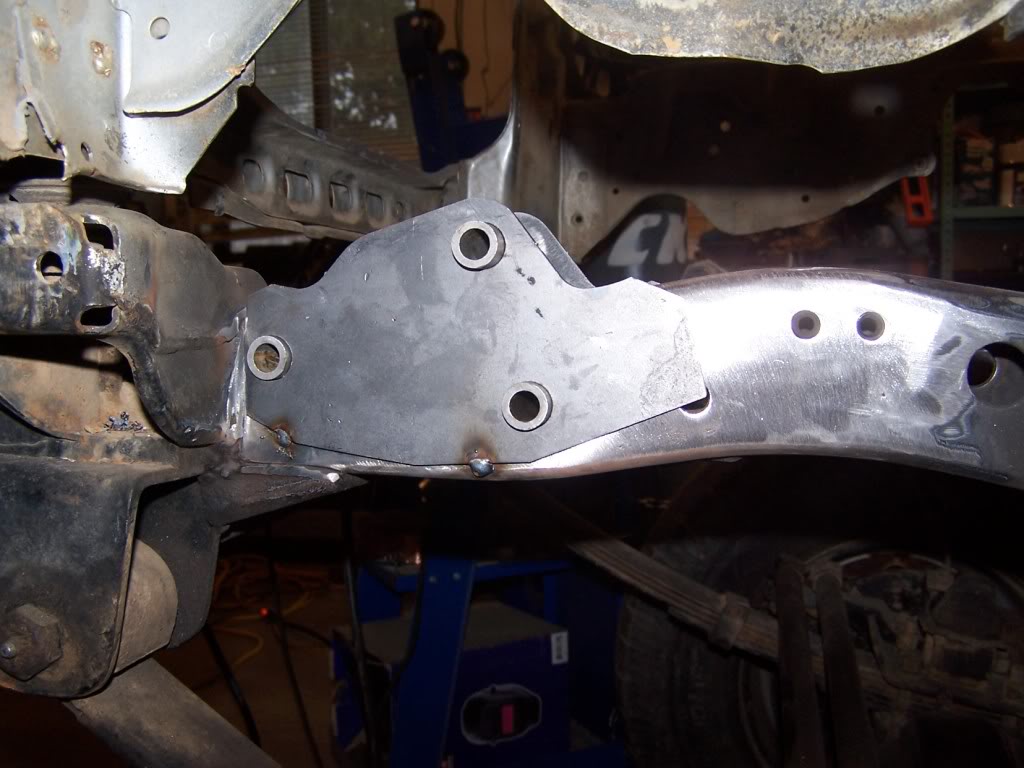
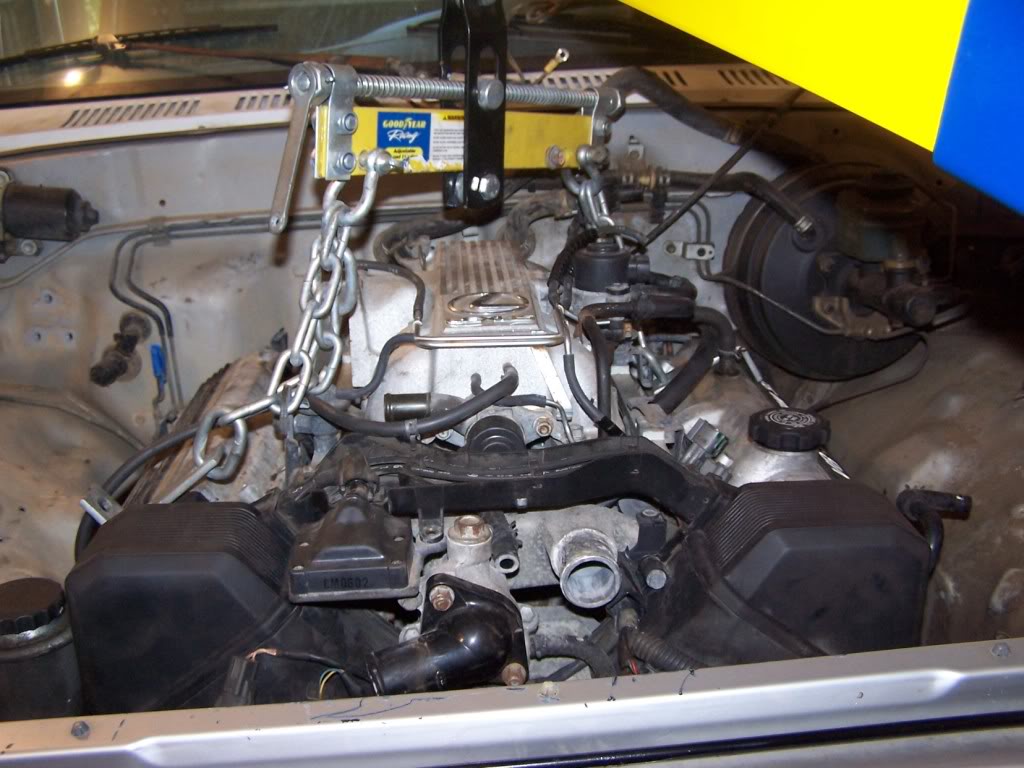
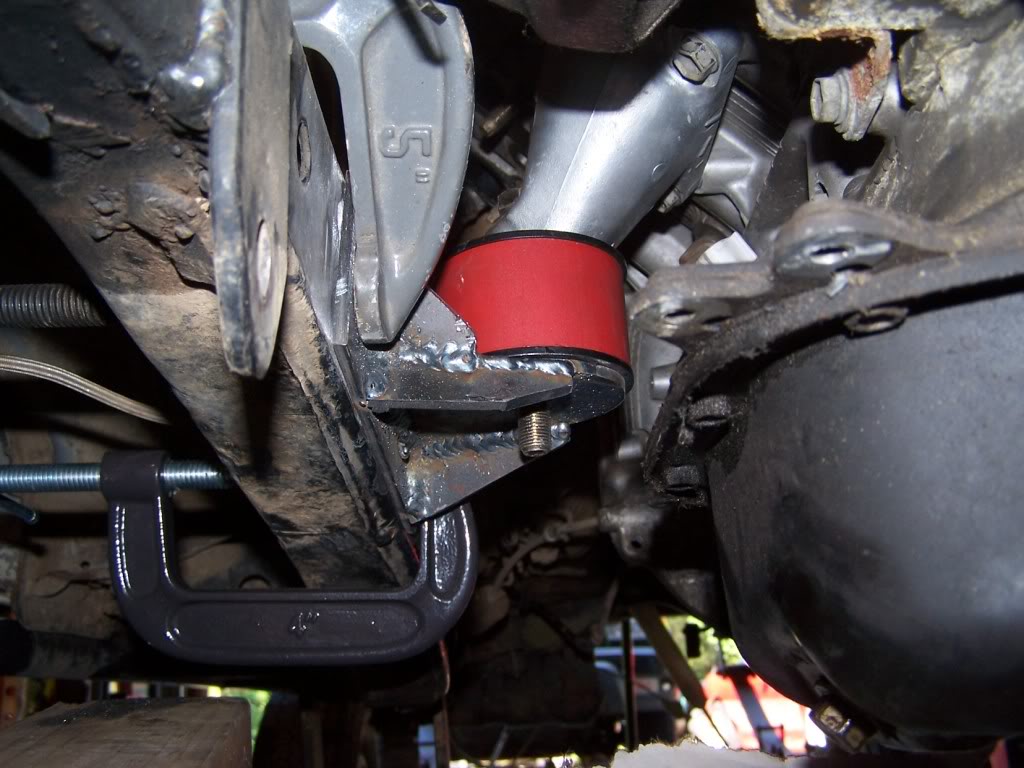
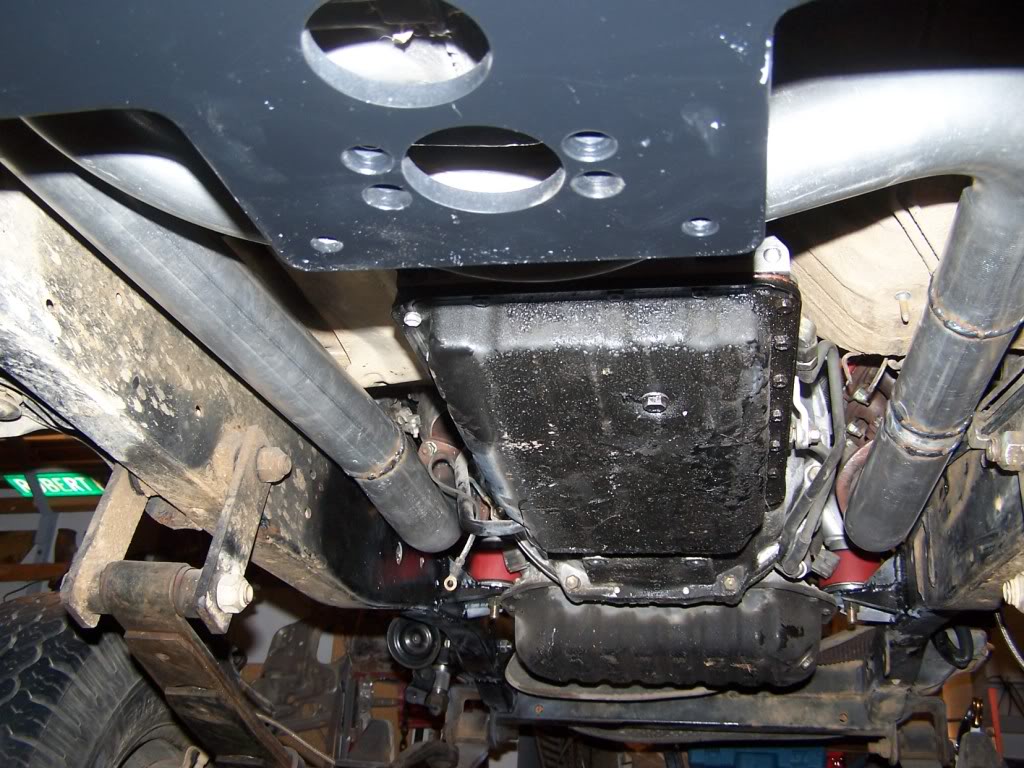
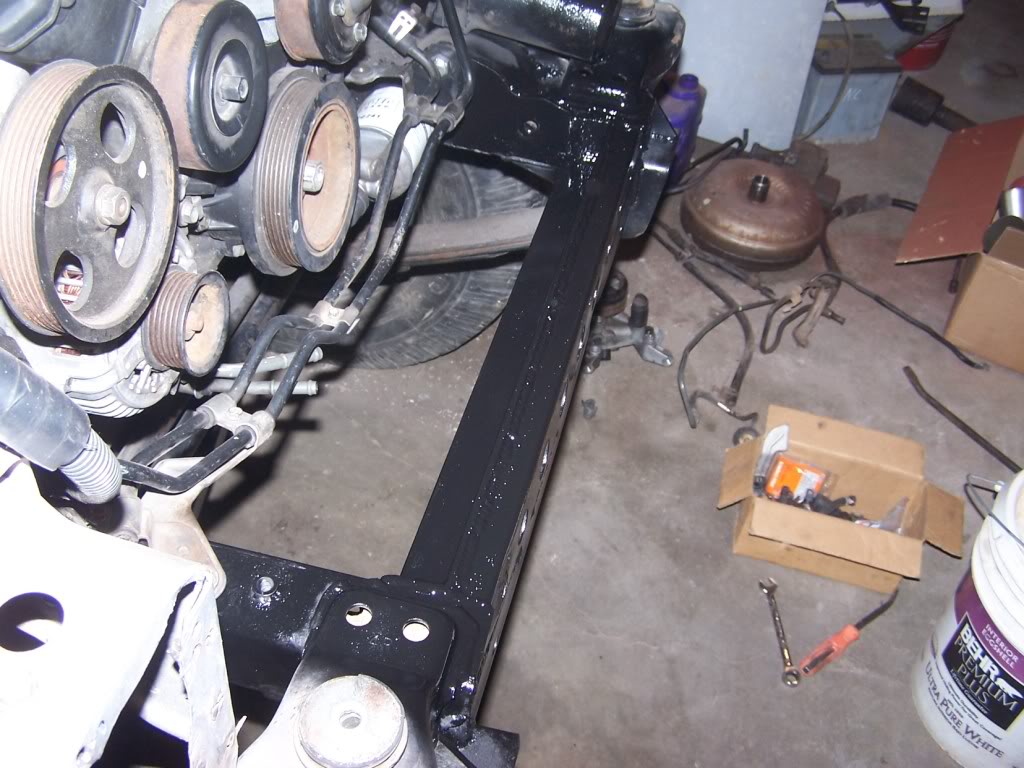
It takes a bit of finesse to make eveything fit. I knew I had to get it as close to the firewall as possible to still have room in front for a radiator and cooling fan.
I used a BFH to massage the firewall a bit.
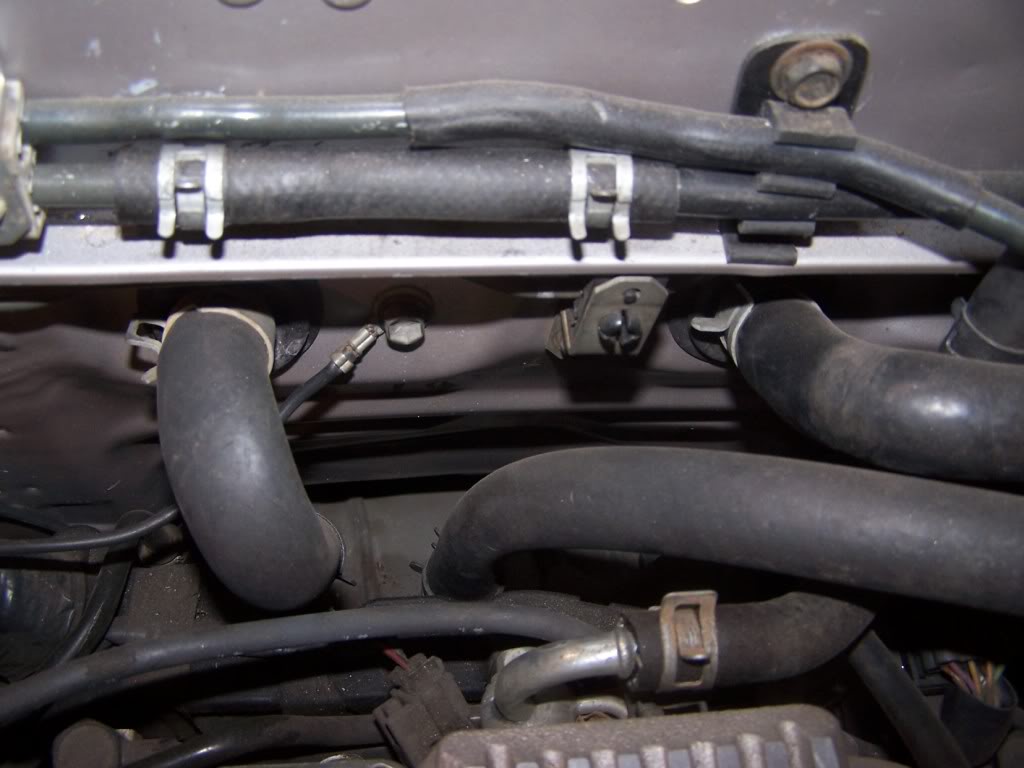
Side to side is also a very tight fit. I ended up offsetting it about 1/4 of an inch to clear the steering shaft. The exhaust manifolds are a different story. The LS400 manifolds won't work at all. They stick out way too far. The SC400's fit between the framerails but the 3 bolt exhaust pipe flange was too big to clear. The Lexus design connects the CATS directly to the exhaust manifolds with the 3 bolt flange and then to the exhaust pipe with a 2 bolt flange. since I wasn't using the CATS (they wouldn't fit anyway) I modified the exhaust manifold and welded the 2 bolt flange from the CAT to it. Sorry no pics of this. I am told that Tundra exhaust manifolds will work too but they also need to be modified. I bought a set of headers for a Tundra to try them out. The passenger one cleared fine but the drivers side wouldn't clear the steering shaft no matter what I did. I'd have to cut the driver side header up and make a custom pipe to clear the steering. I'll save this for a later project.
While the engine was out I cleaned up and painted the engine bay.
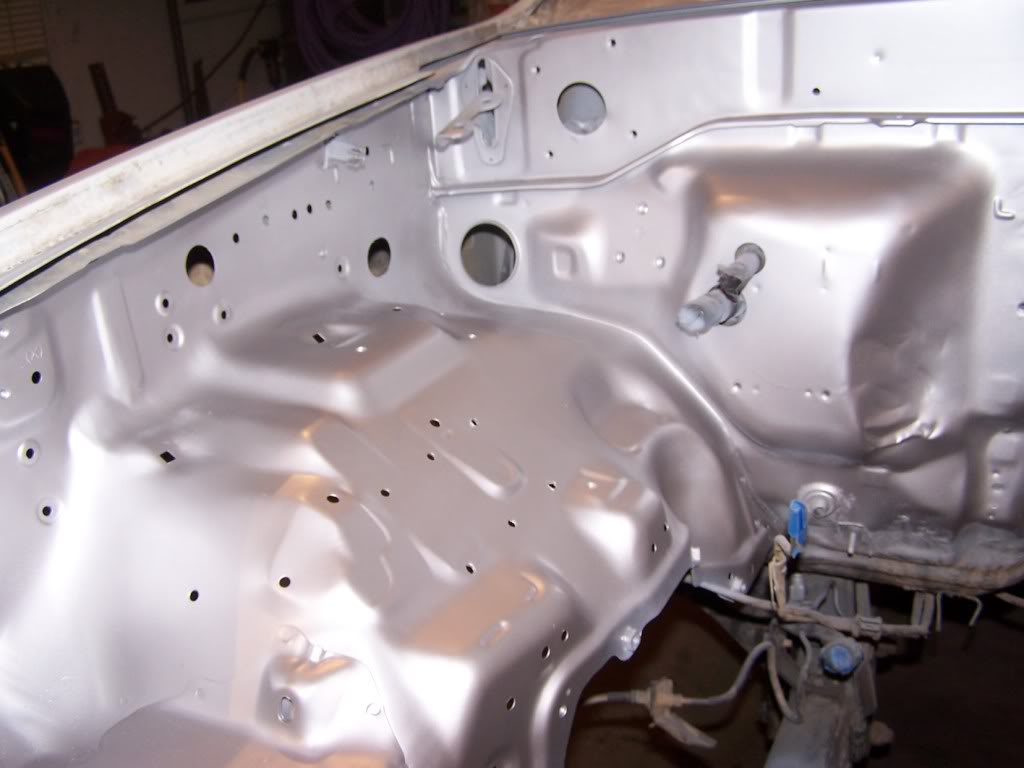
I used a BFH to massage the firewall a bit.
Side to side is also a very tight fit. I ended up offsetting it about 1/4 of an inch to clear the steering shaft. The exhaust manifolds are a different story. The LS400 manifolds won't work at all. They stick out way too far. The SC400's fit between the framerails but the 3 bolt exhaust pipe flange was too big to clear. The Lexus design connects the CATS directly to the exhaust manifolds with the 3 bolt flange and then to the exhaust pipe with a 2 bolt flange. since I wasn't using the CATS (they wouldn't fit anyway) I modified the exhaust manifold and welded the 2 bolt flange from the CAT to it. Sorry no pics of this. I am told that Tundra exhaust manifolds will work too but they also need to be modified. I bought a set of headers for a Tundra to try them out. The passenger one cleared fine but the drivers side wouldn't clear the steering shaft no matter what I did. I'd have to cut the driver side header up and make a custom pipe to clear the steering. I'll save this for a later project.
While the engine was out I cleaned up and painted the engine bay.
Mar 23, 2010 | 06:47 PM
#6
Thread Starter
Registered User
Joined: Jan 2008
Posts: 601
Likes: 1
From: St. Louis, MO
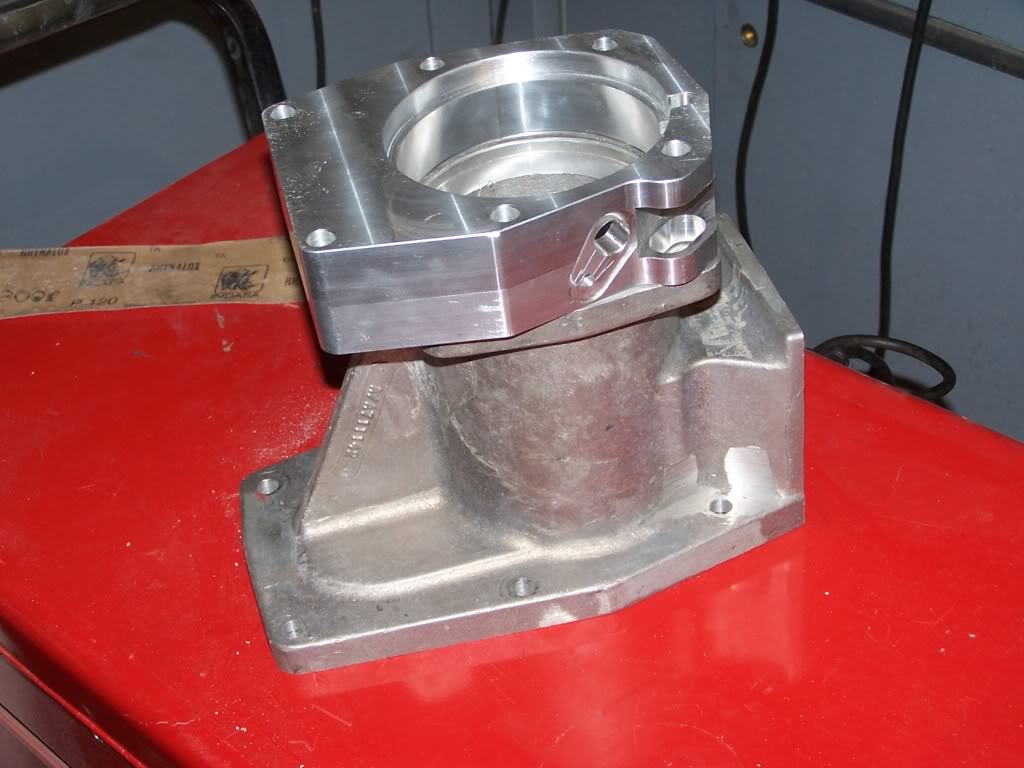
Many of these swaps use either the W56 transmission or the R151 (there are bellhousing adapters for both) but I decided to keep the automatic. Inchworm makes their Pre-Runner adapter to convert a 2wd Tacoma to 4WD using a standard Toyota 21/23 spline right side drop transfer case. Since the Lexus uses the same A340E transmission it will bolt right up.
Here is the adapter. Its a 2 piece unit. Its basically Advanced Adapter's Chevy TH350 to Toyota transfer case adapter and then there is a machined adapter to connect the adapter to a Toyota transmission.
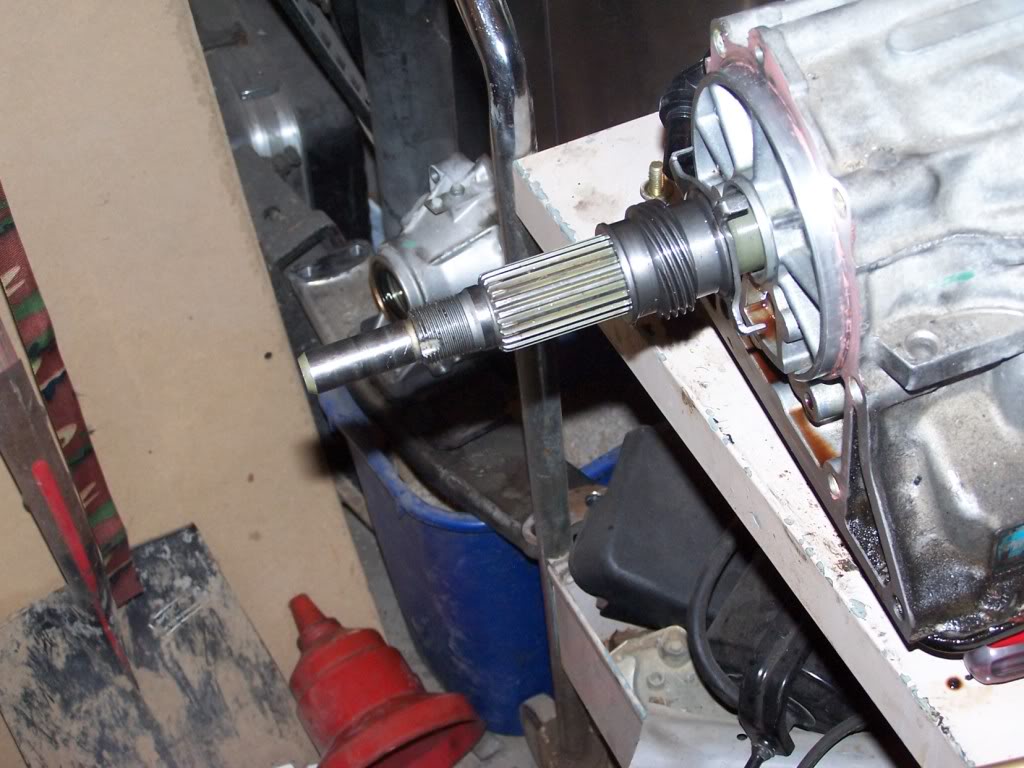
Transmission with the output cover removed. The shaft has to be cut near where the splines end. Unfortunately I was too anxious to get it together so I never got pics of it cut. The instructions that came with Inchworms adapter are for the Toyota version of the tranny, which uses a different output than the Lexus version so the measurments are not the same. It was pretty easy to just measure where it needed to be cut though. Remember, measure three times and cut once, or in my case measure about twenty times.

Here is the adapter. Its a 2 piece unit. Its basically Advanced Adapter's Chevy TH350 to Toyota transfer case adapter and then there is a machined adapter to connect the adapter to a Toyota transmission.
Transmission with the output cover removed. The shaft has to be cut near where the splines end. Unfortunately I was too anxious to get it together so I never got pics of it cut. The instructions that came with Inchworms adapter are for the Toyota version of the tranny, which uses a different output than the Lexus version so the measurments are not the same. It was pretty easy to just measure where it needed to be cut though. Remember, measure three times and cut once, or in my case measure about twenty times.
Last edited by toyminator2000; Mar 23, 2010 at 07:14 PM.


Trending Topics
Mar 23, 2010 | 06:52 PM
#8
Thread Starter
Registered User
Joined: Jan 2008
Posts: 601
Likes: 1
From: St. Louis, MO
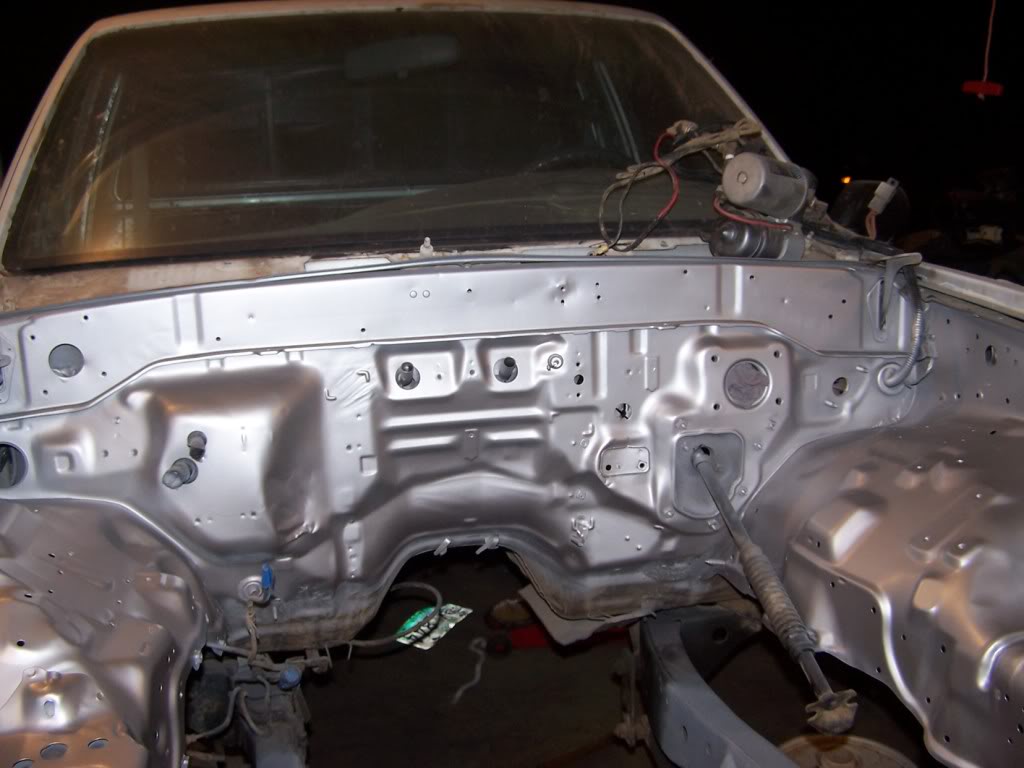
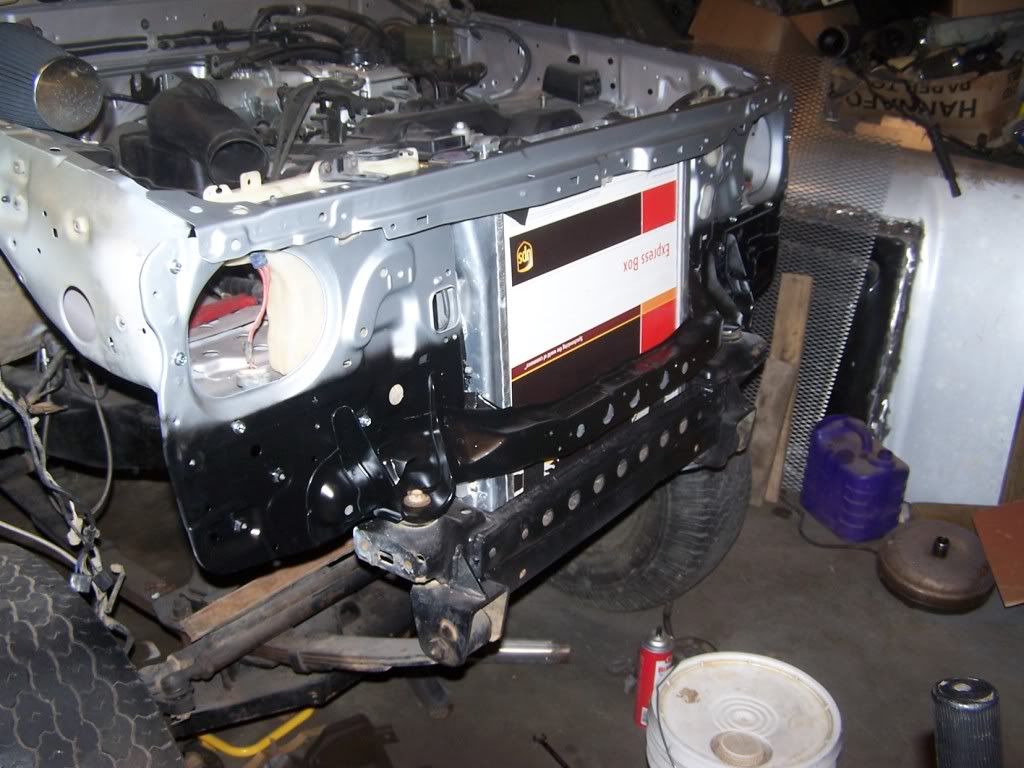
Here is the motor installed. I removed the core support so I could install it all assembled. I had already done it once before when I converted to the 4Runner core support so it was a no brainer. It did suck cutting the welds that I made after putting it back together. This time I got another doner support and made it bolt on instead of welding it.

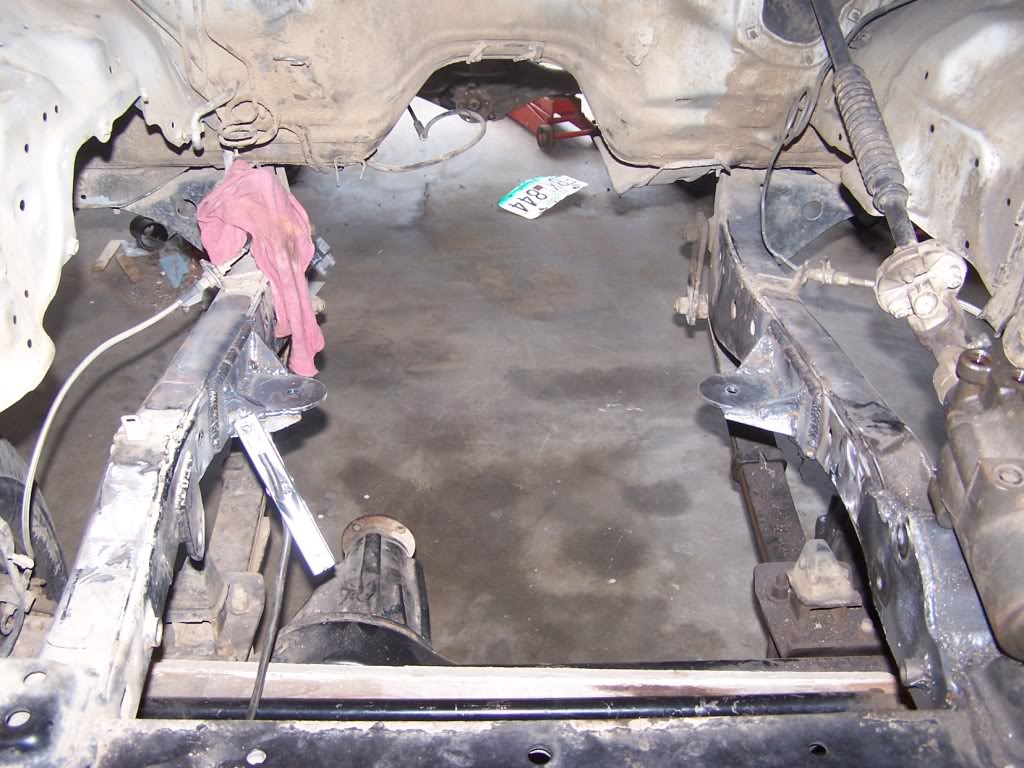
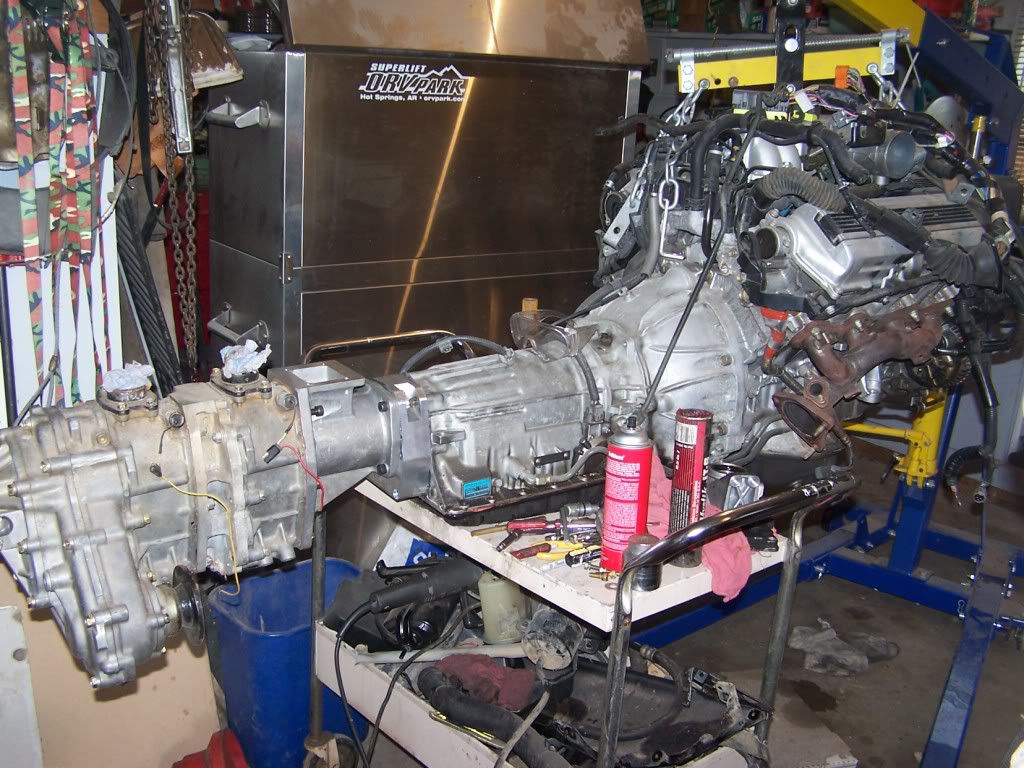
The drivetrain is long with the dual cases. I had to cut out some of the floor and the horsecollar.
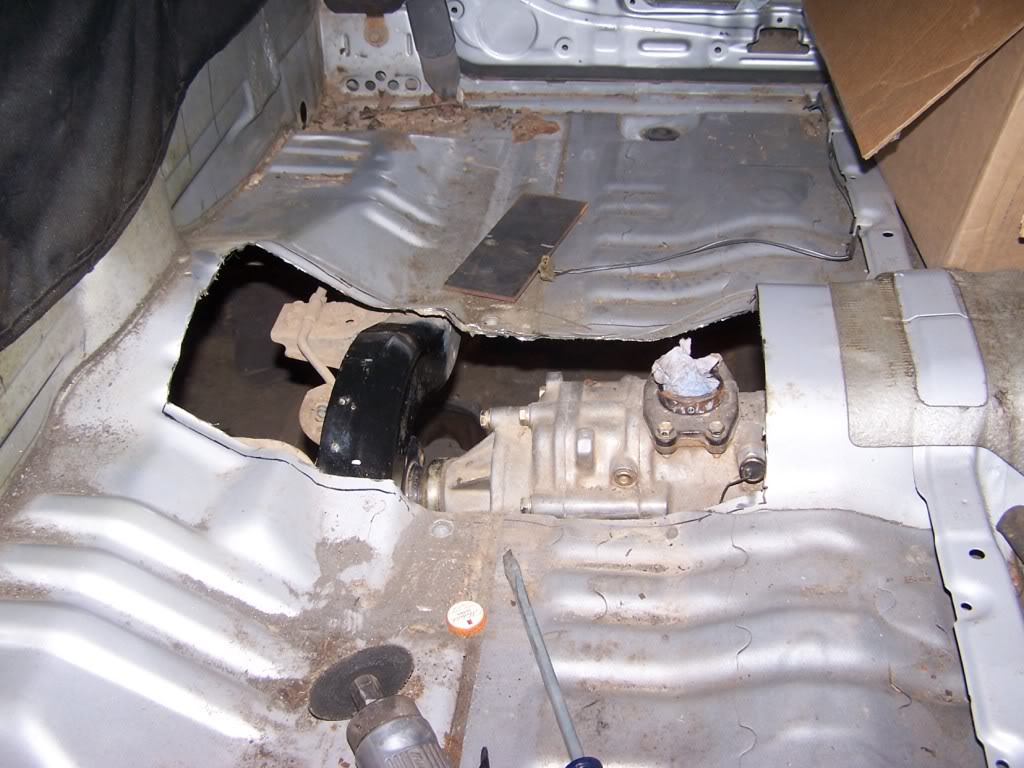
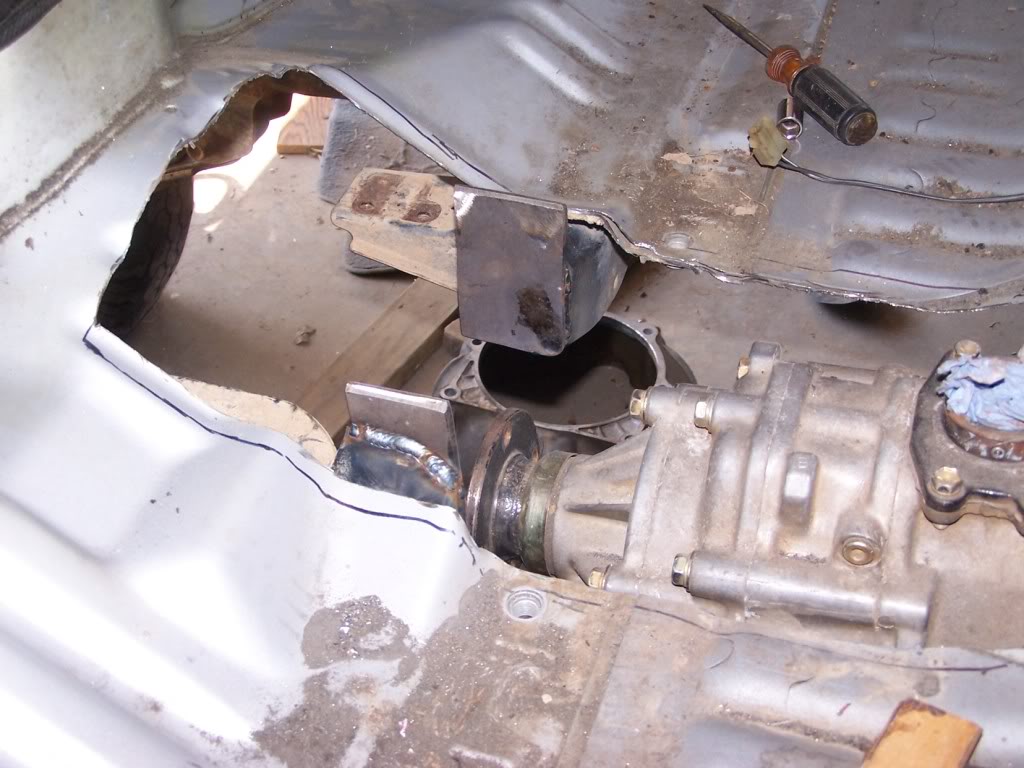
The drivetrain is long with the dual cases. I had to cut out some of the floor and the horsecollar.
Mar 23, 2010 | 06:54 PM
#9
Thread Starter
Registered User
Joined: Jan 2008
Posts: 601
Likes: 1
From: St. Louis, MO
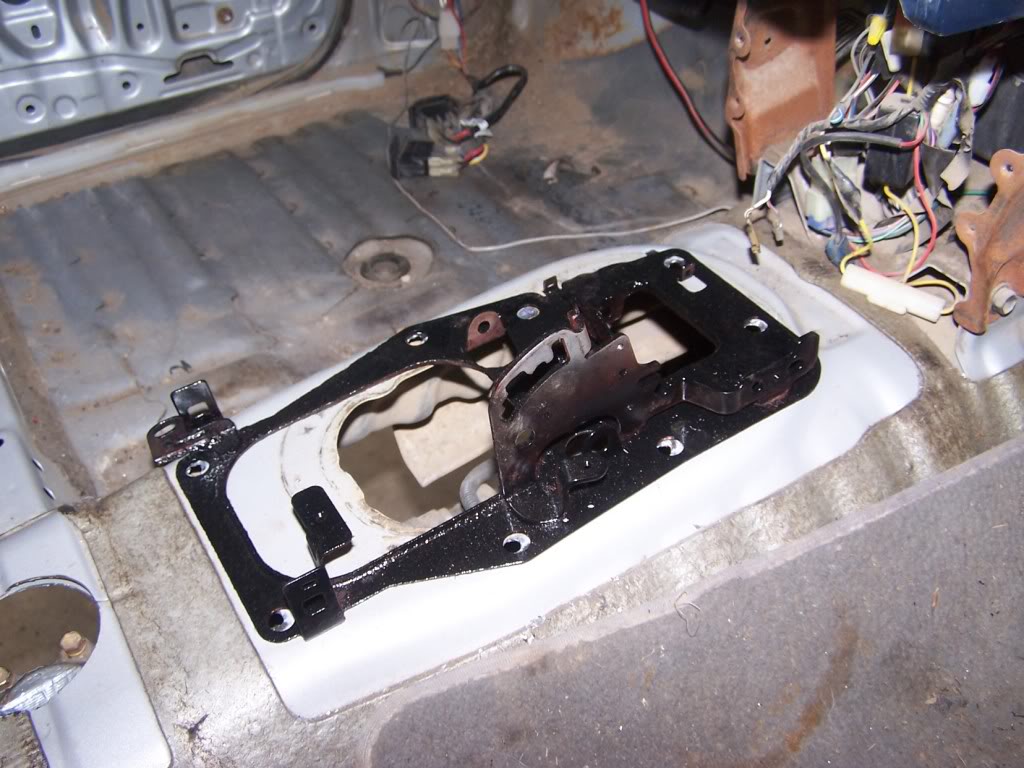
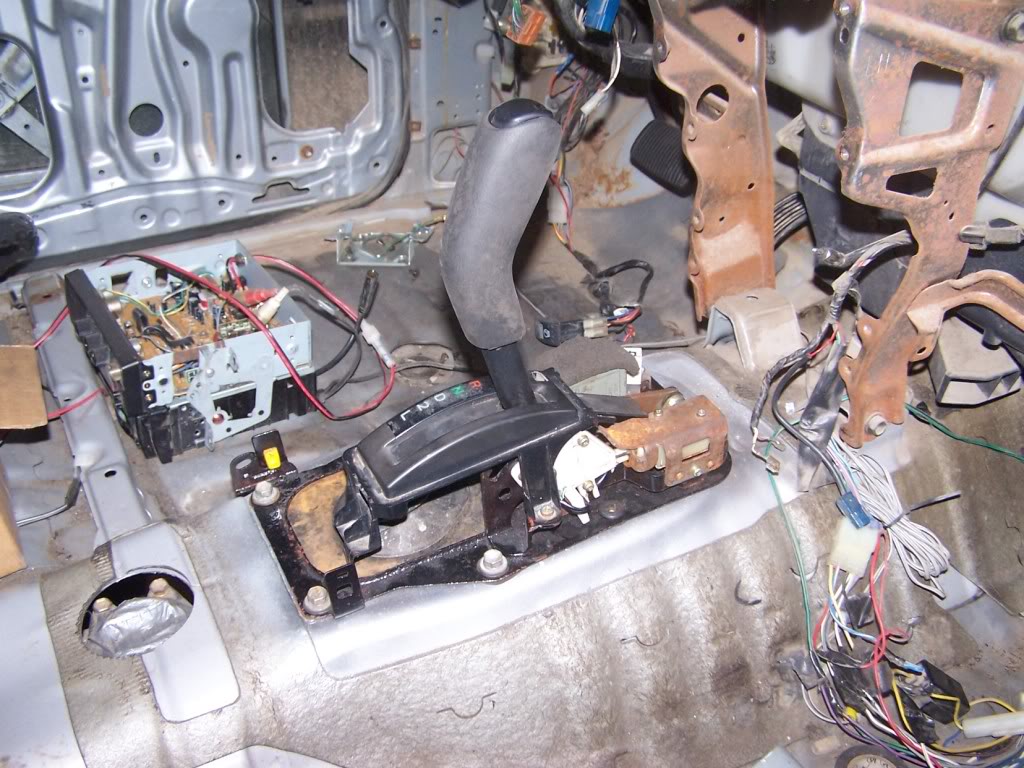
I'm going to use the shifter out of a 2000 4Runner because it doesn't have the 4wd shifter built into it like the 90-95. I couldn't use it anyway. The SC400 shifter hit the dash so I couldn't use it either. It ended up fitting almost perfect. I didn't have to cut any metal. I welded some nuts to the underside of the floorboard to make it easier to install and remove necessary.
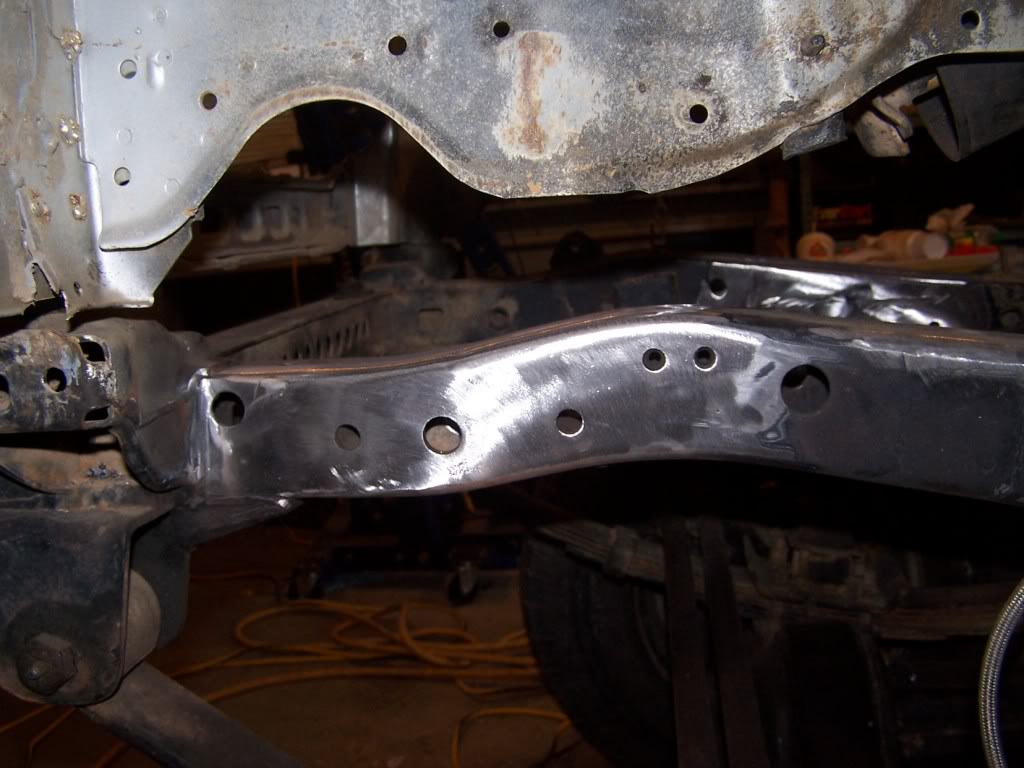
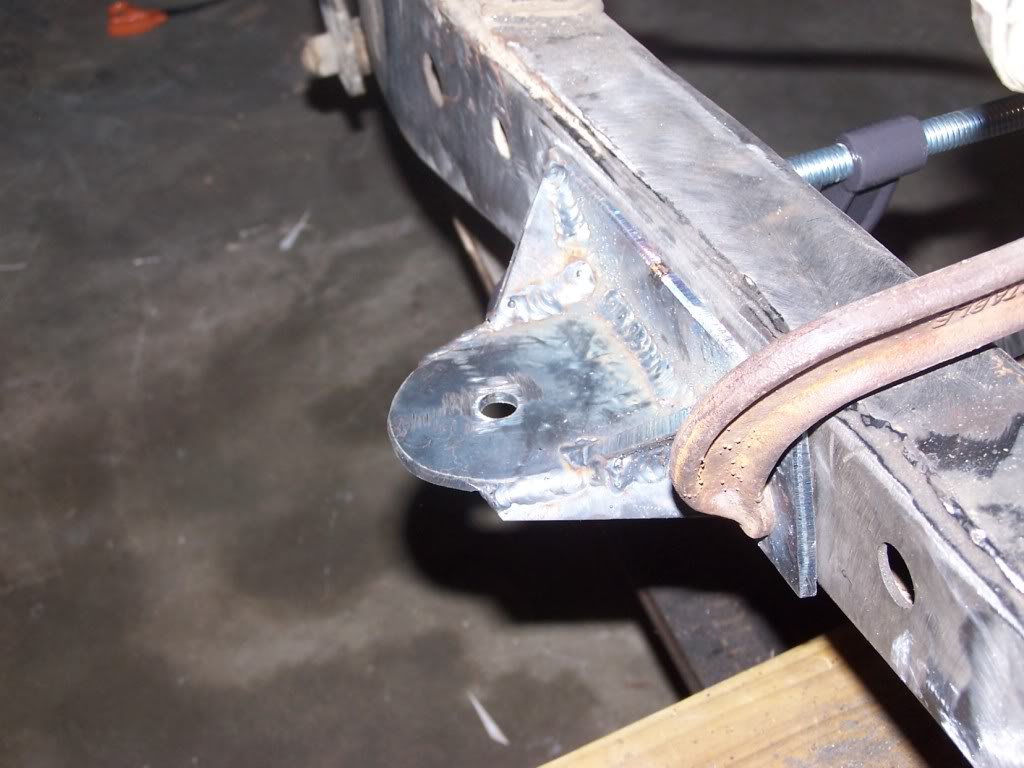
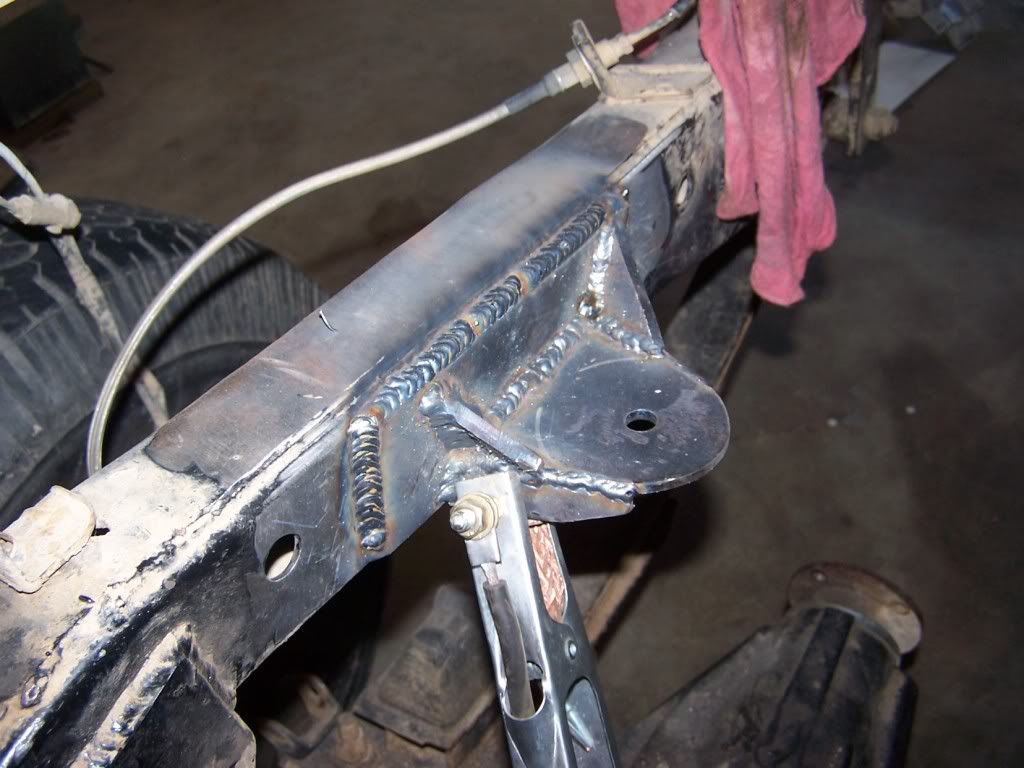
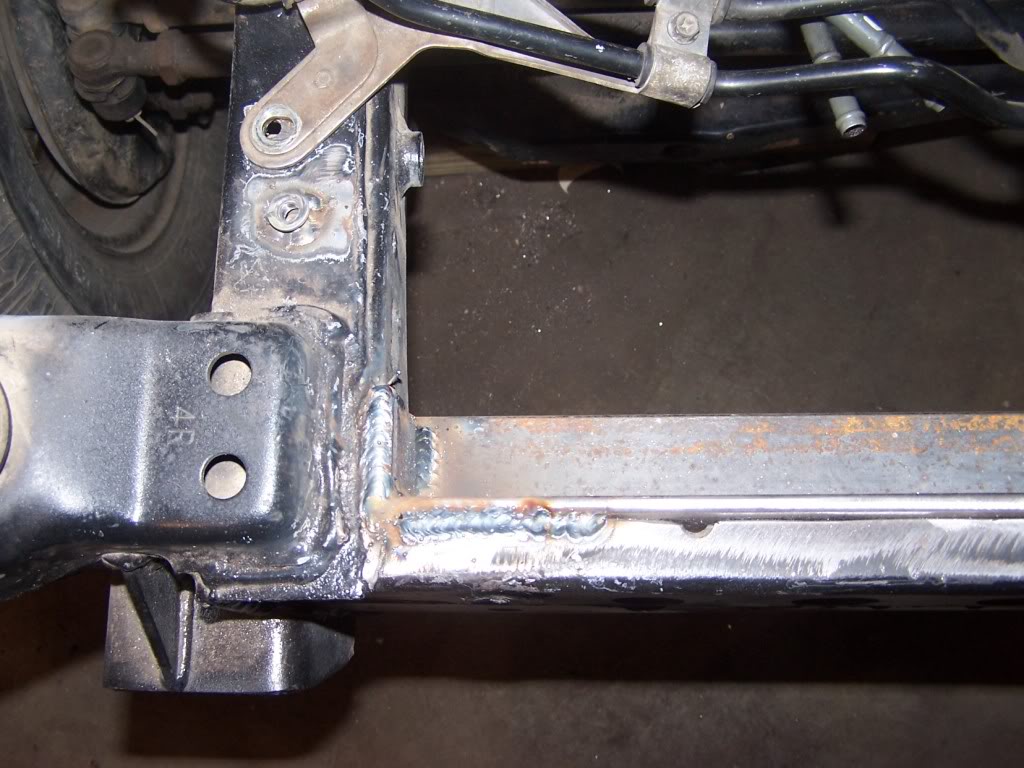
I ende dup using a Budbuilt crossmember and modified it to work. If I had it to do over again I would have probably used Front Ranges. Its a different design and would have been less work but I already had the Budbuilt. The mounting location is about 5 inches behind the factory location. I added a piec of metal each side of the crossmember to utilize the factory bolt holes on the frame. I also made some mounting points to use the slots cut out on the crossmember.
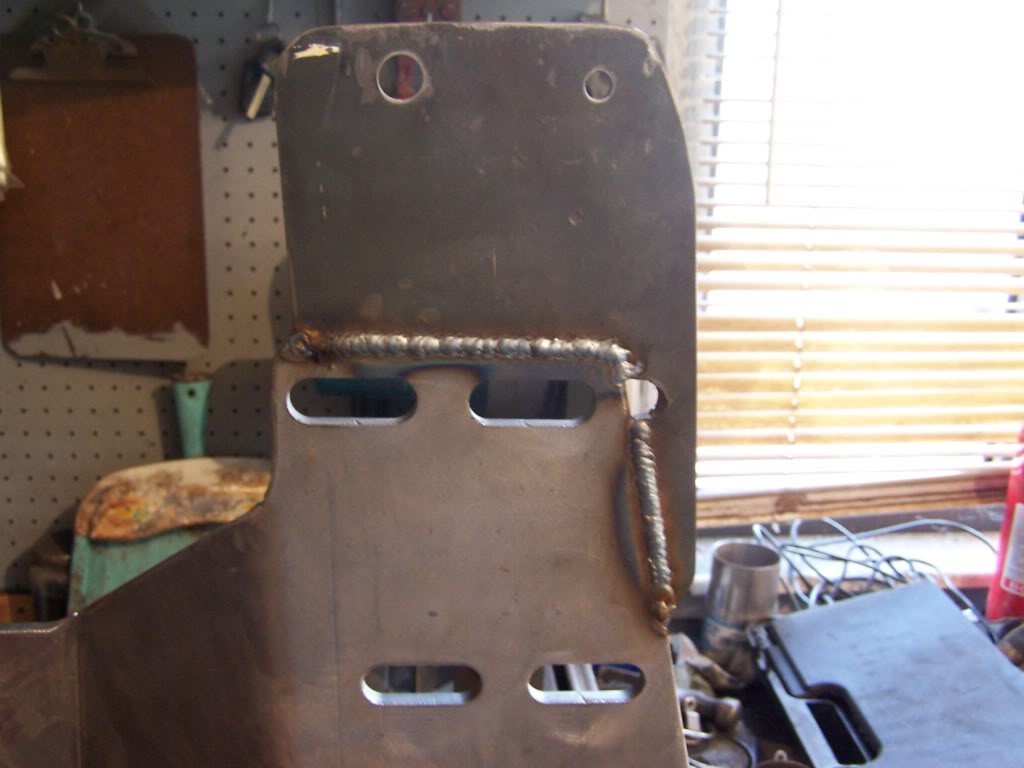
I ende dup using a Budbuilt crossmember and modified it to work. If I had it to do over again I would have probably used Front Ranges. Its a different design and would have been less work but I already had the Budbuilt. The mounting location is about 5 inches behind the factory location. I added a piec of metal each side of the crossmember to utilize the factory bolt holes on the frame. I also made some mounting points to use the slots cut out on the crossmember.
Last edited by toyminator2000; Mar 23, 2010 at 07:26 PM.
Mar 23, 2010 | 06:58 PM
#10
Thread Starter
Registered User
Joined: Jan 2008
Posts: 601
Likes: 1
From: St. Louis, MO
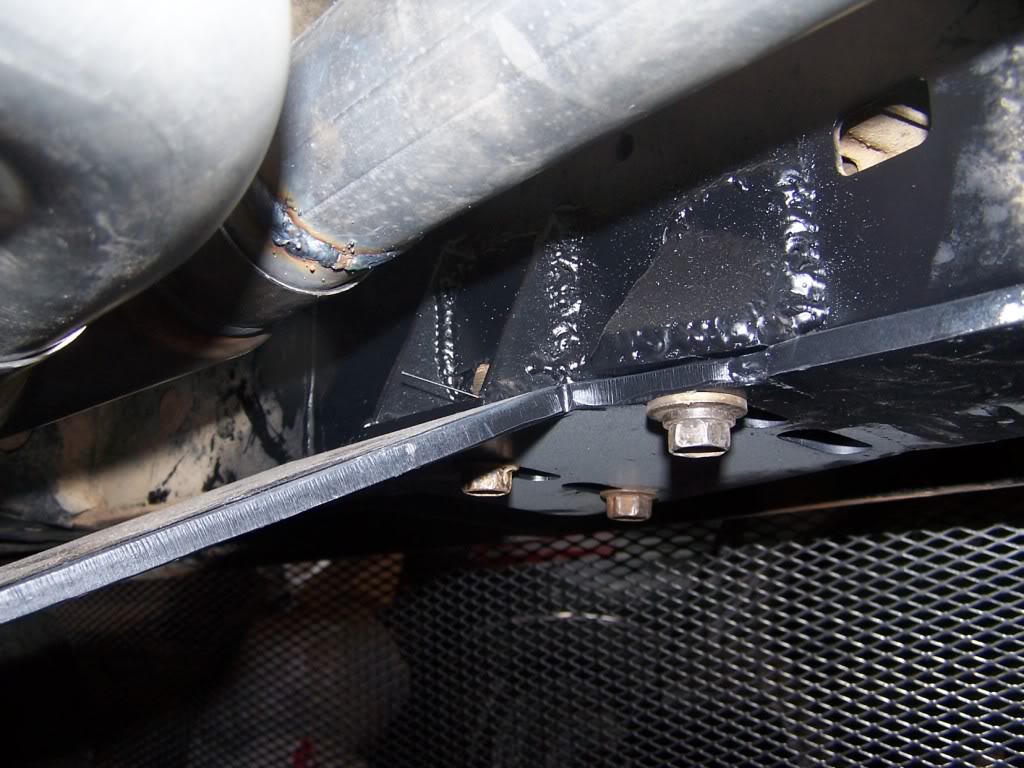
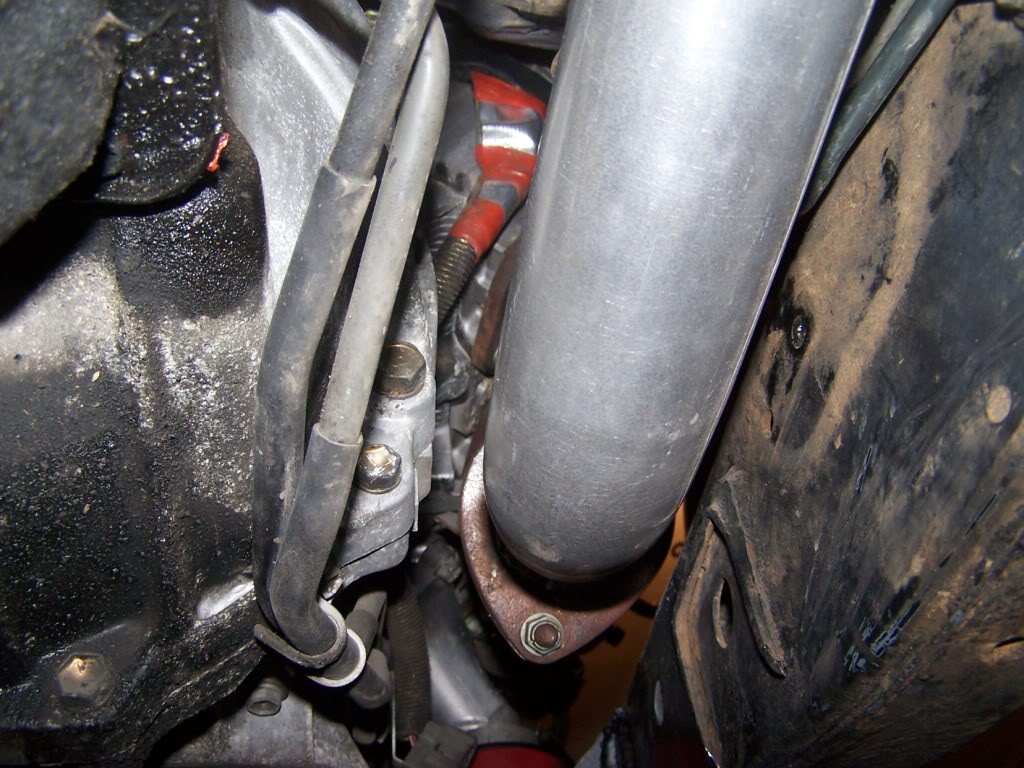
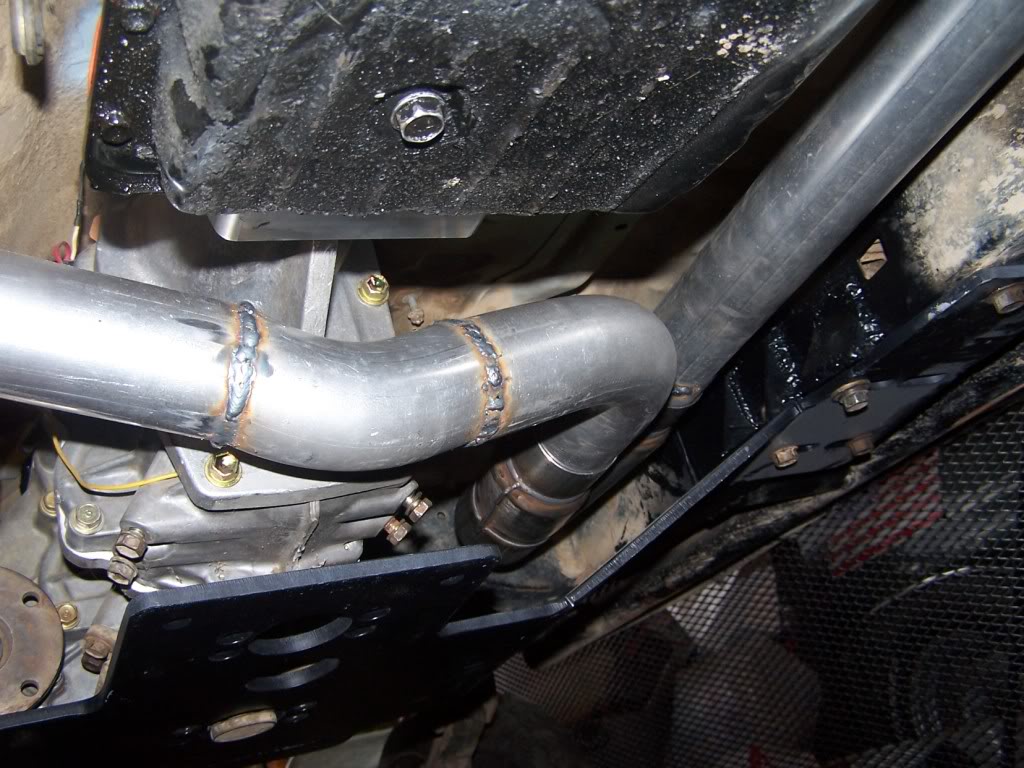
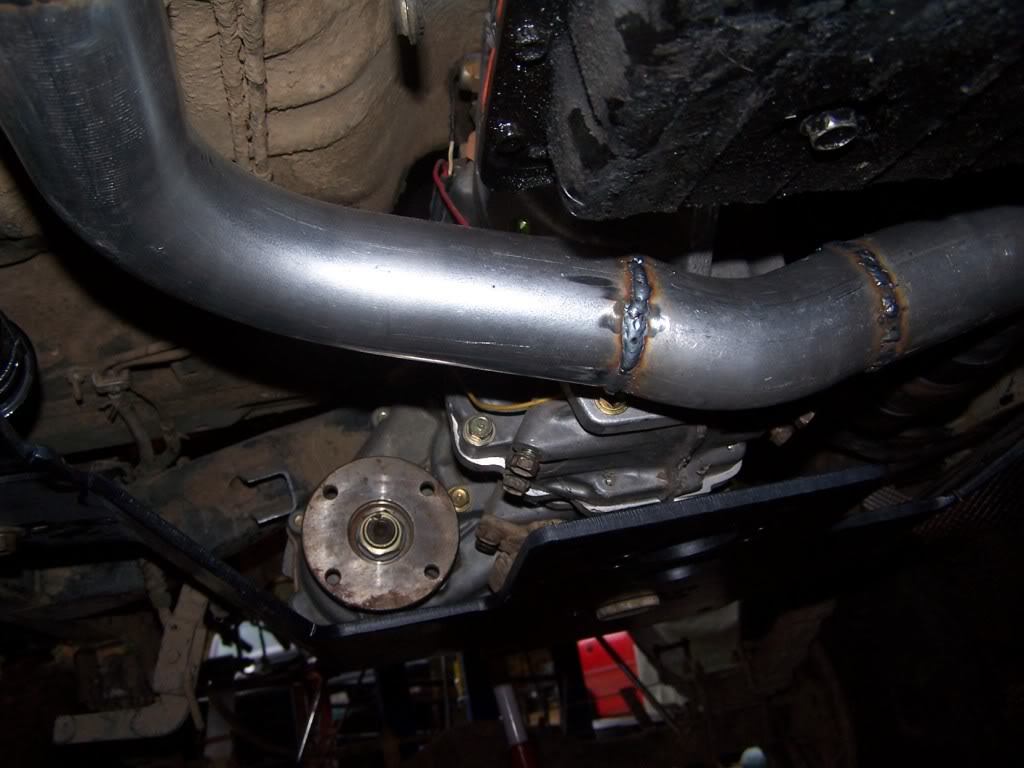
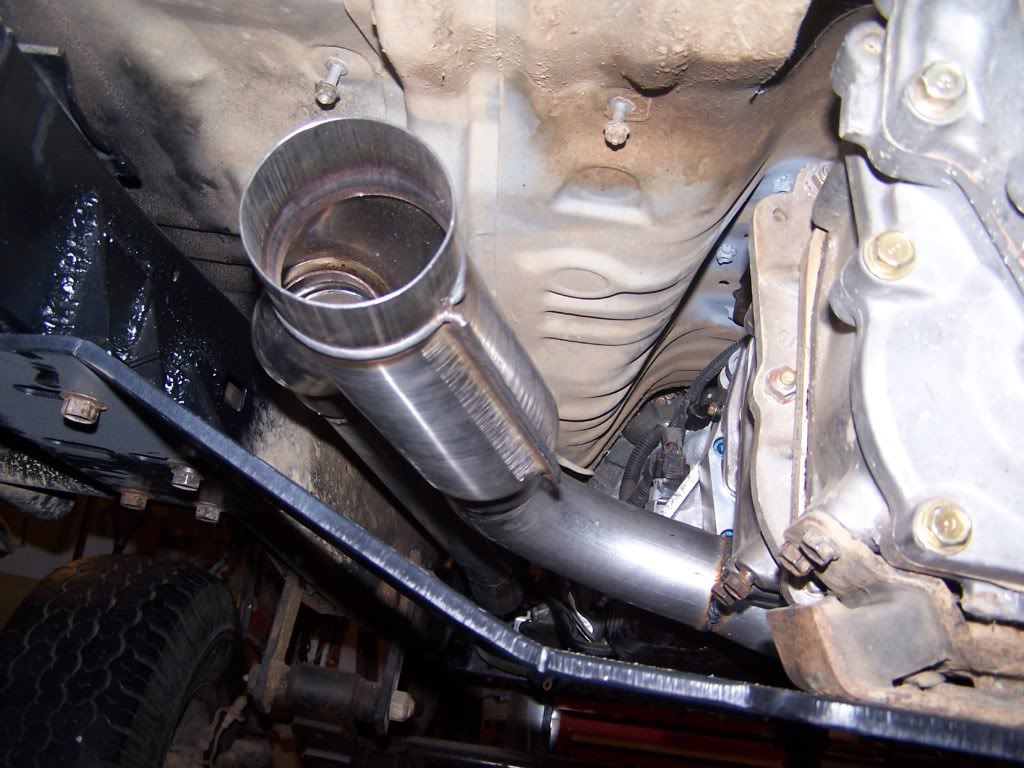
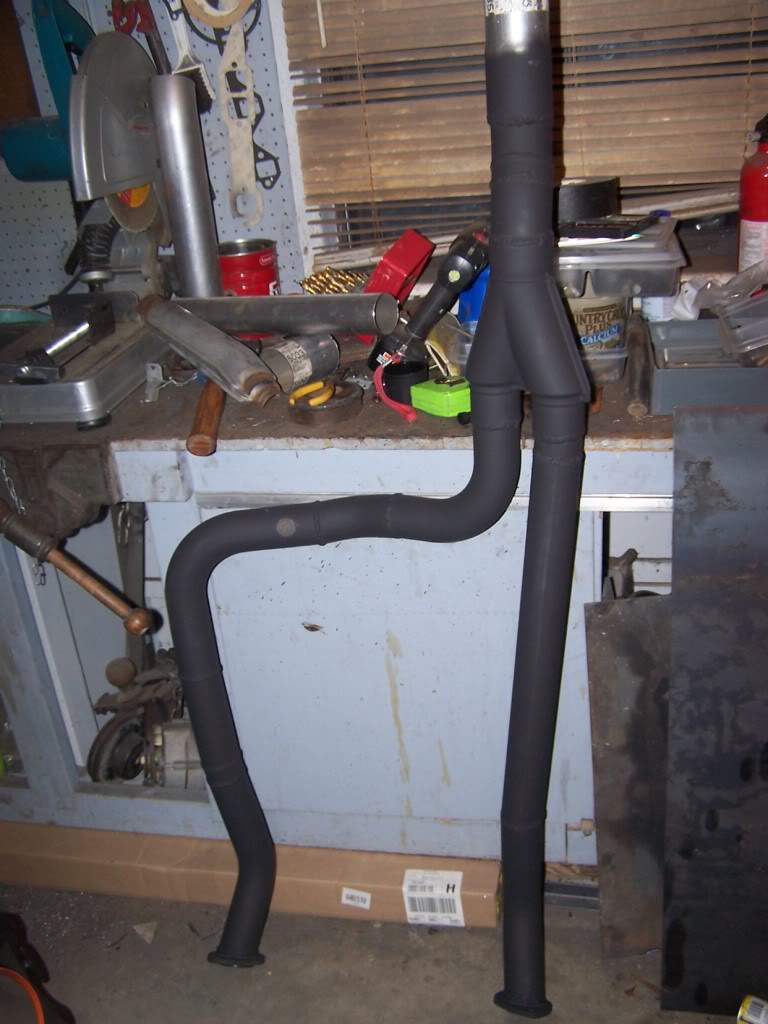
For the exhaust I decided to run dual 2.5" into a single 3". I wanted to run true duals all the way out but the fuel tank location would have made me have to run them both down the drivers side and I saw no reason to do that.

Mar 23, 2010 | 07:00 PM
#11
Thread Starter
Registered User
Joined: Jan 2008
Posts: 601
Likes: 1
From: St. Louis, MO
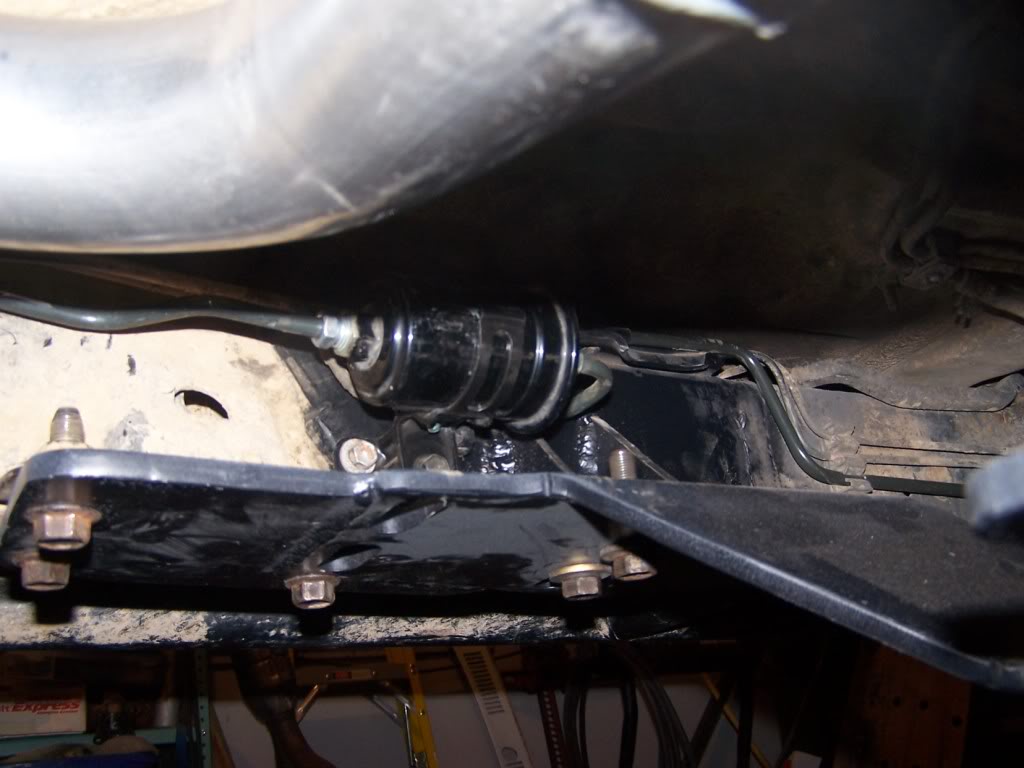
Finished exhaust pipe. I got the rest made with single slip over 3" pipe that I have clamped together just not welded yet.
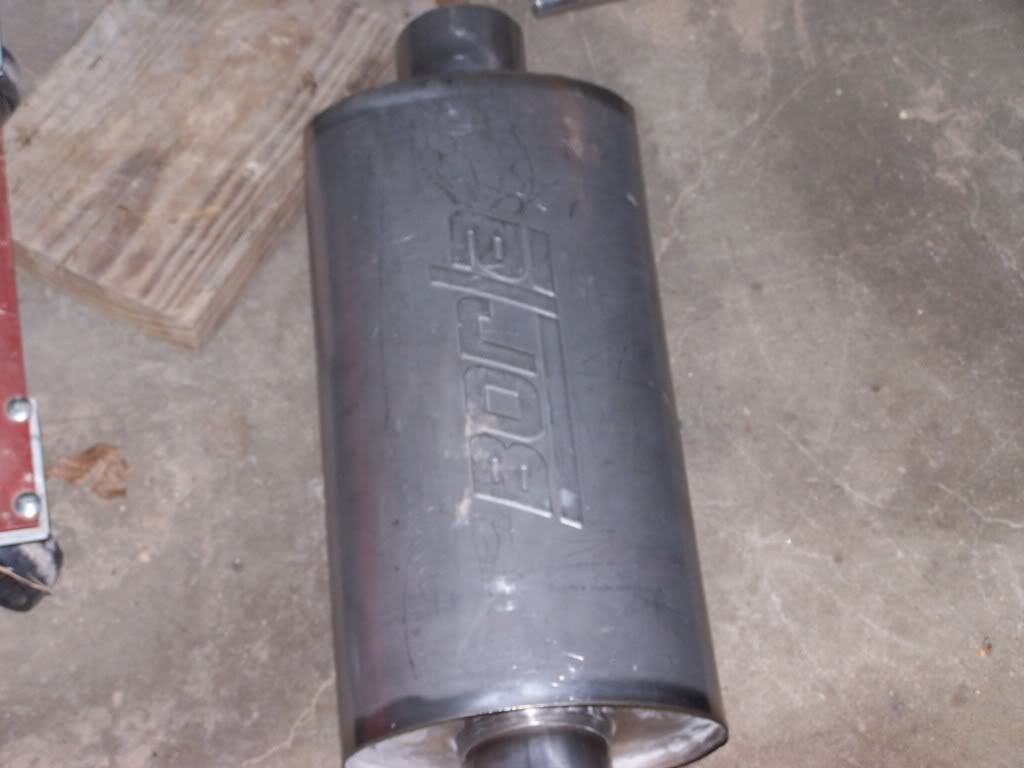
Got a set of these brand new Borla's XR-1's really cheap on Ebay. I hated to use these normally expensive mufflers on a trail truck but....oh well.
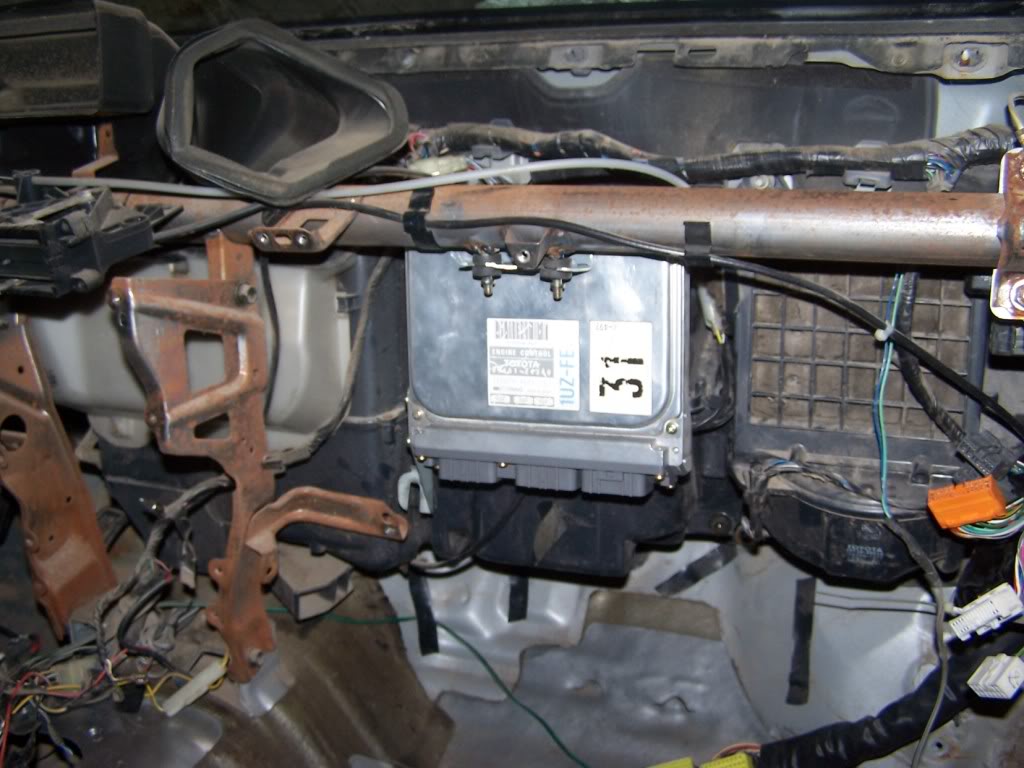
Relocated the Lexus computer up higher than the stock truck unit.
Got a set of these brand new Borla's XR-1's really cheap on Ebay. I hated to use these normally expensive mufflers on a trail truck but....oh well.
Relocated the Lexus computer up higher than the stock truck unit.
Mar 23, 2010 | 07:01 PM
#12
Thread Starter
Registered User
Joined: Jan 2008
Posts: 601
Likes: 1
From: St. Louis, MO
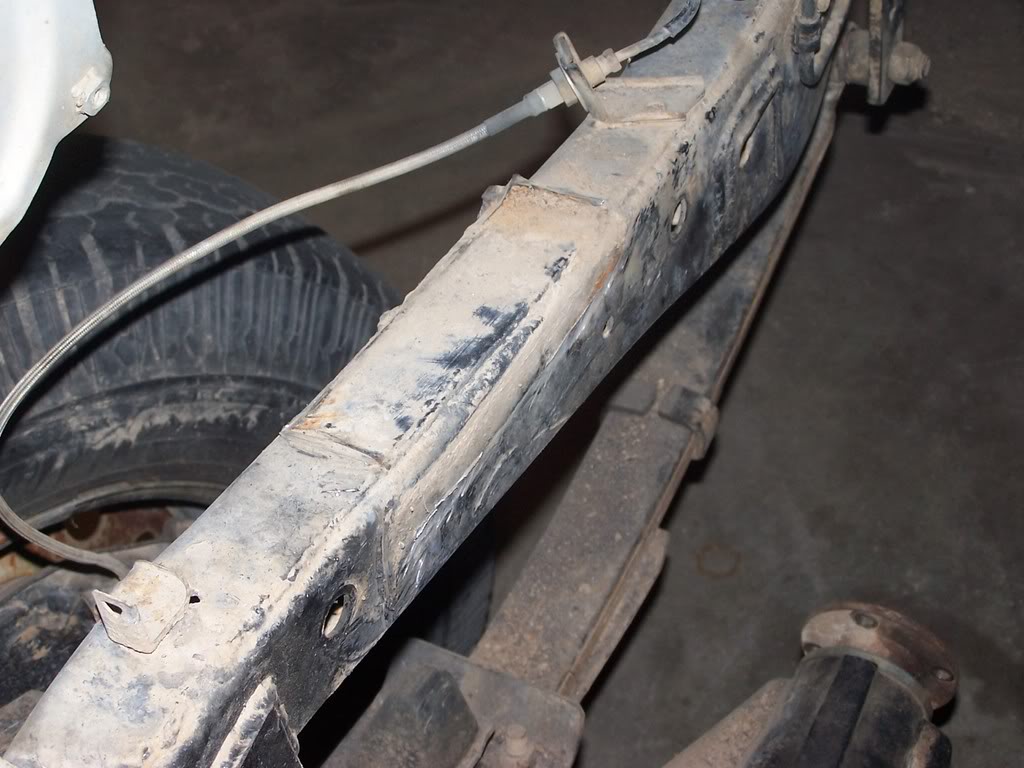
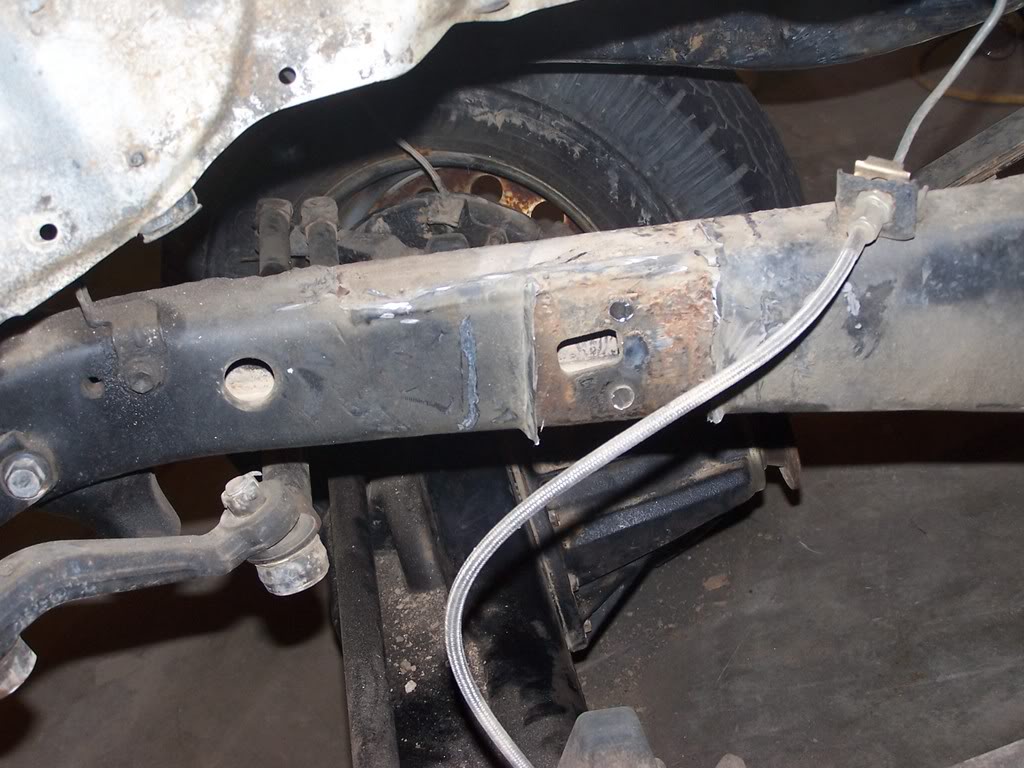
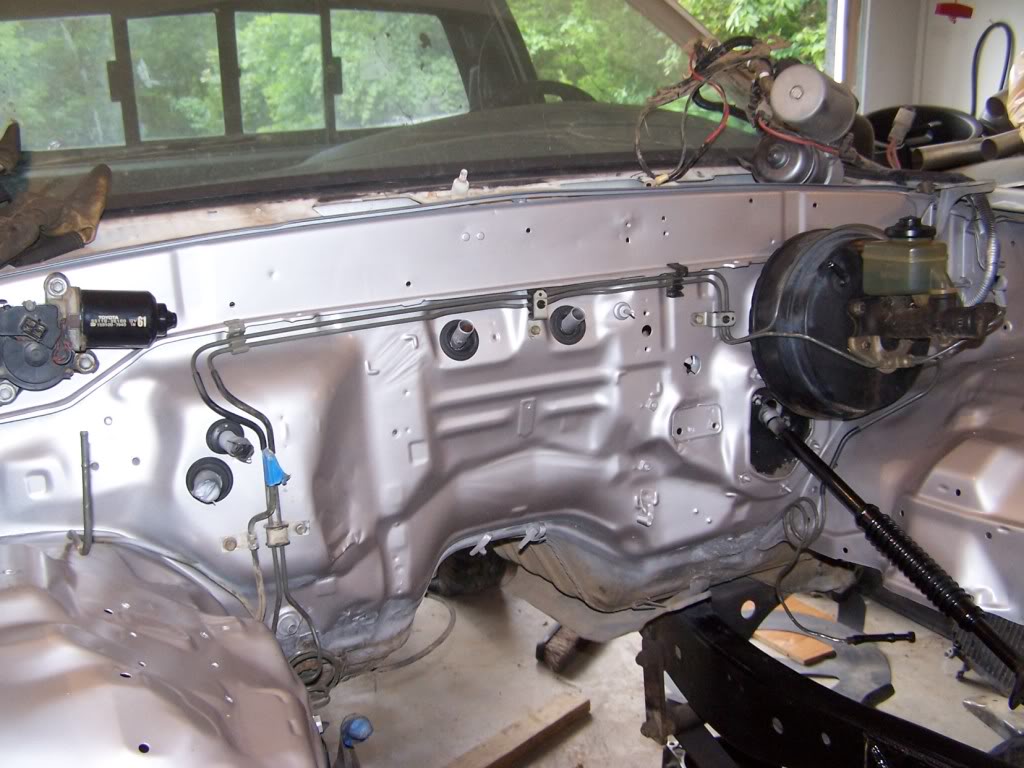
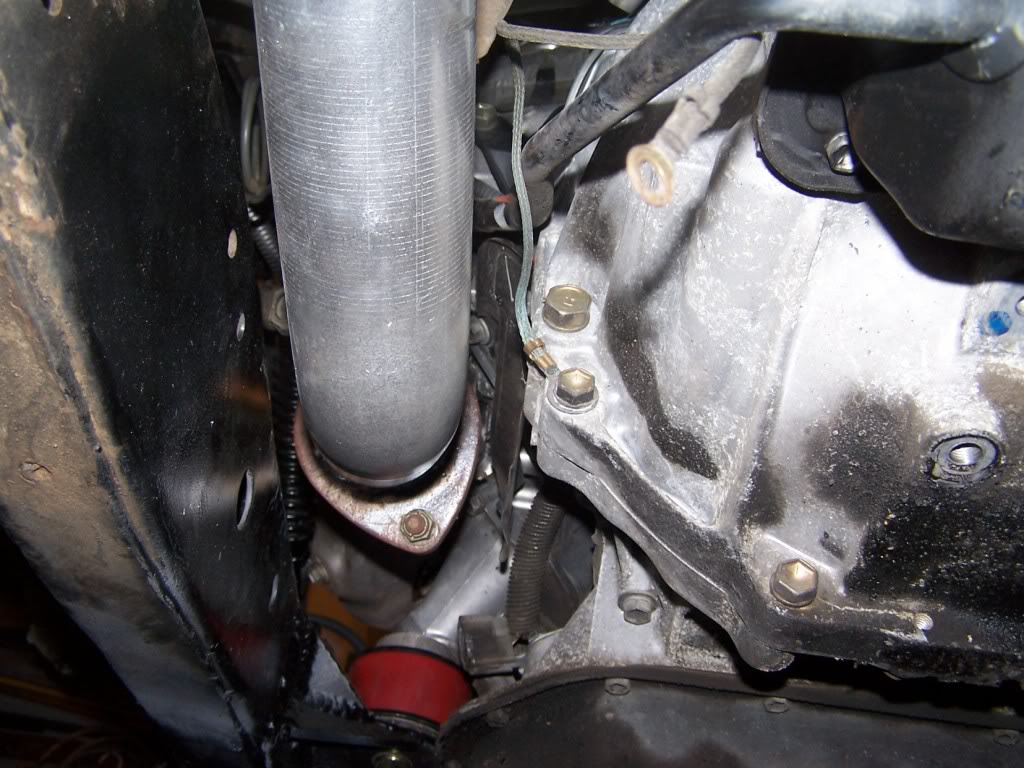
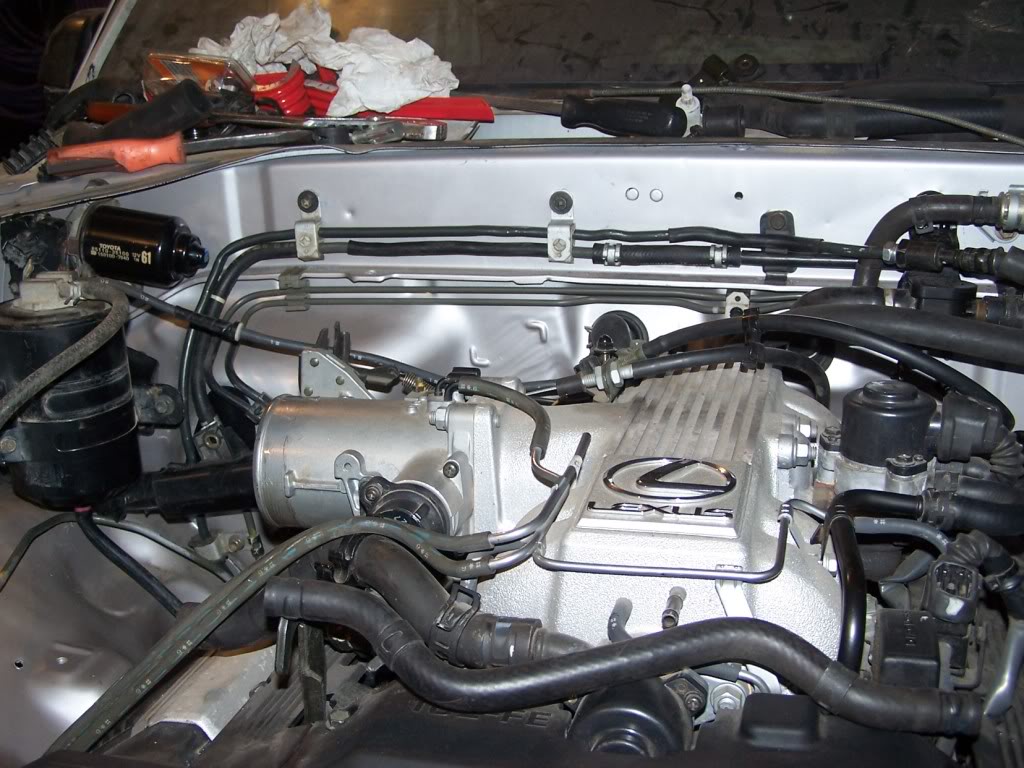
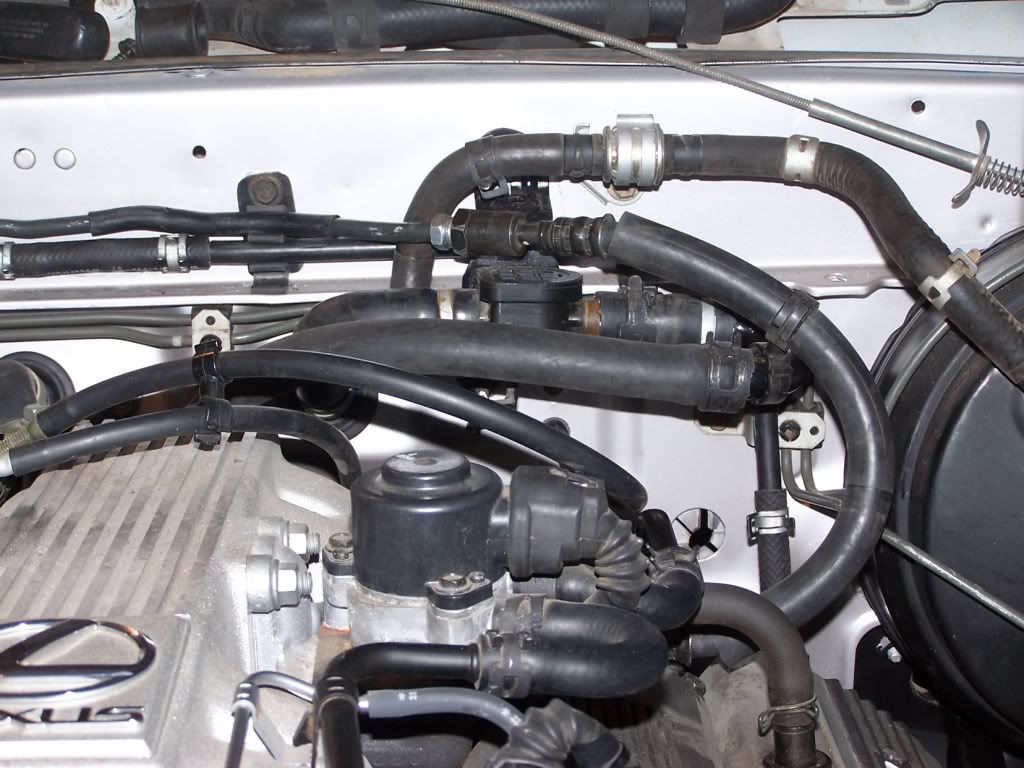
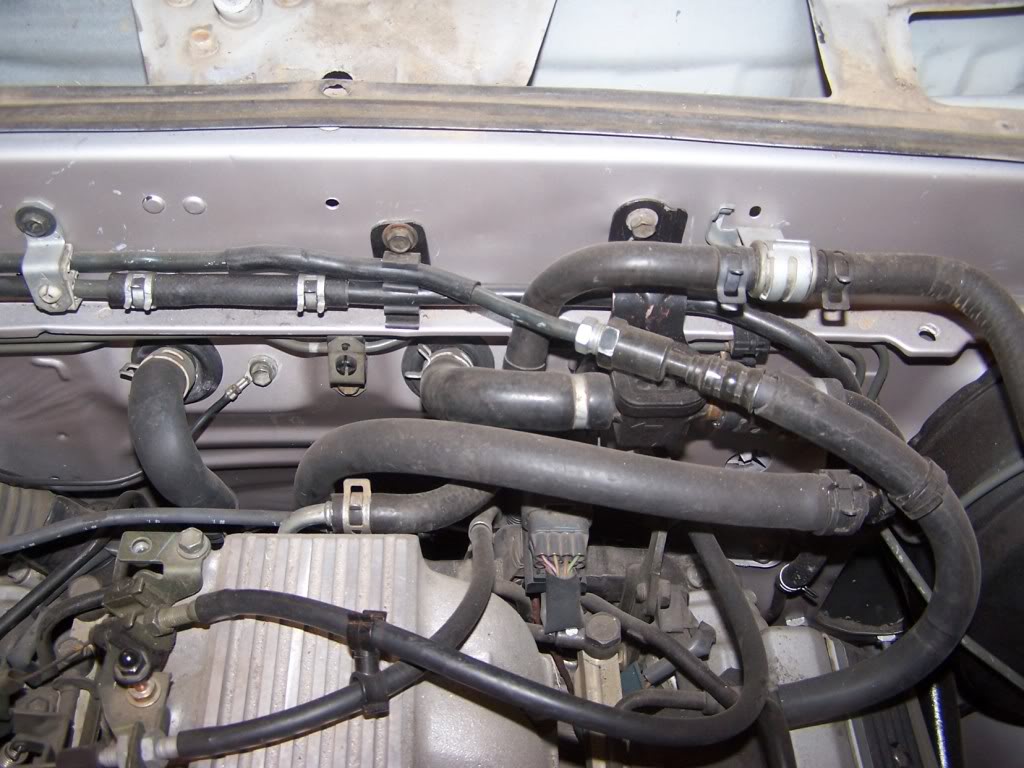
Here is how I routed the fuel lines. The Lexus feed comes from the drivers side of the engine so I had to get it from the passenger side of the truck over to the feed line. I ended up using a combination of 4cyl and v6 factory feed lines to come up with the correct length. My truck was a 4cyl, which places the fuel filter at the engine. The v6 places the filter along the framerail so the fuel lines are completely different. I just re-bent factory Toyota stuff that I bought new.
Mar 23, 2010 | 07:03 PM
#13
Thread Starter
Registered User
Joined: Jan 2008
Posts: 601
Likes: 1
From: St. Louis, MO
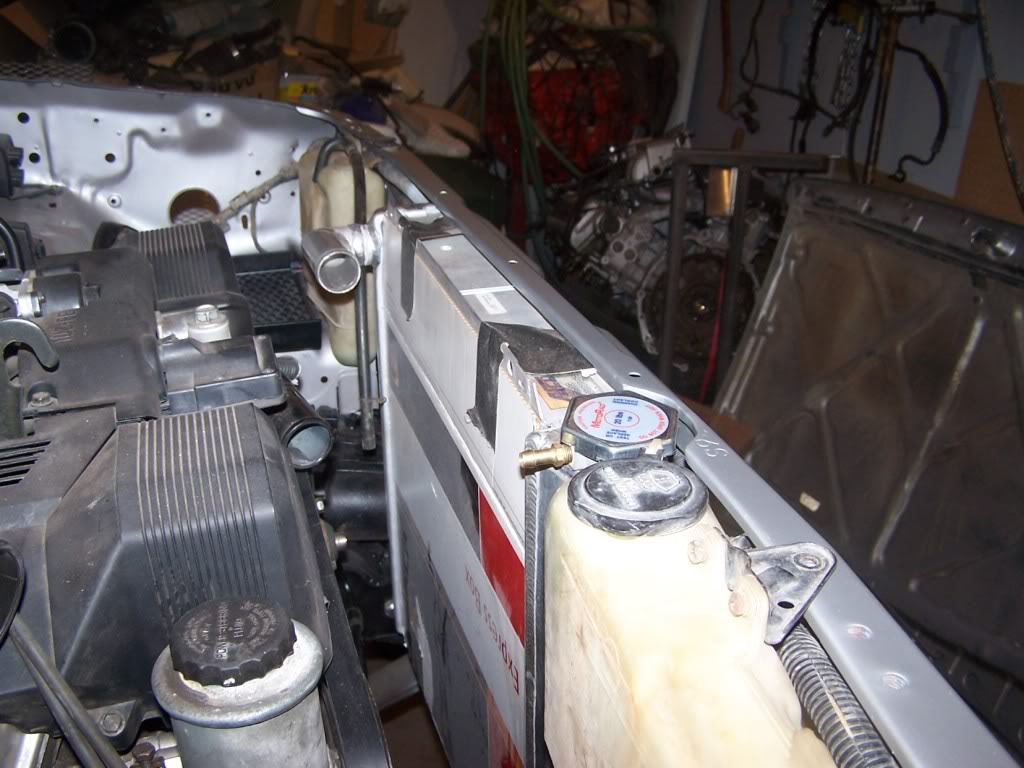
Cooling issues are what seems to be the biggest challenge with this swap. Many of them I noticed that they tried to use the factory radiators, which are much smaller than the factory Lexus one. I could have had a custom aluminum one built but they get really expensive when you have them custom built. I Ended up getting an Afco 2 core unit from my local race car parts shop on sale for $125.00. I forget the dimensions but I made sure it fit between the framerailsand wasn't too tall. I'll try to get the dimensions and post them later.
My goal was to make it fit with enough room to fit and electric cooling fan set up as a puller. Even with the engine mounted as far back as possible you only have about 5" from the front of the engine to core support. To fit my radiator I had to cut a section out of the original front crossmember. I had a new plasma cutter I wanted to play with anyway. I sectioned it out and put in some 1/4" thick angle iron. I still have the square tube from the SAS welded below it so it should be as strong as it was before.
It fits.
 Mar 23, 2010 | 07:46 PM
#15
Contributing Member
Joined: Dec 2008
Posts: 2,505
Likes: 16
From: San Jose ,Ca
Well,well been waiting for this one ,man , looking good . I see your lexus had the hydraulic fan set up , if you havent already got the clutch fan bracket set up , I have an extra one you can have for the shipping only , its an original one not aftermarket.
Just let me know .I owe you one for that $2,000,000 egr tube man..
and subscribed.
Just let me know .I owe you one for that $2,000,000 egr tube man..
and subscribed.
Last edited by RMA; Mar 23, 2010 at 07:47 PM.
Mar 23, 2010 | 08:01 PM
#16
Thread Starter
Registered User
Joined: Jan 2008
Posts: 601
Likes: 1
From: St. Louis, MO
Well,well been waiting for this one ,man , looking good . I see your lexus had the hydraulic fan set up , if you havent already got the clutch fan bracket set up , I have an extra one you can have for the shipping only , its an original one not aftermarket.
Just let me know .I owe you one for that $2,000,000 egr tube man..
and subscribed.
Just let me know .I owe you one for that $2,000,000 egr tube man..
and subscribed.
Mar 23, 2010 | 08:42 PM
#19
Thread Starter
Registered User
Joined: Jan 2008
Posts: 601
Likes: 1
From: St. Louis, MO
Here is a link to the entire build up of the truck on Marlin Crawlers forum.
http://board.marlincrawler.com/index.php?topic=68583.0


