Starting the SAS...

 08-02-2009, 10:44 AM
#62
Registered User
Thread Starter
Join Date: May 2005
Posts: 170
Likes: 0
Received 0 Likes
on
0 Posts
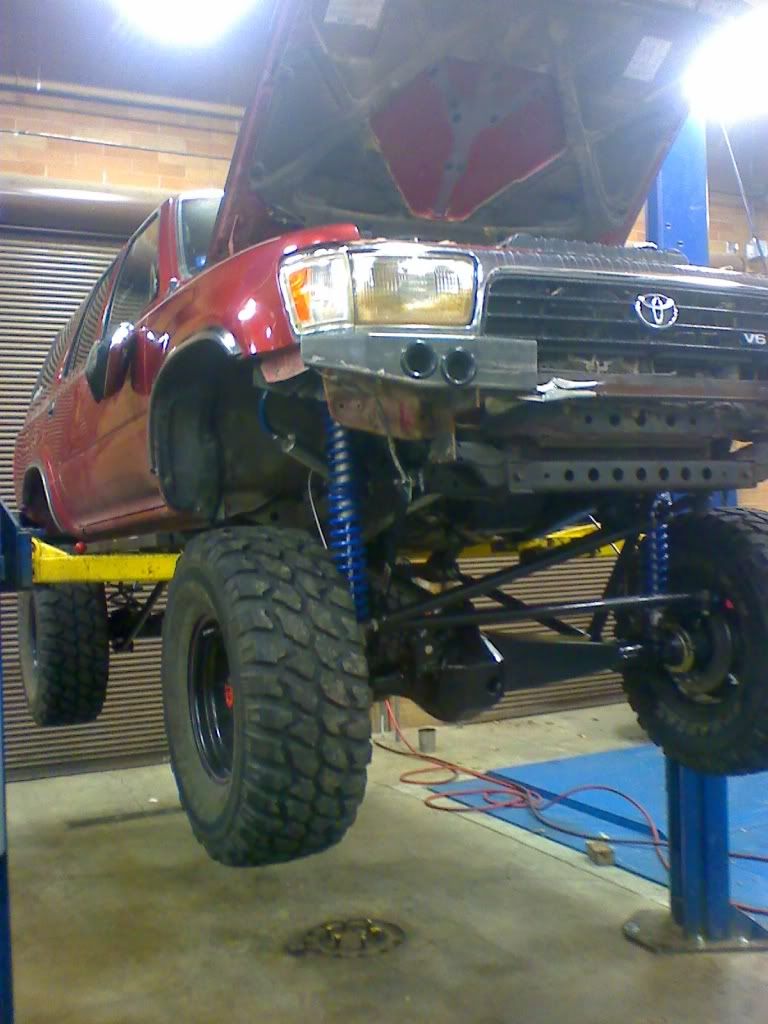
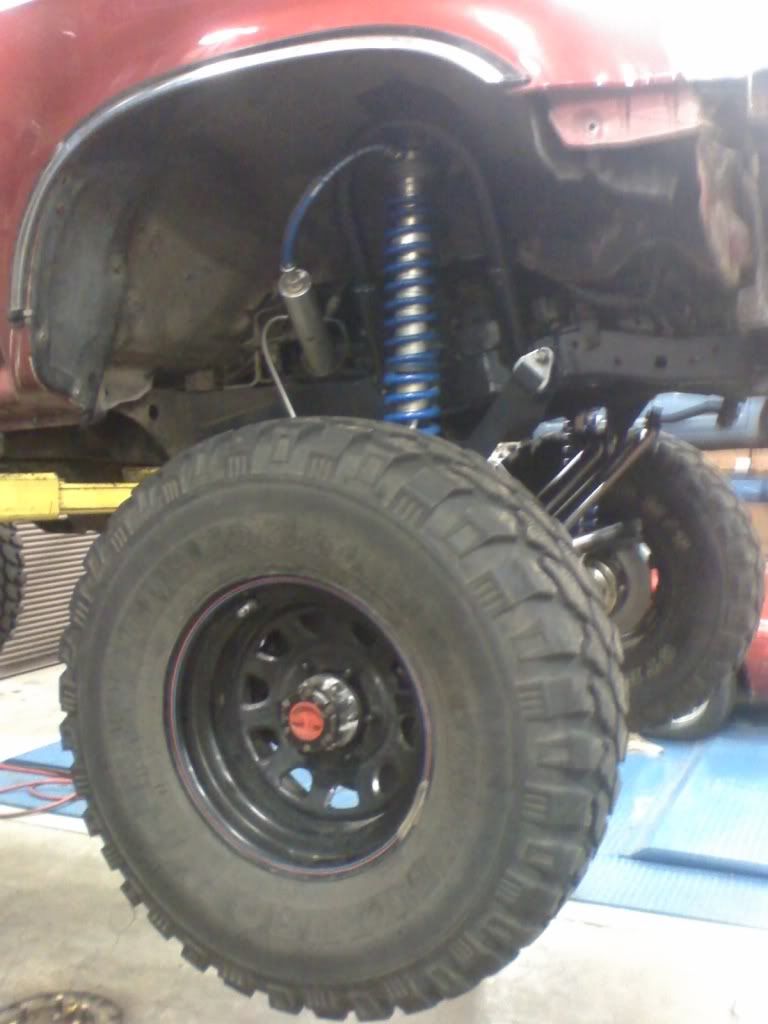
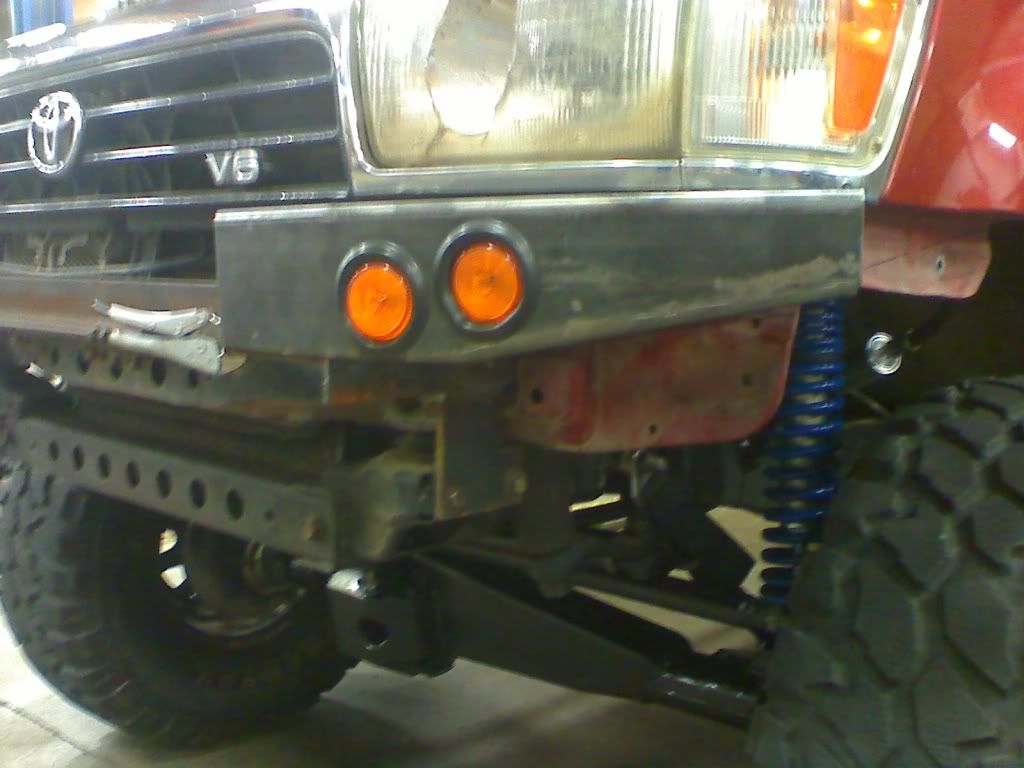
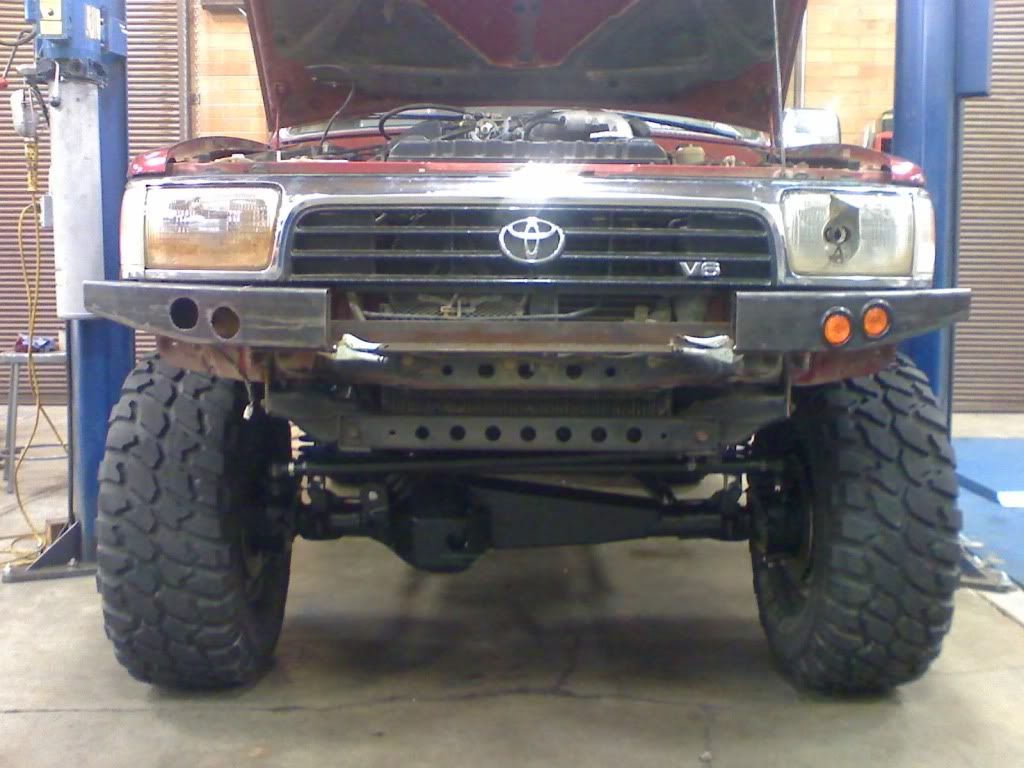
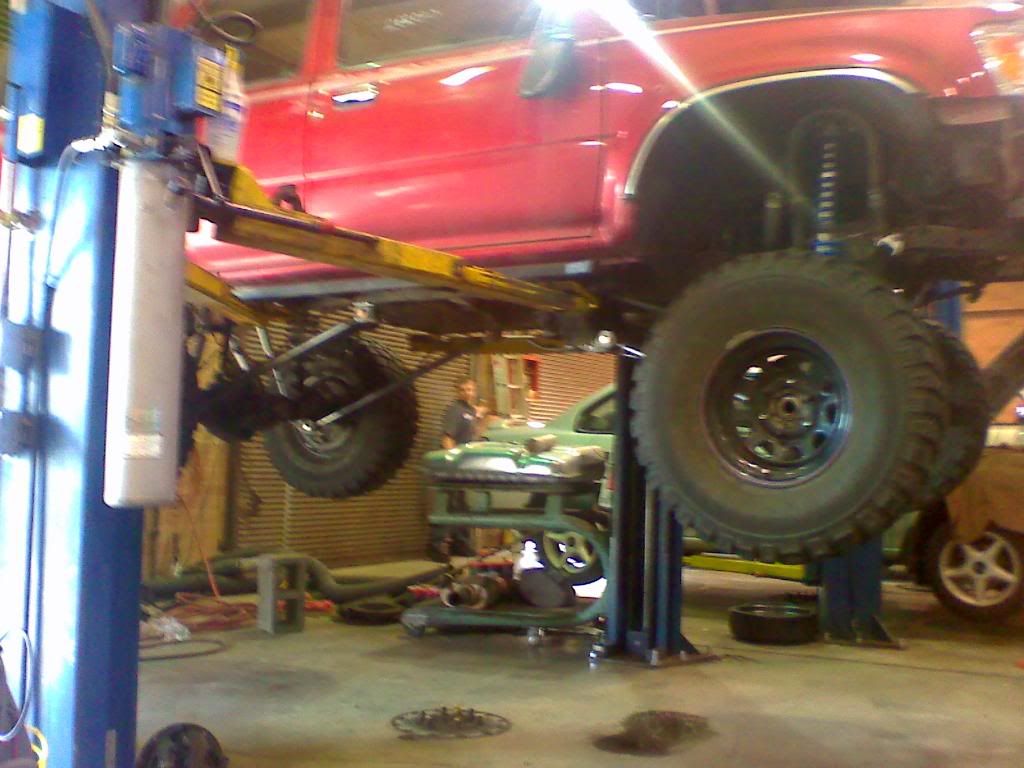
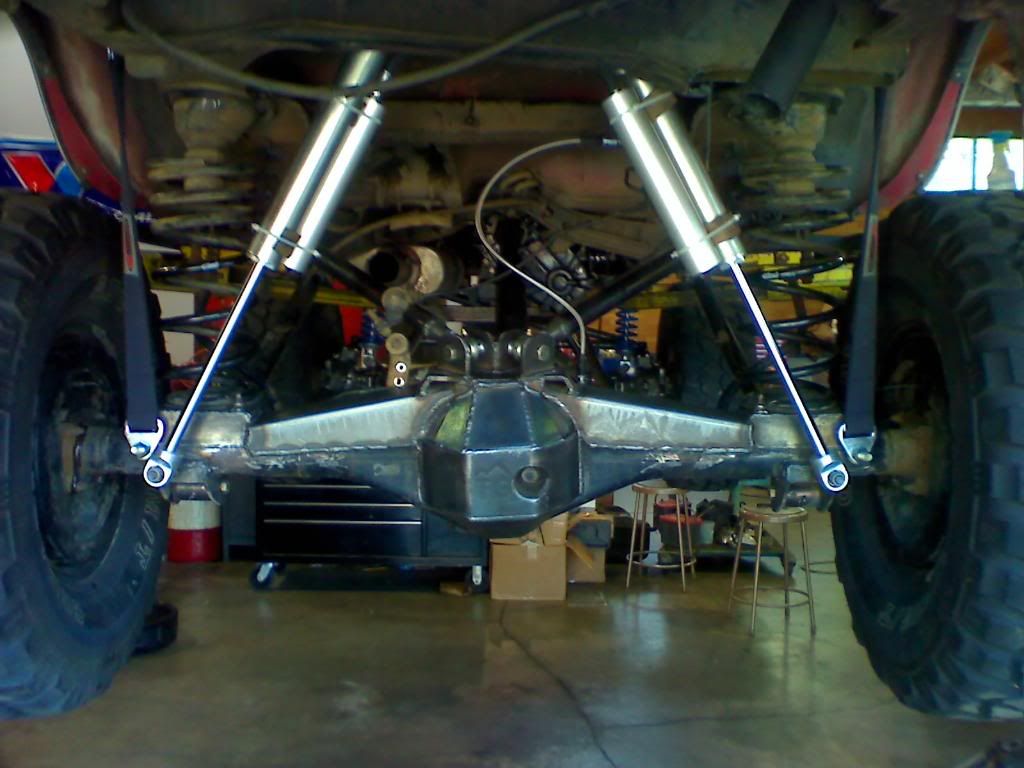
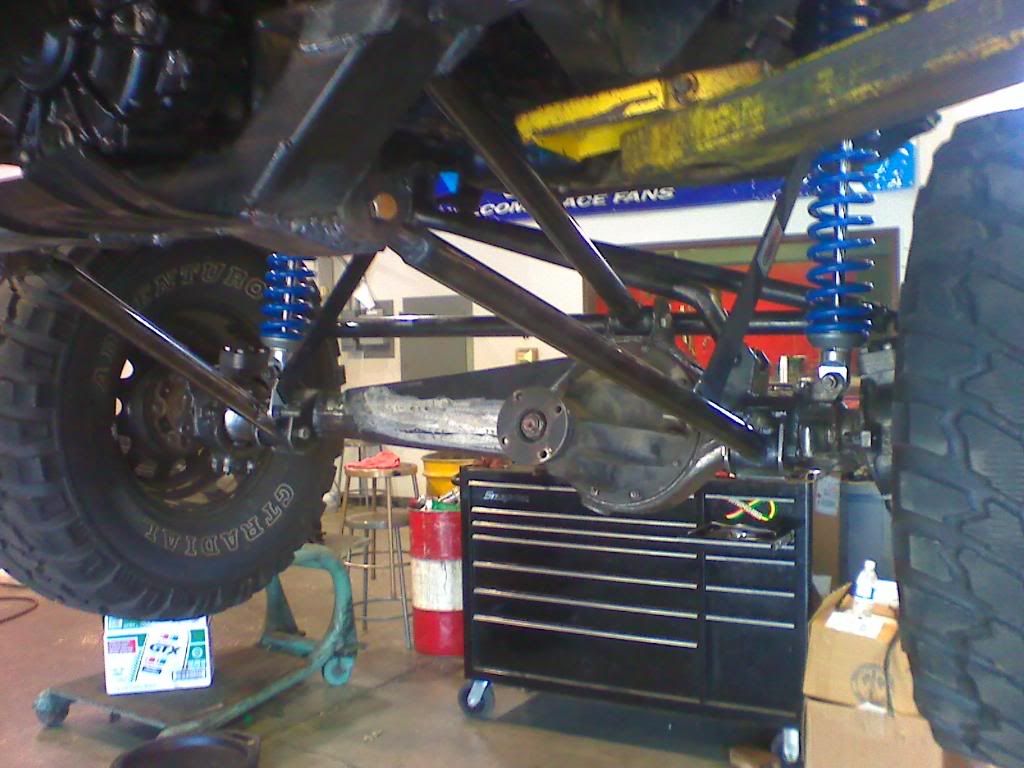
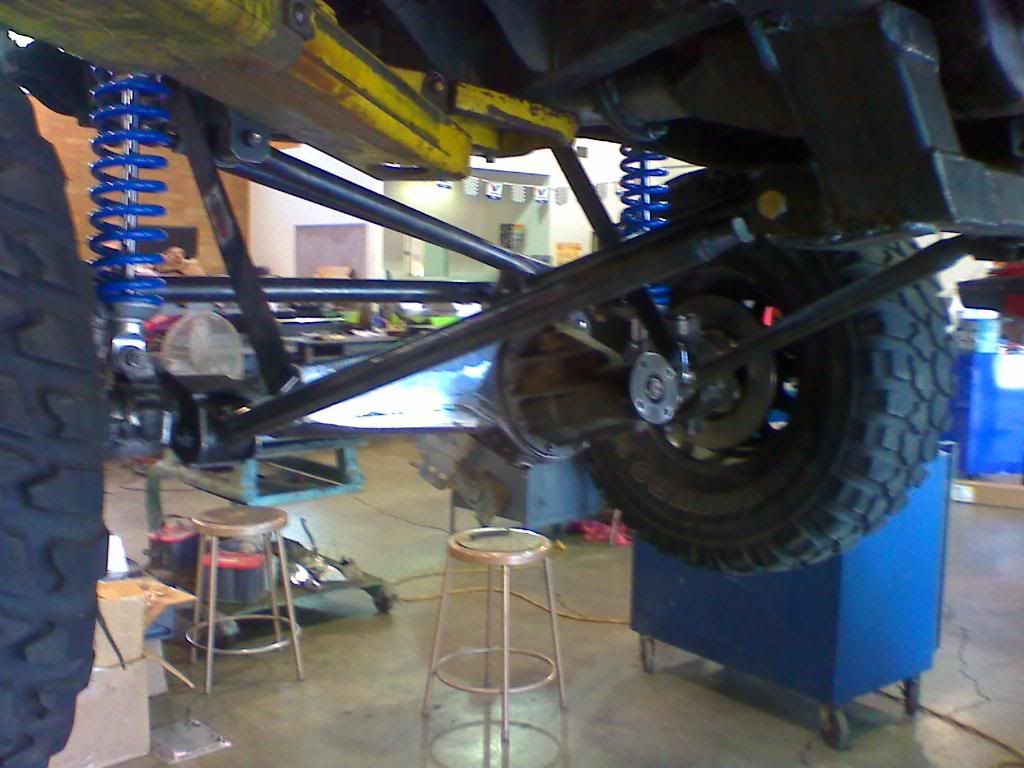
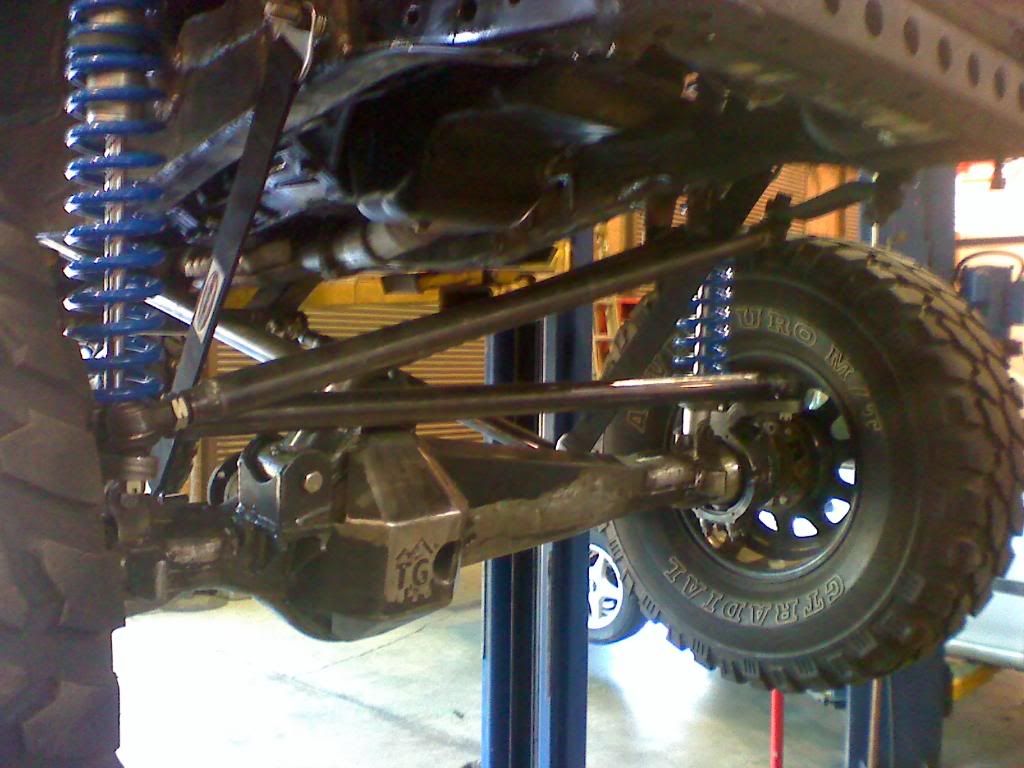
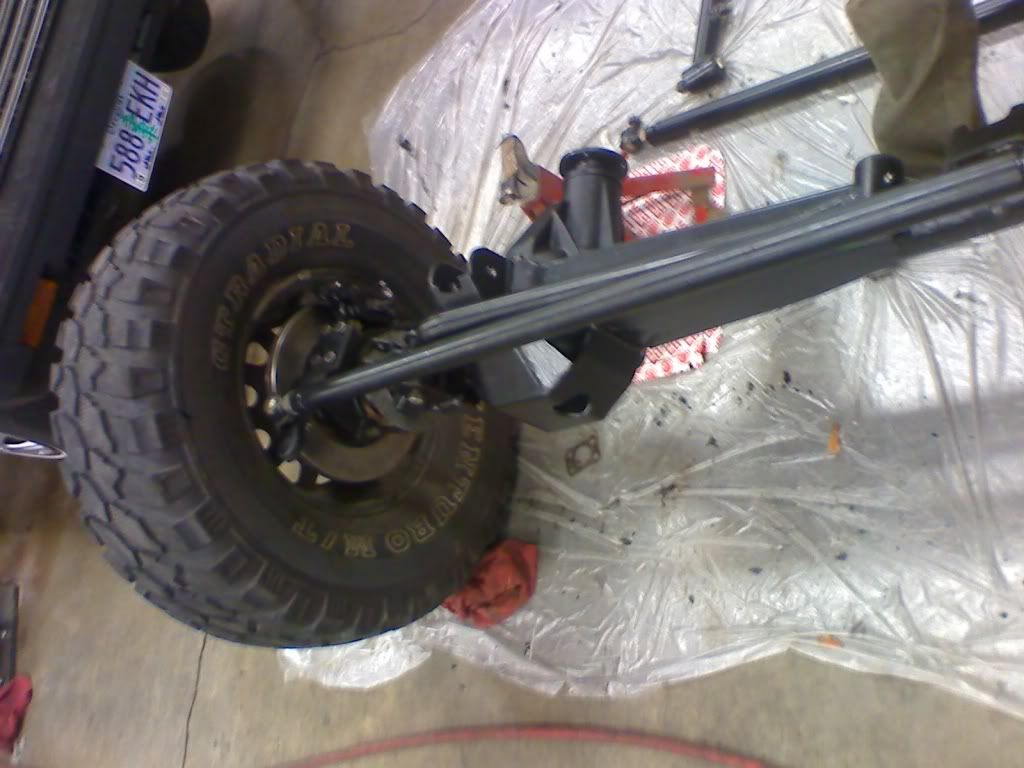
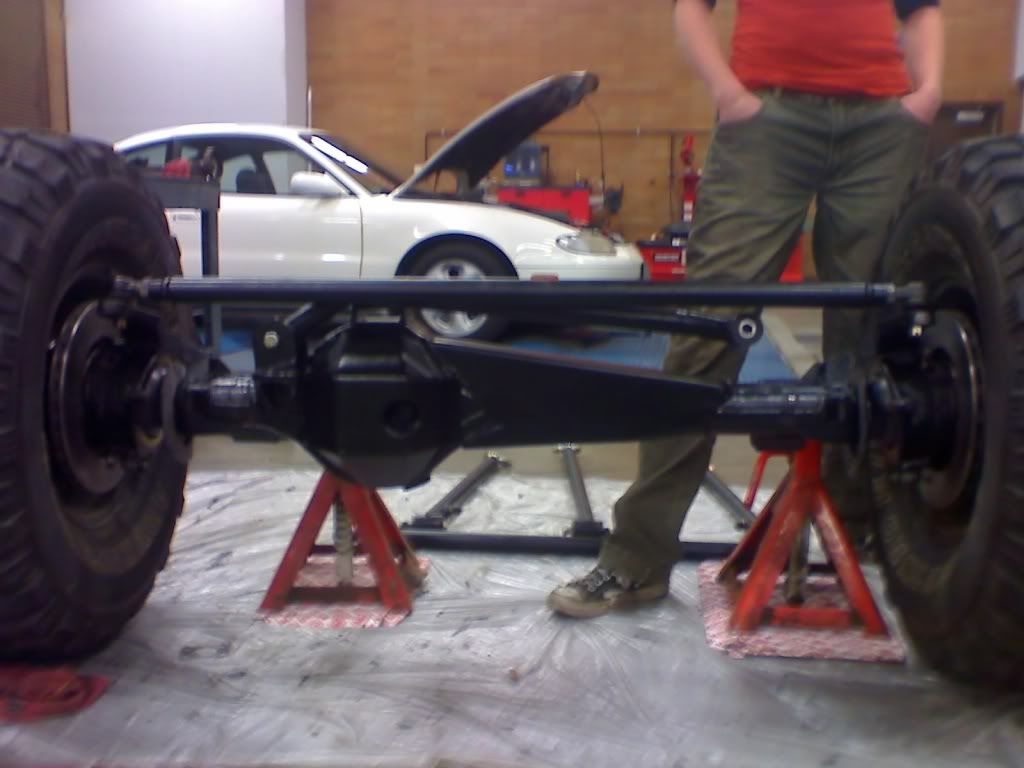
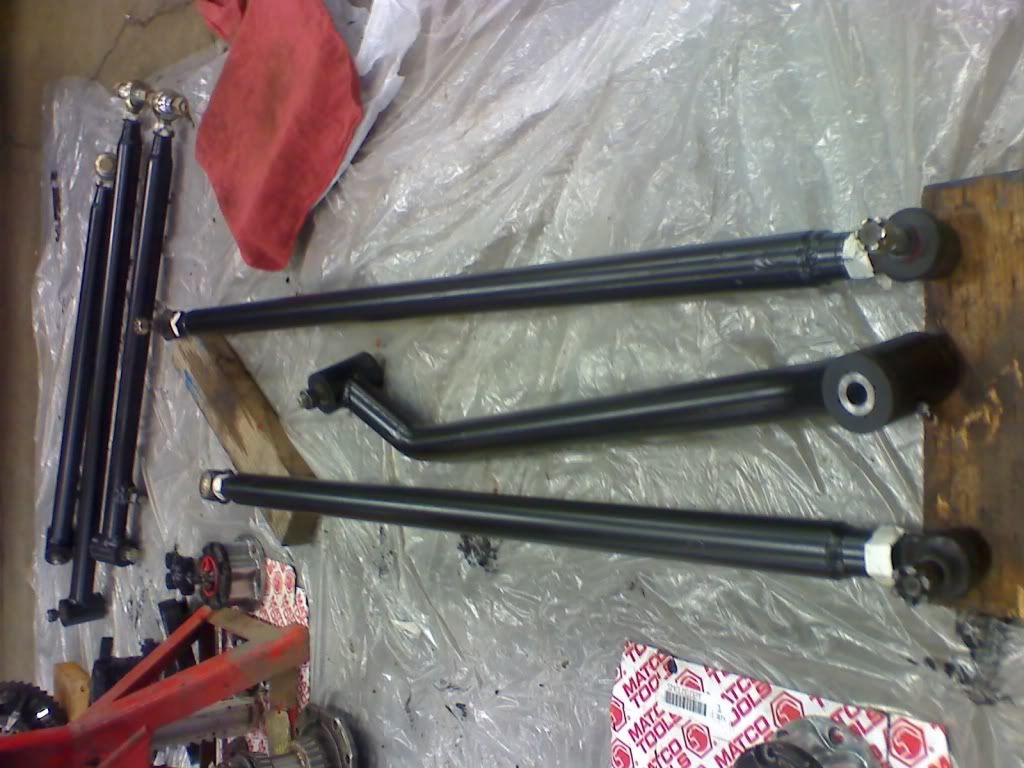
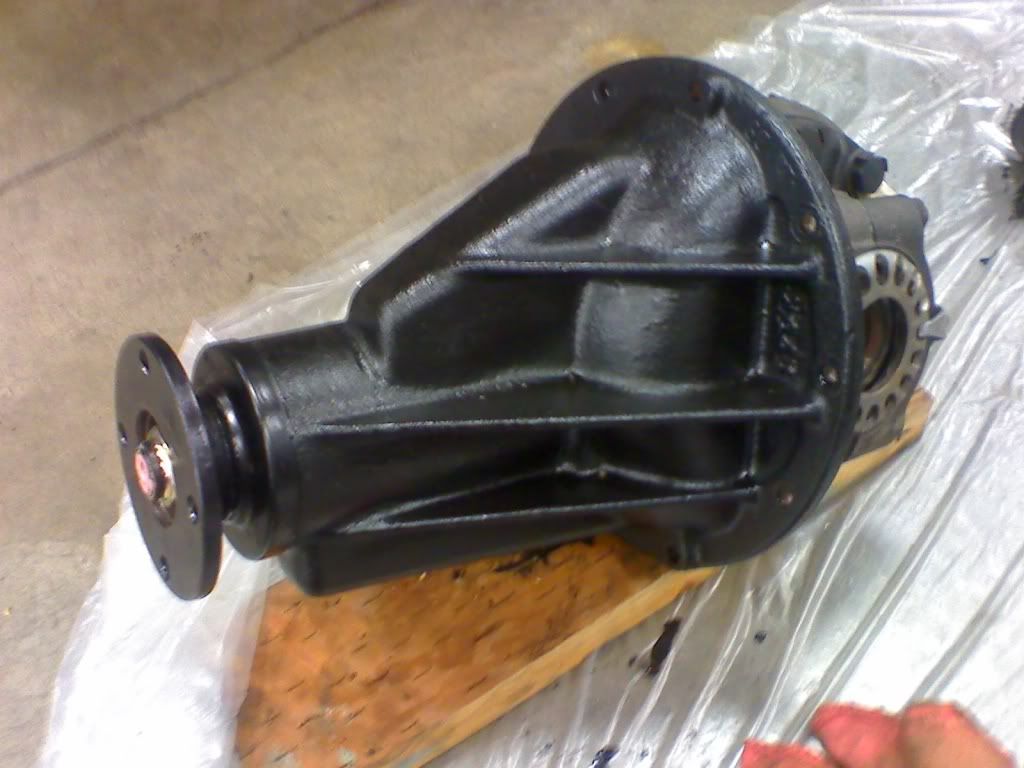
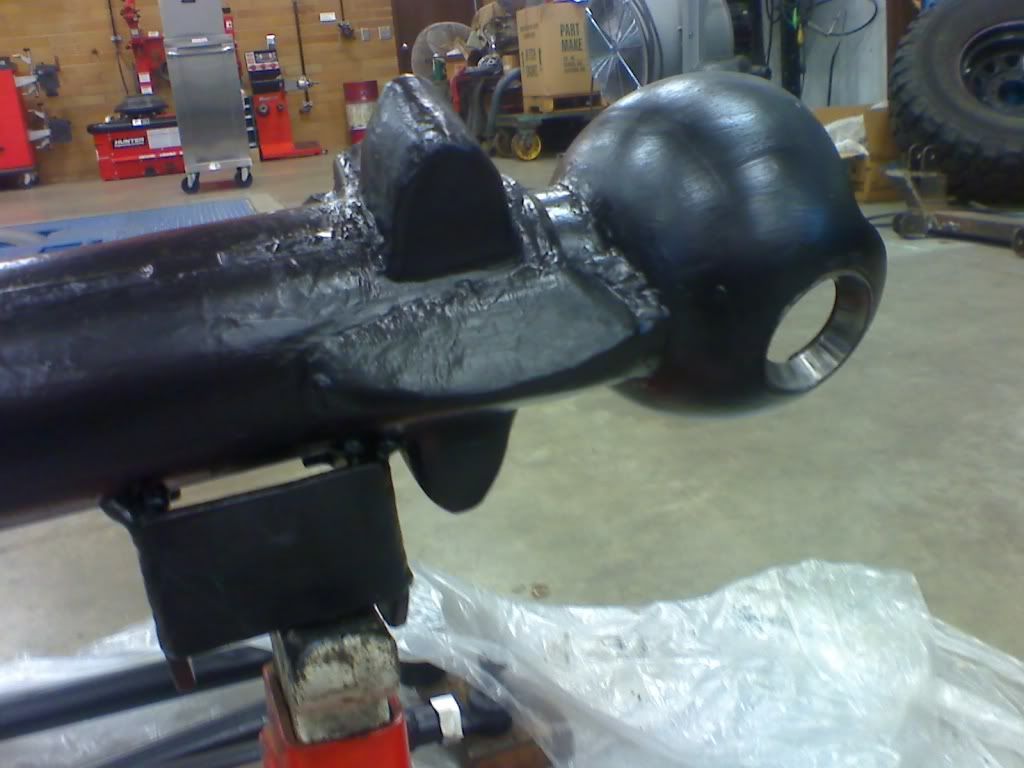
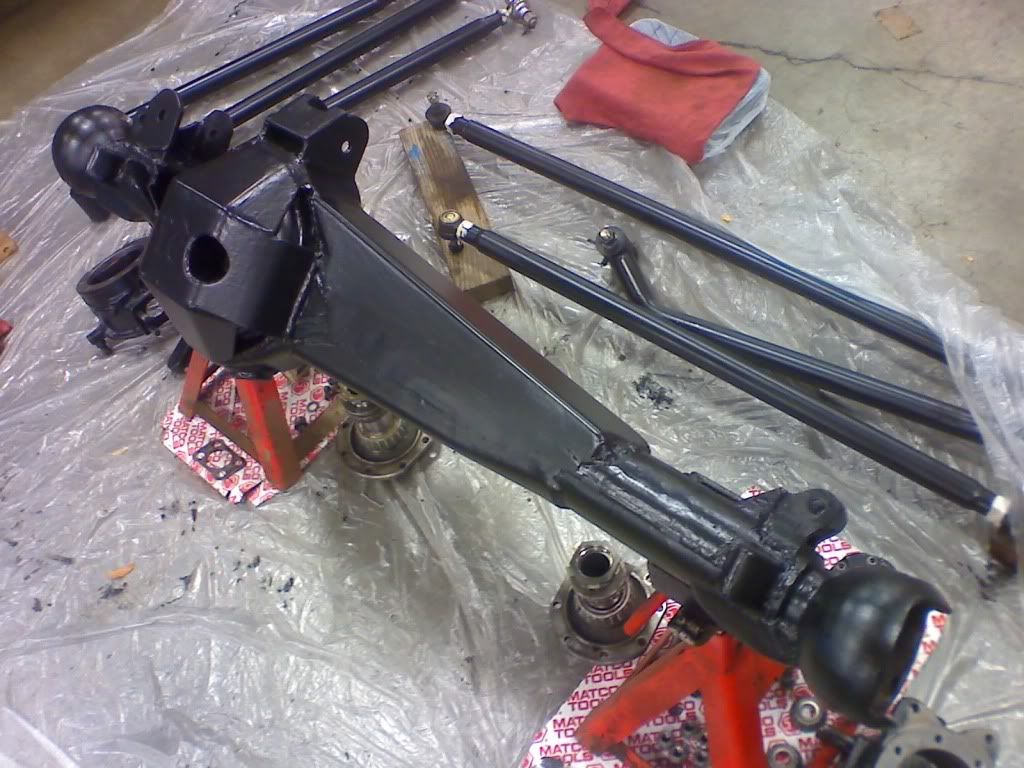
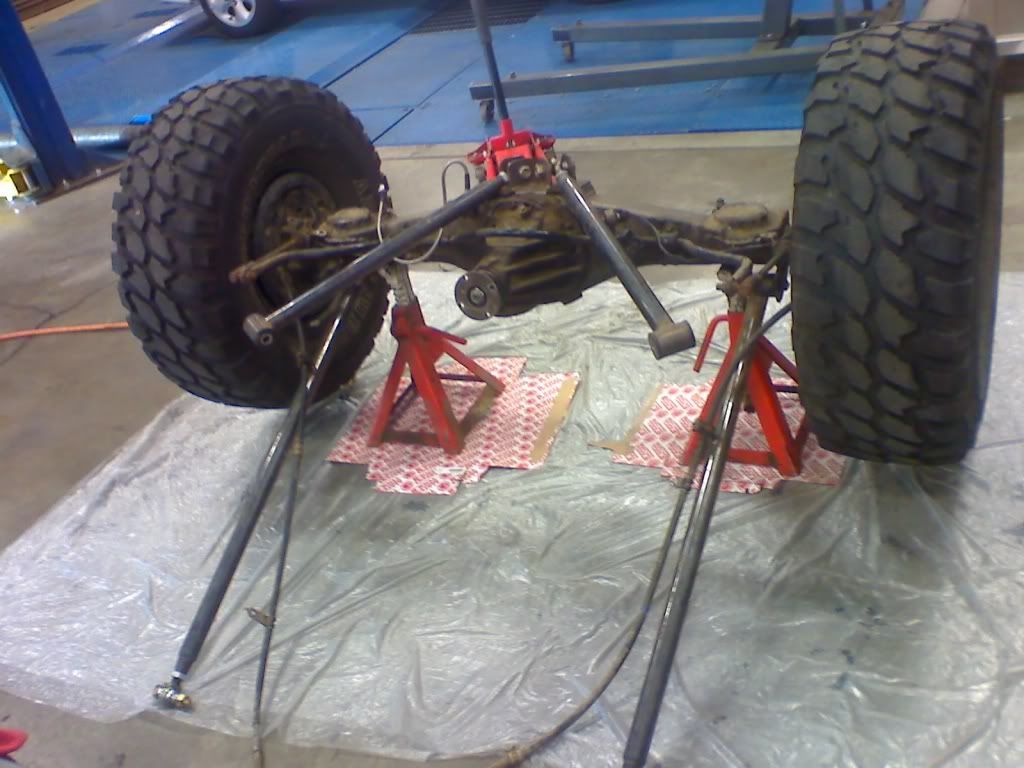
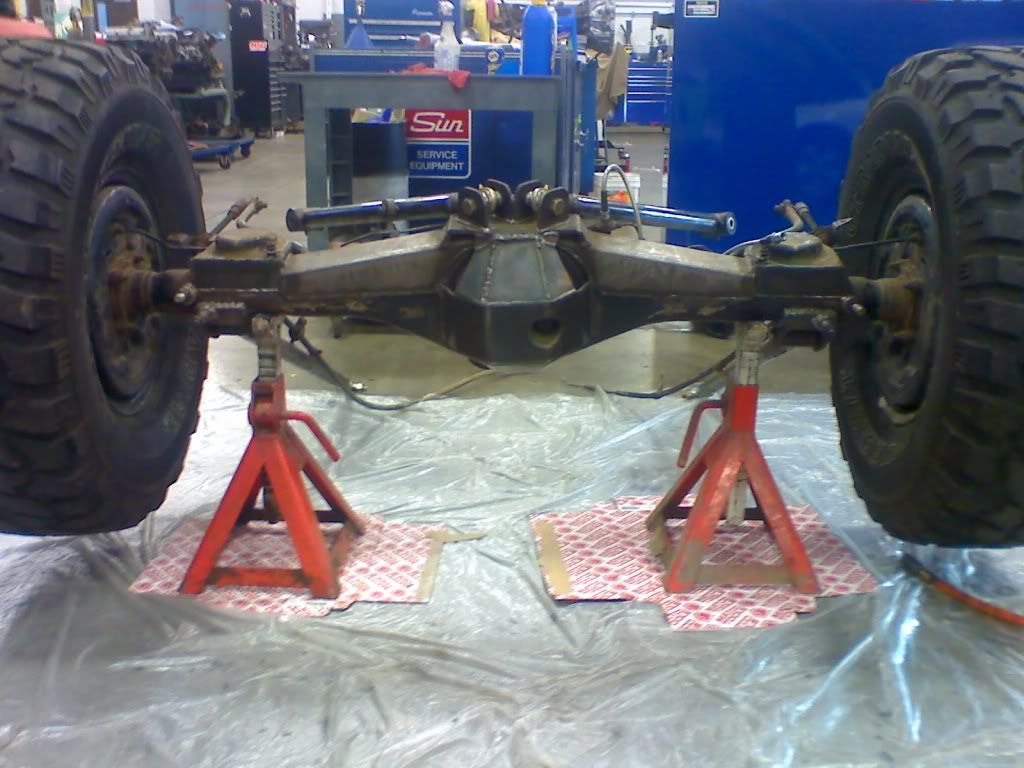
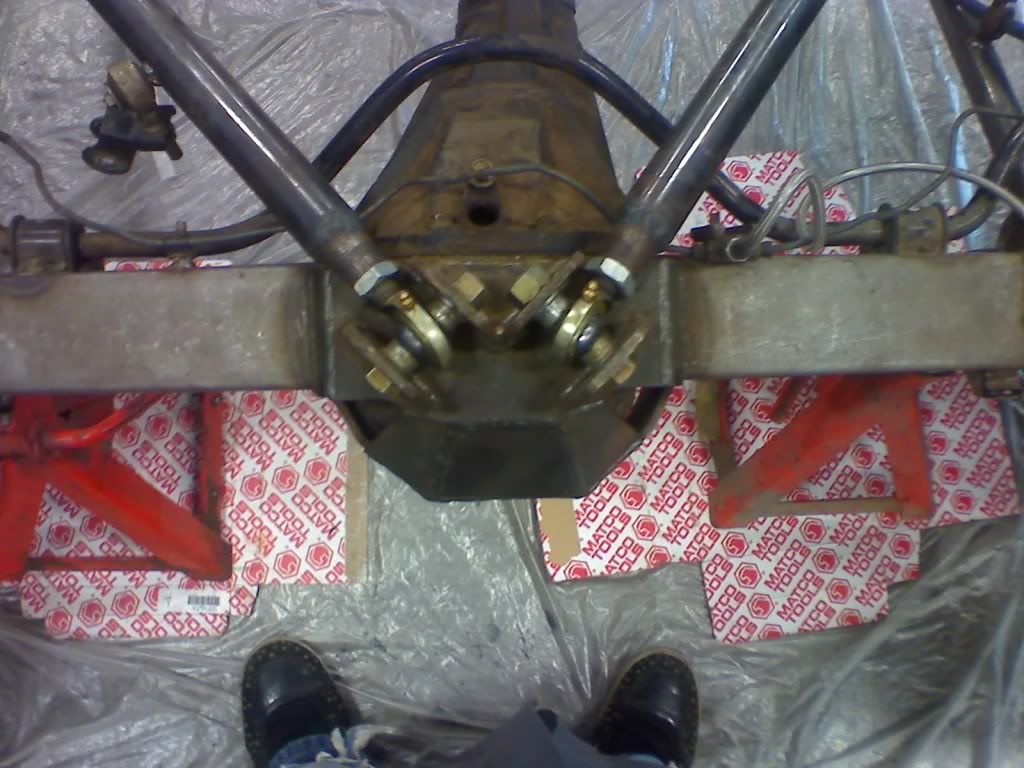
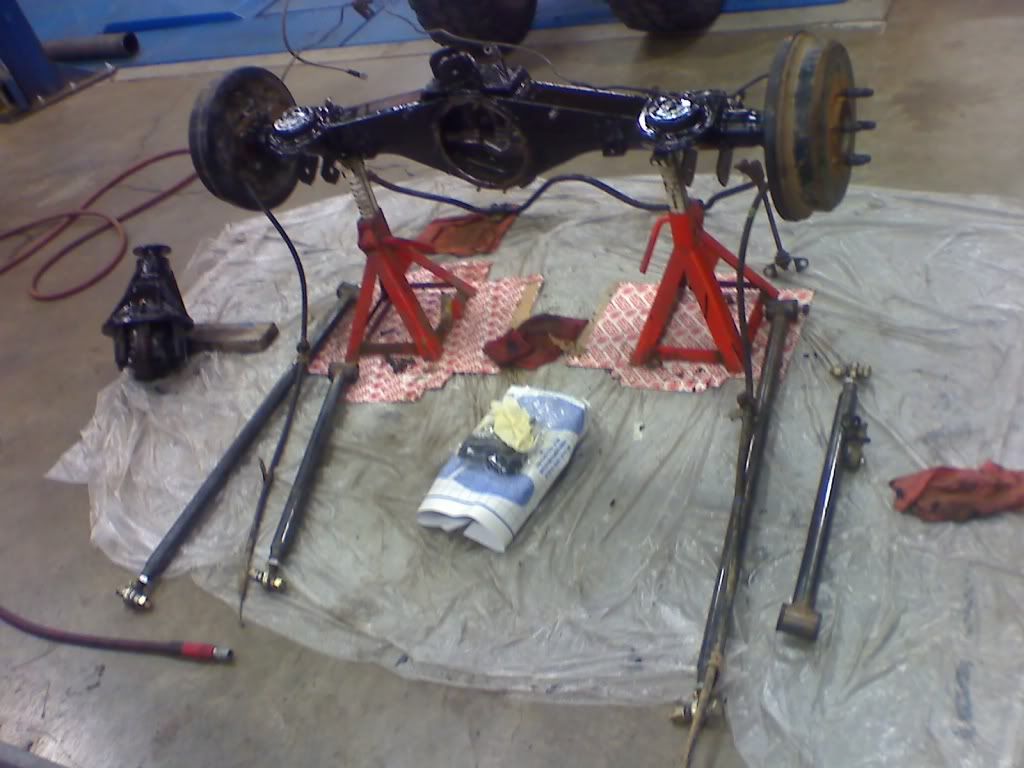
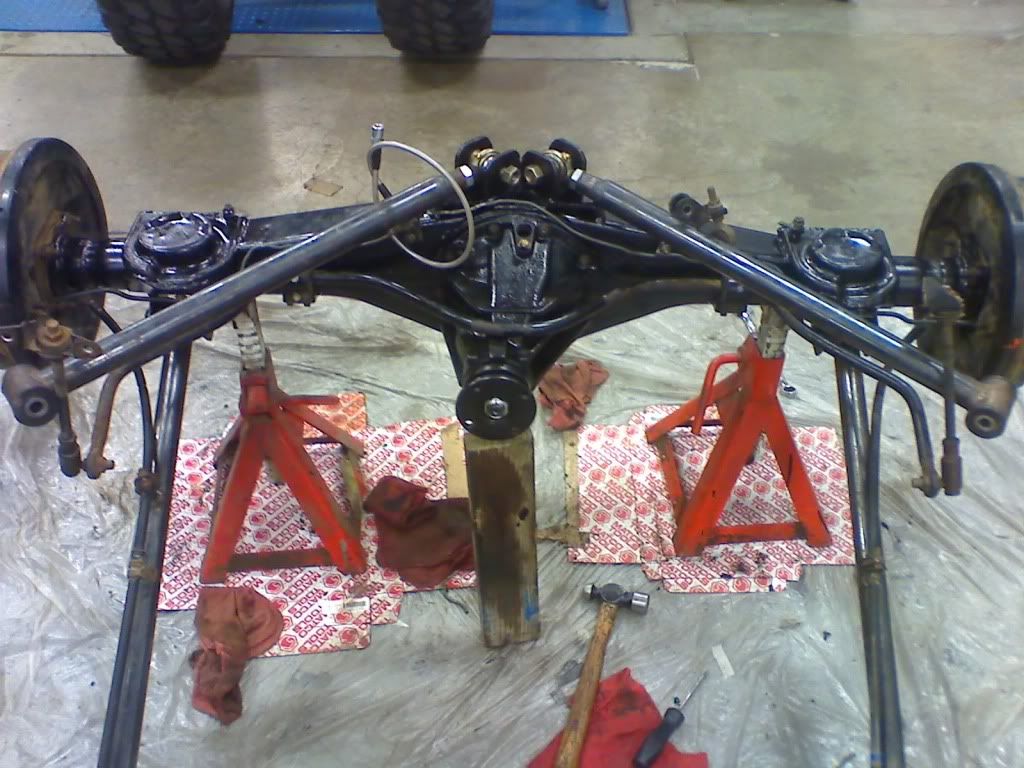
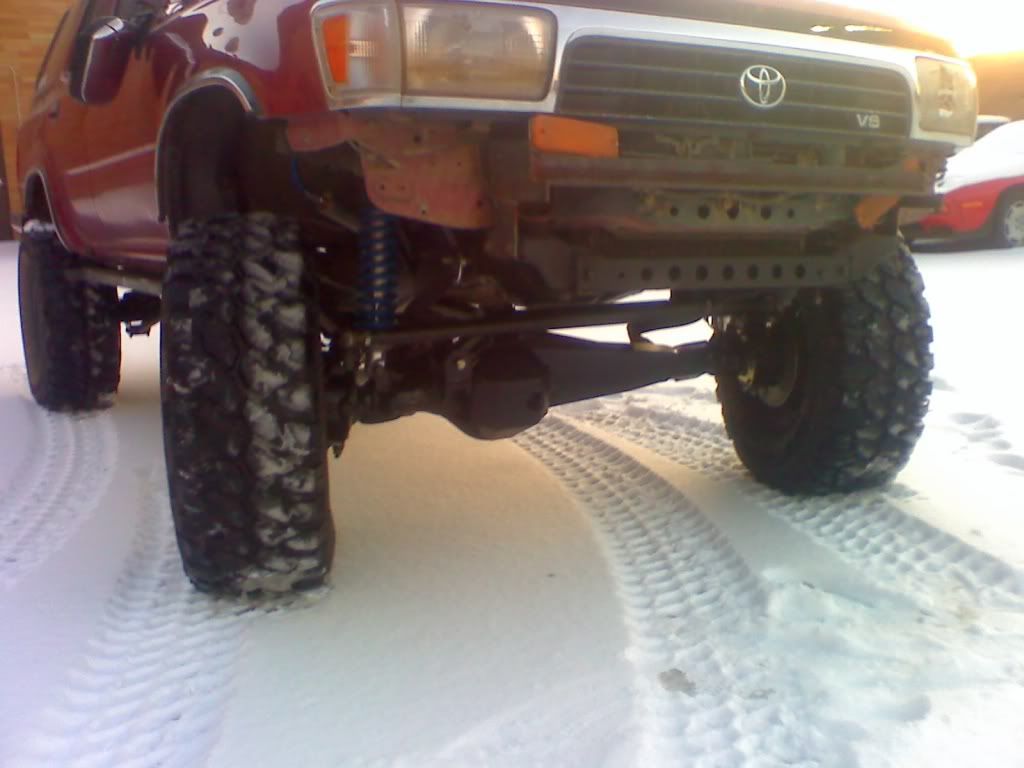
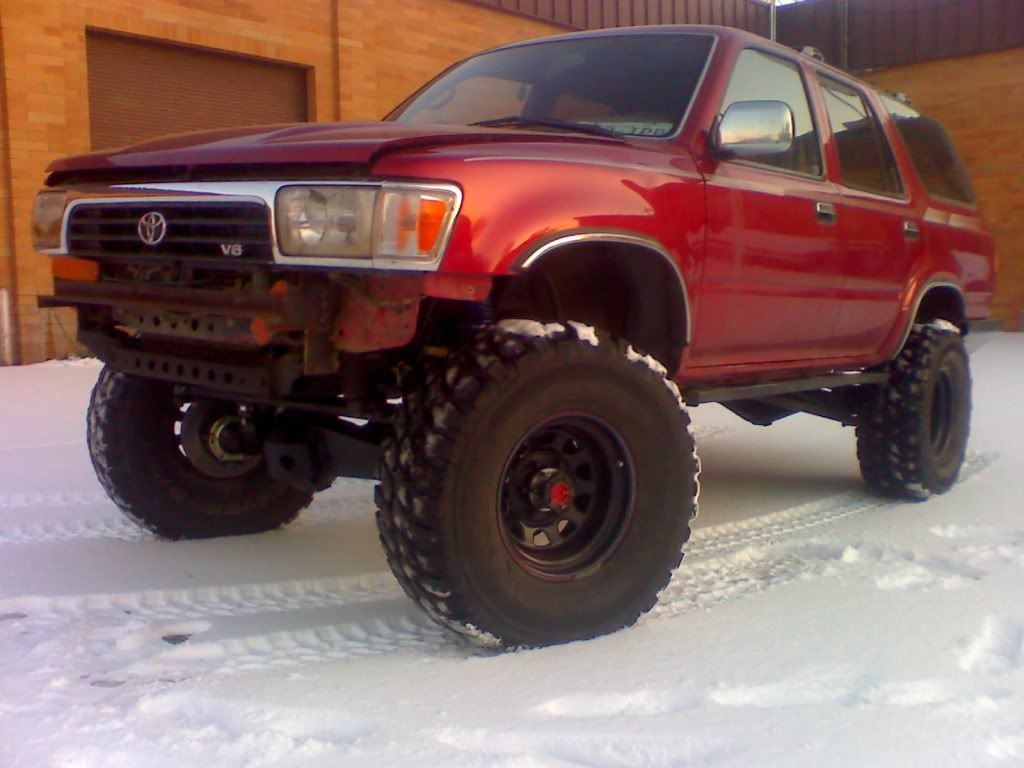
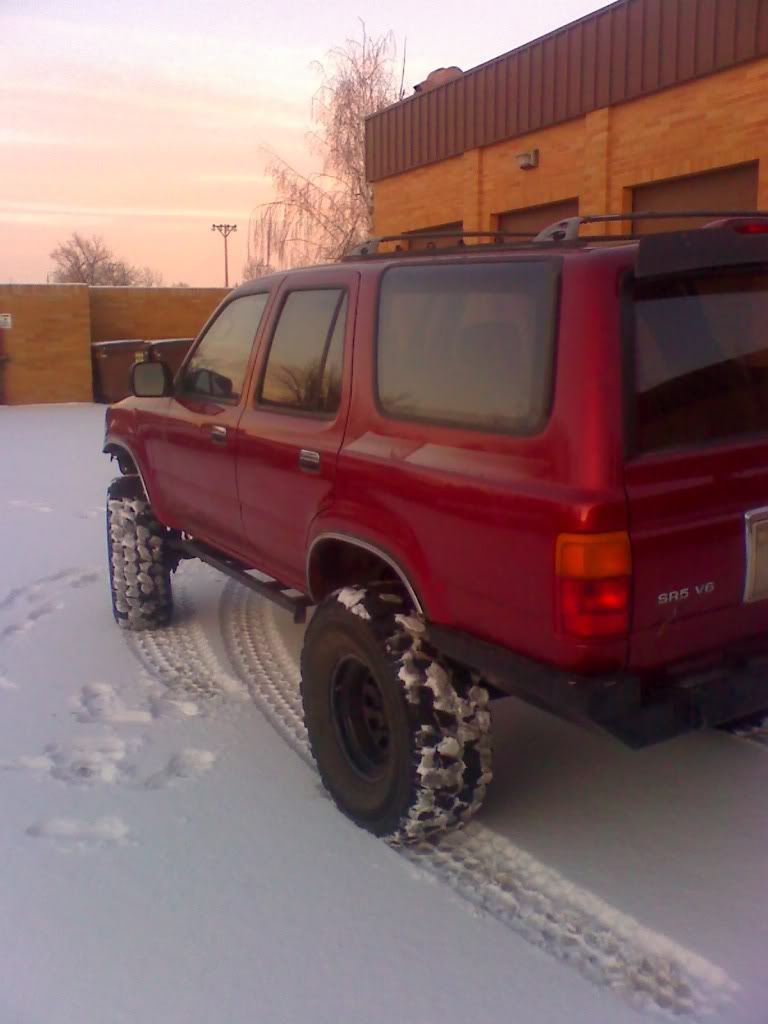
So here is the latest progress with this project, although its been slow, I just finished moving into my new house so now there is internet and time available. Pics of whats done now, enjoy
08-02-2009, 12:40 PM
#63
Registered User
Join Date: Mar 2008
Location: Nelson/Kelowna BC, Saskatoon SK Canada
Posts: 316
Likes: 0
Received 1 Like
on
1 Post
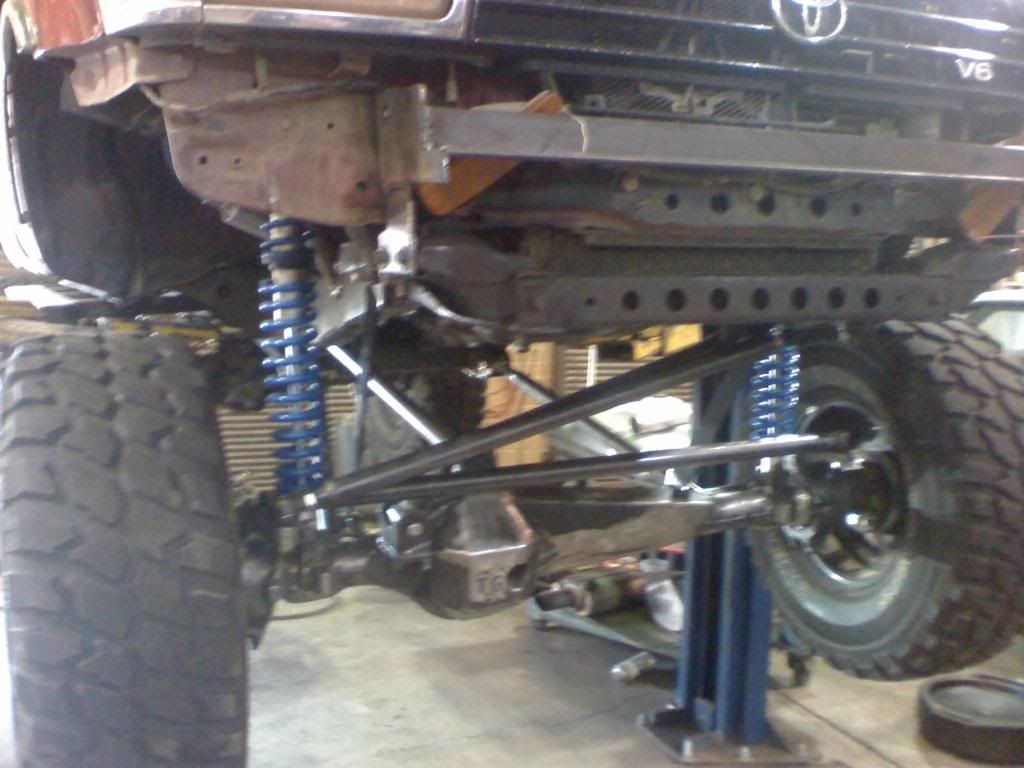
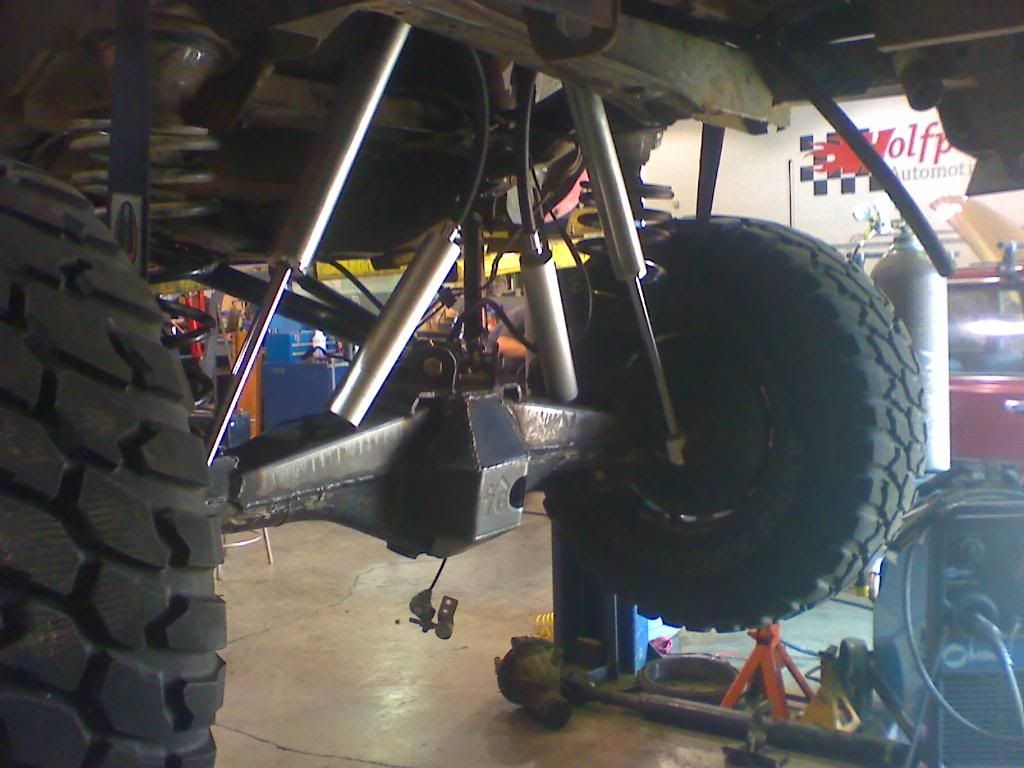
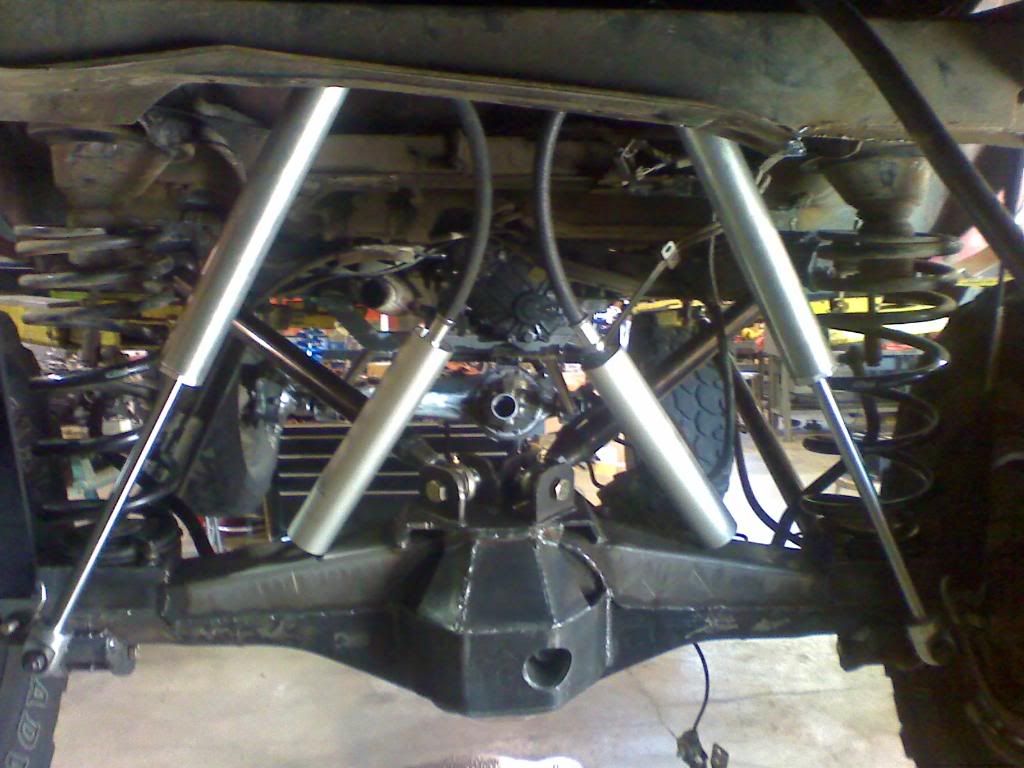
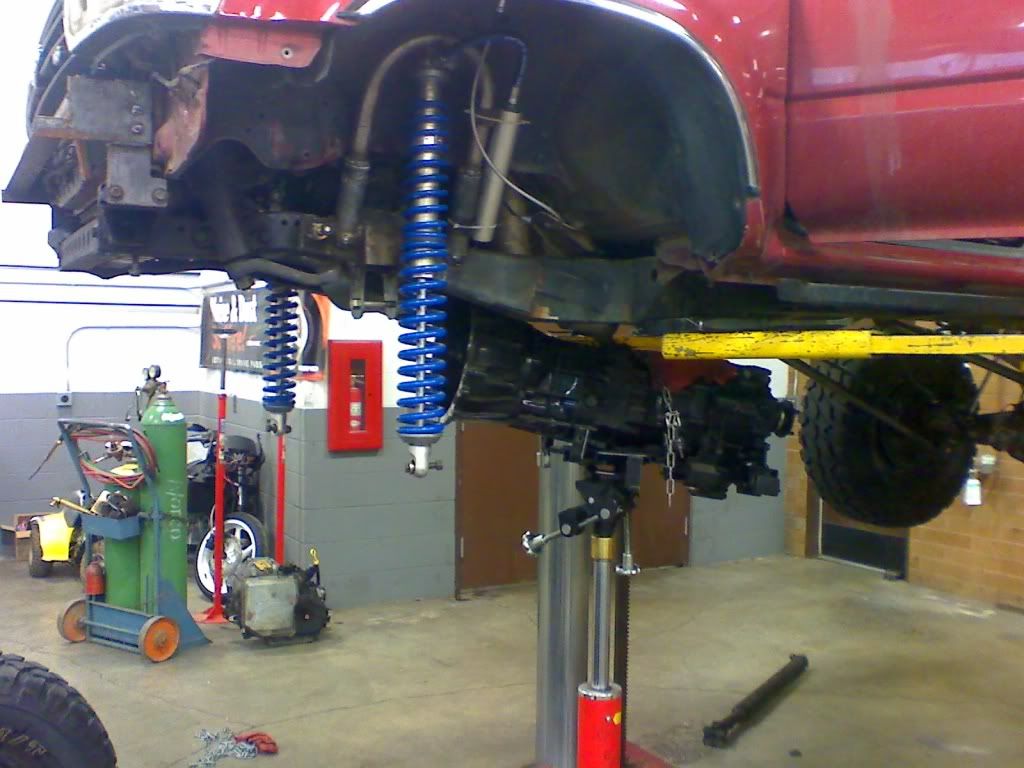
Got any more pics of how the rear links tie into the frame?
Also why did you choose that location for the rear shocks? I guess you aren't concerned about them hitting anything?
Also why did you choose that location for the rear shocks? I guess you aren't concerned about them hitting anything?
 08-02-2009, 09:40 PM
#65
Registered User
Thread Starter
Join Date: May 2005
Posts: 170
Likes: 0
Received 0 Likes
on
0 Posts
The shocks are close, but that is where I needed them to be for the foot long travel remote reservoirs to stretch their legs....I doubt anything will hit them, but we'll see.
08-02-2009, 09:43 PM
#66
Registered User
Thread Starter
Join Date: May 2005
Posts: 170
Likes: 0
Received 0 Likes
on
0 Posts

 08-04-2009, 02:32 PM
#69
Registered User
Thread Starter
Join Date: May 2005
Posts: 170
Likes: 0
Received 0 Likes
on
0 Posts
10-26-2009, 01:41 PM
#70
Registered User
Thread Starter
Join Date: May 2005
Posts: 170
Likes: 0
Received 0 Likes
on
0 Posts
SO I know its been way too long, but I finished the gas tank, the fuel pump, the proportioning valve, and the front rotor issue....
Didn't know you can't use the IFS hubs and use the FJ60 rotors...I'm wetoddid...
Anyhow, tried to start the truck last night, and it sputtered a few times and now my plugs are completely soaked again.... I need to figure out this ridiculous overly rich issue. Either way this truck is very close to being driven, just finishing up the last stuffs, which brings me to more pictures, shortly.
CHeers
 10-28-2009, 10:10 PM
#72
Registered User
Thread Starter
Join Date: May 2005
Posts: 170
Likes: 0
Received 0 Likes
on
0 Posts
Finally got that thing running today, it was tedious but worth it when she fired up and roared nicely... I'm going to finish bleeding the brakes tomorrow and work on the front bumpstops, before I get some flex shots...
10-29-2009, 04:16 PM
#73
Registered User
Thread Starter
Join Date: May 2005
Posts: 170
Likes: 0
Received 0 Likes
on
0 Posts
So no flex shots today. Got everything torqued, re-bled the brakes and the clutch is giving me the same issue of just not enough travel that it will drag and not go into gear. 
Getting closer.... Hopefully tomorrow I can finish the front bumper, box in the rear frame-side UCA brackets and epoxy my mirror back on.
enough ranting...
Getting closer.... Hopefully tomorrow I can finish the front bumper, box in the rear frame-side UCA brackets and epoxy my mirror back on.
enough ranting...
11-22-2009, 03:58 PM
#74
Registered User
Thread Starter
Join Date: May 2005
Posts: 170
Likes: 0
Received 0 Likes
on
0 Posts
Made some progress this last week...
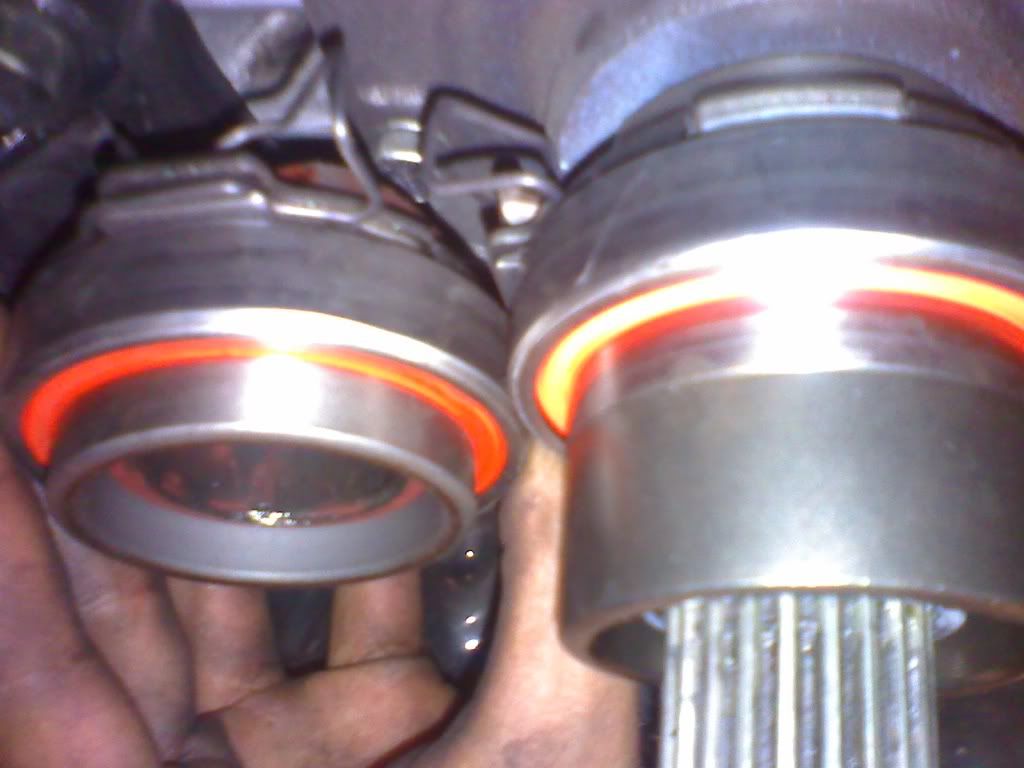
But as has been the norm with this build, I make some progress and take a few steps backward at the same time...Here's some pics of the trans coming out to switch the throw out bearing.
Here you can see the difference between the 5VZ T.O. bearing installed, and the 3VZ T.O. bearing next to it. I thought that this swap to the deeper bearing would take up the extra depth i need to make sure the clutch slave is not throwing all its travel and not fully disengaging the pressure plate....hence no shifty/dragging clutch.
So I didn't take any photos of the pressure plate bolt that I sheered off in the flywheel, because it made me very mad....So much for progress, I will post again when I get my coilover back from FOA with a repaired reservoir line, that doesn't leak and when I finish up painting and finish welding the rear end...
 11-30-2009, 08:44 PM
#76
Registered User
Thread Starter
Join Date: May 2005
Posts: 170
Likes: 0
Received 0 Likes
on
0 Posts
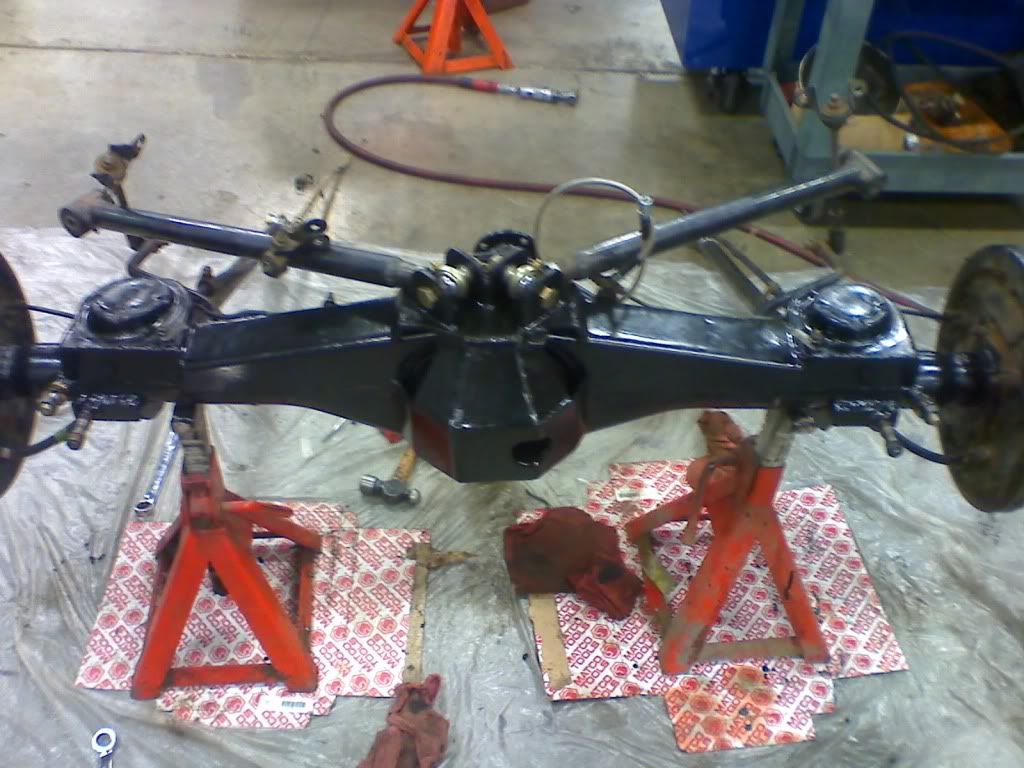
Here's some more pics of the rear which has been painted and remounted under the truck, just need to paint the links and put the RR shocks back in. Then finish the flywheel and Throw out bearing problem.
BTW, the brake lines were re-routed due to the axle/drum assembly being rotated clockwise 90' which I noticed after I had just finished trimming and re-flaring the lines.... the lines are secure, over and out

Last edited by agusgus3; 11-30-2009 at 08:51 PM.
12-03-2009, 03:25 PM
#77
Registered User
Thread Starter
Join Date: May 2005
Posts: 170
Likes: 0
Received 0 Likes
on
0 Posts
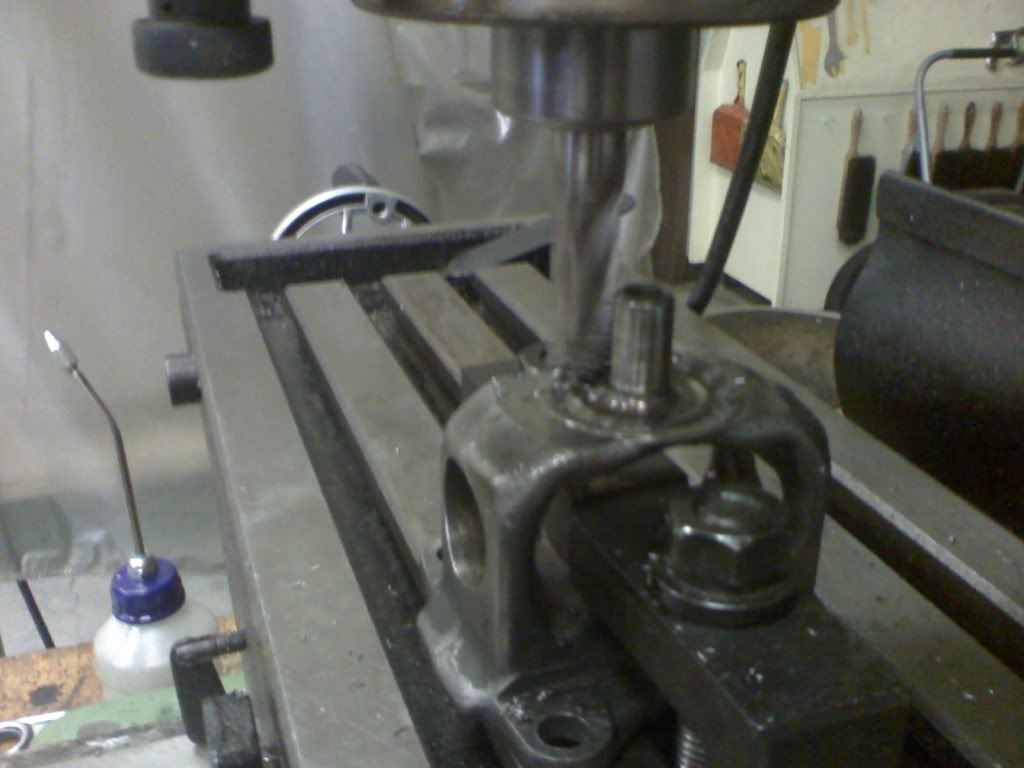
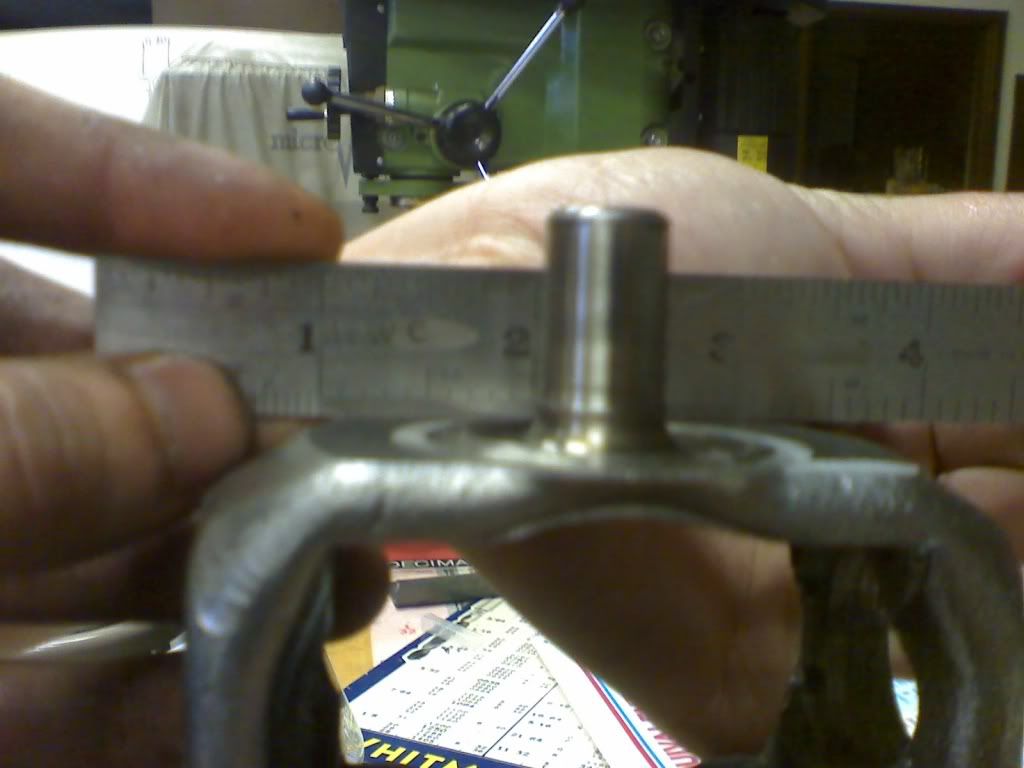
Made a little bit of progress today. I now know that I have to buy a new flywheel and did find one at a local wrecking yard. the better part of the day was machining down the yoke on the front driveshaft and teaching the girly how to secure the work piece and working the mill. Turned out well for her first time milling. Heres the proof...


12-13-2009, 04:15 PM
#78
Registered User
Thread Starter
Join Date: May 2005
Posts: 170
Likes: 0
Received 0 Likes
on
0 Posts
Heres how she stands today all back together with the brakes and clutch bled. Got to drive it for a little bit until it started sputtering. Hopefully get it all done tomorrow...

 12-17-2009, 11:32 AM
#80
Registered User
Thread Starter
Join Date: May 2005
Posts: 170
Likes: 0
Received 0 Likes
on
0 Posts
Thank you much. Not running so good now, still running fairly rich, but not nearly as bad as before, i re-pinned the maf sensor and got a Vapor pressure sensor. I'm chasing down a gremlin, which is most likely in the wiring harness, but I will figure it out soon. Here are some pics from the presentation this morning...sneak peek at the beginnings of the bumper.