
22rte CT26 turbo swap
 02-08-2014, 10:27 PM
#1
22rte CT26 turbo swap
A few back I rode in a buddy's truck that had a 22rte with a CT26 turbo when my truck broke down on the trail. I was so impressed by it that when buying another 4runner I had to get one with a 22rte.
A few months ago I installed a manual boost controller on my truck but no matter what I did it wouldn't boost more than 5PSI. I pulled the my turbo to find that it was cracked near my waste gate and that my turbo needed to be replaced.
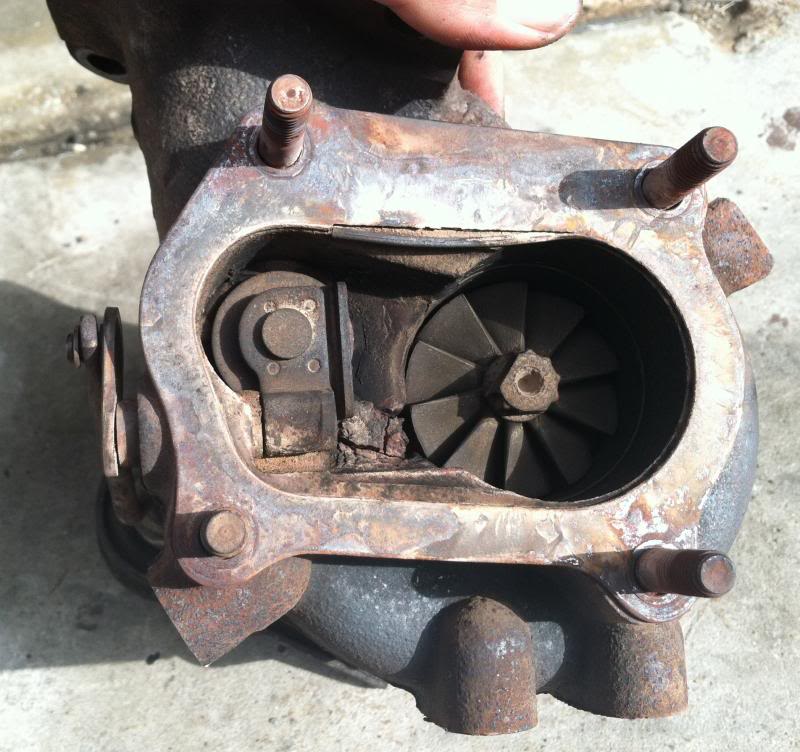
The truck only had 128,000 miles! It's a common issues with these turbos, I was just hoping it wouldn't happen in only 128,000 miles. That's when I decided to swap in a CT26 turbo, mostly because it appears stock and I still have to pass California smog tests!
To start, I'm not taking credit for all info I'm posting since I was able to find most of it online, I just had to search numerous builds to get all the info I needed and wanted to put it all in one place. Here are the swap threads I got most of my info from
-DLM's CT26 Build Funny store, Dave is the one who's truck I rode in that first impressed me by the 22rte.
-COB's 87 4runner Turbo. Page nine and ten really helped me with the air intake and water pump to radiator coolant hose.
Parts needed
-CT26 Supra Turbo, not one from a MR2
-CT26 downpipe flange
-CT26 gasket kit
-2.5" downpipe piping. You could go 3" but there's really no point since the turbo outlet is only 2.5". I used two 45 degree mandrel bent aluminized-steel pipes to make my downpipe.
-2 1/8" 45 degree silicone turbo coupler. Every other build thread I've read said a 2" coupler but I ordered the 2" coupler and it wouldn't fit on my turbo inlet.
-1.25" inner diameter, 15" length flexible radiator hose
-O2 bung to mount an O2 sensor on your down pipe.
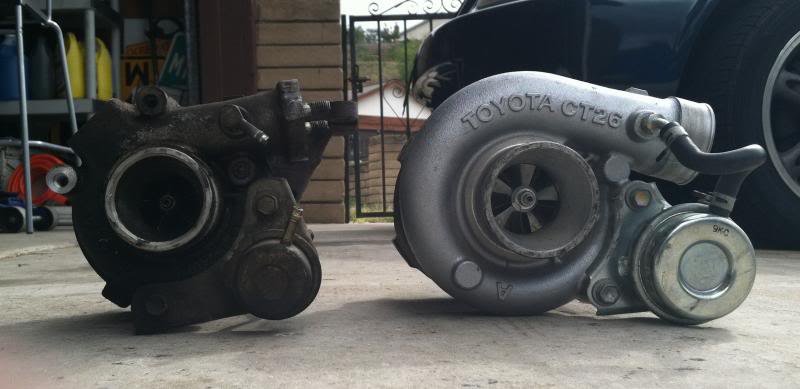
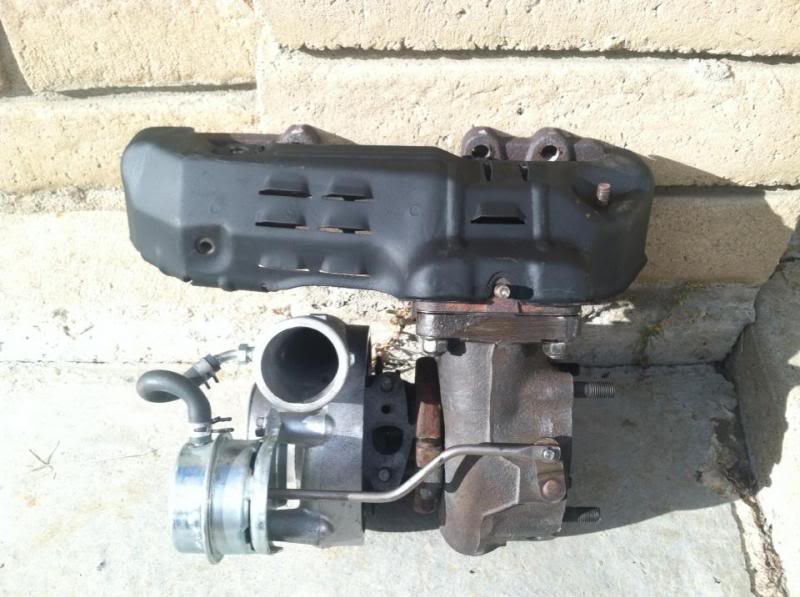
Ok, onto the swap! Firstly here are the two turbos side by side. The stock CT20 on the left and new rebuilt CT26 on the right!
Turbo: The first order of business was getting the CT26 to bolt up to my factory turbo manifold. To this I bought a cheap harbor freight air die grinder with five grinding stone bits, which costs me a grand total of $10. If you don't have an air compressor you could use an electric die grinder also. I probably wouldn't use a dremel though since it seemed to take forever with the air die grinder! Here's a shot of my CT26's mounting flange after I opened up the mounting holes.
To get the CT26 to work on a 22re you have to reclock the CT26. The compressor and exhaust housing are in correct orientation with each other, but you need to clock the center section for your oil and coolant lines to work. Ideally you'll have large C-clip pliers, but if you don't you might be able to get by with needle nose pliers and some patience. Once you re-clock the center section, you might need to bend the feed and drain lines a bit but everything bolts right up.
Turbo Manifold: Next up since I had the die grinder out and was working on the manifold I opening up the exhaust on my turbo manifold to 2.5" and smoothed a few of the bumps inside my turbo manifold.
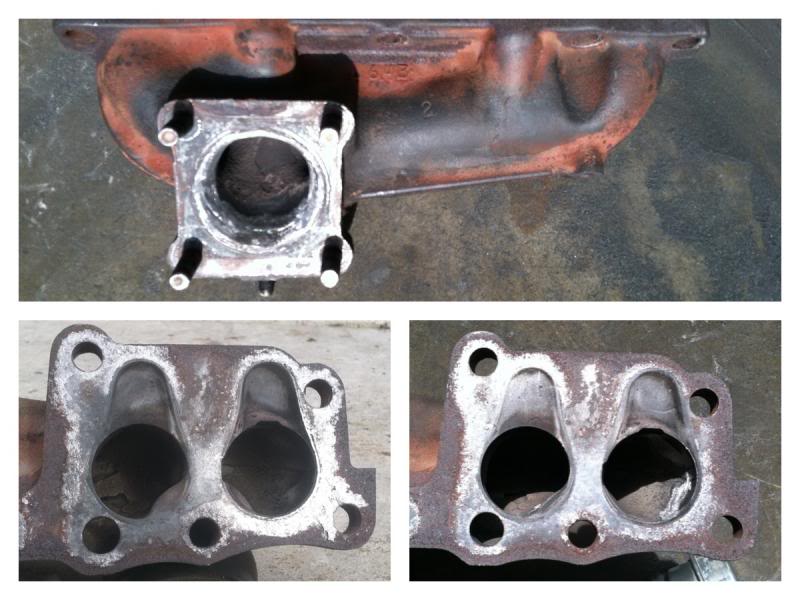
Stock manifold ports on the bottom left and the smoothed out ports on the bottom right. After all that the turbo bolted right up to my manifold!
Intake: For the turbo inlet, the CT26 turbo inlet is larger than the CT20 inlet. The factory rubber 45 degree turbo inlet elbow is a two piece rubber design with one rubber elbow inside of another, so I just cut out the inner rubber elbow on the outlet of the elbow and it fit like a glove.
Charge Pipes: As for the charge pipe that runs for the turbo to the throttle body I just trimmed the factory tube and attached it to the turbo with a 2 1/8" silicone coupler with a 45 degree bend in it. I don't have any picture of the cut tube so I'll just borrow this one from Dave.
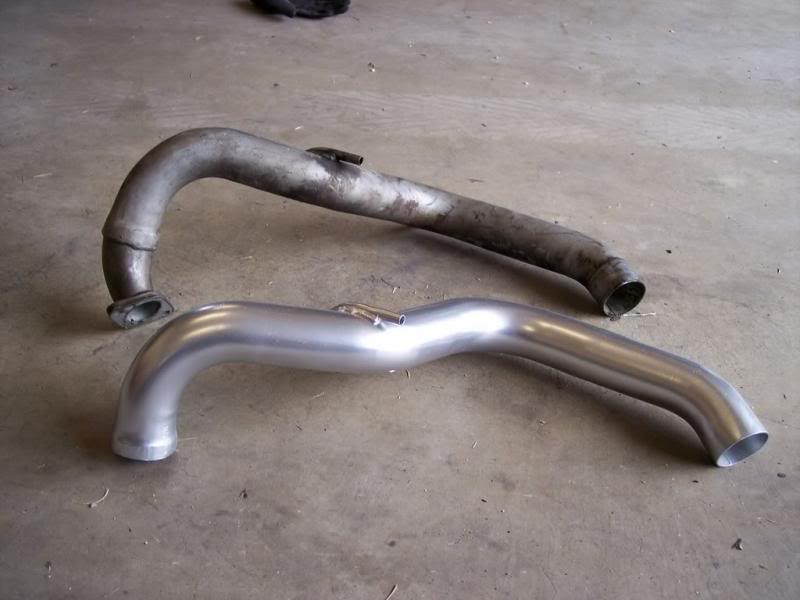
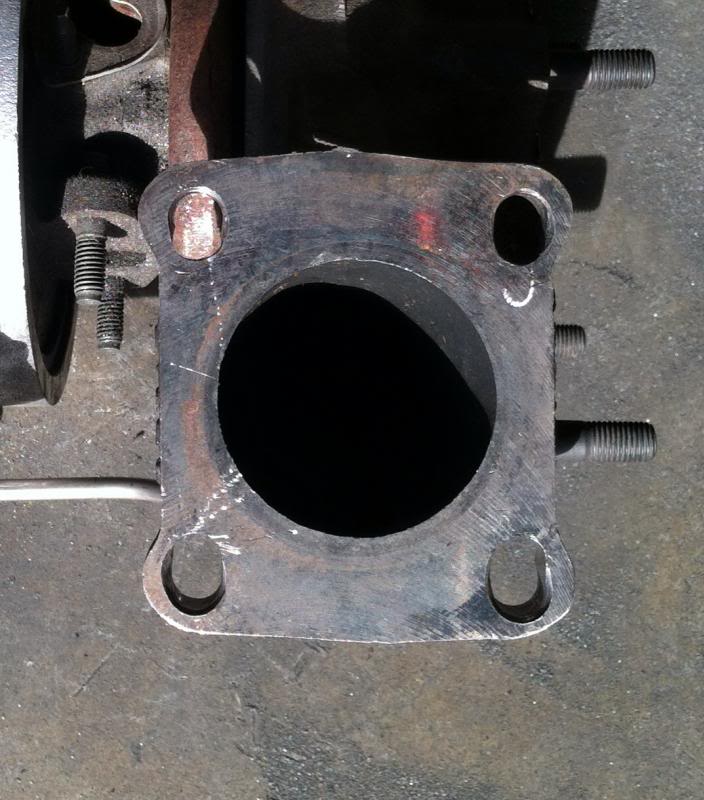
Downpipe: As for a down pipe you can't use a Supra down pipe because the turbo is clocked differently so you have to make your own. Here's the making of my turbo down pipe.
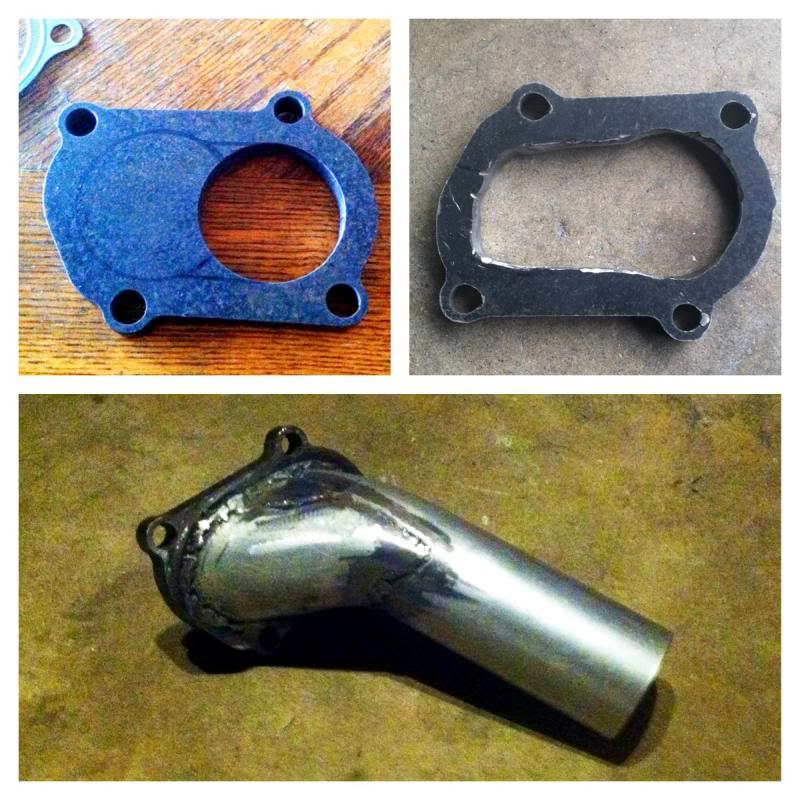
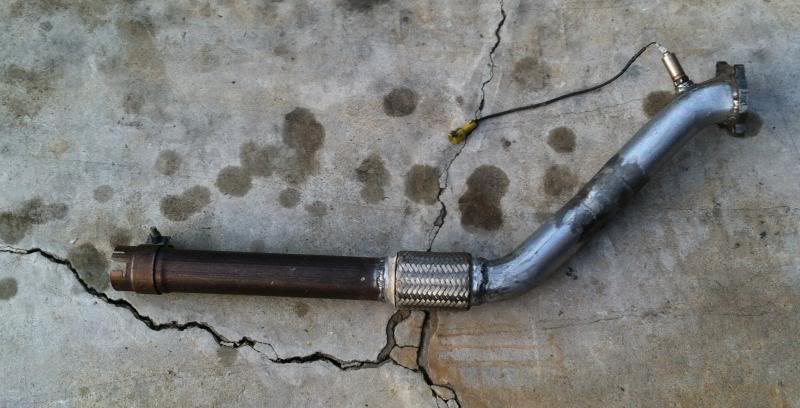
I started with the blank flange, then opened it up to clear my waste gate. To make my down pipe I installed one of my 2.5" mandrel bent tubes where the turbo outlet is on the flange, then welded on a straight tube on the left side of the down pipe to bring it all together. From there I welded on another 45 degree bend to level it all out, then added a flex pipe since I've heard that's part of the reason why our factory turbos crack. Here's a picture of my complete down pipe.
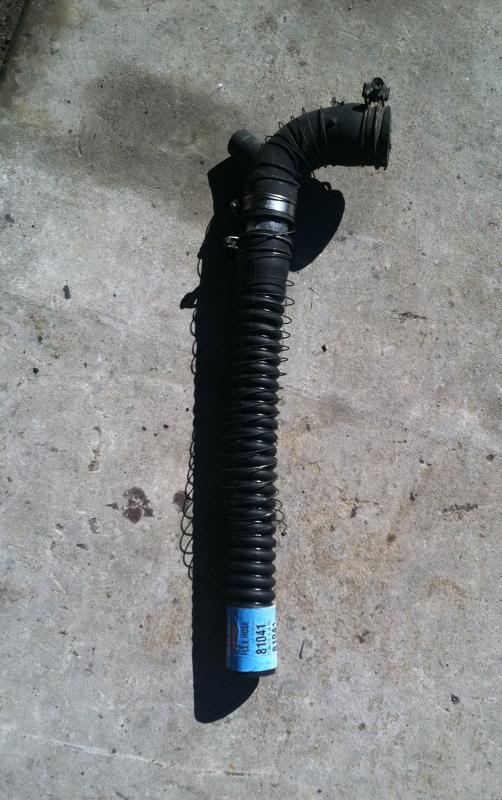
Lower Radiator Hose: One issues I ran into was that the larger turbo didn't clear the metal coolant hose from the water pump to the lower radiator hose. So I cut the rubber elbow that connects to the water pump right after the nipple that connects the heater hose, put a piece of 1.25" steel pipe in there, clamped that in and then added a 1.25" inner diameter flexible rubber hose to the other side so that I can connect it to my radiator. Here's a picture of the setup.
I'll try to get a picture of it on the truck soon!
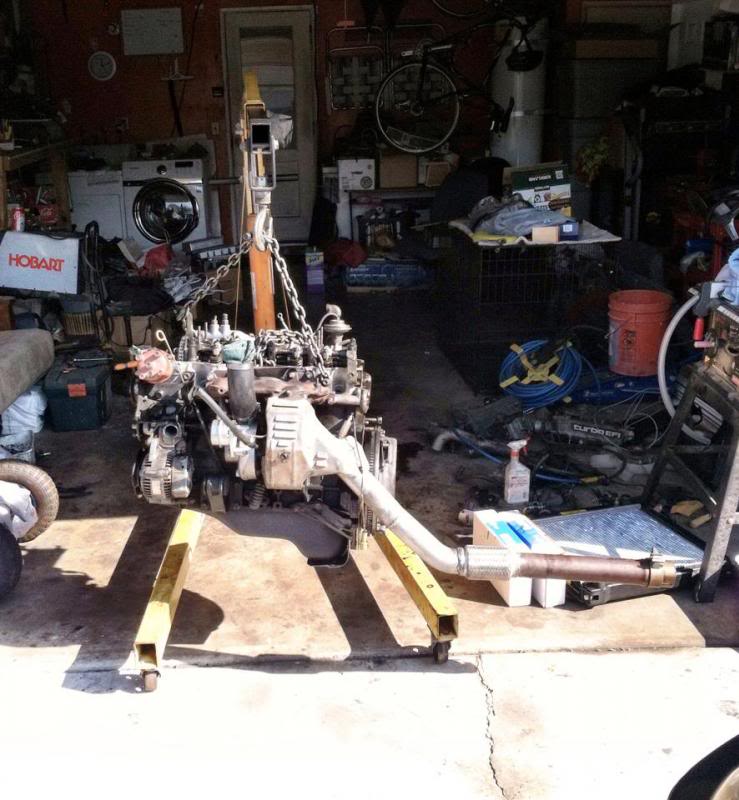
Here's a final shot of everything in place right before I dropped it in!
Here it is in the truck.
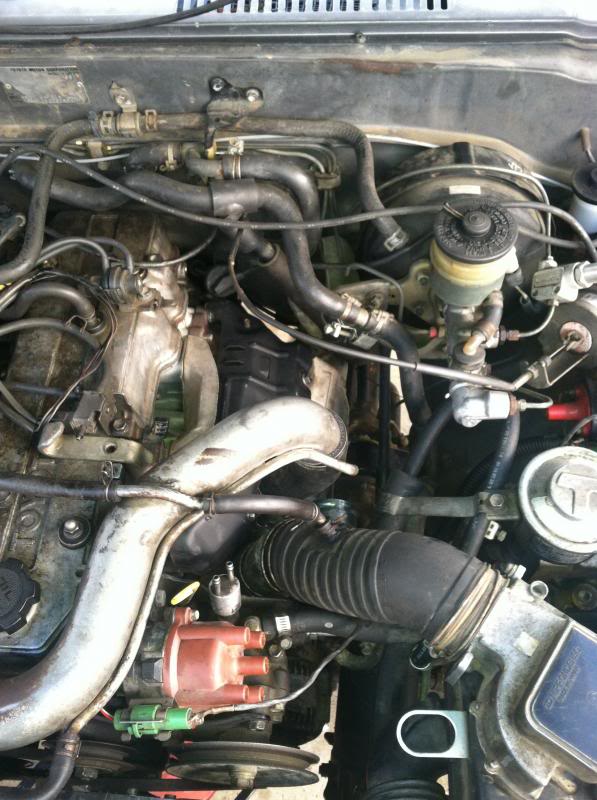
There are a billion things in this picture so it makes it hard to tell what's going on, but you can see how the 45 degree silicone turbo coupler connected my turbo and charge piping.
My cost list
-Rebuilt CT26 Turbo $100
-Two mandrel bent 45 degree 2.5" steel tubing for my downpipe $24
-CT26 gasket set $15 from ebay
-CT26 exhaust flange $30 from ebay
-2 1/8" 45 degree silicone turbo coupler $12 from ebay
-flex pipe was free, a buddy had it sitting around and gave it to me.
-1.25" inner diameter, 15" length flexible radiator hose. Part number #81041 from auto zone. $11
-O2 bung to mount an O2 sensor to my down pipe. I got it from a local muffler shop for $5
Total cost: $197 and a lot of time!
Even though the write-ups online were extremely helpful, I still did a ton of testing fitting and guessing and checking. The truck runs great and pulls hard to redline! The best part is that it looks factory. I couldn't be happier with the swap! Well worth the effort!
A few months ago I installed a manual boost controller on my truck but no matter what I did it wouldn't boost more than 5PSI. I pulled the my turbo to find that it was cracked near my waste gate and that my turbo needed to be replaced.
The truck only had 128,000 miles! It's a common issues with these turbos, I was just hoping it wouldn't happen in only 128,000 miles. That's when I decided to swap in a CT26 turbo, mostly because it appears stock and I still have to pass California smog tests!
To start, I'm not taking credit for all info I'm posting since I was able to find most of it online, I just had to search numerous builds to get all the info I needed and wanted to put it all in one place. Here are the swap threads I got most of my info from
-DLM's CT26 Build Funny store, Dave is the one who's truck I rode in that first impressed me by the 22rte.
-COB's 87 4runner Turbo. Page nine and ten really helped me with the air intake and water pump to radiator coolant hose.
Parts needed
-CT26 Supra Turbo, not one from a MR2
-CT26 downpipe flange
-CT26 gasket kit
-2.5" downpipe piping. You could go 3" but there's really no point since the turbo outlet is only 2.5". I used two 45 degree mandrel bent aluminized-steel pipes to make my downpipe.
-2 1/8" 45 degree silicone turbo coupler. Every other build thread I've read said a 2" coupler but I ordered the 2" coupler and it wouldn't fit on my turbo inlet.
-1.25" inner diameter, 15" length flexible radiator hose
-O2 bung to mount an O2 sensor on your down pipe.
Ok, onto the swap! Firstly here are the two turbos side by side. The stock CT20 on the left and new rebuilt CT26 on the right!
Turbo: The first order of business was getting the CT26 to bolt up to my factory turbo manifold. To this I bought a cheap harbor freight air die grinder with five grinding stone bits, which costs me a grand total of $10. If you don't have an air compressor you could use an electric die grinder also. I probably wouldn't use a dremel though since it seemed to take forever with the air die grinder! Here's a shot of my CT26's mounting flange after I opened up the mounting holes.
To get the CT26 to work on a 22re you have to reclock the CT26. The compressor and exhaust housing are in correct orientation with each other, but you need to clock the center section for your oil and coolant lines to work. Ideally you'll have large C-clip pliers, but if you don't you might be able to get by with needle nose pliers and some patience. Once you re-clock the center section, you might need to bend the feed and drain lines a bit but everything bolts right up.
Turbo Manifold: Next up since I had the die grinder out and was working on the manifold I opening up the exhaust on my turbo manifold to 2.5" and smoothed a few of the bumps inside my turbo manifold.
Stock manifold ports on the bottom left and the smoothed out ports on the bottom right. After all that the turbo bolted right up to my manifold!
Intake: For the turbo inlet, the CT26 turbo inlet is larger than the CT20 inlet. The factory rubber 45 degree turbo inlet elbow is a two piece rubber design with one rubber elbow inside of another, so I just cut out the inner rubber elbow on the outlet of the elbow and it fit like a glove.
Charge Pipes: As for the charge pipe that runs for the turbo to the throttle body I just trimmed the factory tube and attached it to the turbo with a 2 1/8" silicone coupler with a 45 degree bend in it. I don't have any picture of the cut tube so I'll just borrow this one from Dave.
Downpipe: As for a down pipe you can't use a Supra down pipe because the turbo is clocked differently so you have to make your own. Here's the making of my turbo down pipe.
I started with the blank flange, then opened it up to clear my waste gate. To make my down pipe I installed one of my 2.5" mandrel bent tubes where the turbo outlet is on the flange, then welded on a straight tube on the left side of the down pipe to bring it all together. From there I welded on another 45 degree bend to level it all out, then added a flex pipe since I've heard that's part of the reason why our factory turbos crack. Here's a picture of my complete down pipe.
Lower Radiator Hose: One issues I ran into was that the larger turbo didn't clear the metal coolant hose from the water pump to the lower radiator hose. So I cut the rubber elbow that connects to the water pump right after the nipple that connects the heater hose, put a piece of 1.25" steel pipe in there, clamped that in and then added a 1.25" inner diameter flexible rubber hose to the other side so that I can connect it to my radiator. Here's a picture of the setup.
I'll try to get a picture of it on the truck soon!
Here's a final shot of everything in place right before I dropped it in!
Here it is in the truck.
There are a billion things in this picture so it makes it hard to tell what's going on, but you can see how the 45 degree silicone turbo coupler connected my turbo and charge piping.
My cost list
-Rebuilt CT26 Turbo $100
-Two mandrel bent 45 degree 2.5" steel tubing for my downpipe $24
-CT26 gasket set $15 from ebay
-CT26 exhaust flange $30 from ebay
-2 1/8" 45 degree silicone turbo coupler $12 from ebay
-flex pipe was free, a buddy had it sitting around and gave it to me.
-1.25" inner diameter, 15" length flexible radiator hose. Part number #81041 from auto zone. $11
-O2 bung to mount an O2 sensor to my down pipe. I got it from a local muffler shop for $5
Total cost: $197 and a lot of time!
Even though the write-ups online were extremely helpful, I still did a ton of testing fitting and guessing and checking. The truck runs great and pulls hard to redline! The best part is that it looks factory. I couldn't be happier with the swap! Well worth the effort!
Last edited by strykersd; 06-09-2014 at 05:02 AM.
 02-20-2014, 05:25 AM
#5
I've just been breaking her in at stock boost levels. I need to install my Innovate LC-1 wideband setup that I have sitting in my garage before I start playing with my manual boost controller again. I'll probably get around to that this weekend, so I'll let you know then!
03-22-2014, 08:11 PM
#6
Registered User
Join Date: Mar 2014
Location: South Cali.
Posts: 130
Likes: 0
Received 0 Likes
on
0 Posts
Nice write up there. My 87 4runner 22rte has a nice size crack on the exhaste side of the turbo. You can see it from the top with the hood open. Small gap were you can see a nice crack  . Thanks for your write up, just what the doctor order. Gonna start grabbing what i need too get this going for mines also.
. Thanks for your write up, just what the doctor order. Gonna start grabbing what i need too get this going for mines also.


Thread
Thread Starter
Forum
Replies
Last Post


