
1st Gen 4Runner Roof Rack Idea/Install
 11-21-2009, 09:05 PM
#1
Registered User
Thread Starter
Join Date: Sep 2009
Location: Provo, Utah
Posts: 38
Likes: 0
Received 0 Likes
on
0 Posts
1st Gen 4Runner Roof Rack Idea/Install
I've been trying to come up with a good idea for roof racks on my 4Runner for a while now. I didn't really like the idea of using the gutters to mount stuff, especially because a safari rack that far forward would pretty much make the sunroof useless. That would also create another obstacle if I need to take the top off at some point. Versatility was one of my biggest considerations, as I wanted them to easily adapt to whatever mounting needs may arise. I also wanted to have the ability to mount stuff nice and low to the roof and be able to spread loads more evenly without multiple crossbars and such.
So here's what I finally came up with. I think it addresses all of these issues nicely, and I'm really happy with how it turned out...
I stumbled across these tracks online one day and they instantly got the gears turning upstairs.
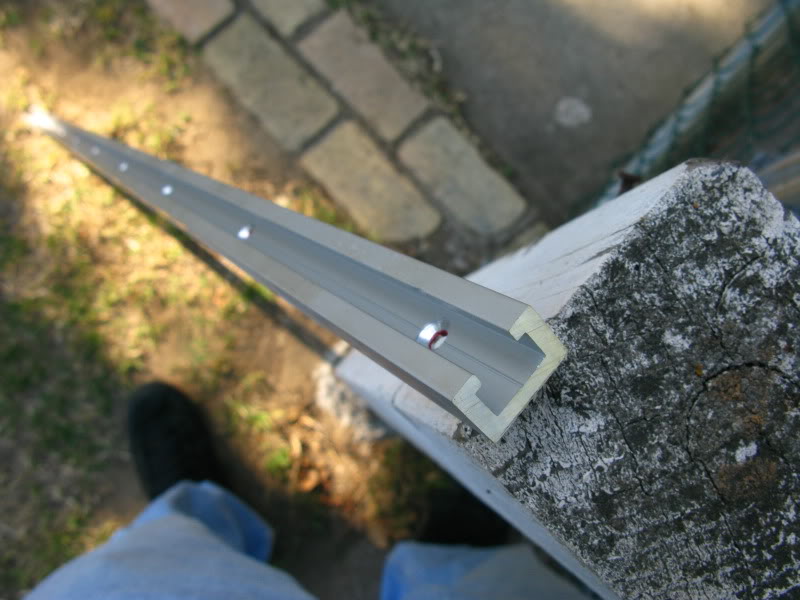
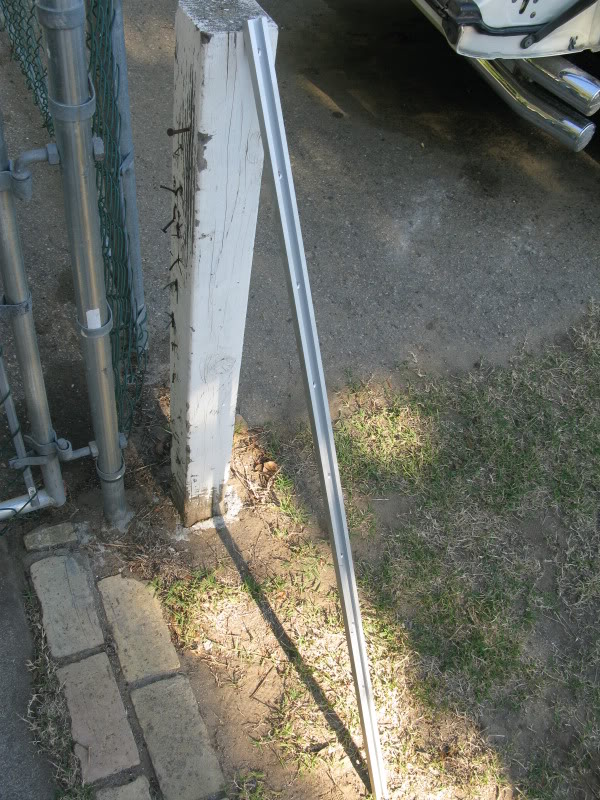
They're used/made for table saw setups and are designed so that the head of a 3/8" bolt fits right in the slot. I got two of the 48" Heavy Duty pieces from here - http://www.ttrackusa.com/track_%20systems.htm#1018. They come pre-drilled for #8 (I think) mounting screws, but I bored them out a little bigger to use #10. There were ten mounting holes per track.
Then I did some measuring and layed them out where I wanted them on the roof. Using a felt tip marker, I marked all the holes so I would have my drill guides like this.

This was a very crucial step due to the fact that there was no rhyme or reason to the pre-drilled holes in the track. They were not even all on center. Annoying, but not really too big of an issue...
I wanted it to be a pretty clean install, so I had gotten some #10 rivnuts on eBay. Using those as a guide to size the holes, I drilled them all out. This is where you want to take your time and be careful... In the positioning I had them, the top was solid in the front 5 spots and the furthest rear. At the other 4 (near the rear windows) the top was hollow inside, so I only drilled through the outer layer. I used one of those depth stoppers to make sure I didn't go too far, but it slipped twice causing me to poke through the headliner a little bit. As far as the mounting screws, I had originally bought #10-24 x 3/4" but found that they were a little too long for those front 4 or 5 positions where they just hide above the headliner. So I got some #10-24 x 5/8" for the front 5 positions on each side. Yeah, I should have just gotten 5/8" for all of them the second time around, but I'm cheap like that.
Having said that, I didn't want to have to buy a special tool for the rivnuts, so I tried a couple simple ways of setting them (no, not in the roof). Of course, those didn't work... So I found this little tool for cheaper than all of the usual rivet gun style tools and went for it.
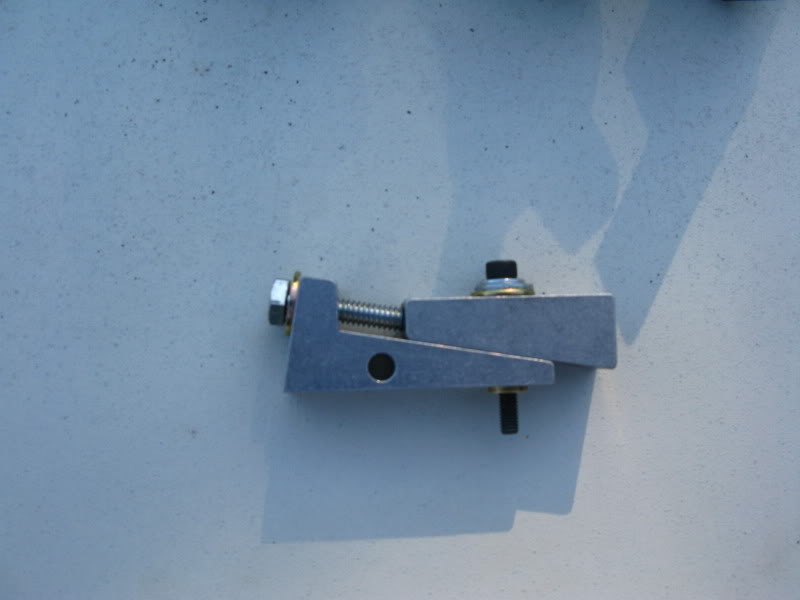
I was actually really pleased with how well it worked. It might not be as fast as most of the usual methods, but I didn't care. Here's where I got mine - http://www.aircraftspruce.com/catalo...vetnuttool.php.
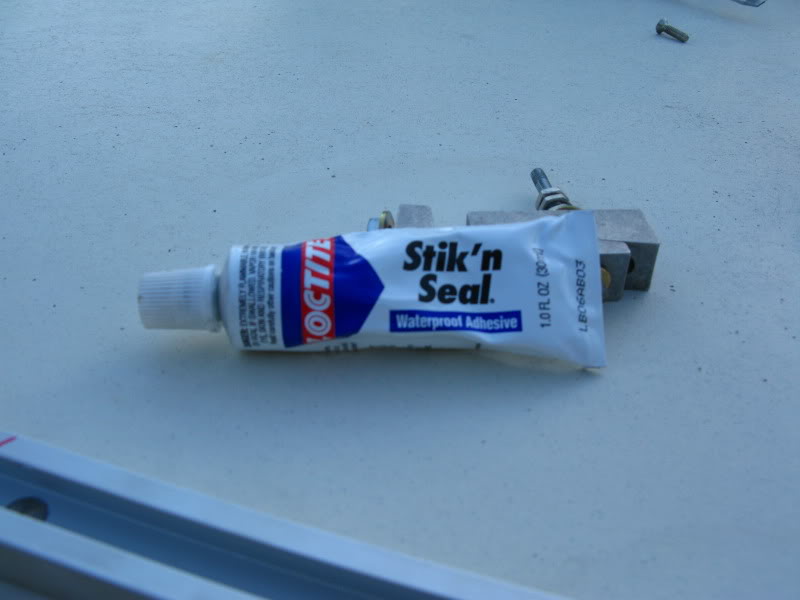
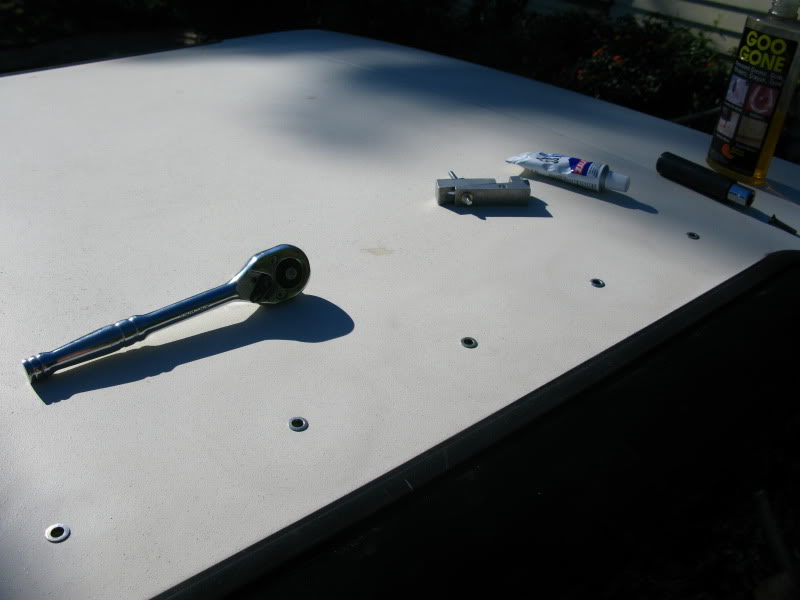
I also put a bead of this stuff around the rivnuts to make sure they're watertight.
A couple pictures of the rivnuts installed...

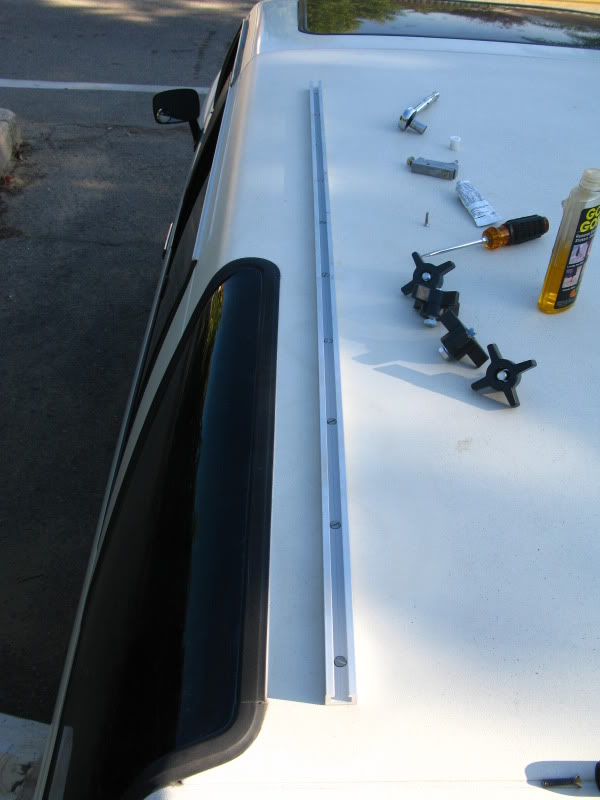
Test fitting the first track...
I ended up having 1 position on each track that was mis-aligned, so I had to adjust those holes in the track. But honestly, I was definitely expecting more, so I was happy about that.
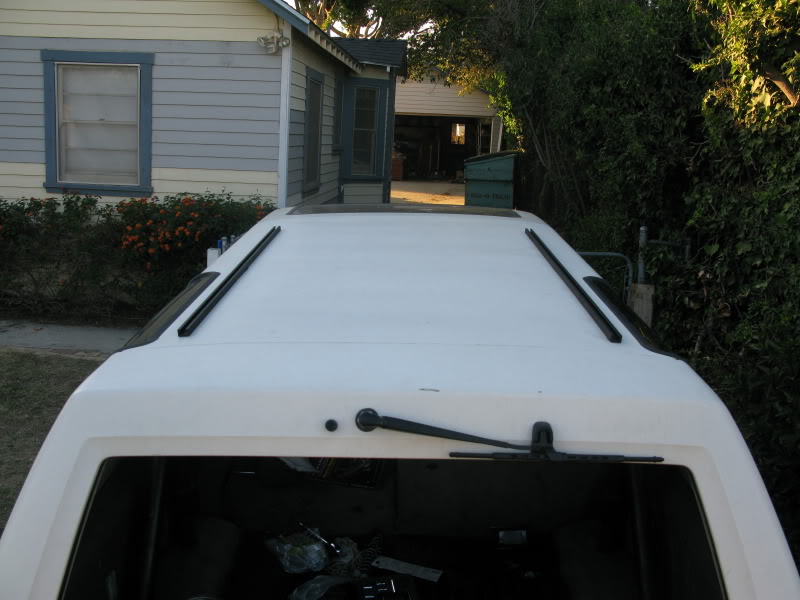
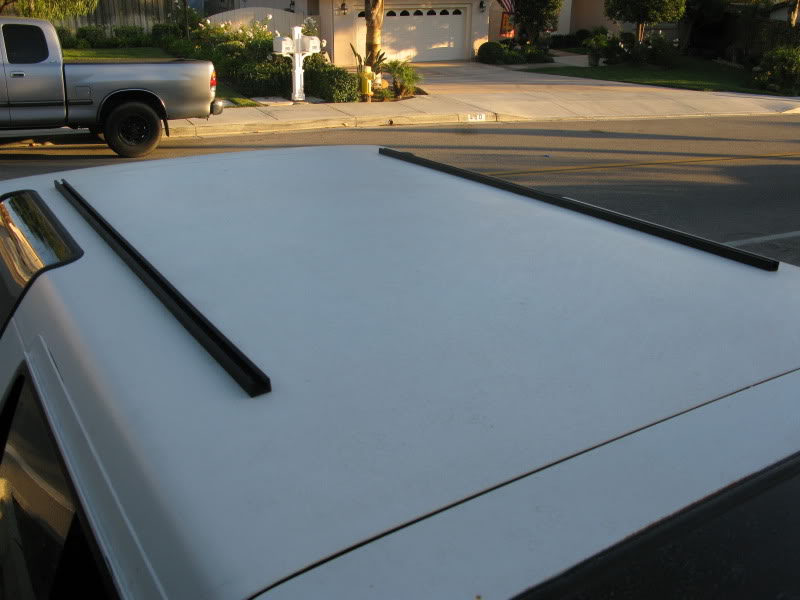
Finally, I sprayed them flat black and cut a couple strips of toolbox liner to go between them and the roof. Before I mounted them up, I put a blob of RTV in each rivnut to seal them up, but still allow for easy removal of the hardware if need be.
And here's the final result...
They're nice and solid. I stood on them individually with no problems whatsoever (I weigh in the 150's). So they shouldn't give me any trouble with good-size loads. They do sit facing outward a little bit, but since I'll be welding up whatever bracketry I need anyway, it's not a concern for me. It probably cost me in the neighborhood of $80 for the tracks, rivnuts, rivnut tool, hardware, etc. But like I said, I'm really happy with them and I hope this will be of use to someone else who might be facing a similar dilemma.
So here's what I finally came up with. I think it addresses all of these issues nicely, and I'm really happy with how it turned out...
I stumbled across these tracks online one day and they instantly got the gears turning upstairs.
They're used/made for table saw setups and are designed so that the head of a 3/8" bolt fits right in the slot. I got two of the 48" Heavy Duty pieces from here - http://www.ttrackusa.com/track_%20systems.htm#1018. They come pre-drilled for #8 (I think) mounting screws, but I bored them out a little bigger to use #10. There were ten mounting holes per track.
Then I did some measuring and layed them out where I wanted them on the roof. Using a felt tip marker, I marked all the holes so I would have my drill guides like this.
This was a very crucial step due to the fact that there was no rhyme or reason to the pre-drilled holes in the track. They were not even all on center. Annoying, but not really too big of an issue...
I wanted it to be a pretty clean install, so I had gotten some #10 rivnuts on eBay. Using those as a guide to size the holes, I drilled them all out. This is where you want to take your time and be careful... In the positioning I had them, the top was solid in the front 5 spots and the furthest rear. At the other 4 (near the rear windows) the top was hollow inside, so I only drilled through the outer layer. I used one of those depth stoppers to make sure I didn't go too far, but it slipped twice causing me to poke through the headliner a little bit. As far as the mounting screws, I had originally bought #10-24 x 3/4" but found that they were a little too long for those front 4 or 5 positions where they just hide above the headliner. So I got some #10-24 x 5/8" for the front 5 positions on each side. Yeah, I should have just gotten 5/8" for all of them the second time around, but I'm cheap like that.
Having said that, I didn't want to have to buy a special tool for the rivnuts, so I tried a couple simple ways of setting them (no, not in the roof). Of course, those didn't work... So I found this little tool for cheaper than all of the usual rivet gun style tools and went for it.
I was actually really pleased with how well it worked. It might not be as fast as most of the usual methods, but I didn't care. Here's where I got mine - http://www.aircraftspruce.com/catalo...vetnuttool.php.
I also put a bead of this stuff around the rivnuts to make sure they're watertight.
A couple pictures of the rivnuts installed...
Test fitting the first track...
I ended up having 1 position on each track that was mis-aligned, so I had to adjust those holes in the track. But honestly, I was definitely expecting more, so I was happy about that.
Finally, I sprayed them flat black and cut a couple strips of toolbox liner to go between them and the roof. Before I mounted them up, I put a blob of RTV in each rivnut to seal them up, but still allow for easy removal of the hardware if need be.
And here's the final result...
They're nice and solid. I stood on them individually with no problems whatsoever (I weigh in the 150's). So they shouldn't give me any trouble with good-size loads. They do sit facing outward a little bit, but since I'll be welding up whatever bracketry I need anyway, it's not a concern for me. It probably cost me in the neighborhood of $80 for the tracks, rivnuts, rivnut tool, hardware, etc. But like I said, I'm really happy with them and I hope this will be of use to someone else who might be facing a similar dilemma.


 02-04-2010, 09:07 AM
#4
Registered User

Join Date: Feb 2010
Location: Aptos, CA
Posts: 2
Likes: 0
Received 0 Likes
on
0 Posts
rivnut size
I just got a 95 factory 4runner rack and am going to install it on my 86 4runner with rivnuts, but I don't know what length of rivnuts to get. You mentioned that some of the holes were "solid" and some "hollow", and you used the same rivnuts for all of them. Rivnuts are designed for a specific wall thickness. Did you just crimp them until they expanded inside the hole rather than having the crimp on the backside of the hole for the "solid" sections? Also, do you have some estimate of how thick the fiberglass shell is? I'm guessing it's between 1/8 and 1/4 inch, but it would be nice to know if it's closer to one or the other.
Thanks for your post. Your install looks great. I would probably have done something like that if I hadn't found a factory rack cheap on craigslist.
Thanks for your post. Your install looks great. I would probably have done something like that if I hadn't found a factory rack cheap on craigslist.
02-10-2010, 11:59 AM
#5
Registered User
Thread Starter
Join Date: Sep 2009
Location: Provo, Utah
Posts: 38
Likes: 0
Received 0 Likes
on
0 Posts
Here's a link to the exact rivnuts i used... http://cgi.ebay.com/ws/eBayISAPI.dll...m=370306923482
And yes, I did just crimp them till they expanded enough in the solid holes. I know it's not how they're designed to work, but I'm confident that they're plenty strong enough like that for whatever is demanded of them (within reason of course).
Unfortunately, I didn't take any thickness measurements or anything. But just from memory, I would guess about 1/8" for the hollow spots and probably around 3/8" or 7/16" for the solid spots.
Here's a link to a thread where the guy cut his top... https://www.yotatech.com/forums/f116...cation-195216/
There's a couple pictures of the top after being cut. It's kinda hard to tell anything, but they might be helpful.
02-10-2010, 04:48 PM
#6
Registered User
Join Date: Feb 2010
Location: Aptos, CA
Posts: 2
Likes: 0
Received 0 Likes
on
0 Posts
Thanks for the reply. I ordered some stainless 1/4-20 rivnuts on Ebay. The rack only has 7 screws per side, so I figured to use some larger screws. I'm going to epoxy the rivnuts in place just to be safe. I'll take some pictures and post them here when i install it.
Trending Topics
03-23-2010, 07:24 AM
#8
Registered User

Join Date: Nov 2008
Location: Minnesota
Posts: 58
Likes: 0
Received 0 Likes
on
0 Posts
How much weight can one of these tops hold? I'm thinking of using mine from time to time at work. (Carpenter) And I'd like to bolt up a roof rack. Can it handle some sheet goods and lumber?
03-23-2010, 07:55 AM
#9
Registered User
iTrader: (1)
Join Date: Dec 2008
Location: Calgary, AB, Canada
Posts: 94
Likes: 0
Received 0 Likes
on
0 Posts
I just got a 95 factory 4runner rack and am going to install it on my 86 4runner with rivnuts, but I don't know what length of rivnuts to get. You mentioned that some of the holes were "solid" and some "hollow", and you used the same rivnuts for all of them. Rivnuts are designed for a specific wall thickness. Did you just crimp them until they expanded inside the hole rather than having the crimp on the backside of the hole for the "solid" sections? Also, do you have some estimate of how thick the fiberglass shell is? I'm guessing it's between 1/8 and 1/4 inch, but it would be nice to know if it's closer to one or the other.
Thanks for your post. Your install looks great. I would probably have done something like that if I hadn't found a factory rack cheap on craigslist.
Thanks for your post. Your install looks great. I would probably have done something like that if I hadn't found a factory rack cheap on craigslist.
 03-24-2010, 11:51 AM
#11
Registered User
Thread Starter
Join Date: Sep 2009
Location: Provo, Utah
Posts: 38
Likes: 0
Received 0 Likes
on
0 Posts
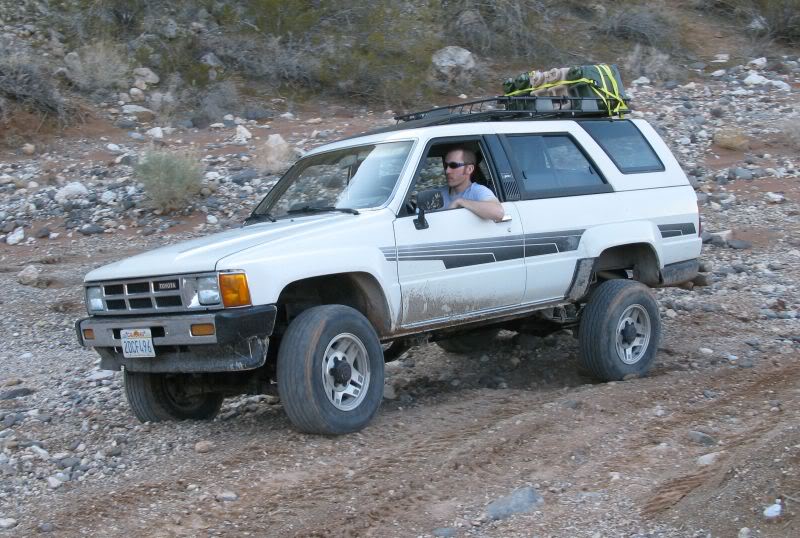
I carried over 160 lbs just in fuel/water on my rack on a recent offroad trip (so yes, it was getting bounced around quite a bit). No issues...
Oh, and still no leaks either.
Oh, and still no leaks either.
 07-06-2010, 11:03 AM
#13
Registered User
Thread Starter
Join Date: Sep 2009
Location: Provo, Utah
Posts: 38
Likes: 0
Received 0 Likes
on
0 Posts
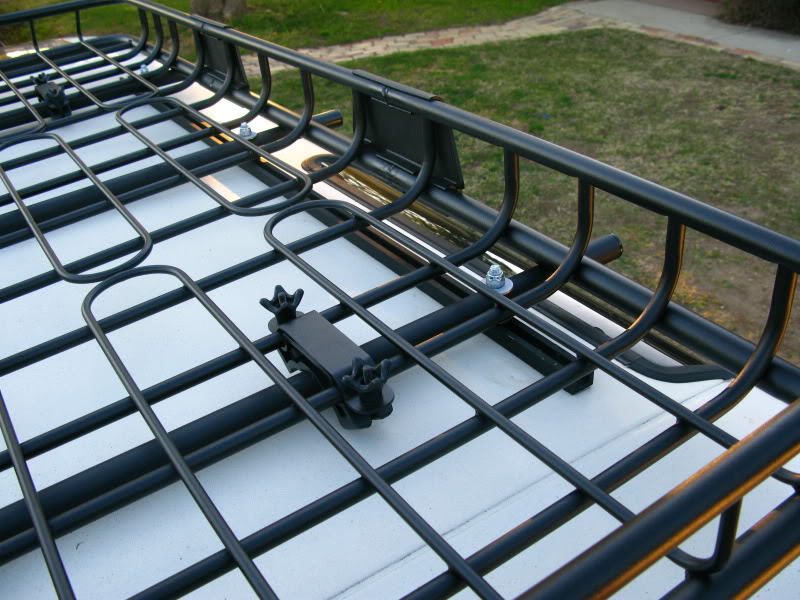
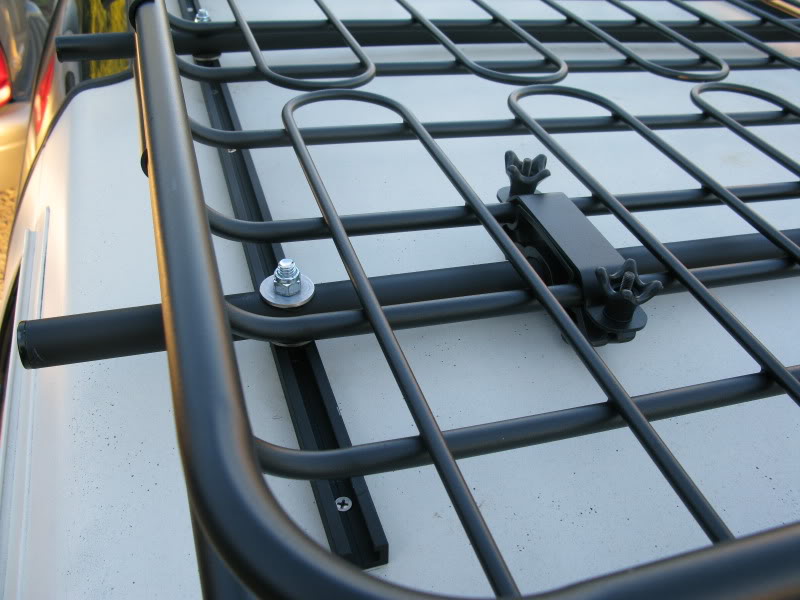
If you're asking me, I just grabbed some 1" OD steel tube for the crossbars.
If it's not too much of a hassle though, I would recommend looking for something right around the same diameter as Yakima crossbars.
That way you can use adapters and stuff designed for those... I believe they're about 1 1/8".
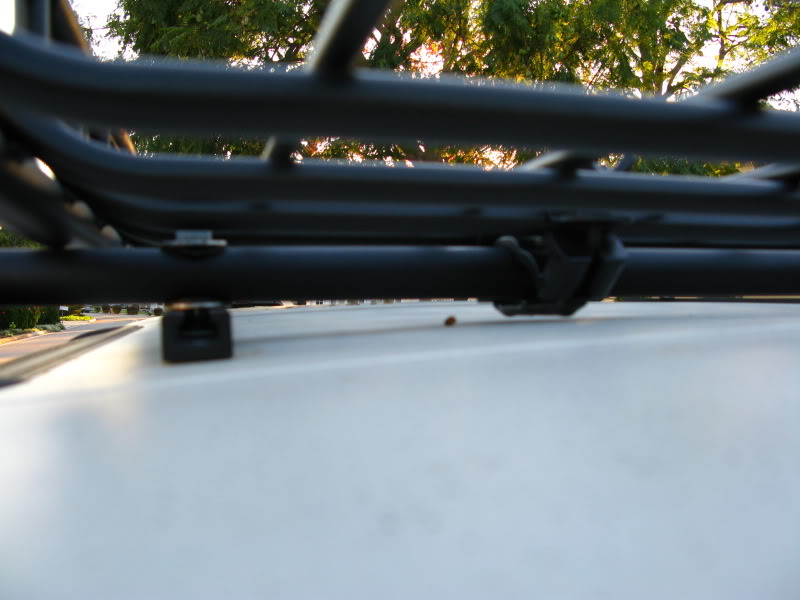
Here's a few more pictures I've got with the crossbars and basket on.
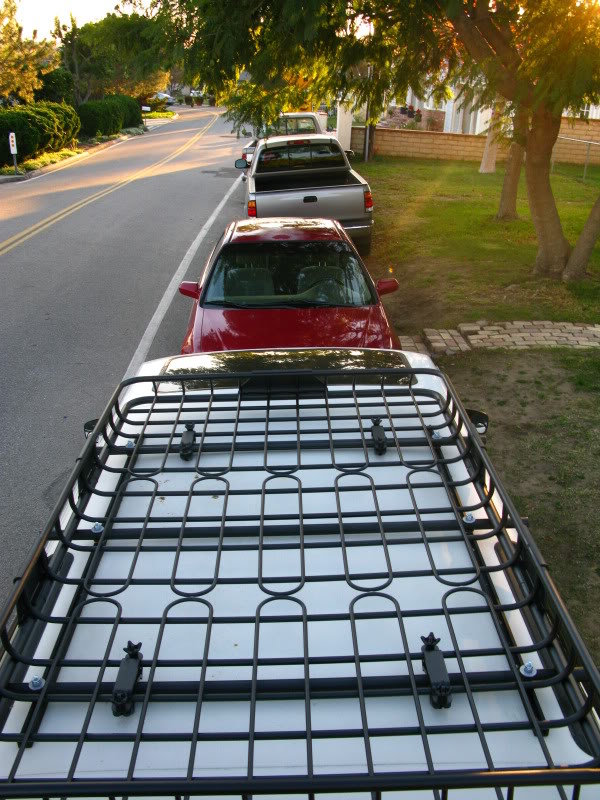
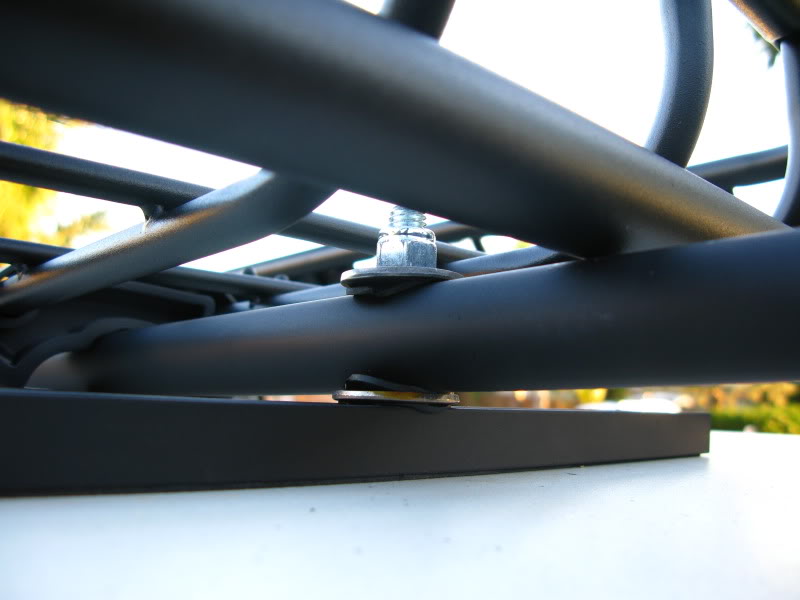
This one shows how nice and tight it is to the roof in order to minimize the change in center of gravity.
One thing to note is that since the tracks are angled out slightly due to the contour of the roof, I had to drill the holes in the crossbars at a slight angle to match.
It gets a little tricky trying to match the spacing and angle of the holes just right, but if you've got a drill press and follow the old saying - "Measure twice, cut once" - you'll be fine.
If it's not too much of a hassle though, I would recommend looking for something right around the same diameter as Yakima crossbars.
That way you can use adapters and stuff designed for those... I believe they're about 1 1/8".
Here's a few more pictures I've got with the crossbars and basket on.
This one shows how nice and tight it is to the roof in order to minimize the change in center of gravity.
One thing to note is that since the tracks are angled out slightly due to the contour of the roof, I had to drill the holes in the crossbars at a slight angle to match.
It gets a little tricky trying to match the spacing and angle of the holes just right, but if you've got a drill press and follow the old saying - "Measure twice, cut once" - you'll be fine.
 07-06-2010, 06:21 PM
#15
Registered User

Join Date: Apr 2008
Location: Ypsilanti, MI
Posts: 82
Likes: 0
Received 0 Likes
on
0 Posts
thanks! i ended up using the Thule cross bars i already had. I was concerned that with those being square instead of round i wouldn't have the clearance but it worked out fantastic!
thanks for sharing your build!
thanks for sharing your build!
 I will be going this route to mount my own rack soon. Thanks for the write up!
03-21-2012, 09:12 AM
I will be going this route to mount my own rack soon. Thanks for the write up!
03-21-2012, 09:12 AM
#18
Hey Snowbrdr,
I know this is an old thread..... I'm just hoping you're still subscribed to it, lol.....
WHERE did you get that specific railing? (the aluminum)... I've heard it called "conduit" railing or "Toe" railing.... but I'm having trouble finding that specific type on line... I'm trying to mount a con-ferr rack, and that style railing is exactly what I've been looking for. NONE of the hardware stores I've tried, even specialty stores, have anything JUST like that(thickness, etc.). Could you PLEASE let me know where, online, you found it?
Thanks.... Either way, nice job!
03-21-2012, 09:39 AM
#19
Registered User
03-21-2012, 11:18 AM
#20
Registered User
Thread Starter
Join Date: Sep 2009
Location: Provo, Utah
Posts: 38
Likes: 0
Received 0 Likes
on
0 Posts
Yep, Outsane beat me to it. The link is also in my original post.
They're still working out really good.
Glad the idea has been of use to some of you guys!
They're still working out really good.
Glad the idea has been of use to some of you guys!


