Toyota Tundra: How to Replace Brake Fluid
Learn how to properly bleed and replace your Tundra's brake fluid with the help of this article.
This article applies to the Toyota Tundra (2000-Present).
The brake fluid in your truck plays a major role when it comes to bringing you to a partial or complete stop. The brake fluid is housed inside the brake fluid reservoir, it's then pumped through the brake lines, and lastly into the brake calipers, which then push the brake pads against the rotor. Learn how to successfully bleed and replace your truck's brake fluid by reading the following steps.

Materials Needed
- Brake fluid
- 10mm open wrench
- Drip pan
- Lug nut wrench
- Floor jack and jack stand
Step 1 – Jack up truck
Before you venture into the hood, jack up your truck and secure it with jack stands. Follow these steps:
- Use your lug nut wrench to loosen the lug nuts to both front tires.
- Locate the floor jack on the appropriate jacking point and lift the truck.
- Secure truck on jack stand.
- Finish undoing the lug nuts with the wrench or by hand.
- Remove the tires.
Step 2 – Flush brake fluid
With the front tires off, it's time to flush the old and dirty brake fluid to make room for the new. Follow these steps:
- Open the hood.
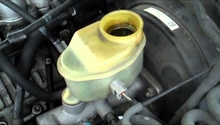
- Locate the brake fluid reservoir and remove the lid.
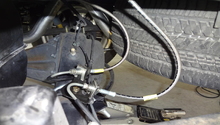
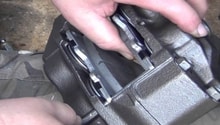
- Locate the bleeder screw on top or on the side of the front brake calipers.
- Use the 10mm wrench to open the bleeder screws (turn counterclockwise, but do not fully remove).
- Allow atmospheric pressure to bleed the system for about 10 to 15 minutes, or until the brake fluid reservoir fluid level is just above the "min" line.
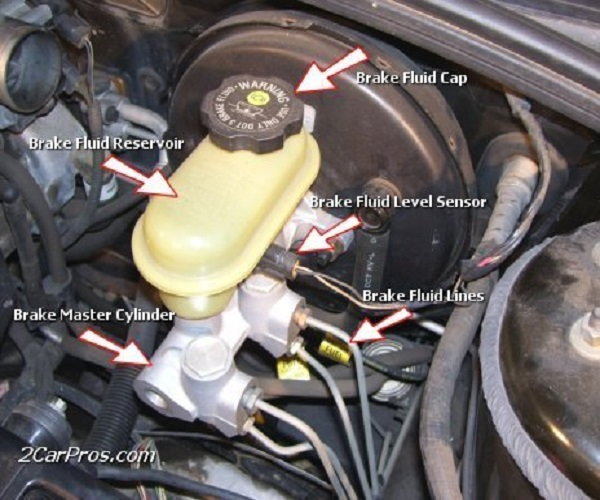
Figure 2. Brake fluid reservoir. 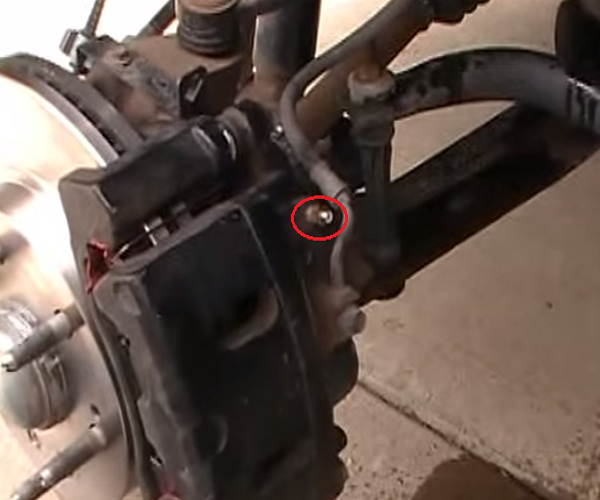
Figure 3. Open bleeder screw to let fluid out.
Pro Tip
Do not push the brakes to force fluid out, as this will only create air bubbles in the system.
Step 3 – Fill up
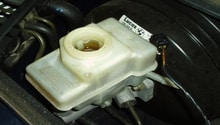
Once the old fluid has been flushed, it's time to prep the system for new fluid. With the bleeder screws still open, pour new brake fluid into the reservoir, then follow these steps:
- Pour new brake fluid into the reservoir.
- While pouring, look at the bleeder screw to see new and clean fluid come out.
- Once clean fluid comes out, use the 10mm wrench to close off the bleeder screws.
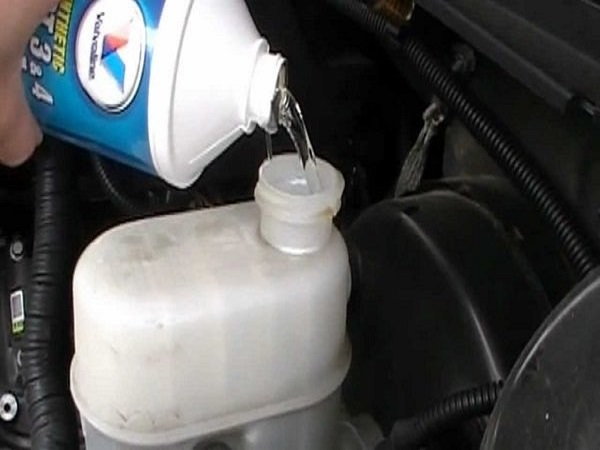
Figure 4. Pour new brake fluid in. 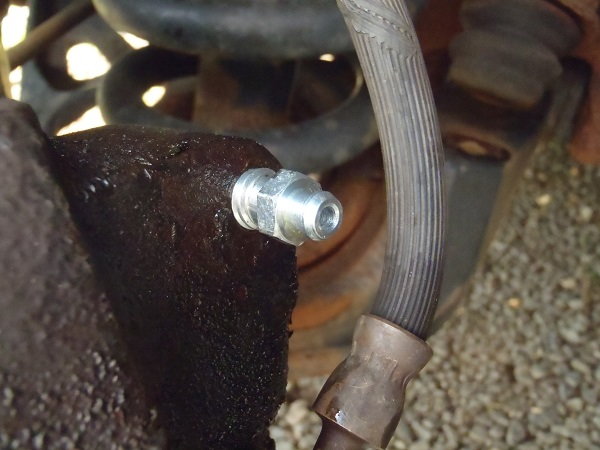
Figure 5. Close and clean bleeder screw.
Step 4 – Wrap Up
Now perform the same initial steps, but in reverse order.
- Replace the lid on the brake reservoir.
- Replace front tires.
- Hand-tighten lug nuts.
- Lower truck back to the ground.
- Tighten lug nuts with lug nut wrench.
- Make sure to pump the brake pedal and inspect for air or any signs of faultiness before driving.