Toyota 4Runner, Tacoma, and Tundra: Why are My Headlights Dim?
It would make sense if one or both of your headlights were completely inoperative. But why is it that sometimes a headlight is just dim? This article covers the probably causes for this issue.
This article applies to the Toyota 4Runner, Tacoma and Tundra (1984-present).
The solution to dim headlights can be as simple as replacing a blown fuse, or it could be more complicated, such as tracking down grounding problems. We'll identify a number of causes for dim headlights and walk you through the best remedies.

Materials Needed
- Multi-meter
- Small flat-head screwdriver
- Steel wool
- 10A fuse
- Small wire brush
- Electrical cleaner
- X-acto knife
- Electrical tape
- Butt connectors
- Solder and soldering gun
Headlight replacement:
- Flat-head screwdriver
- Phillips screwdriver
- Ratchet
- 10mm socket
- Extension
Step 1 – Replace headlight assembly or just the bulbs
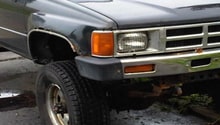
Old, well-used headlights are more likely to not light at all. But if a headlight is just dim, it may have sustained water damage or is physically damaged in some other way. Replace it.
Stock headlights are sometimes considerably dimmer than replacement units. Install halogen bulbs to replace your stock lights for brighter headlamps.
Related Article:
Toyota 4Runner: How to Replace Headlights - Yotatech.com

Featured Video: Replacing Bulbs/Headlight Assembly
If replacing the headlight bulbs/assembly didn't fix the issue, keep diagnosing with these steps.
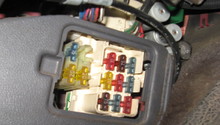
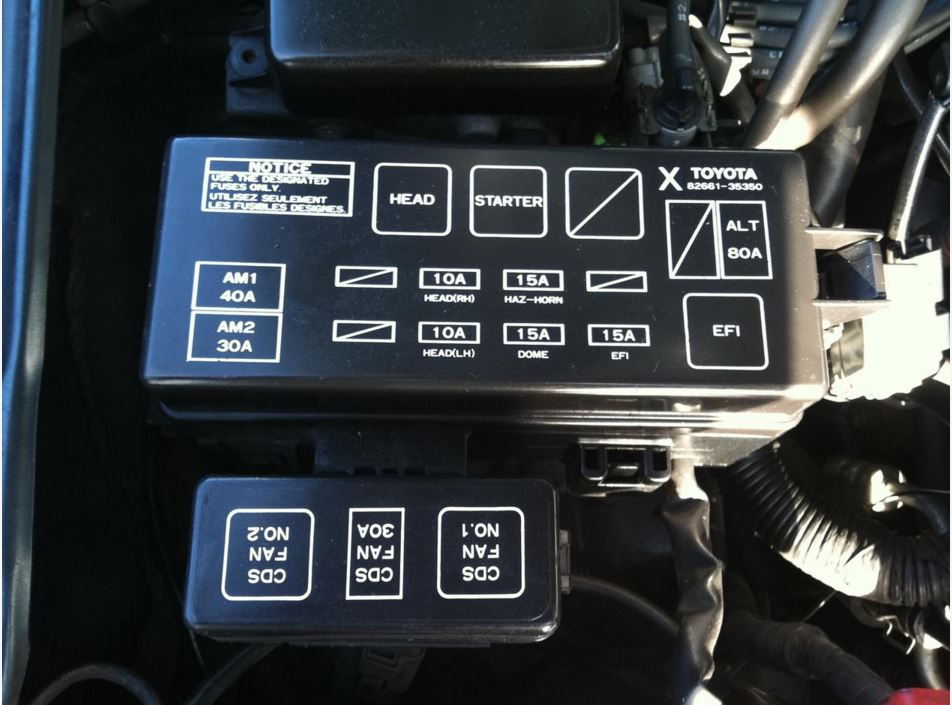
Step 2 – Check the fuses
Check the headlight fuses. The fuses for the right and left headlight are separate. If one of the fuses is bad, the system feeds back and one light burns dim. Swap a bad fuse for a new 10A replacement. Also, check the connectors to the fuse box. These can loosen and cause a bad connection, resulting in a dim headlight.
Pro Tip
A bad battery will not necessarily cause your headlights to dim. Power to the headlights flows from the alternator through the headlight harness, not directly from the battery.
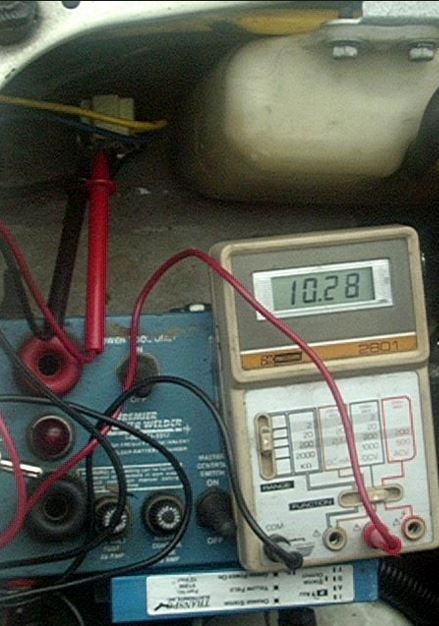
Step 3 – Check voltage going to the headlight
Use your multi-meter to determine that you have 14 volts going to the headlight. Anything less than 11 volts could indicate bad connections, bad ground, bad wiring, etc.
Pro Tip
To get the best voltage reading, test directly across the bulb. First, pull the bulb out slightly from the housing. Then, to test the low beam, place the positive probe on pin 3, and the black probe on pin 1 (red wire, green wire). To test the high beam, place the red probe on pin 3 and the black probe on pin 2 (red wire, yellow wire).
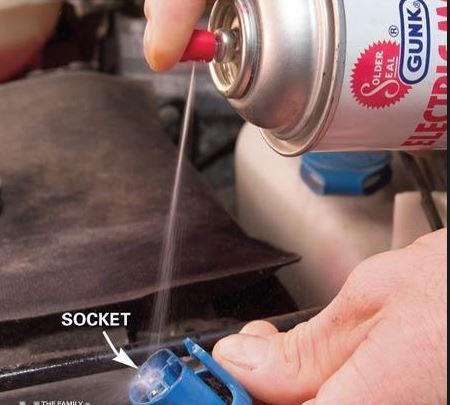
Step 4 – Check the headlight contacts
Rust, corrosion, or wear can cause a bad connection and a dim headlight. To clean the headlight contacts:
- Remove the bulb and clean the contacts with electrical contact cleaner.
- If you see heavy corrosion, use a small flat-head screwdriver, small wire brush, or Xacto knife to clean the contacts.

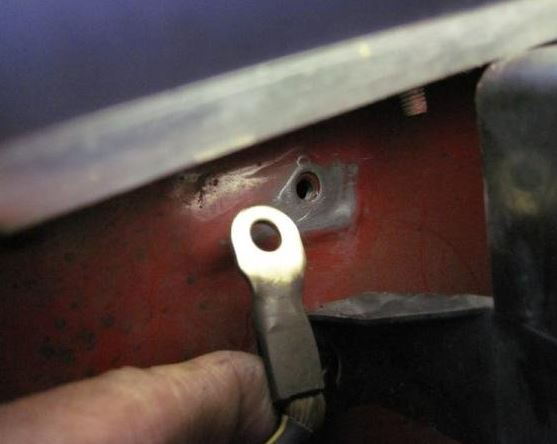
Step 5 – Check the grounds
Make sure the ground wire, located on the right front fender, is making good contact. Disassemble and use steel wool to remove any rust, corrosion, or dirt from the fender mounting area.
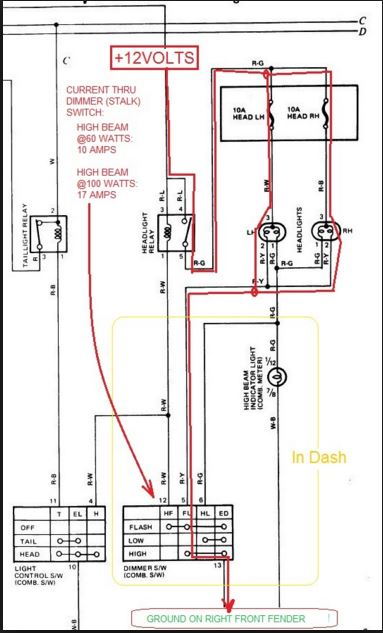
Paint buildup can also cause a dim headlight. Use your steel wool to remove the paint and get down to bare metal for the best ground.
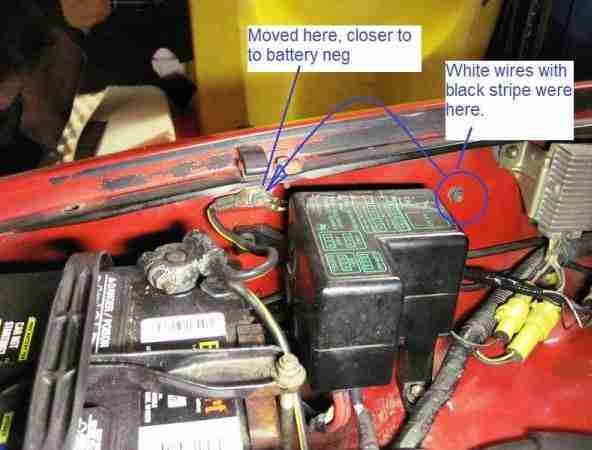
One 4Runner owner relocated the headlight ground wire (white with black stripes) for a better ground connection.
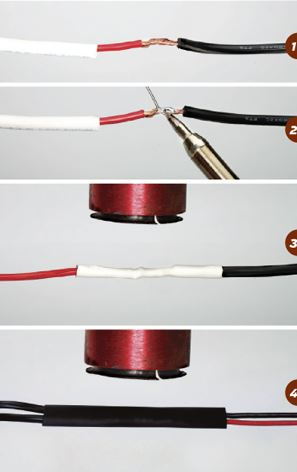
Step 6 – Check for damaged wires
Any wire that is damaged from corrosion or wear can create problems. Check power and ground wires for cracks, breaks, or wear.
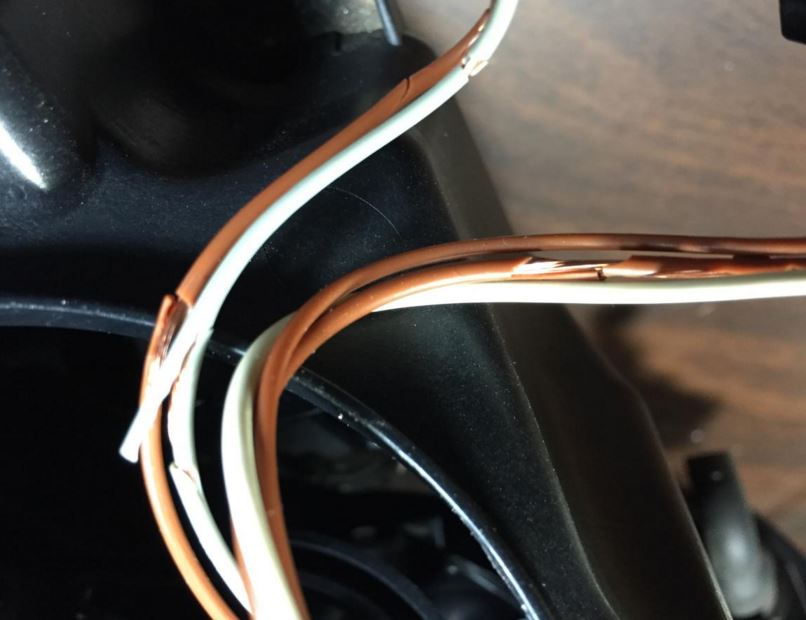
Repair with electrical tape, solder, or butt connectors.
Related Discussions
- Headlight Dim on One Side - yotatech.com
- Dim Headlights - yotatech.com
- Dim Headlight Issue - yotatech.com
- Dim Headlights - yotatech.com
- Why Do My Headlights Dim? - yotatech.com