Toyota 4Runner 1996-2002: How to Replace Starter
Changing out a dead starter on a 4Runner isn't all that hard. Not only will it save you money, but you'll have the pride of a job well done.
This article applies to the Toyota 4Runner (1996-2002).
If you can't get your 4Runner to turn over, or it cranks very slowly, it could be a bad starter. If the battery tests good, and all the wiring looks good, the next logical cause is the starter itself. It's also a possibility that the starter could still be good, but it may just need a good cleaning. Tearing apart your starter and cleaning it isn't too difficult, but no matter what, you'll have to take it off the truck to fix it. The good news is that a starter can be had for much less than $100, and you'll be back up and running again. This is not the easiest DIY job you can tackle, but it is very doable with patience and a little elbow grease. Since you aren't going anywhere in the truck until you can start it, why not spend a few hours fixing it yourself.

Materials Needed
- Hydraulic floor jack
- Jack stands
- Flat head screwdriver
- Safety goggles
- Ratchet with extension and 12mm socket
- Ratcheting wrench (a real time saver but not required)
This how-to covers all 3rd generation Toyota 4Runners from 1996 to 2002 equipped with the V6 motor and automatic transmission, whether 2WD or 4WD. Four cylinder trucks are slightly different.
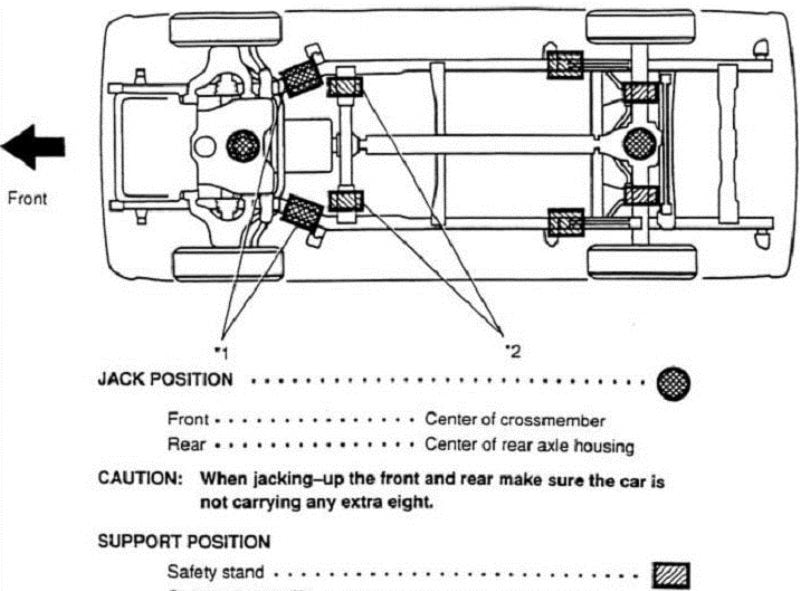
Step 1 – Jack up your 4Runner
Loosen the lugs on your passenger side wheel before you jack up your truck. Use a hydraulic floor jack to lift your truck and place on jack stands in the approved locations.
Pro Tip
Always use jack stands when working under your truck. Never work under any vehicle when only a hydraulic floor jack is used.
Step 2 – Remove passenger wheel and disconnect battery
Disconnect the negative (black) terminal of the battery, as you should do any time you are working with any electrical component of the truck.
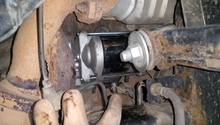
Remove the lugs and pull the passenger wheel. The starter is easily accessed through a special panel in the passenger side wheel well. Use a flat head screwdriver to carefully remove the five plastic plugs that hold the splash guard in place. You may want to have a spare set on hand, as they can easily snap off, especially if they are old.
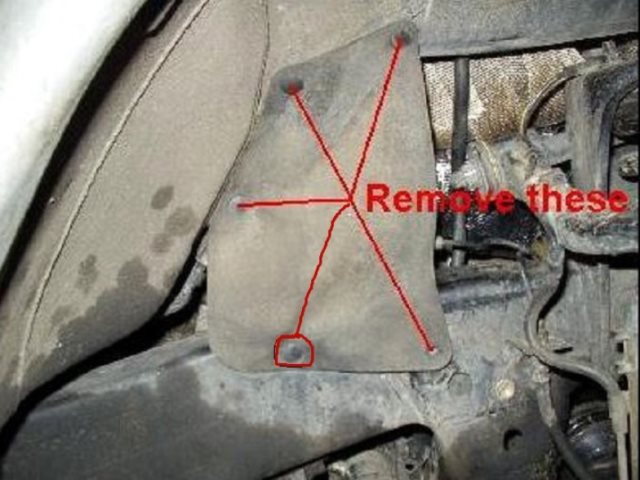
Figure 2. Five plugs hold the splash guard in place. 
Figure 3. Starter location through wheel well. (Note: This is a 2nd gen truck.)
Step 3 – Remove brake line, intake tube and transmission fluid dipstick
Remove the two 12mm bolts that secure the brake line to the frame, and move aside the brake line. Remove the plastic intake tube between the intake manifold and the air box, so you have better access to the starter from above. The transmission dipstick is also held in place by another 12mm bolt. Once this last bolt is removed, pull the dipstick up from the lower tube. Now you should have enough room to get to the starter bolts.
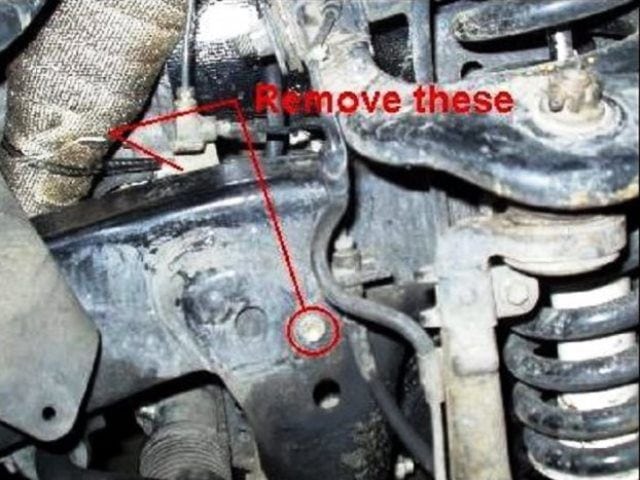
Figure 4. Remove the two 12mm bolts that hold the brake line in place. 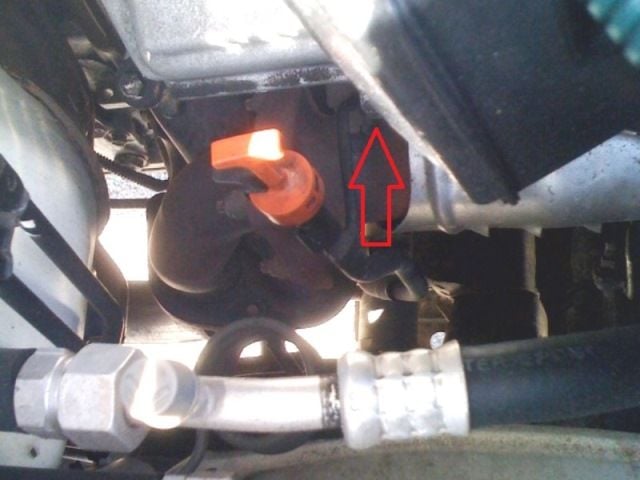
Figure 5. Remove the 12mm bolt holding the transmission dipstick in place.
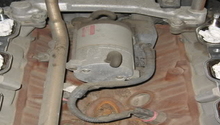
Step 4 – Remove the starter
At this point, the two 12mm mounting bolts on the starter are easily accessible; however, they may not be easily removed. You may want to spray them with penetrating lubricant and let them sit a few minutes. While they are soaking, remove the starter cable from the terminal, which is covered by a protective plastic boot. Use a flat head screwdriver to remove the boot and then remove the 12mm bolt that attaches the cable to the terminal. Crawl under your truck and use a 12mm ratchet with extension to remove the two mounting bolts on the starter. Hopefully the penetrating spray will make this job a little easier. Once the bolts are off, you will have to turn the starter to finagle it out of position and remove the switch cable before pulling it from the truck from below and out through the wheel well, as the manifold will prevent you from taking it out from above.
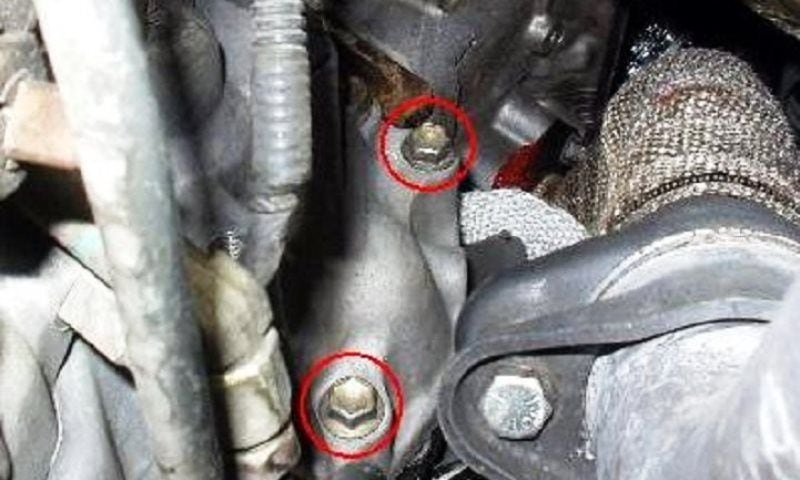
Figure 6. Remove the two 12mm mounting bolts from the starter. 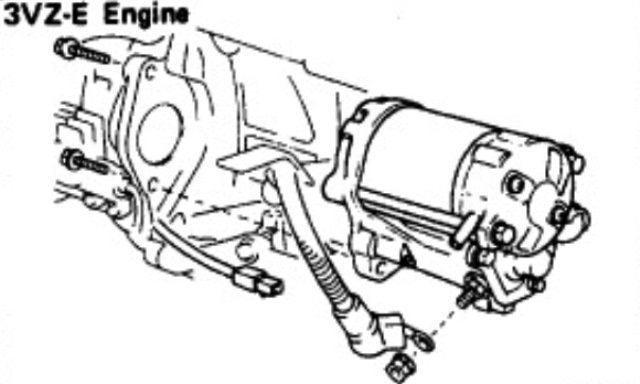
Figure 7. This picture from the manual makes finding the bolts easier. 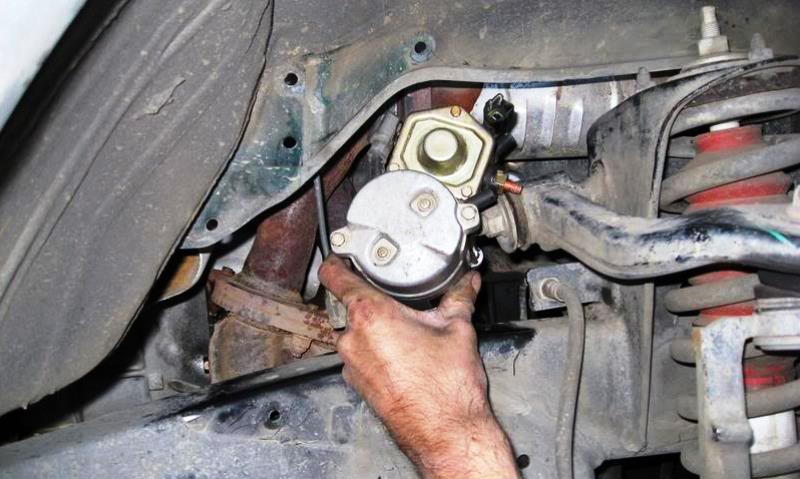
Figure 8. Rotate the starter, disconnect the electrical wiring, and take out through the wheel well.
Step 5 – Replace or rebuild your starter
In many cases, the entire starter may not be bad. The contacts on the plunger could be very gummed up and nasty. Brake cleaner and a steel wire brush may clean the contacts enough to allow months or years more service out of the starter. See the link at the bottom for an in-depth explanation of how to clean it.
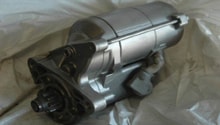
Of course, a new starter should set you back less than $100 and you'll have the confidence that this will solve your problem for years and years to come. No matter what you do, installation will be much easier than removal of the old part.
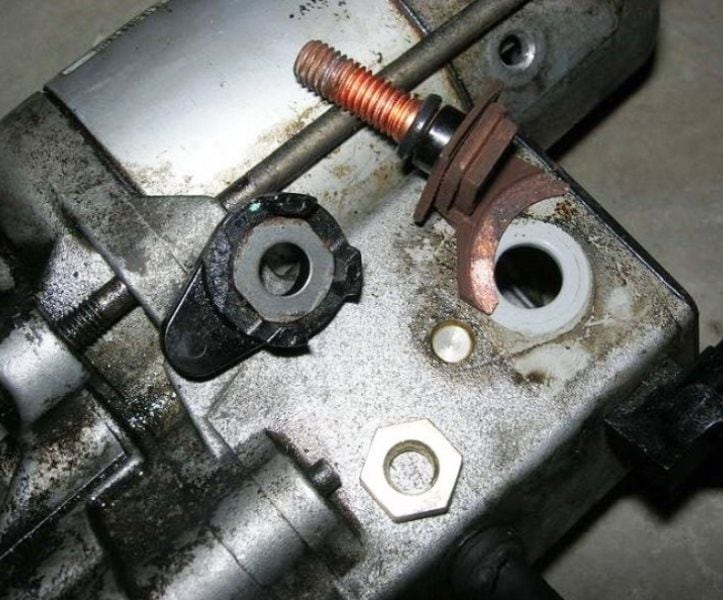
Figure 9. Cleaning the contacts on your starter may be all that is needed. 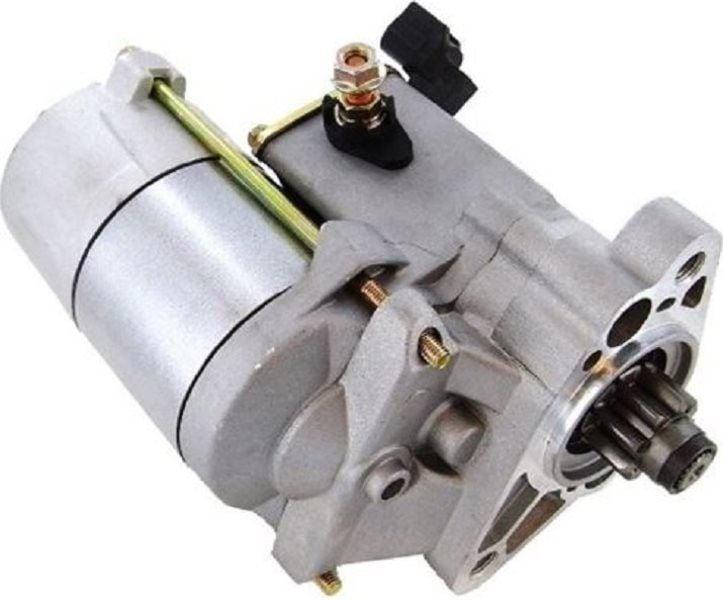
Figure 10. A brand new starter ready to mount.
Step 6 – Install new starter (or reinstall repaired one)
Reinstalling the starter is much easier than the job of taking it out. Turn it and put it back in position, be sure to reconnect the switch cable before remounting it. Use your 12mm ratchet with extension to tighten the mounting bolts. Replace the cable bolt and boot cover. Reinstall the transmission fluid dipstick, and brake line with your 12mm ratchet or wrench. Put the intake tube back in place up top. Replace the splash guard, re-mount your wheel and snug the lugs before dropping the truck. Once on the ground, tighten and torque the lugs.
Featured Video: How to Remove Starter
Related Discussions and Site
- Starter Replacement on the 3.4L V6 Engine 3rd Gen 4Runner - YotaTech.com
- 2000 4Runner (3rd Gen) Starter Replacement - YotaTech.com
- 3rd Gen, 3.4L Auto Starter Removal Write-Up - YotaTech.com
- Replace the Starter on a 2.7l Motor - TacomaWorld.com