Toyota 4Runner 1984-1995: How to Replace Tie Rod Ends
Your steering doesn't feel right--a lot of steering effort is required just to keep your 4Runner going straight. Someone said it might be worn tie rod ends, but how can you tell?
This article applies to the Toyota 4Runner (1984-1995).
Tie rods are attached on both ends of the steering center link/rack to help push and pull the front tires as the steering wheel is turned. They typically last for years, but their lifespan depends on driving conditions, such as bad streets, off-roading, and good old pot holes. If your 4Runner noticeably pulls to one side during normal driving or when braking, the tie rods may be the culprit.
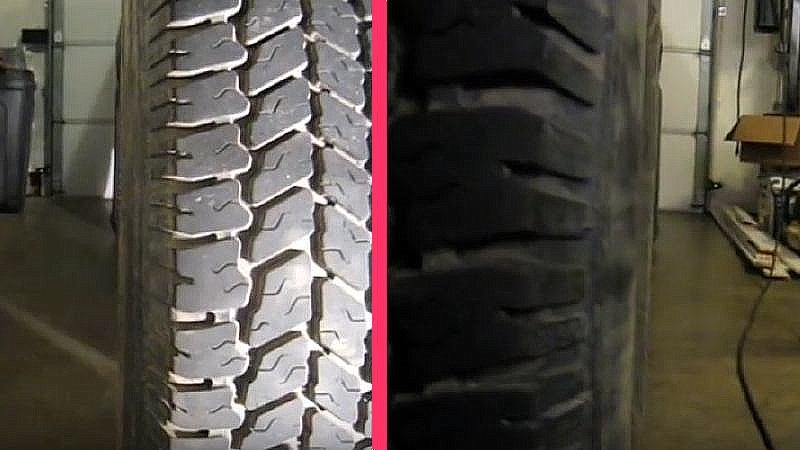
Out of adjustment tie rods can also wear your front tires in abnormal ways; most noticeably by excessive wear on the inside or outside of the tire. A knocking noise coming from the front suspension when making tight turns at low speeds can be a clear indicator of worn tie rod ends.
A good test to see if your tie rods need to be replaced can be accomplished by putting the front end on jack stands, and then manually turning the front tires. If both turn in the same direction tightly, there isn’t a problem with the tie rods. But if there is significant play in one wheel’s lateral movement, with no noticeable movement coming from the opposite wheel, your tie rods probably need replacing. The tie rod ends are adjusted when aligning the front end. This is done by screwing the inner and outer tie rod ends together to a shorter position or apart to a longer position, allowing correction of the vehicle’s alignment. Also, the right and left tie rod ends should always be replaced at the same time.

Cost Breakdown
DIY Cost:
- Tie Rod and Pitman Arm Puller Kit - $6-12 (rental) with $80-100 security deposit
- Inner Tie Rod End - $16-21 (each)
- Outer Tie Rod End - $18-31 (each)
- Complete Kit with Sleeves and Clamps - $80
Pro Cost:
- Parts - $200
- Labor - $200
- Wheel Alignment - $65-85
Materials Needed
- Large ratchet wrench
- Metric sockets, including 19mm (3/4-inch), and 12mm
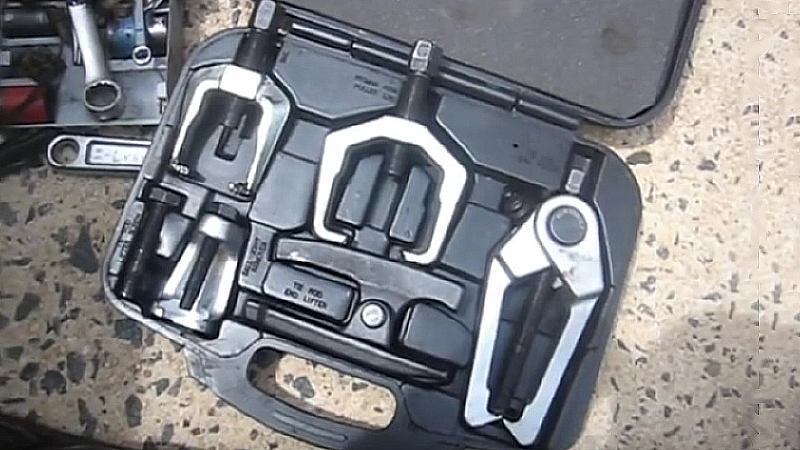
- Tie rod and Pitman Arm Puller kit (can be rented from an auto supplier)
- Trolley jack
- Jack stands (2)
- Wheel chocks (2)
- Breaker bar
- Rubber mallet
- Large vice grips (2)
- Small brush or old toothbrush
Spray the tie rod end connections points on the steering rack and wheel knuckle with PB Blaster, WD-40, or penetrating oil. Let it soak in for at least a few hours before starting.
Step 1 – Prep your 4Runner
Set the parking brake, chock the rear wheels, and put the vehicle’s front end up on jack stands. Remove the front skid plate; removing the front wheels isn't necessary, but can give you more room.
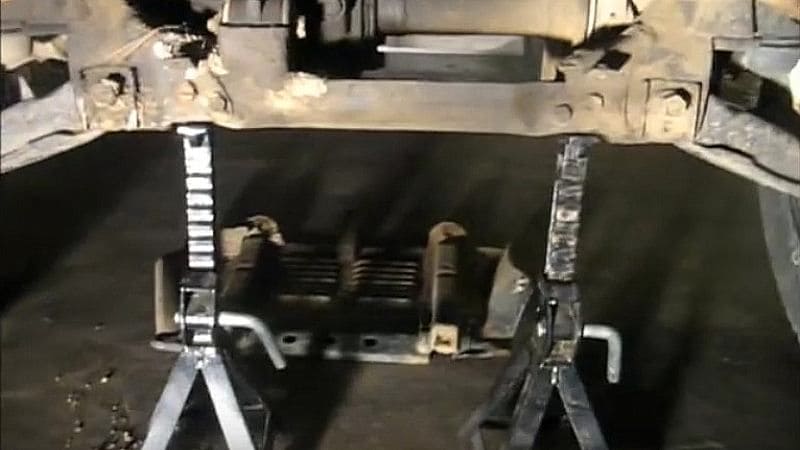
Most experts recommend replacing both the inner and outer tie rod ends at the same time. In the project shown here, the DIYer was replacing only the inner tie rod ends (also known as “rack ends”) on his 1987 4Runner. This was because he had determined that the outer tie rod ends were still in good condition, but the 3rd-party inner tie rods had worn out well before their normal life expectancy. He purchased OEM inner tie rod ends for this job, as he believed that they were better made than the third-party replacements he had previously used. Note that both the inner and outer tie rods can be ordered separately, or together in an assembly that includes the adjusting sleeve and clamps. However, even if only replacing part (the inner or outer section) of a tie rod end, the entire tie rod end assembly must first be removed.

Step 2 – Remove the tie rod ends
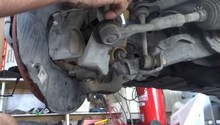
It’s recommended that you use a Pitman Arm/tie rod end puller kit. Most auto parts suppliers offer a reasonable rental fee for these kits.
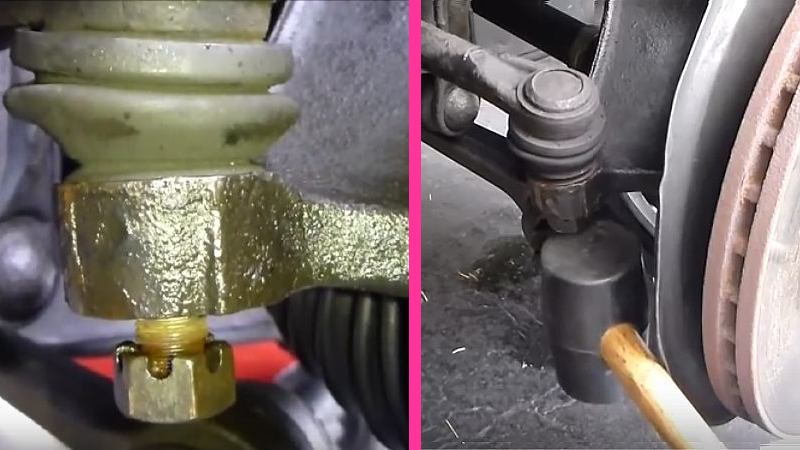
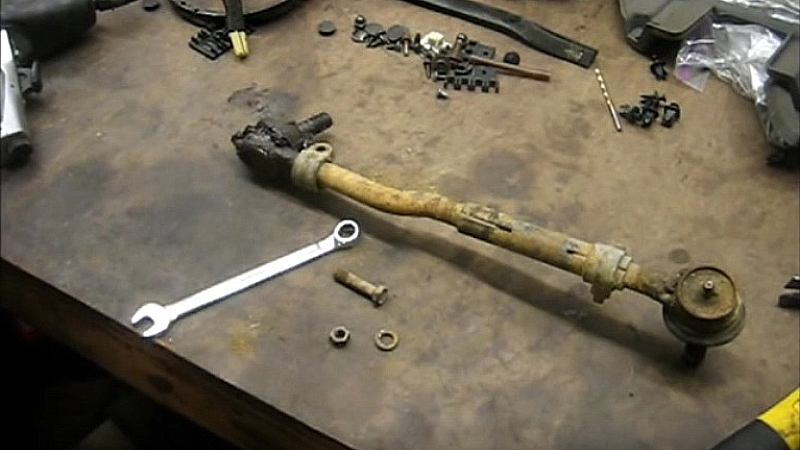
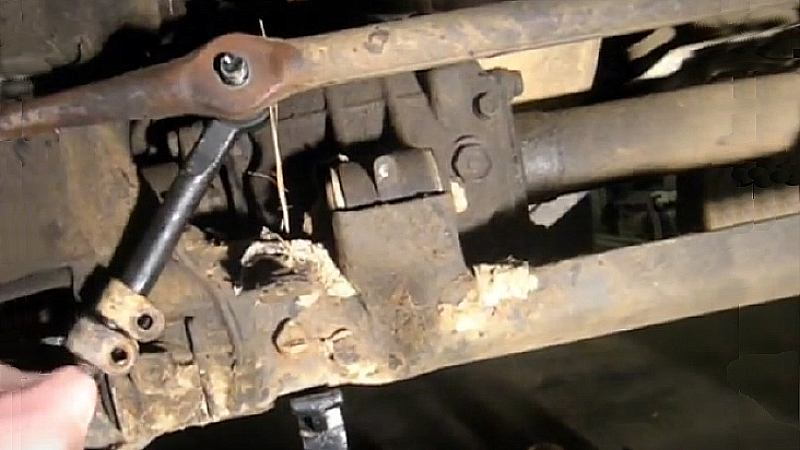
Remove the cotter pin and 19mm (3/4-inch) castle nut (sometimes referred to as a castellated nut) holding the inner tie rod to the steering rack steering center link/rack. Use a puller to push in the ball joint stud and separate the inner tie rod’s ball joint connection from the steering center link/rack.
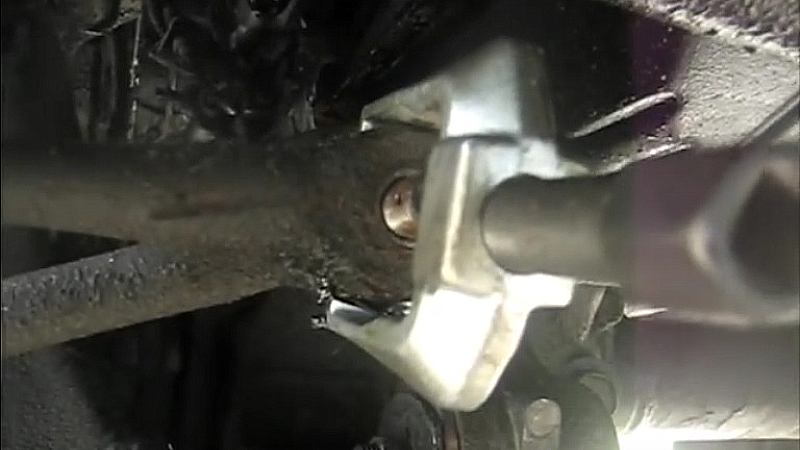
Next, the outer tie rod ball joint must be disconnected. Remove the cotter pin, and take off the 19mm (3/4-inch) castle nut. Use the appropriate-sized tie rod end puller to extract its ball joint from the steering knuckle. Some have also accomplished this by reversing the castle nut on the ball joint’s stud, and then pounding up on it with a rubber hammer.
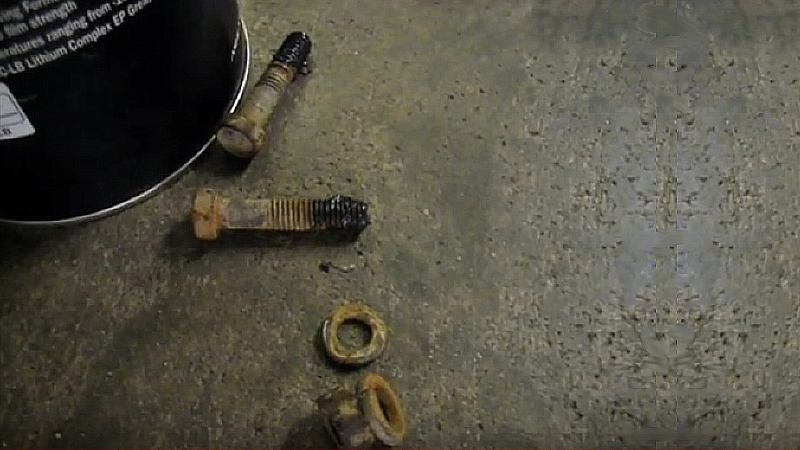
Once both tie rod ends are removed, do not mix up which goes to which side. If you are replacing both the inner and outer tie rod ends on both sides, you’ll need to keep the originals to use as templates to adjust the length of your new tie rod ends.
Step 3 – Prep replacement tie rod ends for installation
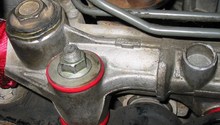
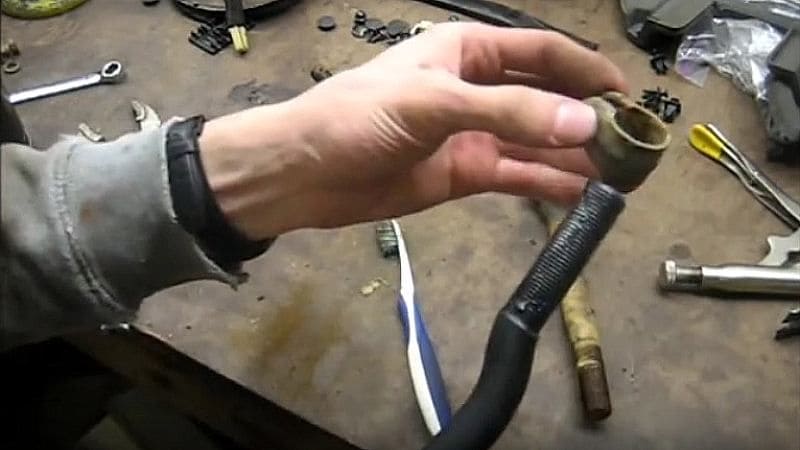
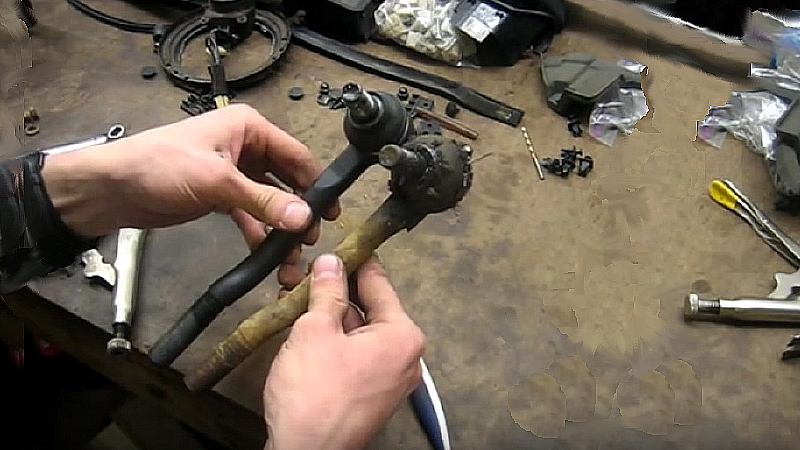
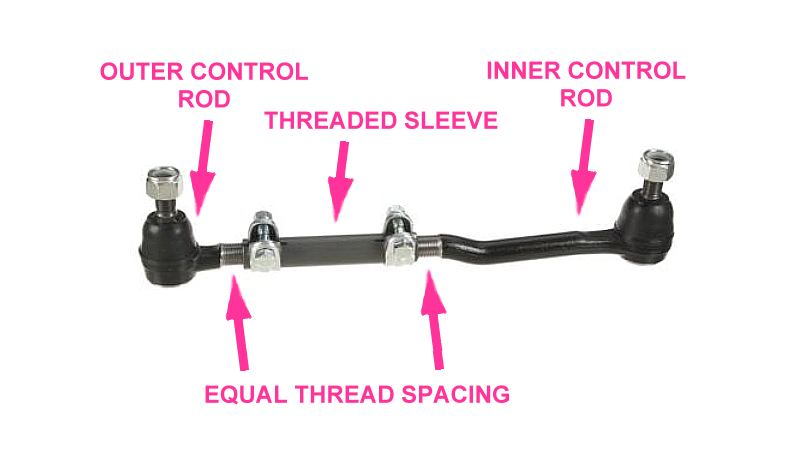
Here, the removed tie rod end will be separated, and the inner section replaced. Thus, the 12mm nuts and bolts holding the clamps on the tie rod end adjusting sleeve must be removed. These clamps encircle the adjusting sleeve where the sleeve is split at both ends to lock the length of the control rod ends after the clamps are tightened.
Put anti-seize or grease on the threads, and screw the threaded ends of the tie rod into the opposite ends of the attachment sleeve. Don’’t forget to put the removed clamp on the new rod before screwing them together.
When unscrewing the outer tie rod end, some count the rotations required to separate the tie rods, others measure the distance between the tie rod studs. It wouldn’t hurt to do both, as you’ll want the replacement tie rod ends to be close to the adjustment of the original configuration. But it doesn’t have to be perfect, just close, as you will need to have the front wheels aligned regardless of how close you can come to the previous installation.
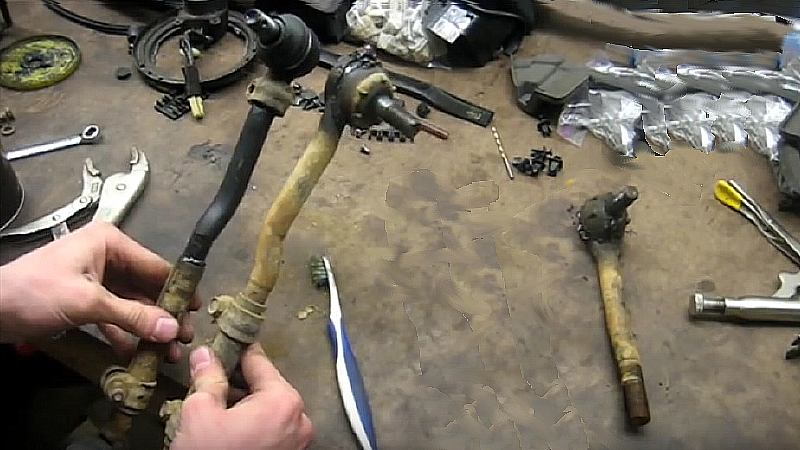
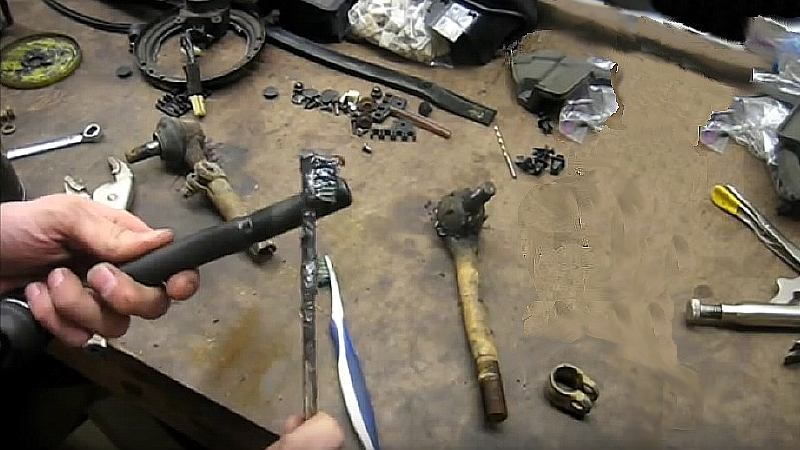
As we’re only replacing the inner tie rods here, the old tie rod assembly must be separated. Using a bench vise, or (as shown here) two large vice grips, unscrew the inner tie rod from the outer tie rod. DO NOT clamp a vice grip near the tie rod adjusting sleeve—the threaded coupling that holds the two tie rod ends together. Again, if you are replacing both the inner and outer tie rod ends as a new assembly, you’ll use the old tie rod end assembly as a template to adjust the length of the new assembly to.

Use a small brush (or retired toothbrush) to clean out any rust or debris from inside the female end of the tie rod end adjusting sleeve.
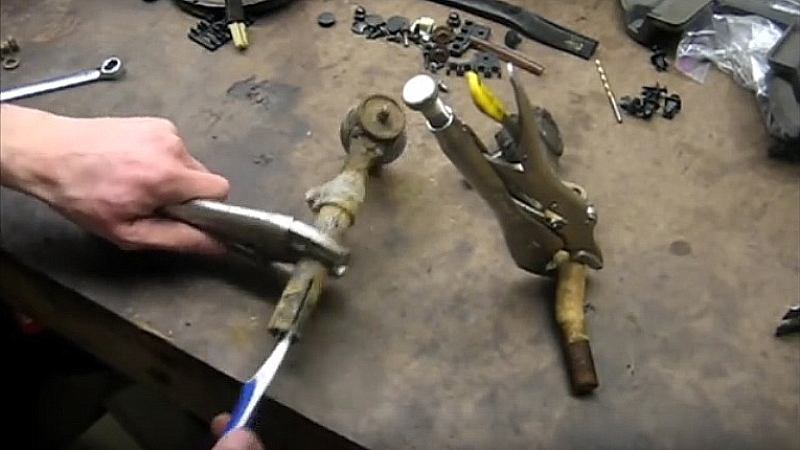
This DIYer believes the seal design on the OEM tie rod’s ball joint is far superior to the worn-out one he’s replacing, which was manufactured for an auto supplier.
Cover the threads on new tie rods with anti-seize compound or grease to keep the threads from binding together, and make it easier for subsequent wheel alignments. Both inner and outer tie rod connection threads should be coated.
Screw the tie rod ends together to close to the same position, ball joint stud to ball joint stud, as the previous. Don’t tighten the clamps yet.

Also, the amount of thread inside the tie rod end adjusting sleeve should be approximately equal. Having one end in the sleeve too deep will mean the other end isn’t in deep enough, which could cause problems for the shop performing a front end alignment. To help with the alignment process, the outer control arm end screws into the tie rod end adjusting sleeve with a reverse thread. This means that with the tie rod end ball joints are attached to the wheel knuckle and steering center link/rack, the length of the tie rod end can be adjusted simply by turning the threaded sleeve (with the clamps loosened) with the tie rod assembly in place, which also maintains the thread spacing at both ends of the sleeve.
Step 4 – Install the replacement tie rod ends
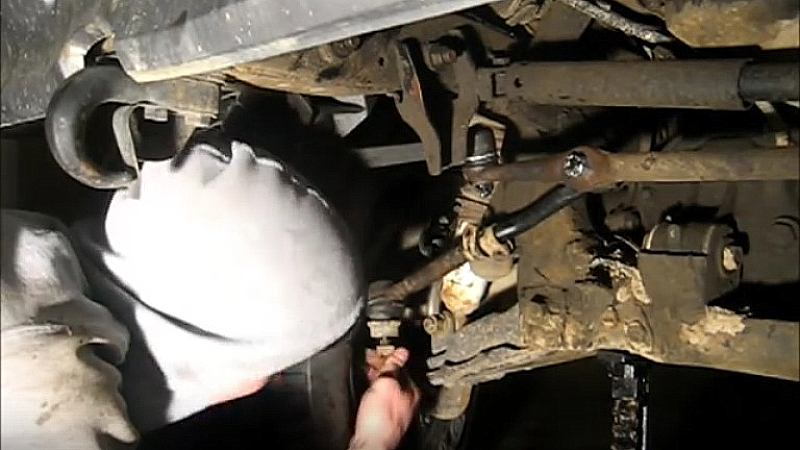
The four tapered holes in the steering center link/rack and wheel knuckles will need to be cleaned out, and anti-seize or grease swabbed in the holes. With the driver's side tie rod end in place, note that the clamps have not been tightened down yet in case an adjustment to the overall length of the tie rod end has to be made.
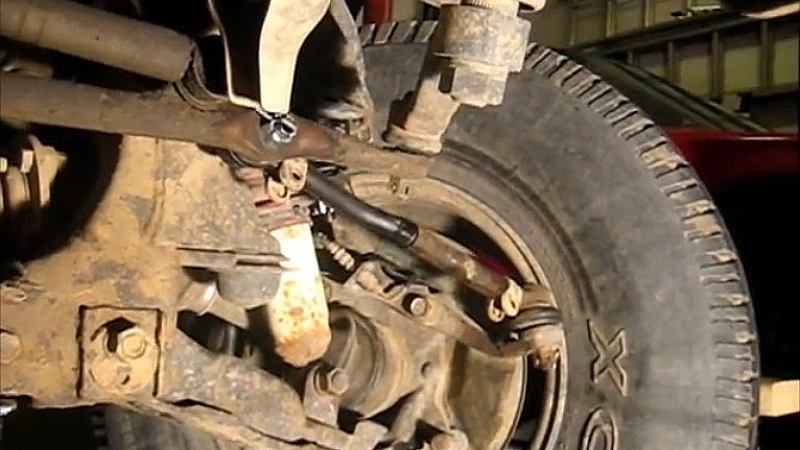
For the passenger's side, he inserts the new inner tie rod end ball joint into the tie rod connection point on the steering center link. Screw on the castle nut (the new inner tie rod ends came with new castle nuts and cotter pins) onto the tie rod end’s ball joint stud. A bit better than finger-tight only for now.
Note that some replacement kits come with a Nyloc nut instead of a castle nut and cotter pin. If this is the case, you may want to consider reusing the old castle nuts and cotter pins. In addition, some replacement kits also have a grease nipple (Zerc fitting) on the back of the tie rod end ball joints. These fittings should be installed before you mount the tie rod ends, and filled with grease after they're installed. Don't overfill the ball joints—just fill them until their rubber boots are tight when squeezed.
Pull the tire into position and insert the other end’s ball joint into the rod connection point on the wheel knuckle. Put the castle nut onto the toe rod end ball joint stud on the wheel housing. Again, only a little better than finger-tight for now.
Pro Tip
Note that the tie rod ends can be installed backward by mistake, with the longer tie rod end going to the outside. Doing so could cause serious steering problems, including steering wheel lock up.
Step 5 – Do a pre-alignment to the front end
Set the steering wheel to its center position.

Then visually check the alignment of the front tires. Ideally, each front tire will be parallel with its rear tire cohort, with the edges of the front tire in the same plane as the edges of the rear tire.
If the front wheels are not in the same plane as the rear wheels, you'll have to lengthen or shorten the tie rod ends on one or both sides by turning the tie rod end adjusting sleeve one way or the other. When the front tires are fairly aligned, grease up the clamp bolts, and attach the clamps to the tie rod adjusting sleeves in the same locations as the originals were. They circle the end of the sleeves where the sleeves are split so the clamps can tighten the sleeve threads to the tie rod threads and lock the tie rod's length.
Tighten the 12mm tie rod end adjusting sleeve clamp nuts to 15 lb-ft (20 Nm). Tighten both of the castle nuts to 67 lb-ft (90 Nm), and to a point where the cotter pin has a clear path through the nut’s “teeth.” Replace the cotter pin.
Pro Tip
Never loosen a castle nut to clear a path for the cotter pin between the teeth, always tighten it to do so.
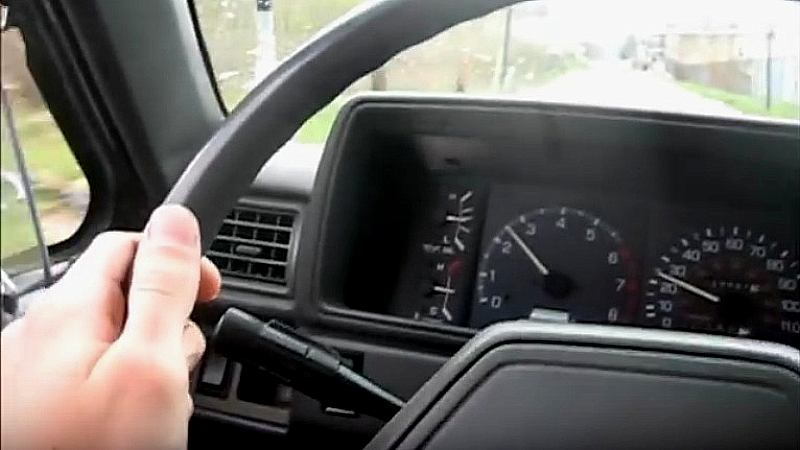
After a professional alignment the next morning, the 4Runner steering is fully corrected. The vehicle doesn’t pull in any direction, and the steering wheel remains straight.
Featured Video: How to Replace Inner Tie Rod on 1987 4Runner
Related Discussions
- Inner Tie Rod Replacement - YotaTech.com
- Changing Tie Rod Ends - YotaTech.com
- How Much to Change Tie Rods - YotaTech.com
- Do I Need Puller to Remove Inner Tie Rod - YotaTech.com
- Replacing Tie Rods/Idler Arm on 2nd Gen 4Runner - YotaTech.com