Toyota 4Runner 1984-1995: How to Replace Shock Absorbers
Anyone familiar with the undercarriage of a Generation 1 and 2 Toyota 4Runner knows that undercarriage elbow room is at a premium, especially with regard to removing the rear shocks. To make matters worse, a number of DIYers will claim changing these shocks isn’t difficult at all, can be done in a matter of minutes, that the vehicle doesn’t need to be raised off the ground to accomplish it, plus no wheels need to be removed!
This article applies to the Toyota 4Runner (1984-1995).
Other 4Runner shock-changers tell a different story, but do agree that there are ways to work around the work-space constraint when changing your shock absorbers. However, the point of this article is not to give you the easiest or the quickest way to change your 4Runner shocks, but the surest and the safest.
Replacement shock absorbers for your 4Runner can consist of OEM-type versions from makers such as Monroe for around $25 to $45 per shock. For serious driving, especially off-road, more rugged—and expensive—shocks can be used from names such as KYB, Rancho, and Bilstein for $50 to $115 per shock.


Materials Needed
- 24-inch high jack stands
- Trolley jack
- Metric closed box wrench set
- SAE closed box wrench set (some shocks come with SAE hardware)
- 1/2" drive 18-24" breaker bar and quality sockets (long and short sockets)
- 3/8" drive impact gun
- Standard and deep metric sockets
- Standard and deep SAE sockets
- Torque wrench (10-100 lb-ft)
- Large flat blade screwdriver
- WD-40 or penetrating oil
- Silicone grease
For obvious reasons, shocks are always changed in matching pairs. To change the front shocks, put the vehicle in Park, the emergency brake on, and chock the rear wheels. Then jack the front of the vehicle up and place it on jack stands. Note that jack stands that can safely reach a height of 24 inches (often the capability of 6-ton stands) will work best, for reasons that will be explained a bit later. If you don’t have an air wrench, loosen the front tire lug nuts before jacking the front end up.
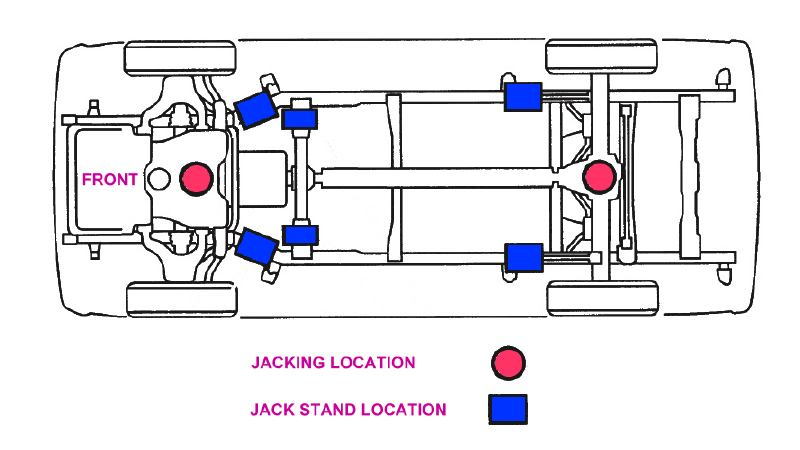
Step 1 – Jack front end and support on jack stands
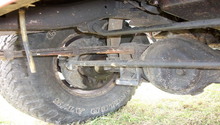
Be sure to use the proper jack positions, as shown in this diagram (red circles). The front is jacked up from under the center crossmember below the engine, and the rear from under the rear axle housing. Jack stand support positions are shown as blue rectangles.
With the front end up, remove a front tire and set it aside.
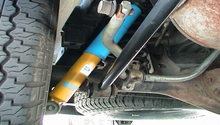
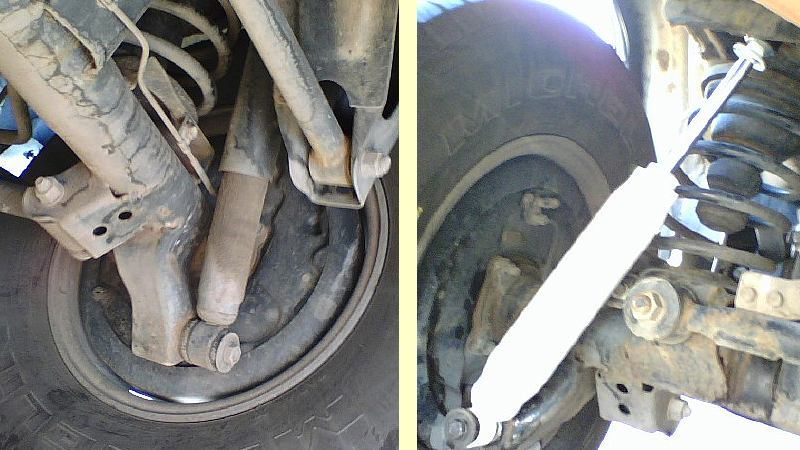
Step 2 – Remove the top shock attachment
Open wrenches and adjustable (Cresent-type) wrenches should not be used. Use only closed box wrenches or socket wrenches (long sockets may be useful for accessing the “bayonet” or shaft style shock top mounts). Removing the top nut from the jack mount can be problematic, especially for the rear shocks. This can be due to the nut rusting to the “bayonet-style” mount stud, a lack of space to get a good grip on the nut with a wrench, or both. It’s always a good idea to first thoroughly clean, then soak the top and bottom shock attachments with W-40 or penetrating oil (such as PB Blaster), and let it work in for twenty minutes or so before attempting removal.

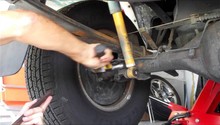
With a wood board atop your trolley jack to protect the front wheel, raise the jack up from under the hub to take some tension off the shock’s top attachment point. Remove the top nut. If it resists, re-soak the area with WD-40 or penetrating oil, wait, then try again. If it still won’t budge, use a hand-held reciprocating saw (Sawzall-type) with a metal-cutting blade to cut the shock’s shaft off just below the mounting bracket, through the lower bushing mounted under the mounting bracket. (These two upper bushings and metal grommets are often referred to as the “upper mount hardware.”) Be careful not to cut into the mounting bracket.
Use a flat blade screwdriver to remove the rubber bushings and mount hardware from the old shock for removal.
Step 3 – Remove the bottom shock attachment
Using two wrenches, such as a box wrench and a socket, remove the bottom shock attachment. Save the bolt, nut, and washer attaching the loop and stud to the bottom attachment bracket.
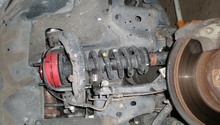
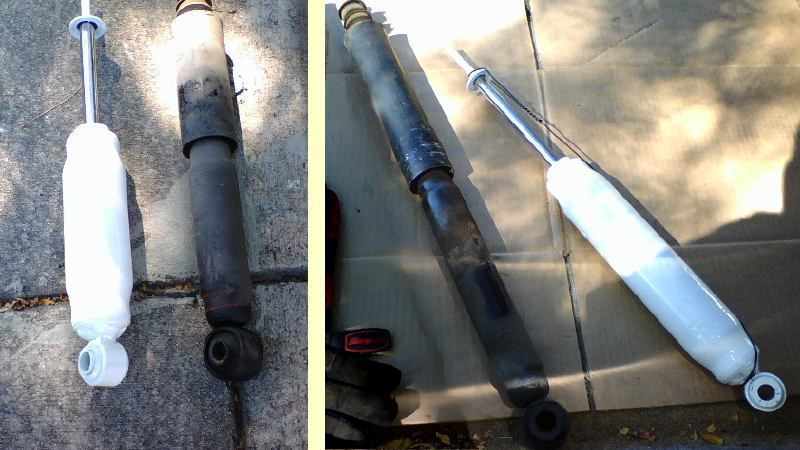
Step 4 – Replace the shock with a new one
Using the new hardware that came with the shocks, replace the shock absorber. Lubricate the end of the shock absorber first with silicone grease (petroleum-based lubricants will disintegrate rubber). Attach the bayonet/shaft top first, replacing the bushings and metal grommets in the proper order above and below the mounting bracket. Don’t tighten the top mount just yet.
Next, instead of having to manually compress or expand the shock to fit the bottom mount, raise or lower the trolley jack under the wheel hub to be able to fit the shock’s lower mount to the bottom attachment. Grease the ring mounting at this loop and stud attachment point as well. Finally, tighten the shock’s top and bottom attachments to 53 lb-ft (72 Nm).
Replacing the rear shocks is very similar to the front shocks, except—as mentioned earlier—there’s even less room to unbolt the top bayonet/shaft nut.
As a final check, don’t forget to lower all of the window and take a test drive to listen for any abnormal noises coming from the suspension.
Related Discussions
- 4Runner Pro Comp Shocks Pics - YotaTech.com
- Shock Replacement - Jack Stand Points - YotaTech.com
- Rear Shock Removal - YotaTech.com
- Replacing Shocks and Struts on '98 - YotaTech.com
- Replacing Stock Shocks - YotaTech.com