
Toy88yota's 88 2wd SAS
 Feb 14, 2015 | 04:38 PM
#1

Thread Starter
Registered User
Joined: Feb 2015
Posts: 18
Likes: 0
Toy88yota's 88 2wd SAS
I have owned this truck for about 3 years and was growing tired of low truck life. It was lowered around 4 inches overall and was still somewhat usable with air shocks and proper bump stops but I wanted to go in a different direction.
The parts list-
85 F/R axles
87 W56 With turbo clutch setup
90 4runner steering box
OME Medium 2.5" leafs up front
OME greasable shackles
Stock rear 2wd springs - overload + a different overload and added a leaf.
Sky Highsteer
Sky Front hanger
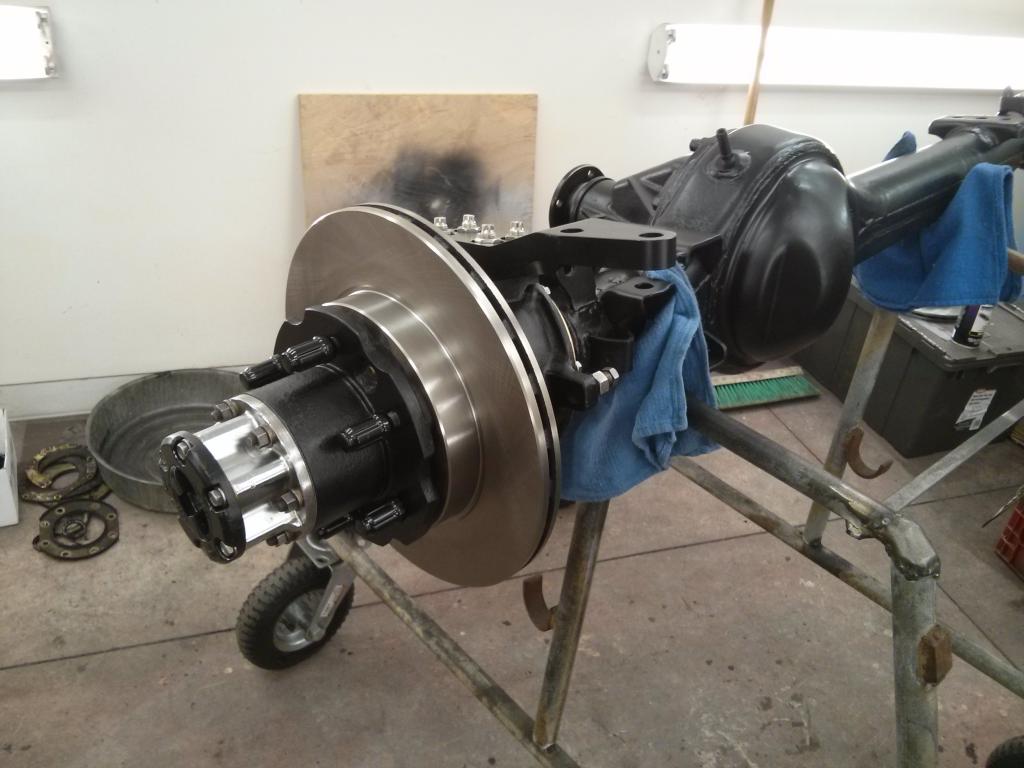
Fj vented brakes
Sky rear disk kit
Sky e brake kit
Budbuilt crossmember/ skid
Trail Gear Twinstick
Trail Gear tube rear bumper
Some sort of front bumper with a 8-9500# winch and synthetic line

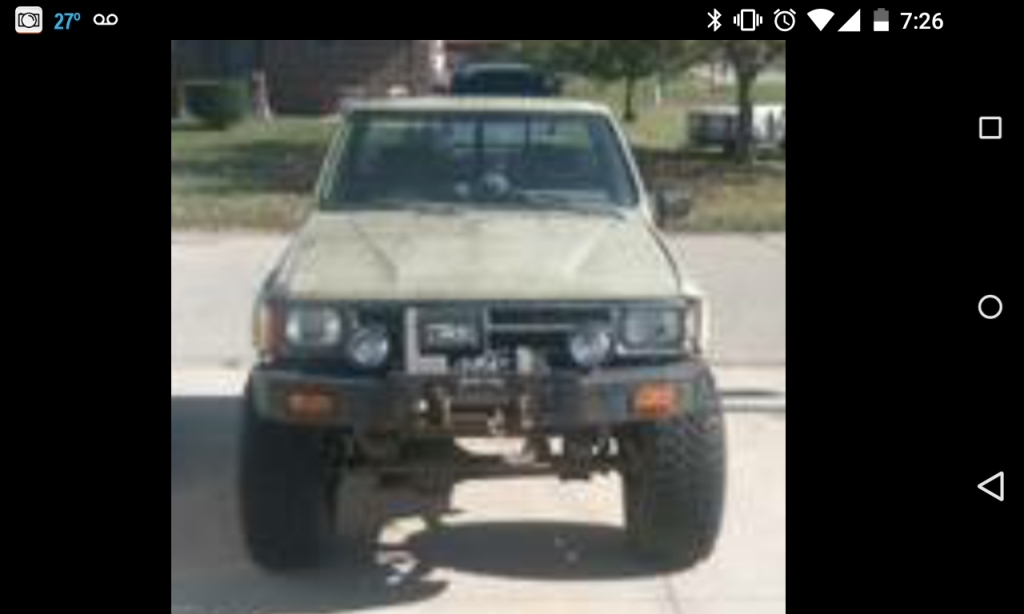
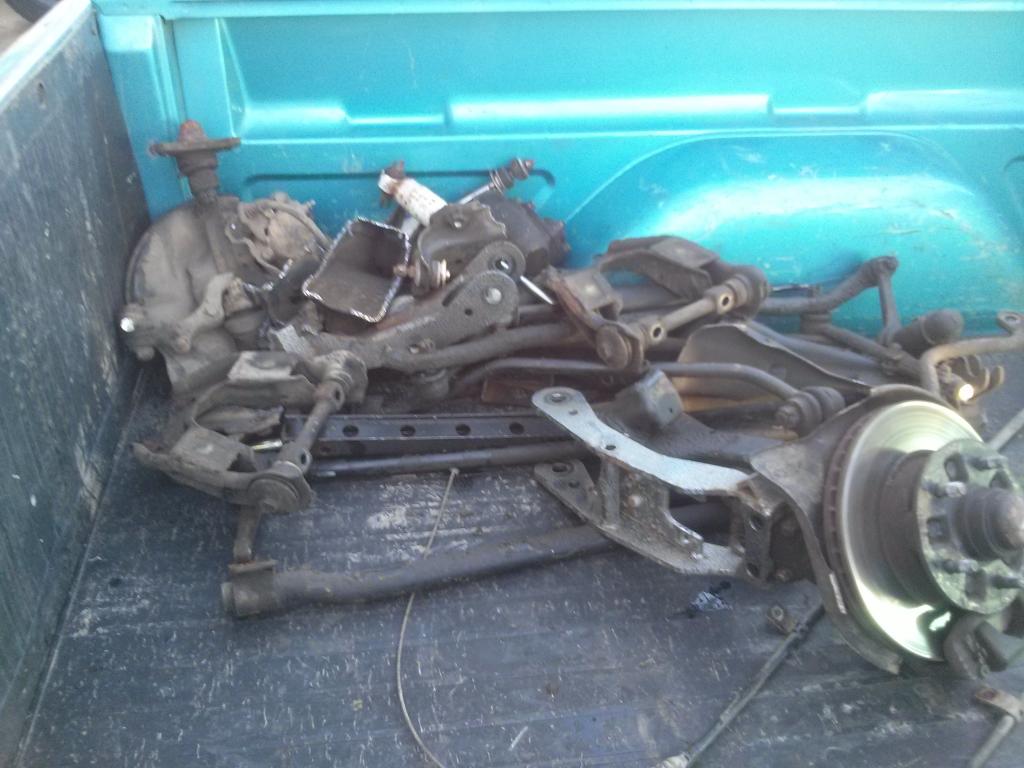
So I bought a truck that was advertised as a 87 with Chevy axles, in reality it was an 85 that was basically stock aside from lift springs and homemade bumpers The drivetrain was in decent shape but the body/ frame were beyond repair from rust damage.
The only decent picture before I dismantled it. Fear not though the 85 gave its life for a higher calling.
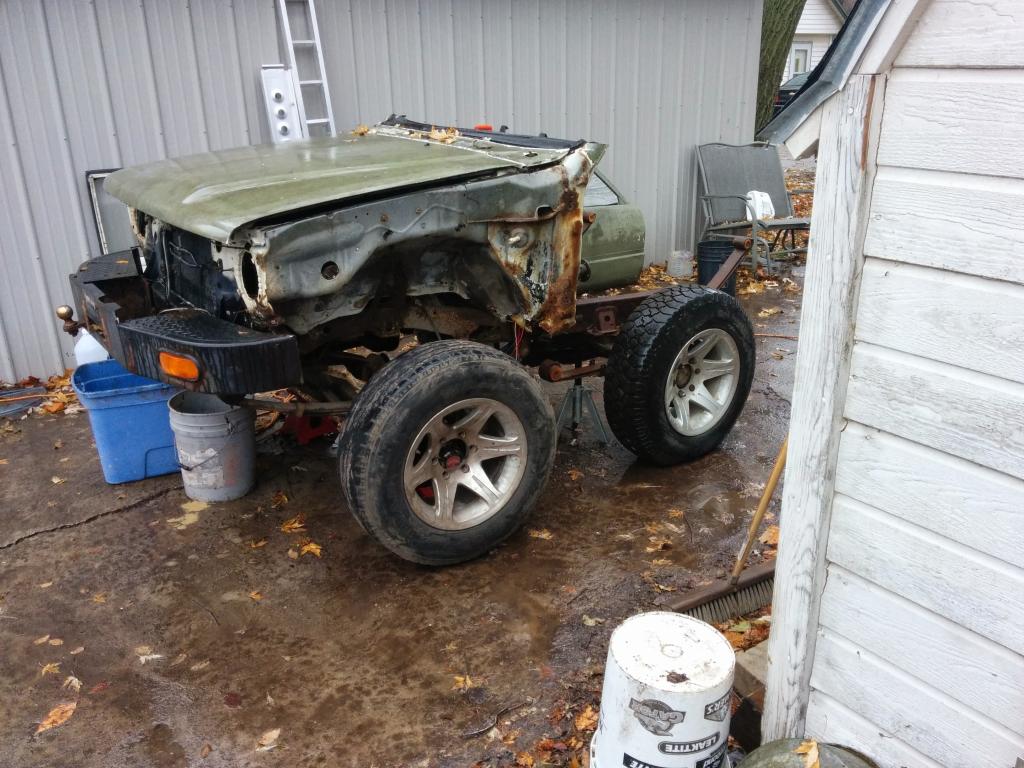
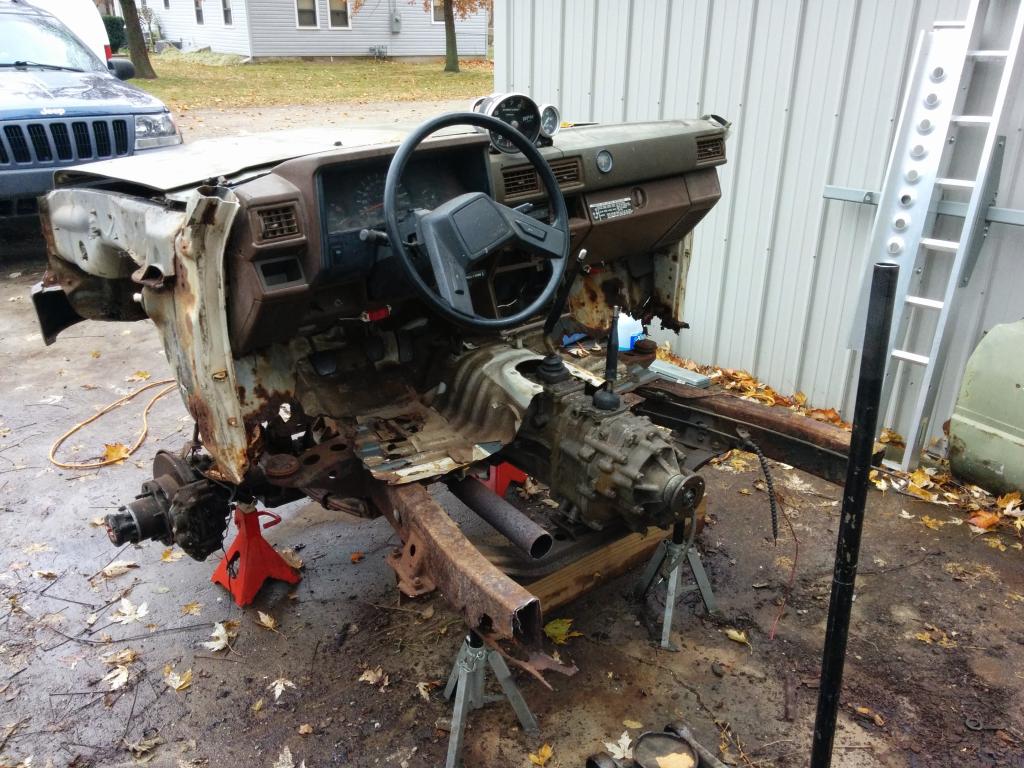
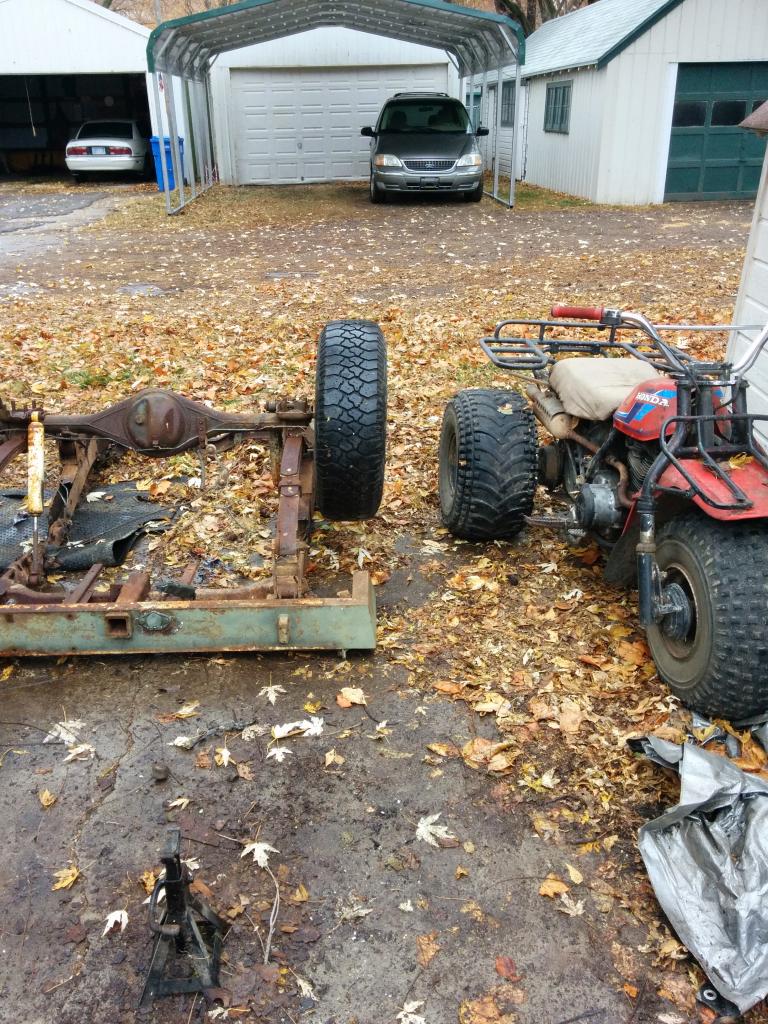
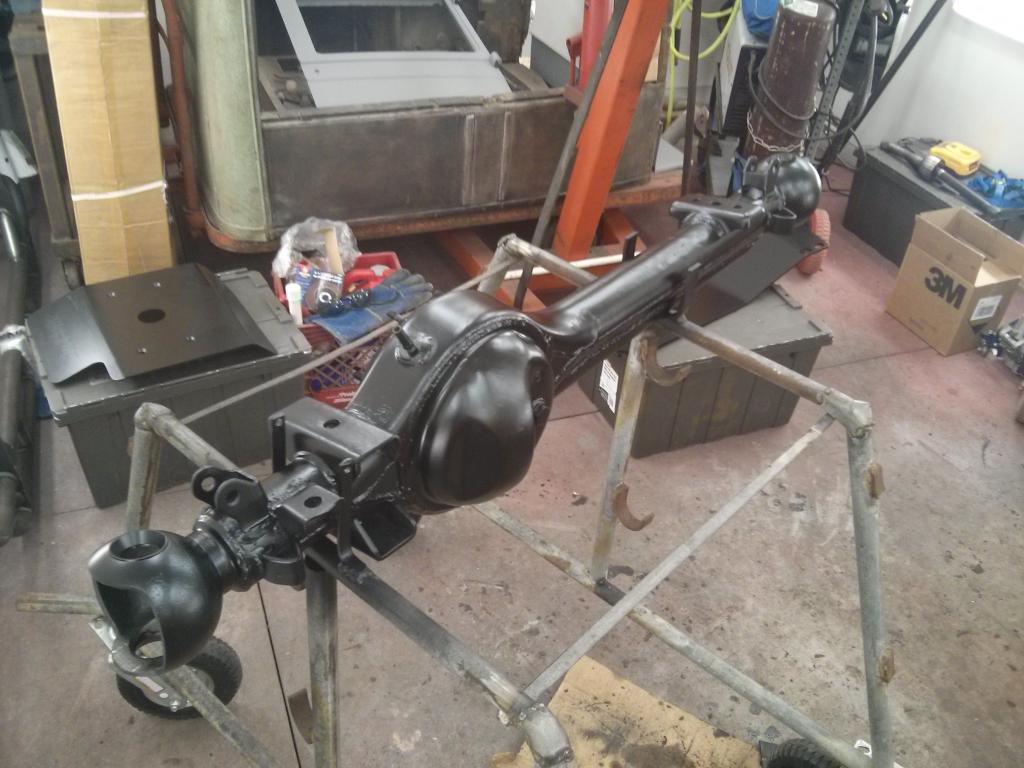
Before long I had scrapped the truck and kept the goodies that I needed for my build and anything else that hadn't rusted away. I built an axle rebuild stand from some sort of pipe holder dealio.

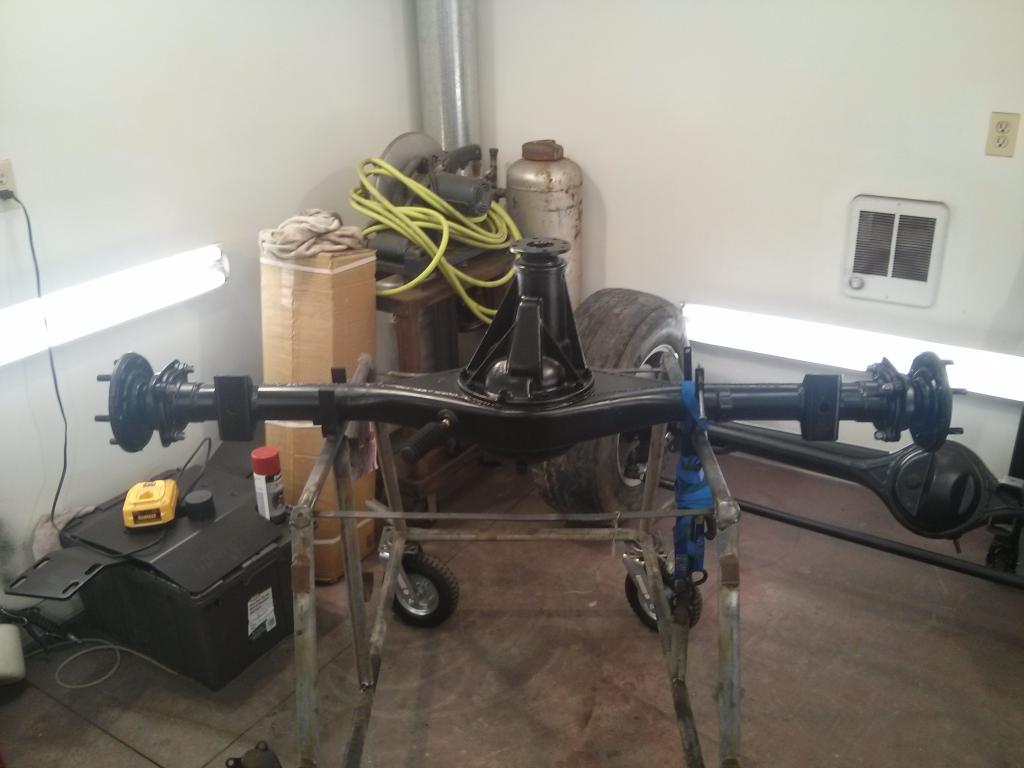
I left the old races in when I painted it so I didnt have to deal with taping anything off.
The parts list-
85 F/R axles
87 W56 With turbo clutch setup
90 4runner steering box
OME Medium 2.5" leafs up front
OME greasable shackles
Stock rear 2wd springs - overload + a different overload and added a leaf.
Sky Highsteer
Sky Front hanger
Fj vented brakes
Sky rear disk kit
Sky e brake kit
Budbuilt crossmember/ skid
Trail Gear Twinstick
Trail Gear tube rear bumper
Some sort of front bumper with a 8-9500# winch and synthetic line

So I bought a truck that was advertised as a 87 with Chevy axles, in reality it was an 85 that was basically stock aside from lift springs and homemade bumpers The drivetrain was in decent shape but the body/ frame were beyond repair from rust damage.
The only decent picture before I dismantled it. Fear not though the 85 gave its life for a higher calling.


Before long I had scrapped the truck and kept the goodies that I needed for my build and anything else that hadn't rusted away. I built an axle rebuild stand from some sort of pipe holder dealio.

I left the old races in when I painted it so I didnt have to deal with taping anything off.

Last edited by Toy88yota; Feb 16, 2015 at 04:13 PM.
Feb 14, 2015 | 04:44 PM
#2
Thread Starter
Registered User
Joined: Feb 2015
Posts: 18
Likes: 0
First I rebuilt the front axle.
Then the rear
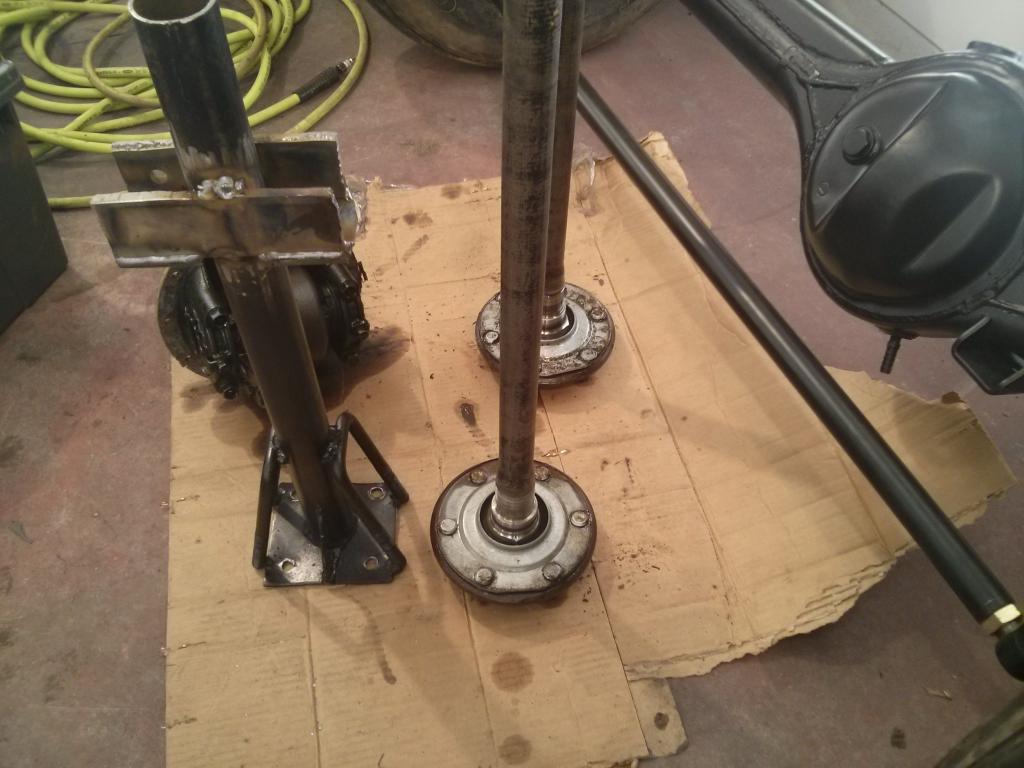
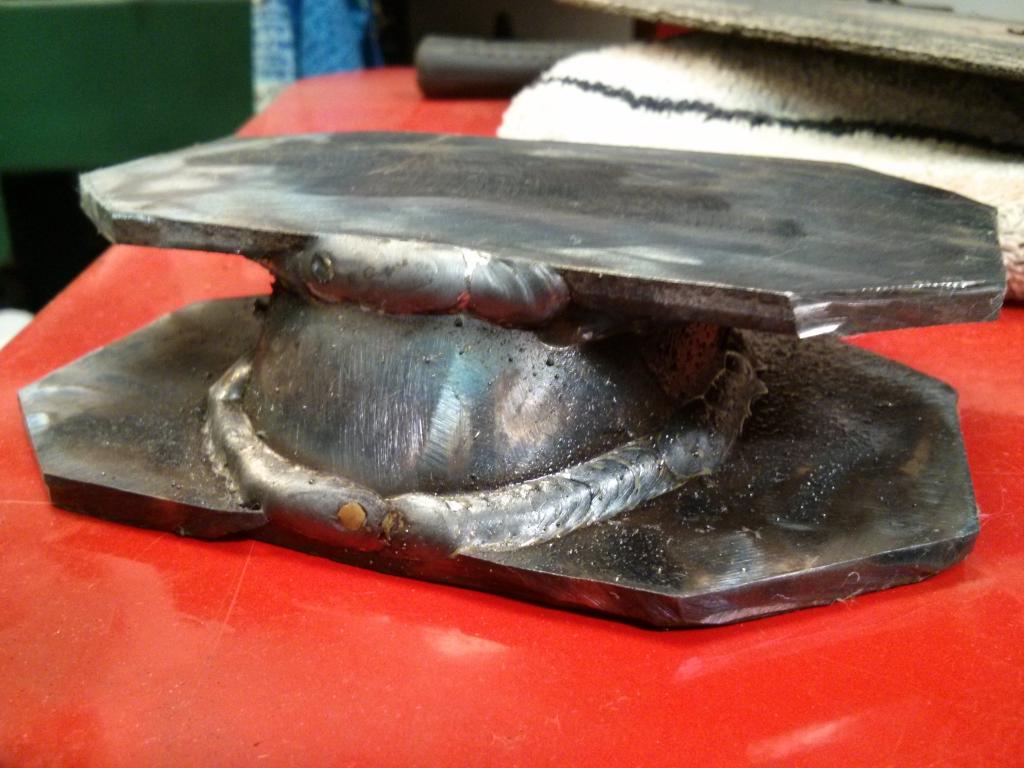
Made my own bearing press tool entirely from scrap. The bottom plate is a little thin but it was all I had in the shop and didn"t want to wait. It worked pretty good really. I replaced all bearings and seals in the axles except anything in the third member.
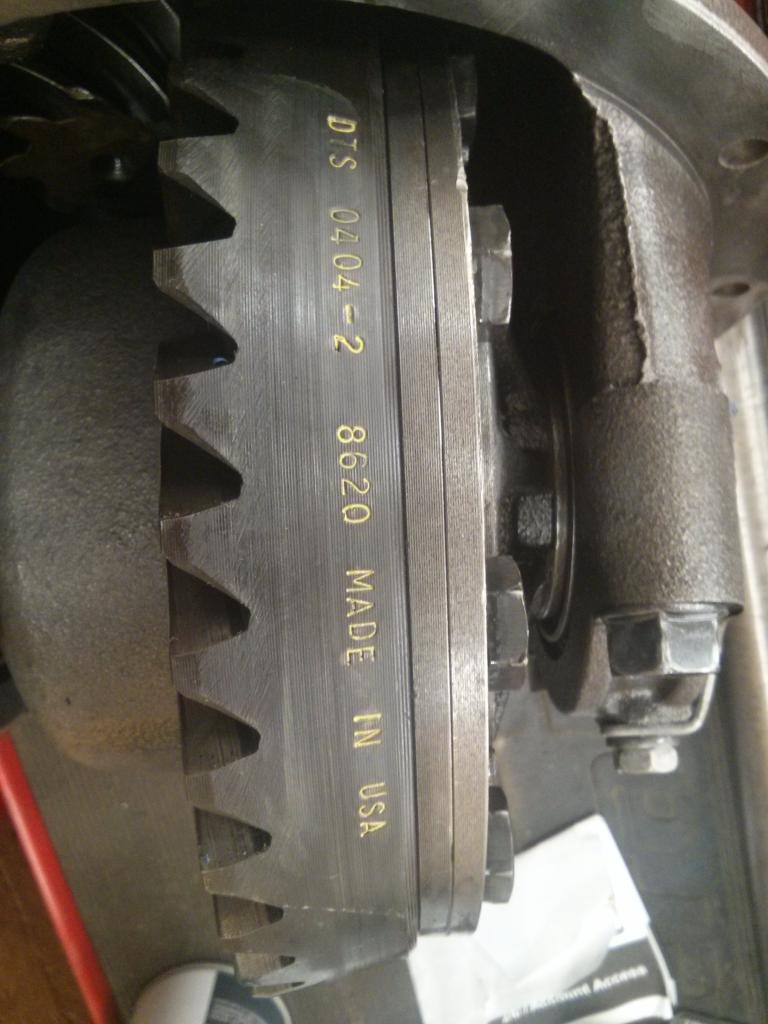
I should mention the 4.88 gears and detroit lockers I found in both axles.

Then the rear

Made my own bearing press tool entirely from scrap. The bottom plate is a little thin but it was all I had in the shop and didn"t want to wait. It worked pretty good really. I replaced all bearings and seals in the axles except anything in the third member.

I should mention the 4.88 gears and detroit lockers I found in both axles.

Last edited by Toy88yota; Feb 14, 2015 at 06:17 PM.
Feb 14, 2015 | 05:00 PM
#3
Thread Starter
Registered User
Joined: Feb 2015
Posts: 18
Likes: 0
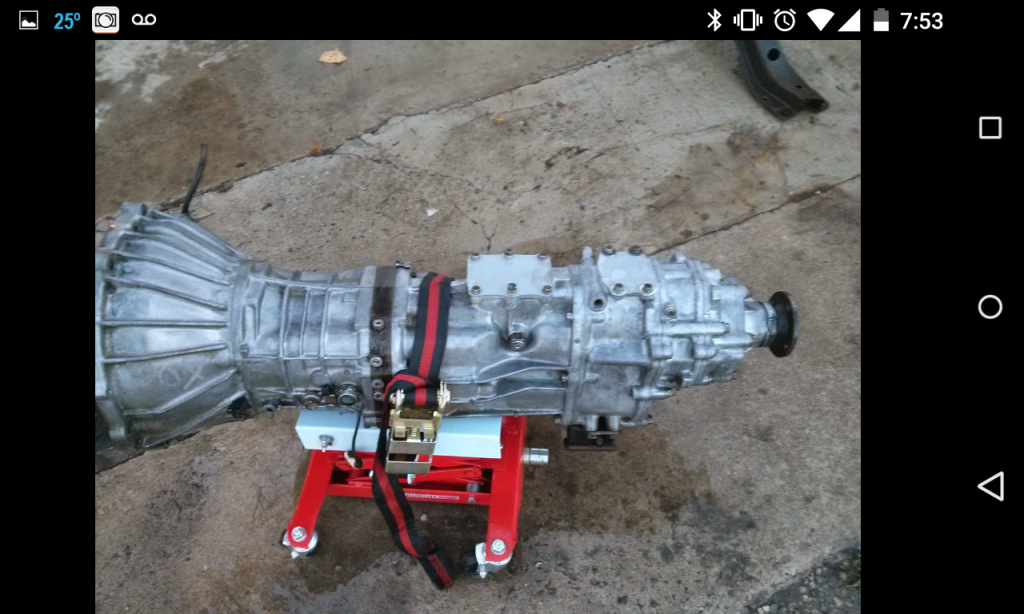
The 85 had a 87 W56 swapped into it at some point. Another bonus. I cleaned up the trans/ t-case did a twinstick conversion and changed the output seal while I was at it. Bought a Marlin HD mount and a budbuilt skid to hold it on the truck.

Last edited by Toy88yota; Feb 26, 2015 at 01:44 PM.
Feb 14, 2015 | 05:14 PM
#4
Thread Starter
Registered User
Joined: Feb 2015
Posts: 18
Likes: 0
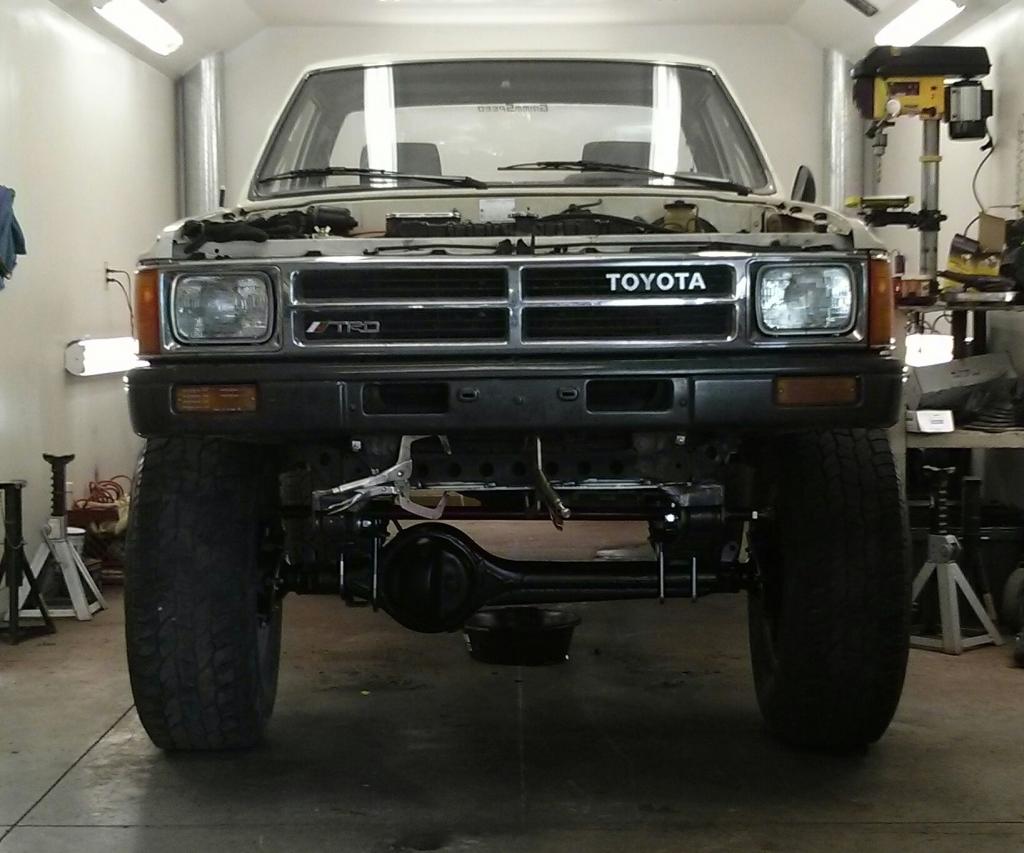
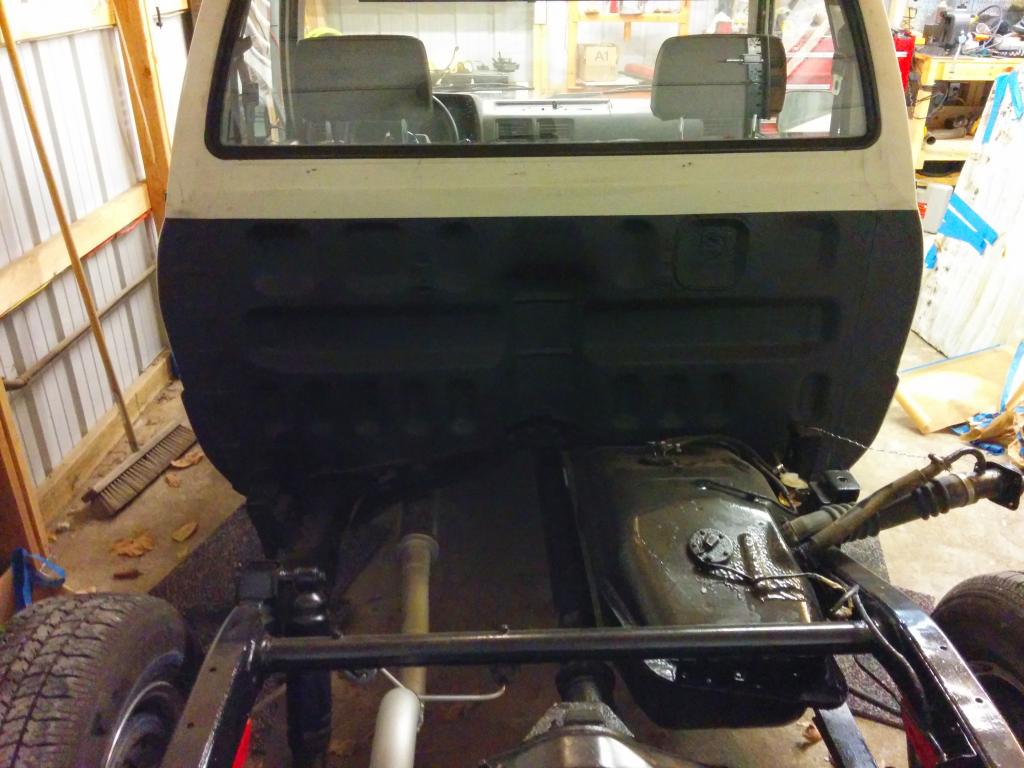
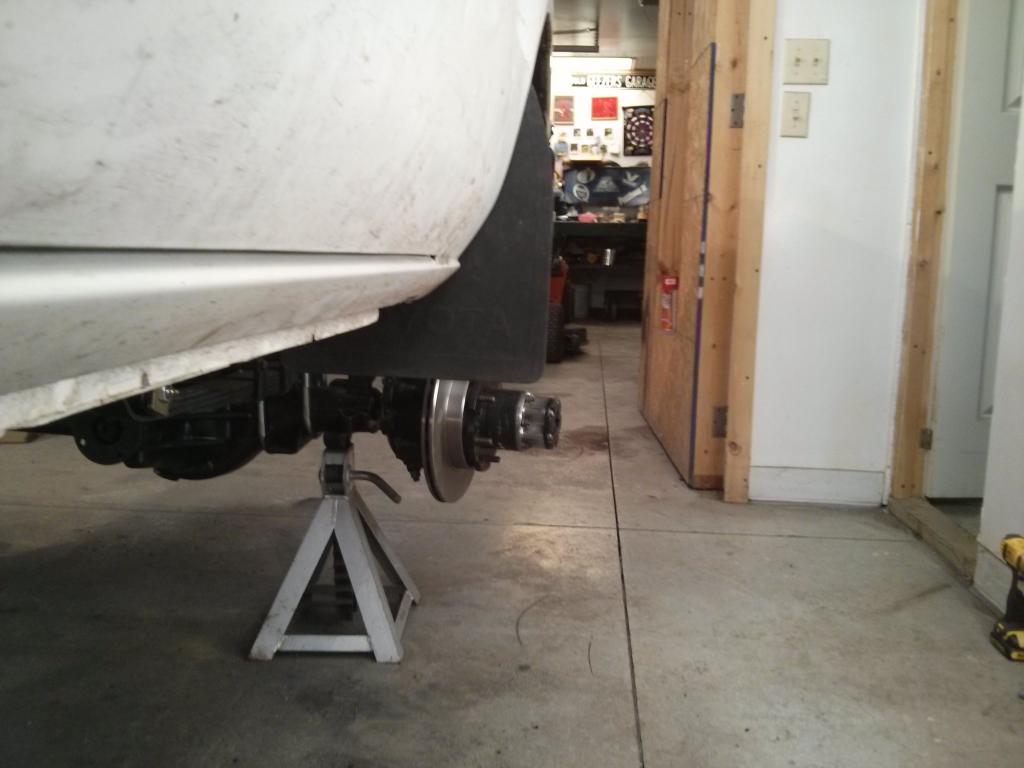
I started the rebuld process in December 2014 and worked on it off and on. I finally decided 2 weekends ago to start the build. I pulled the truck in the garage, swapped out the rear axle and moved the truck into its home for the next couple months.
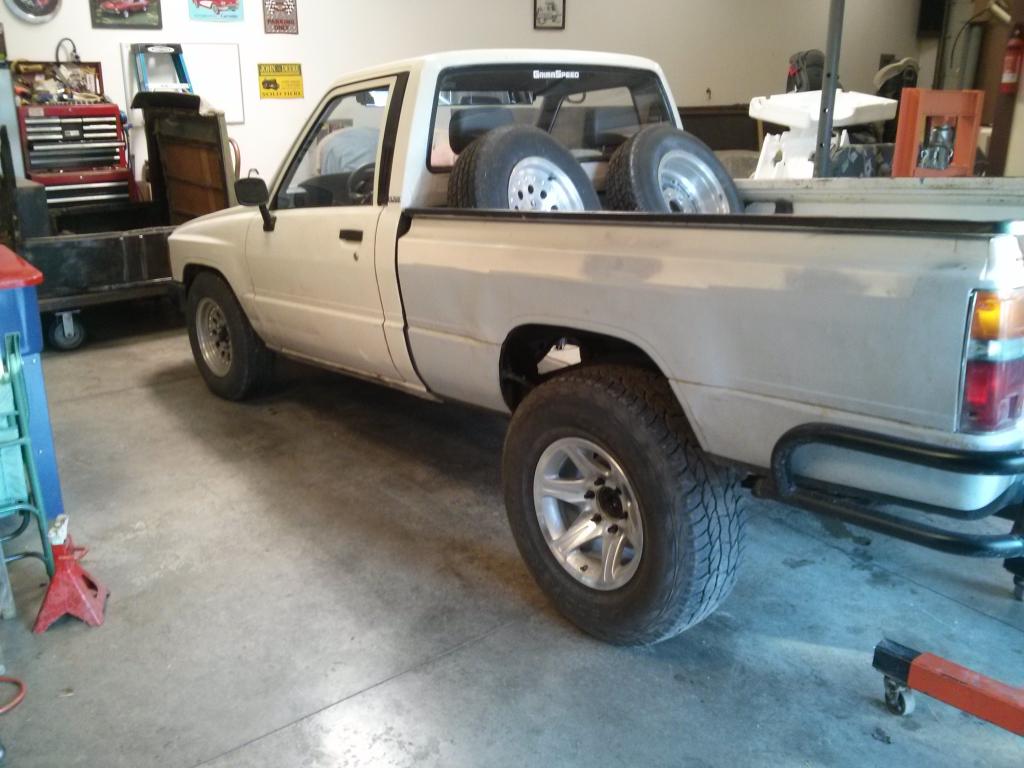
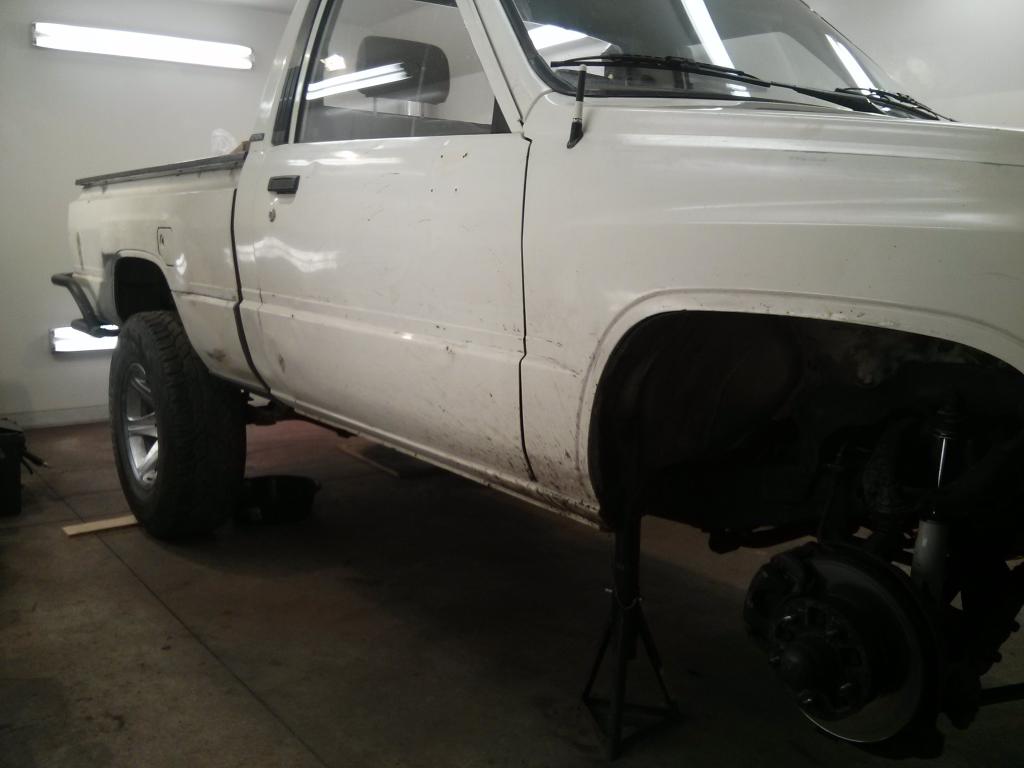
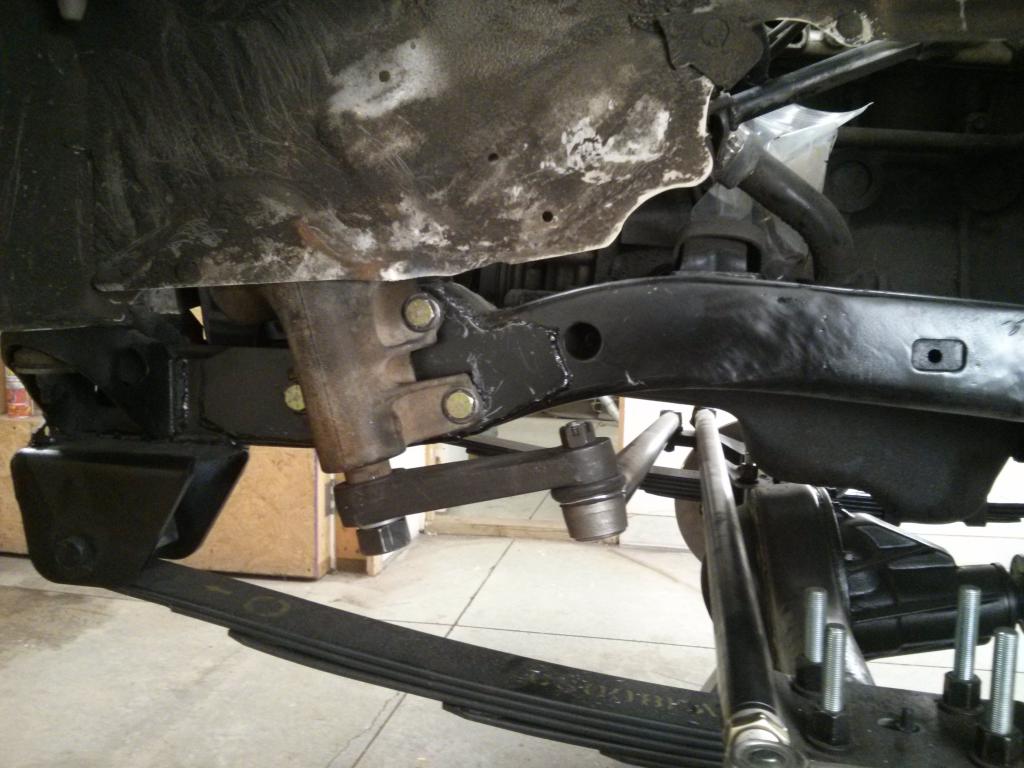
That happened on a Friday night, Saturday was IFS removal day. Not my idea of fun but I got it done. I see why most guys remove the IFS in one piece but I like taking things apart and it gave me a better understanding of the old suspension.


That happened on a Friday night, Saturday was IFS removal day. Not my idea of fun but I got it done. I see why most guys remove the IFS in one piece but I like taking things apart and it gave me a better understanding of the old suspension.

Last edited by Toy88yota; Feb 16, 2015 at 04:33 PM.
Feb 14, 2015 | 05:28 PM
#5
Thread Starter
Registered User
Joined: Feb 2015
Posts: 18
Likes: 0
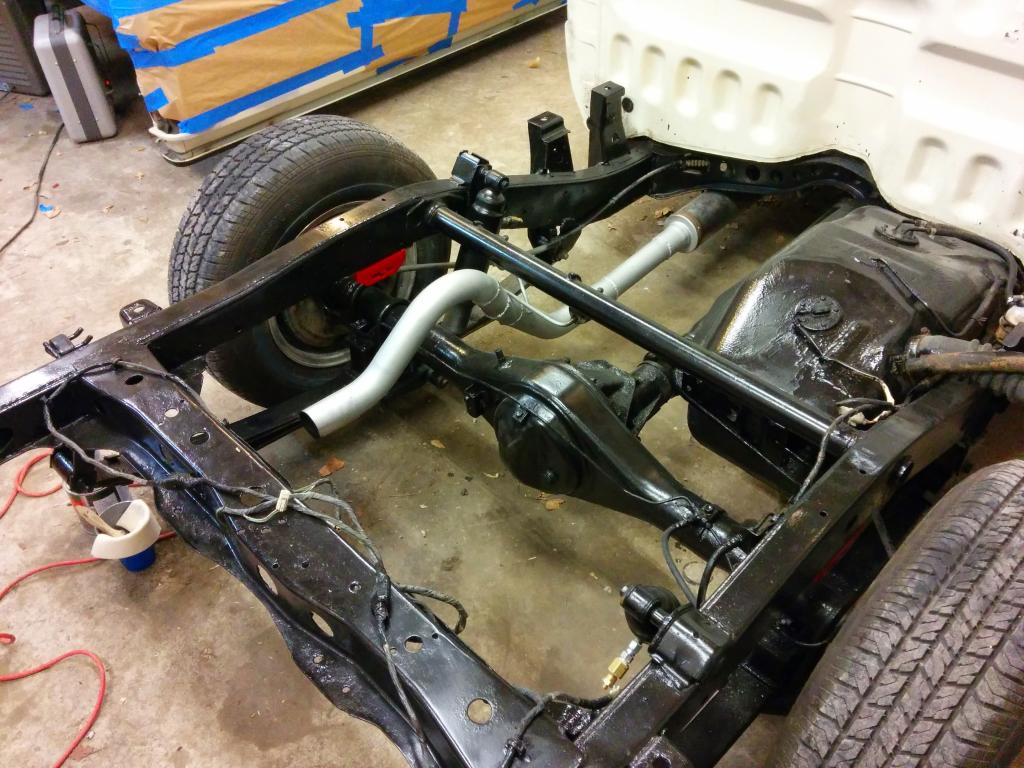
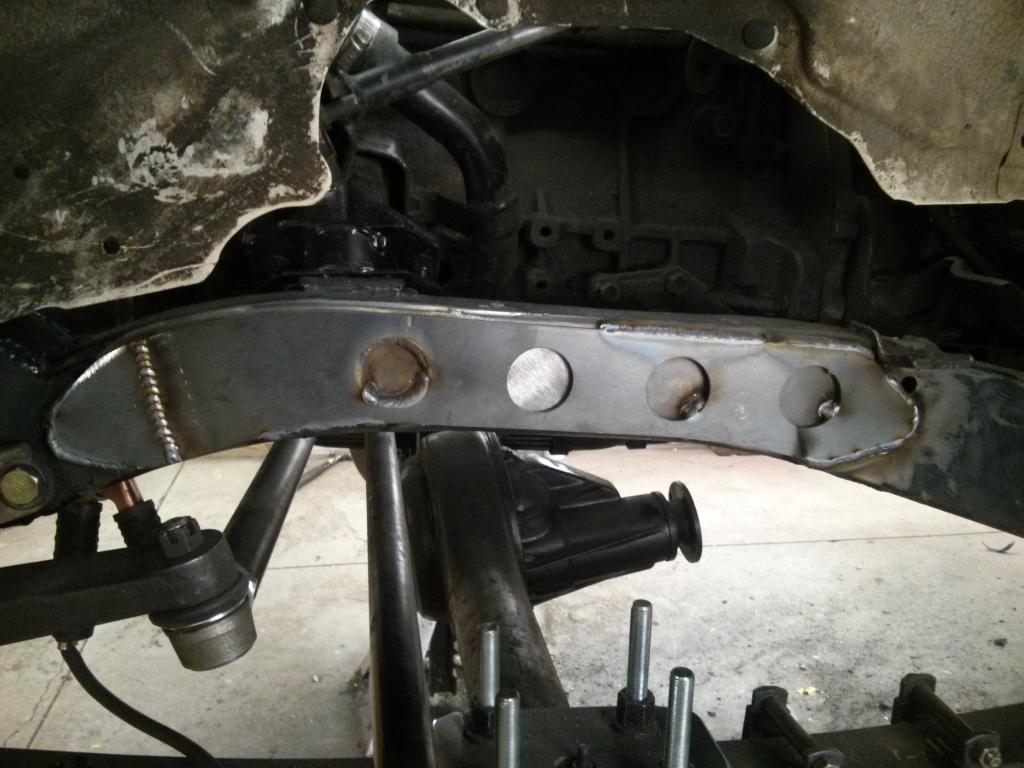
Sunday was the front axle mock up/ tack in day.
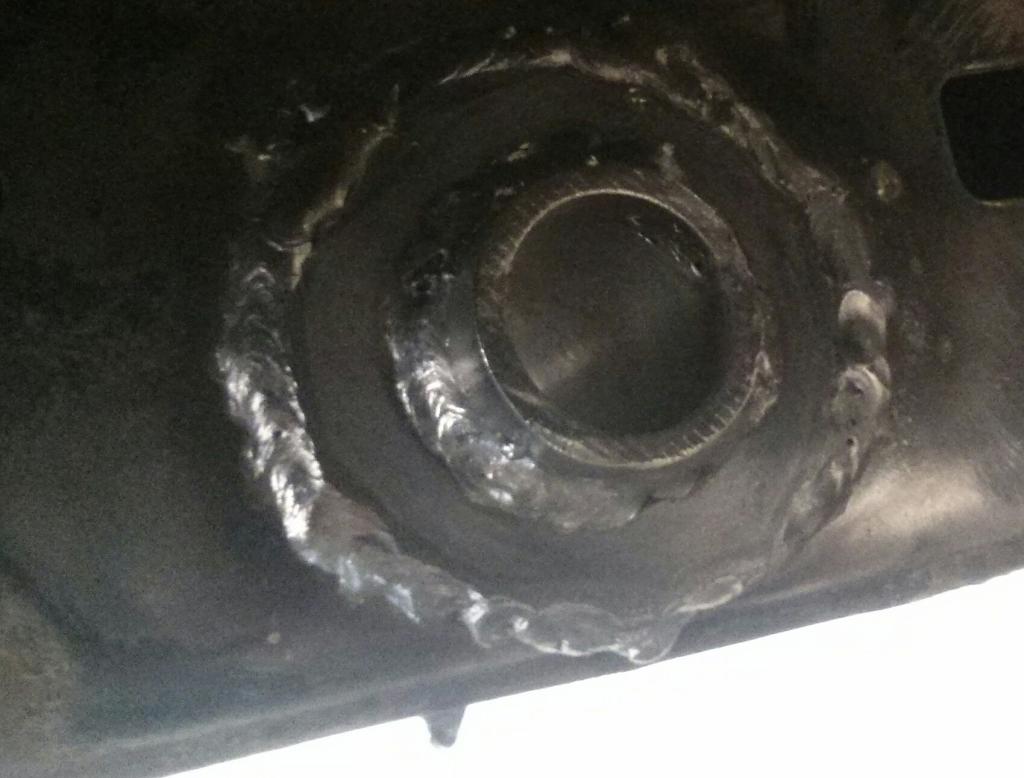
The next weekend it was time to burn the hanger/ tubes in, bought some 1.5" washers to reinforce the frame tubes on all sides. I also got some small stuff like rear brakes installed. I'm running the sky rear disk kit as well as their e brake kit.
Im running OME medium springs in the front and stock 2wd rears that I pulled the overload and installed the bottom two springs from the 85 rear spring pack, that truck had maybe 4-5" of lift. It did the trick and firmed up my worn out 2wd springs. So far the truck is sitting sorta level, interested in seeing how it all settles out.

The next weekend it was time to burn the hanger/ tubes in, bought some 1.5" washers to reinforce the frame tubes on all sides. I also got some small stuff like rear brakes installed. I'm running the sky rear disk kit as well as their e brake kit.

Im running OME medium springs in the front and stock 2wd rears that I pulled the overload and installed the bottom two springs from the 85 rear spring pack, that truck had maybe 4-5" of lift. It did the trick and firmed up my worn out 2wd springs. So far the truck is sitting sorta level, interested in seeing how it all settles out.

Last edited by Toy88yota; Feb 15, 2015 at 06:54 AM.
Feb 14, 2015 | 05:53 PM
#6
Thread Starter
Registered User
Joined: Feb 2015
Posts: 18
Likes: 0
Today I got the steering box and mount installed. I swapped the 4wd u joint onto the end of my steering shaft and broke out the plastic pieces that keep the shaft from being a slip shaft.
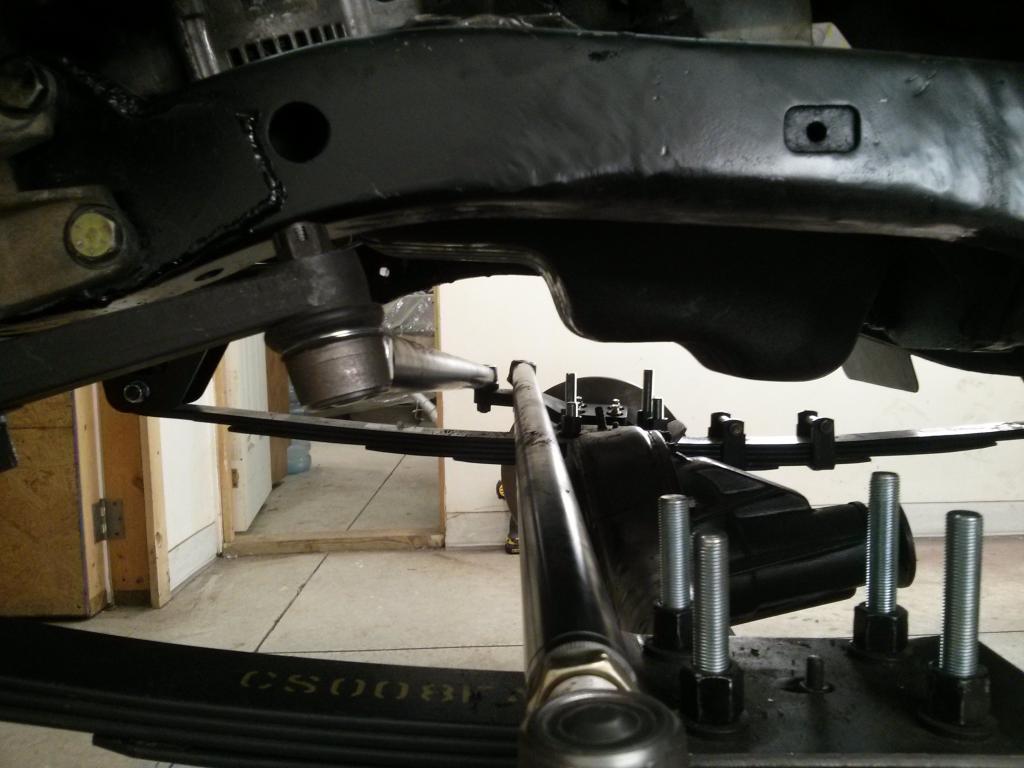
Clearance is going to be close between the tie rod and oil pan while turning and compressing the suspension. It should clear but I am almost wishing I had moved the hanger forward like most everyone does. I Don't plan on running anything bigger than a 32 so I didnt want to move it forward any.
Clearance is going to be close between the tie rod and oil pan while turning and compressing the suspension. It should clear but I am almost wishing I had moved the hanger forward like most everyone does. I Don't plan on running anything bigger than a 32 so I didnt want to move it forward any.

Last edited by Toy88yota; Feb 14, 2015 at 05:55 PM.
Trending Topics


 Feb 14, 2015 | 07:14 PM
#11
Thread Starter
Registered User
Joined: Feb 2015
Posts: 18
Likes: 0
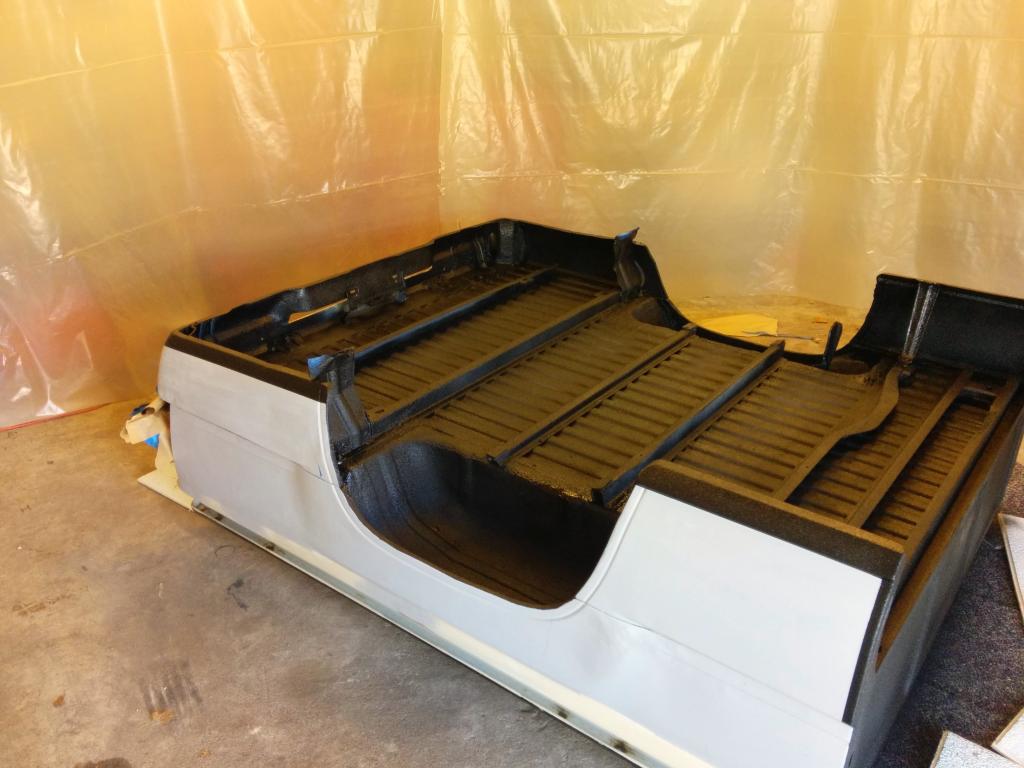
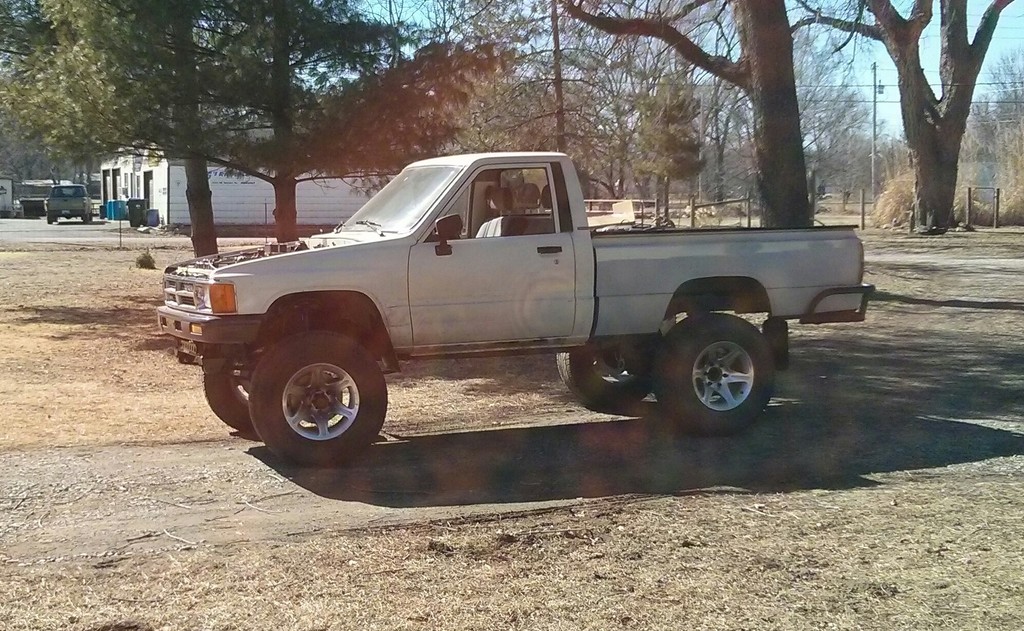
Heres a couple pictures from last year. Before I knew I was going to do the swap. Pulled the bed painted the frame and bedlined the bottom of the bed back of the cab and the front side of the bed. I recommend Raptor liner for sure. I have also pulled the carpet sound deadened the interior including the doors and swapped my bench out for some 4runner buckets.


 Feb 16, 2015 | 02:30 PM
#14
Thread Starter
Registered User
Joined: Feb 2015
Posts: 18
Likes: 0
Thanks guys. Yesterday I swapped out my door seals and got my front mudflaps put on. I was able to use the factory bolt holes for the fender liner, the liner needs replaced since I trimmed it for clearance when it was lowered. They are mounted pretty high but I like the look and its where the holes were. I am going to add washers and another couple mounting points. Need to paint the letters white also.
I also started putting my power steering parts on. I am glad I bought a complete truck to get all these parts/ hardware. These trucks are scarce around here at JYs.
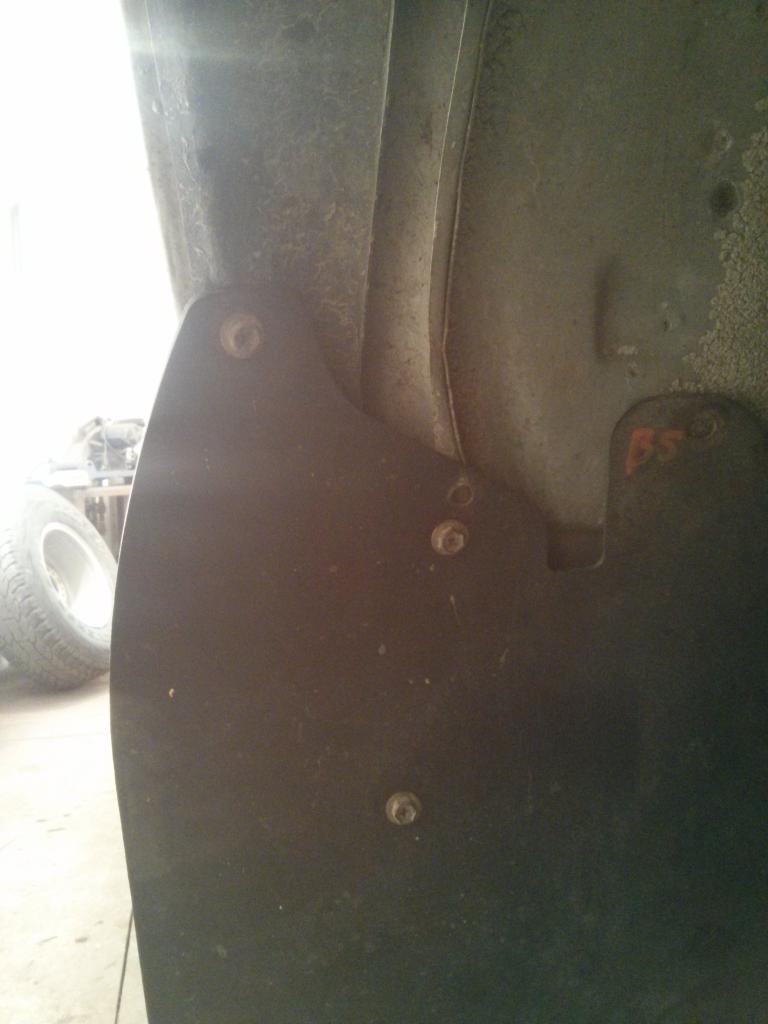
From this angle you can see the passenger side rocker panel is mint. For some reason the driver side is rusted through in many spots.
I also started putting my power steering parts on. I am glad I bought a complete truck to get all these parts/ hardware. These trucks are scarce around here at JYs.


From this angle you can see the passenger side rocker panel is mint. For some reason the driver side is rusted through in many spots.
Last edited by Toy88yota; Feb 16, 2015 at 02:34 PM.
Feb 16, 2015 | 02:37 PM
#15
Thread Starter
Registered User
Joined: Feb 2015
Posts: 18
Likes: 0
Im wishing I would have raptor lined the interior last time I had the seats and carpet pulled. Its an impressive DIY product especially given the price difference vs having a pro do it.
Feb 20, 2015 | 03:11 PM
#18
Thread Starter
Registered User
Joined: Feb 2015
Posts: 18
Likes: 0
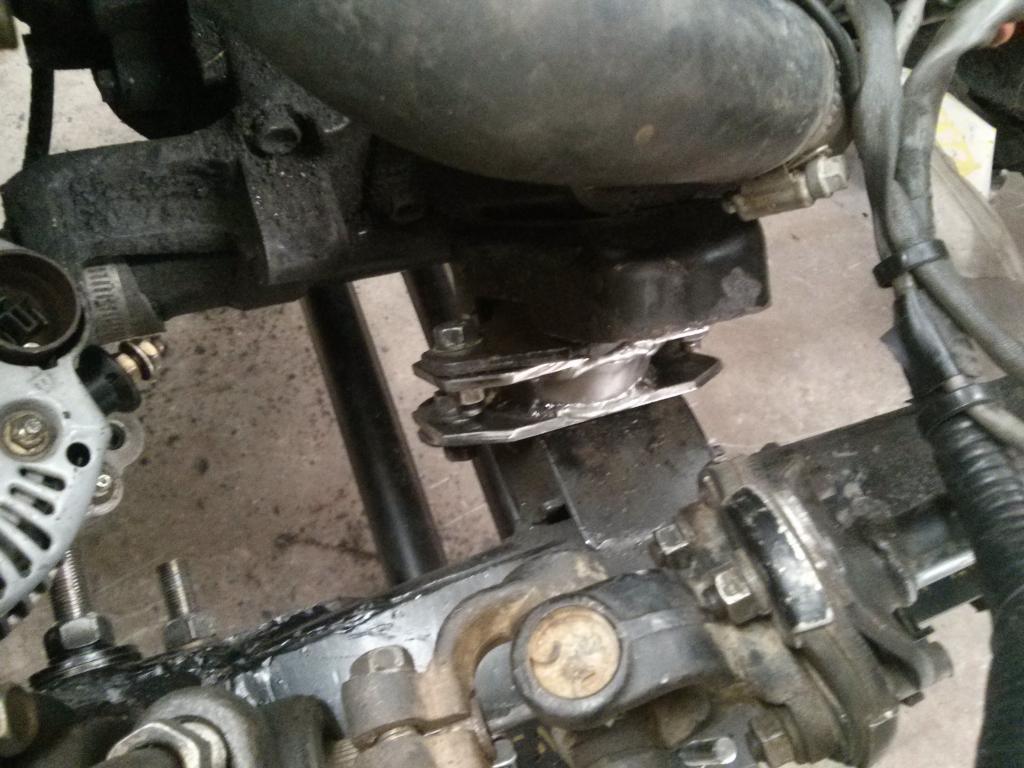
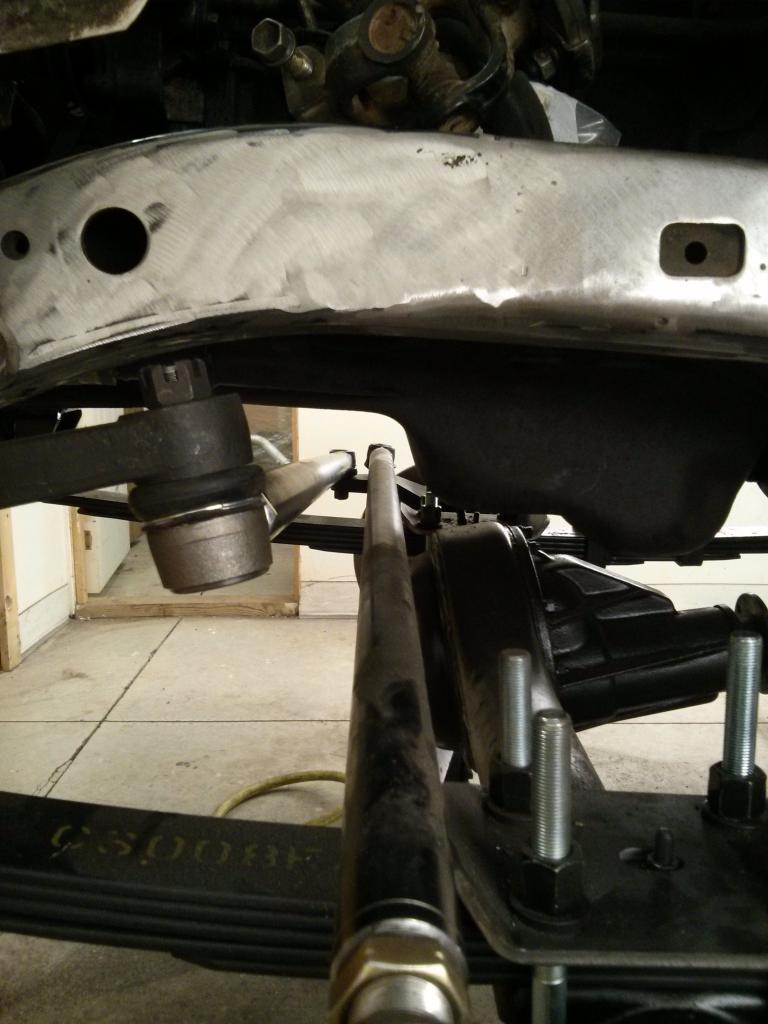
Built and installed some motor mount spacers to help oil pan clearance. Ended up lifting the engine about 1.5". I used some heavy pipe and some 3/16 plate I had laying around. Of course now I have a couple small clearance issues with aircleaner and fan shroud but they should be easily remedied.
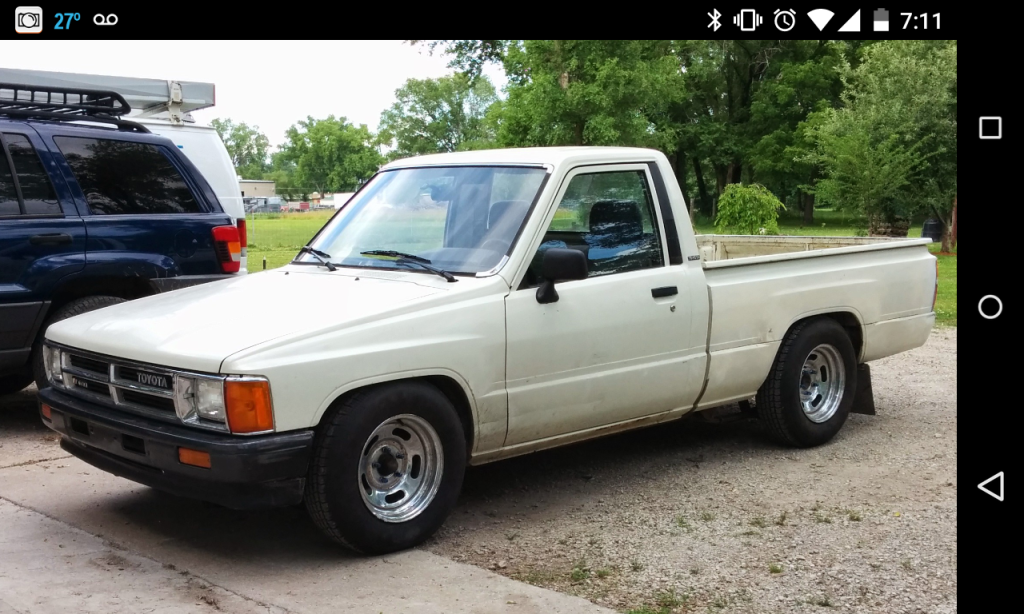
Here's a before picture for comparison.


Here's a before picture for comparison.

Last edited by Toy88yota; Feb 20, 2015 at 03:32 PM. Reason: Added picture.
Feb 22, 2015 | 03:02 PM
#19
Thread Starter
Registered User
Joined: Feb 2015
Posts: 18
Likes: 0
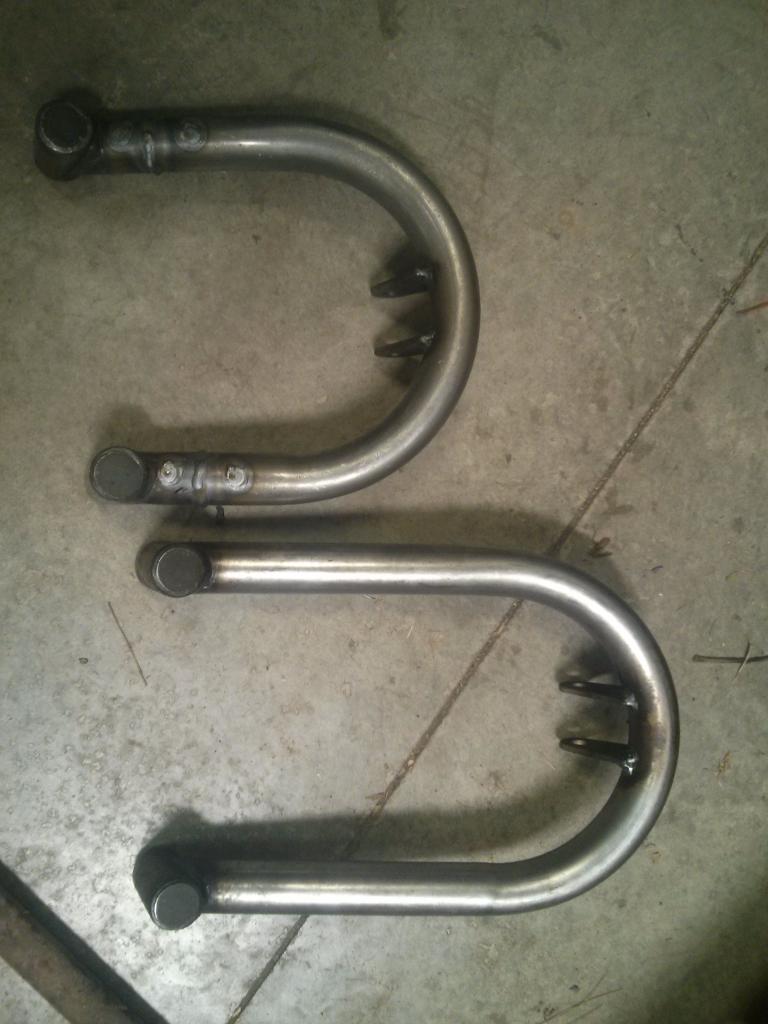
Between yesterday and today I was able to finish installing power steering and get my shock hoops fitted up. Also got the passenger side bumpstop installed.
I bought trail gear hoops and they needed cut down about 4". I put a piece of tube in the middle and drilled some holes for plug welds. still need to add gussets from hoop to frame. I need to measure but it looks like I may be able to use the same shocks front and rear.

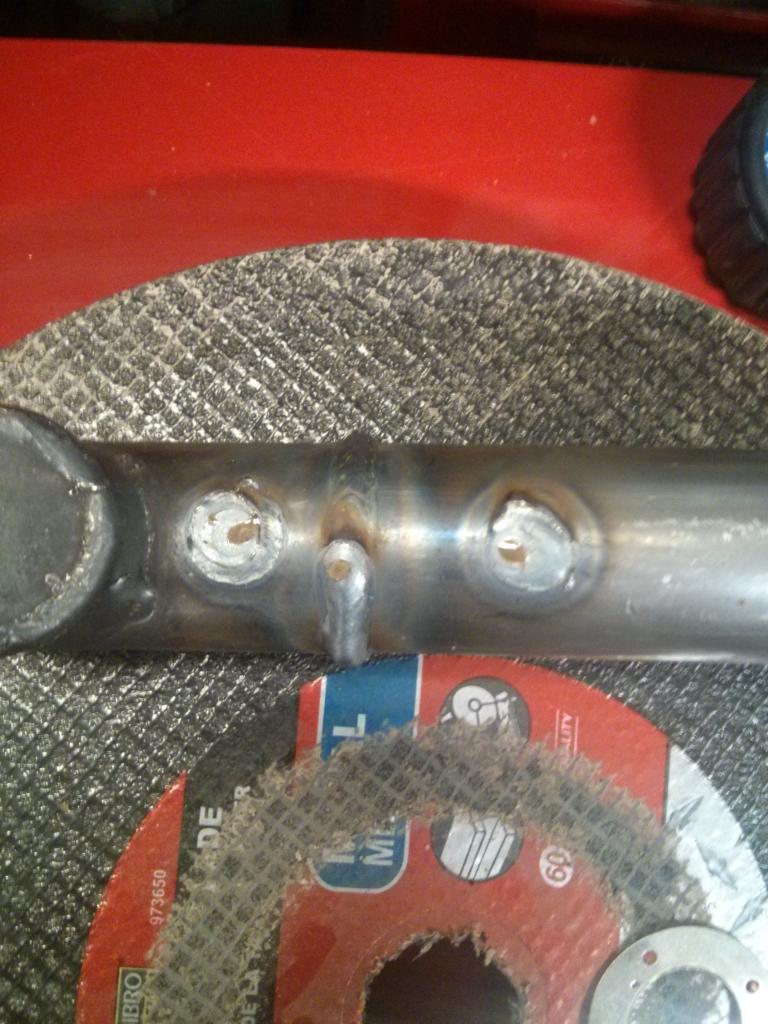
Got the driver side all made up just needs welded on. I plated the frame with the Trailgear pieces. Very slow going when doing stitch welds.
I did the old stack a tack where I notched the steel to bend over the steering box mount, it's notched on the other side a half inch over to form an offset. I could have just butted them together but felt this would be stronger. Ideally the frame plating would go on before the steering box mount but I got in a hurry.

Last edited by Toy88yota; Feb 22, 2015 at 04:30 PM.
Mar 10, 2015 | 08:04 PM
#20
Thread Starter
Registered User
Joined: Feb 2015
Posts: 18
Likes: 0
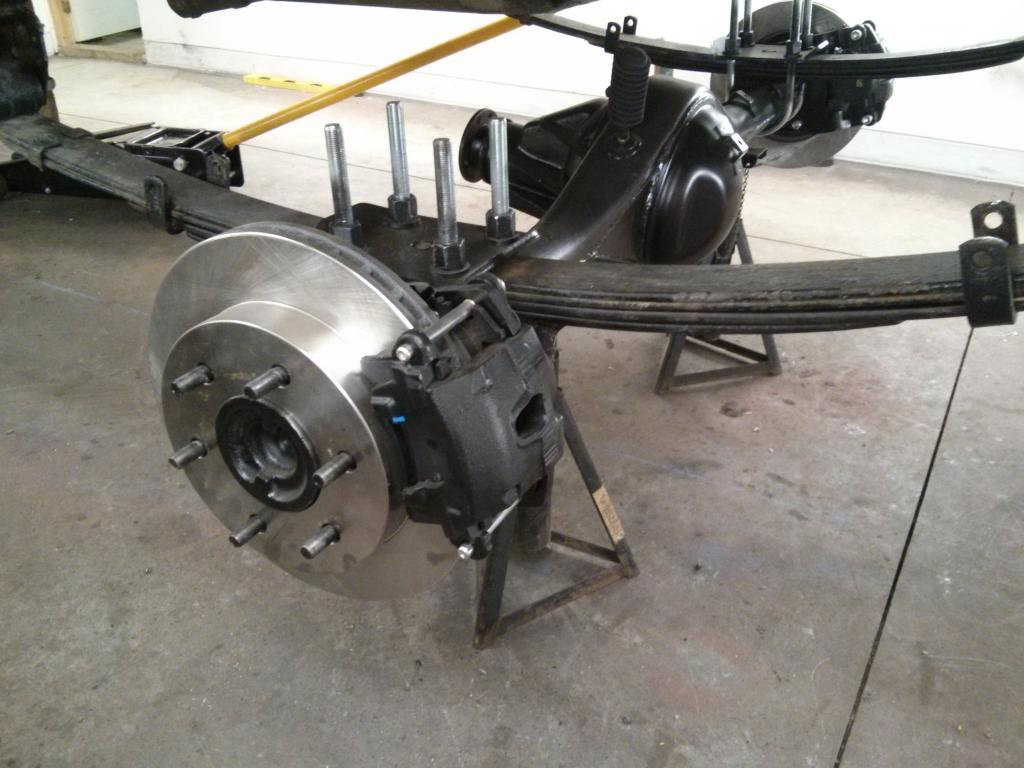
Got my rear brakes all wrapped up a few days ago also got the front done except for brake line and calipers. I will take pictures of the rear setup sometime tomorrow.
First sunlight in more than a month. Paint looks crappy and rocker is toast but it's getting there.
And a before just for fun.
First sunlight in more than a month. Paint looks crappy and rocker is toast but it's getting there.

And a before just for fun.
Last edited by Toy88yota; Mar 10, 2015 at 08:09 PM.


