
Tsword's 1993 4Runner 1UZFE Swap and More
 Mar 31, 2014 | 10:43 AM
#1
Thread Starter
Registered User
Joined: Mar 2014
Posts: 22
Likes: 0
Tsword's 1993 4Runner 1UZFE Swap and More
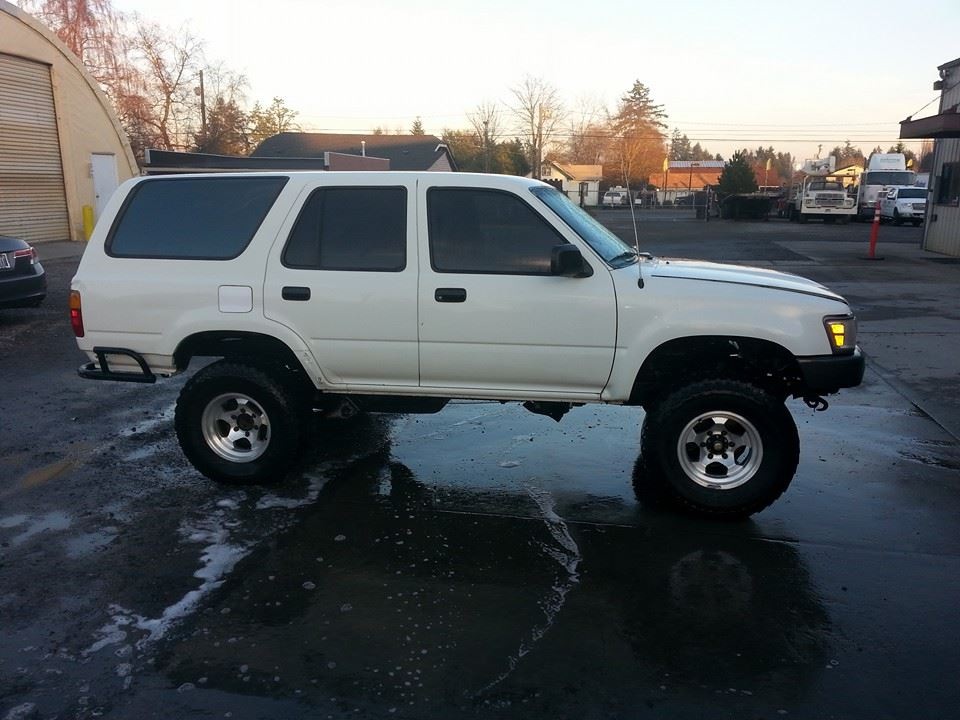
I purchased a 1993 4Runner with a 3vzfe from a friend for $500. It was very clean, looked to be stock ride height on 31s. My original plan was to swap a 3.4 into it but then I began reading about the 1UZFE and decided this was the swap for me.
[IMG]https://www.yotatech.com/<a href=http://s1292.photobucket.com/user/trevorsword/media/IMG_0696_zpscc5096a3.jpg.html target=_blank>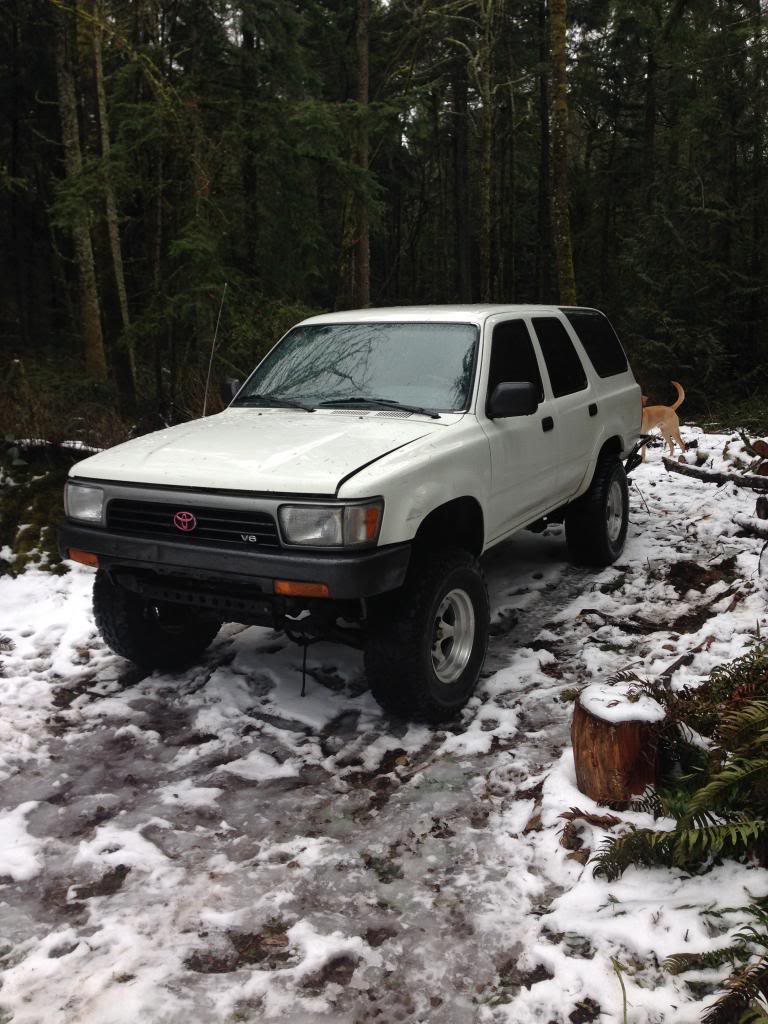
I found a engine on Craigslist, it was a complete conversion, came with all sensor, wire harness, ecu, transmission and many other extras. All the components came from a 1993 SC400 with 160K. I got all this for $500
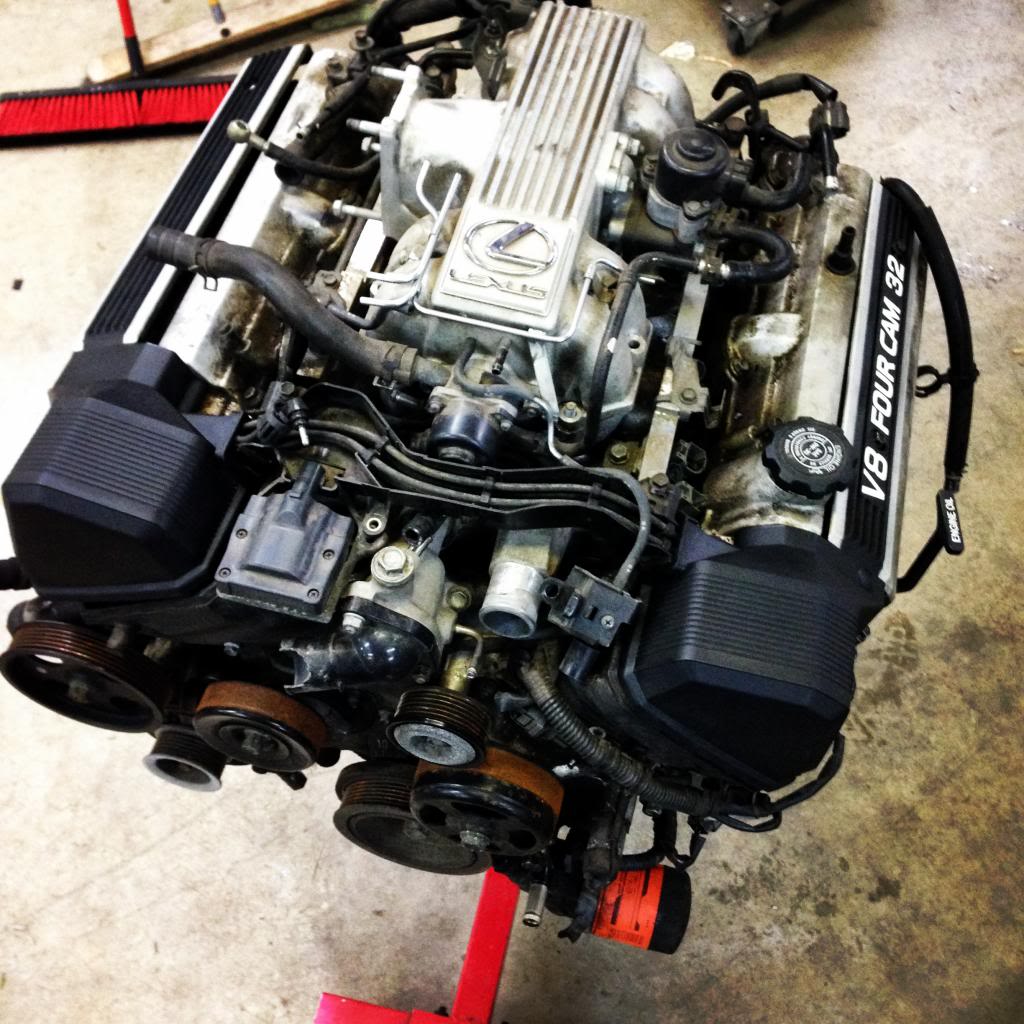
After I placed the engine on the stand, I began to remove valve cover, intake manifold and timing belt covers. I plan replacing those gaskets and replace timing belt, water pump, etc.
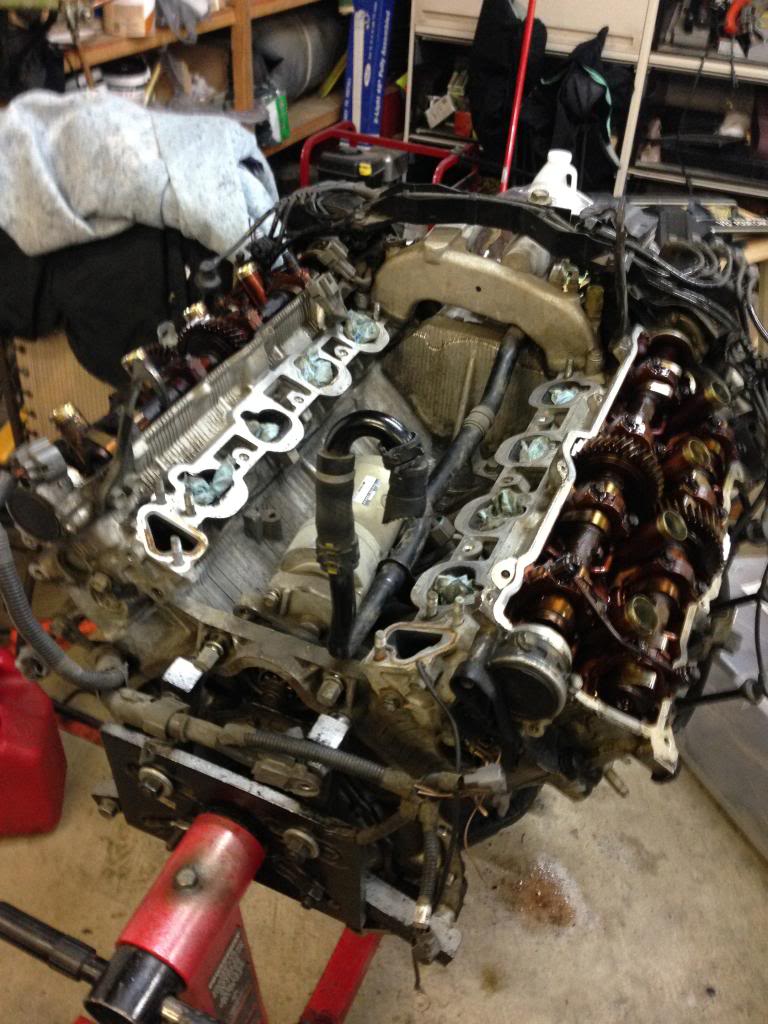
Hot tanked valve cover and manifold
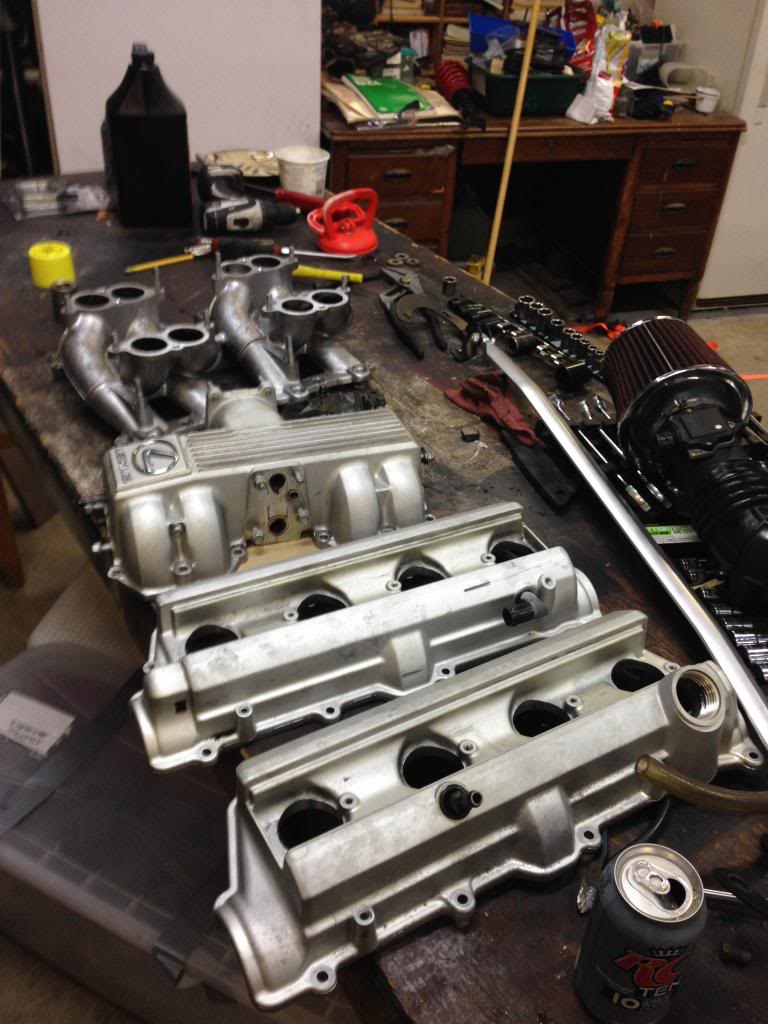
Today I ordered all the parts I need to refresh the engine they should be in later this week.
Total Cost
4Runner- $500
1UZFE Swap- $500
Gaskets and Replacement Parts $400
Total- $1400

[IMG]https://www.yotatech.com/<a href=http://s1292.photobucket.com/user/trevorsword/media/IMG_0696_zpscc5096a3.jpg.html target=_blank>
I found a engine on Craigslist, it was a complete conversion, came with all sensor, wire harness, ecu, transmission and many other extras. All the components came from a 1993 SC400 with 160K. I got all this for $500
After I placed the engine on the stand, I began to remove valve cover, intake manifold and timing belt covers. I plan replacing those gaskets and replace timing belt, water pump, etc.
Hot tanked valve cover and manifold
Today I ordered all the parts I need to refresh the engine they should be in later this week.
Total Cost
4Runner- $500
1UZFE Swap- $500
Gaskets and Replacement Parts $400
Total- $1400
Last edited by Tsword; Mar 31, 2014 at 10:52 AM.
Apr 7, 2014 | 01:02 AM
#4
Thread Starter
Registered User
Joined: Mar 2014
Posts: 22
Likes: 0
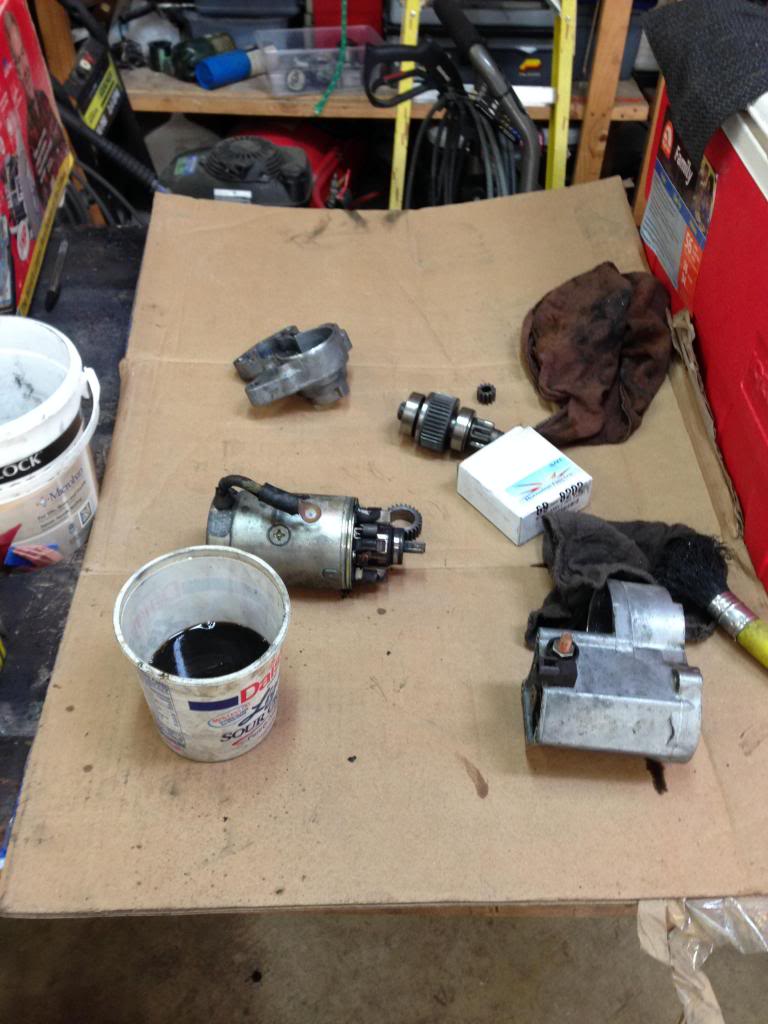
Removed the starter and began rebuilding it. I bought new brushes, contacts and solenoid
I then began to remove all the components of the timing belt and replace them.
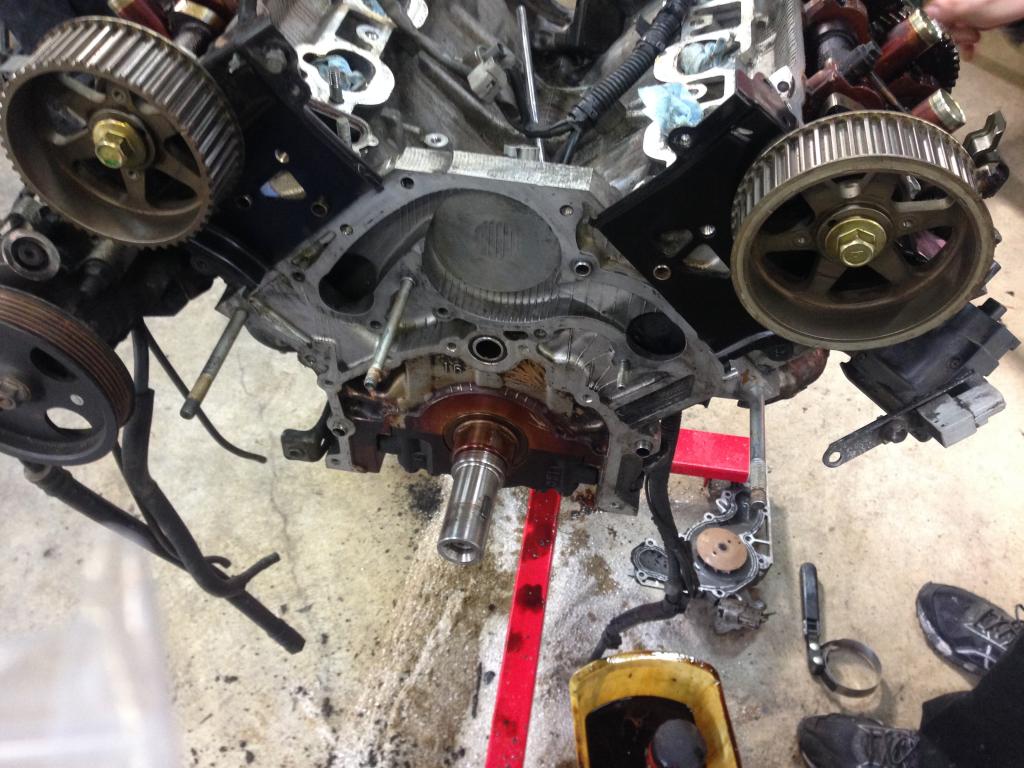
I installed the new timing belt, water pump, and pulleys.
I'm a little nervous about the wiring, I don't have a ton of experience with wiring. I've been thinking about having tweek'd performance convert my harness. I would rather not pay for this and wire it my self. Does any body have experience with wiring the 1uz? Whats my best option
I also sold the 1uzfe auto transmission.
Total Cost:
4Runner- $500
1UZFE Swap- $500
Gaskets and Replacement Parts $400
Automatic Transmission -$250
Total- $1150
I then began to remove all the components of the timing belt and replace them.
I installed the new timing belt, water pump, and pulleys.
I'm a little nervous about the wiring, I don't have a ton of experience with wiring. I've been thinking about having tweek'd performance convert my harness. I would rather not pay for this and wire it my self. Does any body have experience with wiring the 1uz? Whats my best option
I also sold the 1uzfe auto transmission.
Total Cost:
4Runner- $500
1UZFE Swap- $500
Gaskets and Replacement Parts $400
Automatic Transmission -$250
Total- $1150
Last edited by Tsword; Apr 7, 2014 at 01:06 AM.


 Apr 7, 2014 | 11:25 AM
#7
Registered User
iTrader: (1)
Joined: Nov 2012
Posts: 358
Likes: 0
From: Elko NV, at the foot of the Rubys
I really wanted to do this swap, but just can't right now. Looks like you got a sweet deal though, definitely takes time to come across those. Just curious, what adapter are you using to the trans?
Trending Topics
Apr 7, 2014 | 11:47 PM
#8
Thread Starter
Registered User
Joined: Mar 2014
Posts: 22
Likes: 0
The adapter I am using is this one......
http://www.ebay.com/itm/1uz-1uzfe-toyota-Bellhousing-R150-R151-R154-gearbox-bellhousing-only/281305210553?_trksid=p2047675.c100011.m1850&_trkparms=aid%3D222008%26algo%3DSIC.MOTORS%26ao%3D1%26asc%3D21400%26meid%3D6054149060329335681%26pid%3D100011%26prg%3D9407%26rk%3D1%26rkt%3D10%26sd%3D271434073590
Then I will have the flywheel machined so the starter can engage and I will use a clutch for the 3.0.
Total Cost:
4Runner- $500
1UZFE Swap- $500
Gaskets and Replacement Parts $400
Automatic Transmission -$250
Bell Housing Adapter- $500
Total Cost: $1650
Last edited by Tsword; Apr 8, 2014 at 09:31 AM.
 Apr 14, 2014 | 10:48 AM
#10
Thread Starter
Registered User
Joined: Mar 2014
Posts: 22
Likes: 0
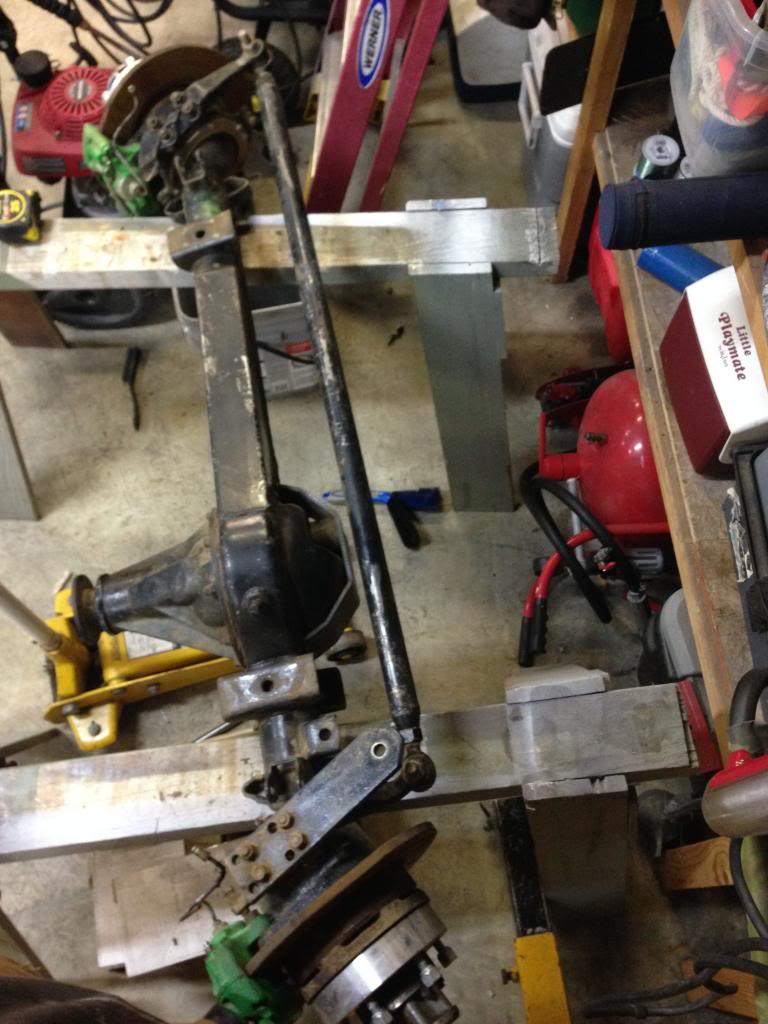
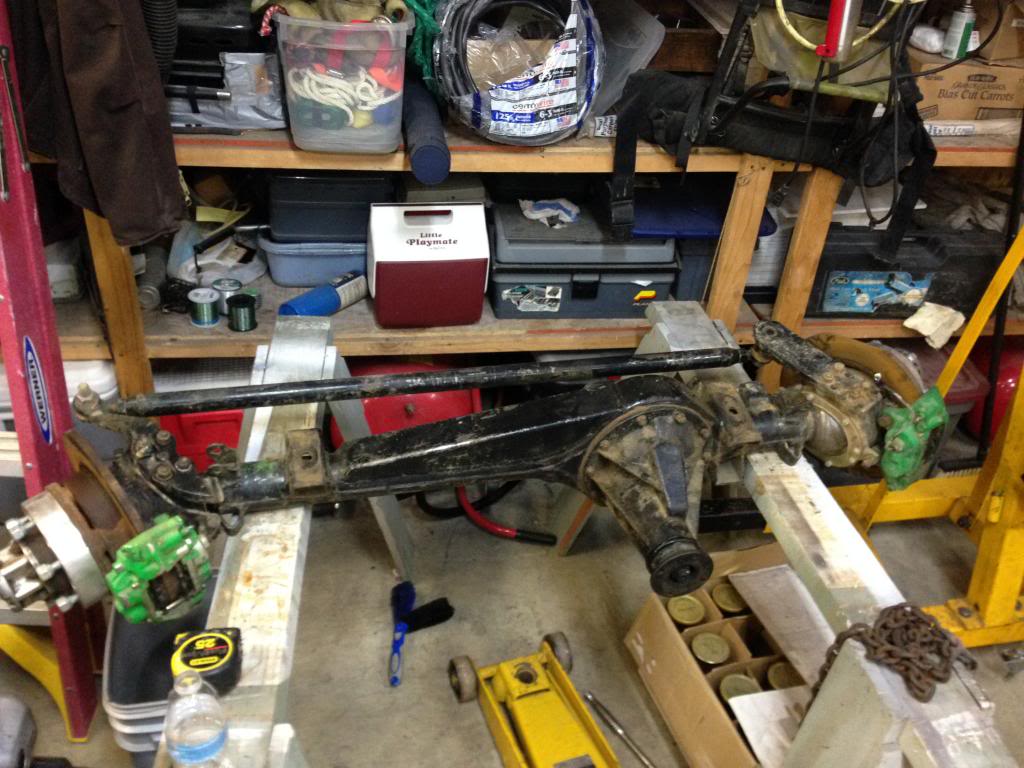
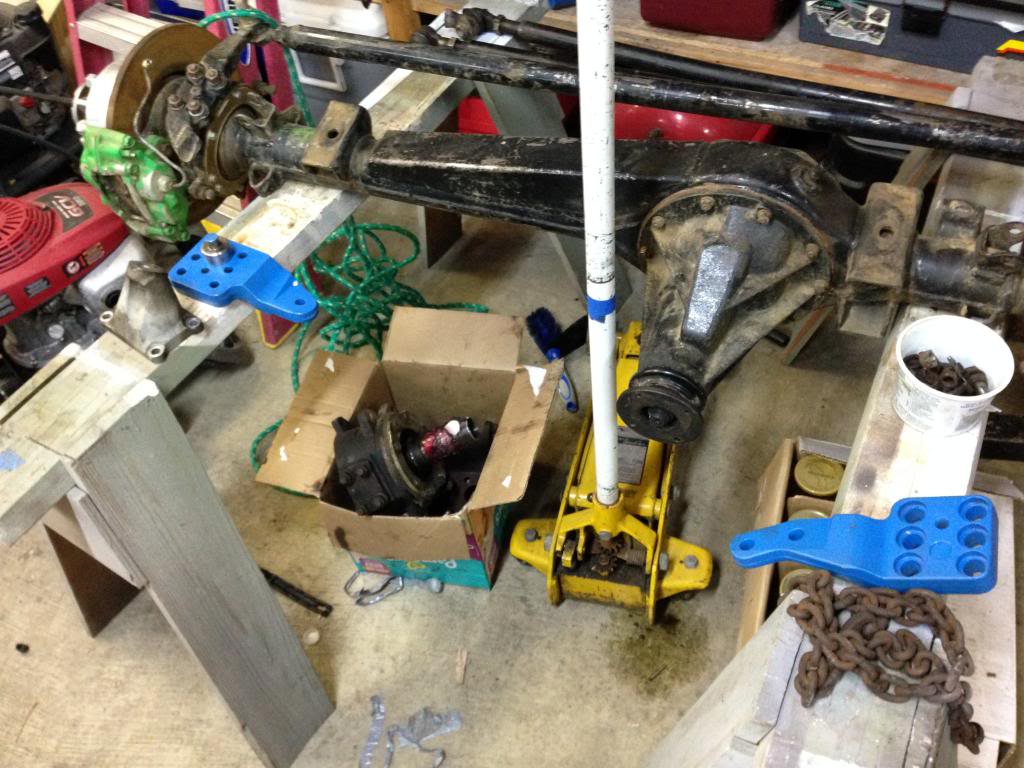
I scored a free E-locker from a TRD FJ Cruiser. My freind got it from the dealer he works at, it made a "pinion noise", it just needs a new bearing. I'm going to retrofit it to fit my existing housing. Other then that I haven't made to much progress on the swap, I'm thinking about sas it before I swap it. Ive been looking into the TG 3 Link set up.
 May 4, 2014 | 09:19 PM
#12
Thread Starter
Registered User
Joined: Mar 2014
Posts: 22
Likes: 0
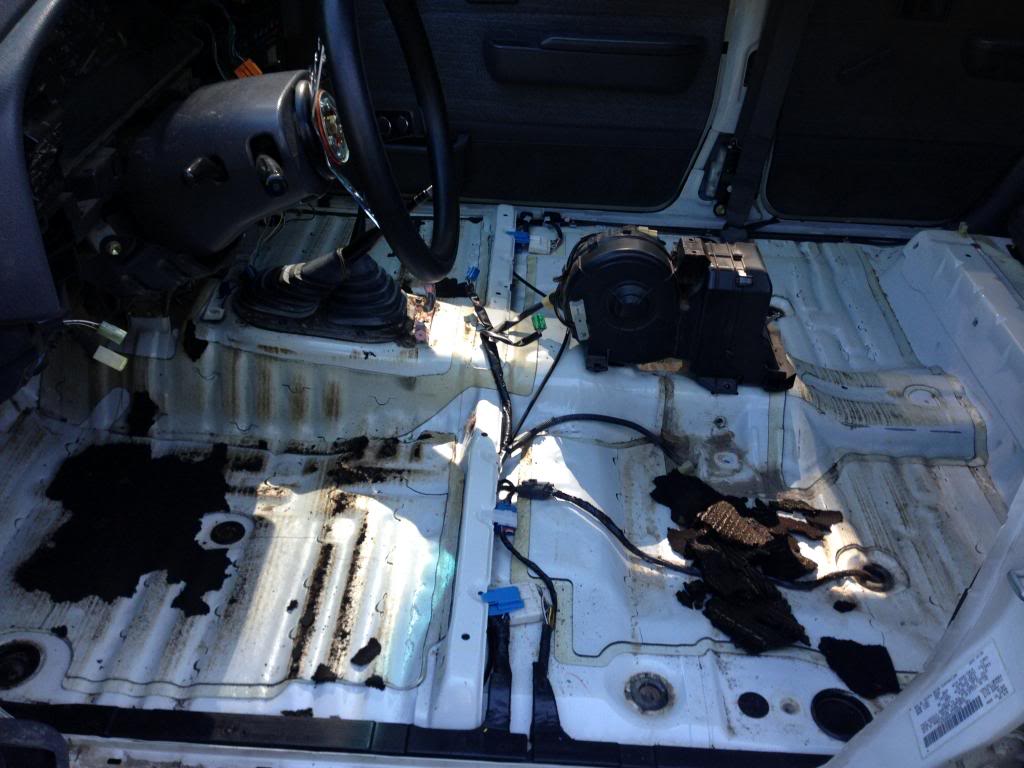
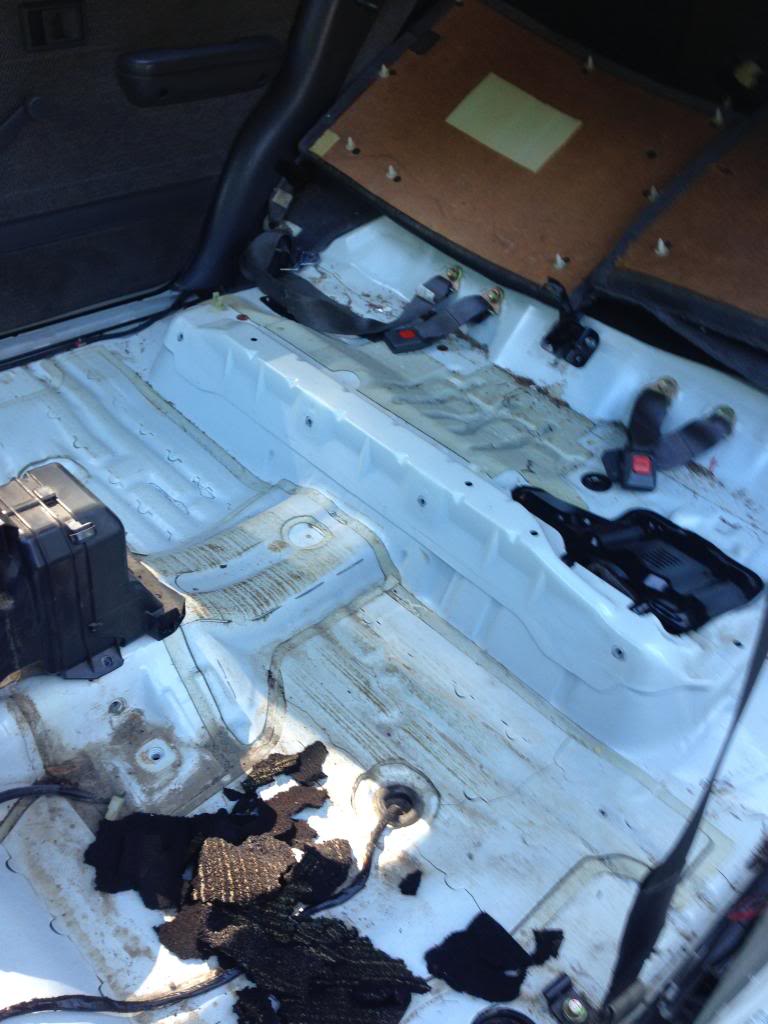
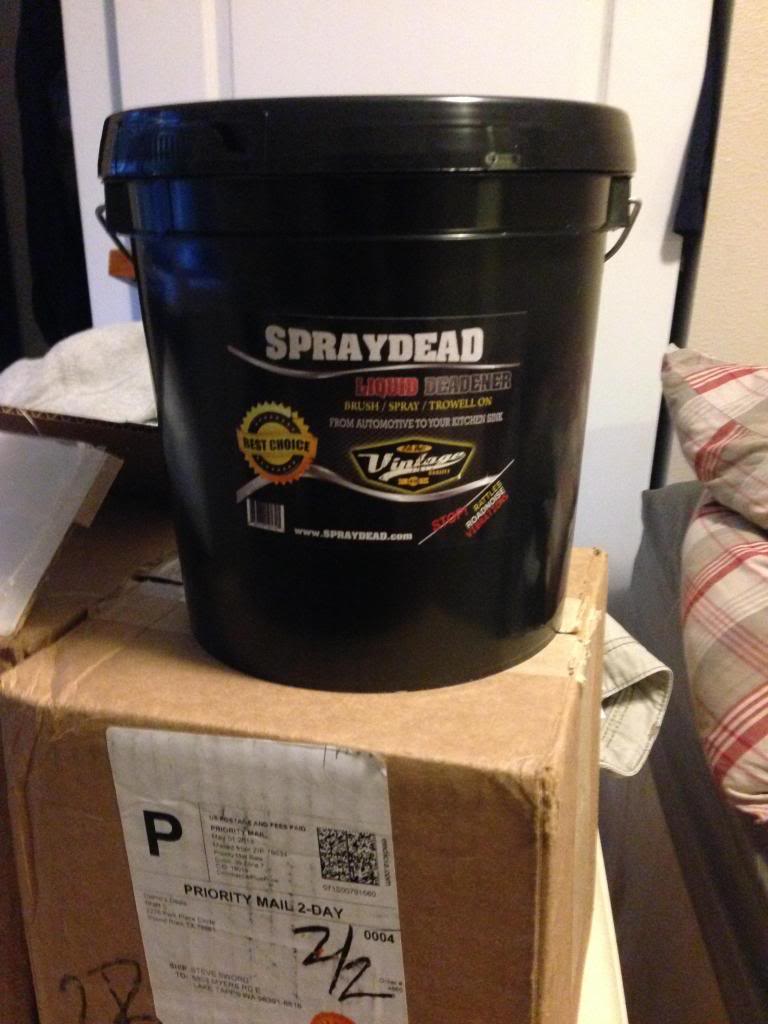
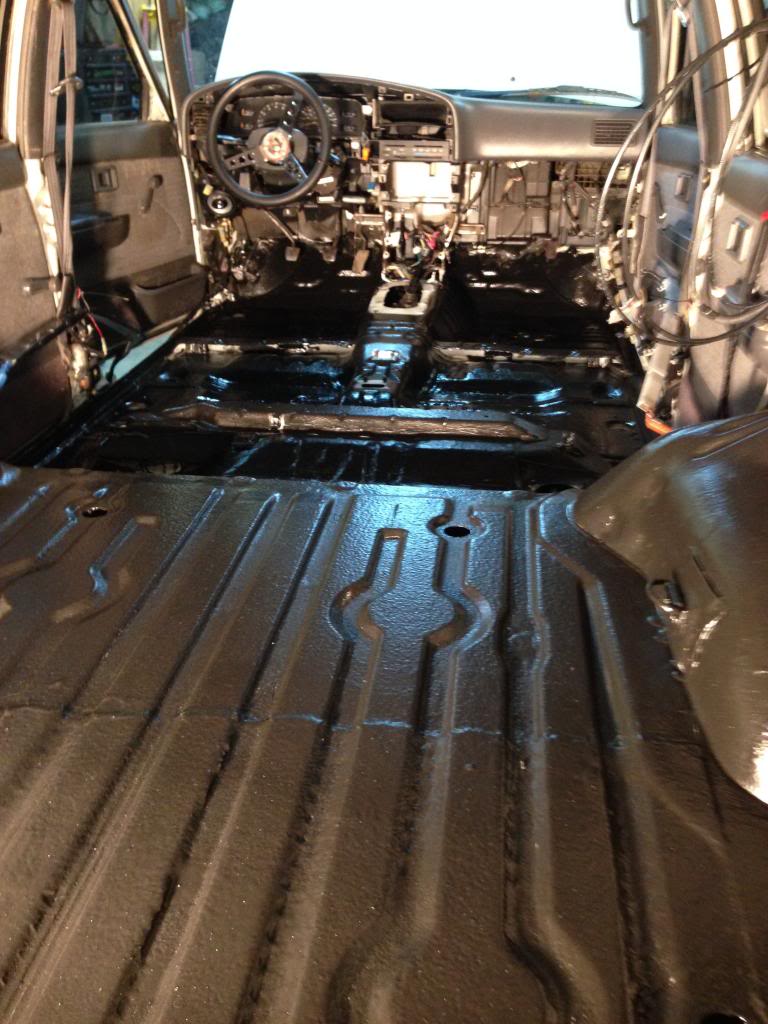
I started on the wiring, I will take some pictures and give a more detailed post later, I decided to SAS it while I do the swap, I purchased a 80 pick up axle, it was rebuilt, has TG diff armor and truss. Ill be buying a the TG 3link kit and high steer this week. I also began to take the interior apart to clean and take out carpet, Im going to bedliner the floor, but first try some paint on sound deadener under the bedliner called spraydead. Everything I've read about it says it works well. I contacted the company and they said it was alright to spray beadliner over the top of it. So I guess ill see how it goes.
Last edited by Tsword; May 4, 2014 at 09:20 PM.
May 4, 2014 | 09:55 PM
#13

Registered User
Joined: Mar 2013
Posts: 1,060
Likes: 48
This should be awesome when finished! Is the axle gusseted? I think I read somewhere that pre 84/85 axles were not gusseted from the factory. Could be wrong though. Also have you heard of 4wheelunderground for another coil suspension setup?
May 4, 2014 | 09:59 PM
#14
Thread Starter
Registered User
Joined: Mar 2014
Posts: 22
Likes: 0
Yeah your right, i want to say the 79-85 axles had no gusset, the person I bought it from added it. I have looked into the 4wheelunderground set up, but its out of my price rang right now. It defiantly looks like a better kit.
 Jun 26, 2014 | 10:54 AM
#17
Thread Starter
Registered User
Joined: Mar 2014
Posts: 22
Likes: 0
Thanks for the replys!
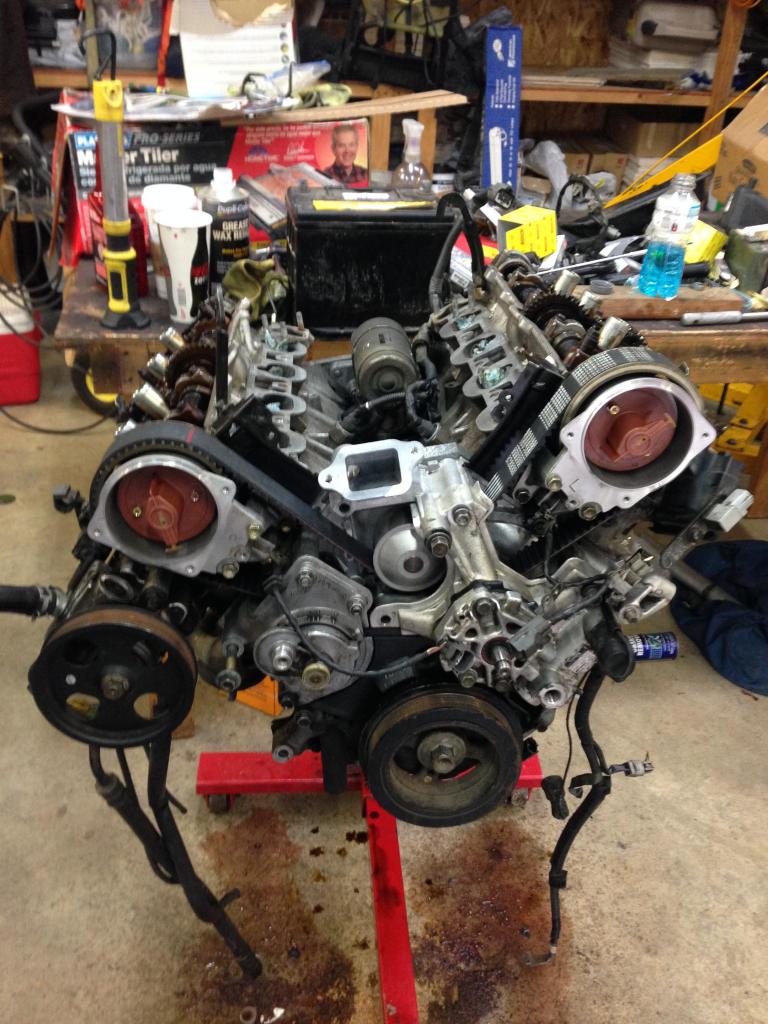
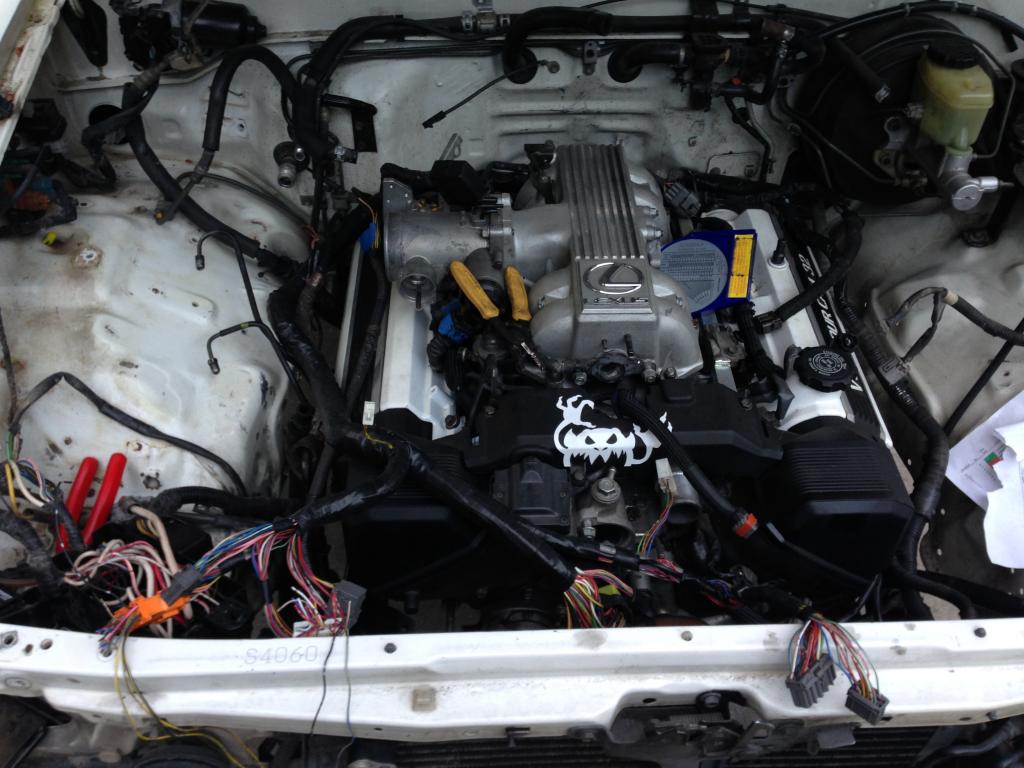
Its been a while since my last post and i have made some progress. I cut off all the ifs
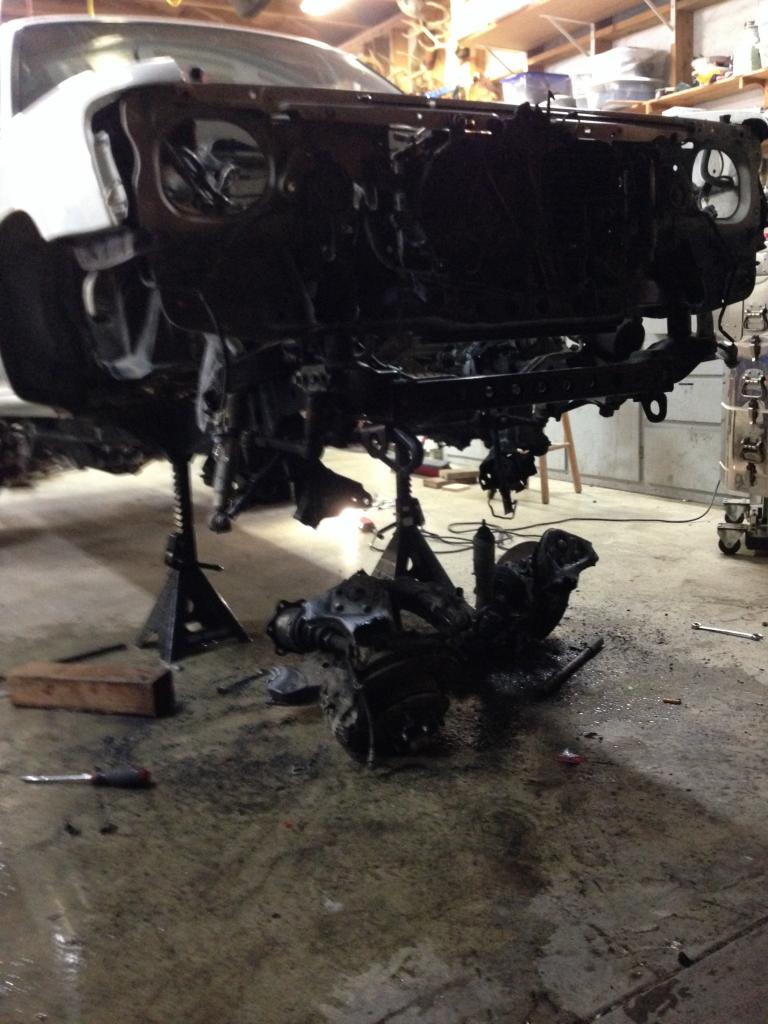
Mounted the engine it, I made some L brackets for the mounts and bolted the sc400 mounts to it. The engine fit very well, the 2inch body lift helped alot.
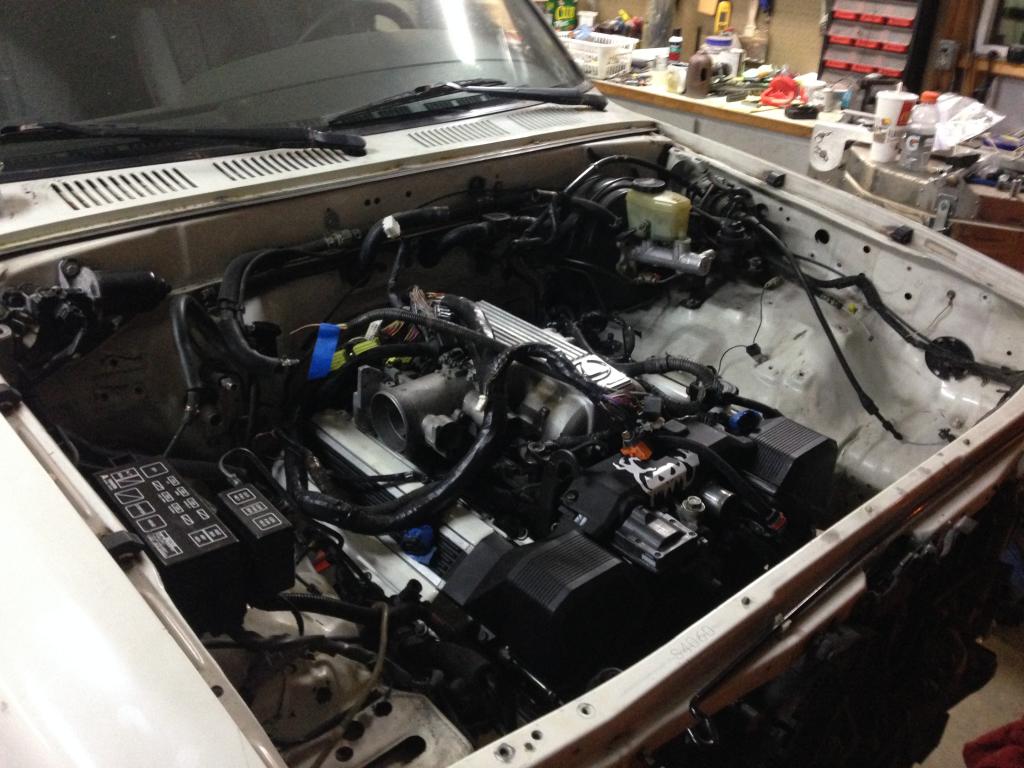
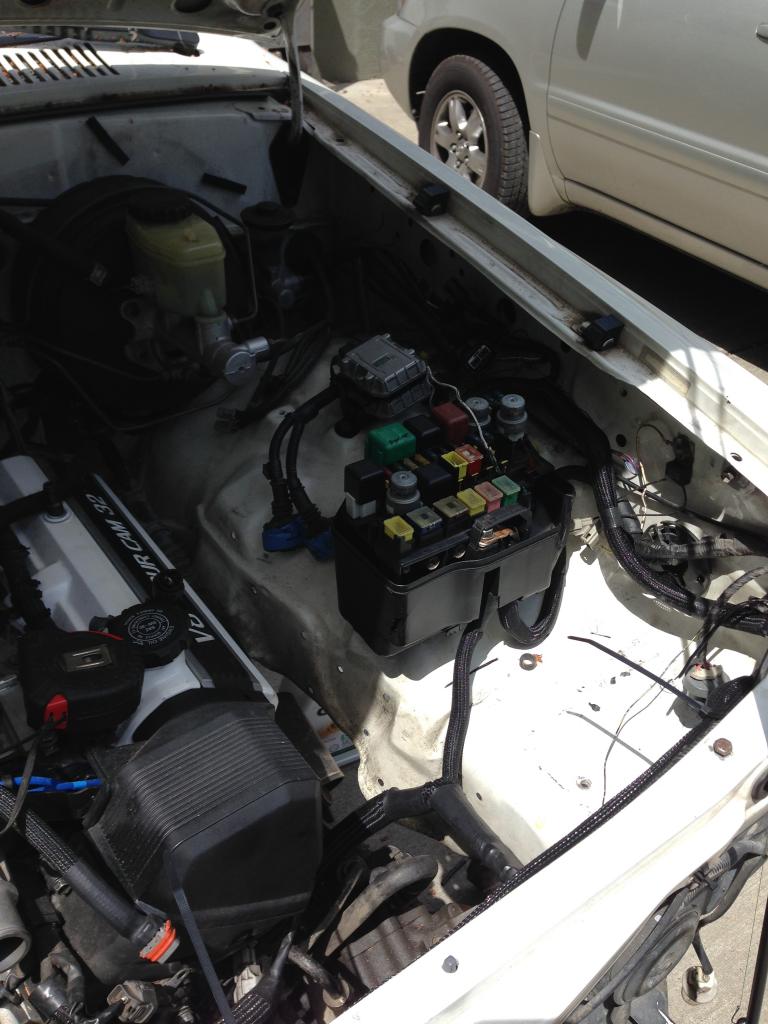
Then I began wiring, I basicly took the sc400 fuse block and integrated it into the 4runner. This wasn't very difficult, I also ran all the wires i need for the gauge cluster.
Ill go into more detail and draw some diagrams to help people out if there doing the swap.
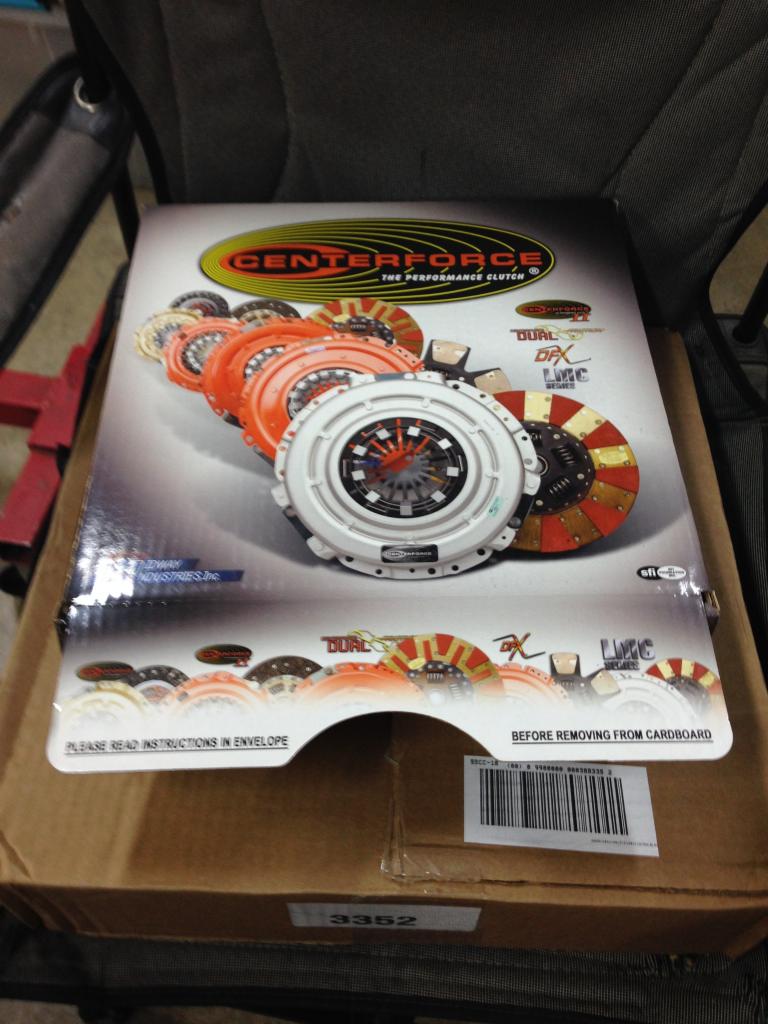
New Clutch Stage 2 centerforce
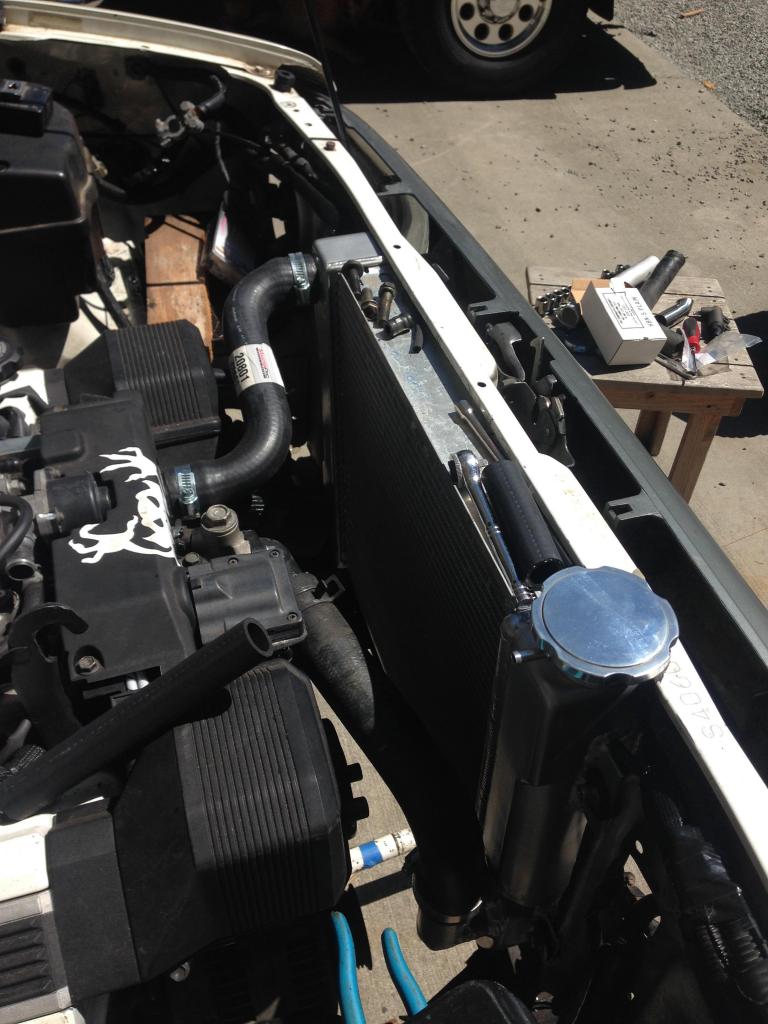
New radiator
Its a CFR Performance radiator dimensions are 22"W x 16.5"H x 3"D
its the ultracool model and they say its good for 1000hp, its used for race/street 350s.
http://www.cfrperformance.com/CFR_UL...p/hz-50010.htm
Its been a while since my last post and i have made some progress. I cut off all the ifs
Mounted the engine it, I made some L brackets for the mounts and bolted the sc400 mounts to it. The engine fit very well, the 2inch body lift helped alot.
Then I began wiring, I basicly took the sc400 fuse block and integrated it into the 4runner. This wasn't very difficult, I also ran all the wires i need for the gauge cluster.
Ill go into more detail and draw some diagrams to help people out if there doing the swap.
New Clutch Stage 2 centerforce
New radiator
Its a CFR Performance radiator dimensions are 22"W x 16.5"H x 3"D
its the ultracool model and they say its good for 1000hp, its used for race/street 350s.
http://www.cfrperformance.com/CFR_UL...p/hz-50010.htm
 Jun 29, 2014 | 09:34 PM
#19
Thread Starter
Registered User
Joined: Mar 2014
Posts: 22
Likes: 0
I want to run 36 or 37 tires, I've been watching craigslist looking for a good deal on a set. I tried starting it today, it turned over but fuel sprayed everywhere. Planning on fixing the fuel leak see if it starts, if not begin trouble shooting.
Aug 12, 2014 | 12:25 PM
#20
Thread Starter
Registered User
Joined: Mar 2014
Posts: 22
Likes: 0
Fixed the fuel lines then it still didn't start, I missed one wire to turn on the efi relay and the fuel pump would only run for 20 seconds. The COR was kicking off so i wired it into the ignition for now. Eventually i will wire in the fuel pump ecu or find a switched ground from the sc400 ecu. It runs very well now. The check engine is acting weird its on when I turn run the engine but when check for codes it flashes constantly. From what i have read it means no codes are being stored. Ive check to make sure the ecus getting constant 12v and it is so thats not the problem. If anyones ran into this let me know.
I modified the crossmember because the transmission moved back a inch or so.

I also received the wrong clutch so i had to get that straightened out. Then i had to modify the bell housing and find the right throwout bearing. So for every one using a R150f transmission with the KS racing bellhousing this is what worked for me.
The ks racing comes with a aluminum spacer, a input shaft extension and a pilot bearing.
with the r150f transmisison you need to use these.
First hammer the alum spacer in the crank
Then put the pilot bearing in.
Put the input shaft extension on the input shaft of transmission.
Mine was a tight fit and I hammered it on.
next the throwout bearing
Im using a 3.0 Flywheel, clutch and pressure plate.
You need a 3.4 Throwout bearing because the 3.0 is to short.
Then you must put two washers under the clutch fork ball. This will give you the right amount of throw.
Then I used the stock 3.0 slave cylinder
I had to shave about 1.25" off of the mounting location and redrill the holes.
I forgot to take pictures of this.
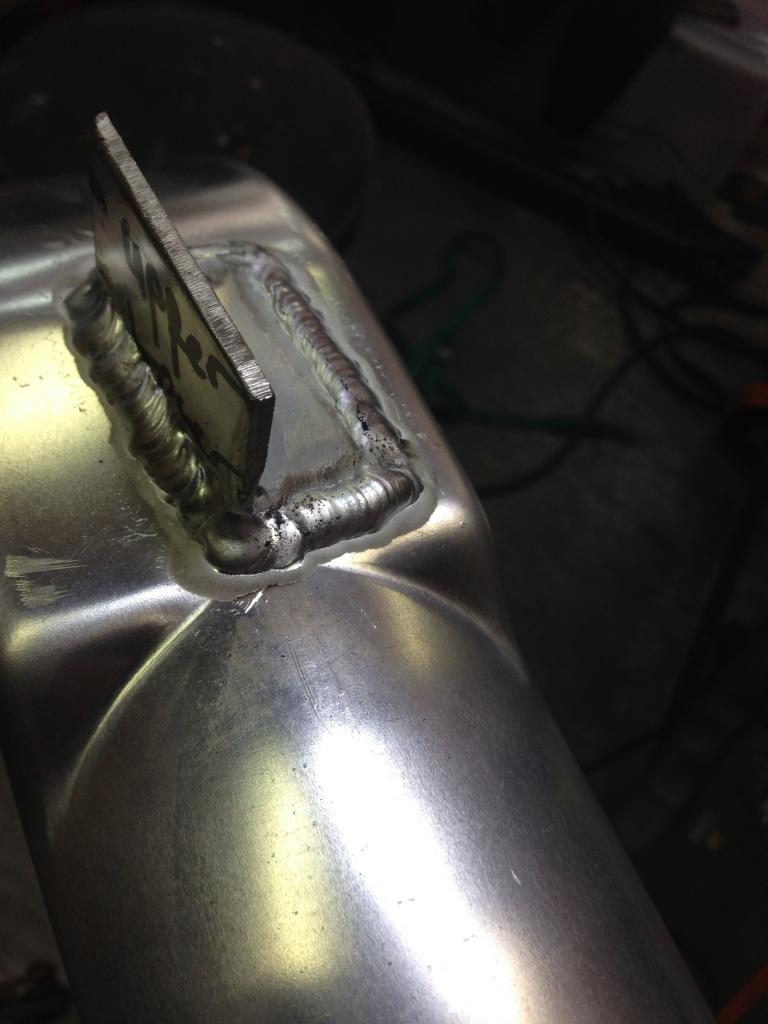
Then I installed the radiator, i had to make the bottom outlet a 90 degree turn up to make it fit. I also welded some brackets on the side so i could mount it.
Now its time for links the engine is pretty much done. I do still need to make an intake and figure out the check engine light.
I modified the crossmember because the transmission moved back a inch or so.
I also received the wrong clutch so i had to get that straightened out. Then i had to modify the bell housing and find the right throwout bearing. So for every one using a R150f transmission with the KS racing bellhousing this is what worked for me.
The ks racing comes with a aluminum spacer, a input shaft extension and a pilot bearing.
with the r150f transmisison you need to use these.
First hammer the alum spacer in the crank
Then put the pilot bearing in.
Put the input shaft extension on the input shaft of transmission.
Mine was a tight fit and I hammered it on.
next the throwout bearing
Im using a 3.0 Flywheel, clutch and pressure plate.
You need a 3.4 Throwout bearing because the 3.0 is to short.
Then you must put two washers under the clutch fork ball. This will give you the right amount of throw.
Then I used the stock 3.0 slave cylinder
I had to shave about 1.25" off of the mounting location and redrill the holes.
I forgot to take pictures of this.
Then I installed the radiator, i had to make the bottom outlet a 90 degree turn up to make it fit. I also welded some brackets on the side so i could mount it.
Now its time for links the engine is pretty much done. I do still need to make an intake and figure out the check engine light.


