
square tube d shaft slip joint
 Mar 1, 2011 | 10:25 AM
#1
Thread Starter
Registered User
Joined: Aug 2010
Posts: 92
Likes: 0
From: miranda,ca
square tube d shaft slip joint
got a sqare tube built recently and it works great, but i kind of want to make the slip better. was wondering if anyone has done anything with that?
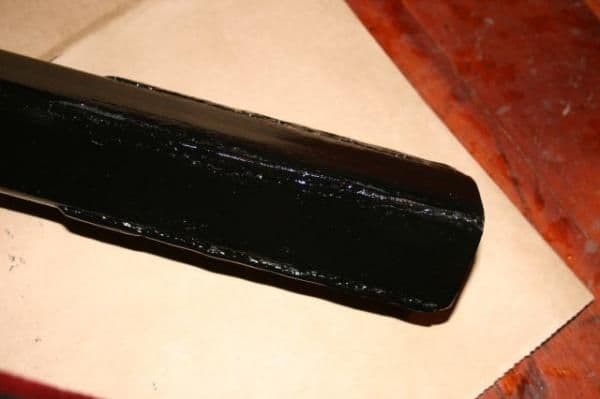
im thinking of putting welds on the corners and grinding down untill its tight. this a good move or should i just leave it alone?
im thinking of putting welds on the corners and grinding down untill its tight. this a good move or should i just leave it alone?
Mar 2, 2011 | 08:59 AM
#3
Thread Starter
Registered User
Joined: Aug 2010
Posts: 92
Likes: 0
From: miranda,ca
thats kind of what i was thinking. will i have any problem with heat bending the tube, or just put one tack at a time to keep that from happening? (i know its .25 but dont want to make the tube all squirrely)
thanks for the confirmation that im on the right track.
thanks for the confirmation that im on the right track.
 Mar 2, 2011 | 12:17 PM
#6
Thread Starter
Registered User
Joined: Aug 2010
Posts: 92
Likes: 0
From: miranda,ca
well i got it up to 45-50 mph and it had some vibs but worked good so...no reason. buuut i wanted to improve upon it. figured with the slop the shaft wasnt a strait line, so making it tighter could also be easer on the ujoints. also noise should be improved although that wasnt a big deal
Trending Topics
Mar 8, 2011 | 09:22 AM
#8
Thread Starter
Registered User
Joined: Aug 2010
Posts: 92
Likes: 0
From: miranda,ca
so after testing the new set up i would say it was a great idea. it doesnt bind up at all, almost no noise and i took it on the street w/ hubs locked/out of 4x4 to 50 mph and vibes felt about as bad as an out of balance wheel. it just works better.
Apr 8, 2011 | 07:35 PM
#11
Registered User
Joined: Jan 2007
Posts: 6,106
Likes: 27
^And more slip(than a stock front driveshaft).
http://infohost.nmt.edu/~jscarbro/driveshaft.htm
Here was my problem: there was not enough slip in the driveshaft to handle the added flex created by my homemade leaf packs and longer shackles. There would be about 1-3/4" of travel left to pull the shaft apart on the RTI ramp, yet on the trail, due to various issues such as axle wrap, and unexpected articulation, the shaft would pull apart.

The solution: Make a SQUARE DRIVESHAFT
I decided to make a square driveshaft for my 1983 Toyota PU. Why?...you may ask. I did this for the following 5 reasons:
1. To get more "slip" (travel before the driveshaft comes apart).
2. It is strong.
3. It is easy to make and fix.
4. It is CHEAP!!!
5. It is EXTREMELY CHEAP!!!!!
I needed a long travel driveshaft. Normally these long travel driveshafts cost between $200-$300. A square driveshaft can cost as little as $10 or $20....sounds good to me!
Though some people look at a square driveshaft, and think..."How ghetto," there are several advantages, which I listed above, when it comes to square driveshafts.
Slip (travel)
This was my main reason for making a new driveshaft. With my regular travel splined driveshaft, I had room for about 1-3/4" compression, and 3 inches of extension allowable in the splines before they would pull apart. With the square driveshaft, I made it so that there was about 3" compression, and 8" extension in the shaft before it would pull apart. These are all from the position of the shaft at rest. I am 100% positive I would never pull apart this shaft on the trail unless my axle fell off!
Strength
The square driveshaft is very strong. Though cylinders are ideal for torsional loads, the square tubing is still very strong, and the odds of the tube shearing or the corners being rounded off (by each other) is very unlikely. The upper tube is "receiver hitch" tube. It is approximately 2.5" OD with a .25" wall thickness. The bottom tube is 2" OD tube with a 3/16" wall (because that is what I had). That piece would be the only piece that I would worry about. The fact that the bottom tube extends so far up into the top tube adds a lot of strength to the overall assembly, and lessens the likelihood of smashing the upper tube at least.
CHEAP!!!
This shaft is very cheap, because you should already have the parts, except for the tubing. The tubing should cost no more than $20. Zerk fittings are $5. Total: $25 Can't beat that!
Ease of Construction
The square driveshaft is very easy to make, and can be done in a few hours...
Last edited by MudHippy; Apr 9, 2011 at 08:56 AM.


 Apr 8, 2011 | 08:23 PM
#13
Registered User
Joined: Aug 2004
Posts: 1,209
Likes: 0
From: Pueblo, CO
I tried welding some fat beads and grinding they down on my front shaft before my Moab trip. It was quieter the first day and after that, it was back to noise  Oh well, worth a shot. Since I put a twin stick in, I've been using 2wd low alot and the front DS makes a ton of noise with no power from the t-cases and just being spun by the front axle and locker. You get used to it on the trail though.
Oh well, worth a shot. Since I put a twin stick in, I've been using 2wd low alot and the front DS makes a ton of noise with no power from the t-cases and just being spun by the front axle and locker. You get used to it on the trail though.
Apr 9, 2011 | 08:50 AM
#15
I tried welding some fat beads and grinding they down on my front shaft before my Moab trip. It was quieter the first day and after that, it was back to noise Oh well, worth a shot. Since I put a twin stick in, I've been using 2wd low alot and the front DS makes a ton of noise with no power from the t-cases and just being spun by the front axle and locker. You get used to it on the trail though.
Oh well, worth a shot. Since I put a twin stick in, I've been using 2wd low alot and the front DS makes a ton of noise with no power from the t-cases and just being spun by the front axle and locker. You get used to it on the trail though.
Apr 10, 2011 | 12:41 PM
#17
Registered User
Joined: Sep 2009
Posts: 64
Likes: 0
my solution was a thin strip of metal welded front and back to the whole length of the slip on all sides to make a nice tight fit. Mine has been up to 40 with hubs locked and i get no noticeable vibes. Elminated almost all slop i had when i first made the shaft

Apr 11, 2011 | 10:32 AM
#19
That's actually what I was thinking about doing. How thick was the shim? .030, .040"?
Apr 11, 2011 | 08:04 PM
#20
Registered User
Joined: Sep 2009
Posts: 64
Likes: 0
ill go out and measure extras of what i used tomorrow with some calipers but i also used 3/16th instead of 1/4" wall square tubing so it will probably be different
Last edited by lazlow; Apr 11, 2011 at 08:08 PM.


