
drew303's '87 Single Cab 'My Truggy'
 Jan 21, 2011 | 03:45 AM
#1
Thread Starter
Registered User
Joined: Dec 2006
Posts: 2,880
Likes: 2
From: Olympia, WA
drew303's '87 Single Cab 'My Truggy'
**PRIVATE PROPERTY DISCLAIMER FOR ALL PHOTOS** 
I've been dreaming up a truggy design since i bought this truck almost 6 years ago and finally had the funds, experience and tools to make a dream become reality this past year. So starting somewhere around January of 2010 I started hammering down on a truggy design... researching what i wanted, how to do it and creating dozens of extensive full featured designs until finally settling with one that satisified all my requirements.
I had some radical ideas for this build that I envisioned myself and later did research to see if someone else had done it (closest in suspension are F-toys)... and only found out no one else had actually done it (or at least published their results on the web) and only found about a million web wheelers with their genius un backed (no real experience) opinions negating my ideas... so I decided to avoid a build thread and just entirely avoid what I'd later find out to be alot of unfounded criticism.
I know we're a community of picture whores so I'll leave the drab never read text here and post some pictures and keep my commentary brief and just start the story from the beginning.
Stock pile of crap on a bent frame no exhaust crappy tires pile of dog crap
It had a bent frame so I decided to frame swap it. Find the whole thread on it here:
https://www.yotatech.com/forums/f116...arning-122175/

Before the swap I had already junked the rear drums for a disc conversion. Thread here:
https://www.yotatech.com/forums/f116.../#post50586263
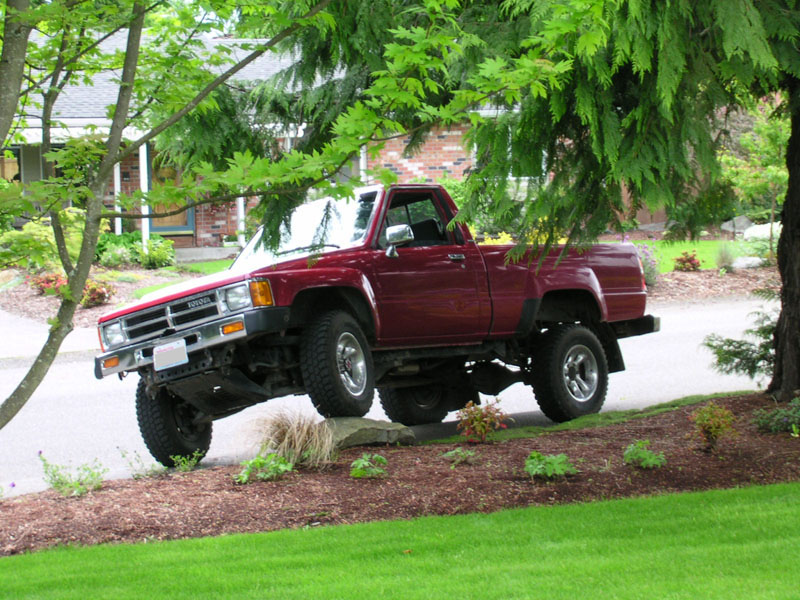
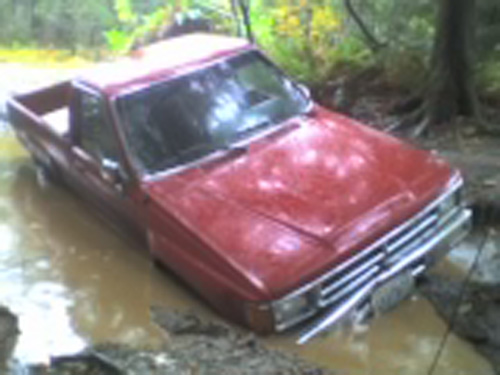
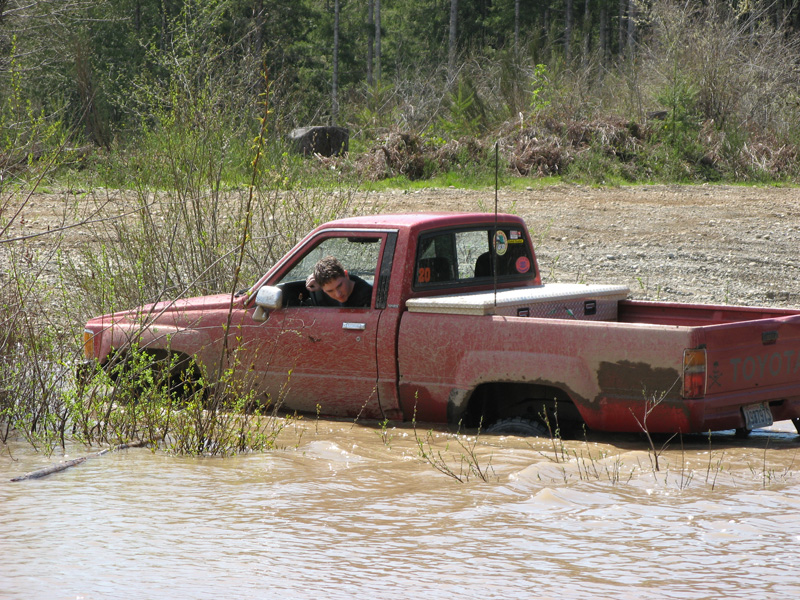
I had TONS of fun when it was still IFS... I mean tons, I beat the hell out of this truck and put it through everything it could possibly do.
some might recognize this picture from the YT forum banner


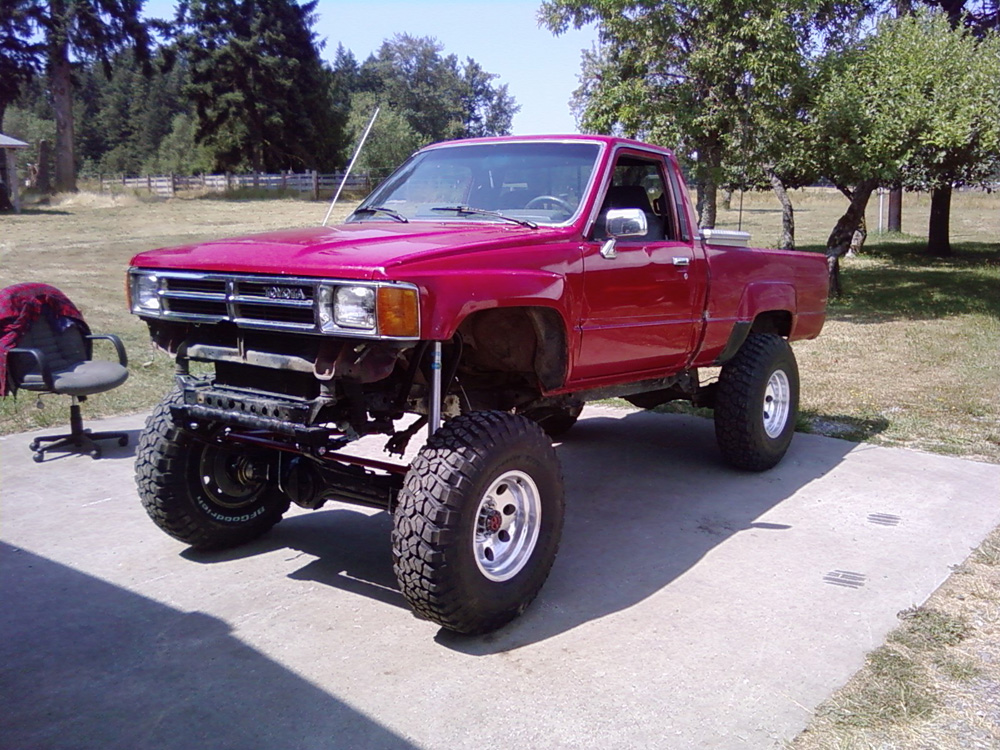
years later I SAS'd it.
Trail Gear 3" IFS eliminator Kit.
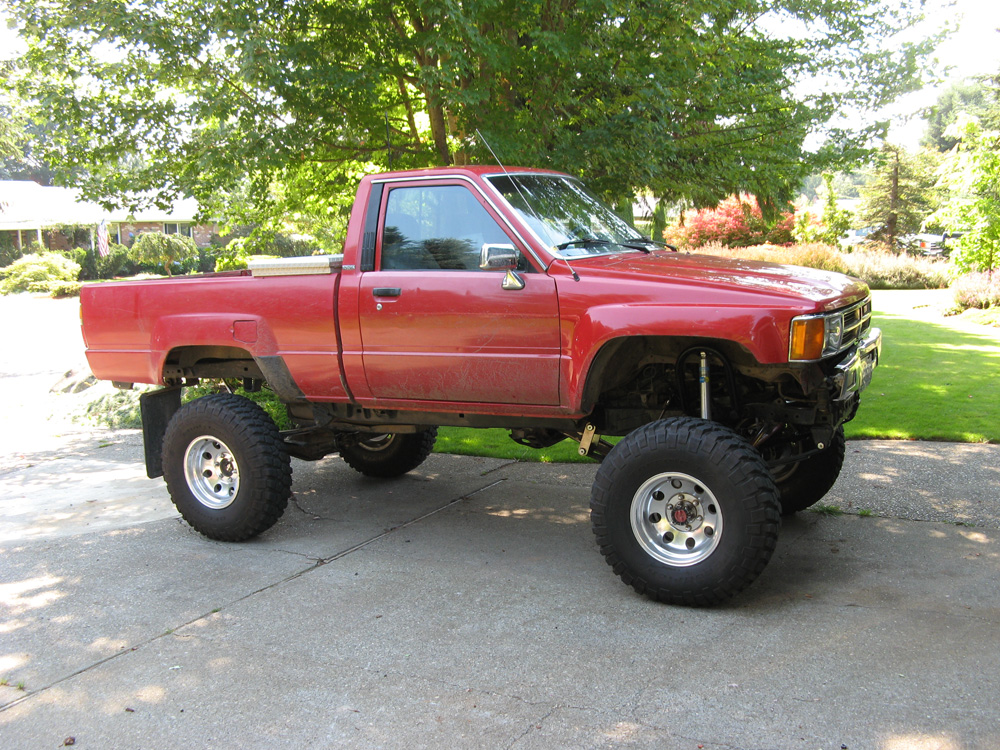
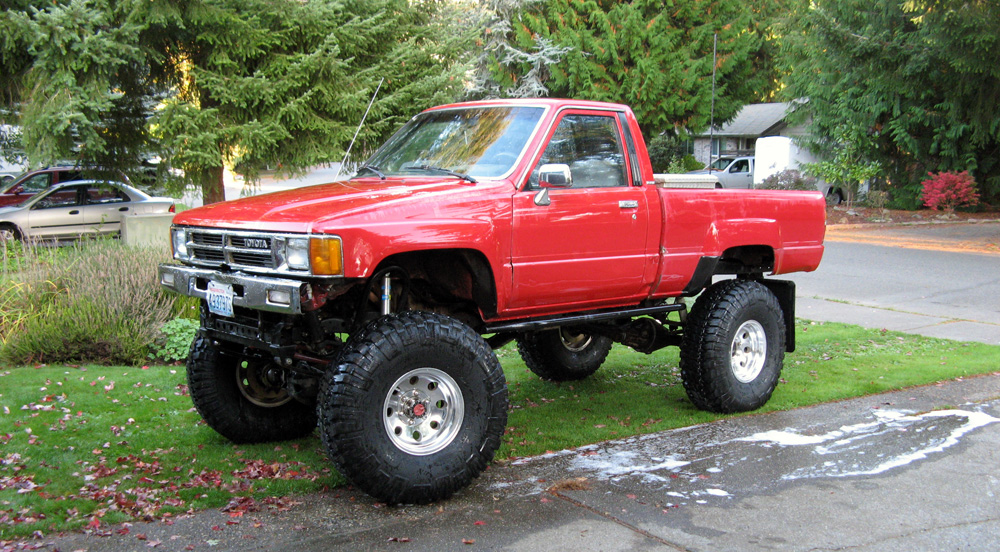
Heres the first rollout picture, 2" body lift, 3" TG kit, no rear mods done yet on brand new 33 KM2's
2" blocks in back and custom packs on 33's
skipping ahead... 5.29 gears... Aussie Rear locker.. Detroit Truetrac in the front axle (5.29 obviously as well) and 37x12.5R15 brand new Goodyear Wrangler MT/R's x5 (spare)

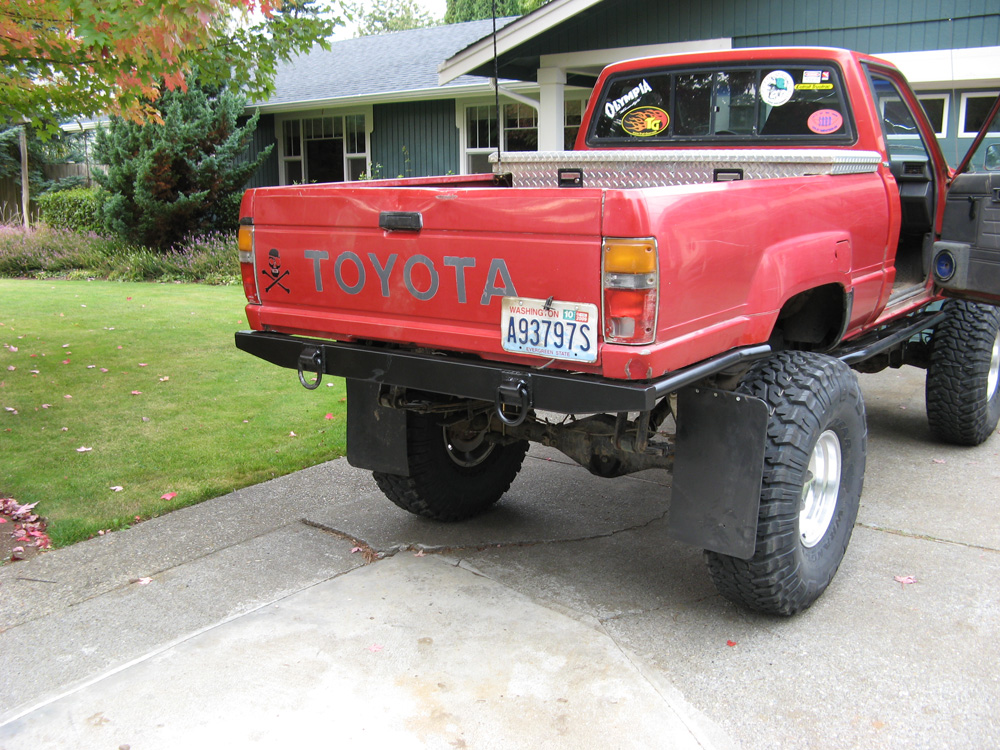
later I added a custom rear bumper... and TG sliders
thread here: https://www.yotatech.com/forums/f116...-heavy-193768/
 ....
....
I've been dreaming up a truggy design since i bought this truck almost 6 years ago and finally had the funds, experience and tools to make a dream become reality this past year. So starting somewhere around January of 2010 I started hammering down on a truggy design... researching what i wanted, how to do it and creating dozens of extensive full featured designs until finally settling with one that satisified all my requirements.
I had some radical ideas for this build that I envisioned myself and later did research to see if someone else had done it (closest in suspension are F-toys)... and only found out no one else had actually done it (or at least published their results on the web) and only found about a million web wheelers with their genius un backed (no real experience) opinions negating my ideas... so I decided to avoid a build thread and just entirely avoid what I'd later find out to be alot of unfounded criticism.
I know we're a community of picture whores so I'll leave the drab never read text here and post some pictures and keep my commentary brief and just start the story from the beginning.
Stock pile of crap on a bent frame no exhaust crappy tires pile of dog crap
It had a bent frame so I decided to frame swap it. Find the whole thread on it here:
https://www.yotatech.com/forums/f116...arning-122175/
Before the swap I had already junked the rear drums for a disc conversion. Thread here:
https://www.yotatech.com/forums/f116.../#post50586263
I had TONS of fun when it was still IFS... I mean tons, I beat the hell out of this truck and put it through everything it could possibly do.
some might recognize this picture from the YT forum banner
years later I SAS'd it.
Trail Gear 3" IFS eliminator Kit.
Heres the first rollout picture, 2" body lift, 3" TG kit, no rear mods done yet on brand new 33 KM2's
2" blocks in back and custom packs on 33's
skipping ahead... 5.29 gears... Aussie Rear locker.. Detroit Truetrac in the front axle (5.29 obviously as well) and 37x12.5R15 brand new Goodyear Wrangler MT/R's x5 (spare)
later I added a custom rear bumper... and TG sliders
thread here: https://www.yotatech.com/forums/f116...-heavy-193768/
....
Last edited by drew303; Dec 6, 2011 at 12:10 AM.
Jan 21, 2011 | 04:05 AM
#2
Thread Starter
Registered User
Joined: Dec 2006
Posts: 2,880
Likes: 2
From: Olympia, WA
Ok onto the Truggy
before picture

Ok so a little heads up on what the design consists of. First off I wanted to inboard the leaf springs. This means you mount the leaf springs closer together than what is stock. in a Formula Toyota Rock Crawler this means you mount the rear springs as close together as the front springs... i believe centered is 29"? ... dont quote me on that. Thats part of the F-toy rules... rear spring spacing. When you bring the springs together you gain articulation. It's fairly simple geometry in reality. The draw backs of bringing the spring packs closer is loss of stability ( in most peoples arguments )
The truth is.... This is a load of web heebish.... and this whole thread is about to be the first (of my knowledge) proof of this.
Under my circumstances.. inboarding the springs to almost the dimensions of a sas'd toyota front setup... is infact not detrimental to ON ROAD .. or OFF ROAD stability.
That aside I'll share some build photos:
new frame rail render


before picture
Ok so a little heads up on what the design consists of. First off I wanted to inboard the leaf springs. This means you mount the leaf springs closer together than what is stock. in a Formula Toyota Rock Crawler this means you mount the rear springs as close together as the front springs... i believe centered is 29"? ... dont quote me on that. Thats part of the F-toy rules... rear spring spacing. When you bring the springs together you gain articulation. It's fairly simple geometry in reality. The draw backs of bringing the spring packs closer is loss of stability ( in most peoples arguments )
The truth is.... This is a load of web heebish.... and this whole thread is about to be the first (of my knowledge) proof of this.
Under my circumstances.. inboarding the springs to almost the dimensions of a sas'd toyota front setup... is infact not detrimental to ON ROAD .. or OFF ROAD stability.
That aside I'll share some build photos:
new frame rail render
Jan 21, 2011 | 04:11 AM
#3
Thread Starter
Registered User
Joined: Dec 2006
Posts: 2,880
Likes: 2
From: Olympia, WA
skipping 6 months of designs and plans... ill go right into the near final renders


I'll update with build pics tomorrow... this took longer than i expected to put together. The truck is done and i took it to elbe for its first run and it did great. I'll have pics of that tomorrow but im to tired to cut them down and upload more tonight.
stay tuned
I'll update with build pics tomorrow... this took longer than i expected to put together. The truck is done and i took it to elbe for its first run and it did great. I'll have pics of that tomorrow but im to tired to cut them down and upload more tonight.
stay tuned

 Jan 21, 2011 | 12:02 PM
#6
Thread Starter
Registered User
Joined: Dec 2006
Posts: 2,880
Likes: 2
From: Olympia, WA
Ok, some more...
draft of the new chassis

beginning fabrication

The whole plan was to chop the frame directly behind the cab, build a whole new rear clip that is narrower (inbaorded leafs) and attach it to the front clip. It would slip inbetween the existing frame rails.
last wheeling trip before the overhaul smashed my door nicely doh!

little more progress


Putting the Tube bender to its first use

Tool box rails

draft of the new chassis
beginning fabrication
The whole plan was to chop the frame directly behind the cab, build a whole new rear clip that is narrower (inbaorded leafs) and attach it to the front clip. It would slip inbetween the existing frame rails.
last wheeling trip before the overhaul smashed my door nicely doh!
little more progress
Putting the Tube bender to its first use
Tool box rails
Jan 21, 2011 | 12:07 PM
#7
Registered User
Joined: Sep 2008
Posts: 3,887
Likes: 16
From: Spokane, WA
good idea with the inboarding.
alotta people don't realise that when you make your frame narrower, your flex goes up. alot.
main issue is shock mounting though..
when i'm gonna do my heep shocks, its gonna be a pain.. at 29", the spring width is pretty narrow.
alotta people don't realise that when you make your frame narrower, your flex goes up. alot.
main issue is shock mounting though..
when i'm gonna do my heep shocks, its gonna be a pain.. at 29", the spring width is pretty narrow.
Trending Topics
Jan 21, 2011 | 12:11 PM
#8
Thread Starter
Registered User
Joined: Dec 2006
Posts: 2,880
Likes: 2
From: Olympia, WA
One thing I wanted to do differently with the rear was have removeable shackles ... finding these mounts was kind of a pain, i ordered them from rockstomper.com since finding something like this locally was apparently impossible. Already used em at elbe! haha


Used creeper joints for the rear shackle hangars

Also got a TK1 Racing offroad sway bar (identical to Currie bar) in anticipation of increased on-road body roll and off camber instability that might happen with inboarding the rears (come to find out i have a $300 sway bar and now no real intentions of installing because the truck handles amazing)

last picture of the rig before cutting 'er in half

Used creeper joints for the rear shackle hangars
Also got a TK1 Racing offroad sway bar (identical to Currie bar) in anticipation of increased on-road body roll and off camber instability that might happen with inboarding the rears (come to find out i have a $300 sway bar and now no real intentions of installing because the truck handles amazing)
last picture of the rig before cutting 'er in half
Jan 21, 2011 | 12:22 PM
#9
Thread Starter
Registered User
Joined: Dec 2006
Posts: 2,880
Likes: 2
From: Olympia, WA
almost ready to be installed

starting the tear down, bumper cut off

tore down ready to be cut

frame cut and first night mockup with the new rear clip (nothings attached yet and thats not me, buddy workn hard with that beer lol)

welding it on

attached

Darn im out of time gotta go to work, I'll try and get some more pics up tomorrow if i have time ... i havent had a break in over a month I need a vacation.

starting the tear down, bumper cut off
tore down ready to be cut
frame cut and first night mockup with the new rear clip (nothings attached yet and thats not me, buddy workn hard with that beer lol)
welding it on
attached
Darn im out of time gotta go to work, I'll try and get some more pics up tomorrow if i have time ... i havent had a break in over a month I need a vacation.
Last edited by drew303; Sep 21, 2011 at 10:23 PM.


 to you. haha


