
stevenazevedo00's 1987 toyota build-up thread
 Nov 21, 2010 | 09:32 AM
#1
Thread Starter
Registered User
Joined: Mar 2010
Posts: 55
Likes: 0
From: tracy, ca
stevenazevedo00's 1987 toyota build-up thread
Ok so appearantly my first thread didnt make sense so heres the work i've dont to my truck in the past year alot of the stuff i have done id like to consider fairly unique cheap as hell and quality as far as visibility goes haha no everything i do i make sure it'll last a long time ill post write up's to my best ability
i just realized i put 1987 toyota lol im a dumba55
Ideas and To DO list
-nissan front fender extensions- done 15$
-Half doors - in progress 35$ so far
-spare tire carrier- done 35$ with all the hardware
-adding a gas tank in the old spare tire spot - looking for a gas tank to fit..
-total chaos kit - maybe?
-smittybuilt bumper hacked and ready to weld hitch reciever on for my jack- in progress
-canvas canopy from scratch maybe? - an idea im really leaning towards guestimating 150$-300$
-Maybe a grill swap from an early 70's yota havent seen one so far i think it might look cool?- in progress
-I forgot i was thinking about bobbing the bed i just need an extra one just in case lol - in progress
-Extra tow hook, antenna , maybe a bucket seat swap with center console, fog lights on bumper, leds in guage cluster, just some minor stuff maybe wing windows idea thanks to 87hillbillyoter's rig

i just realized i put 1987 toyota lol im a dumba55
Ideas and To DO list
-nissan front fender extensions- done 15$
-Half doors - in progress 35$ so far
-spare tire carrier- done 35$ with all the hardware
-adding a gas tank in the old spare tire spot - looking for a gas tank to fit..
-total chaos kit - maybe?
-smittybuilt bumper hacked and ready to weld hitch reciever on for my jack- in progress
-canvas canopy from scratch maybe? - an idea im really leaning towards guestimating 150$-300$
-Maybe a grill swap from an early 70's yota havent seen one so far i think it might look cool?- in progress
-I forgot i was thinking about bobbing the bed i just need an extra one just in case lol - in progress
-Extra tow hook, antenna
, maybe a bucket seat swap with center console, fog lights on bumper, leds in guage cluster, just some minor stuff maybe wing windows idea thanks to 87hillbillyoter's rig
Last edited by stevenazevedo00; Nov 22, 2010 at 11:53 AM.
Nov 21, 2010 | 09:52 AM
#3
Thread Starter
Registered User
Joined: Mar 2010
Posts: 55
Likes: 0
From: tracy, ca
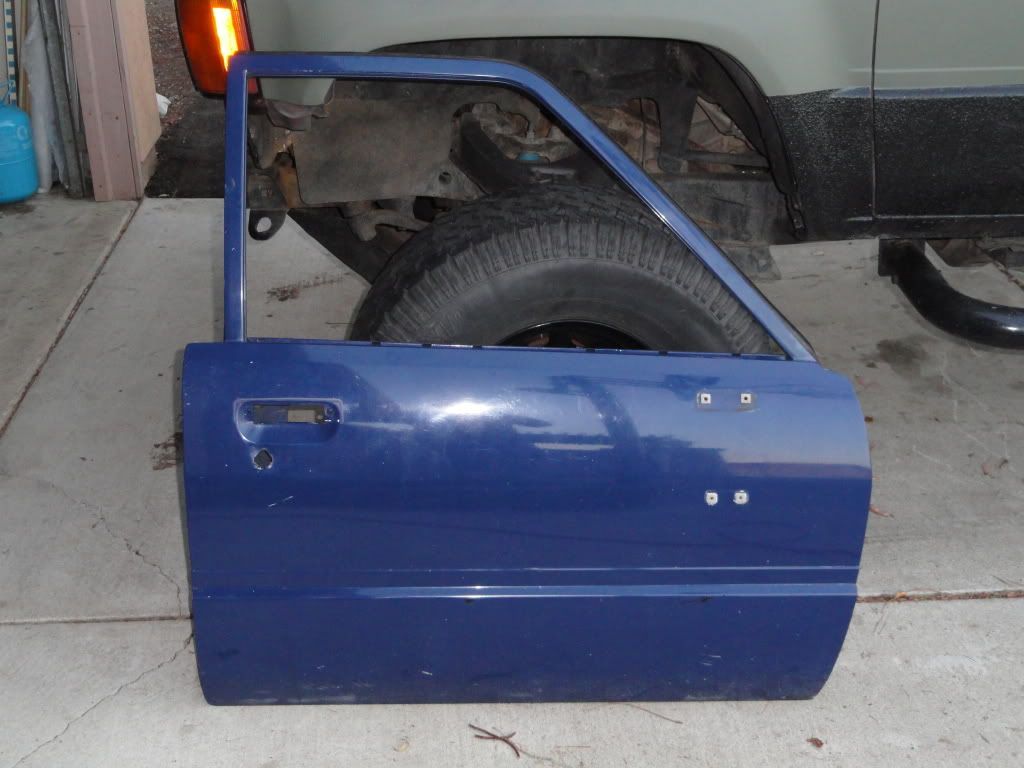
I got my doors from a cool guy out in santa cruz a couple months back with the intent of making some half doors and well heres my half door progress..

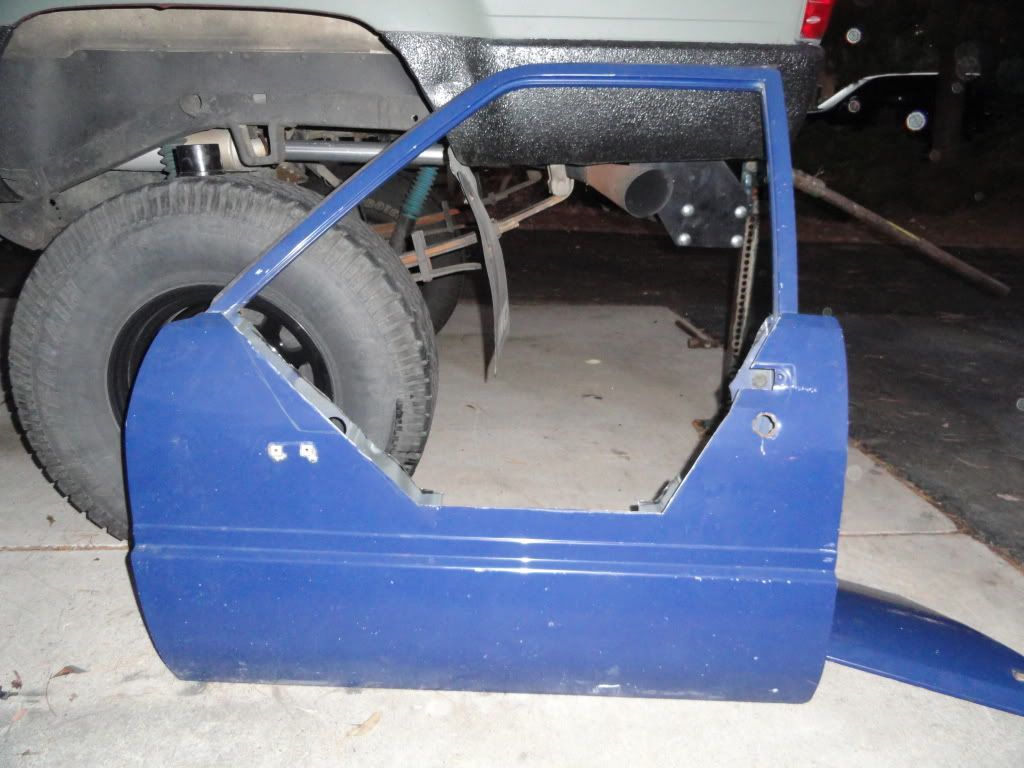

i cut them too low so i dont have an armrest now solved im gonna weld a 1x1 bar across it
i cut them too low so i dont have an armrest now solved im gonna weld a 1x1 bar across it
Last edited by stevenazevedo00; Nov 21, 2010 at 09:58 AM.
Nov 21, 2010 | 09:54 AM
#4
Thread Starter
Registered User
Joined: Mar 2010
Posts: 55
Likes: 0
From: tracy, ca
half doors in progress.. i did the swing out tire carrier i can post that up it was a super cheap mod and ive had some people ask me about itso ill post it.. i also want to make a canvas canopy from scratch im just broke right now but i can post the stuff ive already done..
Last edited by stevenazevedo00; Nov 21, 2010 at 09:55 AM.
 Nov 21, 2010 | 10:05 AM
#6
Thread Starter
Registered User
Joined: Mar 2010
Posts: 55
Likes: 0
From: tracy, ca
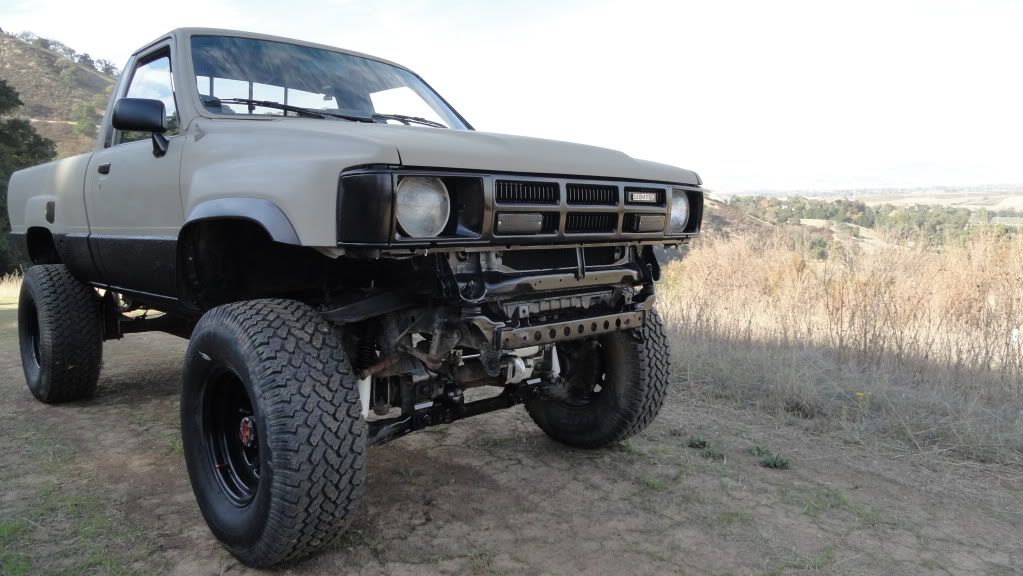
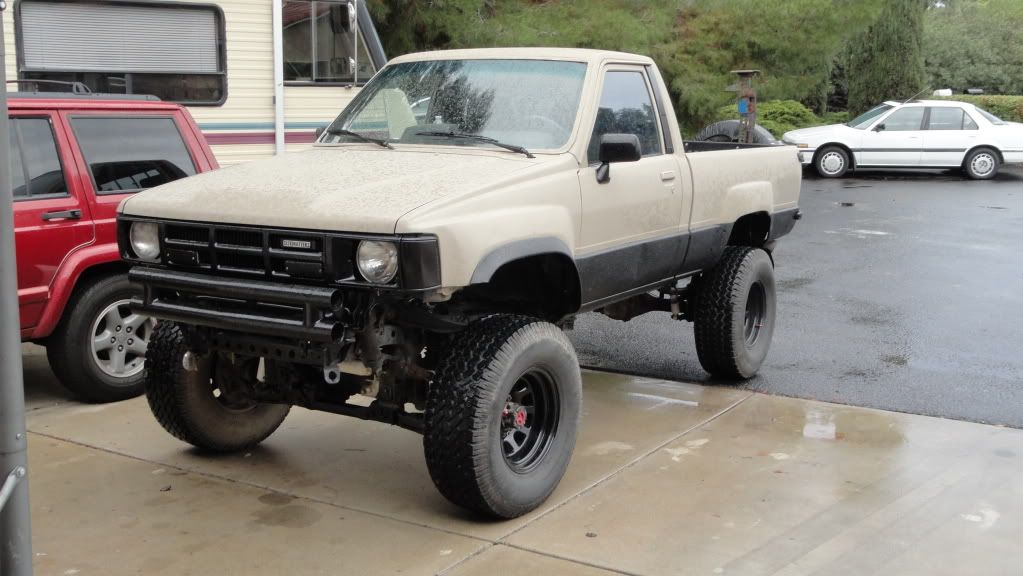
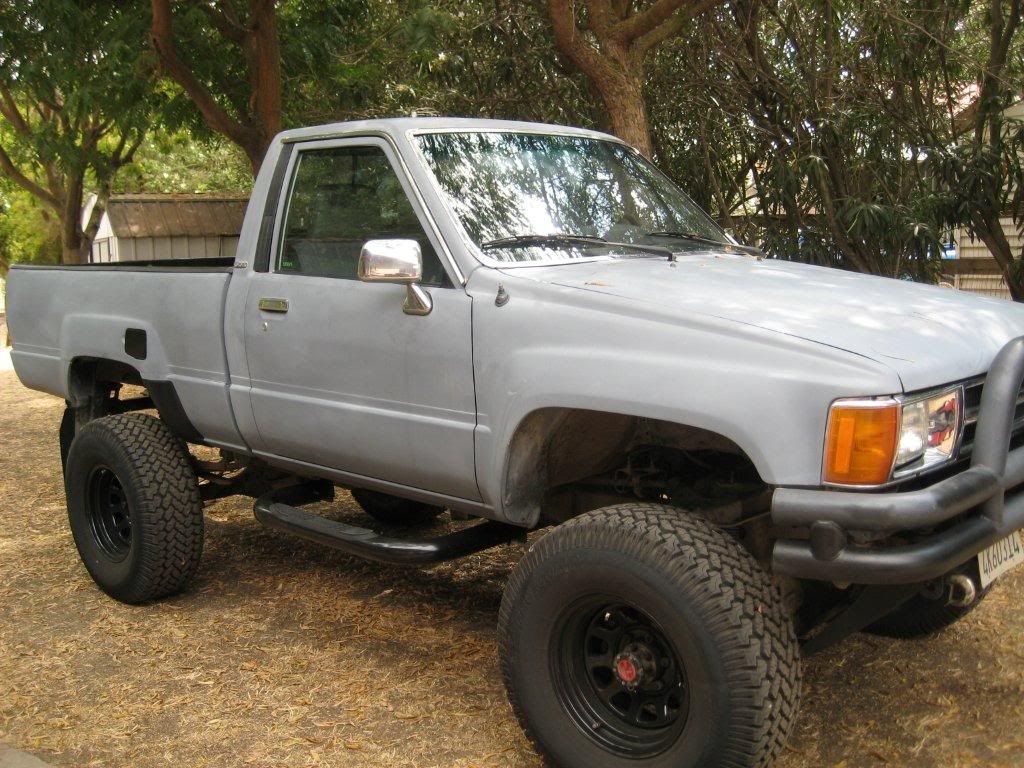
ok heres my before and after smittybuilt bumper hack those things are so f+ing ugly
the first ones not a good view but if youve seen one youve seen em all!
by the way this is my truck when i first got it and my most recent pic of it

the first ones not a good view but if youve seen one youve seen em all!
by the way this is my truck when i first got it and my most recent pic of it
Last edited by stevenazevedo00; Nov 21, 2010 at 10:09 AM.
Trending Topics

 Nov 21, 2010 | 07:50 PM
#11
Registered User
iTrader: (2)
Joined: Dec 2009
Posts: 2,159
Likes: 7
From: Pleasanton, CA - SF Bay Area
Wow - that tire carrier looks fantastic - great work! Do you have images of the other side of the sheet metal, where you drilled and bolted in? Would this work on a 1st gen 4runner you think? I am trying to imagine where the lower mount would attach....bumper? Sheet metal?
Is it from an Isuzu Rodeo? Trooper? Which model and which years?
Looking good - like your truck's colors
Is it from an Isuzu Rodeo? Trooper? Which model and which years?
Looking good - like your truck's colors
Nov 21, 2010 | 08:58 PM
#12
Registered User

Joined: Mar 2008
Posts: 190
Likes: 0
From: Fremont, CA
I think I'm stealing your round headlight idea soon. Looks awesome, I've always wondered what an 84-88 pickup or a first gen runner would look like with the round headlights. How much of a pain is it to swap the rectangular ones out for round ones?
Nov 22, 2010 | 09:47 AM
#13
Thread Starter
Registered User
Joined: Mar 2010
Posts: 55
Likes: 0
From: tracy, ca
How to on the lights its kinda a judgement thing as well but here you go
sorry my explaining is kinda of backwards in the pics but it will give you an idea of what to do


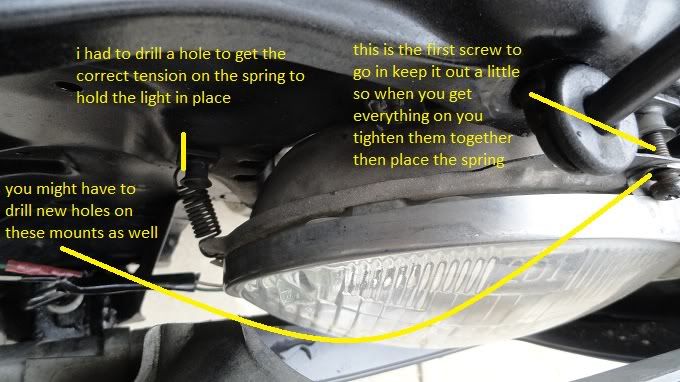

sorry my explaining is kinda of backwards in the pics but it will give you an idea of what to do
Last edited by stevenazevedo00; Nov 22, 2010 at 09:50 AM.

 Nov 22, 2010 | 11:16 AM
#15
Thread Starter
Registered User
Joined: Mar 2010
Posts: 55
Likes: 0
From: tracy, ca
Wow - that tire carrier looks fantastic - great work! Do you have images of the other side of the sheet metal, where you drilled and bolted in? Would this work on a 1st gen 4runner you think? I am trying to imagine where the lower mount would attach....bumper? Sheet metal?
Is it from an Isuzu Rodeo? Trooper? Which model and which years?
Looking good - like your truck's colors
Is it from an Isuzu Rodeo? Trooper? Which model and which years?
Looking good - like your truck's colors
Anyways as far as model goes its a rodeo 91-97 lots at the pick and pull these cars are junk all them had the carrier out of 8 total lol! i chose this because the mount was close to the shape of the pickup and less grinding was needed
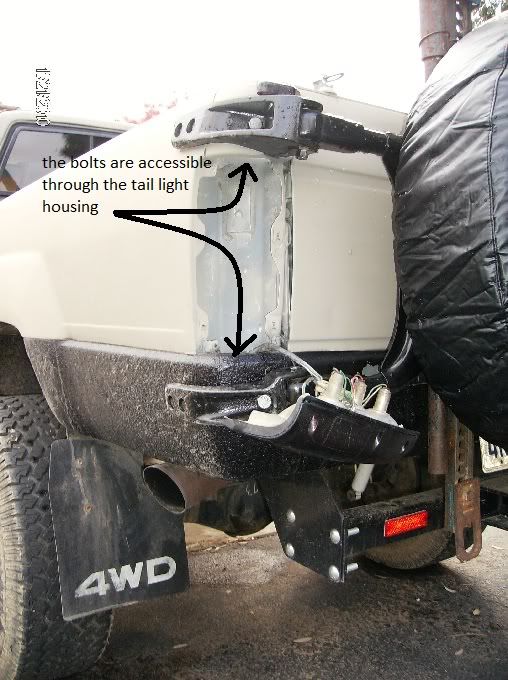
as far as the 4runner goes the only difference i know of is that the tailgate is wider so youd have to look at what i did in these pics to know for sure im sure you wont have a problem
Theres more involved when you get the tire carrier like taking off the mounts from the swing out thats a pain youll see
you dont have to grind too much off the mounts but its needed.. constantly test fit while modifying the mounts!! but remember they dont have to be perfect your gonna put some rubber gaskets between them
by the way you need two people to get this level and correct looking p.s i did it by myself
feel free to ask questions


Last edited by stevenazevedo00; Nov 22, 2010 at 11:36 AM.
Nov 22, 2010 | 11:52 AM
#16
Registered User
iTrader: (2)
Joined: Dec 2009
Posts: 2,159
Likes: 7
From: Pleasanton, CA - SF Bay Area
Thanks! Great write up, and of photos are a huge plus
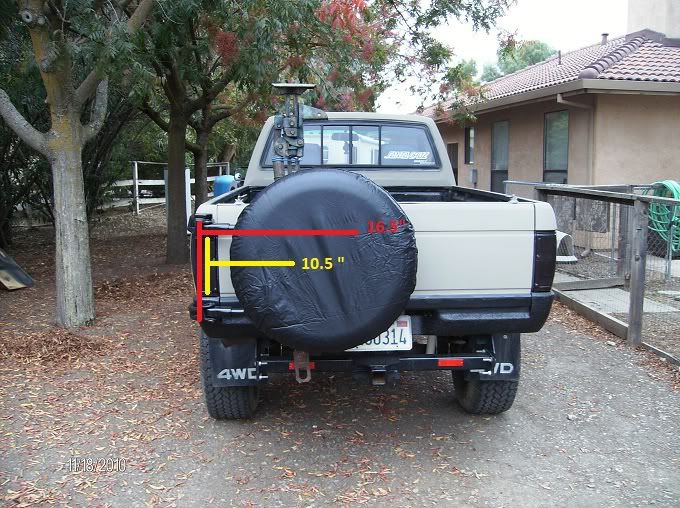
Mind sharing what the distance is between the tops and bottoms of both brackets are - in this photo here, the distance between where your arrows are, and then the distance between the tops of those brackets:
Mind sharing what the distance is between the tops and bottoms of both brackets are - in this photo here, the distance between where your arrows are, and then the distance between the tops of those brackets:
Nov 22, 2010 | 12:07 PM
#17
Thread Starter
Registered User
Joined: Mar 2010
Posts: 55
Likes: 0
From: tracy, ca
Last edited by stevenazevedo00; Nov 22, 2010 at 12:08 PM.
Nov 22, 2010 | 12:31 PM
#18
Registered User
iTrader: (2)
Joined: Dec 2009
Posts: 2,159
Likes: 7
From: Pleasanton, CA - SF Bay Area
Thanks - sorry I should have been more clear in my question 
I meant the hight between the brackets (so one could measure around their tail light and see if this works for them on a.....4runner for instance.
So, in your photo above, the height of the vertical red and yello lines - not the width of your other 2 longer lines. Make more sense now?
Sorry, I could have asked more clearly I now realize.
Phil
Nov 22, 2010 | 12:41 PM
#19
Thread Starter
Registered User
Joined: Mar 2010
Posts: 55
Likes: 0
From: tracy, ca
-the yellow line in the pic above is the hieght of the light which is 10.5"
-the most outer parts of the mounts is 16.5"
-the inner part of the mount is 11.5
-so the mounts are 2.5" wide
-the most outer parts of the mounts is 16.5"
-the inner part of the mount is 11.5
-so the mounts are 2.5" wide


