
22re head gasket adventure. [Pics] Help / Advice / Tips welcome!
 Nov 26, 2009 | 08:55 PM
#1
Thread Starter
Registered User
Joined: Nov 2009
Posts: 58
Likes: 0
22re head gasket adventure. [Pics] Help / Advice / Tips welcome!
Hey Yotatech,
I am a newbie here, however I have been trolling the forums for the past 2 weeks reading, and reading, and searching, and reading some more before I decided to make an account.
I recently bought a 1990 4 runner, 22re, 5 speed, 250k miles from a buddy of mine, after he overheated the thing and blew the head gasket / possibly cracked the head. He was driving up the grade, and somehow the drain petcock on the bottom of the radiator worked its way open, drained all the coolant while he was driving, and the vehicle overheated and he wasn't paying attention. So he dumped some water in, limped it home, and parked it.
That's where I bought it for $500, a steal if you ask me.
I haven't ever done a job as involved as a head gasket change before, so I was hoping for as much guidance and advice as I can receive. I have read numerous other threads on the same topic, and they have helped me greatly so far. I wanted to create a thread to post pictures of my progress as well as ask a bunch of questions I'm sure I will have. Most of them will be dumb and rudimentary for most of you, but please bear with me for I am new at this.
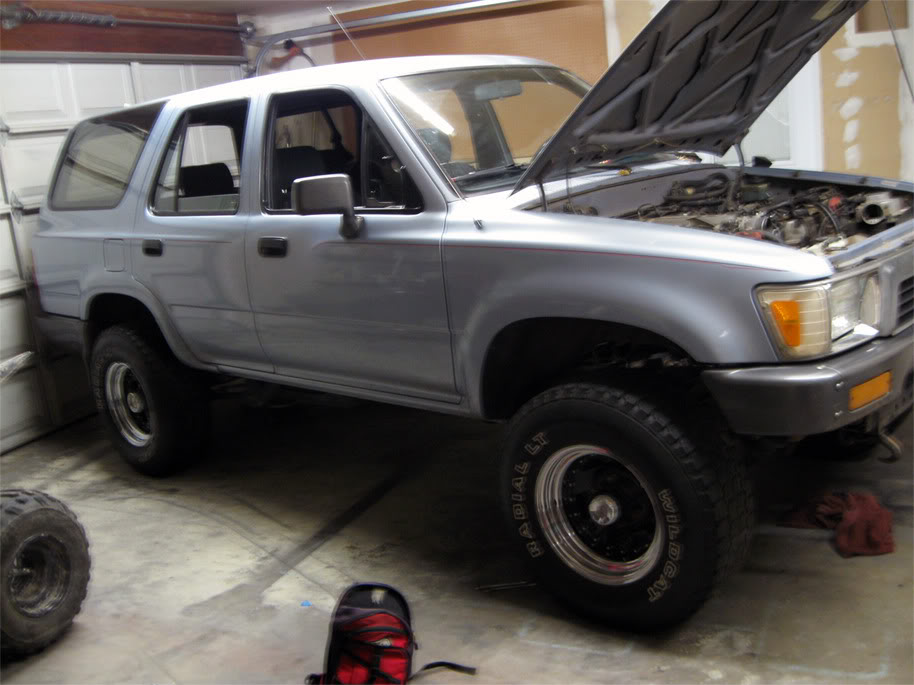
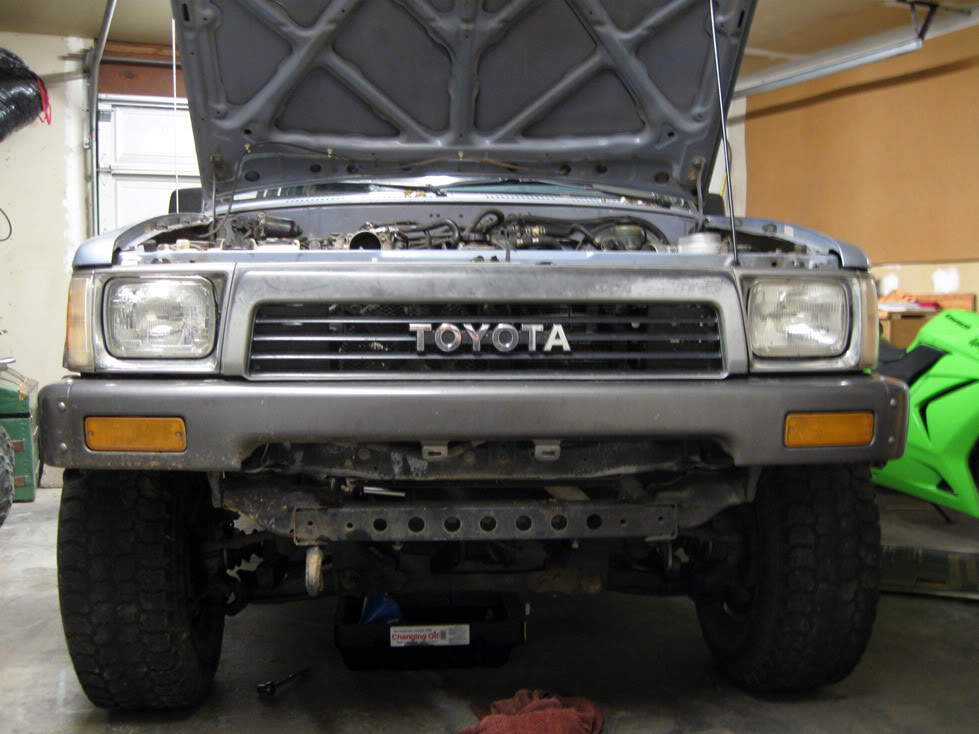
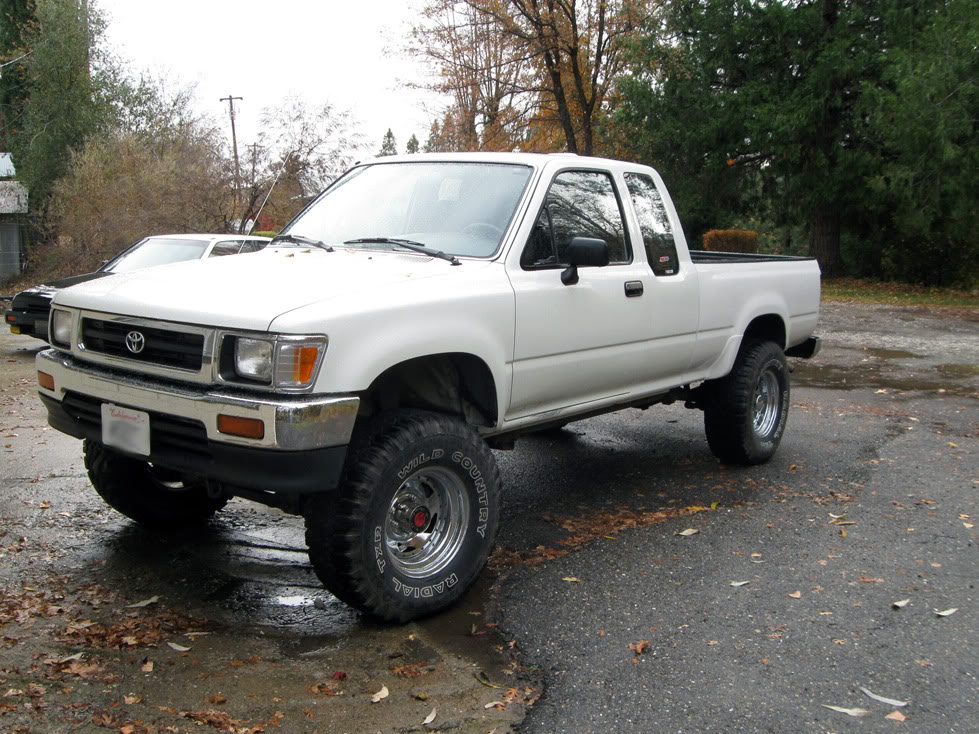
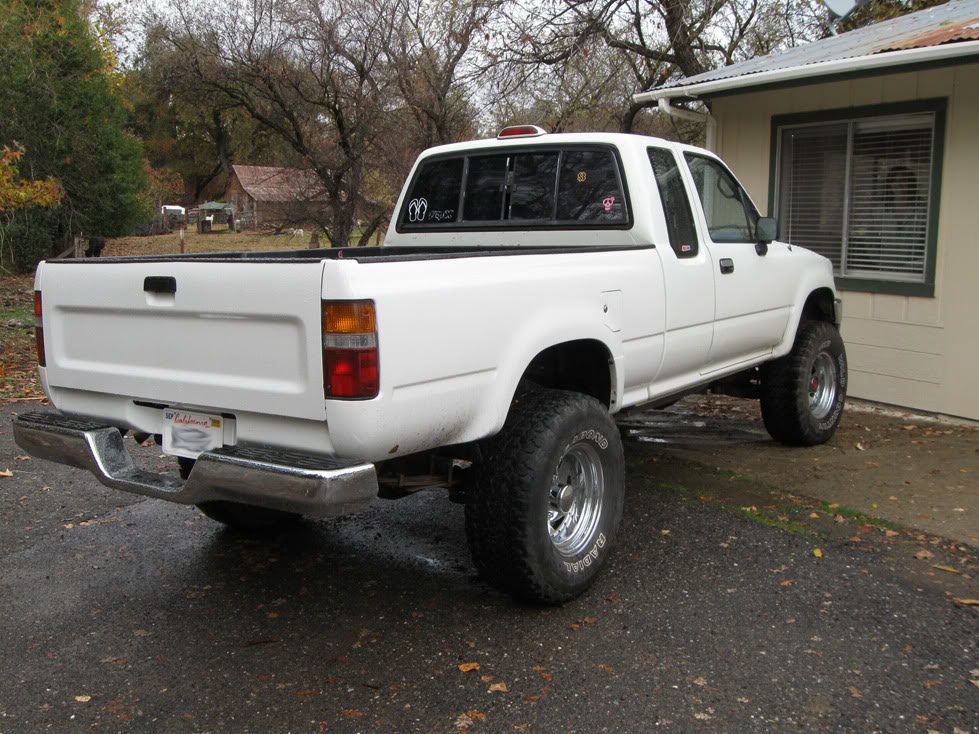
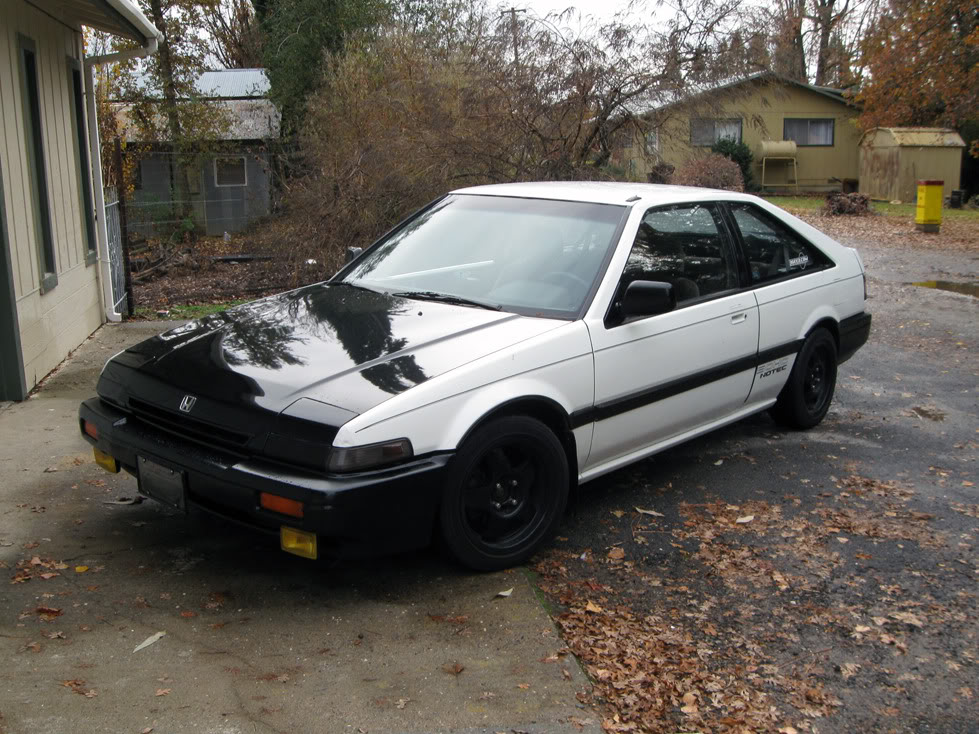
So it begins... Here are a few shots of my 4 runner, sorry for the cramped pictures.

So I went out, bought a Chilton's manual for it (Not finding it to be much help at all), and got to work.
- Drained the Oil, slight chocolaty milkshake appearance, but not bad.
- Drained the Coolant (No Oil in coolant)
- Removed the Radiator, Fan shroud
- Removed the Battery
- Removed the Distributor
- Disconnected the Upper mounting PS Bracket, moved it aside
- Removed Air intake tubing, and filter box.
- Unbolted the No. 2 Secondary Air Injection Manifold
- Unbolted the exhaust manifold, moved it out of the way. ( Much easier to move aside after releasing the clamp under the vehicle holding it to a mount)
- Started unplugging connectors, and hoses, and started to label them.
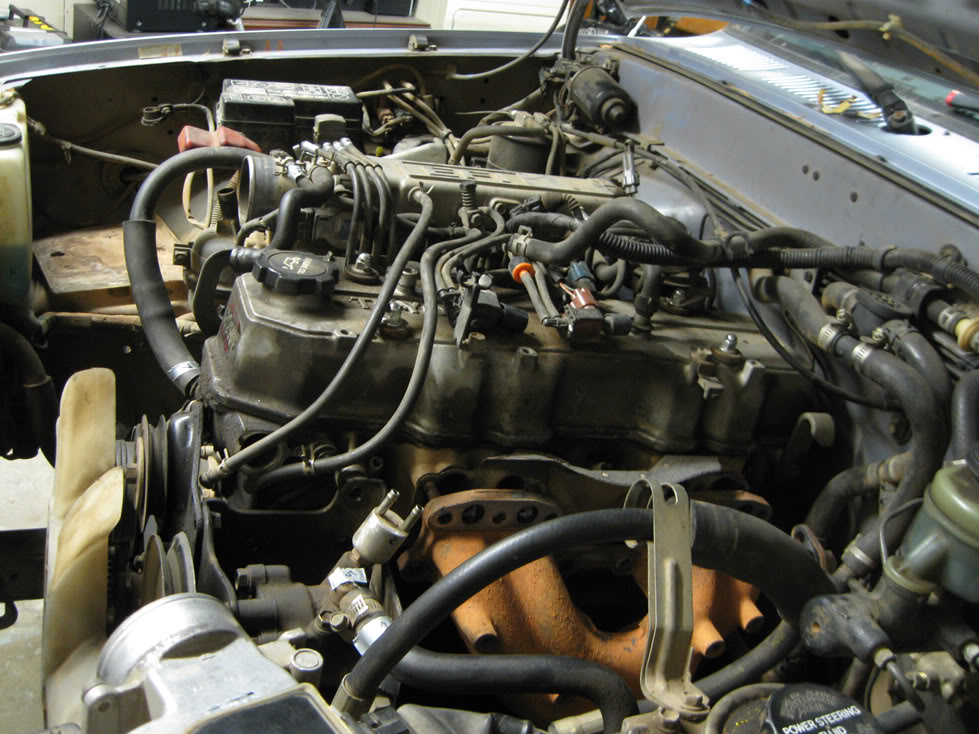
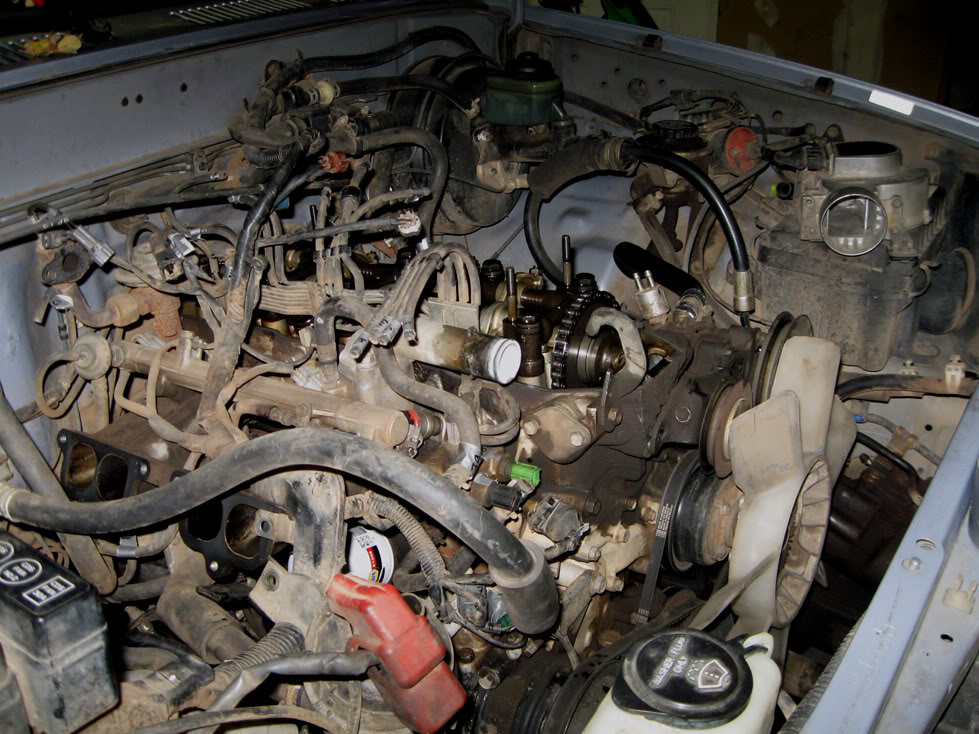
At the start:
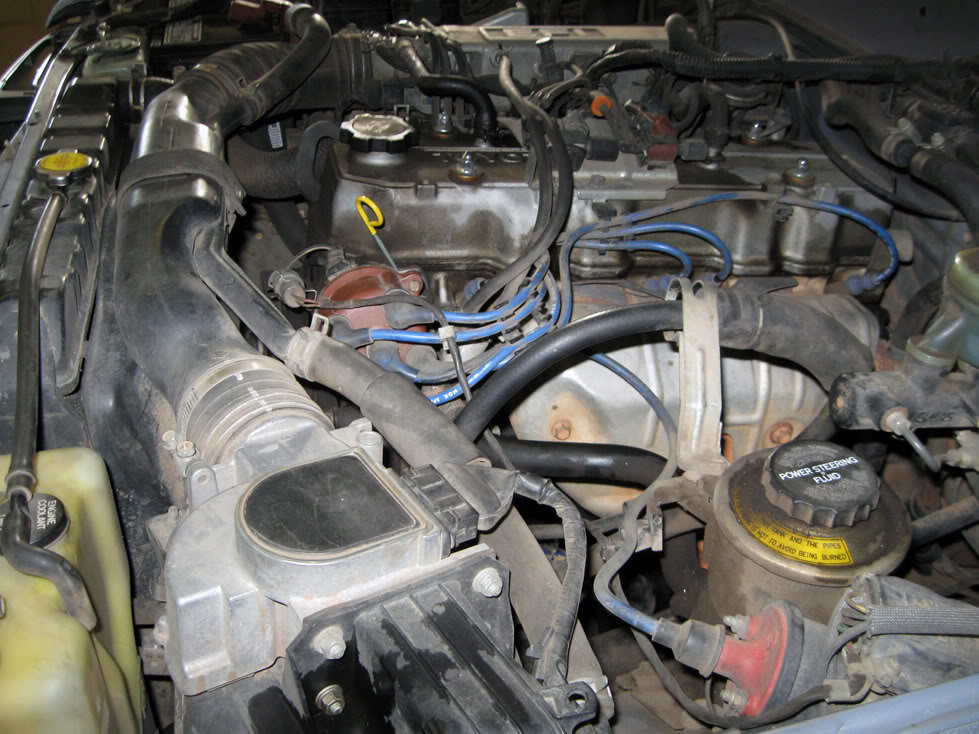
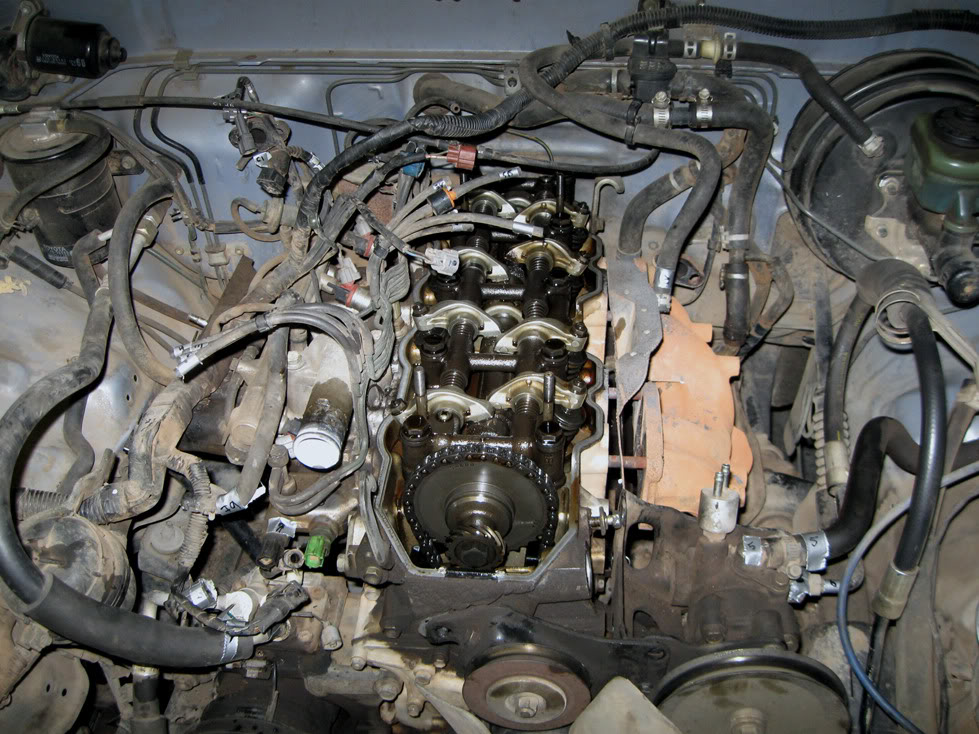
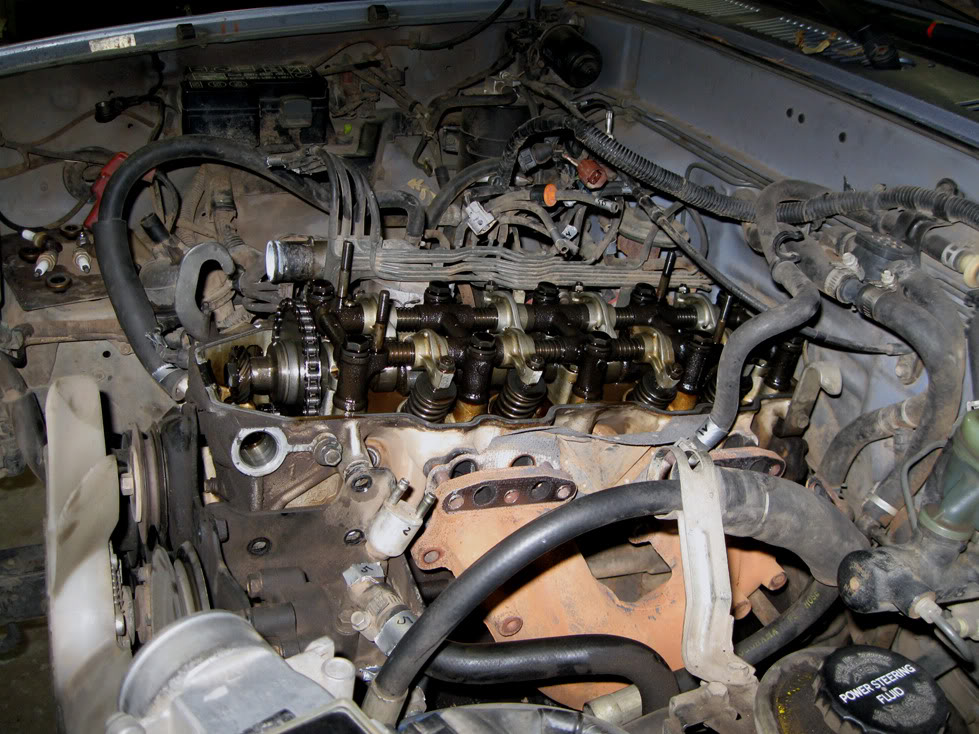
Progress after an hour or two:

And that's all I've gotten done so far. My dilemma is where to go from here.
I have absolutely no Idea what all the sensors, valves, solenoids ect are on teh vehicle, and I don't know what half the stuff is I am looking at.
I am also lost as to what vacuum lines, and connectors I need to detach, remove, ect to get out of the way.
Should I just start labeling them all, and remove them all? Is it best to leave it all connected, and pull the head with the entire Intake assembly still attached? What should I begin to remove next? I am sorry if these are all basic questions but again this is all new to me, I am by no means a mechanic, but I was hoping that by doing this myself I can learn alot about the 22re, and engines in general. So any help / guidance would be great! I will get back to it tomorrow, and post pictures as I progress.
Thanks !!
I am a newbie here, however I have been trolling the forums for the past 2 weeks reading, and reading, and searching, and reading some more before I decided to make an account.
I recently bought a 1990 4 runner, 22re, 5 speed, 250k miles from a buddy of mine, after he overheated the thing and blew the head gasket / possibly cracked the head. He was driving up the grade, and somehow the drain petcock on the bottom of the radiator worked its way open, drained all the coolant while he was driving, and the vehicle overheated and he wasn't paying attention. So he dumped some water in, limped it home, and parked it.
That's where I bought it for $500, a steal if you ask me.
I haven't ever done a job as involved as a head gasket change before, so I was hoping for as much guidance and advice as I can receive. I have read numerous other threads on the same topic, and they have helped me greatly so far. I wanted to create a thread to post pictures of my progress as well as ask a bunch of questions I'm sure I will have. Most of them will be dumb and rudimentary for most of you, but please bear with me for I am new at this.
So it begins... Here are a few shots of my 4 runner, sorry for the cramped pictures.
So I went out, bought a Chilton's manual for it (Not finding it to be much help at all), and got to work.
- Drained the Oil, slight chocolaty milkshake appearance, but not bad.
- Drained the Coolant (No Oil in coolant)
- Removed the Radiator, Fan shroud
- Removed the Battery
- Removed the Distributor
- Disconnected the Upper mounting PS Bracket, moved it aside
- Removed Air intake tubing, and filter box.
- Unbolted the No. 2 Secondary Air Injection Manifold
- Unbolted the exhaust manifold, moved it out of the way. ( Much easier to move aside after releasing the clamp under the vehicle holding it to a mount)
- Started unplugging connectors, and hoses, and started to label them.
At the start:
Progress after an hour or two:
And that's all I've gotten done so far. My dilemma is where to go from here.
I have absolutely no Idea what all the sensors, valves, solenoids ect are on teh vehicle, and I don't know what half the stuff is I am looking at.
I am also lost as to what vacuum lines, and connectors I need to detach, remove, ect to get out of the way.
Should I just start labeling them all, and remove them all? Is it best to leave it all connected, and pull the head with the entire Intake assembly still attached? What should I begin to remove next? I am sorry if these are all basic questions but again this is all new to me, I am by no means a mechanic, but I was hoping that by doing this myself I can learn alot about the 22re, and engines in general. So any help / guidance would be great! I will get back to it tomorrow, and post pictures as I progress.
Thanks !!
Nov 26, 2009 | 09:04 PM
#2
Registered User
Joined: Mar 2008
Posts: 12,723
Likes: 6
From: Temecula Valley, CA
Welcome to Yotatech!!!!
A lot of the connectors are somewhat color coded, i.e. the green connector connects to the green sensor, etc.; and the wiring harness tends to put connectors close to the sensors. You could go to radio shack, or even home depot, and get numbered tape that you could wrap on the connector with matching tape on the sensor. I would recommend taking lots of pictures too. That way you could match up things based on how the picture(s) show them.
You're biggest problem will be the vacuum hoses, particularly those on the throttle body at the front of the engine and around the EGR valve and rear of the engine.
For what it's worth, 500 for that 4Runner seems to me to be a steal. You could buy a reman'd engine for 2000 and have a great truck for 2500 bucks total, plus a couple days invested.
Nov 26, 2009 | 09:05 PM
#3
Registered User
Joined: Jul 2006
Posts: 479
Likes: 5
From: Anchorage
That is a great looking truck! Download the factory service manual here: http://www.ncttora.com/fsm/index.html and use it, step by step, to do the job. Label everything and take a lot of pictures as you go. There are a couple of threads here on 22re head gasket replacement. Do a search for "head gasket" and you should find a few.
Nov 26, 2009 | 09:05 PM
#4
Registered User
Joined: Mar 2008
Posts: 12,723
Likes: 6
From: Temecula Valley, CA
As for the manuals... check this thread out: https://www.yotatech.com/forums/f116...l-link-131168/

 Nov 26, 2009 | 09:36 PM
#7
Registered User
Joined: Apr 2009
Posts: 5,592
Likes: 24
From: Dixon, Ca
Willkommen Suprasb, label label label, Now If I can do a head you can, what helped me is online pictures and S manual, and i had a 4x8 foot table to put all things on marked. I layed craft paper down and made notes. i stumbled through it, but did OK. No probs after 2000 miles. Good luck.
Trending Topics
Nov 26, 2009 | 09:41 PM
#8
Registered User
Joined: Mar 2008
Posts: 12,723
Likes: 6
From: Temecula Valley, CA
I guess I should mention that it is possible to install the head gasket down-side up (up-side down?), so to speak. If you do that, you'll block a very important oil passage that supplies oil to the head (if I remember correctly).
Nov 26, 2009 | 10:09 PM
#9
Thread Starter
Registered User
Joined: Nov 2009
Posts: 58
Likes: 0
Wow thanks for the quick replies! I downloaded the FSM and started reading through it, along with 92Toy's rebuild thread. Very helpful. I will just continue labeling and marking things as I take them off.
My girlfriend has a very nice 1994 Toyota Truck with a 22re that I can also use as a reference If I get lost as well, so I guess I shouldn't worry too much about vacuum hose routing and connectors eh?
Thanks for the quick replies, will give more updates tomorrow!
My girlfriend has a very nice 1994 Toyota Truck with a 22re that I can also use as a reference If I get lost as well, so I guess I shouldn't worry too much about vacuum hose routing and connectors eh?
Thanks for the quick replies, will give more updates tomorrow!
Nov 26, 2009 | 10:52 PM
#10
Registered User
Joined: Mar 2009
Posts: 1,459
Likes: 1
From: B.C. Canada
welcome to yotatech! nice 4runner you have there and the wheels are nice too here is a good 22re rebuild you can check out
https://www.yotatech.com/forums/f116...ctures-181237/ this guy know his stuff and if you ask him he can be very helpful. dont be worried about about the rebuild there are lots of us to help you out
here is a good 22re rebuild you can check outhttps://www.yotatech.com/forums/f116...ctures-181237/ this guy know his stuff and if you ask him he can be very helpful. dont be worried about about the rebuild there are lots of us to help you out
Nov 27, 2009 | 03:13 PM
#11
Thread Starter
Registered User
Joined: Nov 2009
Posts: 58
Likes: 0
Well I made some more progress today, after reading through some more rebuild / BHG threads. They gave me some insight on where to start next.
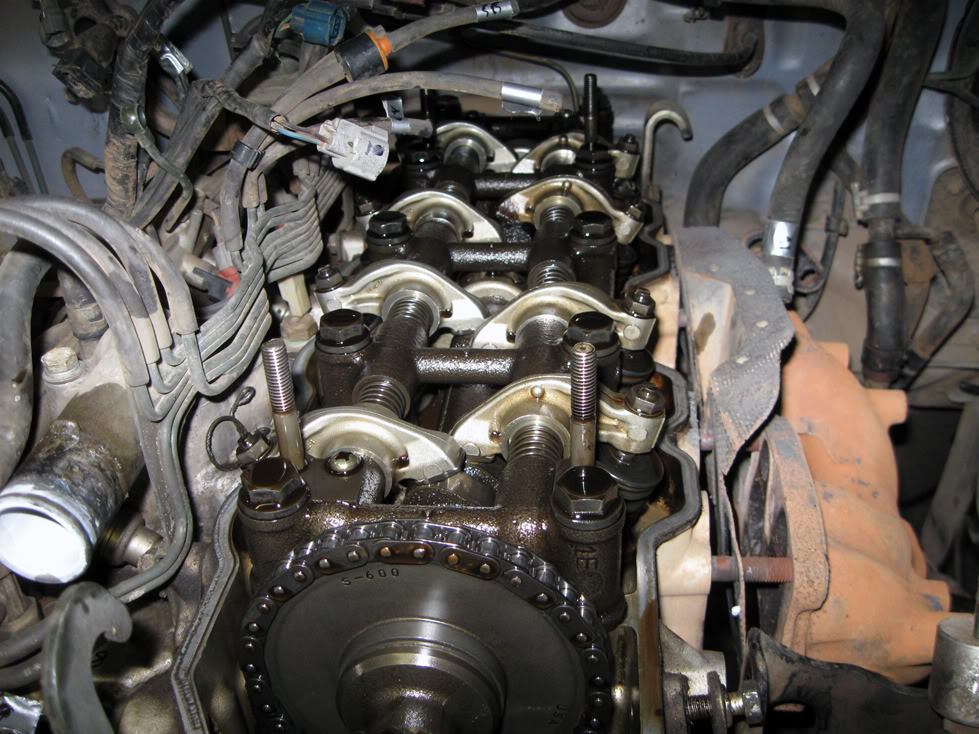
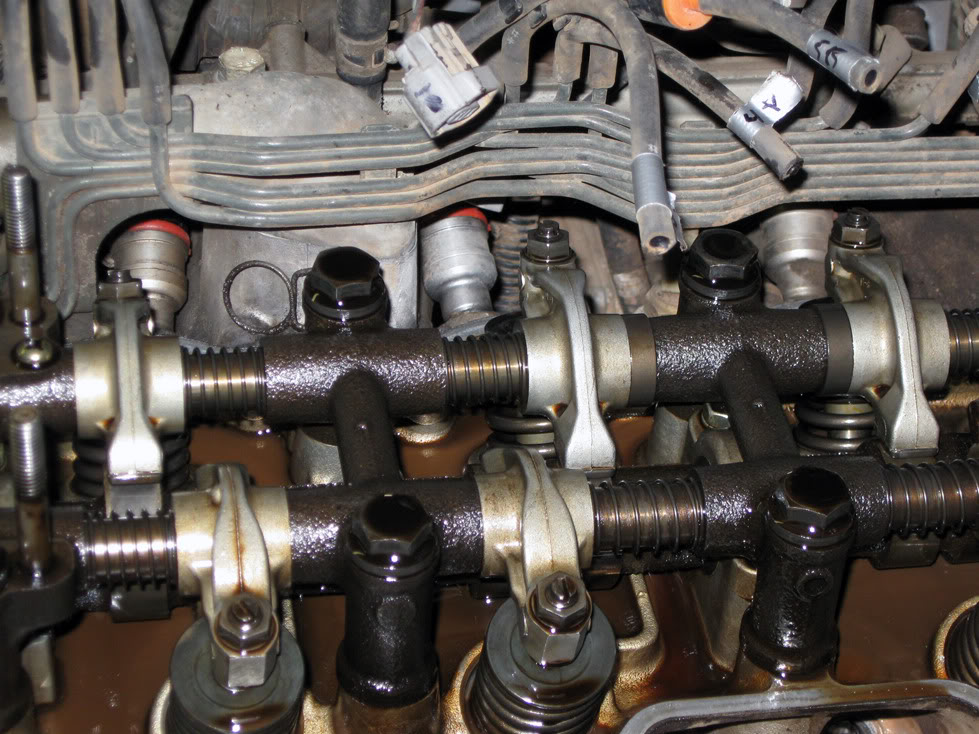
So I went ahead and spent about an hour more labeling every connector and every hose that was removed or disconnected. I believe I got the most aggrivating and intimidating part done, the upper intake manifold. Got everything removed off that that needed to come off, and pulled her on out. Note to others working on this step:
- Don't forget the hard fuel line supplying fuel to the (tell me if I'm wrong here) Cold Start Injector on the side of the manifold? Also, the small 12mm bolt on the bottom of the manifold, connecting the manifold to some sort of support bar. After those are off it should come right off if you have all the other fuel / vacuum hoses unattached. I was pleased when I removed the Valve cover and saw how clean and Nice it still was inside. There doesn't seem to be a whole lot of water in the oil, and the rocker arm assembly seems to be in really good shape.
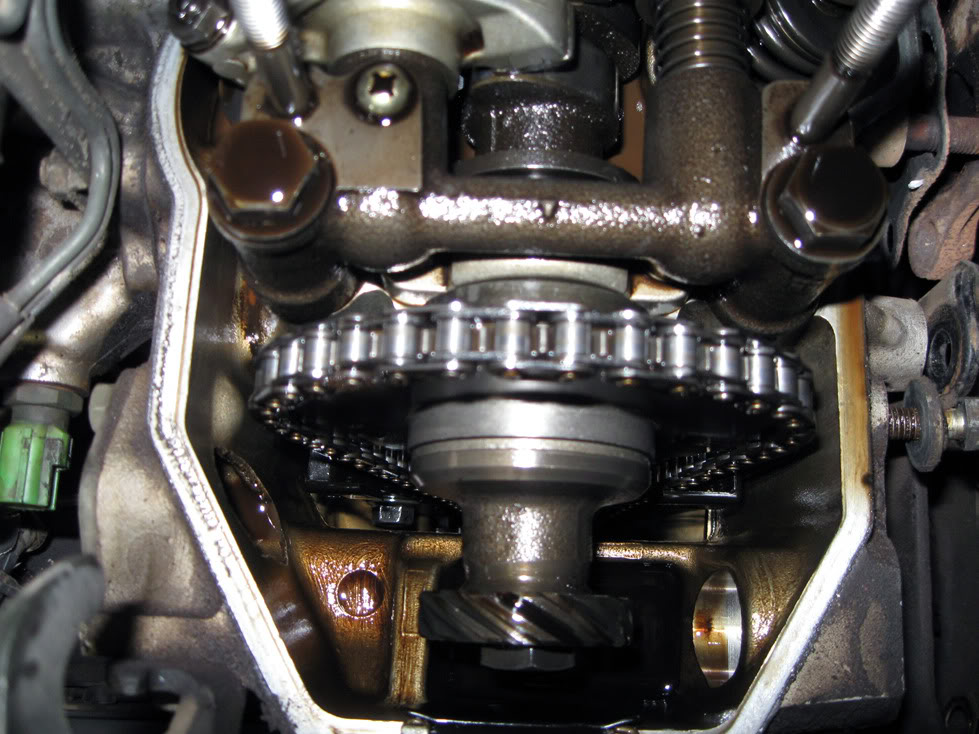
The entire top end ( Timing Chain, Guides, Cover, sprockets, HG, and other gaskets ( along with a head R & R was done 80k miles ago, in 2001. I am not going to worry about the timing assembly this time around, for I plan to drop another motor in the 4 runner come summer time, when It gets parked. (This is my winter vehicle so I can park my Honda in the garage for the winter).
On with the pictures:
So there is my progress for today. I will work on it some more maybe tonight, or tomorrow night. I'm hoping to get this head off and inspected by mid this week. Things have been really smooth so far, nothing has broken, or snapped so far. *knocks on wood*
Oh, and in-case anyone was curious, here is my GF's 1994 Toyota pickup. (22re, 5speed) Should be a good reference if I get lost or confused putting it back together.
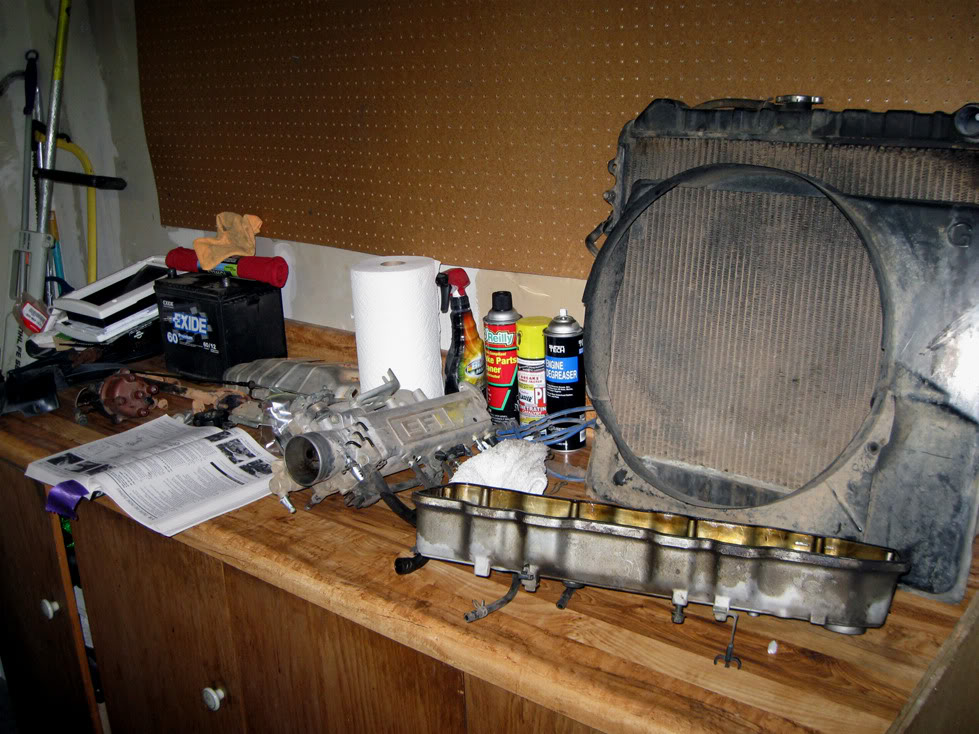
And the other inhabitants of my garage...
I really appreciate the replies and advice so far, YotaTech has been a godsend for me, I would definitely not have even attempted this job if I didn't find this place. You guys rock..
Thanks! More tips / advice / how too is very welcome!! Let me here what ya got?
So I went ahead and spent about an hour more labeling every connector and every hose that was removed or disconnected. I believe I got the most aggrivating and intimidating part done, the upper intake manifold. Got everything removed off that that needed to come off, and pulled her on out. Note to others working on this step:
- Don't forget the hard fuel line supplying fuel to the (tell me if I'm wrong here) Cold Start Injector on the side of the manifold? Also, the small 12mm bolt on the bottom of the manifold, connecting the manifold to some sort of support bar. After those are off it should come right off if you have all the other fuel / vacuum hoses unattached. I was pleased when I removed the Valve cover and saw how clean and Nice it still was inside. There doesn't seem to be a whole lot of water in the oil, and the rocker arm assembly seems to be in really good shape.
The entire top end ( Timing Chain, Guides, Cover, sprockets, HG, and other gaskets ( along with a head R & R was done 80k miles ago, in 2001. I am not going to worry about the timing assembly this time around, for I plan to drop another motor in the 4 runner come summer time, when It gets parked. (This is my winter vehicle so I can park my Honda in the garage for the winter).
On with the pictures:
So there is my progress for today. I will work on it some more maybe tonight, or tomorrow night. I'm hoping to get this head off and inspected by mid this week. Things have been really smooth so far, nothing has broken, or snapped so far. *knocks on wood*
Oh, and in-case anyone was curious, here is my GF's 1994 Toyota pickup. (22re, 5speed) Should be a good reference if I get lost or confused putting it back together.
And the other inhabitants of my garage...
I really appreciate the replies and advice so far, YotaTech has been a godsend for me, I would definitely not have even attempted this job if I didn't find this place. You guys rock..
Thanks! More tips / advice / how too is very welcome!! Let me here what ya got?
Nov 27, 2009 | 03:23 PM
#12
YotaTech Milestone-Two Millionth Post
Joined: Jan 2009
Posts: 12,009
Likes: 122
From: Northeast Pennsylvania
Hey....WELCOME!!!
I have a thread going that is actually too long and wandering but basically it coverseverything to the point I am and the troubles I've had along the way.
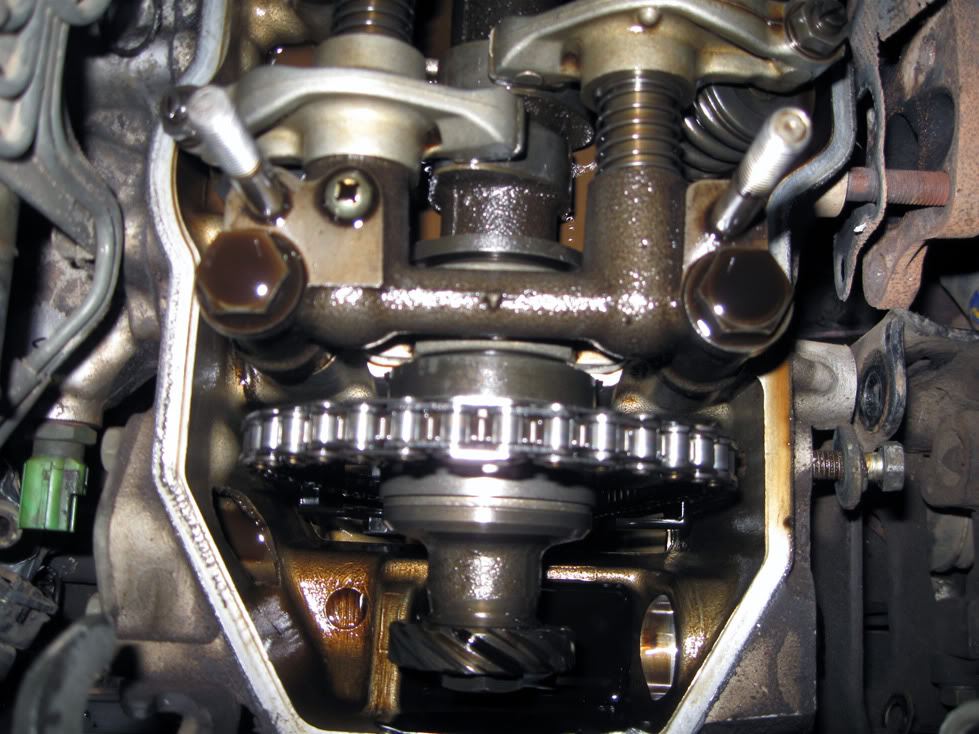
Timing chain cover looks good....sprocket in front of the cam looks different than mine.
Keep it going.....I am currently doing this job...if you need any pics, I have a bunch.
I have a thread going that is actually too long and wandering but basically it coverseverything to the point I am and the troubles I've had along the way.
Timing chain cover looks good....sprocket in front of the cam looks different than mine.
Keep it going.....I am currently doing this job...if you need any pics, I have a bunch.
Nov 27, 2009 | 03:30 PM
#13
Thread Starter
Registered User
Joined: Nov 2009
Posts: 58
Likes: 0
Hey....WELCOME!!!
I have a thread going that is actually too long and wandering but basically it coverseverything to the point I am and the troubles I've had along the way.
Timing chain cover looks good....sprocket in front of the cam looks different than mine.
Keep it going.....I am currently doing this job...if you need any pics, I have a bunch.
Your thread has been a great help for me. I actually spent about 2 hours reading through your whole thread because it was well documented, and we seem to have about the same mechanical aptitude, so we are on the same mental level. hahah Big thanks for your thread, and how well you have documented it. Has been a lifesaver.
Nov 27, 2009 | 04:46 PM
#15
YotaTech Milestone-Two Millionth Post
Joined: Jan 2009
Posts: 12,009
Likes: 122
From: Northeast Pennsylvania
Your thread has been a great help for me. I actually spent about 2 hours reading through your whole thread because it was well documented, and we seem to have about the same mechanical aptitude, so we are on the same mental level. hahah Big thanks for your thread, and how well you have documented it. Has been a lifesaver.
Thanks for the compliments....just use my experiences to your advantage so you don't make the same mistakes or have the same problems.
Nov 27, 2009 | 05:01 PM
#16
Thread Starter
Registered User
Joined: Nov 2009
Posts: 58
Likes: 0
I am going to order the gasket kit from ENGNBLDR. Seems like the general consensus agrees that his products are the best. I don't have a toyota dealer anywhere close so I would have to do some driving to order an OEM gasket. Thoughts? Should I get an OEM over Engnbldrs?
 Nov 27, 2009 | 09:07 PM
#20
Thread Starter
Registered User
Joined: Nov 2009
Posts: 58
Likes: 0


