
Ammo Can Drawer Slide
 Nov 8, 2008 | 09:32 AM
#1
Thread Starter
Registered User
Joined: Nov 2008
Posts: 89
Likes: 0
From: Ontario
Ammo Can Drawer Slide
Here's a project I finished back in May.... the ammo can drawer slide.
This was posted a while back in the fabrication section.
The idea came to me while sitting on the thrown... go figure.
The project was less than $70 including the ammo can.
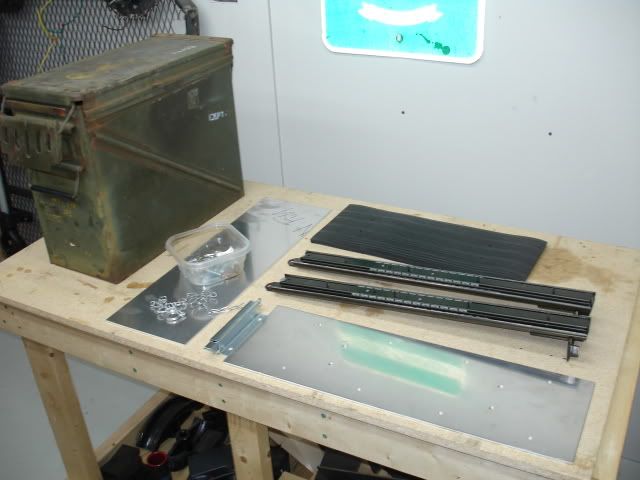
the parts include surplus ammo can, filing cabinet drawer slides, 2 aluminum mounting plates, nuts, bolts, machine screws, magnet, fence latch assembly, loctite, Duplicolor battleship gray paint, primer, workshop foam floor mat, scrap steel.
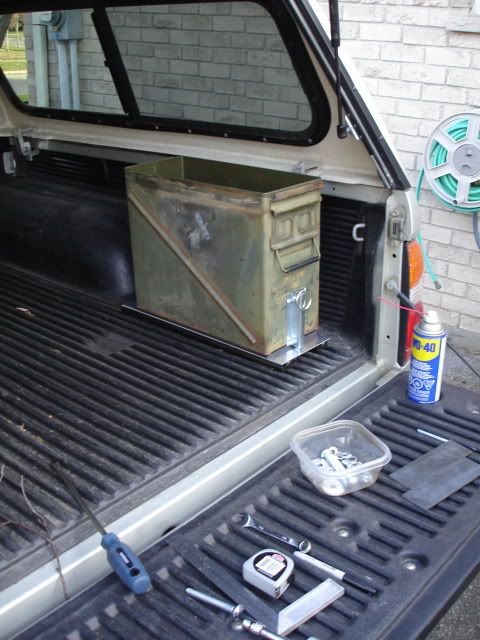
I was going to simply bolt the ammo can directly to the truck bed, but..... I had to take it to the next level.
The ammo can will hold tools, recovery gear, tire repair kit, roof rack straps and some other junk. I used a plastic tool box for all that gear but the plastic box was cracking. The reason I put the ammo box on slides was.... I hate climbing into the back of the truck to retrieve items I use on a regular basis like roof rack straps this will save my back.
Here's a sequence of the build....
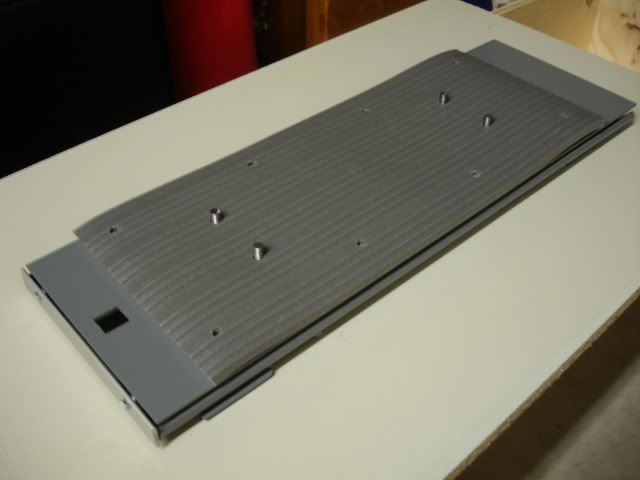
The parts:
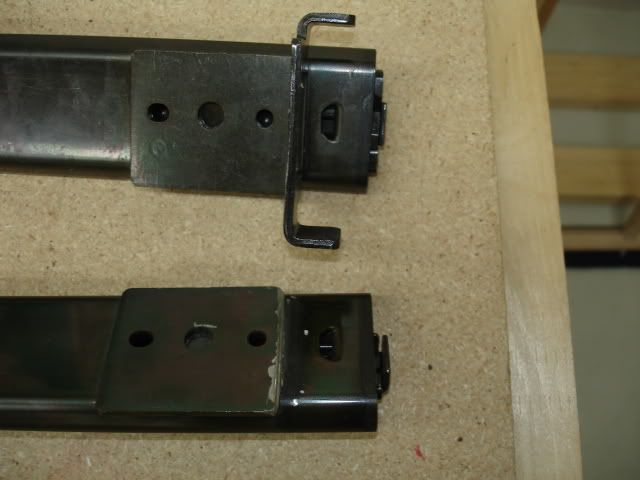
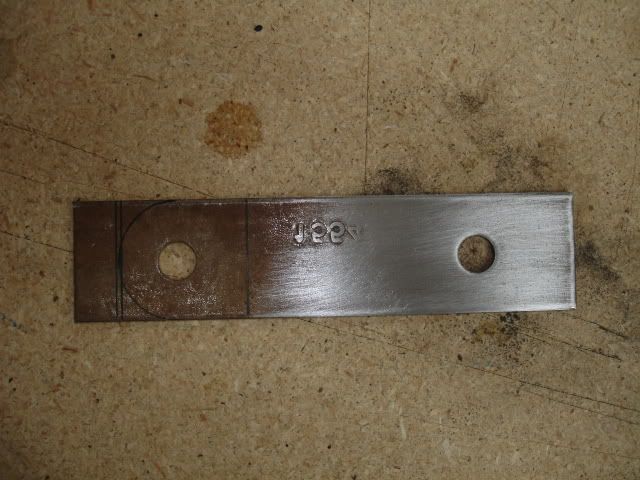
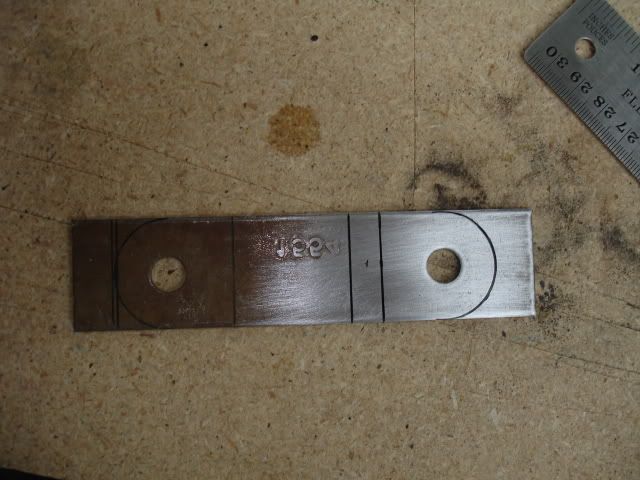
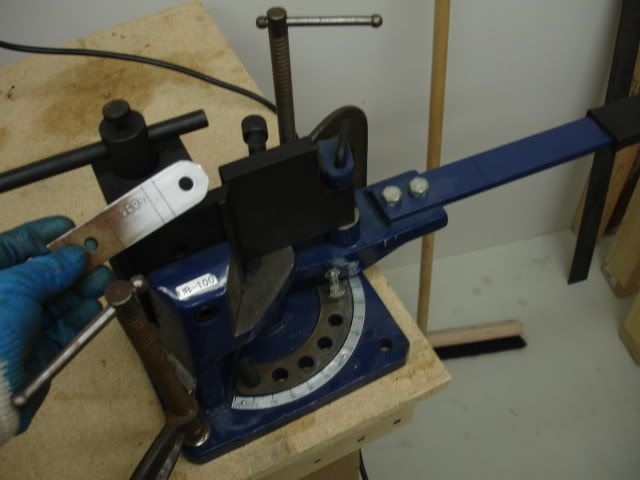
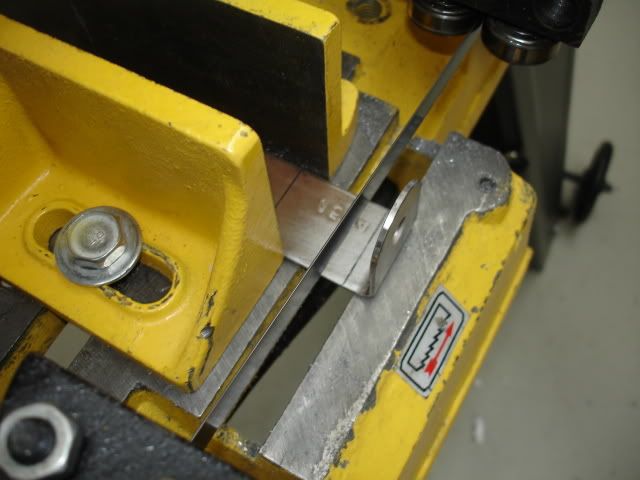
The slides need modification:
This was posted a while back in the fabrication section.
The idea came to me while sitting on the thrown... go figure.
The project was less than $70 including the ammo can.
the parts include surplus ammo can, filing cabinet drawer slides, 2 aluminum mounting plates, nuts, bolts, machine screws, magnet, fence latch assembly, loctite, Duplicolor battleship gray paint, primer, workshop foam floor mat, scrap steel.
I was going to simply bolt the ammo can directly to the truck bed, but..... I had to take it to the next level.
The ammo can will hold tools, recovery gear, tire repair kit, roof rack straps and some other junk. I used a plastic tool box for all that gear but the plastic box was cracking. The reason I put the ammo box on slides was.... I hate climbing into the back of the truck to retrieve items I use on a regular basis like roof rack straps this will save my back.
Here's a sequence of the build....
The parts:
The slides need modification:
Nov 8, 2008 | 09:34 AM
#2
Thread Starter
Registered User
Joined: Nov 2008
Posts: 89
Likes: 0
From: Ontario
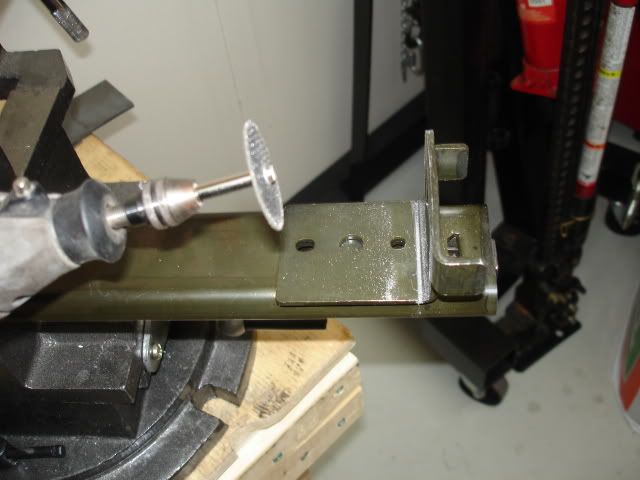
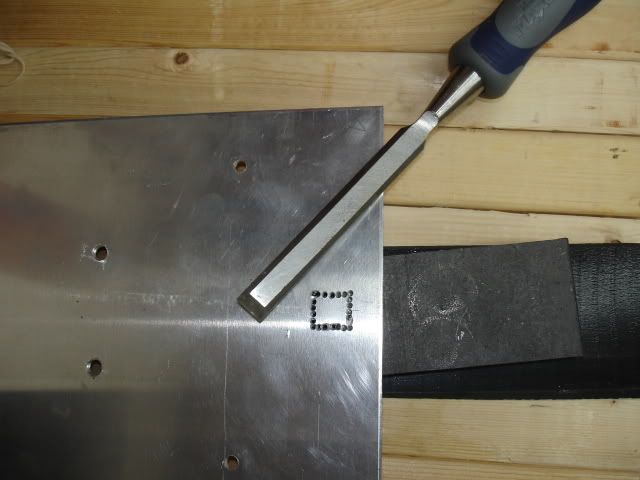
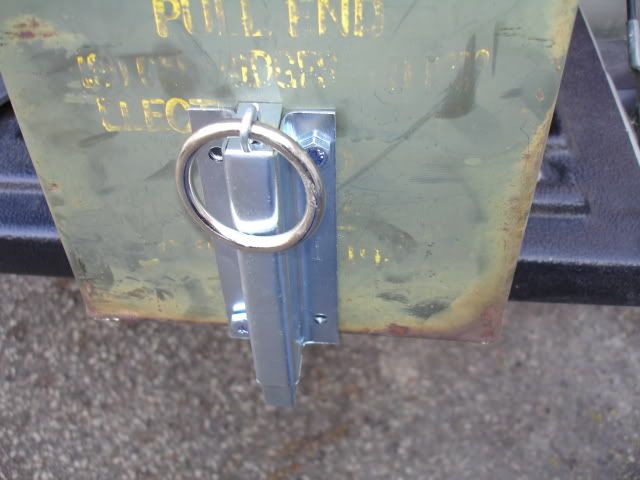
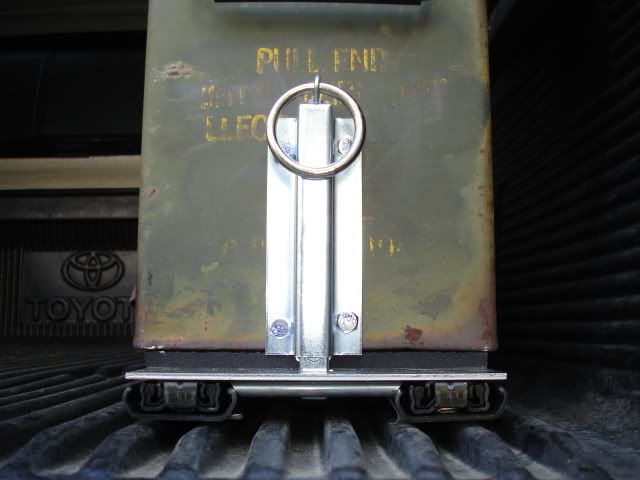
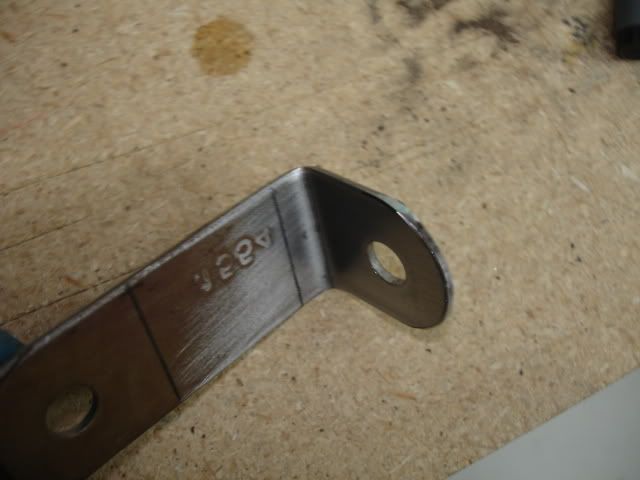
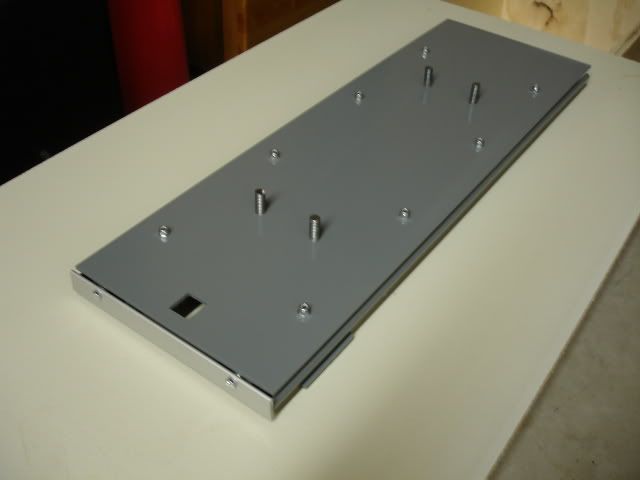
After drilling the holes on the top plate of the slide, I positioned the fence latch in position to figure out how it will work:
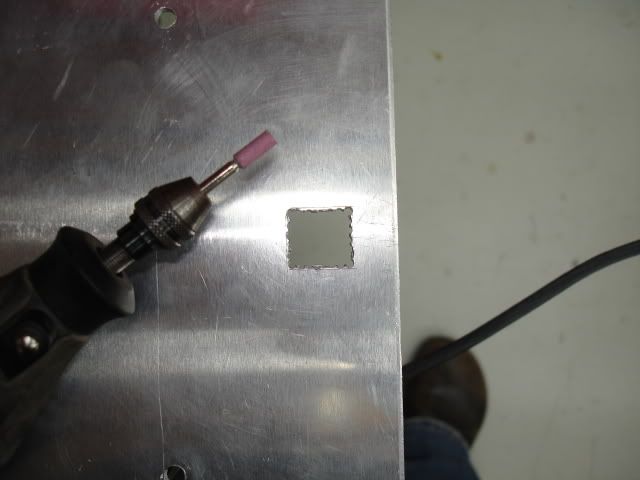
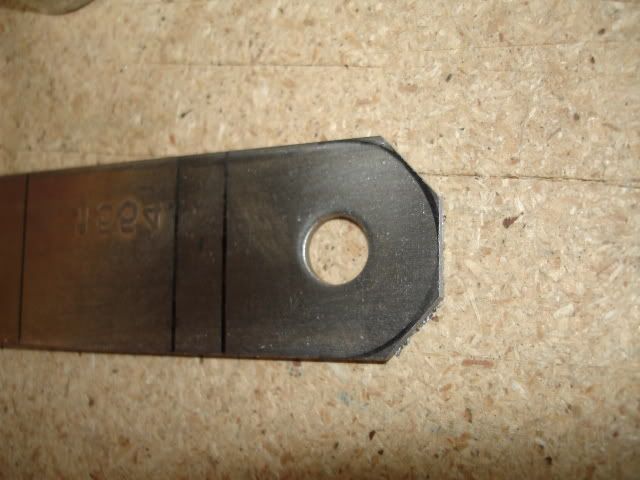
After I was confident the latch position was in the correct place, I drilled perforation holes for the latch hole. I used a chisel to punch out the square hole. The edge of the square hole was cleaned up with the chisel. Aluminum is soft. the chisel worked well and was still sharp after taking the aluminum out:
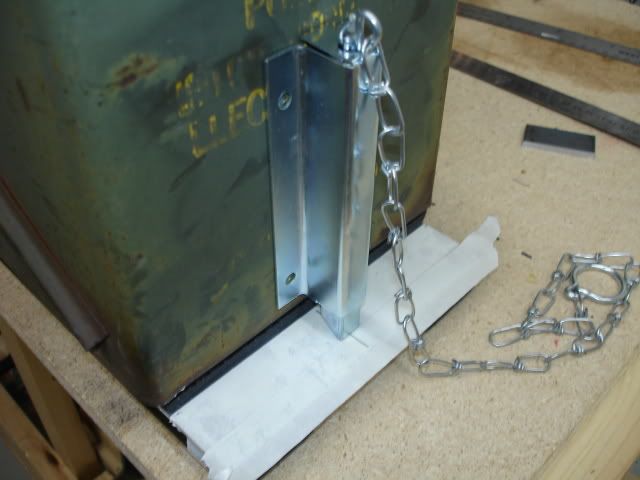
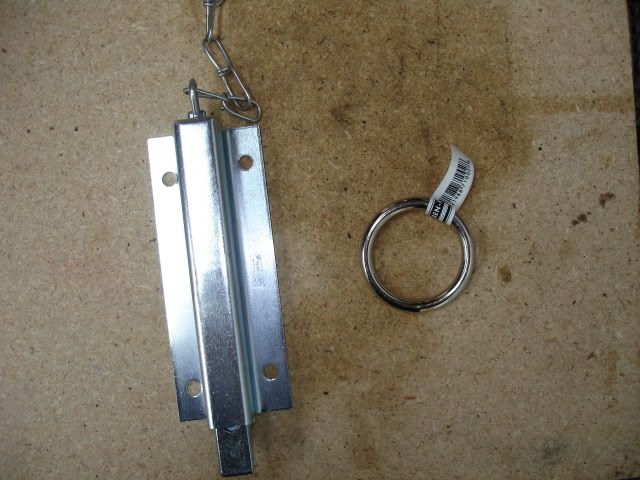
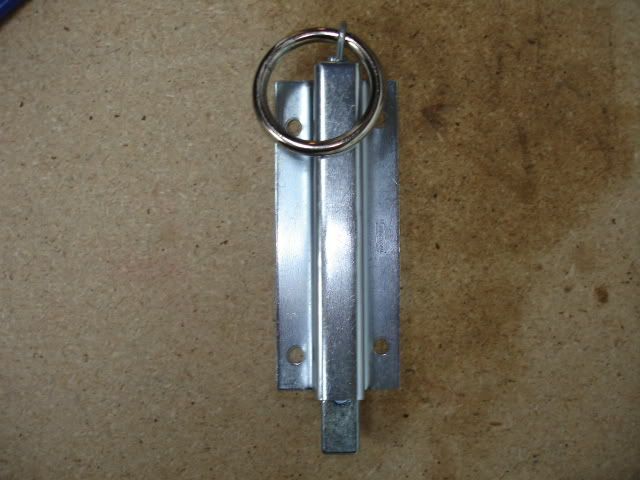
The fence latch assembly came with a chain. I swapped out the chain for a steel ring. Later I added a magnet to keep the ring from banging around. The magnet works really well. I used super glue to secure the magnet. The ring will always return to the "home position".
After I was confident the latch position was in the correct place, I drilled perforation holes for the latch hole. I used a chisel to punch out the square hole. The edge of the square hole was cleaned up with the chisel. Aluminum is soft. the chisel worked well and was still sharp after taking the aluminum out:
The fence latch assembly came with a chain. I swapped out the chain for a steel ring. Later I added a magnet to keep the ring from banging around. The magnet works really well. I used super glue to secure the magnet. The ring will always return to the "home position".


 Nov 8, 2008 | 09:39 AM
#5
Thread Starter
Registered User
Joined: Nov 2008
Posts: 89
Likes: 0
From: Ontario
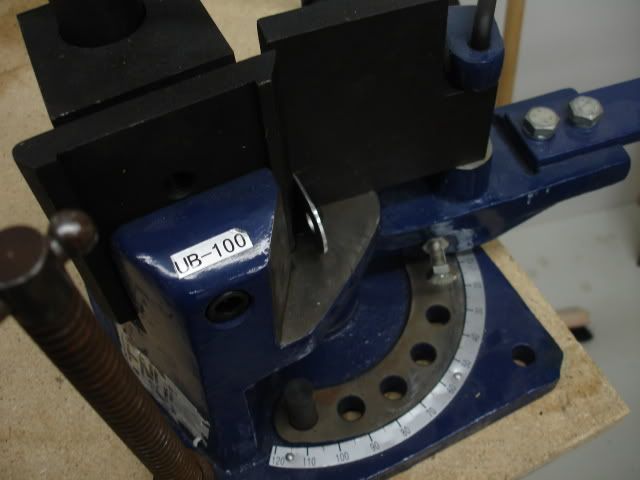
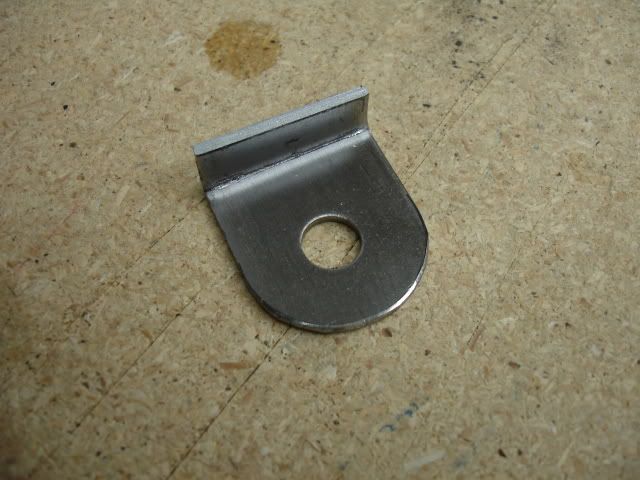
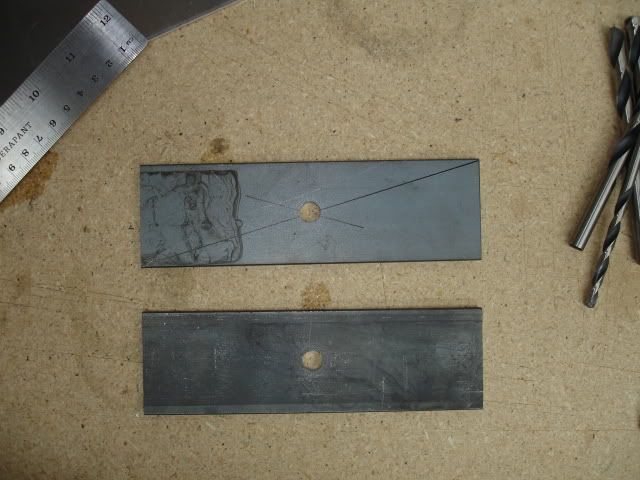
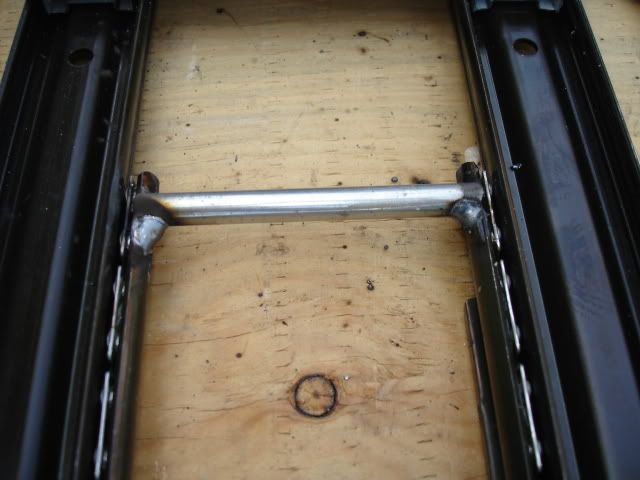
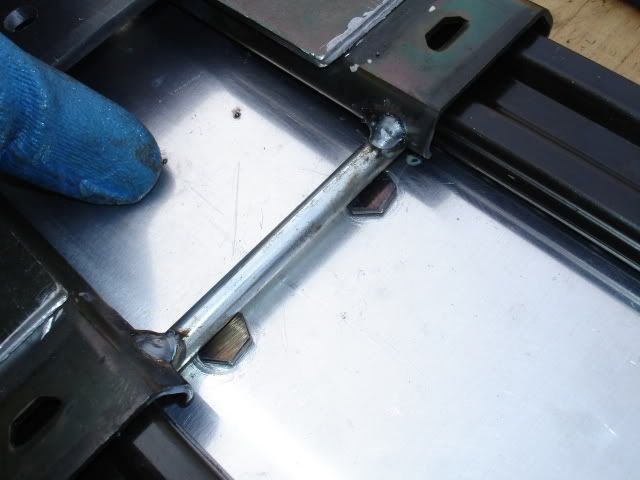
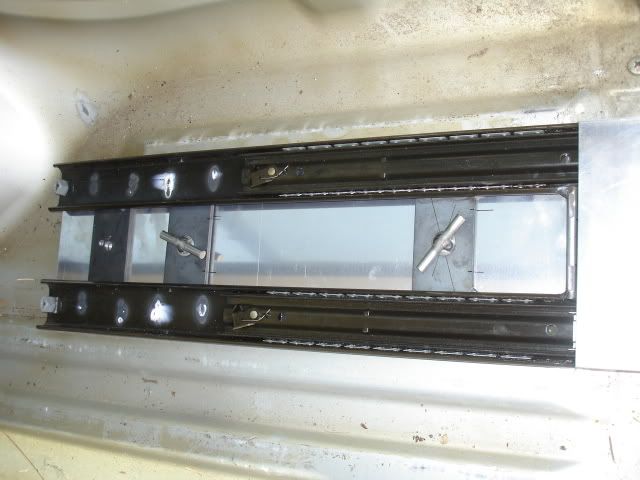
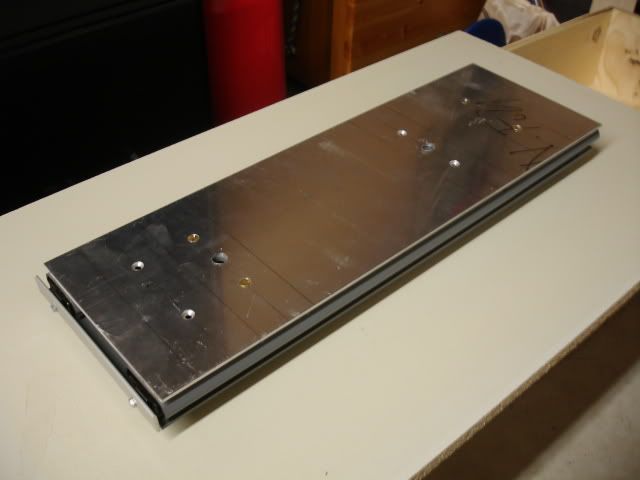
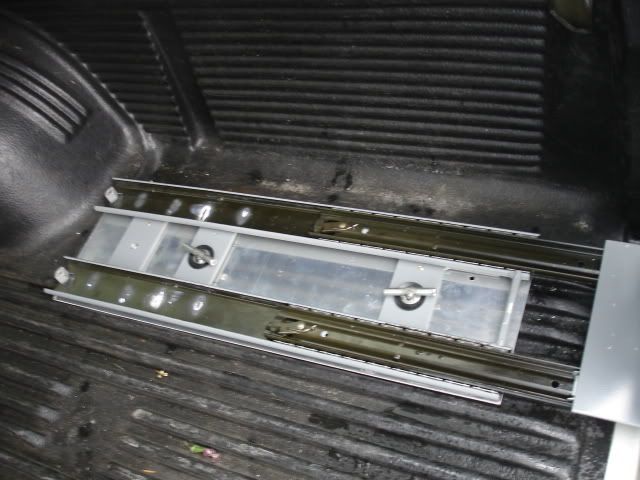
I made some cross members for the slide and welded them into position:
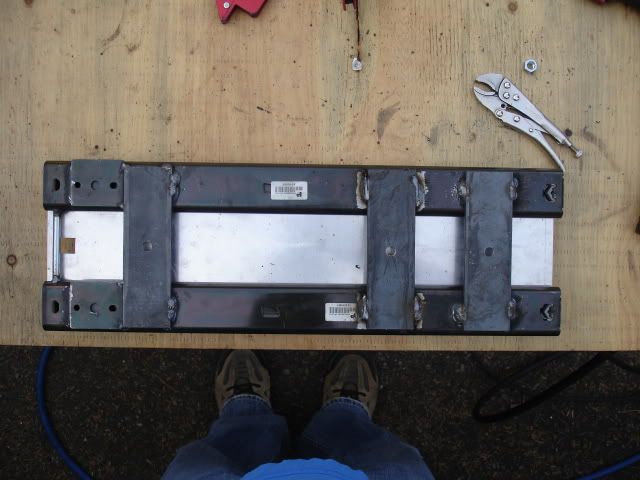
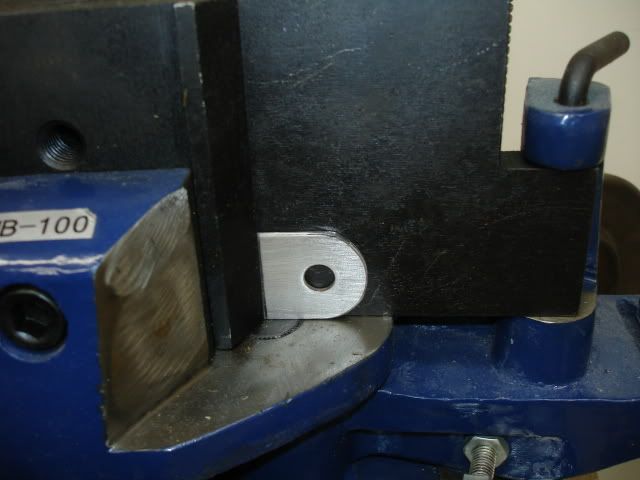
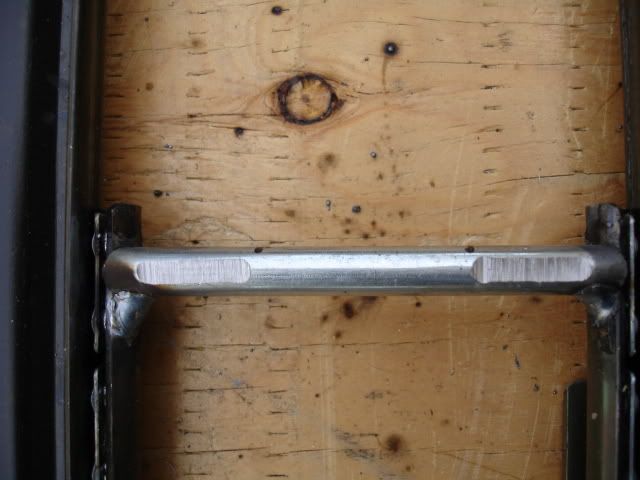
I added the latch lock bar. I had issues with the bolts mounted to the top plate clearing the latch bar, so I did a little grinding:
I added the latch lock bar. I had issues with the bolts mounted to the top plate clearing the latch bar, so I did a little grinding:
Nov 8, 2008 | 09:41 AM
#6
Thread Starter
Registered User
Joined: Nov 2008
Posts: 89
Likes: 0
From: Ontario
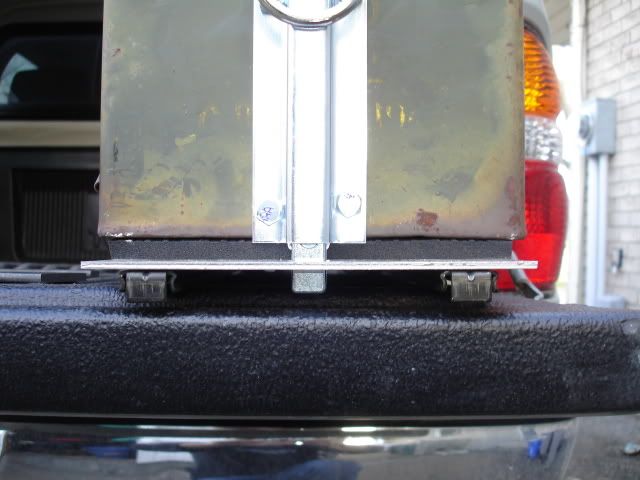
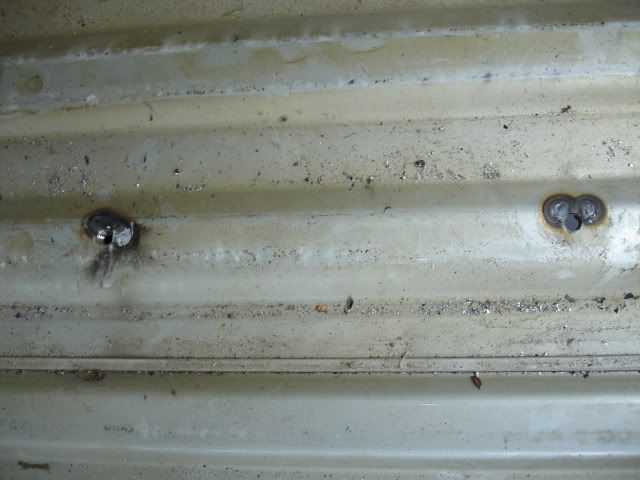
I made some wing bolts for mounting the slide to the bed of the truck. The wing bolts are nice. I don't need tools too take the ammo box and slide out of the bed if I need extra room. The bolts were later cut to correct length.
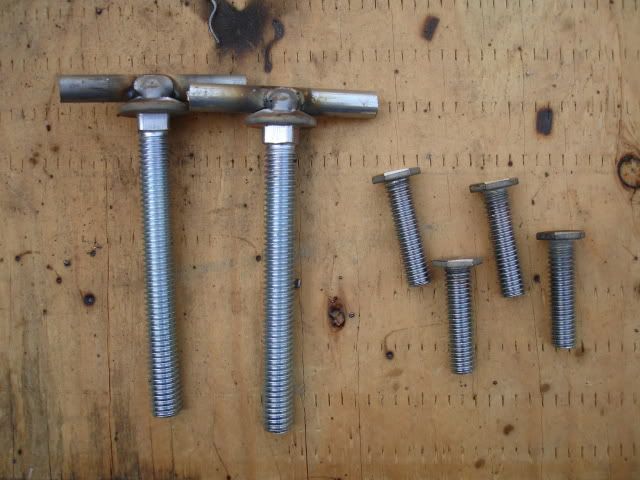
After taking the bed liner out, I drilled holes through the truck bed and welded nuts too the underside. I sprayed some leftover bed liner spray to the nuts and weld to keep them from rusting. The heat marks and damaged paint inside the bed were covered up with some leftover silver automotive spray paint.
Later I put the bed liner back in the bed.
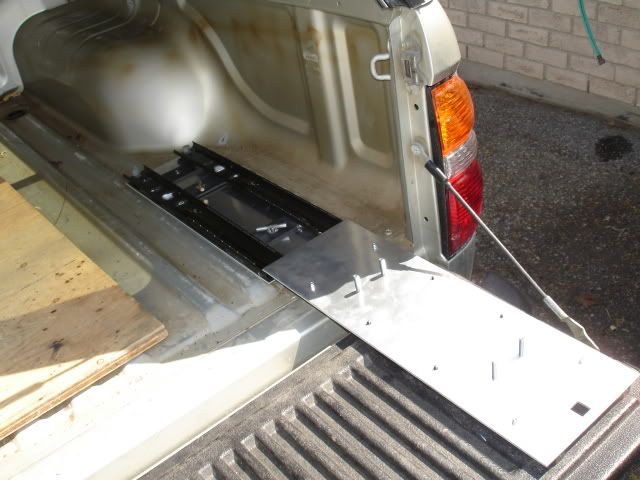
Before bed liner went in, I made sure the slide fit with the bolts in place:
After taking the bed liner out, I drilled holes through the truck bed and welded nuts too the underside. I sprayed some leftover bed liner spray to the nuts and weld to keep them from rusting. The heat marks and damaged paint inside the bed were covered up with some leftover silver automotive spray paint.
Later I put the bed liner back in the bed.
Before bed liner went in, I made sure the slide fit with the bolts in place:

Trending Topics
Nov 8, 2008 | 09:46 AM
#8
Contributing Member
Joined: Dec 2005
Posts: 2,226
Likes: 0
From: Houston (home), Atlanta (school), Cincinnati (work)
i knew i recognized that spotless shop...thats a great idea and im way jealous of the resources you have to do it! all i have besides hand tools is a drill and an angle grinder...you should see me trying to make stuff...clamp it to the sliders, beat the crap out of it to bend it then hold it with a pair of vice-grips while i try to cut it...
Nov 8, 2008 | 09:46 AM
#9
Thread Starter
Registered User
Joined: Nov 2008
Posts: 89
Likes: 0
From: Ontario
I took apart and painted everything bling Battleship Gray.
I reassembled everything, used Loctite on all the nuts and bolts, replaced some nuts with lock nuts.
The second pic shows the workshop floor mat, (no I didn't paint the foam mat gray). The foam mat is a spacer/ vibration dampener.
The only thing I didn't paint was the bottom aluminum plate, I may swap it out for a wider plate later...... I have another idea possible add on.
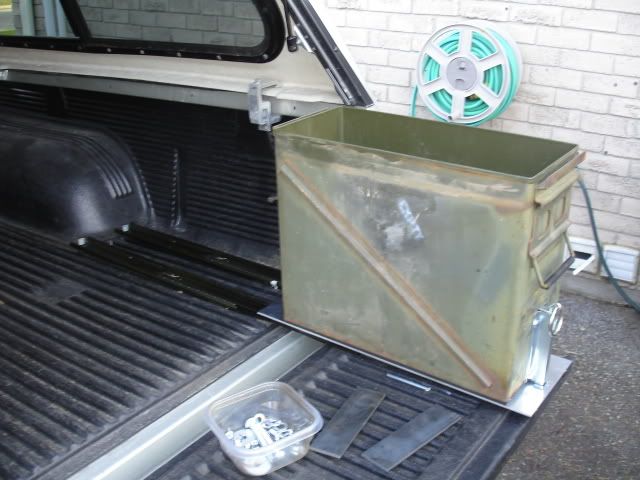
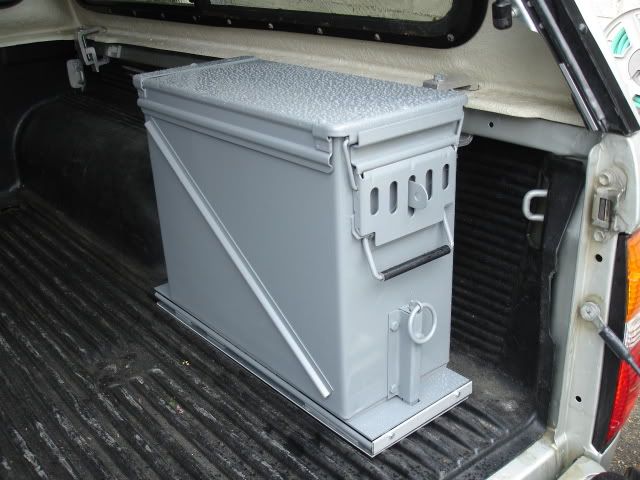
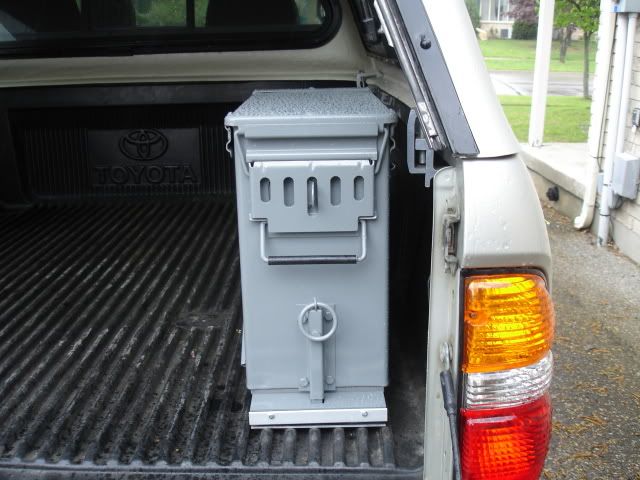
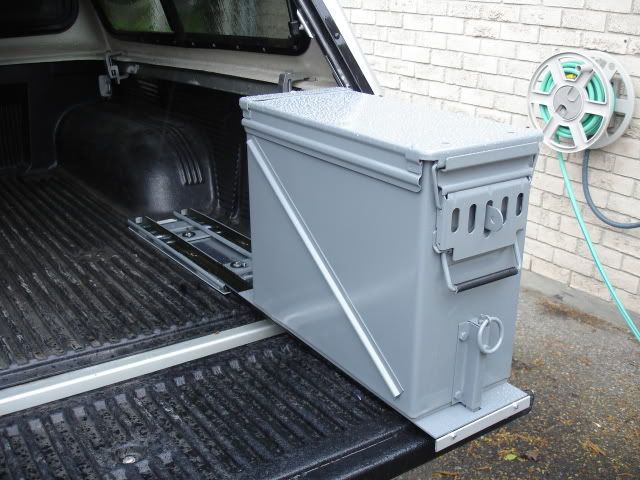
Here's the finished product.
In round of pics the ammo can was loaded with 40 lbs of truck stuff. (yes, I actually weighed the stuff). At 40 lbs @ full extension the slide rests on the tailgate. I designed it to rest on the gate. The slide isn't supporting suspended weight just resting weight supported by the tail gate.
Filing cabinet slides are typically mounted sideways it's designed that way to support fully extended, suspended weight.
I mounted mine flat. I wanted to keep the slides tucked under the ammo can to save weight and keep it nice and tidy and narrow. At full extension the slide drops slightly but does not effect the slide , its very strong and stable. To slide the ammo can back in you lift it slightly and the slide moves fine with full weight. Works better than I thought it would. The slide only drops at full extension when it passes the edge of the tail gate, I may add a piece of plastic to the molded bed liner on the tailgate edge if it becomes a problem. I think it will be fine the way it is, time will tell.


Here are a couple cheap videos:
The vid is posted by weldergirl I hijacked my wife' s account.
http://www.youtube.com/watch?v=CwWpdXgaJWw
http://www.youtube.com/watch?v=NOoFn...eature=related
(May /08) I hit a local mud hole and corrugated dirt roads today and gave the truck a good rattling, shake things up a bit. Every thing is rock solid and the bed bolts never backed off.
I'm taking a trip up north this weekend, its a good chance to further test it.
UPDATE: It's been half a year since the project was completed, I'm happy to say, the drawer slide is holding up strong. The occasional cleaning of the tracks is nesessary, remove the old grease with a rag and replace with new grease. The ammo can has been carrying the same weight and contents since the build was completed, there are some new dents and scrapes but over all the paint has been holding up better than expected.
I have all the parts to build a second Ammo Can Drawer slide.
I reassembled everything, used Loctite on all the nuts and bolts, replaced some nuts with lock nuts.
The second pic shows the workshop floor mat, (no I didn't paint the foam mat gray). The foam mat is a spacer/ vibration dampener.
The only thing I didn't paint was the bottom aluminum plate, I may swap it out for a wider plate later...... I have another idea possible add on.
Here's the finished product.
In round of pics the ammo can was loaded with 40 lbs of truck stuff. (yes, I actually weighed the stuff). At 40 lbs @ full extension the slide rests on the tailgate. I designed it to rest on the gate. The slide isn't supporting suspended weight just resting weight supported by the tail gate.
Filing cabinet slides are typically mounted sideways it's designed that way to support fully extended, suspended weight.
I mounted mine flat. I wanted to keep the slides tucked under the ammo can to save weight and keep it nice and tidy and narrow. At full extension the slide drops slightly but does not effect the slide , its very strong and stable. To slide the ammo can back in you lift it slightly and the slide moves fine with full weight. Works better than I thought it would. The slide only drops at full extension when it passes the edge of the tail gate, I may add a piece of plastic to the molded bed liner on the tailgate edge if it becomes a problem. I think it will be fine the way it is, time will tell.
Here are a couple cheap videos:
The vid is posted by weldergirl I hijacked my wife' s account.
http://www.youtube.com/watch?v=CwWpdXgaJWw
http://www.youtube.com/watch?v=NOoFn...eature=related
(May /08) I hit a local mud hole and corrugated dirt roads today and gave the truck a good rattling, shake things up a bit. Every thing is rock solid and the bed bolts never backed off.
I'm taking a trip up north this weekend, its a good chance to further test it.
UPDATE: It's been half a year since the project was completed, I'm happy to say, the drawer slide is holding up strong. The occasional cleaning of the tracks is nesessary, remove the old grease with a rag and replace with new grease. The ammo can has been carrying the same weight and contents since the build was completed, there are some new dents and scrapes but over all the paint has been holding up better than expected.
I have all the parts to build a second Ammo Can Drawer slide.
Nov 8, 2008 | 09:55 AM
#10
Thread Starter
Registered User
Joined: Nov 2008
Posts: 89
Likes: 0
From: Ontario
i knew i recognized that spotless shop...thats a great idea and im way jealous of the resources you have to do it! all i have besides hand tools is a drill and an angle grinder...you should see me trying to make stuff...clamp it to the sliders, beat the crap out of it to bend it then hold it with a pair of vice-grips while i try to cut it...
Thanks guys!
I still use unconventional techniques, odd, slap together jigs, I still do a lot of work outside. I wish I had a garage. Hey whatever gets the job done run with it.
My rear bumper build has some creative jigs I used to get angle cuts on my band saw. That post is coming.

 Nov 8, 2008 | 12:22 PM
#13
Registered User
Joined: Jan 2008
Posts: 11,338
Likes: 120
From: Austin, Texas
 Nov 8, 2008 | 12:40 PM
#14
Contributing Member
Joined: Apr 2004
Posts: 5,464
Likes: 6
From: Arvada, Colorado
Nov 8, 2008 | 01:33 PM
#15
Thread Starter
Registered User
Joined: Nov 2008
Posts: 89
Likes: 0
From: Ontario
Well.... Just to throw some bait out, I have a unique rear bumper build I'll be posting in the next little while. I promise the thread will be truly epic in length. I'm posting all my builds in a step by step format.....
So when should I post the bumper?
So when should I post the bumper?

Thread
Thread Starter
Forum
Replies
Last Post
dropzone
86-95 Trucks & 4Runners (Build-Up Section)
1097
Jul 17, 2022 04:28 PM
justdifferentials
Just Differentials
5
Jun 13, 2022 07:40 PM
JookUpVandetti
86-95 Trucks & 4Runners
13
Sep 24, 2015 08:56 AM


