
Steering Rack Bushings: Done, but I have a Q!
 Oct 2, 2008 | 09:10 PM
#1

Thread Starter
Registered User
Joined: Aug 2008
Posts: 56
Likes: 0
From: Corpus Christi, TX
Steering Rack Bushings: Done, but I have a Q!
First off, big thanks to both WabFab / Wabbit for getting me the CORRECT kit, even when I goofed the order up. Excellent customer service!! 
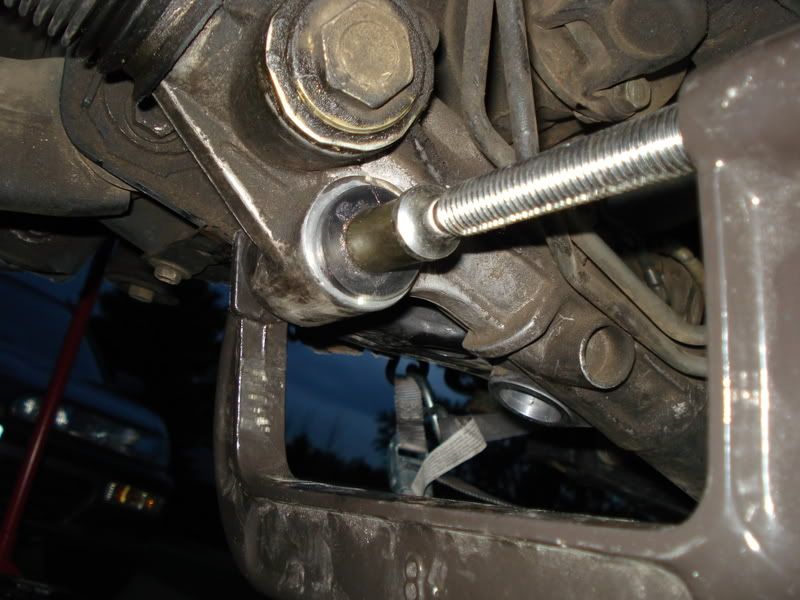
Wow...what a 'fun' time I had getting the old bushings out! The bushing that gives everybody trouble, the center mount, was actually pretty easy after cutting the lower lip away from the metal sleeve (...and figuring out that the bolt is removed from ontop of the mount...I spent 10 minutes trying to break loose the welded nut from the crossmember ). I used a variation of the 'socket' method to get the center mount out; I used a socket and a c-clamp.
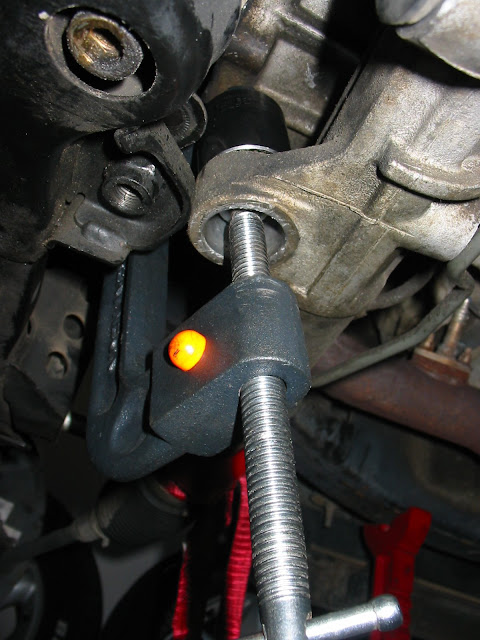
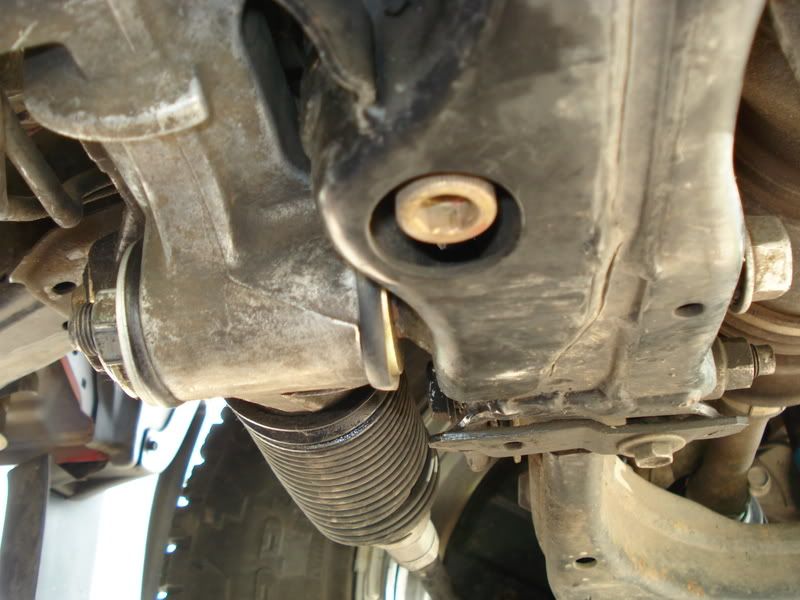
The drivers side mount was a major f'ing PITA to remove. Lots of cutting, pulling, gouging, cussing, and it finally came out. Install of all the new bushings was easy with minimal fuss. I torqued them down to the specified values, and in this, is my question.
Are the bushing supposed to 'squish' out of the mounts a little bit? I don't know if it's easily seen in the picture, but the driver side bushing is slightly squished out of the mount...sorta like a muffin top, if that makes sense.
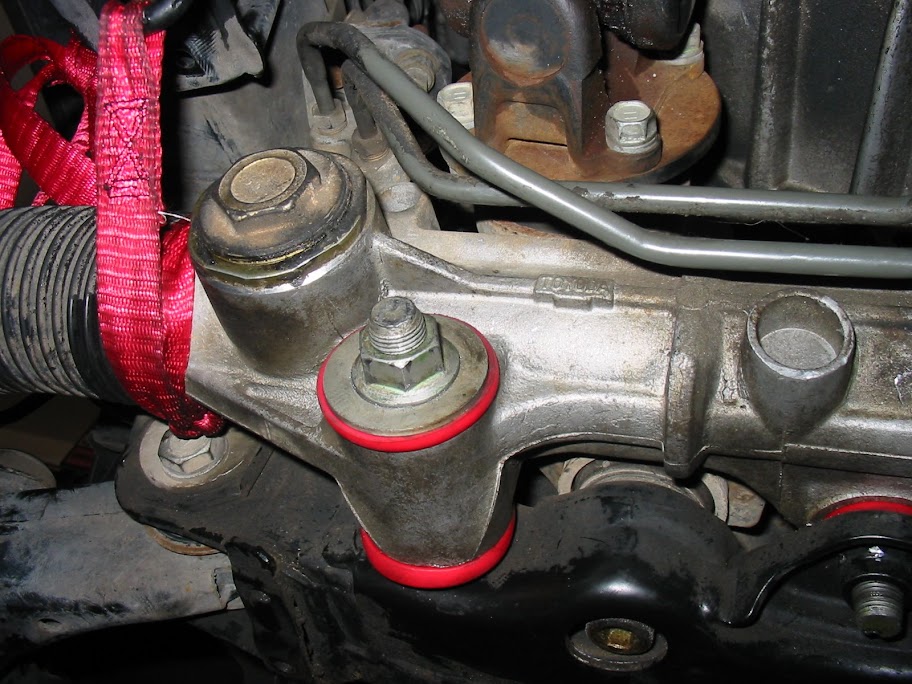

Is that normal??
Wow...what a 'fun' time I had getting the old bushings out! The bushing that gives everybody trouble, the center mount, was actually pretty easy after cutting the lower lip away from the metal sleeve (...and figuring out that the bolt is removed from ontop of the mount...I spent 10 minutes trying to break loose the welded nut from the crossmember
). I used a variation of the 'socket' method to get the center mount out; I used a socket and a c-clamp.The drivers side mount was a major f'ing PITA to remove. Lots of cutting, pulling, gouging, cussing, and it finally came out. Install of all the new bushings was easy with minimal fuss. I torqued them down to the specified values, and in this, is my question.
Are the bushing supposed to 'squish' out of the mounts a little bit? I don't know if it's easily seen in the picture, but the driver side bushing is slightly squished out of the mount...sorta like a muffin top, if that makes sense.
Is that normal??
Last edited by MunkeyTX; Oct 2, 2008 at 09:25 PM.
 Oct 3, 2008 | 05:56 AM
#4
Thread Starter
Registered User
Joined: Aug 2008
Posts: 56
Likes: 0
From: Corpus Christi, TX

Thanks for the pics, mine look squished, exactly like yours!
Originally Posted by sabre
I just ordered this week from wabfab, the same thing. How long did it take to get yours in? I havent heard back from them yet.
Oct 3, 2008 | 06:43 PM
#5
Contributing Member
Joined: Mar 2004
Posts: 128
Likes: 0
From: Twin Cities
I just did mine last weekend. You're correct, what an effin' bitch to get the center and drivers side bushings out. I ended cutting the ends off with a razor knife and with a combination of PB blaster, channel locks, and a c-clamp, I got them out.
It looks like its ok that the drivers side "squishes" out a bit. I was wondering the same thing as mine did it too...
It looks like its ok that the drivers side "squishes" out a bit. I was wondering the same thing as mine did it too...

Trending Topics
Oct 5, 2008 | 05:30 AM
#9
We do have these in stock guys and unless it is the weekend usually ship the next day.  I saw your order Sabre and it will ship Monday.
I have changed a few of these myself now and yes, it is a fun job for sure. Lots of dirt, grease, grime and flowery speech later it will be done, but it sure does make a big difference in steering feel and response IMO.
I could not see the last two pictures, red Xs, but yes the bushings do get a bit muffin headed when you first torque them down, but should mellow out over time.

I saw your order Sabre and it will ship Monday.I have changed a few of these myself now and yes, it is a fun job for sure. Lots of dirt, grease, grime and flowery speech later it will be done, but it sure does make a big difference in steering feel and response IMO.
I could not see the last two pictures, red Xs, but yes the bushings do get a bit muffin headed when you first torque them down, but should mellow out over time.
Oct 20, 2008 | 07:01 PM
#11
Registered User
Joined: Sep 2008
Posts: 69
Likes: 0
i just installed these poly on mine this weekend. the center was the most pain to get back into the slot.
i got a question, i was trying to tighten the drivers side mount, but i dind't tighten it all the way, the bushing gets very very squished.
it's more than in you pic, am i supposed to keep tigthening? it's still pretty loose
thanks
i got a question, i was trying to tighten the drivers side mount, but i dind't tighten it all the way, the bushing gets very very squished.
it's more than in you pic, am i supposed to keep tigthening? it's still pretty loose
thanks
Oct 21, 2008 | 05:10 AM
#12
Thread Starter
Registered User
Joined: Aug 2008
Posts: 56
Likes: 0
From: Corpus Christi, TX
I'd say keep tightening until the proper torque spec is reached.
In my case, I was so exhausted, I couldn't get the bolts torqued to the exact specs, instead I just tightened them until it felt like my arms were going to tear out of their sockets. Apparently this wasn't good enough (duh), and I've got jumpy steering again. I need to go back under and hit everything with the torque wrench.
But back to the question; I'd say unless they're damn near completely popping out of the hole, just keep tightening and let them mushroom out.
Oct 21, 2008 | 05:55 AM
#13

Registered User
Joined: Jul 2008
Posts: 340
Likes: 0
did anyone do the upper control arm? How did you get those bushings out? Does that center bracket press out? what size bolt and threads are on the ends of that center piece that attaches the upper control arm to the truck. When I removed mine the dimples in the ends that the factory uses to hold the nut on trashed my threads, and I need to re tap and die the threads on the bolt end and nut on the rear side of the uca bolt.
Oct 21, 2008 | 08:05 PM
#14
Registered User
Joined: Sep 2008
Posts: 69
Likes: 0
I'd say keep tightening until the proper torque spec is reached.
In my case, I was so exhausted, I couldn't get the bolts torqued to the exact specs, instead I just tightened them until it felt like my arms were going to tear out of their sockets. Apparently this wasn't good enough (duh), and I've got jumpy steering again. I need to go back under and hit everything with the torque wrench.
But back to the question; I'd say unless they're damn near completely popping out of the hole, just keep tightening and let them mushroom out.
In my case, I was so exhausted, I couldn't get the bolts torqued to the exact specs, instead I just tightened them until it felt like my arms were going to tear out of their sockets. Apparently this wasn't good enough (duh), and I've got jumpy steering again. I need to go back under and hit everything with the torque wrench.
But back to the question; I'd say unless they're damn near completely popping out of the hole, just keep tightening and let them mushroom out.
thanks for the advice
Oct 27, 2008 | 12:12 PM
#15

Registered User
Joined: Apr 2008
Posts: 90
Likes: 0
From: Loveland, CO
Mine is still not done, I had some 'help' from some friends while I was out picking up a tool and got so frustrated with the 'easy' part, my truck is sitting in the garage waiting for me to go fight with getting the old bushings out. Thanks for the pix of how you got stuff put back in. Hopefully I can avoid using the mini-torch method of getting the old stuff out.
How did you all get the top/vertical bolt torqued? I have yet to figure out how to get the big torque wrench up there in between the bell housing and the bolt, let alone enough room to work the thing.
Last edited by mrdoug; Oct 27, 2008 at 12:15 PM.
Oct 27, 2008 | 06:36 PM
#17
Registered User
Joined: Apr 2008
Posts: 90
Likes: 0
From: Loveland, CO
Actually, the part I was dreading the most was the easiest. C-clamps and sockets to remove, c-clamps and washers to install.. Got it all put back together now.. just 2 last bolts for the rag joint I'm looking up the torque specs for now and I'm done.
I finally found an angle to get my big torque wrench in to get that vertical bolt at 123 ft. lbs. I had a few choice words for the engineer that crammed so much in such a tight spot that it left about 2* to turn a wrench up there.
I finally found an angle to get my big torque wrench in to get that vertical bolt at 123 ft. lbs. I had a few choice words for the engineer that crammed so much in such a tight spot that it left about 2* to turn a wrench up there.

Thread
Thread Starter
Forum
Replies
Last Post
justdifferentials
Just Differentials
5
Jun 13, 2022 07:40 PM
kawazx636
The Classifieds GraveYard
34
Oct 6, 2021 03:03 PM
Scotttekoch
General Electrical & Lighting Related Topics
5
Sep 28, 2015 10:30 PM


