When you click on links to various merchants on this site and make a purchase, this can result in this site earning a commission. Affiliate programs and affiliations include, but are not limited to, the eBay Partner Network.
here is where we are as of the most recent pictorial update (1/7/24):
I picked this little guy up on July 3rd. got it for a fair price from a guy who was the second owner, and who was good family friends with the original owner.
Original condition when I bought it in July 2017.
This truck is older than I am! Built in September of 1990, number 1291 off the line if memory serves correctly. Got it all cleaned a few days after picking it up and snapped some pics/played with my camera at a trailhead near my house.
The emblem I wanted.
This message approved by #themaceydog
I've been crushing hard on these trucks for years. This one came along from a known source for the right price and low miles, and I had to move on it. Probably the biggest pitfall of the truck at the time of purchase was the lack of A/C. Central Texas summers are unkind at best. The summer I purchased the truck was no exception. I gotten really good at hand-cranking down windows really fast.
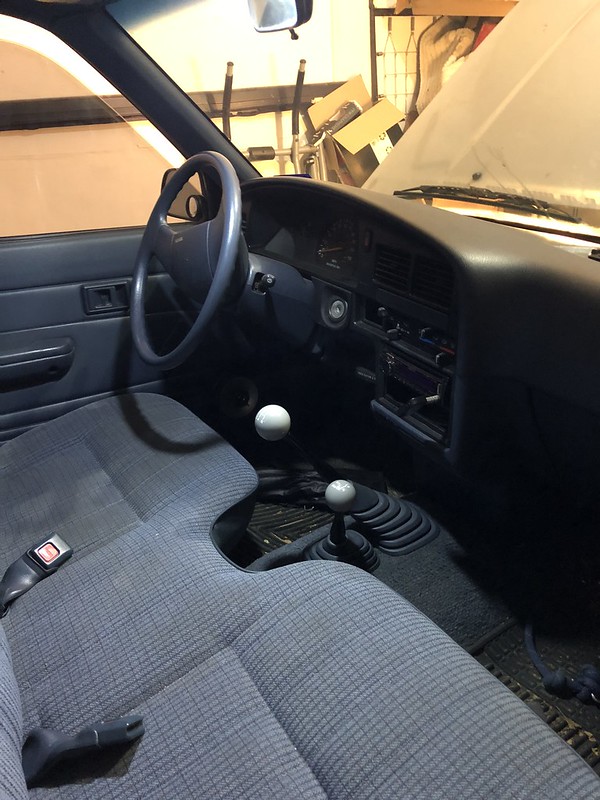
About the truck:
STILL NEEDS A NAME (I'm thinking Surely, as in don't call me Surely)
22re
W56 transmission
4wd
locking hubs
125,431 mi (date of purchase, by all accounts original miles)
single cab cab
glacier blue metallic (only made in 90 and 91 or 91 and 92)
according to the previous owner, the "engine was rebuilt" around 85k. Not 100% sure what that means, neither was he. He inherited it at 105k.
matching VINS all over, even the block
purchased in Seattle in April of 91. retail was ~$12k. if only such quality could be attained for so little these days...
The previous owner had installed some *bump* to it in terms of some cheap 6.5s in the doors and a crappy kicker sub wedge box.
I have big plans for this little blue pickup. I'll get to learn new skills and buy new tools to do all the things I want.
Short Term:
general maintenance:
- plugs, wires, dist cap. coil
- fluids
- inspect all pivots/bushings and replace/upgrade as needed
- shocks
- brakes
- replace all fuses with light up ones
paint correction
fix tears in seats
WHEEL/DRIVER MOD
Mid-Term:
small bedrack system for Thule basket
wheels and tires
SR5 cluster
SR5 triple atti-gauge install
full sound treatment inside (soundmat doors, floor, firewall, rattle suppression, thicker carpet pad)
double DIN head unit with radio comm(gmrs or HAM) and rear camera integrated
upgrade sound system (door speakers, custom tweeter mounts, crossovers; better sub, full-custom sub box. better amp and wiring)
console build or console swap from 4r and bucket seat install
behind seat storage build/integration with sub box
radiator hoses
battery/intake swap
manifold back exhaust
rear disc brake upgrade/master cylinder upgrade(date)
take advantage of general maintenance upgrade opportunities as they come along
headers
A/C install
overland/camping/exploring gear build in bed/wherever it'll fit
Long Game:
long travel front
chevy 63s/deavers in the rear
custom shock mounting situation
long shackles
4.88 or 4.56 front and rear for 33s
lockers front and rear
onboard air
custom bumpers and sliders
engine rebuild, built to be strong A.F. and actually make over 100hp
A-pillar gauges
Maybe:
Engine swap, 3rz,1jz, 2jz, 5ze, etc
This forum has been a wealth of inspiration and knowledge. I've spent the last couple of months really getting to understand the truck, and much of that is thanks to YT. I hope to add some valuable content and eventually have a vehicle that meets my wants and expectations and is full of my own trials, tribulations, tears (maybe) and the joy of fulfillment, as well as a build thread that reflects my truck and how I operate.
Last edited by Genera_lee; 01-07-2024 at 05:14 PM.
Reason: added picture
Brought the truck home and marveled at it for a bit. Then went inside cause mosquitos love me. Drove it around for a few days just to get used to it and driving a stick again. I had an RX8 with a 6 speed before that and it felt TOTALLY different. But I learned to drive a stick on a car with a super sensitive clutch, now I can drive anything smoothly.
Got an oil change and inspection done at a jiffy lube down the street. Probably the only oil change this truck will ever have performed by someone other than myself from now on. no milkshake oil so it seems the HG is still in OK shape. Checked before I bought the truck, but it was nice to see confirmation.
On the 6th, Cobb Tuning here in Austin had a lowkey meetup here and I decided to go check it out and see a buddy that works there.
one pic of the truck. lots of pics of all the super cool stuff people brought:
Naturally lots of subies present.
COOLANT
I was also in the process of moving into a new place locally at the time and had to carry a bunch of crap between the old a new place.
On the last run of the day, I parked the truck in the driveway of the new place to unload. As I turned off the truck, I heard a really loud hiss and a bunch of gurgling and splashing. Initial thought was fuel. then I turned the key to ACC just so I could watch the coolant temp needle inch into the red. "Had this truck less than 2 weeks and I'm already having issues" was all I could think. Turned out the radiator cap valve was fused shut, and the coolant had a nasty brownish tint. But it definitely overheated. Guess it's time for a flush. As an aside, that's the only time I listen to a seller saying its fine mechanically...
Grabbed some of the Red Stuff from the local Yota dealer (also happens to be down the street, lucky me), a t-stat, new radiator cap, some hose clamps, and some grey RTV from Autozone (store of choice, happens to be around the corner too; seriously, their rewards program is stupid good) and like 30million gallons of distilled water and got to work doing a full system flush and refill with the right coolant. Pretty sure it was just some yellow crap in there before, hard to tell with the brown tint. Filled the system 3 times with just water, ran it up to temp, rinse, repeat. Then drained another couple gallons through just the radiator and some through just the block. With everything looking squeaky clean, I filled it up with 50/50 red coolant and h2o. This was the only time I had bubble issues in the system. I'm talking geyser in my engine bay bubbles. Wow. Also confirmed the heater could roast a chicken, so that's good.
I put a new thermostat and the proper coolant in the truck now, and the needle never wavers past about 1/3. Good enough for me.
- Update: 2000 miles in and the coolant is still nice and clean. The truck must have been really neglected for the coolant to get so murky before I changed it. Either that or oil from the assembly during the engine rebuild got it and murked it up. Time will tell. I'll be keeping an eye on it.
Last edited by Genera_lee; 04-03-2018 at 09:20 PM.
Really decided I hate the blacked out look. It was time for a change.
Off to my favorite store, AutoZone, to see what they had in the way of paint stripping supplies.
Found this awesome stuff called Oops. It supposedly removes overspray and all kinds of other stains.
I tell you what, it worked pretty well on the grill and all the lights.
Took the taillights from this:
To this:
A little abrasive love after stripping the paint: worked from 800-2500 grit wet sanding
Lastly used some Blue Magic to get them to shine up:
Did the side markers in the front too, but forgot the pics. so instead here is one from later on.
Here is one of the grill after removing the paint and a little blue magic:
Shiny
Aaaand the pup being helpful as always...
Last edited by Genera_lee; 01-06-2018 at 11:02 AM.
I've been hearing increasing amounts of noise from the front end on startup, and some other random times.
I know these engines have valve trains that tend to be louder than normal, especially when loose.
Decided to check it out and get the valves adjusted, or at least check em.
I pulled the valve cover. In the 5 minutes it took me to do that, decided I would never again deal with all those vacuum lines if I could help it.
Turns out I can. In Texas, vehicles older than 25 years don't have to pass smog or get sniffed.
I'd recently cleaned up the engine bay a little bit but it was still cluttered.
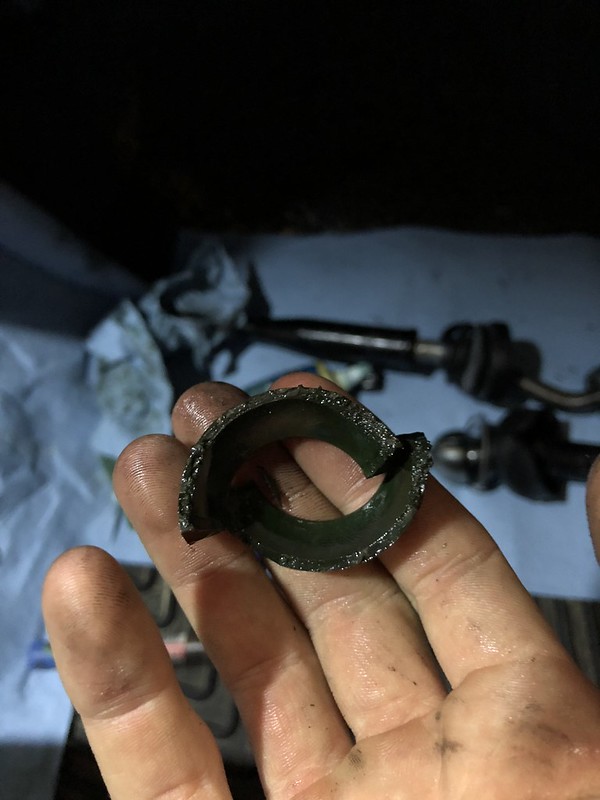
Found some valves out of adjustment, but more importantly, found the driver's side timing chain guide missing.
No wonder I get so much noise at startup. I figured this might be the case, and was a secondary reason for pulling the cover.
The chain had worn a tiny bit into the head on the driver's side and even less on the TC cover.
I talked to Ted at ENGNBLDR and he said as long as the TC cover is grooved less than 1/16", it should be ok to reuse.
I couldn't find that info anywhere and had to actually call ENGNBLDR to find it out.
Here's the damage. I'm thinking I caught the TC guide being broken just pretty quickly after it happened.
Forgot to take a pic of the grooves in the TC cover.
Adjusted the valves and got everything buttoned up. Cranked it and it sounded better, but still some light TC noise at idle, startup, and revving down.
I've been driving it just it around just a bit until I could get the TC kit from ENGNBLDR.
Macey was no help. Drinking on the job here:
I was really planning on going with the 22re Performance double row conversion, but it turns out I don't need a cover, so that cuts my costs down significantly.
I like nice things, but $60 vs. $400 is hard to say no to.
Parts are on order and will be here soon to do a TC and guide replacement.
Why does no one make a geared timing conversion kit? Surely it could be done...
Last edited by Genera_lee; 01-06-2018 at 11:12 AM.
I'm gonna do an EGR and PAIR delete on the truck while I have it apart for the timing chain. If anyone wants to chime in why this would be ill-advised, I'd like to know why.
I'm also going to do a write-up on the process for my year and equipped truck. the LCE video is pretty decent, but I'd have liked to have still shots and diagrams to add some peace of mind. So I'll make one. Maybe it will help someone.
Its been proven to give absolutely zero gains (other than a minor de-clutter in the bay) and has actually been proven to decrease performance in some cases. do some research on it before doing the removal. its not a small block chevy and doesnt respond to the normal upgrades in the way youd assume.
@space-junk - Thanks for the insight. I'd do it just for the de-clutter of the engine bay. If I get worse performance, I'll reinstall it. It wasn't too bad to take off and I saved everything.
Edit 4/3/18: 100% regret taking off the emissions stuff. all of mine functioned fine before removal. it made the truck warm up more slowly, have an intermittent slight stutter under 3/4 throttle on less-than-smooth roads, less perceived power, and actual reduced gas mileage. reinstalled and now all those issues are gone.
Last edited by Genera_lee; 04-03-2018 at 09:26 PM.
Its been proven to give absolutely zero gains (other than a minor de-clutter in the bay) and has actually been proven to decrease performance in some cases. Do some research on it before doing the removal. Its not a small block Chevy and doesn't respond to the normal upgrades in the way you would assume.
^^ I agree. Often times when people do see an improvement, it is because something was wrong with their emissions systems to begin with.
I would keep everything stock unless you decide to do some major modifications to the engine.
Plus, how often do you plan to take the valve cover off anyway once you finish replacing the timing chain? Just a thought...
I do like the stock looking tail lights and grill. It makes the truck look more grown up than the "blackout" look.
Got all sealing surfaces (except the oil pan, what a bugger) cleaned and prep'd last night.
I was also able to borrow a tach and a timing light from my boss. Should be able to get Surely back together and running by monday night.
Hopefully this will solve my oil leak issue too cause my engone was grody before i pulled the whole front end off.
Install pics to come as the weekend begins and progresses.
It's been a minute since I posted on the slo_build. here is the finish of the TC kit install. Overall I'm pleased with the quality and service from Engbldr.
Finished up late late in the evening. Got the coolant system burped, truck ran great. No complaints.
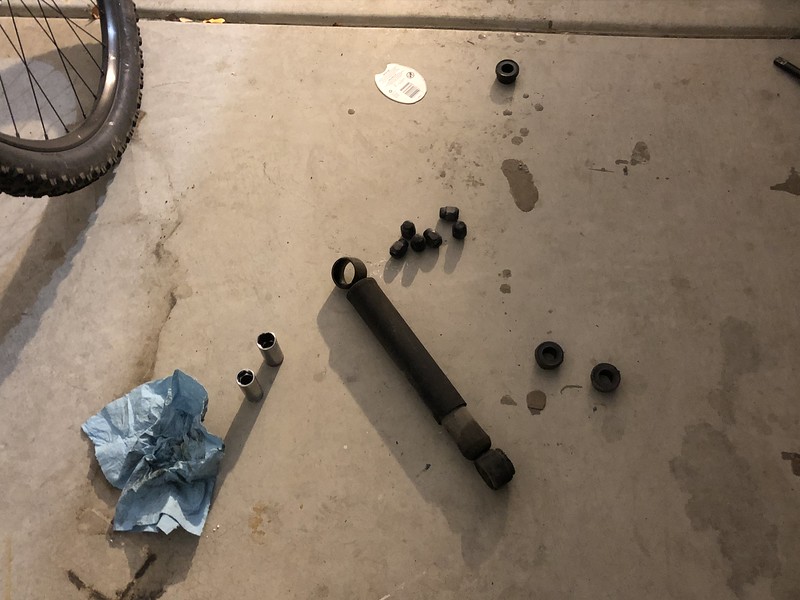
To get the crank fixing bolt off, I was able to do the starter bump method using an impact socket and a breaker bar. The previous tenant of our house also left a bunch of stuff and I stumbled upon a long, very thick gauge pipe that I used as a "torque multiplier" on the breaker bar.
Here are a few pics of during:
During teardown
Really bad pic of the contents of the kit
I've never re-checked anything more than checking to make sure I had the chain on the right teeth.
I had a hell of a time getting the chain drive gear off the crankshaft. I didn't have any gear pullers or anything so I ended up just kind of walking it off with a board and a hammer. I felt bad for my roommates. I normally do this kind of stuff pretty late in the evening. turns out the drive gear was cracked anyway. Could've been caused by me, who knows though.
Gears, chain, and cover reinstalled.
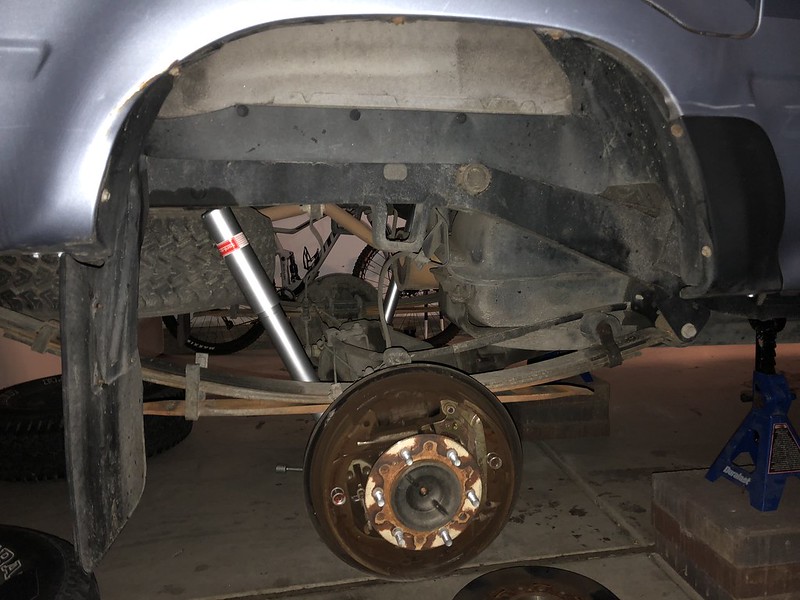
I was able to drop the front crossmember and the diff and remove the oil pan from under the truck. It was full of plastic chunks and baked-on oil. Yum.
Tried to clean this surface as best I could. The top of the oil pan was covered in RTV. WHAT A PAIN.
It took forever to remove enough of it where I was satisfied with the result. Then I cleaned out all the crap from the pan and got it ready to reinstall.
Nice and clean. Just before I installed the hidden bolt to begin the full reassembly process.
Dropping the front crossmember and diff was a challenge with no air or power tools. Holding the nuts in place to bolt the diff back in was also very tough.
Buttoned everything up, double check torque and tightness everywhere as I went along.
Used the breaker bar and rolled the truck to tighten down the crank pulley fixing bolt. Made sure valves were adjusted.
I'd forgotten to mark the position of the distributor when I removed it. I thought i was gonna fight this issue for a couple of days. Seems I got lucky.
Filled all fluids, using new oil and filter and filtering the used (but relatively recently replaced, ~500miles) coolant, then rolled it out to the end of the driveway to start it and burp the coolant system. Started up like a champ. Played with the timing some until it sounded close to right for a cold start, then let it warm up and burped the collant system. I checked my timing with a light I borrowed from my boss. I was at about 7* just by ear. Set it to 5* and took it for a little drive.
It was so quiet!! No chain slap on engine braking, no valve noise, it was great!
Lessons learned from the whole process:
watch your knuckles
don't use a gasket on the oil pan
don't settle for ok alignment on the gasket for the TC cover
PB Blaster more than 20 minutes beforehand
take more pictures of brackets and locations of parts
So I'm now having a few small issues after completing this repair.
First and foremost, I have a pretty major oil leak from around the oil pan. I decided I would use a cork gasket for it instead of a mountain of RTV. Mistakes were made.
Part of it can be attributed to the fact that the TC cover gaster sticks out kinda funny on one side (I tried to account for that with RTV; seems it didn't work), but the other areas of the oil pan leak, I have no idea why they leak, other than it's because of the gasket.
Second, I now get idle-drop every once in a while at a light while the truck is still warming up. It's like there's a bubble in the coolant system, like how the idle surges and drops when it's getting burped. It goes away once the truck is warm. It's strange and I can't figure out whats going on. I've burped the system as well as I know how multiple times...
Third, I have a slow coolant leak from where the water pump seals against the TC on the passenger side. So I guess that means I get to pull the oil pan and water pump and fix those issues. Joy.
I HATE having a leaky truck.
Does anyone have any ideas on that aforementioned idle surge issue?
Last edited by Genera_lee; 01-06-2018 at 11:34 AM.
Reason: pics
Since I replaced the timing chain, I lost my job due to the company doing some financial restructuring, got hired on by another place, moved across the country, have been out of the country for training, and have had no time or money to do anything with Surely.
It's been a stressful couple of months, but it's starting to turn around now.
I've been in midwest rural Japan for the last month for some on-site manufacturing training for my new job doing manufacturing equipment service. I moved to Reno, Nevada. I had the leave the truck in Texas.
I go back to Japan for 2 more months as well soon.
After that, the fun begins. Surely will be delivered to Reno. Then I'll get to reinstall all the smog stuff i took off during the timing chain install; so much for all that work. Then, new wheels and tires (this is a maybe), rotors, drums, pads and shoes, and a bleed. Some accessory lights will be added. Transmission and differentials will get new fluids. bushings, ball joints, tre's, etc, etc. Shocks all around and maybe springs in the rear. Then I'll start working on my center console box and behind-the-seat shelf system to store stuff in the cab more efficiently.
Anyone have any recommendations for some of those soft replaceable parts like bushings, motor and transmission mounts, and whatnot?
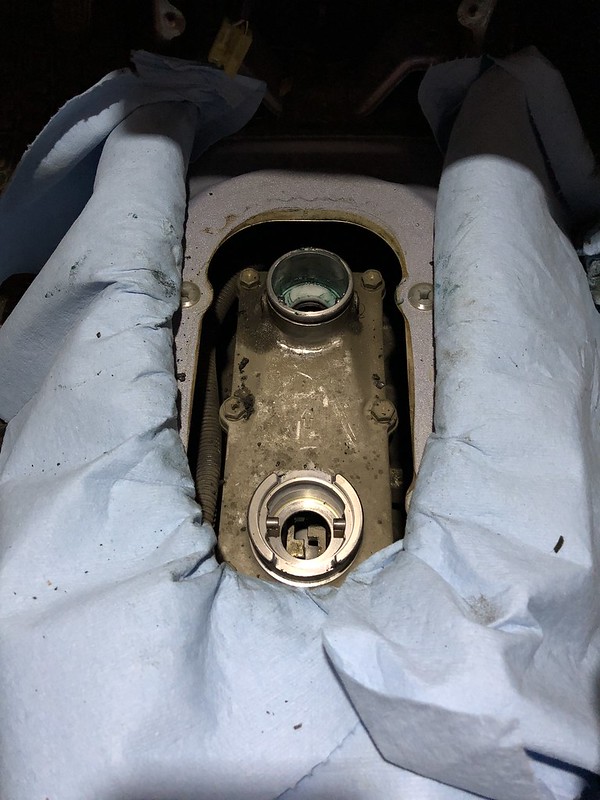
Can I fill the transmission from the shifter? if so i'll replace the seat bushing too. (EDIT: I learned the other day that I can fill from the shifter, at least for the transmission.)
I'm a Texan at heart; so I'll also be painting a *subtle* Texas flag in the bed with light gray and white paint, letting it get scuffed up for a while, a nice patina, then putting a clear Bedliner over it. Worst case scenario, I hate it and do black bedliner. But let's be real. It's gonna be awesome.
Last edited by Genera_lee; 03-17-2018 at 10:10 PM.
Reason: edit for learning
I'm finally back in the US. Shirlee gets delivered on wednesday.
I have a pile of parts and receipts for adventuresome times ahead, general maintenance items, and little trick things i've found over the last couple months.
Japan was cool and all, but I'm glad to be back in the states. I missed Mexican food and speaking English more than I'm comfortable admitting. And I missed working on and driving my truck. Which I have since remedied.
While I was gone, I ordered a bunch of stuff from summit and low range. I am sad to hear ENGNBLDR has closed shop, hopefully, for the community, it's just temporary.
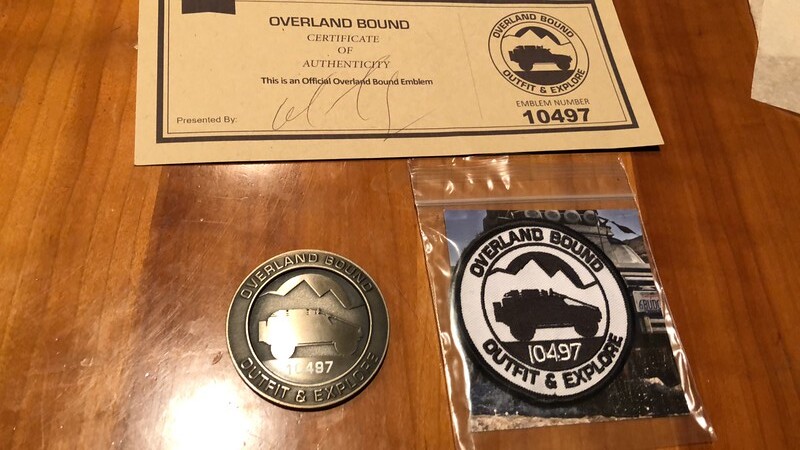
Got some new shocks, brake pads, shifter seats and bushings, a little bit of jdm flair, shift knobs, some lights, horns, and some paint. Oh, and also my Overland Bound Emblem!
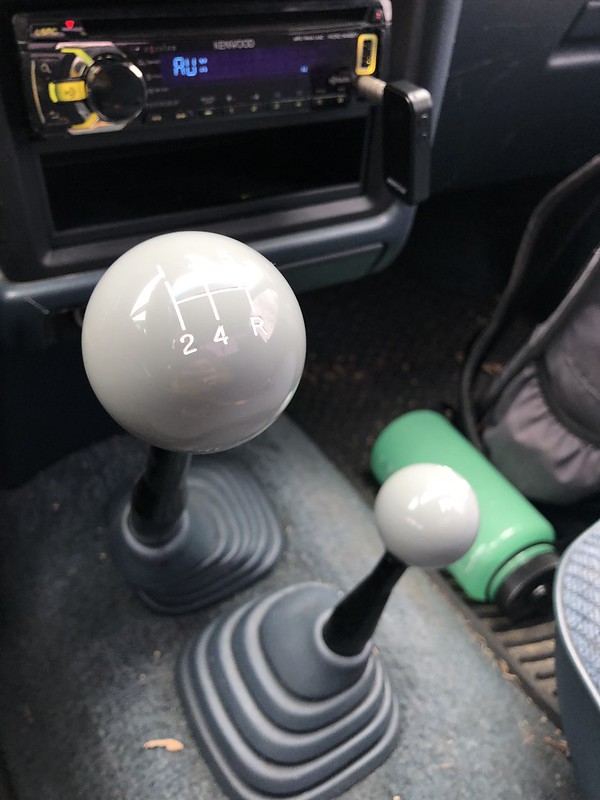
First thing I did was install my new Core Shifters shift knobs. These things are awesome! And they match my truck color scheme perfectly. They are the exact same color gray that I'll be using on everything on the truck!
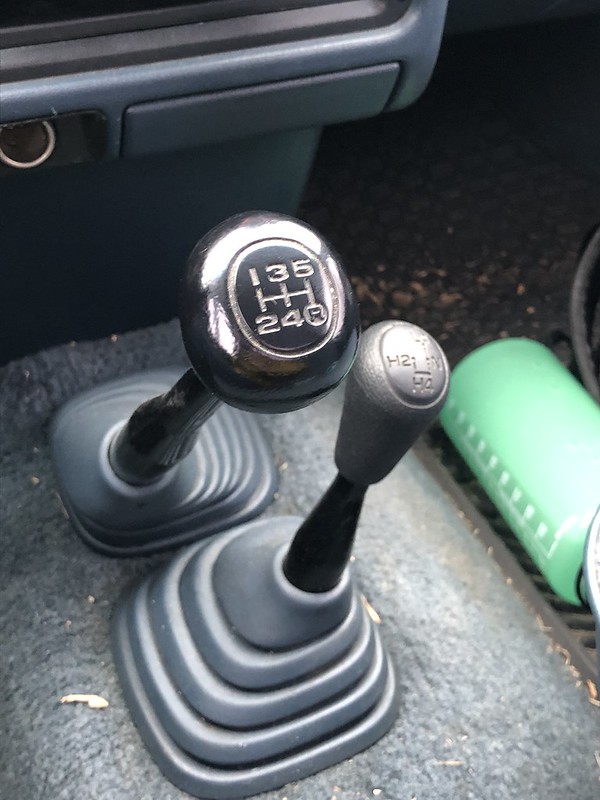
Old:
New:
Ditched the old oil top cap from autozone for one I found on eBay that has the TEQ logo on it. It will go perfect with my custom plates.
Installed the led dome light upgrade from low range. Holy crap what a difference. Buy it. It's perfect.
New hella horns. Grills painted to match. Wiring seems to be pretty straightforward; I just need the right sized spade connectors to go in the stock plug. I'll try to do a quick write up on it when I'm done. Installed the horns between the front clip and radiator supports using an existing bolt. No more wimpy horn when someone tries to cut me off. plus more tuner/jdm subtle touches.
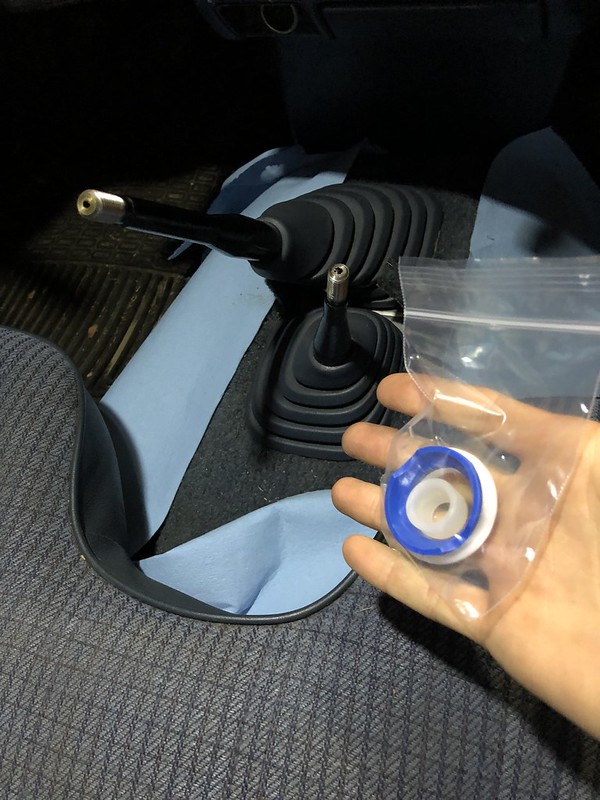
Installed new heavy duty shifter seats and a shifter bushing for both the transmission and transfer case shifters. That was a pretty interesting install. It took some ingenuity to be able to turn the ring that holds the shifter in place without the right tools, or any tool well suited to the job. The old rubber shift seat just crumbled into 1000 pieces when I tried to remove the shifter too. Luckily the bushing was still in Ok shape. But overall it took the transmission from feeling just a bit sloppy to tight and impressive for the age of the truck. The transfer case shifters seat was still in decent shape but had cracked in half. So I replaced it too. *One other note important to that install is that the marlin crawlers HD shifter seat does not require the metal ring to go underneath the seat itself. Doing so will prevent you from reinstalling the spring retainer piece*. I'm also in the middle of replacing whatever fluid was in the transmission and transfer case with some Redline MT90.
Busted t-case shifter seat:
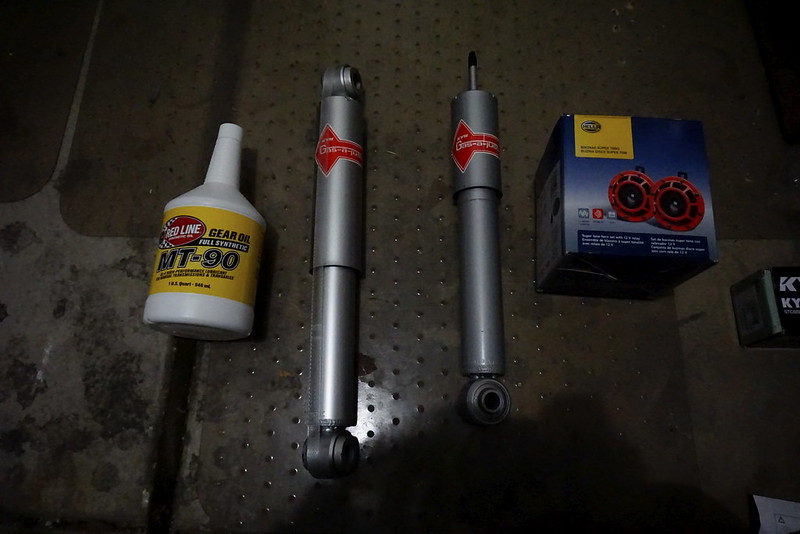
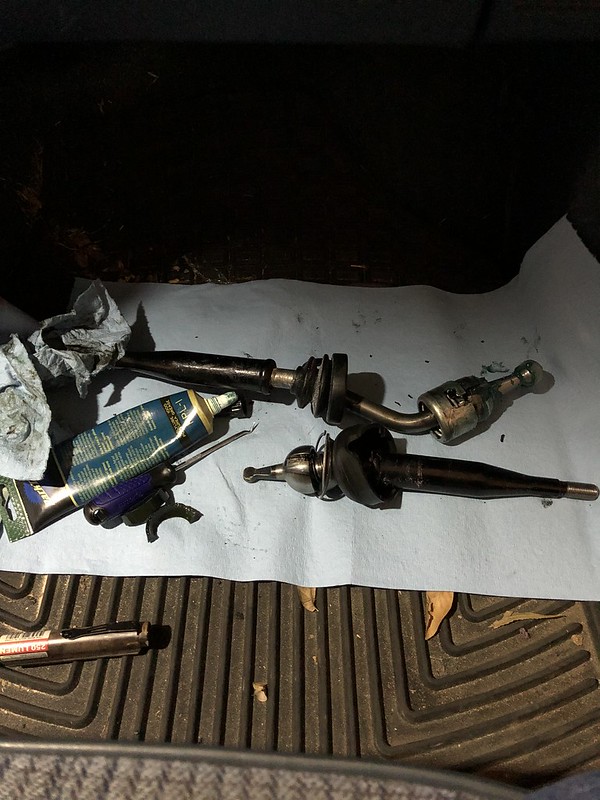
I'm also installing new shocks all the way around, and i have an add-a-leaf kit to put on, and new u-bolts. KYBs for now. eventually i'll do a couple inch lift (spacers up front and a 63 swap rear), put on some 33's, lockers, new gears, and go with some 5100s.
New rears installed. It was way easier to remove the old ones than i expected. also the old ones were straight from Toyota. so i would imagine they are stock. from 1991. whoa.
Old shock with no gas pressure justt sitting compressed.
Next on the list: finish horn wiring
install emission equipment and Tuck the whole system
finish the rest of the engine bay cleanup
reinstall grill
Shocks in front
pads in front if needed,
paint calipers and rotors
Transfer case and transmission fluid refill
See what I can do about getting the u-bolts loosened to do the rear add a leaf set.
track down all the little exhaust leaks I have
figure out if injector 4 is leaking gas
Last edited by Genera_lee; 03-30-2018 at 09:53 PM.
Reason: photographic evidence
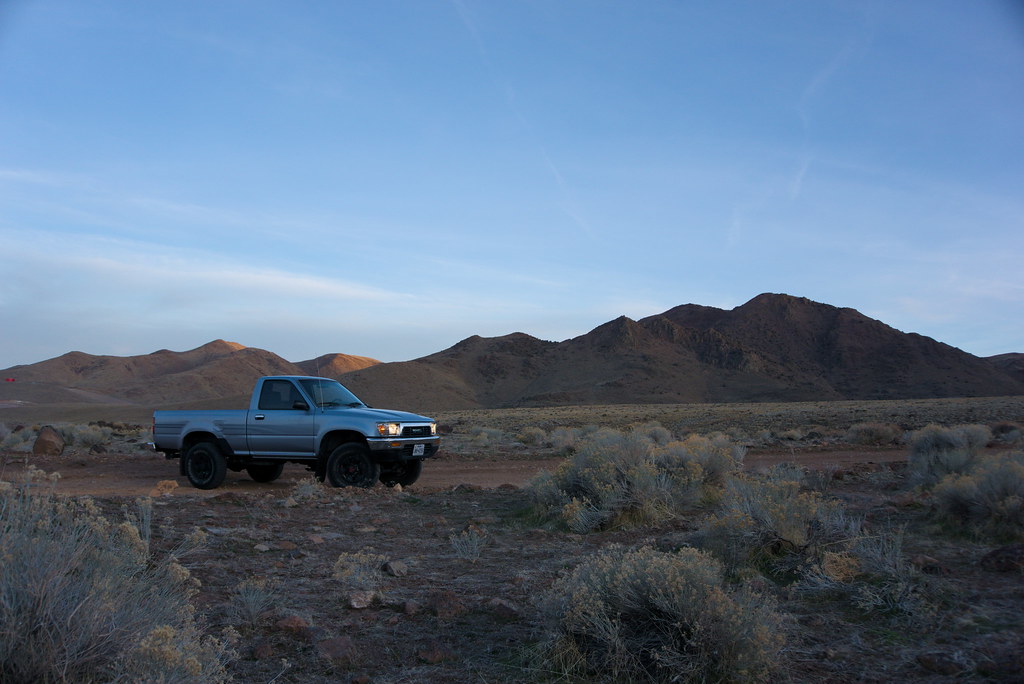
went out and found a nice little dirt road on my way home from work. I love living in the mountains now! and I couldn't pass up the golden hour photo op.
 09-27-2017, 10:10 PM