
Door hinge modification with removable pins and bushings
 May 6, 2009 | 06:26 PM
#1
Thread Starter
Registered User
Joined: Mar 2009
Posts: 257
Likes: 0
From: indiana
Door hinge modification with removable pins and bushings
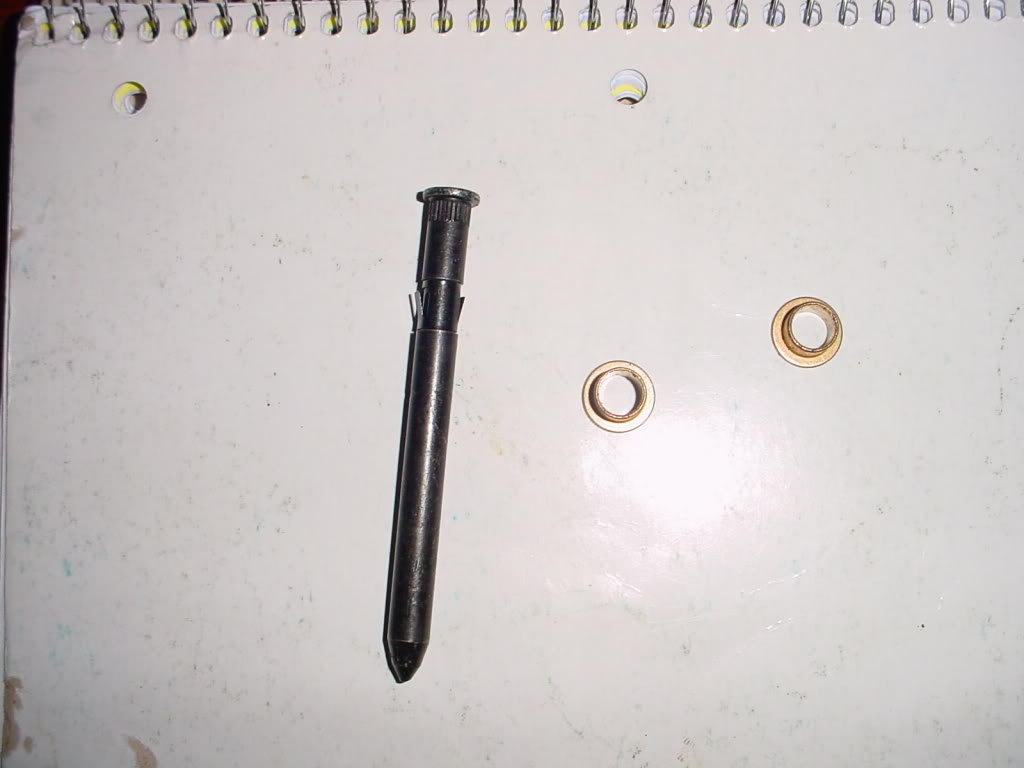
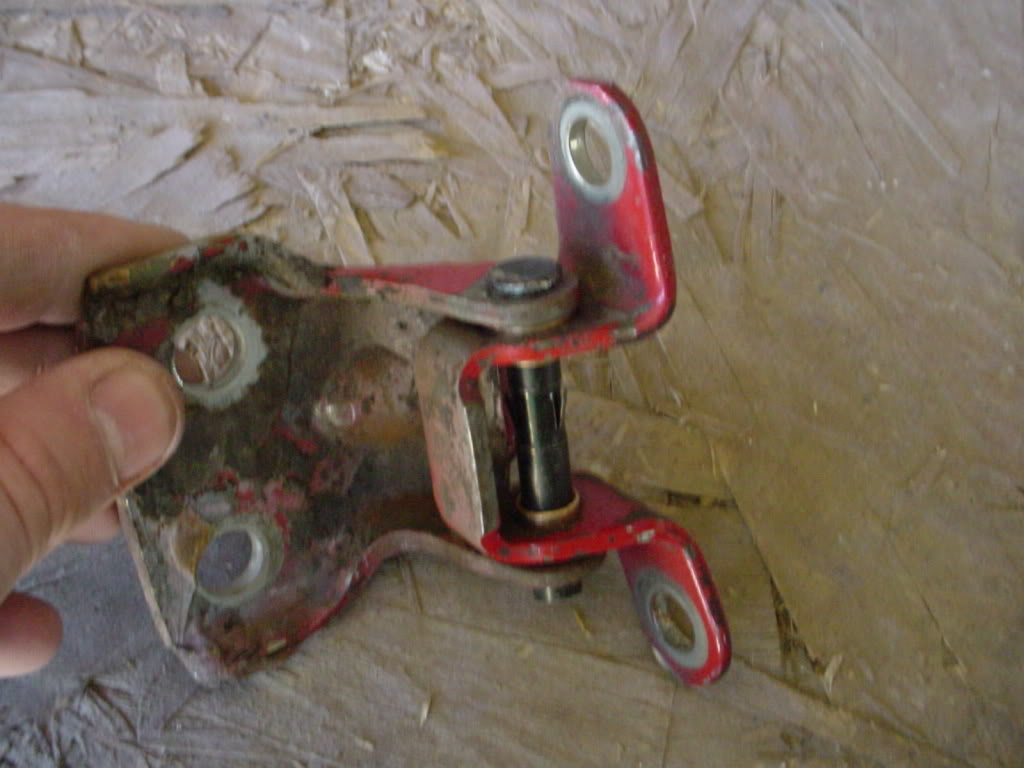
It seems that you can purchase lower door hinge replacements but not upper hinges. I modified my hinges to use replacable pins (PN# 19183) and bushings (PN# 14550). To do this modification you will need: 12mm socket, ratchet, at least 3 inch extension, files or grinding tool, hammer, punch, vise, hacksaw, and a helper. (I will try and get the part numbers of the pins and bushings i used. I took my hinges to the parts store after i removed the old pins and bushings and found something close.)
1. Roll down the window, it makes the door easier to handle when removed.
2. If not equiped with power windows or locks skip to step 4.If equipped with power options you will need to remove the kickpanel and disconect the wiring.
3. Pull the wiring through the A pillar.
4. Using the ratchet, extension, and 12mm socket remove one bolt from each hinge.
5. Have your helper hold the door as you remove the last two bolts.
6. Remove the 4 bolts holding the hinges to the door shell. There should be a total of 8 bolts.
7. Place the door shell in a place where it will not get damaged.
8. Take pictures or mark the hinges top and bottom to aid reassembly later. Work on one hinge at a time so you do not mix parts.
9. Secure the hinge in a vise.
10. Using a flat file or a grinding tool, a dremel or a die grinder work well, to grind the puddle weld holding the pin. Be careful not to grind too much off of the hinge.
11. Use the punch and hammer to knock the pin out of the hinge.
12. Remove the old bushings.
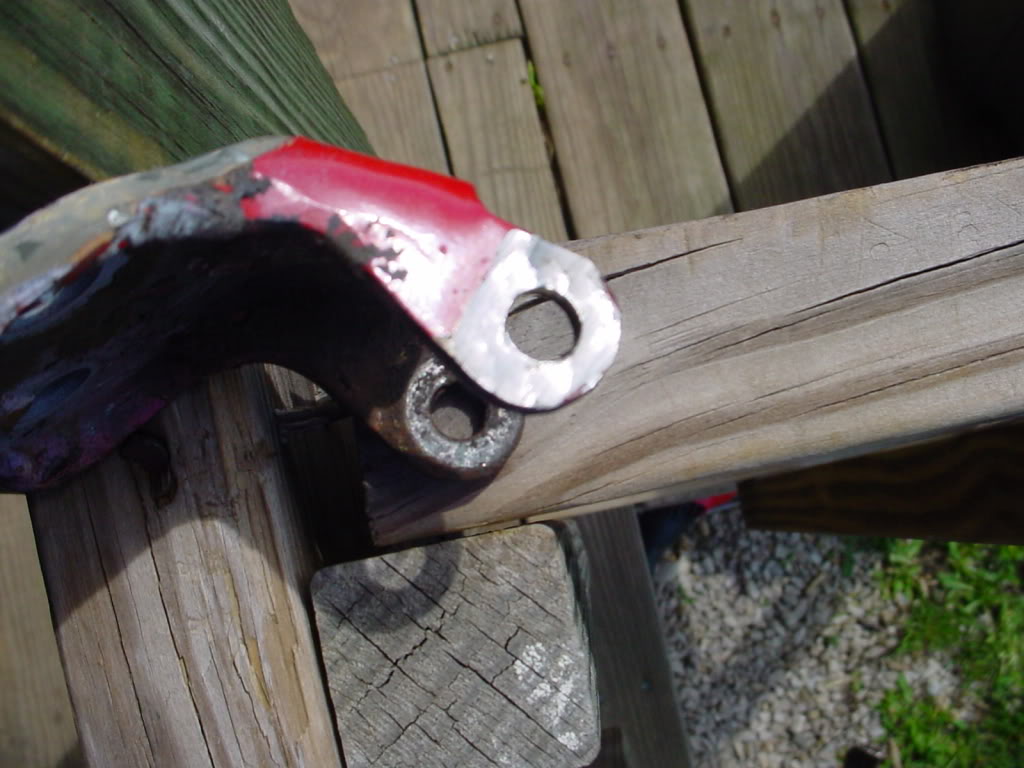

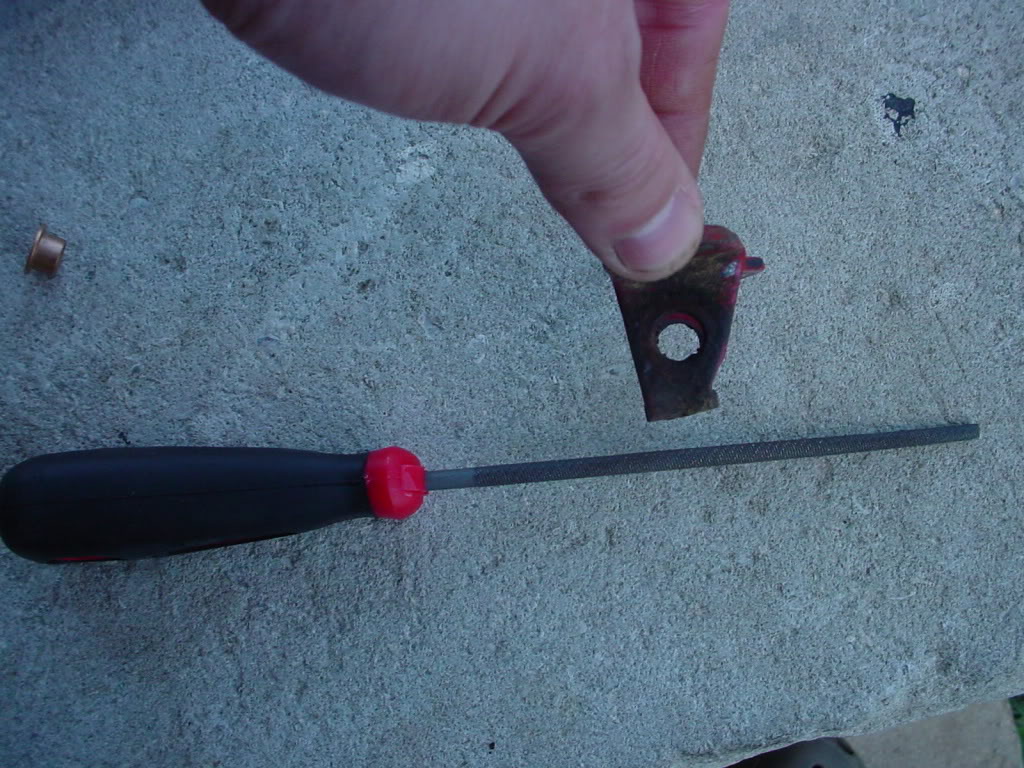
13. File, drill, or grind the hinges to fit the new pins and bushings. Notice that not all of the holes are the same size, check the fitting often.
14. Line up your marks or refer to your picture for reassembly.
15. Install new bushings.
16. Install new pin.
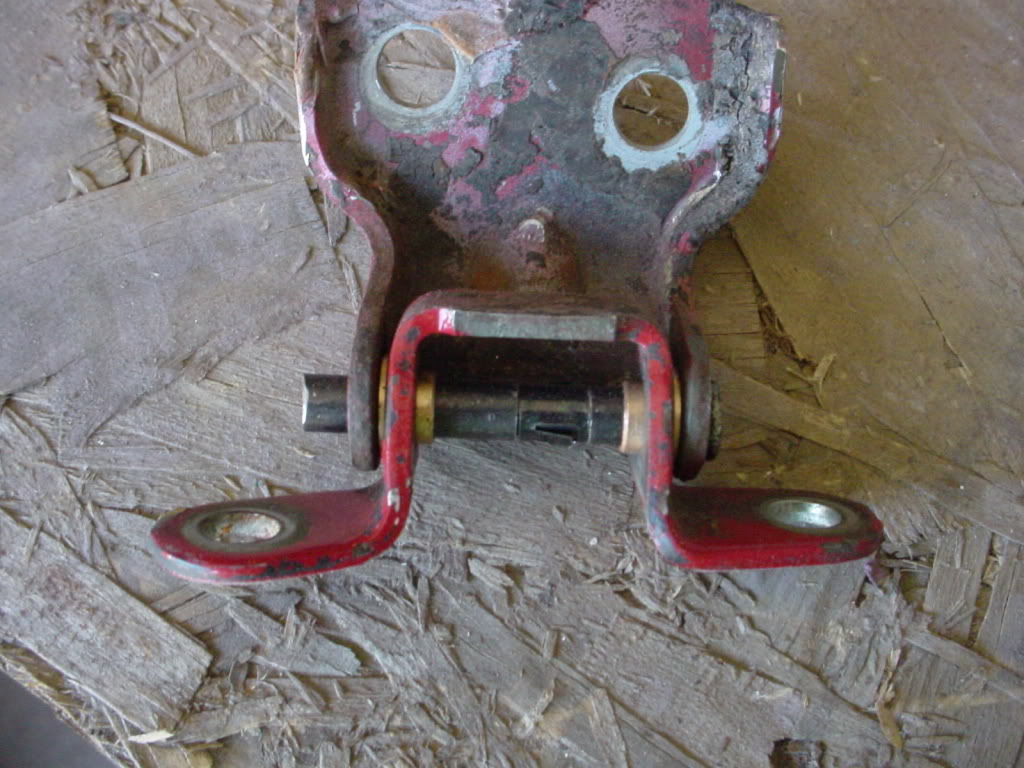
17. Reassemble the hinge.
18. Using the hacksaw you can cut off the excess pin. (optional)
19. Repeat steps 8-18 for the other hinge.
20. Reinstall the hinges to the door shell.
21. Have helper hold the door as you mount the hinges to the body.
1. Roll down the window, it makes the door easier to handle when removed.
2. If not equiped with power windows or locks skip to step 4.If equipped with power options you will need to remove the kickpanel and disconect the wiring.
3. Pull the wiring through the A pillar.
4. Using the ratchet, extension, and 12mm socket remove one bolt from each hinge.
5. Have your helper hold the door as you remove the last two bolts.
6. Remove the 4 bolts holding the hinges to the door shell. There should be a total of 8 bolts.
7. Place the door shell in a place where it will not get damaged.
8. Take pictures or mark the hinges top and bottom to aid reassembly later. Work on one hinge at a time so you do not mix parts.
9. Secure the hinge in a vise.
10. Using a flat file or a grinding tool, a dremel or a die grinder work well, to grind the puddle weld holding the pin. Be careful not to grind too much off of the hinge.
11. Use the punch and hammer to knock the pin out of the hinge.
12. Remove the old bushings.
13. File, drill, or grind the hinges to fit the new pins and bushings. Notice that not all of the holes are the same size, check the fitting often.
14. Line up your marks or refer to your picture for reassembly.
15. Install new bushings.
16. Install new pin.
17. Reassemble the hinge.
18. Using the hacksaw you can cut off the excess pin. (optional)
19. Repeat steps 8-18 for the other hinge.
20. Reinstall the hinges to the door shell.
21. Have helper hold the door as you mount the hinges to the body.
Last edited by wheatus; May 9, 2009 at 07:34 AM.
 May 8, 2009 | 05:55 PM
#4
Thread Starter
Registered User
Joined: Mar 2009
Posts: 257
Likes: 0
From: indiana
i will find out the part number next time i get to my parts store. the best part about this is that it is cheaper than just buying hinges. i think it was about $15 for one hinge, i did this mod top and bottom on one side for $5.
May 8, 2009 | 06:00 PM
#5
i was able to get 2 sets of hinges for $5 at u-pull it, but very nice write up those brass bushings can be some tenacious buggers...
edit: gonna borrow this and add it to my misc ideas thread...
those brass bushings can be some tenacious buggers...edit: gonna borrow this and add it to my misc ideas thread...
Last edited by dropzone; May 8, 2009 at 06:03 PM.
 May 9, 2009 | 12:52 AM
#7
Thread Starter
Registered User
Joined: Mar 2009
Posts: 257
Likes: 0
From: indiana
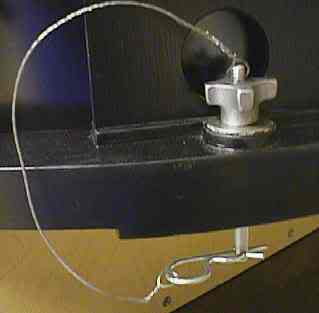
if i was going to make the doors easily removable instead of hacking up the hinge i would use a clevis pin something like this. i painted my hinges when i was edging parts for my truck but i don't have any pictures though.
Last edited by wheatus; May 9, 2009 at 12:55 AM.
Trending Topics
May 9, 2009 | 04:20 AM
#8

Registered User
Joined: Aug 2008
Posts: 264
Likes: 0
That is a great write up! Sounds easy enough.
THis is what I plan on going once I make my half doors.
http://4xinnovations.com/pages/guarding/hingekit.htm.
THis is what I plan on going once I make my half doors.
http://4xinnovations.com/pages/guarding/hingekit.htm.

Thread
Thread Starter
Forum
Replies
Last Post
Steven.m.paulk
86-95 Trucks & 4Runners (Build-Up Section)
3
Jul 24, 2015 01:44 PM
crashburnoveride
86-95 Trucks & 4Runners
1
Jul 10, 2015 06:39 AM


