
BJ Spacer Question?
 May 2, 2005 | 11:30 AM
#21
Sponsoring Vendor
Joined: Sep 2004
Posts: 1,100
Likes: 0
From: Dallas Texas
Originally Posted by Dekri
Quick Question, if I install the BJ spacers... Which I probably will soon... Should I do the BJ spacers and the Rear Coil Spring Spacers at the same time? Or could I just do 1 and then the other, or does it even matter?
May 2, 2005 | 11:42 AM
#22
Contributing Member
Joined: Nov 2002
Posts: 10,666
Likes: 5
From: Oklahoma State
I would do the rear either first or at the same time. You will have adjustment in the front, so if you do the rear first you can adjust the front to match the rear. Once you have it all adjusted and you're happy (test drive it a least a block and remeasure) then go get an alignment.
May 2, 2005 | 12:46 PM
#23
Sponsoring Vendor
Joined: Sep 2004
Posts: 1,100
Likes: 0
From: Dallas Texas
I guess I assumed he was just wanting to install the BJ spacers and not worried about adjusting the T-bars and putting the Coil Spacers on later. In either case, mt goat is right in regards to matching the front height with the rear. And you should get an alignment when you have it set where you want it. Good luck...........
May 5, 2005 | 08:56 AM
#24
Registered User
Joined: Aug 2004
Posts: 976
Likes: 0
From: AZ
for an 89 4runner....what would be a good compliment for the rear suspension when BJ spacers are installed in the front?? Does anyone have any experience with some good 1.5-2"" lift springs or any other ideas..my friend needs a couple ideas..the springs on his 89 4runner are flat almost. Maybe an soft ride AAL...??
Brian
Brian
May 5, 2005 | 11:24 AM
#25

Originally Posted by westy44runner
for an 89 4runner....what would be a good compliment for the rear suspension when BJ spacers are installed in the front?? Does anyone have any experience with some good 1.5-2"" lift springs or any other ideas..my friend needs a couple ideas..the springs on his 89 4runner are flat almost. Maybe an soft ride AAL...??
Brian
Brian
https://www.yotatech.com/forums/f2/new-rear-leafs-installed-48400/

 May 6, 2005 | 08:29 PM
#28
Originally Posted by Marc P
BLKNBLU I hope your truck isn't always that clean...
May 7, 2005 | 06:11 AM
#29
Contributing Member
Joined: Jan 2003
Posts: 488
Likes: 0
From: Pittsburgh, PA
Originally Posted by blainelukens
ok so all that helps thanks but what about the trimming of the UCA, what should I use? I have an agle grinder with a griding wheel , will that work I heard I need a cut off wheel what is that?
May 7, 2005 | 06:31 AM
#30
Contributing Member
Joined: Jan 2003
Posts: 488
Likes: 0
From: Pittsburgh, PA
Originally Posted by BLKNBLU
Mine took forever BUT... that was because I decided to do pretty much the whole front end. It was one of those jobs where one thing kept leading to another. I did control arm bushings (upper and lower).....I also spent ALOT of time cleaning up parts and sanding and painting stuff.
BLKNBLU: My question is about alignment after the BJ spacer install. Took the truck to Toyota for an alignment and they got it pretty good except for the caster on the passenger side. They can't get the caster right because the lower control arm bushing is frozen. Apparently this involves burning the bolt out of the bushing/sleeve like the rear lateral control rod frozen bolt removal process. Did you have this problem when you did the control arm bushings? I'm guessing no b/c you are out of the rust belt.
May 8, 2005 | 08:00 AM
#31
Originally Posted by PAhydrohead
Like someone else said, Man your truck looks clean!! Ditto here on cleaning up sanding and cleaning up the parts. After leaving CA in '96 my 4Runner has rusted significantly so I figured this was a good time to clean up as much of the suspension as I could and repaint it. Really makes things look nice.
BLKNBLU: My question is about alignment after the BJ spacer install. Took the truck to Toyota for an alignment and they got it pretty good except for the caster on the passenger side. They can't get the caster right because the lower control arm bushing is frozen. Apparently this involves burning the bolt out of the bushing/sleeve like the rear lateral control rod frozen bolt removal process. Did you have this problem when you did the control arm bushings? I'm guessing no b/c you are out of the rust belt.
BLKNBLU: My question is about alignment after the BJ spacer install. Took the truck to Toyota for an alignment and they got it pretty good except for the caster on the passenger side. They can't get the caster right because the lower control arm bushing is frozen. Apparently this involves burning the bolt out of the bushing/sleeve like the rear lateral control rod frozen bolt removal process. Did you have this problem when you did the control arm bushings? I'm guessing no b/c you are out of the rust belt.
May 26, 2005 | 10:59 AM
#32
Registered User
Joined: May 2005
Posts: 18
Likes: 0
From: Collettsville, NC
May 26, 2005 | 02:01 PM
#33
Contributing Member
Joined: Nov 2002
Posts: 10,666
Likes: 5
From: Oklahoma State
Originally Posted by fireman1525
 Jul 20, 2007 | 02:24 AM
#39
Registered User
Joined: Aug 2005
Posts: 420
Likes: 0
From: PDX, Oregon
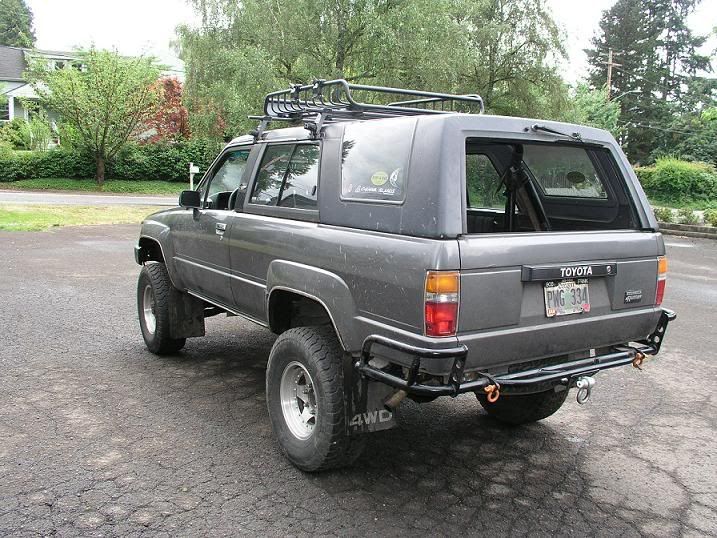
Her are mine in:
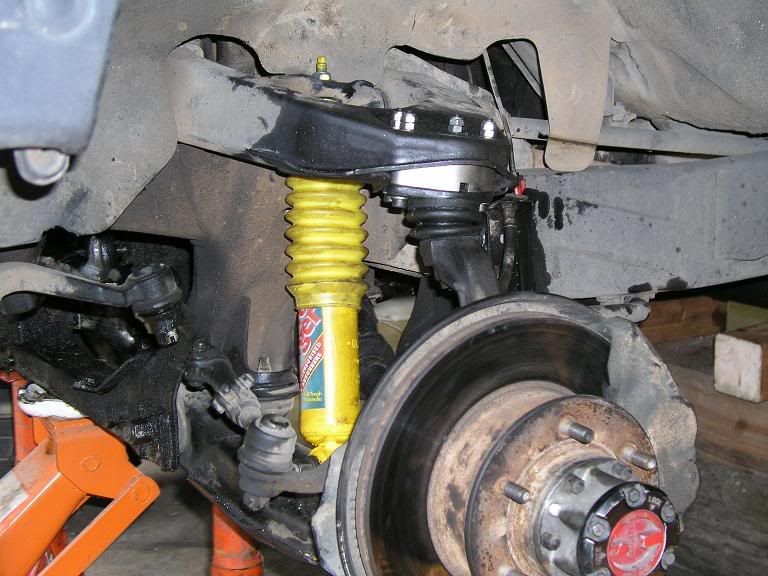
My write up is in the 86-95 tech section "Project 4 Rescue"... Basicly the first side takes about 3 times as long as the other side because you figure out what to remove and when. The directions are good, and it is REALLY simple in terms of mechanical knowhow etc. the cutting and grinding takes about the longest of all the steps, but if you shim the A-arm up it's really open to work on. Do your self a favor and just remove the brake line and bleed afterwards, it gives you all the room you could need to manipulate the A-arm/knuckle/hub assembly. Also, pound out the Ball joint studs while you support the knuckle with a floor jack and the assembly is still together, you can then just drop the BJ/knuckle away from the upper a-arm...
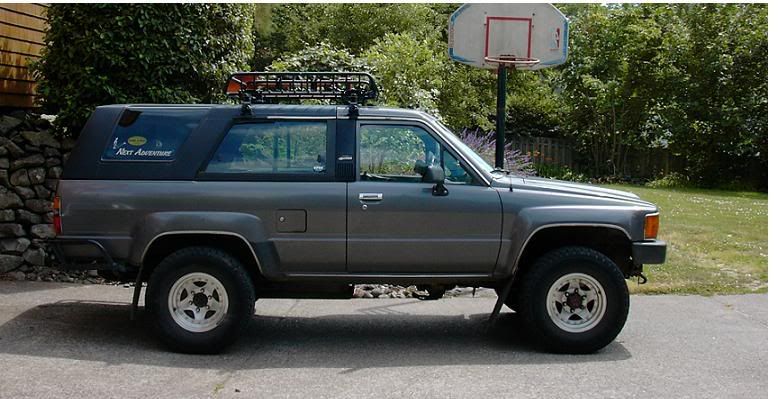
I used mine in conjunction with OME rear springs. My ass was sagging REALLY bad...
Here's what it came out looking like with NO t-bar crank:
before:
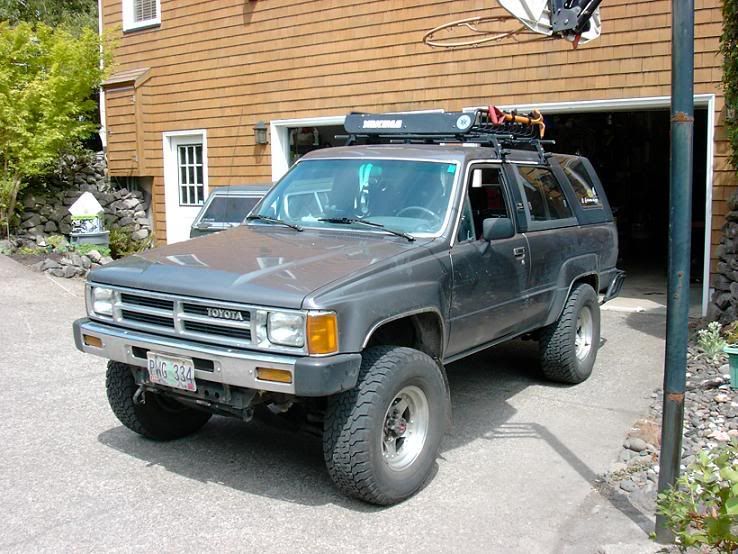
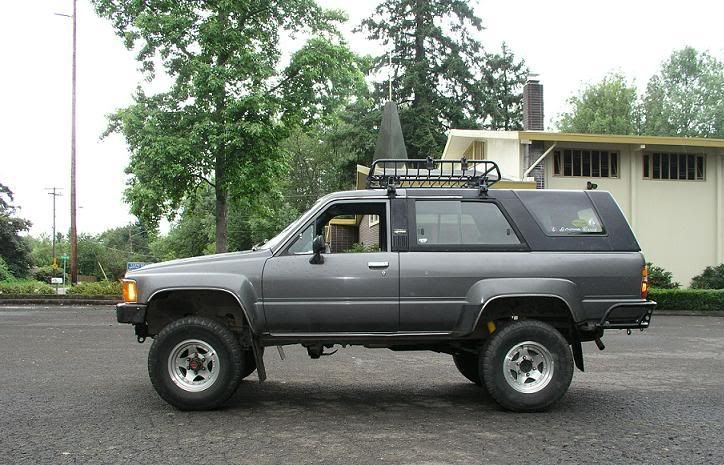
after:
My write up is in the 86-95 tech section "Project 4 Rescue"... Basicly the first side takes about 3 times as long as the other side because you figure out what to remove and when. The directions are good, and it is REALLY simple in terms of mechanical knowhow etc. the cutting and grinding takes about the longest of all the steps, but if you shim the A-arm up it's really open to work on. Do your self a favor and just remove the brake line and bleed afterwards, it gives you all the room you could need to manipulate the A-arm/knuckle/hub assembly. Also, pound out the Ball joint studs while you support the knuckle with a floor jack and the assembly is still together, you can then just drop the BJ/knuckle away from the upper a-arm...
I used mine in conjunction with OME rear springs. My ass was sagging REALLY bad...
Here's what it came out looking like with NO t-bar crank:
before:
after:
Jul 22, 2007 | 01:28 AM
#40
Registered User
Joined: May 2007
Posts: 636
Likes: 0
From: used to be so. cal. now Indy
i had mine installed today, took me 6 hours. mainly because one of the balljoints had a stuck stud, even i have PB blast'd the whole thing for a week. i had to knock out the bj to get the stud out, i damaged the cast;r nut. went to 2 dealers and all the hardwere, autoparts stores in the 15 mile radius, come back with NaDa. ended up savage the nut with a file and table vise, it holds good, for now. i'm ordering couple of them and replace the old ones next week. luckily, my daily commute is only 3 miles.
broke a brand new Craftsman rachet on one of the 19mm bolts on the steering elbow. i've never seen that many red loctite before. went to Sears got a brand new one for replacement.
for me, the most difficult part is how to sticking a piece of 2x4 between the upper control arm and the uppper bump stop. cutting and grinding is pretty straight forward.
if any of you are planning doing this, please get all the safety equipment, i.e. eye protection, long sleeve shirt, hat. plus treat the angle grinder as a loaded gun, only plug it in when you are actually grinding, turn the power switch off before you plug it in. that thing is the scariest thing in my tool chest.
man i'm tired.


