Corey's 2007 FJ Cruiser Build-Up Thread
 05-20-2008, 06:59 AM
#261
Contributing Member
Join Date: Mar 2003
Location: COTKU,Ontario,Canada
Posts: 11,334
Likes: 0
Received 0 Likes
on
0 Posts
web wheeler pic hahaha
I was thinking Corey you need to add some tunes to that set-up video... maybe the sax solo from the old Benny Hill show?
Taking a long long weekend eh? must be nice... We just had ours and I got stuck workin' on the Sat.
I was thinking Corey you need to add some tunes to that set-up video... maybe the sax solo from the old Benny Hill show?
Taking a long long weekend eh? must be nice... We just had ours and I got stuck workin' on the Sat.
 05-30-2008, 02:27 PM
#262
Tomorrow is detailing day.
It has been since last September when I last Porter Cabled the rig.
Doing the three step tomorrow with the Porter Cable:
Griots clay
Griots Machine Polish #3
Best Of Show wax.
My rig needs a detail bad.
But Sunday is where the new mod comes in.
It will take a good amount of time Sunday morning.
I have not been happy with my ARB fridge mounted to the top of my cargobox.
I can not see in the fridge for one thing, as the lid hits the ceiling when opening it.
If the fridge sat lower on the deck it would be OK.
Member kcfunke (from the big FJ forum) told me how to get the rear seat bottoms out.
Reading the manual and some info from him on how to pry off the plastic covers on the back of the bottom seat cushion, I should be able to mount my Engel Slide Lock that holds the fridge stationary to it.
If all goes well, I will have some pictures of the new location for the fridge.
This will make it so much easier to stock/raid the fridge.
Oh, and as I was taking my rear seats out, a cute girl next door said see liked my Hummer.
I had to explain to her it was a Toyota FJ Cruiser, and not a Hummer.
She drives a Ford Explorer.
She thought it was cool on the heritage of it (explained how the FJC pays homage to the the FJ 40), as she actually has seen the old FJ 40s once I explained to her they had the same type of body style as the Jeeps.
05-30-2008, 02:41 PM
#263
Sponsoring Vendor
Join Date: Sep 2004
Location: Dallas Texas
Posts: 1,100
Likes: 0
Received 0 Likes
on
0 Posts
 I forgot this is PG.
 ... look out down there!
  05-30-2008, 03:08 PM
#265
She was barely legal, 18 or 19

On a sidenote Phil, I am ecstatic about the ARB fridge I bought from you.
It had been running 24/7 since last Thursday when I stocked it up for the camping trip I did not make

I had a four day weekend, and my rig sat from Thursday after work (2 PM) until Monday morning about 5:30 am when I hit the grocery store.
That is almost four full days.
The rig started right up as normal, and the dual battery switch was in the stock only battery location.
The fridge hardly uses any juice at all.
I am sure I could have pushed it to day five (Tuesday morning for work) but I had to go get vittles as my youngest son was over, and he can eat.
During the work week the yogurt drinks and vanilla milk shakes I had in the fridge I would just take them out of the fridges inventory for work all this week.
I can not say enough how COOL this ARB fridge is.
Anyone thinking about getting one of these for camping/traveling should give strap22 or trdparts4you.com a PM and line one up.
There is no comparison between this and a regular cooler.
I even used it during a power outage at home during the winter.
I already had it in the rig, and I set it to freeze mode and dumped the contents of my home freezer into it to keep from spoiling.
The fridges main compartment at home would be good enough to keep the food in it safe for a day or so, so no worries on that.
I was concerned about my freezers contents though, and the ARB fridge saved the day.
05-30-2008, 03:50 PM
#267
Sponsoring Vendor
Join Date: Sep 2004
Location: Dallas Texas
Posts: 1,100
Likes: 0
Received 0 Likes
on
0 Posts
Glad to hear the fridge is doing so well. I love mine. I have used it alot and even kept ice cream in it for the weekend an it hardly draws any juice. Best investment I have ever made. No more soggy sandwiches.
05-30-2008, 04:02 PM
#268
And that right there is only one of several reasons to invest in one of these.
I actually got away from ice chest coolers back around '92.
I used a Coleman 12v/110v one when camped at a state park or facility that had hookups.
That fridge though would drain a 12v battery overnight if using it that way.
And I also used (still have it in my closet) a Dometic 12v/110v/propane fridge I bought back around '92 or '93.
Same outfit that makes them for RVs, only this one was portable.
I would run it inside the tent trailer plumbed via extra hose I plumbed up to run off the tent trailers main bottle up front.
It too would drain a battery overnight if using its 12v function, and it also is bulkier than the ARB type, and it can not get as cold or freeze like the ARB one.
The ARB type is the best choice since it uses hardly any amperage.
05-31-2008, 01:53 AM
#270
Sponsoring Vendor
Join Date: Sep 2004
Location: Dallas Texas
Posts: 1,100
Likes: 0
Received 0 Likes
on
0 Posts
He like to practice packing for a trip....I wish I had the time like Corey to practice.
I do agree with his comments on the ARB fridge. The best investment in gear I have ever made. We have a new shipment coming in so if anyone is interested send your request to info@trdparts4u.com
I do agree with his comments on the ARB fridge. The best investment in gear I have ever made. We have a new shipment coming in so if anyone is interested send your request to info@trdparts4u.com
05-31-2008, 09:06 AM
#271
ARB fridge relocated 5-31-2008
OK, some of you may have read that I have mentioned my neighbor here before who is a weatherman for the FAA.
Most of the time he is right about the weather.
He told me it was going to rain today, the day I wanted to spend about five to six hours detailing my rig.
The local news stations said no rain today, it is coming tonight.
Well, it started raining here about 9 am just after I finished up my ARB fridge relocation project.
I was just finishing up with the mandatory snapshots and was going to vacuum out the rig and wipe the interior down of dust when it started in raining.
Anyways, below are some pictures of the fridge move.
I like it a lot better where it is now.
I can access the lid to load/unload grub, and actually see what is in there.
I still can not raise the lid all the way up to the ceiling, but I can raise it far enough to see very well inside.
There is a guy on IH8MUDs forum who has put together all the hardware for the hinge relocation kit to make the lid lift up from either side instead of from the end, and after I order that from him, I will be able to raise the lid all the way up and let it stay open.
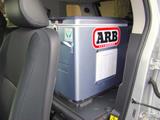
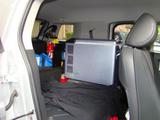
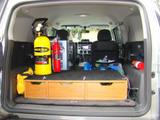
Here is a comparison when it was mounted in the rear.
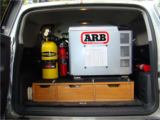
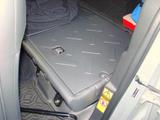
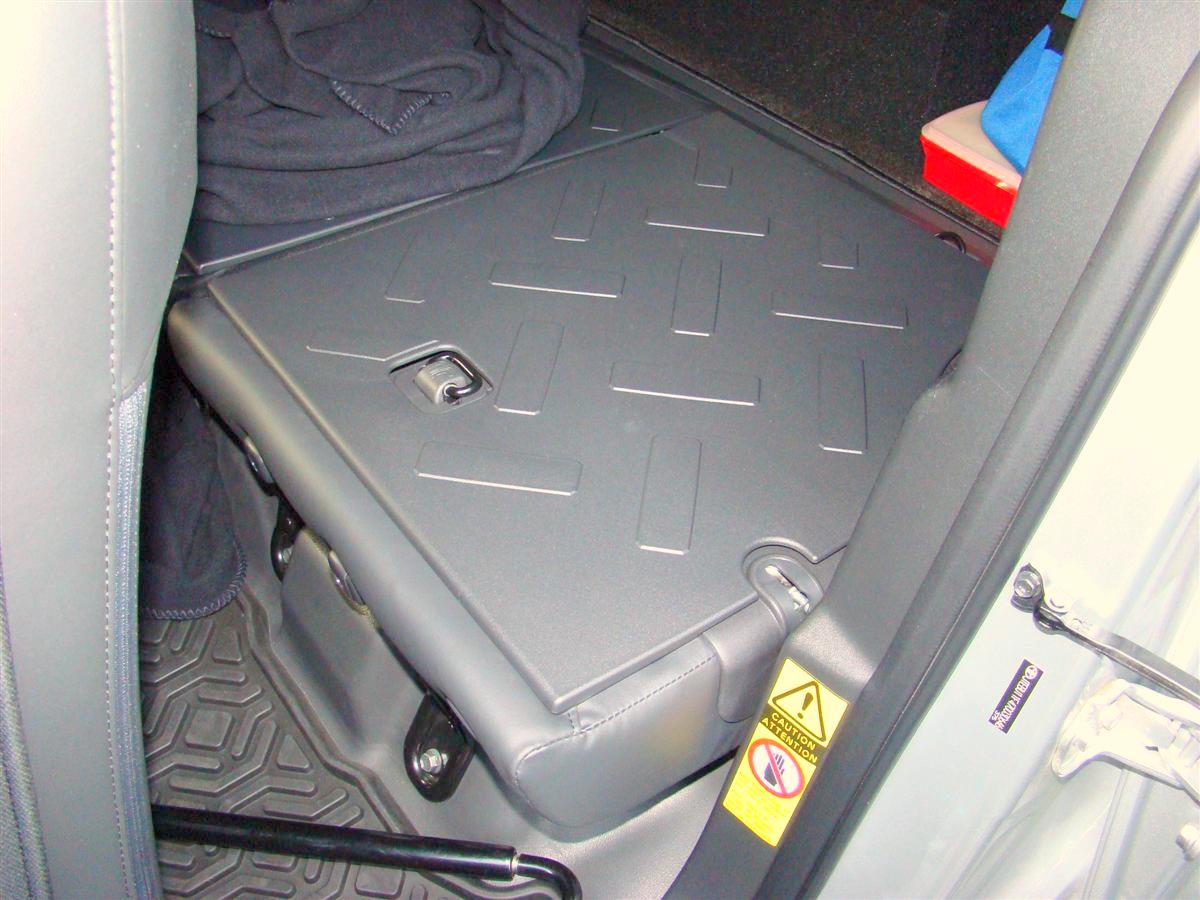
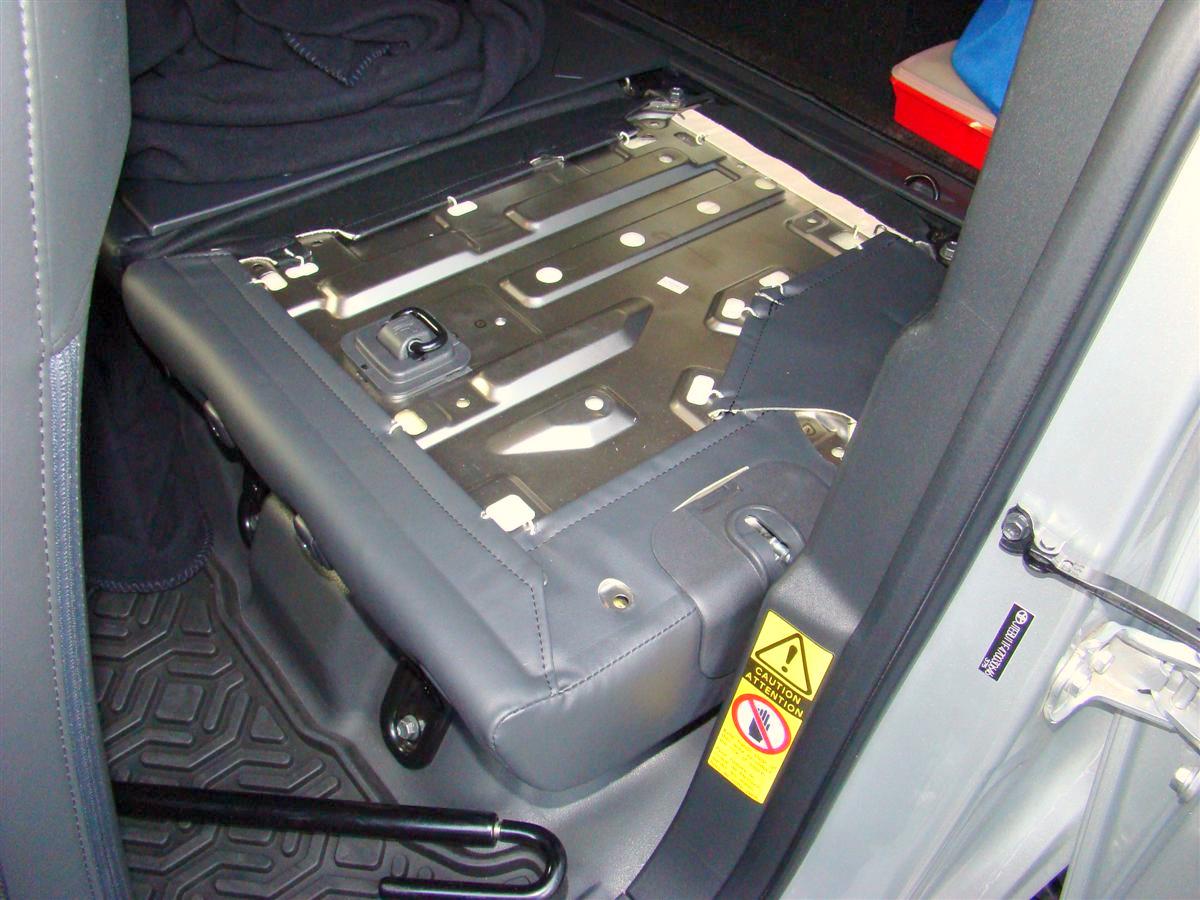
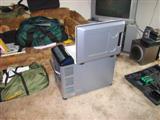
The first two pics show the seat back cover in place and then removed.
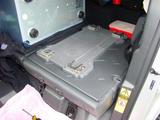
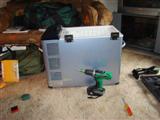
Picture three shows the Engel Slide Loc screwed down to the plastic cover.
I had to move the plate around some so it would avoid the D ring and raised hump it resides in so the plate would sit flush.
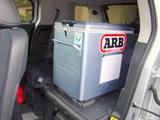
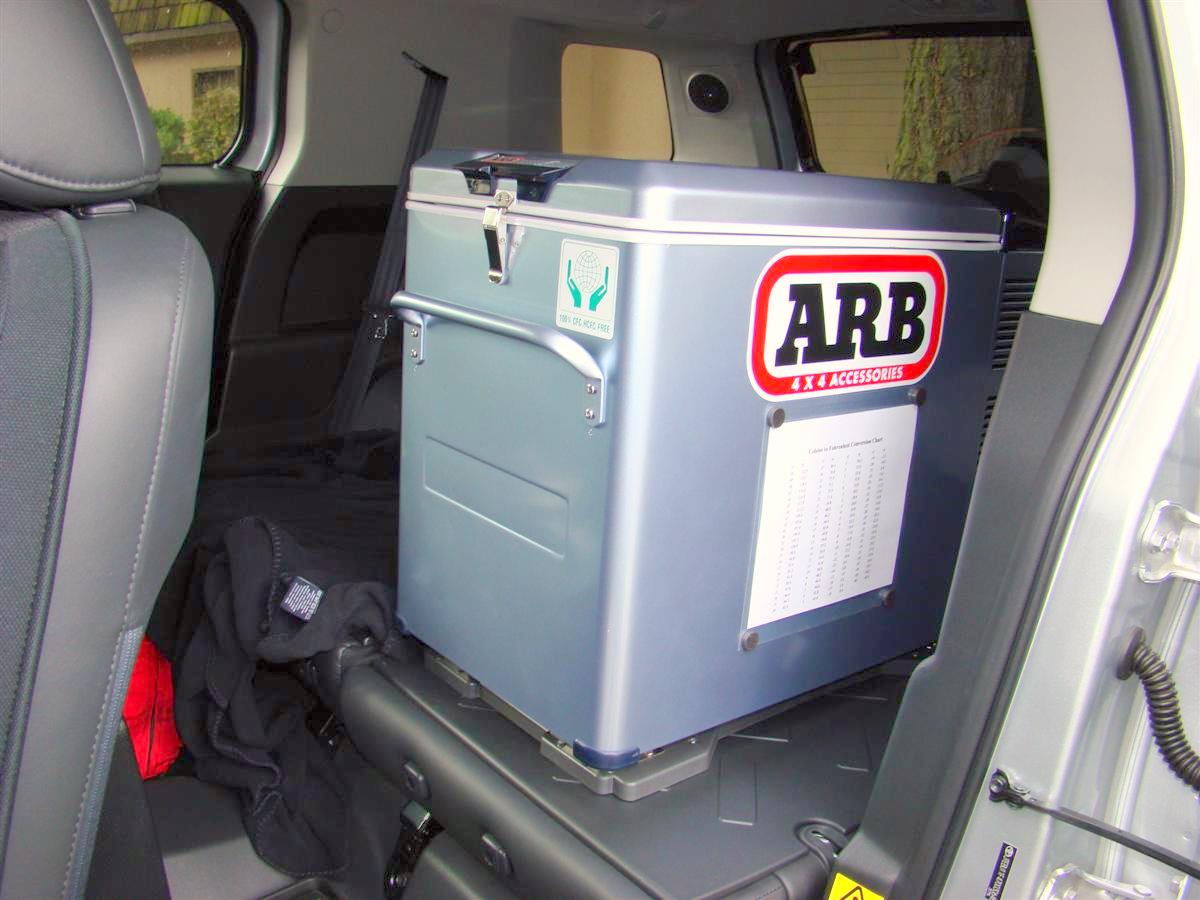
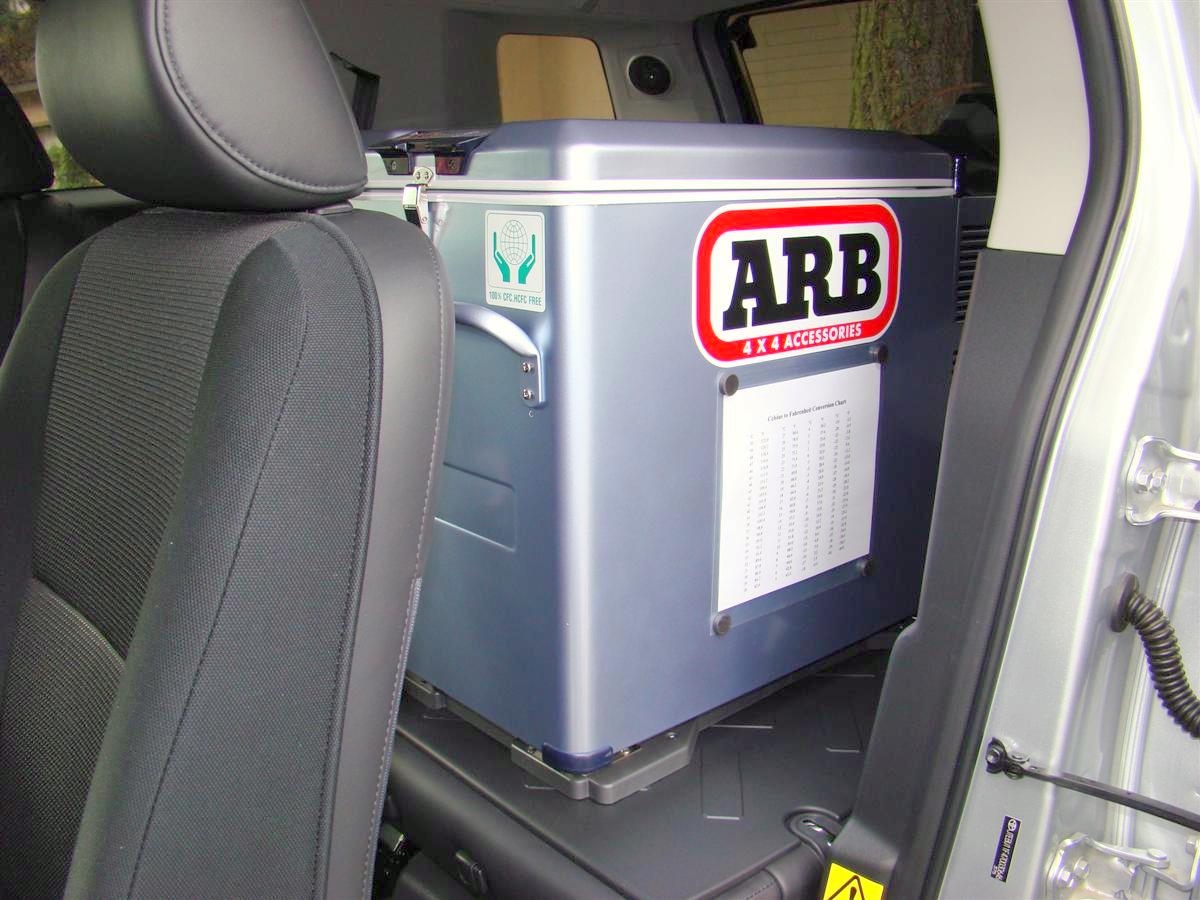
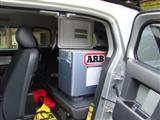
Pictures four five and six show the fridge mounted to the Slide Loc.
I drilled small pilot holes into the plastic, and after tightening the screws down, they do not contact the metal underneath.
If I was worried about needing more strength, I can get longer screws and drill the holes deeper and into the sheet metal underneath.
I also used two extra screws this time instead of four like I did when it was mounted on top of the cargo box.
This will give me more room to load my camping gear now.
For the long stuff like the Cabela's picnic table and Camp Kitchen, I will load them in from the rear door and shove it towards the passenger seat.
This should speed up the loading process quite a bit.
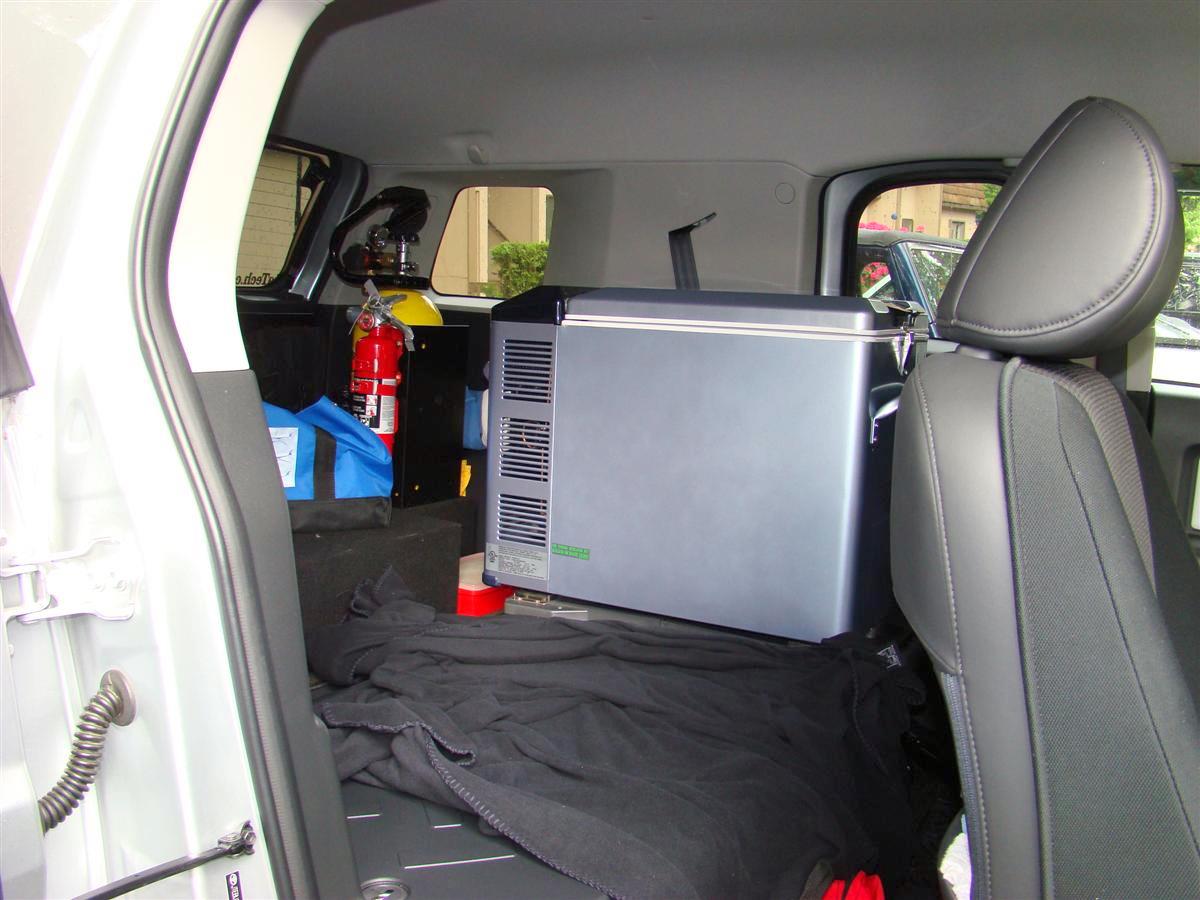
The best part though is being able to access my fridge much easier and see what is inside of it.
If you do not mind giving up your rear drivers side seat, this is a good way to mount your fridge.
I can still put up the passenger side rear seat with the fridge in place.
I may even put the bottom seat cushion back in too for the rear passenger side, as it is currently out right now.
But the drivers side will stay this way indefinitely.

OK, some of you may have read that I have mentioned my neighbor here before who is a weatherman for the FAA.
Most of the time he is right about the weather.
He told me it was going to rain today, the day I wanted to spend about five to six hours detailing my rig.
The local news stations said no rain today, it is coming tonight.
Well, it started raining here about 9 am just after I finished up my ARB fridge relocation project.
I was just finishing up with the mandatory snapshots and was going to vacuum out the rig and wipe the interior down of dust when it started in raining.
Anyways, below are some pictures of the fridge move.
I like it a lot better where it is now.
I can access the lid to load/unload grub, and actually see what is in there.
I still can not raise the lid all the way up to the ceiling, but I can raise it far enough to see very well inside.
There is a guy on IH8MUDs forum who has put together all the hardware for the hinge relocation kit to make the lid lift up from either side instead of from the end, and after I order that from him, I will be able to raise the lid all the way up and let it stay open.
Here is a comparison when it was mounted in the rear.

The first two pics show the seat back cover in place and then removed.
Picture three shows the Engel Slide Loc screwed down to the plastic cover.
I had to move the plate around some so it would avoid the D ring and raised hump it resides in so the plate would sit flush.
Pictures four five and six show the fridge mounted to the Slide Loc.
I drilled small pilot holes into the plastic, and after tightening the screws down, they do not contact the metal underneath.
If I was worried about needing more strength, I can get longer screws and drill the holes deeper and into the sheet metal underneath.
I also used two extra screws this time instead of four like I did when it was mounted on top of the cargo box.
This will give me more room to load my camping gear now.
For the long stuff like the Cabela's picnic table and Camp Kitchen, I will load them in from the rear door and shove it towards the passenger seat.
This should speed up the loading process quite a bit.
The best part though is being able to access my fridge much easier and see what is inside of it.
If you do not mind giving up your rear drivers side seat, this is a good way to mount your fridge.
I can still put up the passenger side rear seat with the fridge in place.
I may even put the bottom seat cushion back in too for the rear passenger side, as it is currently out right now.
But the drivers side will stay this way indefinitely.

 06-02-2008, 01:04 PM
#272
Contributing Member
Much better now! Really opened up storage space, well done.
I'm worried about that lump sitting behind you unrestrained, though it's in a much better place lower down and closer to the FJ CG. Maybe it would be possible to rig a restraint strap using the forward floor tie-down loop and front seat cushion bracket mounting bolt.
I'm worried about that lump sitting behind you unrestrained, though it's in a much better place lower down and closer to the FJ CG. Maybe it would be possible to rig a restraint strap using the forward floor tie-down loop and front seat cushion bracket mounting bolt.
06-02-2008, 01:29 PM
#273
I might be able to Bob.
You can see in the second picture back towards my Tupperware firstaid kit (have had that one since the 80s) a D ring on the cargobay floor.
I am sure I can rig up some turnbuckles to work with the handles on the fridge.
Or maybe even some straps.
I have some FJ Cruiser blue straps, they might do the trick and look trick at the same time
06-02-2008, 02:16 PM
#274
Contributing Member
Join Date: Mar 2003
Location: COTKU,Ontario,Canada
Posts: 11,334
Likes: 0
Received 0 Likes
on
0 Posts
Only problem I see is you can't recline the driver's seat anymore... but if you were feeling sleepy [or frisky] I guess you could crank up the tent double quick...
What I might have done [creating a whole lot more work lol] would be to rebuild the drawer thingy so it was on one side of the bed {stacked} with the ARB on a slider to one side so you just slide her all the way out to get in to it kind of deal. looks good your way though...
What I might have done [creating a whole lot more work lol] would be to rebuild the drawer thingy so it was on one side of the bed {stacked} with the ARB on a slider to one side so you just slide her all the way out to get in to it kind of deal. looks good your way though...
06-02-2008, 02:56 PM
#275
I like the drawer system I have now, paid $300 for it summer of '01.
I was thinking of having a carpenter at work make me a new drawer setup with a slider for the fridge, but I would be about $500 into it.
I really like the fridge where it is now, much easier than opening the rear door.
I was thinking of having a carpenter at work make me a new drawer setup with a slider for the fridge, but I would be about $500 into it.
I really like the fridge where it is now, much easier than opening the rear door.
09-25-2008, 04:49 PM
#276
ARB Fridge Rehinged 9-26-2008
First I had the fridge on top of the cargobox, then I moved it to behind the drivers seat as seen above in a previous update.
It is much easier to get to the contents of the fridge now, but I still could not lift the lid up all the way, and I had to hold it open with one hand.
On my trip to Mt. Rainier in August, it was a PITA to have to hold the lid open with one hand, and move the contents with the other hand.
Awhile back I came upon a thread on IH8MUDs forum about relocating the hinges so the lid will open from the side.
The creator of the thread ended up putting together a kit so one does not have to hunt around for the parts.
The kit arrived today, and I could not wait to dig in on another project.
Total time was around a half hour or so.
While the instructions do not call for drilling a pilot hole for the self tapping screws supplied, I did drill a small 7/64th pilot hole.
I was careful to not drill into far.
I first put the hinge in place, and I went back in 1.5" from each end of the fridge to center the hinges.
I marked one hole with a felt pen, then drilled it.
I then put the hinge in place and used the 18v drill to put in the new screw.
Once it was in and tight, I then drilled one hole at a time and repeated with the self tapping screws.
So in other words, I did not drill all four pilot holes at once.
Once the hinges were in place, I then took out the top screws I had just put in and took the lid all the way off.
You then have to remove the stock hardware from the lid and the fridge for the stock hinges.
Once you have done that, you reuse the stock bolts (these are not screws) to fill in the holes.
I put the lid back on again and put back in the upper screws for the new hinges.
I then snapped close the stock latch, and all is very tight.
I did not opt to install the new clasp/lock supplied in Kevin's kit, as the stock hinge worked out fine in its original position.
Plus I will not have to modify the thermal bag by cutting a hole in it for a new clasp/lock.
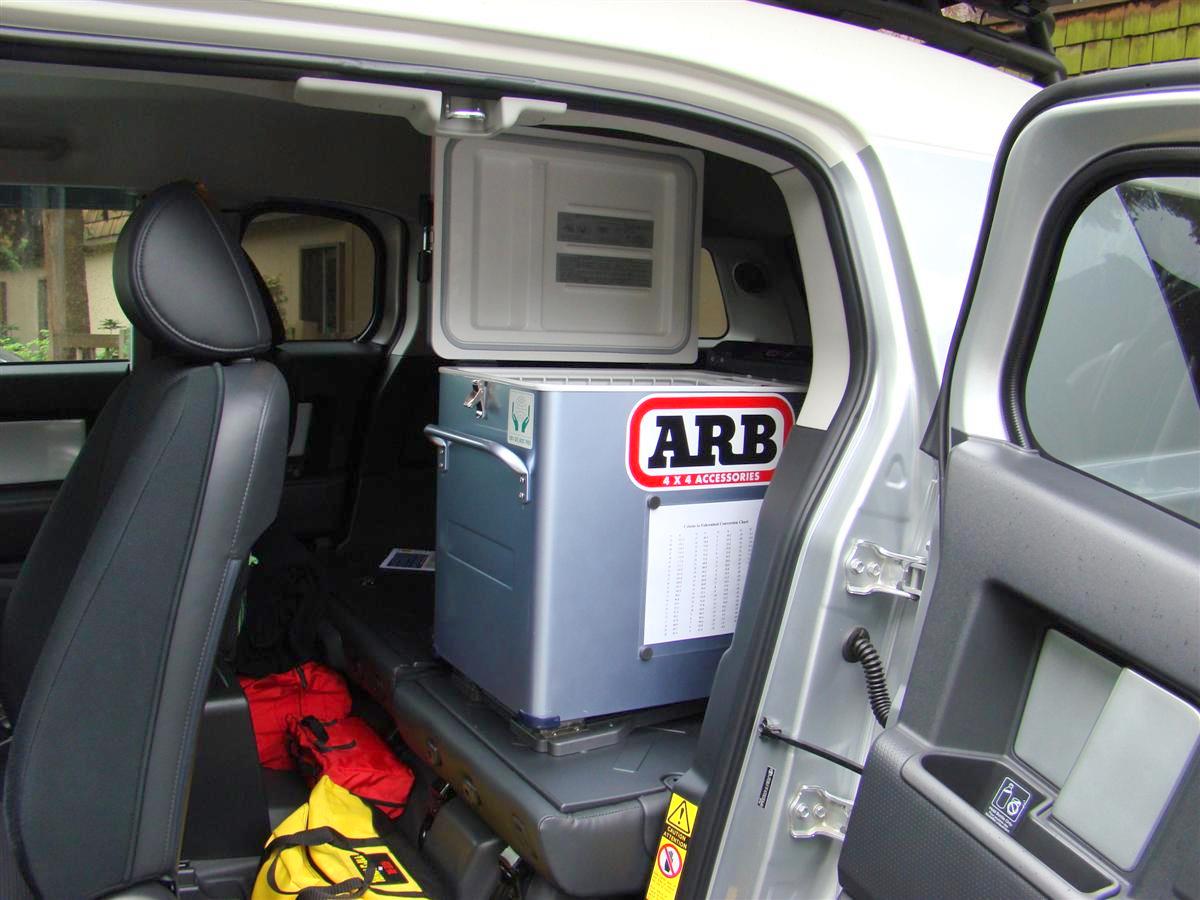
Picture one below shows me holding the lid open with the fridge in the rig.
The lid hits the ceiling and will not raise up all the way.
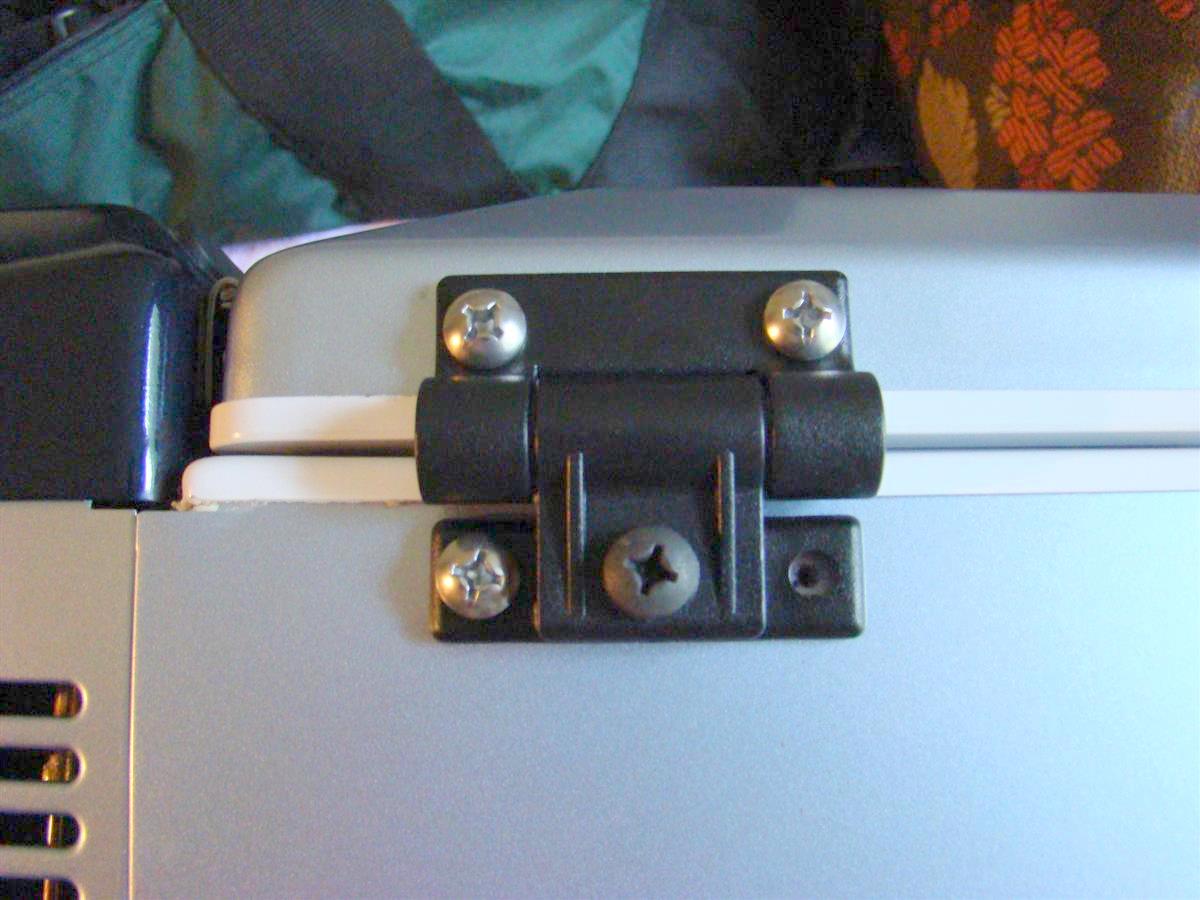
Picture two shows the hinge on with three screws in place and a pilot hole ready for the fourth screw.
Picture three shows the new hinges in place and the lid open.
Note that the lid stays open too.
It has an adjustment screw you tighten to cause friction in the hinge, thus allowing the lid to stay open in any position.
Way cool man
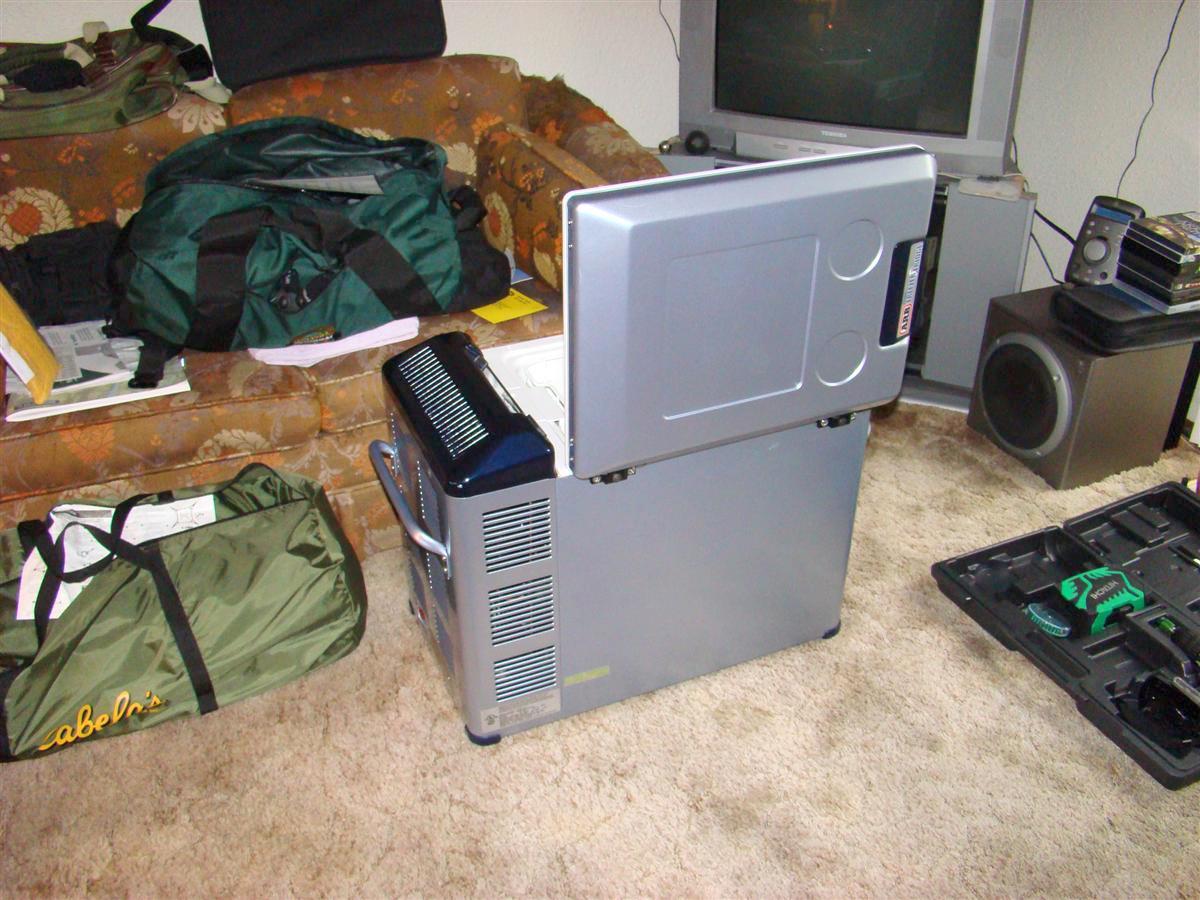
Picture four shows the new hinges in place and the lid off ready for me to take off its hardware and the fridges hardware for the stock hinges.
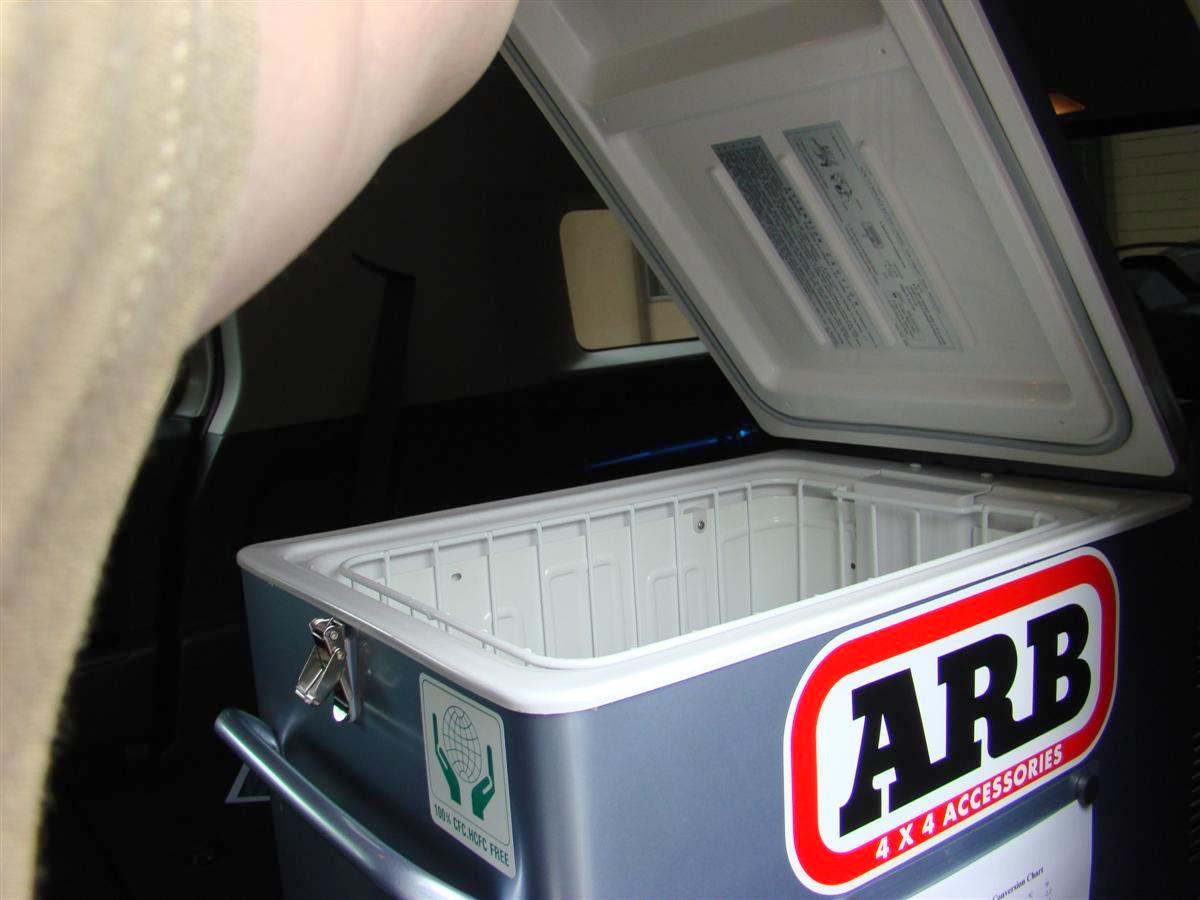
Picture five shows the fridge back in its native environment, and the lid open as if I was going to access it for grub.
The lid clears the ceiling just fine too.
This retrofit will make an ARB or Engel fridge that more enjoyable to access the interior of it.
This kit gets the two thumbs award


Click here for the instructions and to order the kit.
The thread on IH8MUD that started it all.
It is much easier to get to the contents of the fridge now, but I still could not lift the lid up all the way, and I had to hold it open with one hand.
On my trip to Mt. Rainier in August, it was a PITA to have to hold the lid open with one hand, and move the contents with the other hand.
Awhile back I came upon a thread on IH8MUDs forum about relocating the hinges so the lid will open from the side.
The creator of the thread ended up putting together a kit so one does not have to hunt around for the parts.
The kit arrived today, and I could not wait to dig in on another project.
Total time was around a half hour or so.
While the instructions do not call for drilling a pilot hole for the self tapping screws supplied, I did drill a small 7/64th pilot hole.
I was careful to not drill into far.
I first put the hinge in place, and I went back in 1.5" from each end of the fridge to center the hinges.
I marked one hole with a felt pen, then drilled it.
I then put the hinge in place and used the 18v drill to put in the new screw.
Once it was in and tight, I then drilled one hole at a time and repeated with the self tapping screws.
So in other words, I did not drill all four pilot holes at once.
Once the hinges were in place, I then took out the top screws I had just put in and took the lid all the way off.
You then have to remove the stock hardware from the lid and the fridge for the stock hinges.
Once you have done that, you reuse the stock bolts (these are not screws) to fill in the holes.
I put the lid back on again and put back in the upper screws for the new hinges.
I then snapped close the stock latch, and all is very tight.
I did not opt to install the new clasp/lock supplied in Kevin's kit, as the stock hinge worked out fine in its original position.
Plus I will not have to modify the thermal bag by cutting a hole in it for a new clasp/lock.
Picture one below shows me holding the lid open with the fridge in the rig.
The lid hits the ceiling and will not raise up all the way.
Picture two shows the hinge on with three screws in place and a pilot hole ready for the fourth screw.
Picture three shows the new hinges in place and the lid open.
Note that the lid stays open too.
It has an adjustment screw you tighten to cause friction in the hinge, thus allowing the lid to stay open in any position.
Way cool man
Picture four shows the new hinges in place and the lid off ready for me to take off its hardware and the fridges hardware for the stock hinges.
Picture five shows the fridge back in its native environment, and the lid open as if I was going to access it for grub.
The lid clears the ceiling just fine too.
This retrofit will make an ARB or Engel fridge that more enjoyable to access the interior of it.
This kit gets the two thumbs award

Click here for the instructions and to order the kit.
The thread on IH8MUD that started it all.
10-21-2008, 10:19 AM
#277
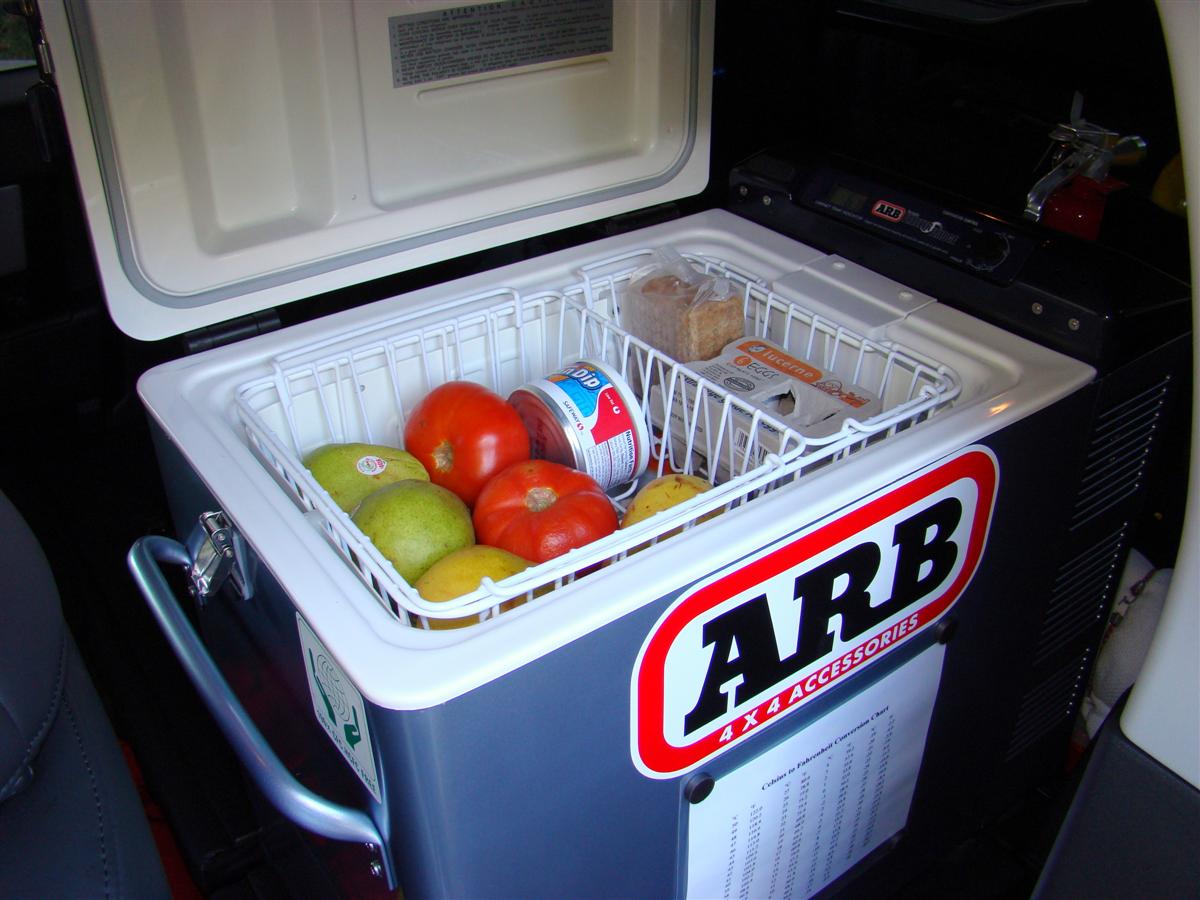
TwoZone Basket Set For ARB Fridge 10-21-2008
I am like a kid on Christmas morning.
As soon as UPS dropped off my package from Expedition Exchange, I tore into it and got out the camera.
First off I really dig my ARB fridge/freezer.
No ice to mess with, low battery draw, and you can pack enough food for a week or more into it.
When I took my vacation to Mt. Rainier in August of 2008 I ate really good
Problem is you still have to move around a lot of the grub as it is just one big deep carnivorous well that swallows whatever you can throw at it.
One problem I solved keeping the lid open on the fridge by itself, and not having the lid hit the roof of the FJ was solved in a prior post in my buildup thread.
So once again the fridge is undergoing another mod, it is being transformed into a basket case...
I saw a thread on Expedition Portal that led me to the TwoZone Basket Set sold by Sierra Expeditions.
They are two different sized baskets that hook onto the stock basket in an ARB or Engel 42 qt fridge.
Here is a little info from Sierra's website:
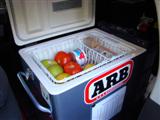
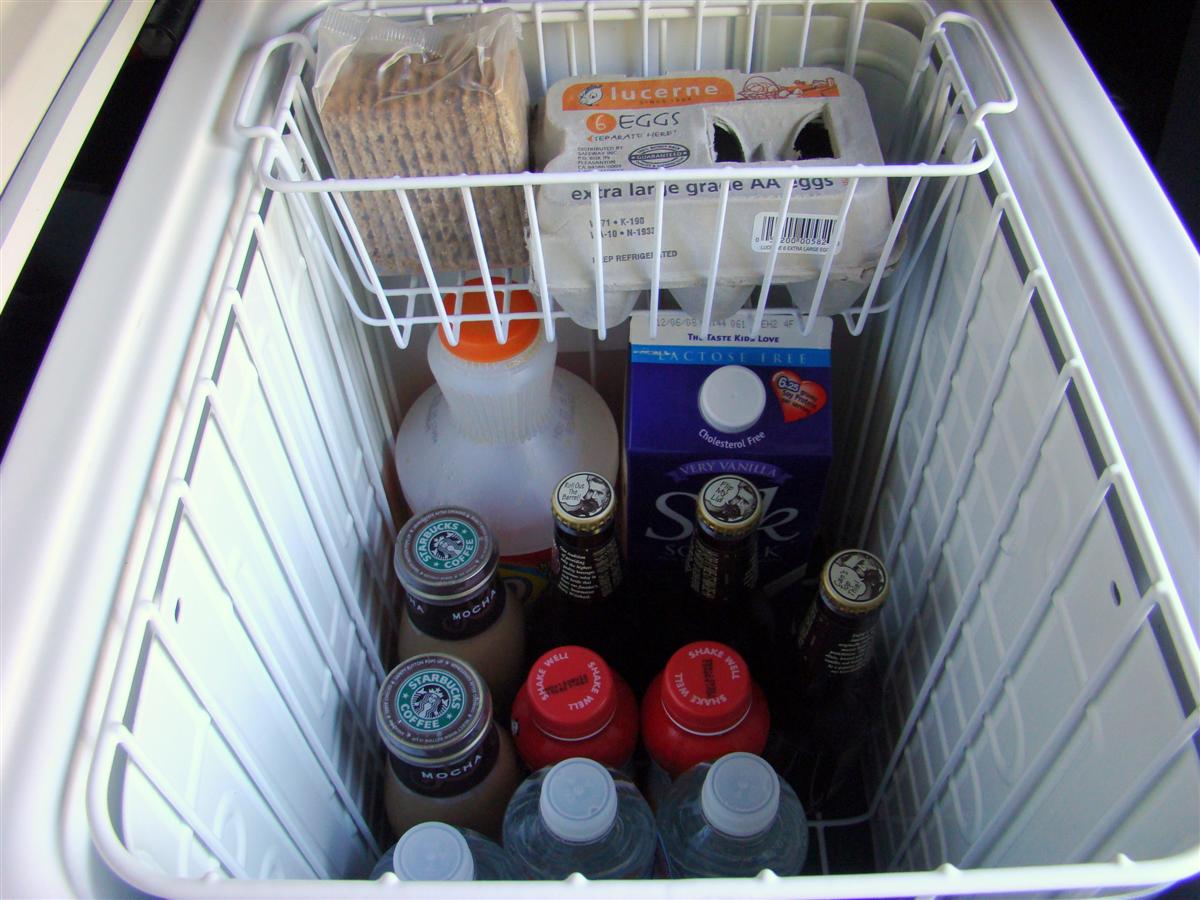
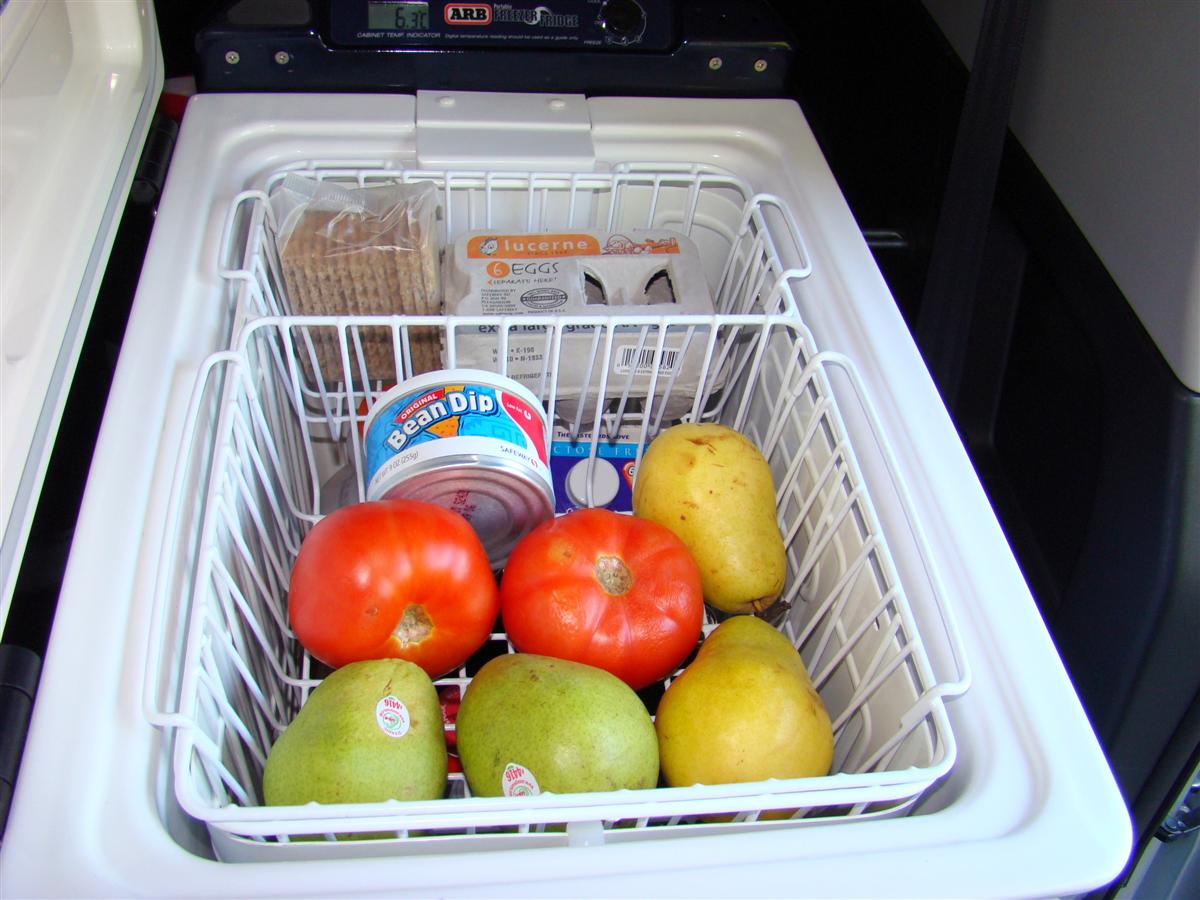
This will allow you to pack your vegetables and fruits on top without the worry of them getting bruised and turned into mush by heavier items that may bump up against them.
You can also load up a basket with your snacks, eggs, dip, whatever you do not want buried.
Below the two baskets you still have room to store stuff you might want to keep a little colder such as meats, frozen burritos, milk, orange juice, whatever beverages you are into
So if you are looking for a great solution to keeping your trail/overlanding grub well organized, look no further, these baskets are a great addition to your fridge.
Here are a few pictures showing the size on my laptop for comparison, and some out in the fridge loaded up.
You can easily access the food below by taking out one basket.
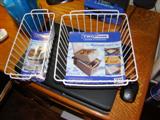


TwoZone Basket Set sold by Sierra Expeditions
As soon as UPS dropped off my package from Expedition Exchange, I tore into it and got out the camera.
First off I really dig my ARB fridge/freezer.
No ice to mess with, low battery draw, and you can pack enough food for a week or more into it.
When I took my vacation to Mt. Rainier in August of 2008 I ate really good
Problem is you still have to move around a lot of the grub as it is just one big deep carnivorous well that swallows whatever you can throw at it.
One problem I solved keeping the lid open on the fridge by itself, and not having the lid hit the roof of the FJ was solved in a prior post in my buildup thread.
So once again the fridge is undergoing another mod, it is being transformed into a basket case...
I saw a thread on Expedition Portal that led me to the TwoZone Basket Set sold by Sierra Expeditions.
They are two different sized baskets that hook onto the stock basket in an ARB or Engel 42 qt fridge.
Here is a little info from Sierra's website:
The TwoZone Suspended Basket Set is compatible with most ARB, Engel, Norcold, and Waeco fridge/freezers.
The larger basket measures 11.5" from suspension tab to tab, and the basket is 10.4 wide, 9.5" long and 4" deep.
The smaller basket measures 11.5" from suspension tab to tab, and the basket is 10.4 wide, 5" long and 4" deep.
The larger basket measures 11.5" from suspension tab to tab, and the basket is 10.4 wide, 9.5" long and 4" deep.
The smaller basket measures 11.5" from suspension tab to tab, and the basket is 10.4 wide, 5" long and 4" deep.
You can also load up a basket with your snacks, eggs, dip, whatever you do not want buried.
Below the two baskets you still have room to store stuff you might want to keep a little colder such as meats, frozen burritos, milk, orange juice, whatever beverages you are into
So if you are looking for a great solution to keeping your trail/overlanding grub well organized, look no further, these baskets are a great addition to your fridge.
Here are a few pictures showing the size on my laptop for comparison, and some out in the fridge loaded up.
You can easily access the food below by taking out one basket.


TwoZone Basket Set sold by Sierra Expeditions
11-15-2008, 11:46 AM
#278
Phase One & Two HAM Radio Install 11-15-2008
This HAM radio setup will be taken in steps as it is very labor intensive, and I am taking my time on it also, as I am still working on my license.
I have all the gear on tap, and here is what I have.
Yaesu 857D HF/VHF/UHF mobile transceiver
YSK-857 Separation Kit to remote mount the faceplate of the radio
Diamond GLP58 mounting group to mount an antenna to the ARB front bumper
Diamond NR770HA 2 meter and 440 MHz (70 cm) mobile antenna (Will be getting an all band Yaesu ATAS-120a antenna in the future)
Valor VS4 Big Mouth mobile extension speaker (Got two, going to replace my present one for my CB radio)
Diamond MX62M duplexer (Allows two antennas or one ATAS-120a antenna to be used with the 857Ds two antenna connection on the radio)
And various small parts such as fuses and RG58U coax
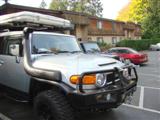
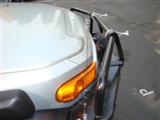
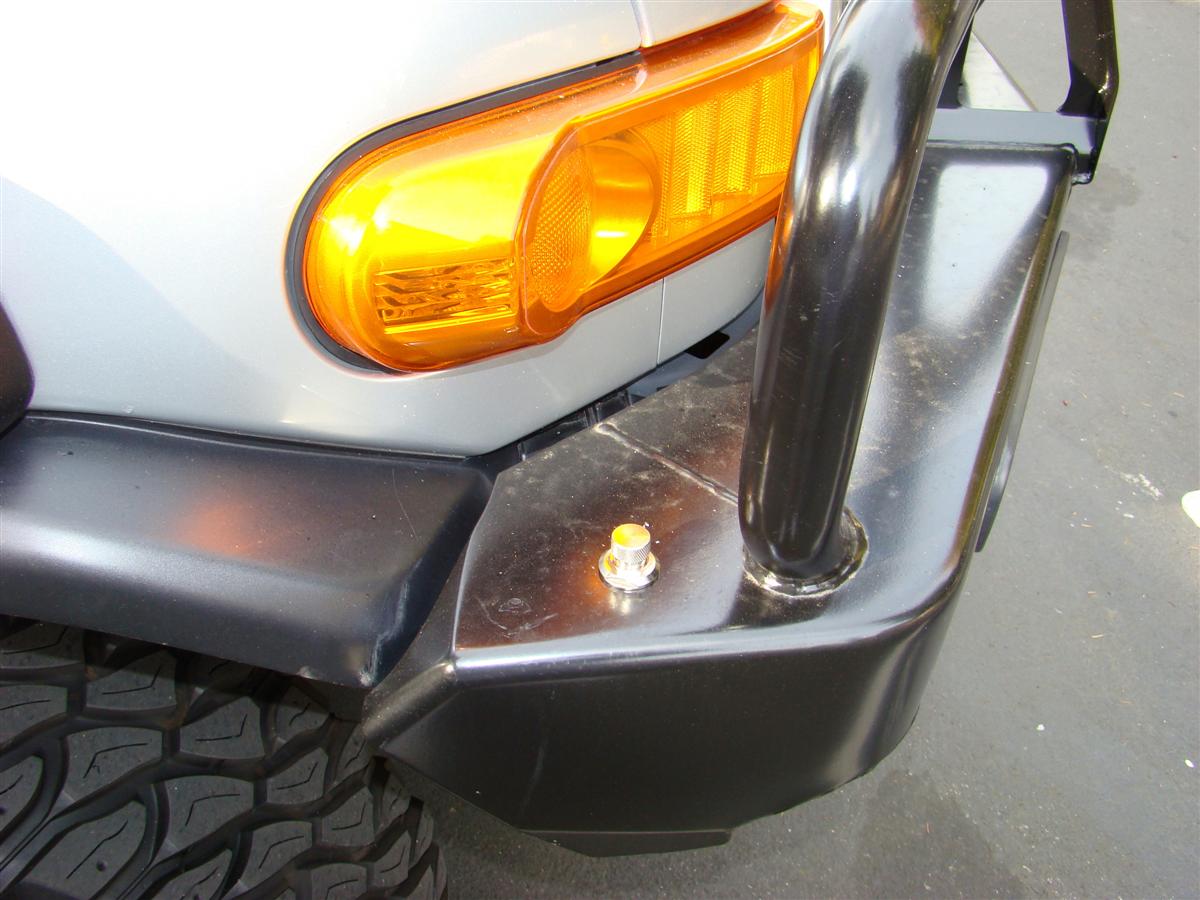
I installed the antenna back on 10-29-2008, here are some pictures of the install.
This antenna is only for 2 meter and the 70 centimeter bands, hence why I will switch out later to the Yaesu ATAS-120a antenna.
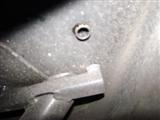
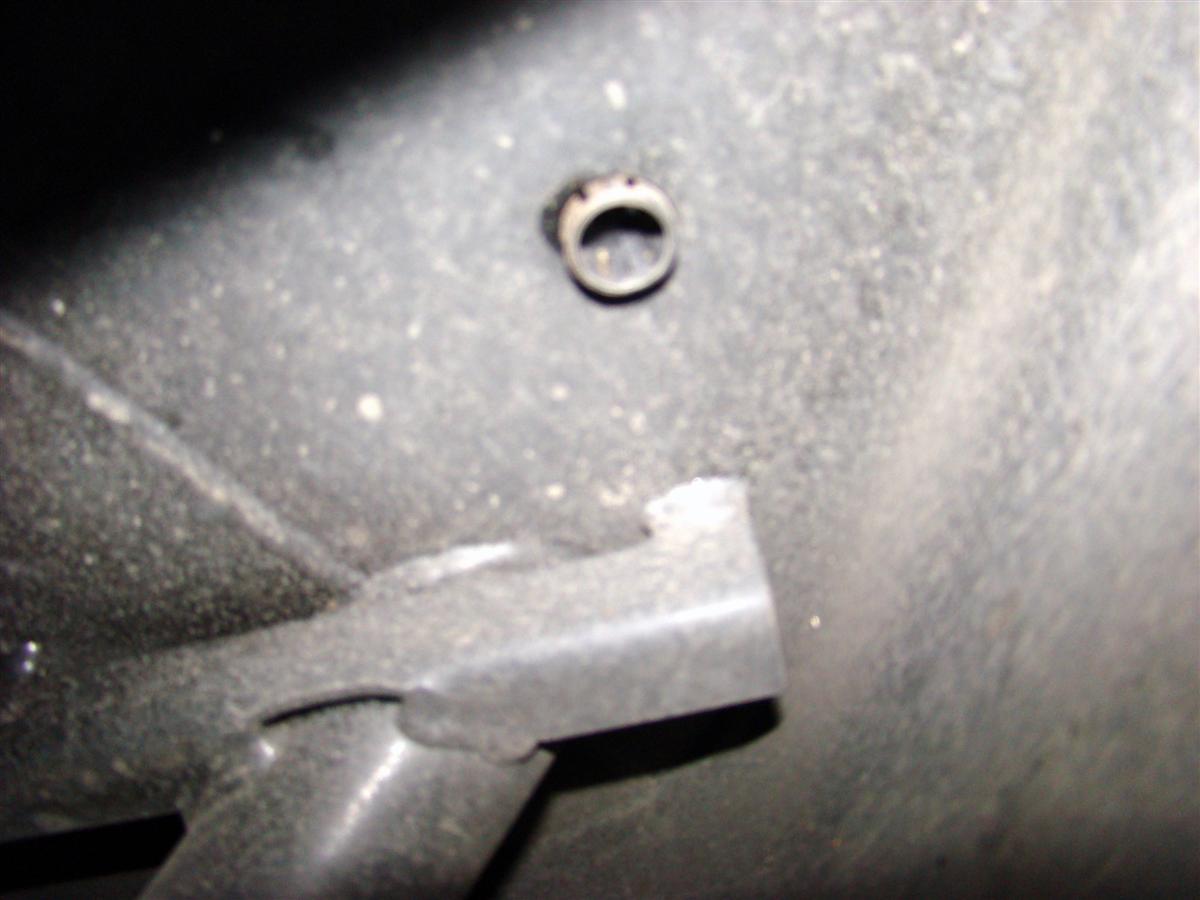
I had to pick up some step drills from Harbor Freight to drill out the antenna hole on the ARB bumper, as the Diamond mounts stud is bigger than a CB antenna stud.
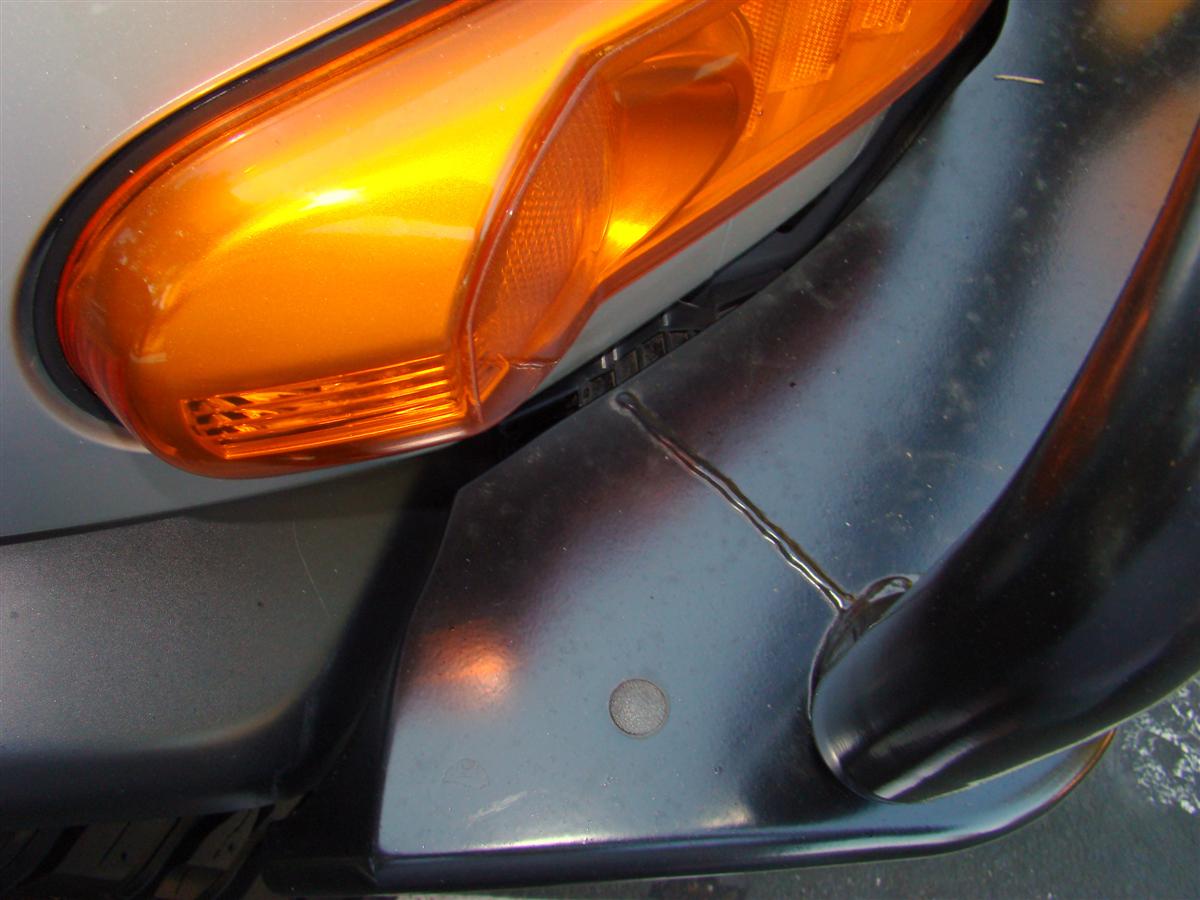
You pop out the plastic cap on the bumper by tapping it from below with a hammer.
Installed the Diamond mount and screwed the antenna to the base.
I still have to have the coax soldered at both ends for the antenna mount and the plug that goes to the back of the radio.
That will come another day.
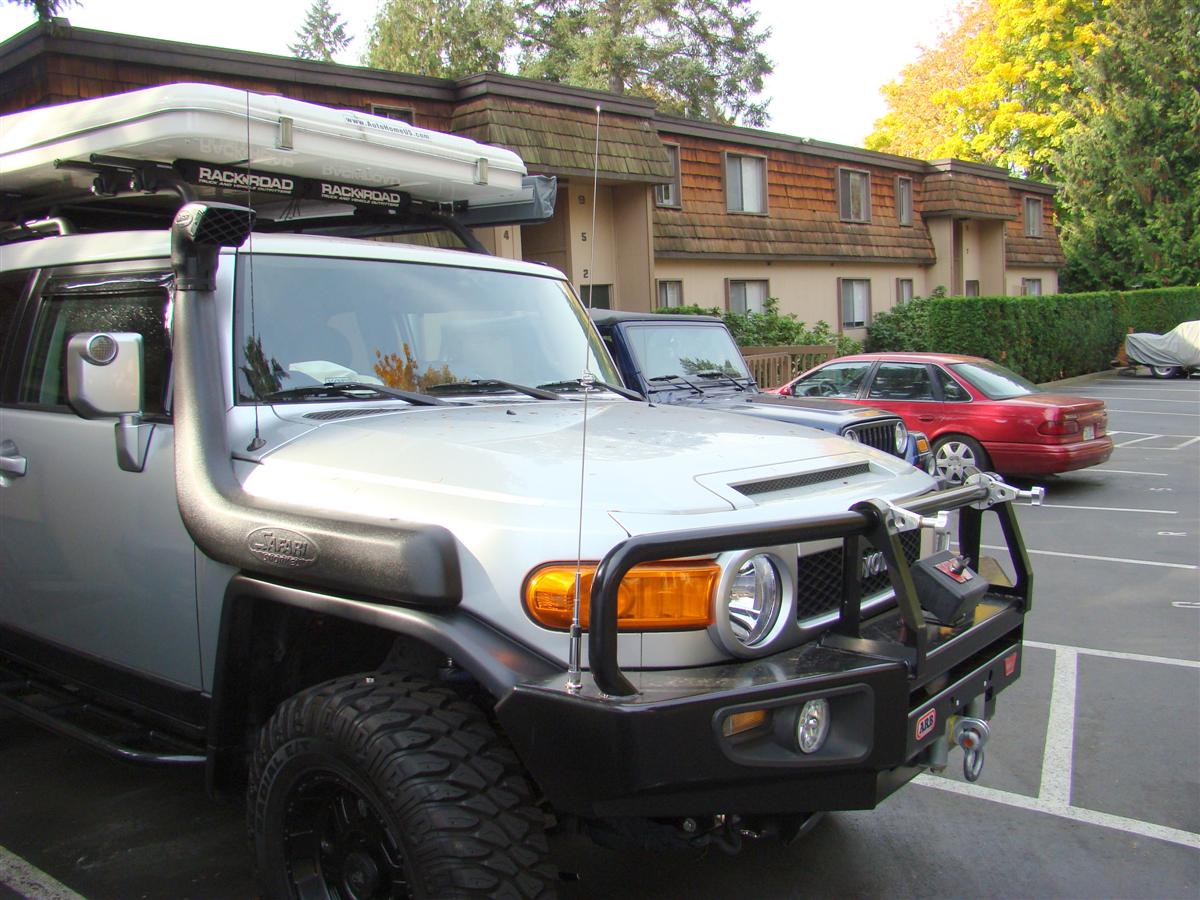
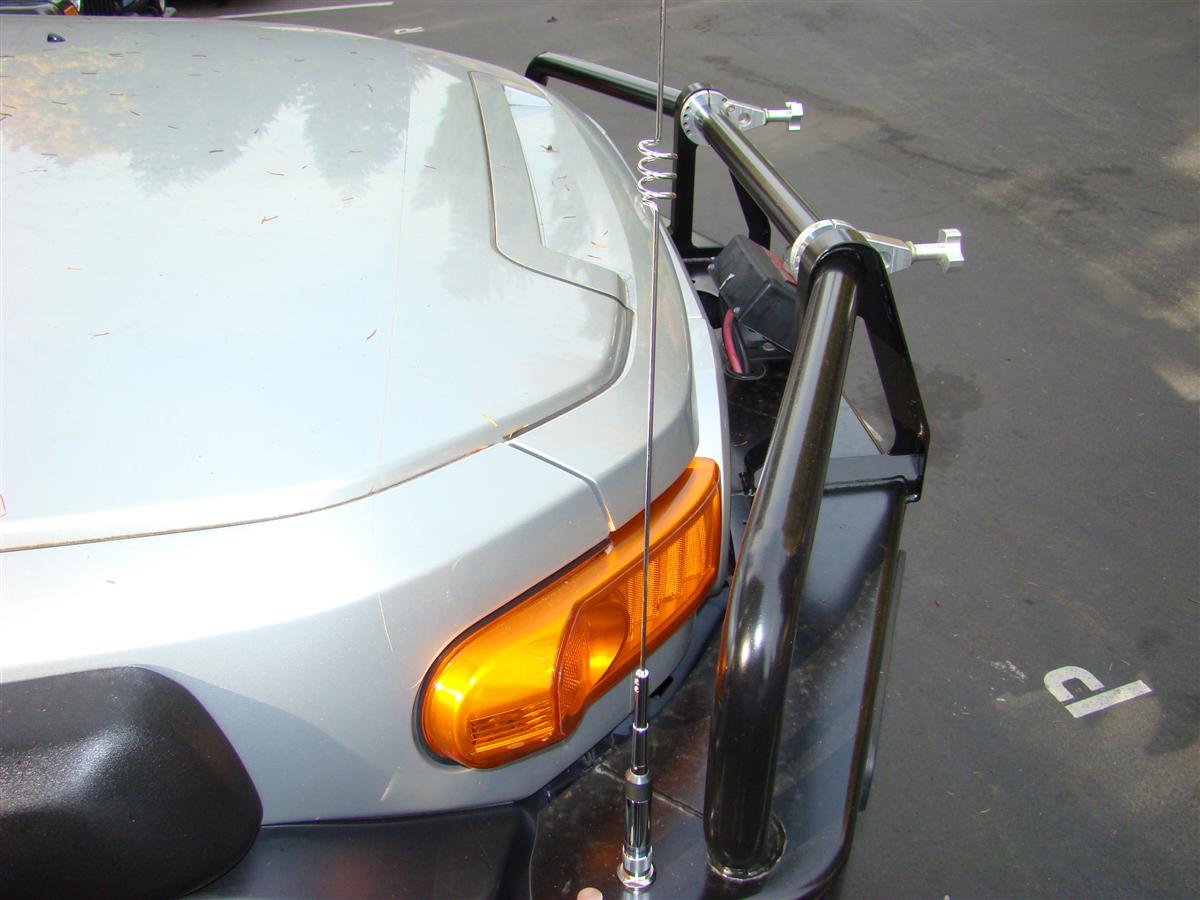
The antenna is very stealth.
The Yaesu ATAS-120a antenna I will get later however is not so stealth.


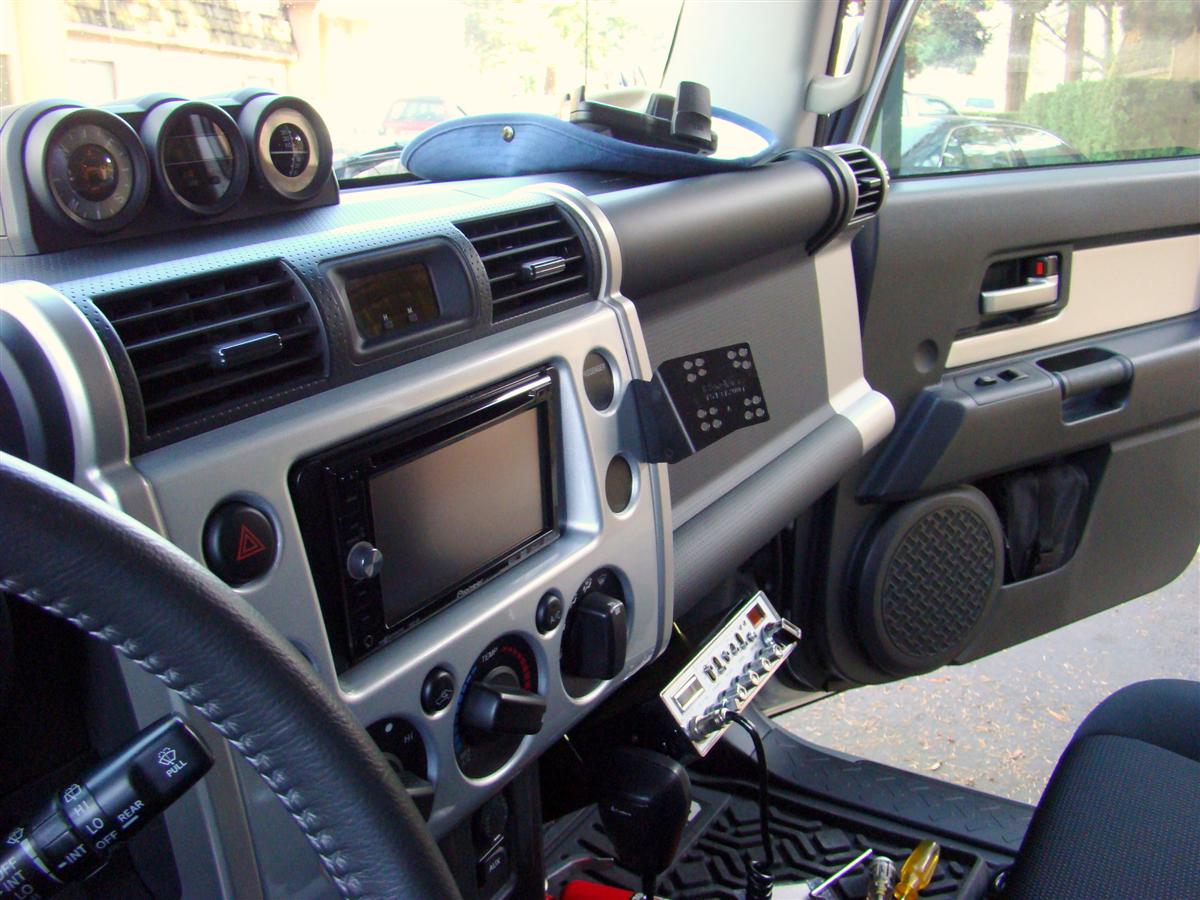
Installed the remote faceplate of the radio today.
I used an existing mount in the rig which was for an iPod, cell phone, or GPS.
https://www.yotatech.com/50362018-post78.html
I took off the grip pod part of it, and much to my delight, the Yaesu faceplate kits holes line up perfectly with the holes in the Panavice mount.
I can even move it around for different configurations, and the holes still align up.
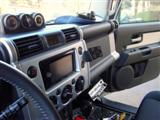
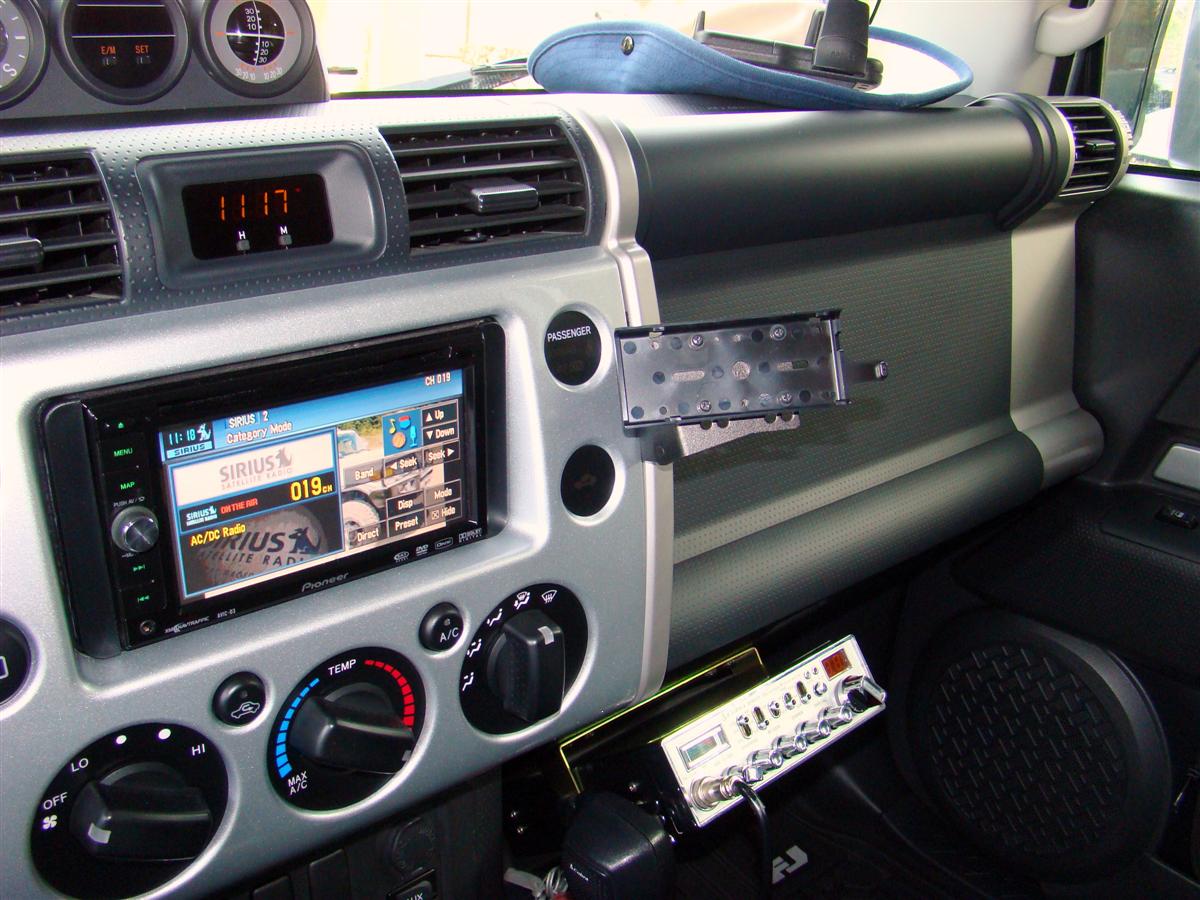
Picture one shows the Panavice mount only with the grip pod off of it.
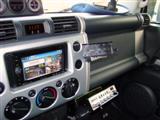
Picture two shows the Yaesu remote faceplate mount bolted to the Panavice mount.
Picture three shows the Yaesu 857D faceplate mounted to the remote mount.
It is a perfect reach for me to reach out to adjust the radio.

The next phase will bet getting the the two external speakers mounted, and hopefully taking out the passenger seat to install the radio underneath of it and get the power hooked up to it, and the cables from the remote faceplate ran down to the radio.
I have all the gear on tap, and here is what I have.
Yaesu 857D HF/VHF/UHF mobile transceiver
YSK-857 Separation Kit to remote mount the faceplate of the radio
Diamond GLP58 mounting group to mount an antenna to the ARB front bumper
Diamond NR770HA 2 meter and 440 MHz (70 cm) mobile antenna (Will be getting an all band Yaesu ATAS-120a antenna in the future)
Valor VS4 Big Mouth mobile extension speaker (Got two, going to replace my present one for my CB radio)
Diamond MX62M duplexer (Allows two antennas or one ATAS-120a antenna to be used with the 857Ds two antenna connection on the radio)
And various small parts such as fuses and RG58U coax
I installed the antenna back on 10-29-2008, here are some pictures of the install.
This antenna is only for 2 meter and the 70 centimeter bands, hence why I will switch out later to the Yaesu ATAS-120a antenna.
I had to pick up some step drills from Harbor Freight to drill out the antenna hole on the ARB bumper, as the Diamond mounts stud is bigger than a CB antenna stud.
You pop out the plastic cap on the bumper by tapping it from below with a hammer.
Installed the Diamond mount and screwed the antenna to the base.
I still have to have the coax soldered at both ends for the antenna mount and the plug that goes to the back of the radio.
That will come another day.
The antenna is very stealth.
The Yaesu ATAS-120a antenna I will get later however is not so stealth.
Installed the remote faceplate of the radio today.
I used an existing mount in the rig which was for an iPod, cell phone, or GPS.
https://www.yotatech.com/50362018-post78.html
I took off the grip pod part of it, and much to my delight, the Yaesu faceplate kits holes line up perfectly with the holes in the Panavice mount.
I can even move it around for different configurations, and the holes still align up.
Picture one shows the Panavice mount only with the grip pod off of it.
Picture two shows the Yaesu remote faceplate mount bolted to the Panavice mount.
Picture three shows the Yaesu 857D faceplate mounted to the remote mount.
It is a perfect reach for me to reach out to adjust the radio.

The next phase will bet getting the the two external speakers mounted, and hopefully taking out the passenger seat to install the radio underneath of it and get the power hooked up to it, and the cables from the remote faceplate ran down to the radio.


