TPF racing's '04 tacoma build! Picture heavy!
 07-15-2012, 11:54 PM
#21
Registered User
I just found this. It's pretty awesome. Keep up the good work. See if you can convince your friend into a window ac unit for your garage. They're awesome!
 07-16-2012, 06:17 AM
#22
Registered User
Thread Starter
Join Date: Jun 2003
Location: Las Vegas
Posts: 342
Likes: 0
Received 0 Likes
on
0 Posts
Thanks for the compliment. We're trying that's for sure!
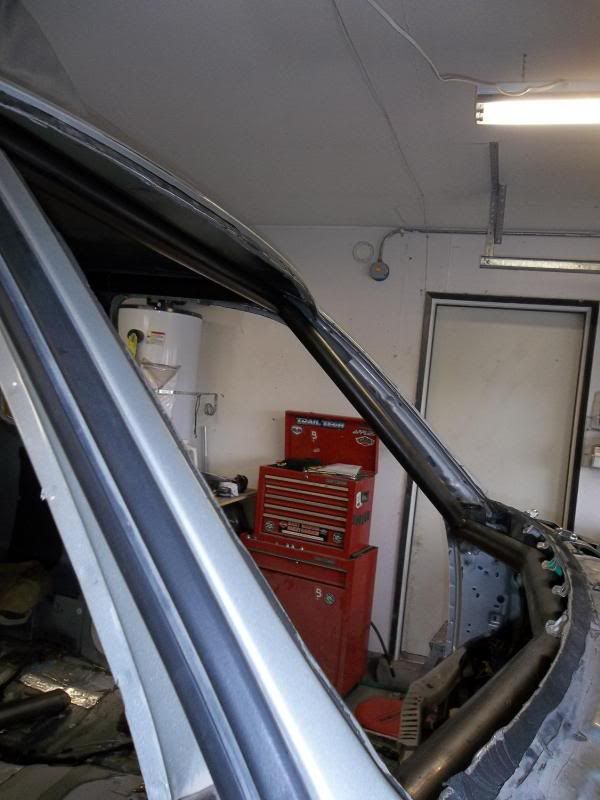
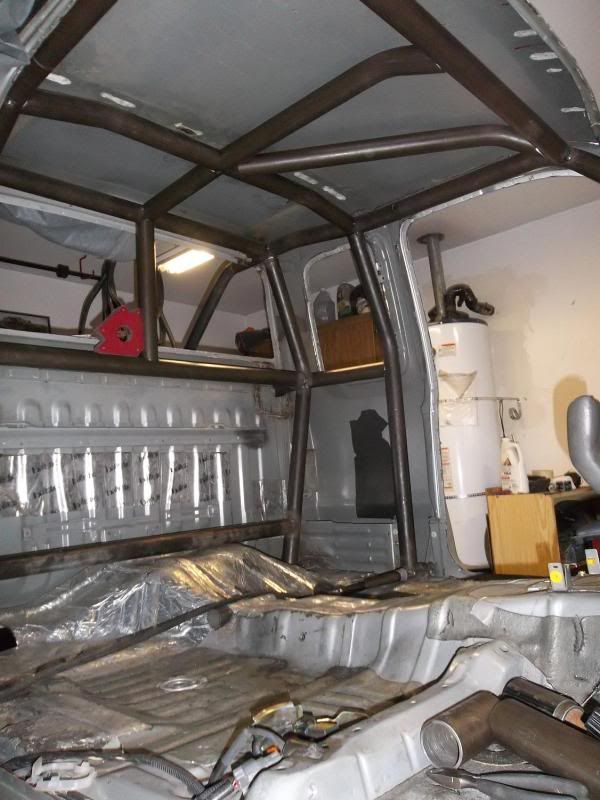
Well, things didn't go quite as I'd hoped this weekend and I spent a few hours trying to please my fab ego wasting time when I should've just checked it at the door to get it done and make progress. I fell a little bit short on my personal weekend goals as far as the amount of tube work I wanted to get done but I still made progress.
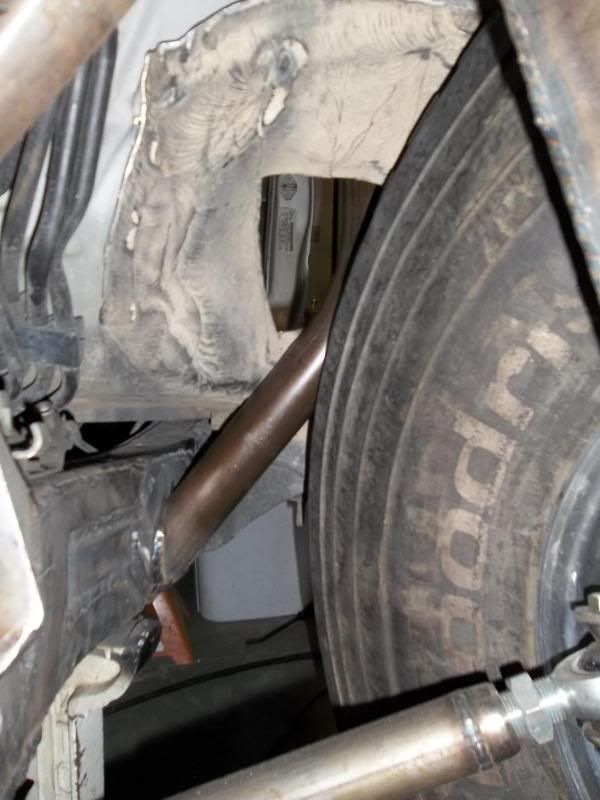
The rear down bars in the bedcage area already existed so the spread or width where I came into the cab was already dictated which kinda forced some issues. In the end it'll still do it's job should it ever need to.
Well, things didn't go quite as I'd hoped this weekend and I spent a few hours trying to please my fab ego wasting time when I should've just checked it at the door to get it done and make progress. I fell a little bit short on my personal weekend goals as far as the amount of tube work I wanted to get done but I still made progress.
The rear down bars in the bedcage area already existed so the spread or width where I came into the cab was already dictated which kinda forced some issues. In the end it'll still do it's job should it ever need to.
Last edited by sirhk100; 07-16-2012 at 06:21 AM.
07-20-2012, 06:36 AM
#23
Registered User
Thread Starter
Join Date: Jun 2003
Location: Las Vegas
Posts: 342
Likes: 0
Received 0 Likes
on
0 Posts
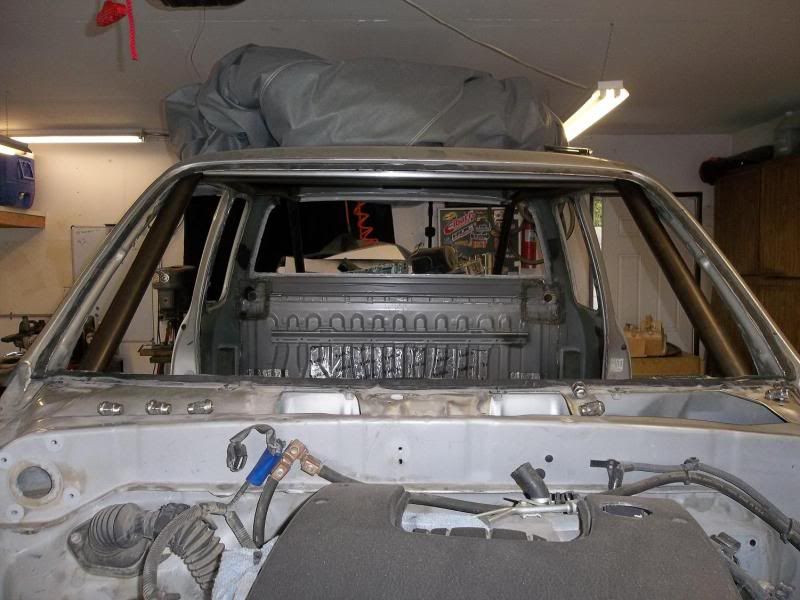
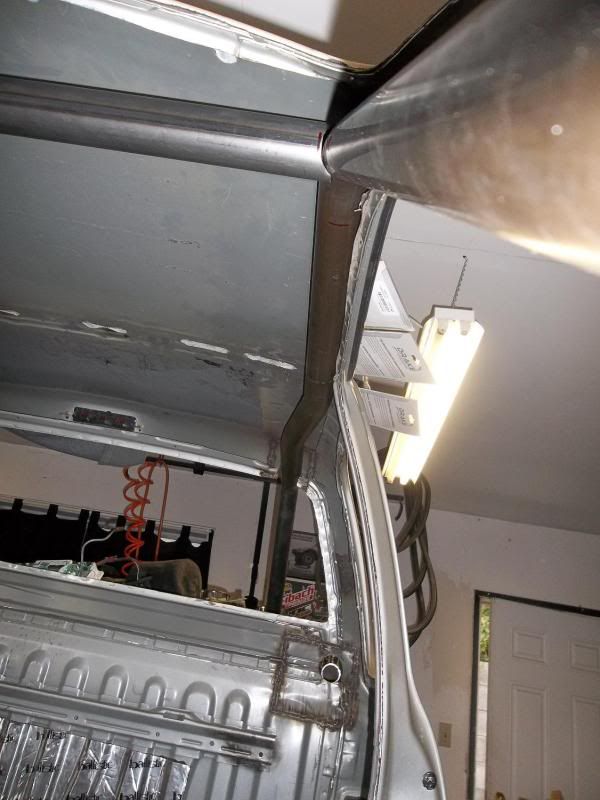
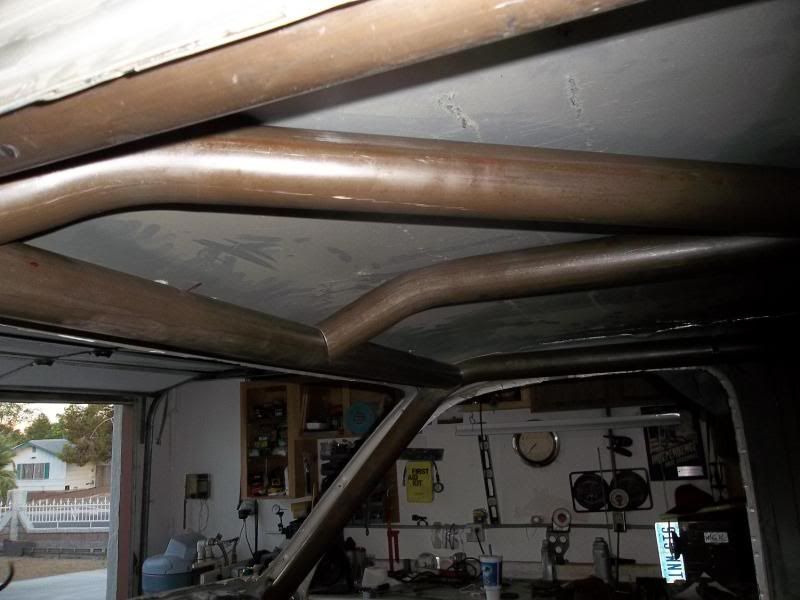
Got the a-pillars tied into the frame rails last night. I'm not sure my plans tonight but doesn't matter, over this weekend I'm planning to make some substantial progress inside the cab.
BTW, these compressed pictures are most likely shown past where bump is actually going to be.

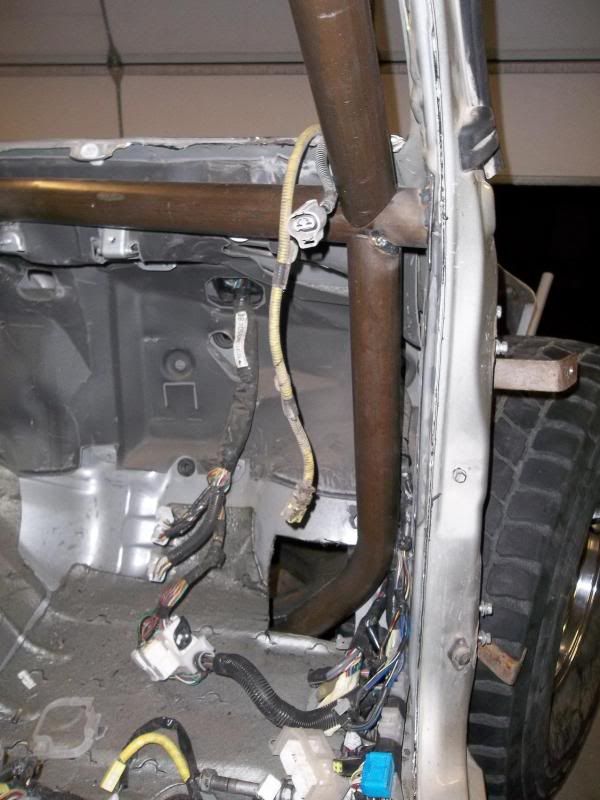

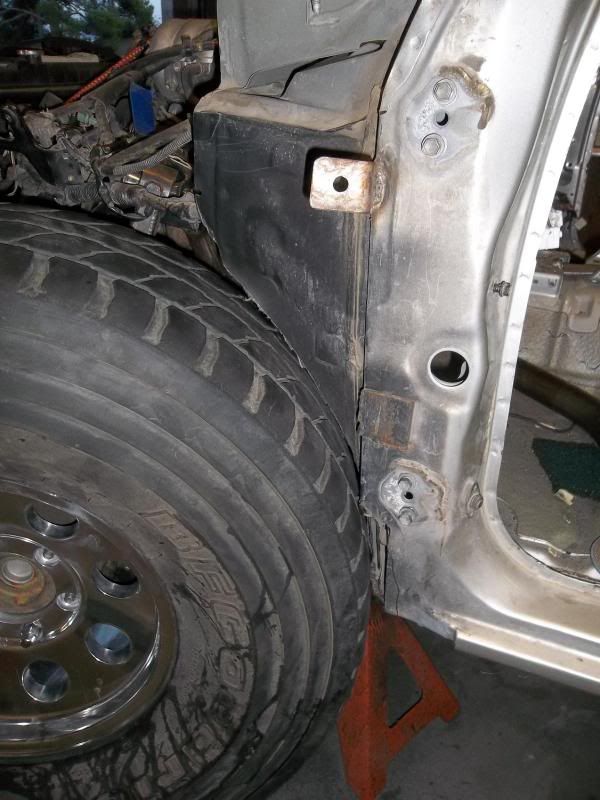
BTW, these compressed pictures are most likely shown past where bump is actually going to be.
07-23-2012, 02:34 PM
#26
Registered User
Thread Starter
Join Date: Jun 2003
Location: Las Vegas
Posts: 342
Likes: 0
Received 0 Likes
on
0 Posts
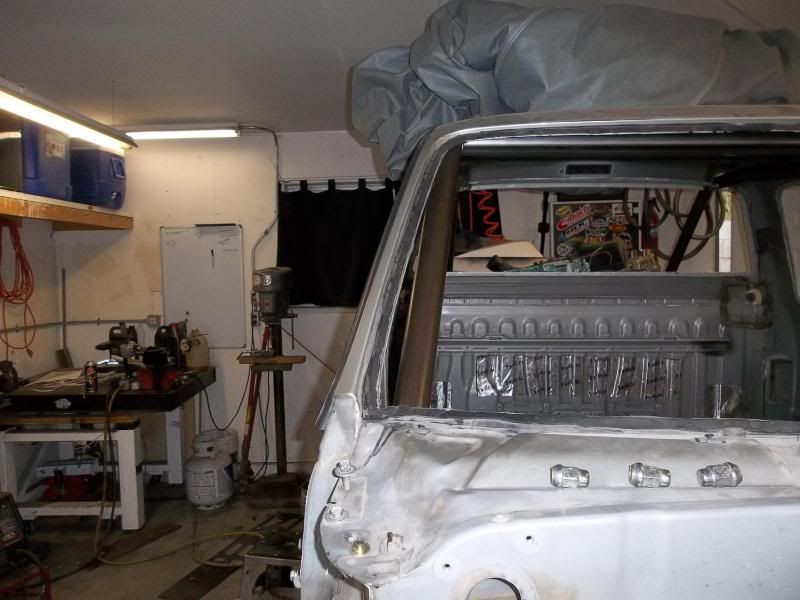
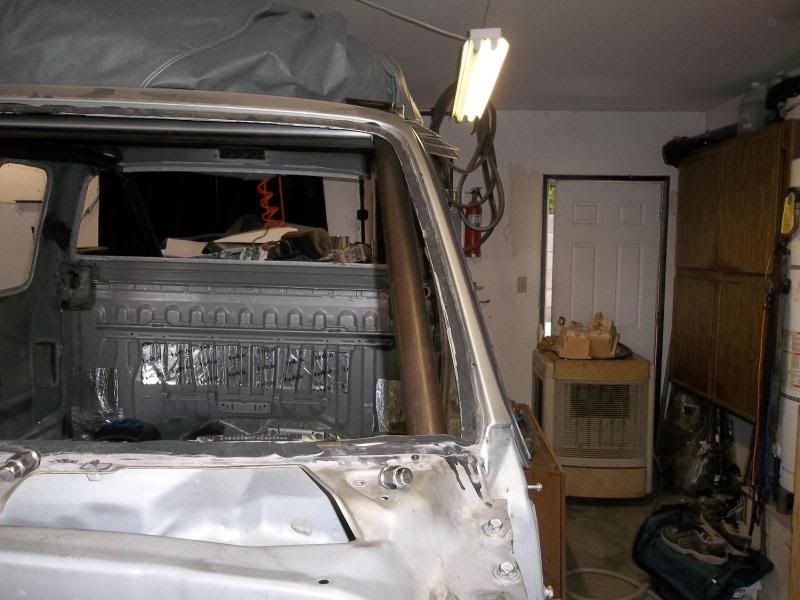
Not the most current as I actually got more done this weekend then this but...
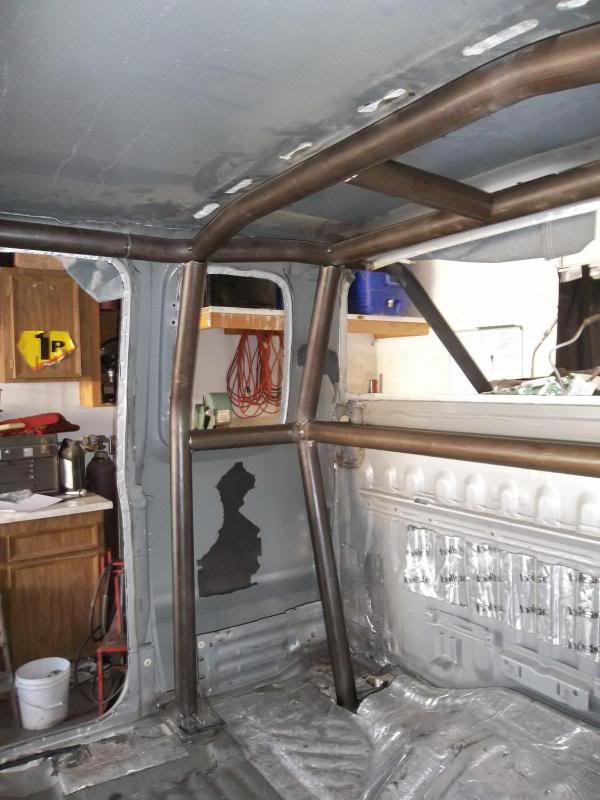
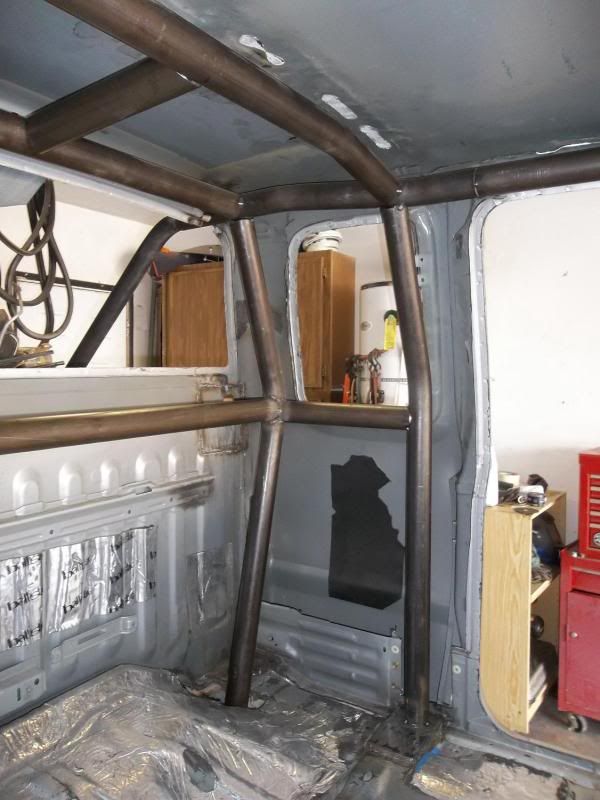
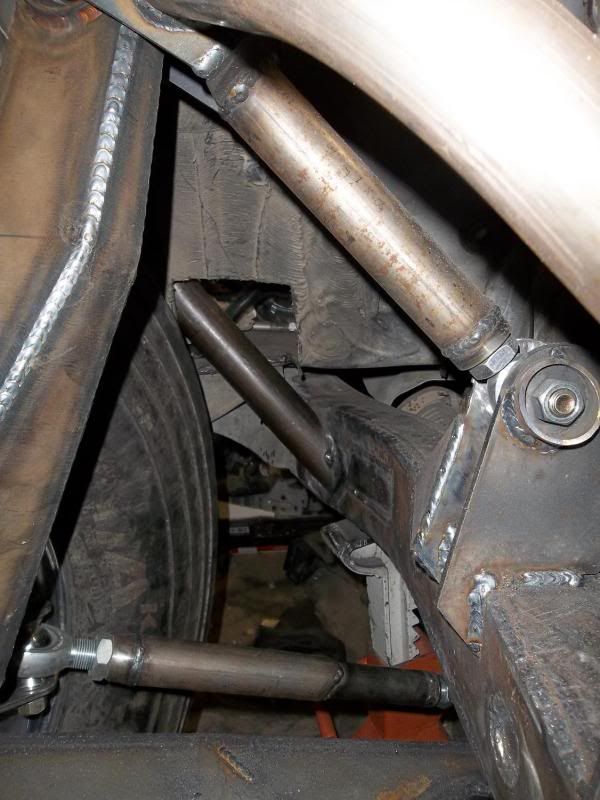
Another existing tube from the rear that I had to work around with fitment not being able to easily move it...

Another existing tube from the rear that I had to work around with fitment not being able to easily move it...
07-23-2012, 06:53 PM
#27
Registered User
Lookin good man, you may want to consider running a flapper around your tubes to remove the mill scale from the area you're welding. Keep the pictures coming!
07-23-2012, 10:32 PM
#28
Registered User
Thread Starter
Join Date: Jun 2003
Location: Las Vegas
Posts: 342
Likes: 0
Received 0 Likes
on
0 Posts
Funny you mention that... I really wish I had a lathe to just quickly chuck up the tubes and hold a strap of sand paper across for that exact reason. I won't lie, this is the first time I've worked with dom. Typically with mild I just grab some emory cloth and do a couple passes by hand to clean it up but that didn't even barely scratch the surface on this stuff. I know the high end shops do it, realistically though, how much does it affect the weld? I've got a couple of the tubes welded up where I needed to do some weld before fitting an intersecting tube in and I don't physically notice any difference at all in the look of my weld or physical change while welding. I guess simply saying, if I'm not doing structure analysis and breaking welds with measurement equipment, realistically if the cage is ever "tested" (lol) do you think it's going to be noticeable or is it just something the high end shops with the easy equipment do because they can...?

 07-24-2012, 09:04 PM
#30
Registered User
Personally, I always take the mill scale off for a few reasons. I tig weld everything, but I will use the mig to tack things up. A tack weld on a piece of metal with the mill scale still on it will often just peel right off, but with the scale removed, it bonds to the metal much more readily. Also, if I weld something without the scale removed, I can see it floating around in my puddle. I also wipe down everything with denatured alcohol before welding.
That's really just my opinion, but clean metal is very important and I can definitely see the difference in the puddle behavior.
I really don't know how much of a difference with mig it makes, but considering the amount of time it takes to clean the tube I think it can only help to clean it.
It's actually very easy to clean the scale off with your grinder. Get a flap disc sanding wheel (I prefer 80 grit) and you just run the grinder along the tubes lengthwise and roll the tube in your hand. Takes about 30 seconds per end or less. Also, convenient to bevel your tube back just a little while you're at it. Helps get good penetration.
Lastly, DOM and HREW are both mild steel. Mild steel has to do with the carbon content. DOM and HREW are just different processes of forming the tube. HREW stands for Hot Rolled Electrically Welded. DOM is Drawn Over Mandrel to normalize the tube size and weld. If you look into the tube, you can actually see where the weld is, every piece of DOM has it, it's just been smoothed out, but it is still visible.
Last edited by SCToy; 07-24-2012 at 09:07 PM.
07-24-2012, 09:10 PM
#31
Registered User
Also, for tubes that are already tacked up, a good wire wheel is pretty decent for taking scale off in areas that you can't get at with a flapper.
If haven't already got one, it really is worth the extra money to get the heavy duty, braided wire wheel. They're like 20 bucks instead of 5-10, but they last 10 or 15 times longer.
If haven't already got one, it really is worth the extra money to get the heavy duty, braided wire wheel. They're like 20 bucks instead of 5-10, but they last 10 or 15 times longer.
 07-25-2012, 09:39 AM
#34
Registered User
Thread Starter
Join Date: Jun 2003
Location: Las Vegas
Posts: 342
Likes: 0
Received 0 Likes
on
0 Posts
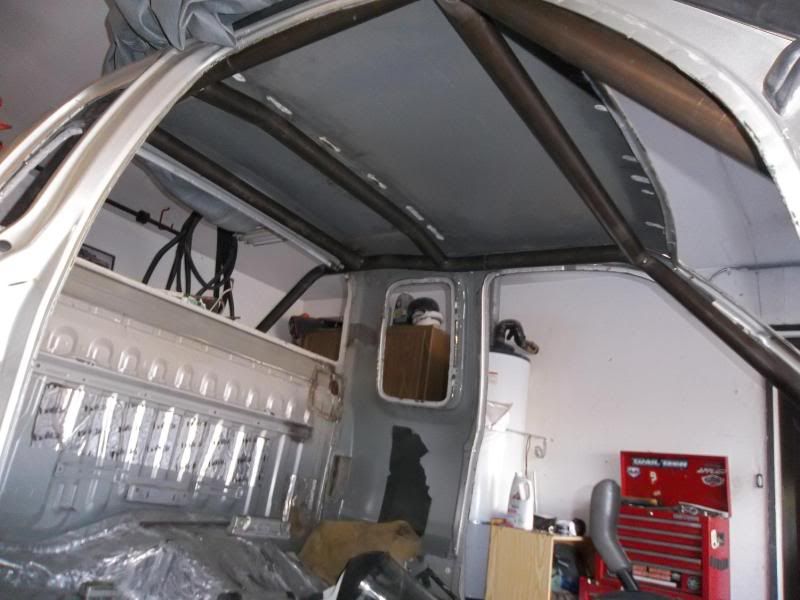
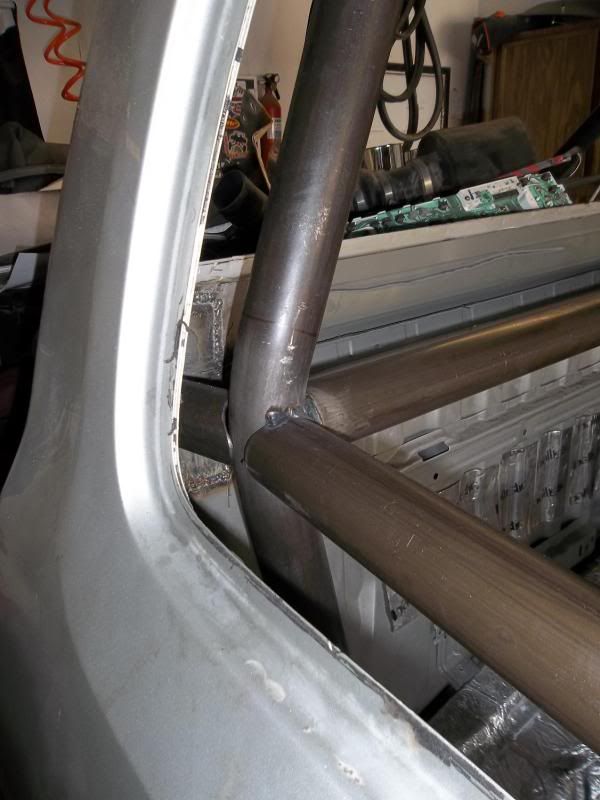
LOL, nothing of too much interest. I might make a reply tomorrow depending how motivated I am tonight to take of video of something I happened to do last night that sort of touches on the previous post. Let's just say I screwed up and tacked a tube in place in a location that made the tack VERY difficult to cut. The tube is at an angle though so it also can't simply be pulled out using the leverage to simply break the tack. So last night I'm sitting there with a 3lb sledge hammer beating on the tube virtually as hard as I can and the damn tack weld wouldn't break. It's still in there, I'm going to pickup a bit for my dremel in hopes of it fitting in there to cut the tack. The tack was on the mill scale tube. It just kinda made me laugh a bit that he mentioned the tack weld that simply popped loose when last night I couldn't bust a tube loose with a 3 lbs sledge that's pretty lightly tacked.
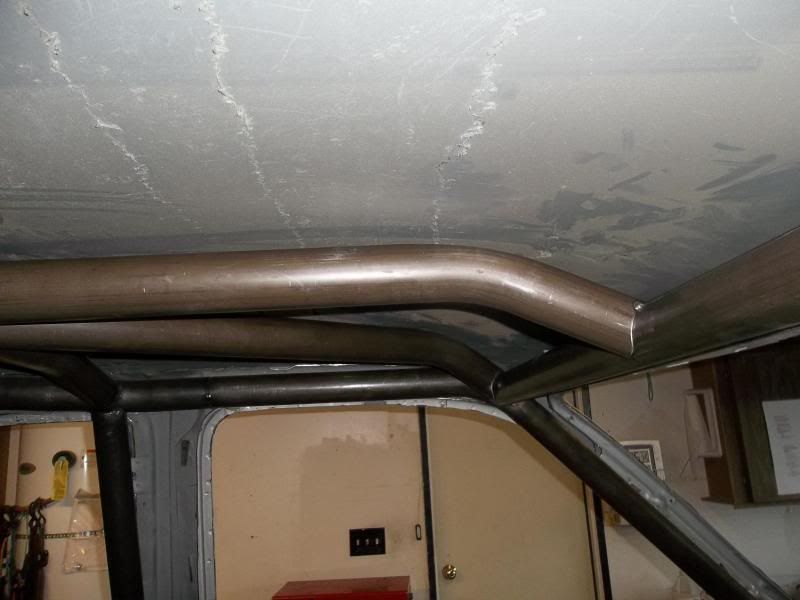
Screw the video, how about a paint illustration... Basically this diagonal shown below. Believe it or not, it's fitted too tight to the roof and I've decided I want to redo it. The center tube with the "X" on it isn't tacked in so I moved it out of the way. There's no tacks on the diagonal where it intersects at the a-pillar cause if you think about it, it's wedged in there and can't move. So the only tack weld holding this entire tube in place is just barely seen almost right in front of the bad arrow I drew. With the center tube out of the way I beat the living piss out of that tube last night with a 3lb sledge in the direction of the arrow right at the joint. No luck, it's still there...
The funny part is that I did that last night... Then this morning I read this in the post above.
I really wish this tack weld would simply peel off but that's just not the case! Scroll up 5 pictures from this post, the tack weld that won't break loose swinging a 3lb sledge at the tube in the direction of the arrow right at the joint looks just like those ones. I tacked it kinda near the top like at the 1-2 o-clock position though so I can't really easily get in to cut it without hitting the roof too.

Like I said, I'm half ways tempted to take video of it because I know how everyone is so skeptical on the internet of things people say. LOL
Screw the video, how about a paint illustration... Basically this diagonal shown below. Believe it or not, it's fitted too tight to the roof and I've decided I want to redo it. The center tube with the "X" on it isn't tacked in so I moved it out of the way. There's no tacks on the diagonal where it intersects at the a-pillar cause if you think about it, it's wedged in there and can't move. So the only tack weld holding this entire tube in place is just barely seen almost right in front of the bad arrow I drew. With the center tube out of the way I beat the living piss out of that tube last night with a 3lb sledge in the direction of the arrow right at the joint. No luck, it's still there...
The funny part is that I did that last night... Then this morning I read this in the post above.
but I will use the mig to tack things up. A tack weld on a piece of metal with the mill scale still on it will often just peel right off, but with the scale removed, it bonds to the metal much more readily.
Like I said, I'm half ways tempted to take video of it because I know how everyone is so skeptical on the internet of things people say. LOL
Last edited by sirhk100; 07-25-2012 at 09:54 AM.
07-25-2012, 12:34 PM
#35
Registered User
Like I said, I really don't know much about mug welding, I've never welded anything with it before. I can tell you have some pretty beefy tacks from the pics, the ones I was speaking about are very small. Maybe 1/4-1/3 of a second. Just enough to hold something together, but won't mess up my bead.
Looks like you've got it all handled and the truck is well on its way.
Not trying to dis on you or anything, just pointing out something from a TIG perspective, if that makes anything sense. There are a many ways to skin a cat.
What kit in the front are you thinking to run, or are you gunna build your own?
07-25-2012, 01:16 PM
#36
Registered User
Thread Starter
Join Date: Jun 2003
Location: Las Vegas
Posts: 342
Likes: 0
Received 0 Likes
on
0 Posts
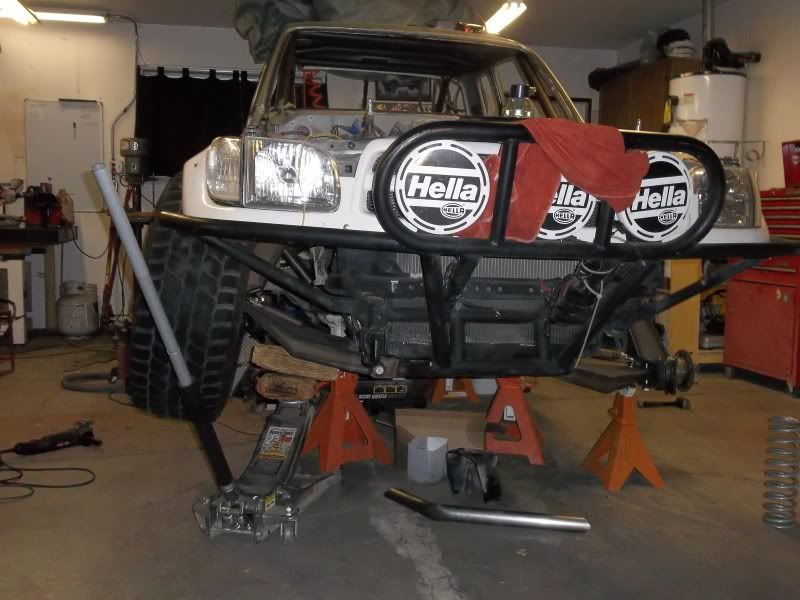
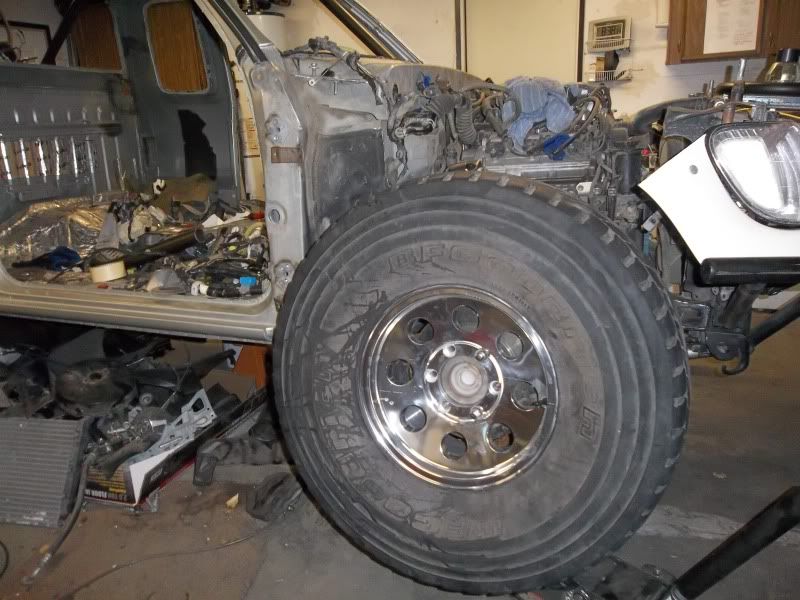
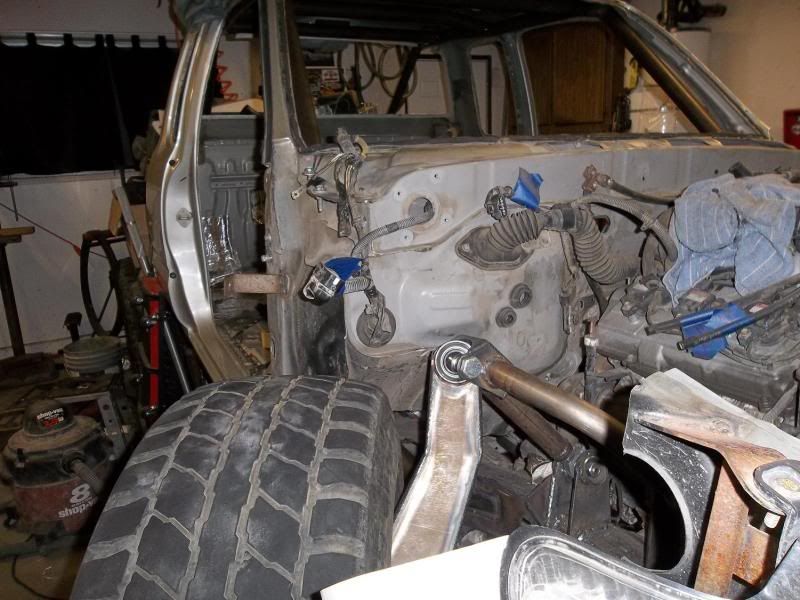
We have King 2.5" coilovers, 3" bypass & 2.5" bumps to run with it.

It'll sit about 4" narrower with the new wheels we got with the correct backspacing.

You can see the difference in spindle clearance between that last picture and this next one.
Last edited by sirhk100; 07-25-2012 at 01:22 PM.
07-25-2012, 01:20 PM
#37
Registered User
Thread Starter
Join Date: Jun 2003
Location: Las Vegas
Posts: 342
Likes: 0
Received 0 Likes
on
0 Posts
Also, my tacks are in there pretty solid cause I won't be doing any final welding till everything is fitted 100%. A lot of my tubes don't actually slide into place but actually need to be tapped into place with a mallet so with the various tensions that creates I'd rather not take the chance on a tack popping loose that I don't notice and continuing to build only in the end to find something has shifted that was fitted at the very beginning.
07-25-2012, 09:42 PM
#39
front end looks nice!! i dont know much about welding but even if the metal is dirty, as long as you get good penetration there shouldnt be an issue. oh well haha thanks for the PM explaining. too funny
07-26-2012, 06:42 AM
#40
Registered User
Thread Starter
Join Date: Jun 2003
Location: Las Vegas
Posts: 342
Likes: 0
Received 0 Likes
on
0 Posts
If I remember correctly it's like 2 degrees at droop, 8-9 at ride and about 14 at bump because of that upper arm being at factory rake. I wanted to clean it up but as a favor to my friend that built it I kept it stock geometry when I redid the upper mounts so he can show it as a race proven kit on stock mounts essentially.


