
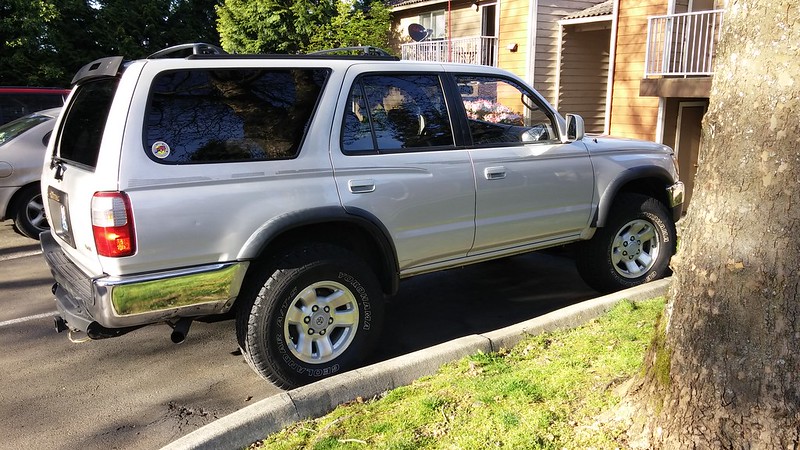
Brutus! 1997 4Runner SR5
 Mar 30, 2014 | 04:33 PM
#1
Thread Starter
Registered User
Joined: Jun 2011
Posts: 180
Likes: 0
From: Seattle, WA
Brutus! 1997 4Runner SR5
Unfortunately, I didn't get as far with my 1988 4Runner as I had wanted to. After revisiting what I wanted to do with it and the work needed to get it to that point, I just didn't have the time or space to accomplish it with the 88. So I decided to sell it, and to secure a replacement 
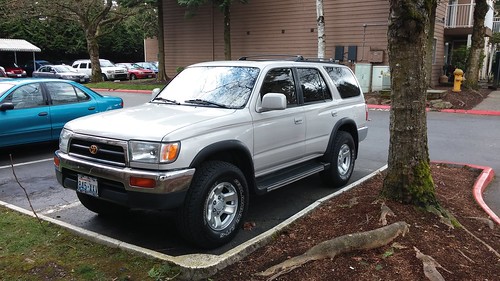
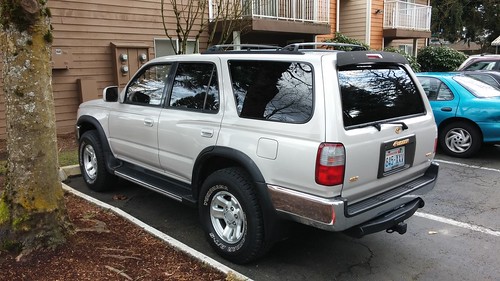
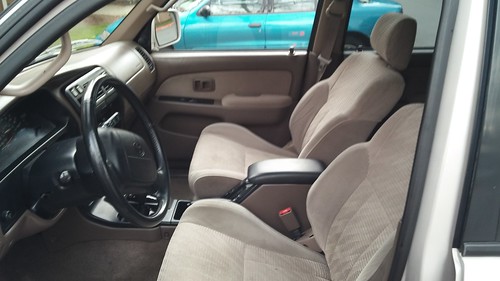
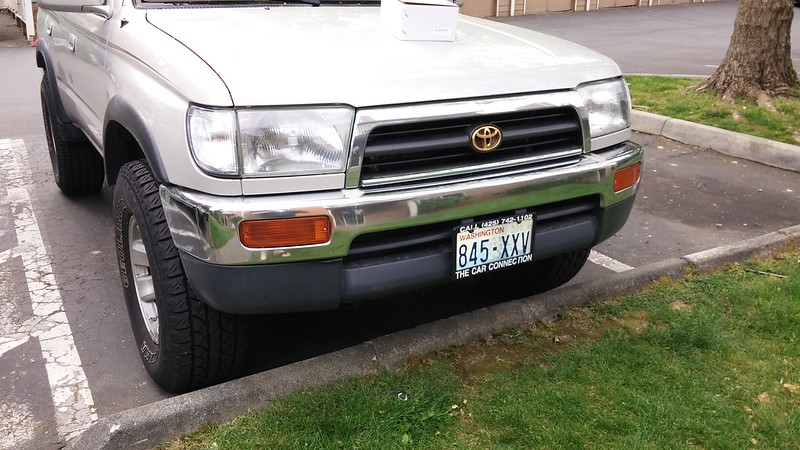
A 1997 4Runner SR5! This vehicle is soo clean (especially compared to the many others I looked at). I had originally wanted to get a Limited package, but all the ones I was finding had leather that looked rougher than Clint Eastwood's face!
The only other item on my wishlist was a rear locker, which the 97 does not have. I do have a Toyota E-locker installed in another axle back in Montana so getting it and converting the current axle is definitely in the plans.
I plan to camp (with a fair bit of travel involved) and hit whatever trails can be found here in the PNW Snow wheeling is definitely something I want to get into as well. I read through Dirtco's build and really love what I see there, so his build will be a template (with my own taste and revisions of course).
Well before I get tooo wordy (I know... too late heh), here are the pics
The immediate plans are to upgrade the battery (Sears Mode 34 Platimum Marine Battery) and moving the battery that was in it to the 88 since that one is dead.
Then comes the Trans cooler. Then I think I will get all the fluids changed so I know for sure it is good.
OH and I had to name it or the wife threatened to call it Betty 2 (she named the 88 Betty), so I came up with Brutus lol.
A 1997 4Runner SR5! This vehicle is soo clean (especially compared to the many others I looked at). I had originally wanted to get a Limited package, but all the ones I was finding had leather that looked rougher than Clint Eastwood's face!
The only other item on my wishlist was a rear locker, which the 97 does not have. I do have a Toyota E-locker installed in another axle back in Montana so getting it and converting the current axle is definitely in the plans.
I plan to camp (with a fair bit of travel involved) and hit whatever trails can be found here in the PNW
Snow wheeling is definitely something I want to get into as well. I read through Dirtco's build and really love what I see there, so his build will be a template (with my own taste and revisions of course).Well before I get tooo wordy (I know... too late heh), here are the pics
The immediate plans are to upgrade the battery (Sears Mode 34 Platimum Marine Battery) and moving the battery that was in it to the 88 since that one is dead.
Then comes the Trans cooler. Then I think I will get all the fluids changed so I know for sure it is good
.OH and I had to name it or the wife threatened to call it Betty 2 (she named the 88 Betty), so I came up with Brutus lol.
Last edited by Webbuff; Mar 30, 2014 at 04:54 PM.


 .
Apr 16, 2014 | 08:05 AM
.
Apr 16, 2014 | 08:05 AM
#5
Thread Starter
Registered User
Joined: Jun 2011
Posts: 180
Likes: 0
From: Seattle, WA
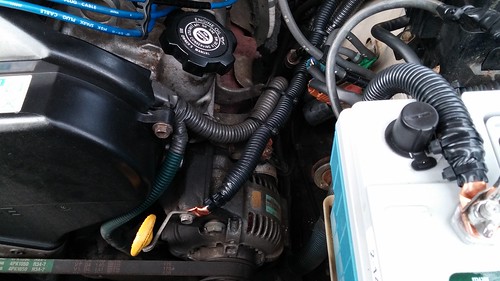
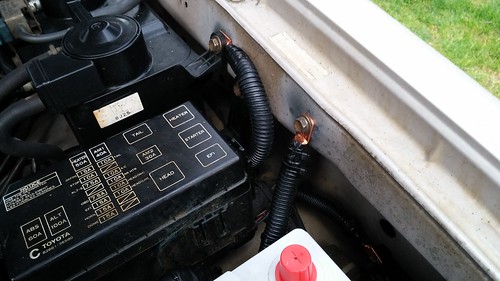
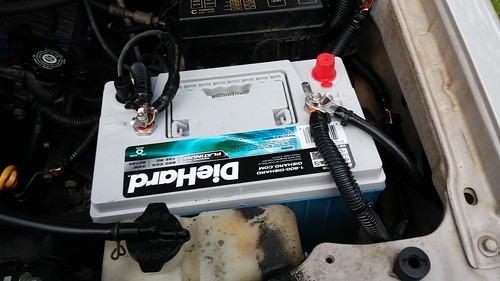
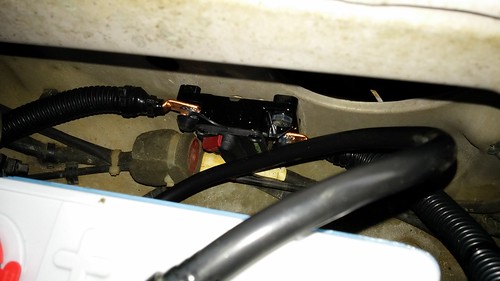
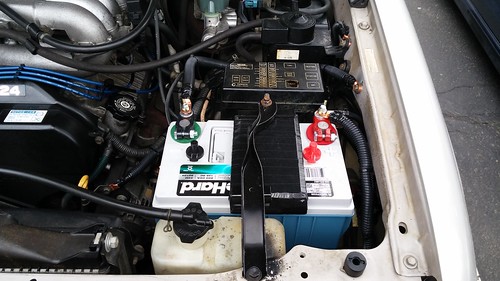
As my 88 4Runner (selling) needed a new battery I decided to move the one from the 97 to it and buy a new upgraded battery for the 97.
I went with a Sears DieHard Platinum Marine (34M). As the existing cabling was not long enough I decided to also knock out the "big 3" as well.
I followed the instructions here: http://www.toyota-4runner.org/3rd-ge...unner-how.html
The stock hold-down was fully corroded so bought a new one at the dealership, but found the new battery is shorter than the stock one.
I order a new battery box which I will be able to pick up tonight from the local 4 Wheel Parts. Though I realized that as it is a flat bottom, I won't be able to bolt it in. I will need to get it welded, which I don't have the hardware, space, or expertise (as yet) to accomplish lol.
SO, in the interim I will create a "shim" to go between the battery and the hold down for now till I can arrange for the welding to be done.
Here are the pics, I did do some re-routing of the cables close to the battery to make more room for the hold down/box so just slightly different, but this gives the general idea. I also hit the grounding connections on the inner fender with a dremel to make better contact.
Last edited by Webbuff; Apr 16, 2014 at 08:07 AM.
Apr 21, 2014 | 07:35 AM
#6
Thread Starter
Registered User
Joined: Jun 2011
Posts: 180
Likes: 0
From: Seattle, WA
Worked on the fluids this weekend
Got the rear diff and the transfer case changed, but didn't have a 12mm Hex to do the front diff. No places where I could possibly get one was open on Sunday so will just have the dealership knock it out when I take it in for the oil change/lube.
I didn't do the oil change myself this time as I don't have any grease guns to hit the zerk fittings in the drive lines with. Also since this was a new vehicle to me I though having them do a look over the truck wasn't a bad idea also.
The other project is the installation of a CB, which I picked/order all the parts for. Once I receive the shipped ones in this week will get that all installed as well and post some pics.
Trending Topics
Apr 28, 2014 | 07:51 AM
#8
Thread Starter
Registered User
Joined: Jun 2011
Posts: 180
Likes: 0
From: Seattle, WA
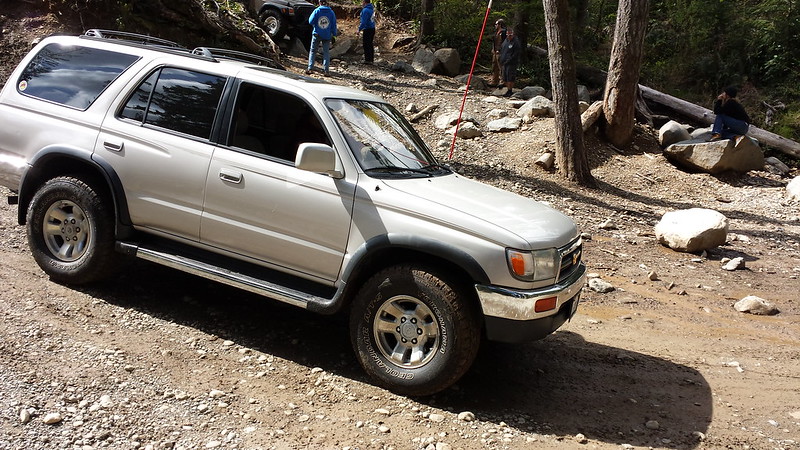
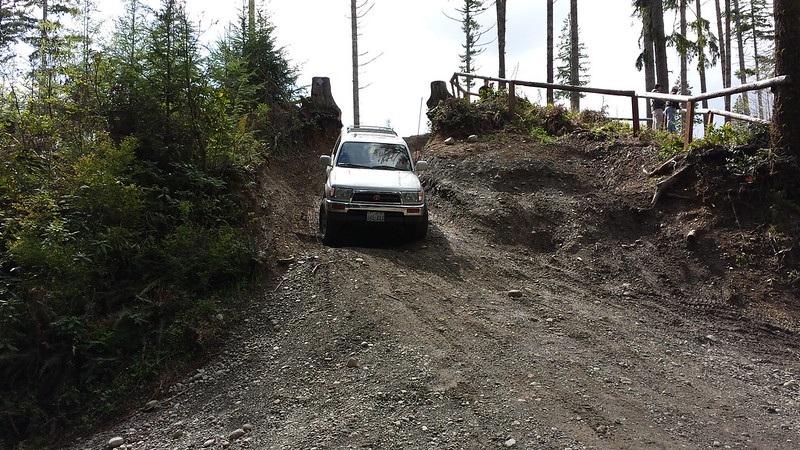
Took the Runner out on a shakedown run with the Timber Tamers at Tahuya. Had a blast and made it through the trail unscathed, except for mangling the running boards lol.
Will be taking those off this week and making sliders my next must get
We ended up accidentally on a quad trail that had some super tight sections that caused some carnage on a couple other vehicles.
Here is a pic/vid of one section my wife happened to capture for me

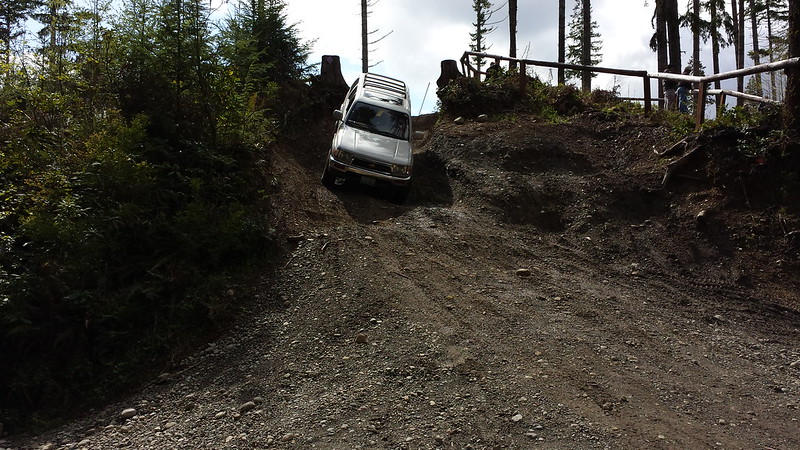
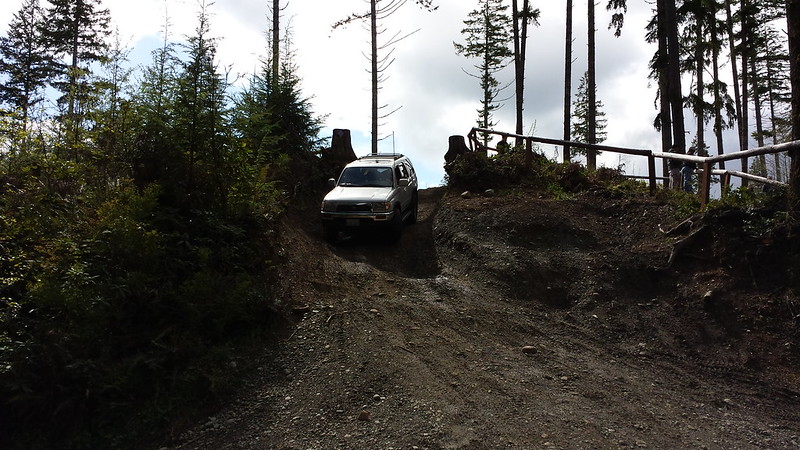

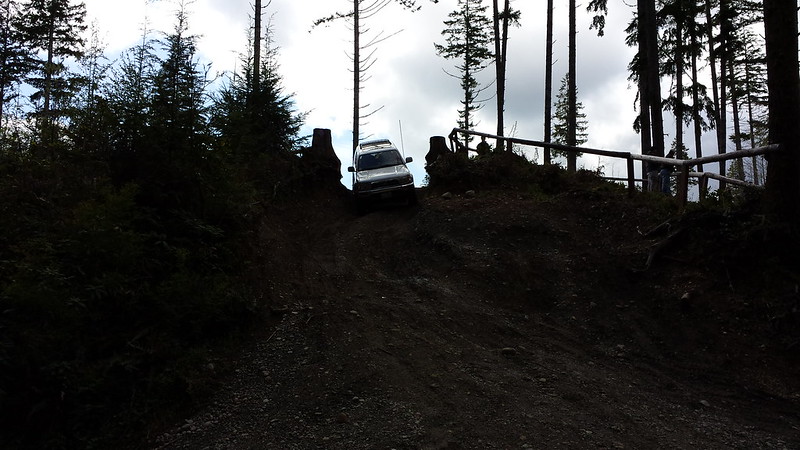


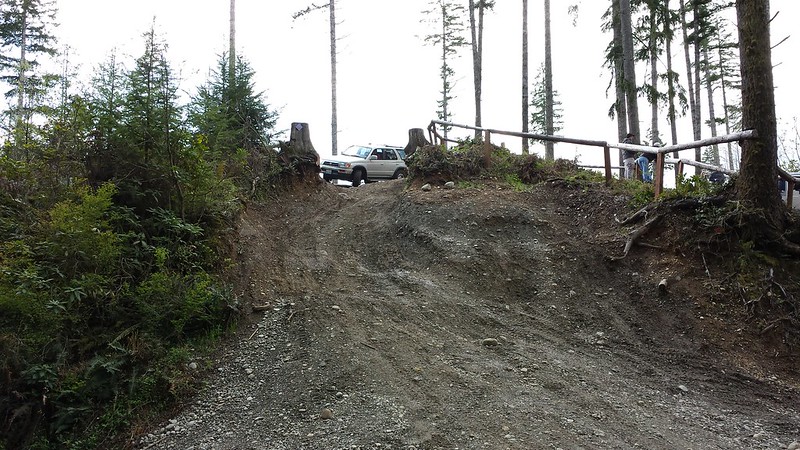
Video of decent!
https://flic.kr/p/nrpjUx
Will be taking those off this week and making sliders my next must get
We ended up accidentally on a quad trail that had some super tight sections that caused some carnage on a couple other vehicles.
Here is a pic/vid of one section my wife happened to capture for me
Video of decent!
https://flic.kr/p/nrpjUx
Last edited by Webbuff; Jun 17, 2014 at 07:25 AM.
Apr 29, 2014 | 06:17 AM
#9
Thread Starter
Registered User
Joined: Jun 2011
Posts: 180
Likes: 0
From: Seattle, WA
Got the running boards off last night.. now the truck looks taller hehe
Think I will need to shorten the flare in front of the rear tire, but will likely way till I get sliders to see how it lines up.
Will get some pics up once I get it washed lol.
Think I will need to shorten the flare in front of the rear tire, but will likely way till I get sliders to see how it lines up.
Will get some pics up once I get it washed lol.
 May 12, 2014 | 08:49 AM
#11
Thread Starter
Registered User
Joined: Jun 2011
Posts: 180
Likes: 0
From: Seattle, WA
Went to install a TG rear diff self-contained diff breather and found the PO has already extended it. Not sure where it ends up so will have to look more next time I am under it lol.
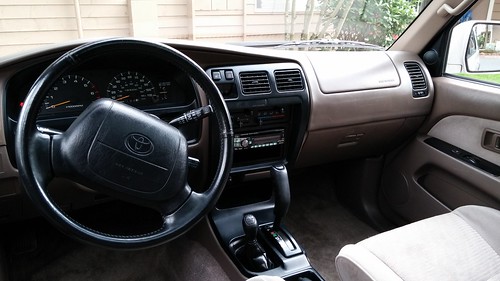
Got a new radio bezel ordered as well as some clear corners. My passenger one looks like an aquarium lol.
Gonna get the new bezel trimmed for the CB and then trace/re-route the CB cable to see how the installer at Car Toys did it. Not terribly happy with how he put a hole in my FW. I had a nice 12 dollar firewall boot I had that he didn't use so not sure how well he sealed the hole he made.
May 13, 2014 | 02:36 PM
#12
Registered User
Joined: Sep 2013
Posts: 42
Likes: 0
From: Whistler, Canada
Nice find! I just live up in Whistler, BC, soon Squamish and am finally getting into modifying mine too. Lucky you already had a rear diff breather, I did the diff breather mod, cost me about $30 in parts, was pretty easy. Most likely it's routed up the gas filler tube somewhere.
May 14, 2014 | 06:35 AM
#14
Thread Starter
Registered User
Joined: Jun 2011
Posts: 180
Likes: 0
From: Seattle, WA
Yeah I thought the same, didn't see it protruding into the filler cap so its either behind it or maybe behind the taillights. Just want to find out for sure so I know and can ensure its in good shape
It will see the trails, but I intend to do what I can to keep it as nice as possible.
Need to clean up/out the 88 so I can get to listing it for sale. Was waiting on a guy at work who said he wanted it to see if he could get the moolah together, but its been around a month and I need to get it sold.
May 16, 2014 | 06:28 AM
#17
Thread Starter
Registered User
Joined: Jun 2011
Posts: 180
Likes: 0
From: Seattle, WA
Got my clear corners in last night so got those installed. It was nice to replace the fish tank that was my passenger side corner lol.
I also got my new dash console (radio bezel) so will be getting that ready to install this weekend and get my CB properly mounted.
Before:

After:
I also got my new dash console (radio bezel) so will be getting that ready to install this weekend and get my CB properly mounted.
Before:
After:
May 18, 2014 | 02:03 PM
#18
Thread Starter
Registered User
Joined: Jun 2011
Posts: 180
Likes: 0
From: Seattle, WA
I made one of the most important upgrades to the 4Runner....
STICKERS!! pics below hehe.

Wife made me add that one lol

Gaming tag is Static Panda so I get called Panda a lot which has transferred over to as my CB handle
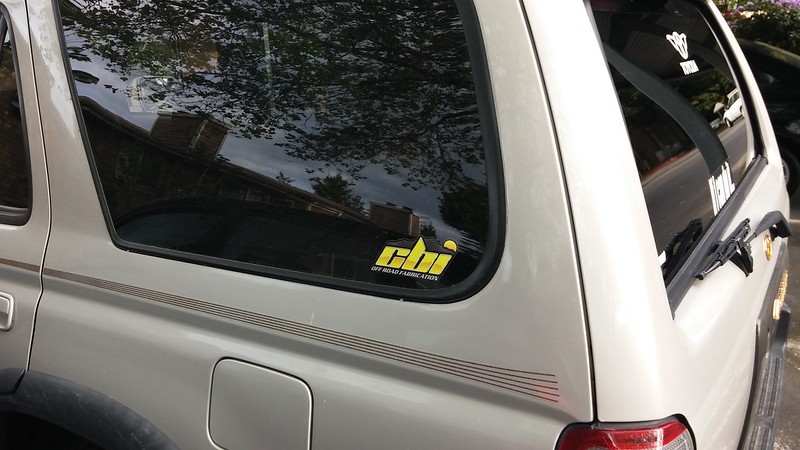
CB mount is from these guys , really like it Will have pics of the CB setup one I get it wrapped up.
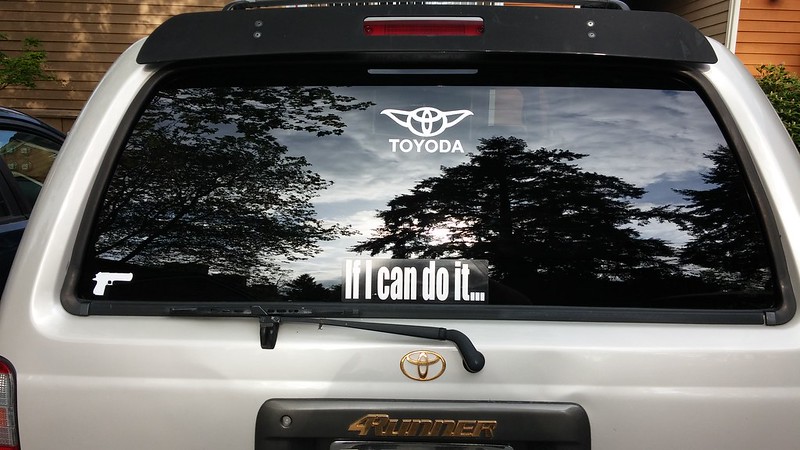
Couple on here The If I can do it... one I got made after the Tahuya run. Another Toy owner kept telling me he liked following me as he knew if my stock 4runner could make it he could lol.
STICKERS!! pics below hehe.
Wife made me add that one lol
Gaming tag is Static Panda so I get called Panda a lot which has transferred over to as my CB handle
CB mount is from these guys , really like it
Will have pics of the CB setup one I get it wrapped up.Couple on here
The If I can do it... one I got made after the Tahuya run. Another Toy owner kept telling me he liked following me as he knew if my stock 4runner could make it he could lol.
Last edited by Webbuff; May 18, 2014 at 02:09 PM.
May 20, 2014 | 04:39 PM
#19
Thread Starter
Registered User
Joined: Jun 2011
Posts: 180
Likes: 0
From: Seattle, WA
Well still need to decide where to mount the Mic hanger but got it in and all buttoned up.

Not quite flush but all nice and tidy. Got it tapped to a 12v constant so it doesn't forget its channel every time I turned the truck off heh.
Here is the CBI mount. It came withth longer bolts and a really nice finish. Had to trim the black cowl on that side to get the bracket to clear correctly, but nothing my Dremel couldn't handle
Last edited by Webbuff; Jun 17, 2014 at 07:23 AM.
Jun 17, 2014 | 07:20 AM
#20
Thread Starter
Registered User
Joined: Jun 2011
Posts: 180
Likes: 0
From: Seattle, WA
Not a whole lot done of late as I have been getting ready for a wheeling/camping trip to Evans Creek area.
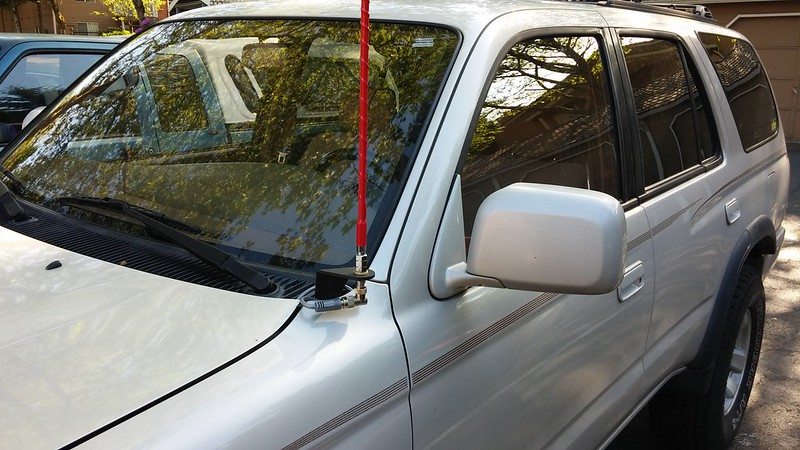
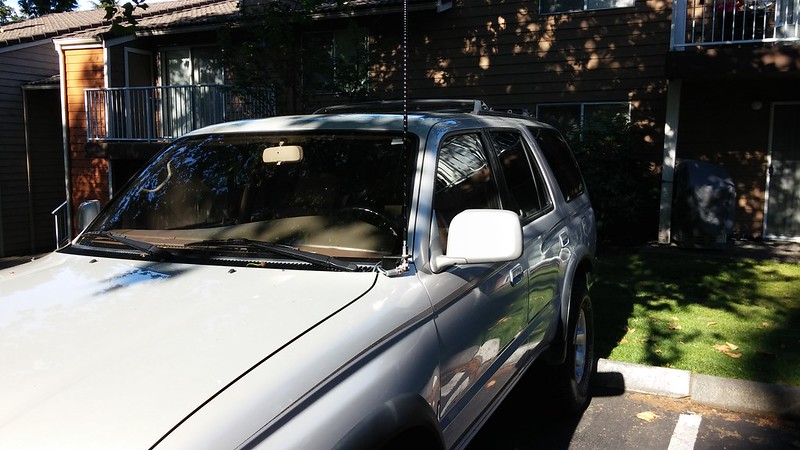
My Firestick had the top of it clipped off when my wife drove the Runner into a parking lot so got it replaced (went with a black one this time.
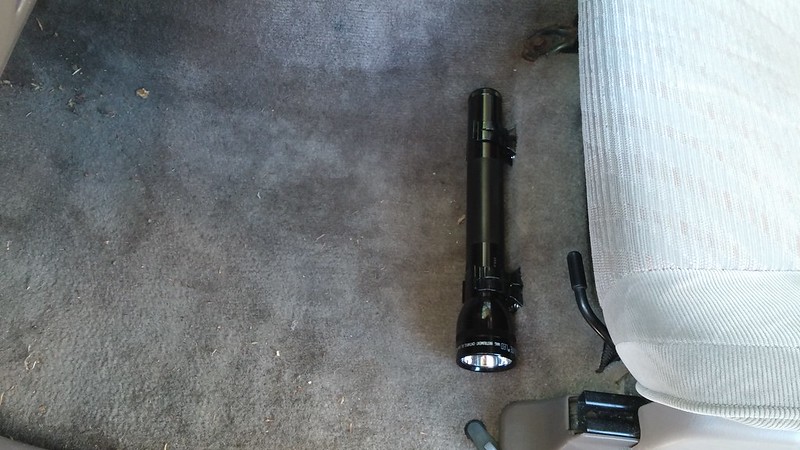
I also installed my LED maglite
I found someone who is parting out a 97 4Runner that had an e-locker rear. I am arranging to pick that up for a good price so that once I get my e-locker from MT I can swap out the rears (once I confirm the gearing in the locker and match the front accordinly).
The next project is going to be getting the front brakes upgraded and do the manual hubs conversion done (as well as get the front end freshened).
My Firestick had the top of it clipped off when my wife drove the Runner into a parking lot so got it replaced (went with a black one this time.
I also installed my LED maglite
I found someone who is parting out a 97 4Runner that had an e-locker rear. I am arranging to pick that up for a good price so that once I get my e-locker from MT I can swap out the rears (once I confirm the gearing in the locker and match the front accordinly).
The next project is going to be getting the front brakes upgraded and do the manual hubs conversion done (as well as get the front end freshened).


