
vwfastg60's 1987 Pickup Build-Up Thread
 try not to distroy it
 Nov 11, 2008 | 04:23 AM
#22
Thread Starter
Registered User
Joined: Apr 2005
Posts: 876
Likes: 0
From: Longmont Colorado
Nate said it wasn't flopped. I was the one telling him if you can use the wheel as a cup holder its flopped. I have to find the camera phone pic of my palmer sitting in the wheel while we were climbing on it.
The goal to be driving it is by Dec. I wanted to drive it on my B-day but it looks like im going to be setting a seat on the frame and having people push me down the driveway to have that happen. Im calling Scott today cause i was WAY too hung over to move all day after my insane night sunday so i didnt get to him. Getting (you will love this) GEARS 5:29's and a 4.7 case with an adapter and Xmember, Driveshaft's, A front bumper and winch. Im grabbing a new grill, Headlight buckets, corner lights, and 2 new fenders(Nate made my new ones flat) Also replacing the clutch with a 6puck because my stock one was smoked from the flop.
Lastnight Bart chopped the rear tire holder out and we have some cleaning to do on that. Cleaned up the holes on the frame for the Front shackles, and we dropped the trans Xmember so i could pull the front shaft for the guy who picked up my lift stuff.
Tonight is a big night. Gym, take new goodies up and mount the fenders on the new cab, Put the new hood on and adjust it all. 4x fenders on my 2wd and my 2wd fenders on barts 4wd. Build the rear Xmember, Weld in and build the plates for the shackles, mount sliders if we get around to it. I need to get the shock hoops tacked up and flex it out to make sure everything is good and no binding and then the fun starts. The axle will come back out add on the knuckle ball truss set and the highsteer arms, New bearings...pull 3rds for gears and at that point winch the cab off and clean the full frame. I want any rust repaired or ground off and will need to make a bracket for the e-brake cable cause we hacked off the Tbar mounts. Bart has one repair to make on the frame where Ballz nicked it with the sawsall.
As for wrecking it again....Not going to happen. Everything i did to this truck and every change i made was trial and error for the final build....This is it. I will be adding Rear disk, twinstick, Rear driveline disconnect and might even go FF with the rear. Up front im going to a high pin elocker or ARB's in both depending on money and for sure Longs up front.
I already have another project truck lined up and the parts truck for it. My buddy has 2 D60's in his garage so were going to take that stuff and throw it under a SAF truck frame and gear it, Spool the rear and lock the front with whatever motor he has(has like 10) were thinking 4inches of lift with 40's cut to fit and just exo the cab. Everything else will be smashed like crazy. It will be the one we wreck
Nov 11, 2008 | 01:53 PM
#25
Contributing Member
Joined: Nov 2005
Posts: 8,875
Likes: 3
From: Longmont, CO
I would consider a standard clutch with the low gears. A puck style will be awful harsh - send a lot of torque impact down the drivetrain.
As for gears - 'bout damn time!
I'm heading to Hungary for work this weekend, but will be available the next weekend(22-23) - I owe you some help! (Plus I need to touch up and wet sand/buff the doors/fenders)
As for gears - 'bout damn time!
I'm heading to Hungary for work this weekend, but will be available the next weekend(22-23) - I owe you some help! (Plus I need to touch up and wet sand/buff the doors/fenders)
Nov 11, 2008 | 07:16 PM
#26
Thread Starter
Registered User
Joined: Apr 2005
Posts: 876
Likes: 0
From: Longmont Colorado
My multi quote is not working for some reason
The truck will look better then ever.
Molly you better get on that 3.4 swap cause i will wanna wheel when this is done.
Troy, I thought about that but my fear is the clutch slipping. Let me know when your back and we can play at the shop. I should have the body off and frame cleaned and be working on spraying so we will have a tailgate to put on your rig too.
Nov 12, 2008 | 08:36 AM
#27
Contributing Member
Joined: Nov 2005
Posts: 8,875
Likes: 3
From: Longmont, CO
Gotta fix my rear bumper before installing the tailgate ... but need the tailgate to line up the tire carrier ... which will involve modifying the exo/bumper ... big chicken and egg thing!
 Nov 24, 2008 | 02:47 AM
#29
Thread Starter
Registered User
Joined: Apr 2005
Posts: 876
Likes: 0
From: Longmont Colorado
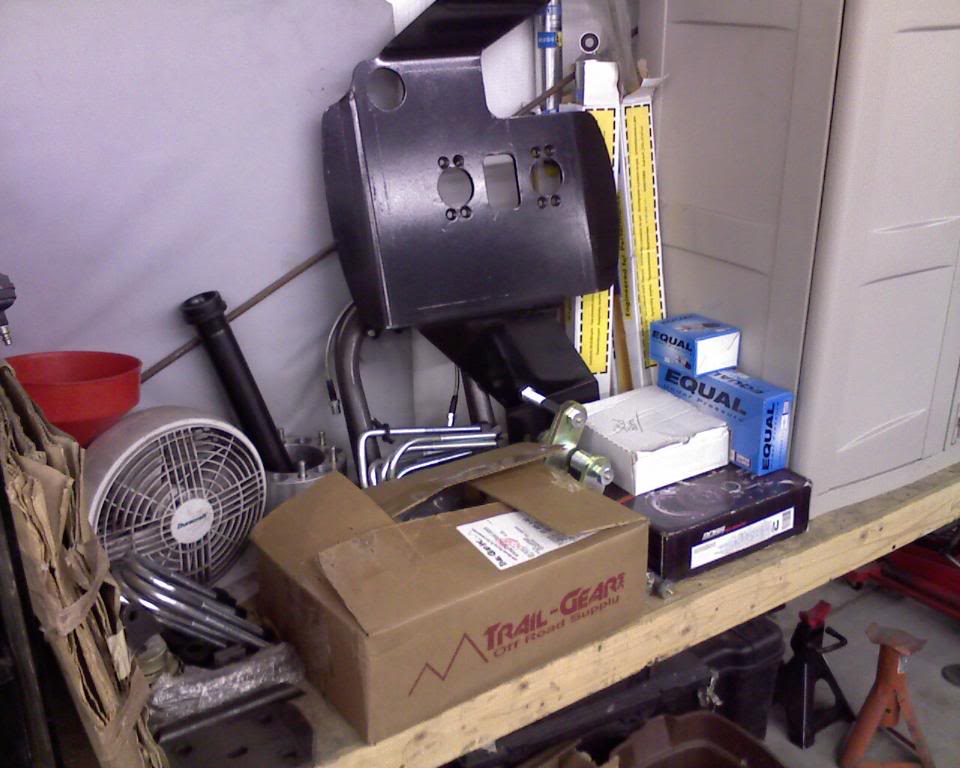
3rd's are being geared right now, Crawlbox is sitting on my bench along with 4.7 gears and all the clutch parts and hydro's for the clutch. I originally ordered the 6puck kit but it came as the solid disc and for the sake of not shipping it back i think im just going to get the difference back or apply it to more parts.
I spent last night cleaning up and getting the massive parts stack out of boxes and organized on the workbench. The housing will come back after its gutted and im going to fully polish the balls on the end, Bart will work his magic on the shock mounting and ball truss and steering truss stuff. A bit more finish welding and grinding on the armor(making it 100% smooth) and a fresh coat of paint on everything and it will go back over to be put together.
After the gears then the cases will go over and be finished up.
Nate and i gutted the bay last weekend and all that needs to be removed is the radiator, brakelines at the frame, slave from the tranny and the cab can come off and the motor and trans will come off the frame. We made an attempt at the sliders but the chop saw was 40miles away and the rockers are so smashed we couldnt figure out how high to go cause we couldn't even get the doors on.
The truck is sitting as high as my 2wd right now and its really weird cause its been huge for 3 years now. kinda creepy and scary at the same time.
So about this point in the build i have to give some credit to a few people.
Nate-for his body work and understanding of how anal i really am.
Bart-for cleaning up the welds and making pretty beads....also knowing how anal i am.
Scott at addictedoffroad.com for making all this possible with parts, service and again understanding im a weirdo who wants a show truck to wheel and drive in the snow.
Kirk- welding, Use of the big welder and cutting metal as i throw it at him.
Im sure when its all done i will have 100 more people to thank because all of the Pros are coming out for this one. The stereo install and bed build will be freakin sweet!
My Birthday and Thanksgiving will be this week so im not sure how much i will get to work on the truck. I wanted to drive it on my birthday but it looks like i will be getting some seat time around Christmas.
Some pics..
Back in the day

Last weekend with nate

Back to her spot in the shop.

Bart put the Xmember in and cut out the old tire stuff. Made the truck much stiffer.
as she sits now...waiting for major stuff to happen
more to go on.
I wish i had a scanner....I found pics of the truck from when i was 13!!
I spent last night cleaning up and getting the massive parts stack out of boxes and organized on the workbench. The housing will come back after its gutted and im going to fully polish the balls on the end, Bart will work his magic on the shock mounting and ball truss and steering truss stuff. A bit more finish welding and grinding on the armor(making it 100% smooth) and a fresh coat of paint on everything and it will go back over to be put together.
After the gears then the cases will go over and be finished up.
Nate and i gutted the bay last weekend and all that needs to be removed is the radiator, brakelines at the frame, slave from the tranny and the cab can come off and the motor and trans will come off the frame. We made an attempt at the sliders but the chop saw was 40miles away and the rockers are so smashed we couldnt figure out how high to go cause we couldn't even get the doors on.
The truck is sitting as high as my 2wd right now and its really weird cause its been huge for 3 years now. kinda creepy and scary at the same time.
So about this point in the build i have to give some credit to a few people.
Nate-for his body work and understanding of how anal i really am.
Bart-for cleaning up the welds and making pretty beads....also knowing how anal i am.
Scott at addictedoffroad.com for making all this possible with parts, service and again understanding im a weirdo who wants a show truck to wheel and drive in the snow.
Kirk- welding, Use of the big welder and cutting metal as i throw it at him.
Im sure when its all done i will have 100 more people to thank because all of the Pros are coming out for this one. The stereo install and bed build will be freakin sweet!
My Birthday and Thanksgiving will be this week so im not sure how much i will get to work on the truck. I wanted to drive it on my birthday but it looks like i will be getting some seat time around Christmas.
Some pics..
Back in the day
Last weekend with nate
Back to her spot in the shop.
Bart put the Xmember in and cut out the old tire stuff. Made the truck much stiffer.
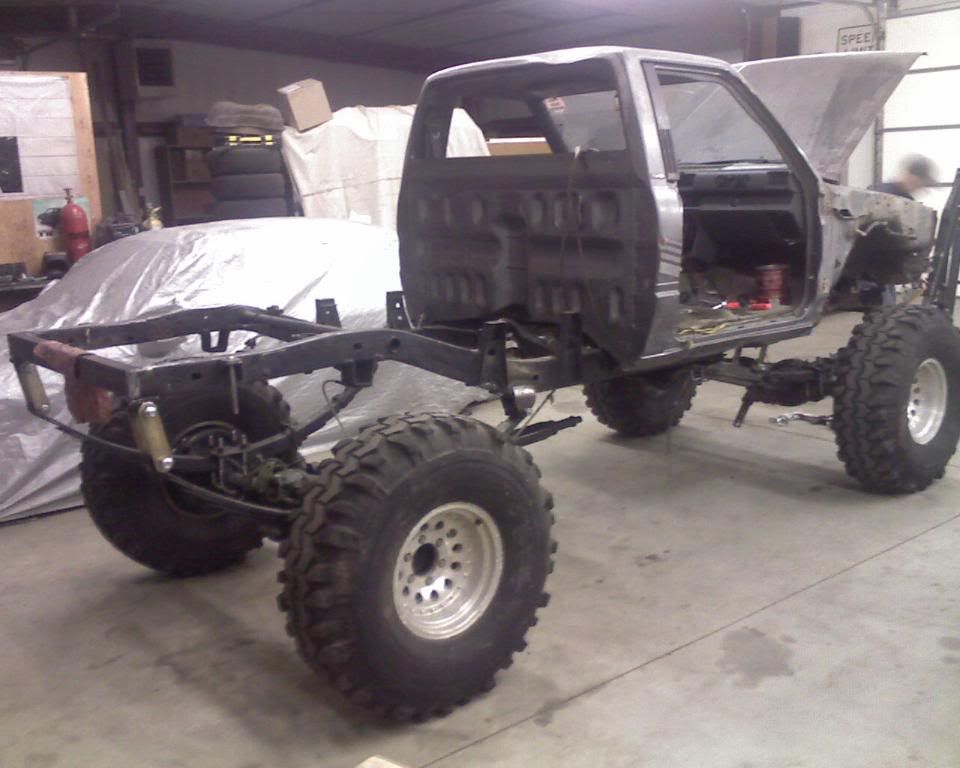
as she sits now...waiting for major stuff to happen
more to go on.
I wish i had a scanner....I found pics of the truck from when i was 13!!
Nov 24, 2008 | 02:50 AM
#30
Thread Starter
Registered User
Joined: Apr 2005
Posts: 876
Likes: 0
From: Longmont Colorado
Wow, I cleaned my phone and shot the last pic tonight and its not bad for a phone....hmm
I thought id add....The shackle angle is much better when theres weight on the truck. Everything is set up so that once broken in it should be about 30degrees. I also have to set the pinion angle and figure out of im going to triangulate the rear again...Any feed back would be helpful on that still. Im back and forth on it but if i do i need to remove the old mounting and have a pretty cool idea for the top mounting.
I thought id add....The shackle angle is much better when theres weight on the truck. Everything is set up so that once broken in it should be about 30degrees. I also have to set the pinion angle and figure out of im going to triangulate the rear again...Any feed back would be helpful on that still. Im back and forth on it but if i do i need to remove the old mounting and have a pretty cool idea for the top mounting.
Last edited by vwfastg60; Nov 24, 2008 at 02:54 AM.
Dec 22, 2008 | 02:19 PM
#31
Thread Starter
Registered User
Joined: Apr 2005
Posts: 876
Likes: 0
From: Longmont Colorado
so heres an update...
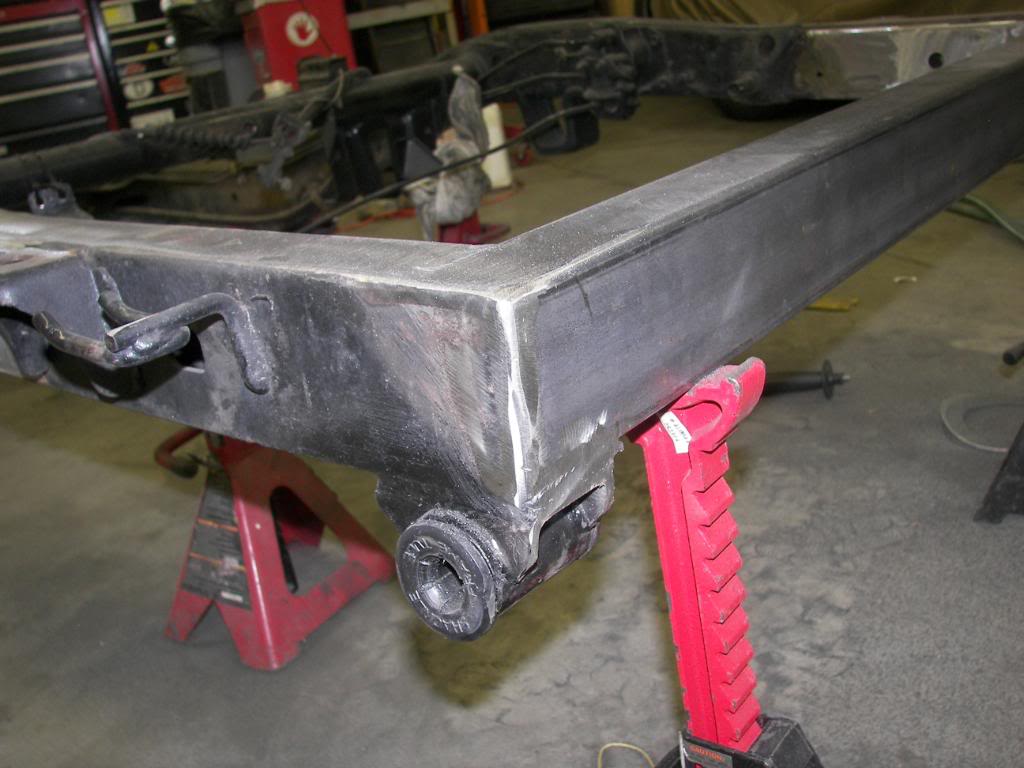
Rear spring hangers had to be moved 7inches forward and 2 and 3/4 back IIRC
After mock up it all has to come off.
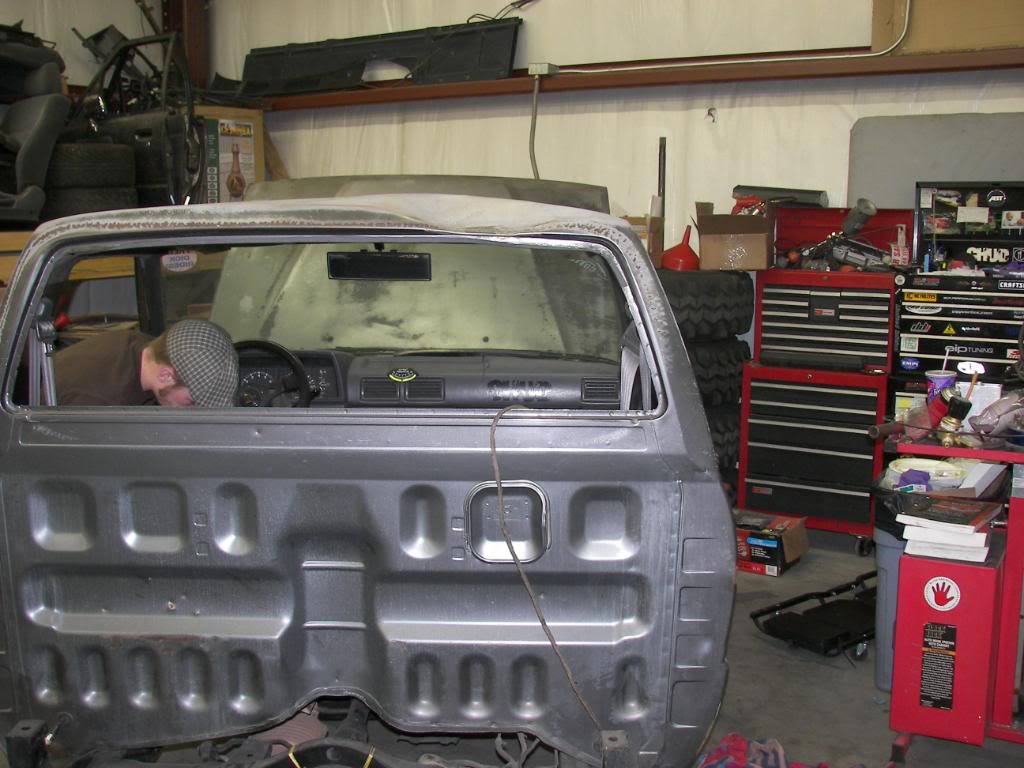
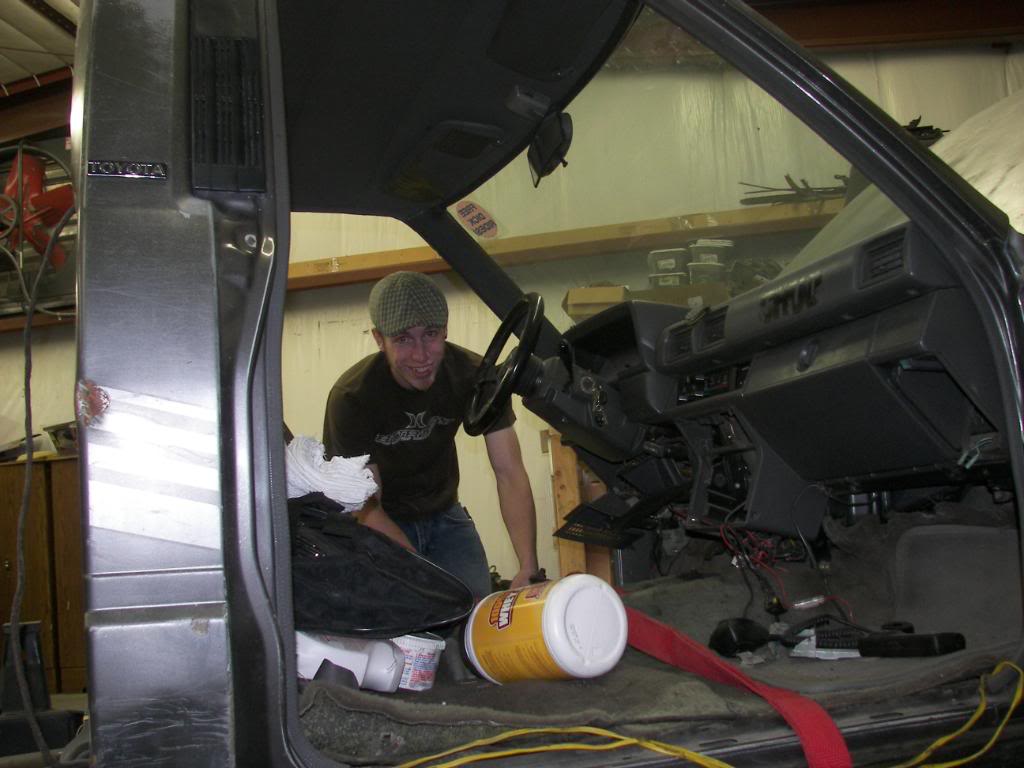
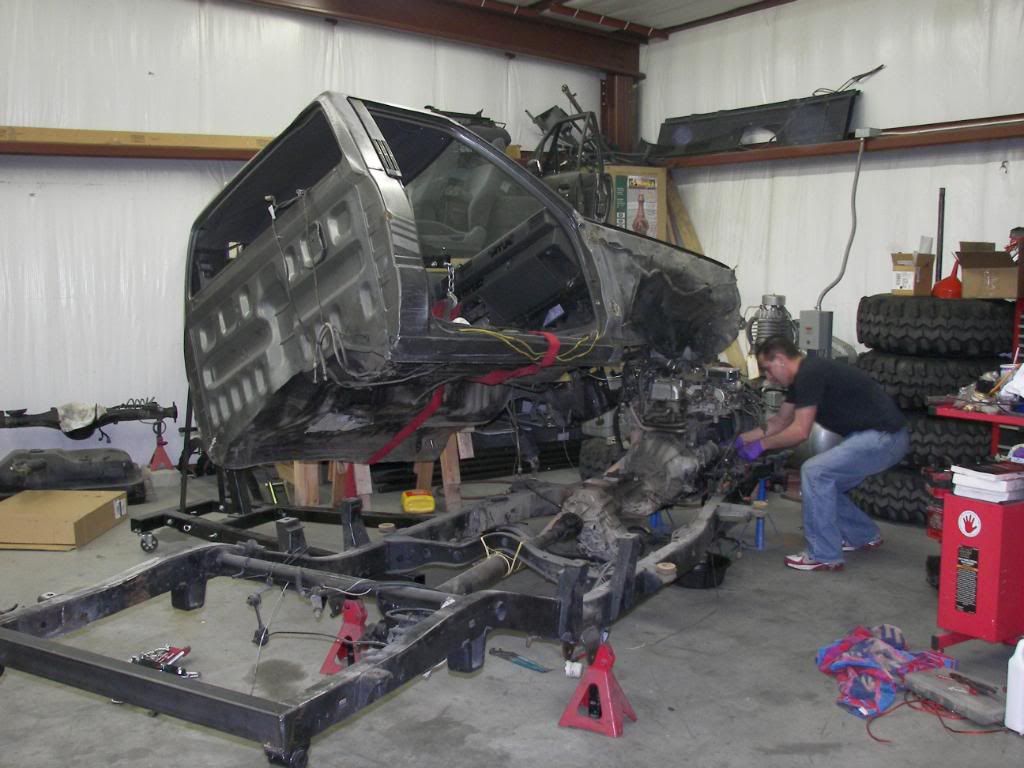
so we started tearing it down. Here are some pics showing why the cab is being replaced because everyone thought i was crazy
you can see how the inner fender is smashed and been pounded back and smashed again and pounded back

This side is still smashed from the wreck a few years back
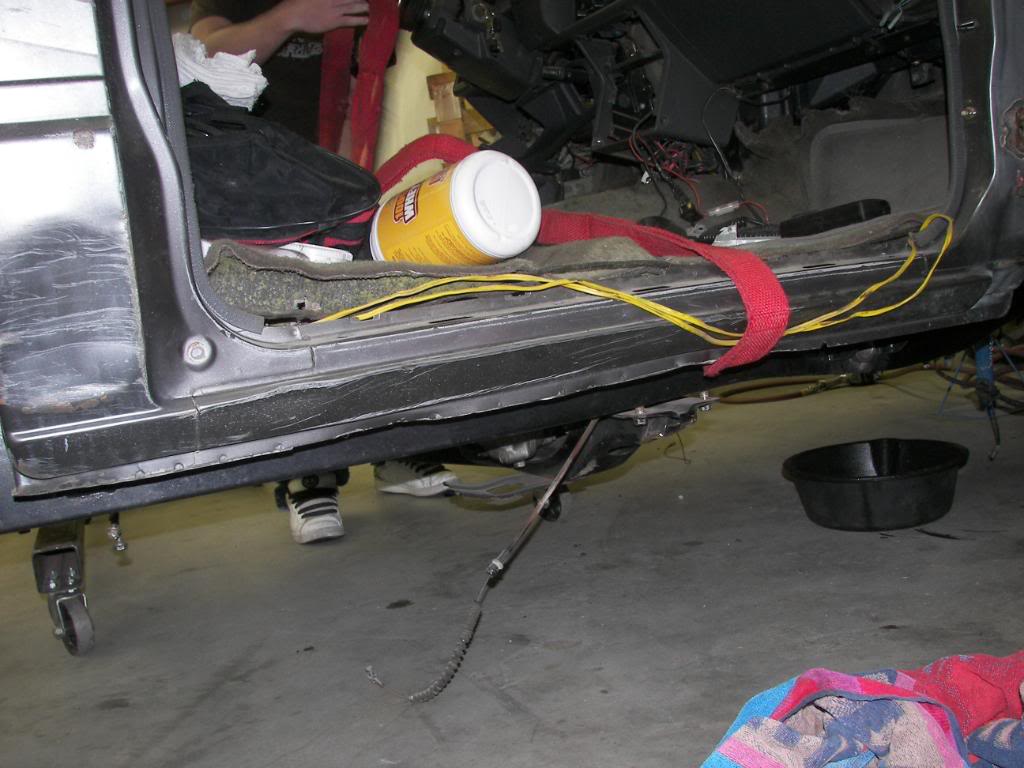
The rockers

The roof.
So lets get this junk off so the new goodies can go on.
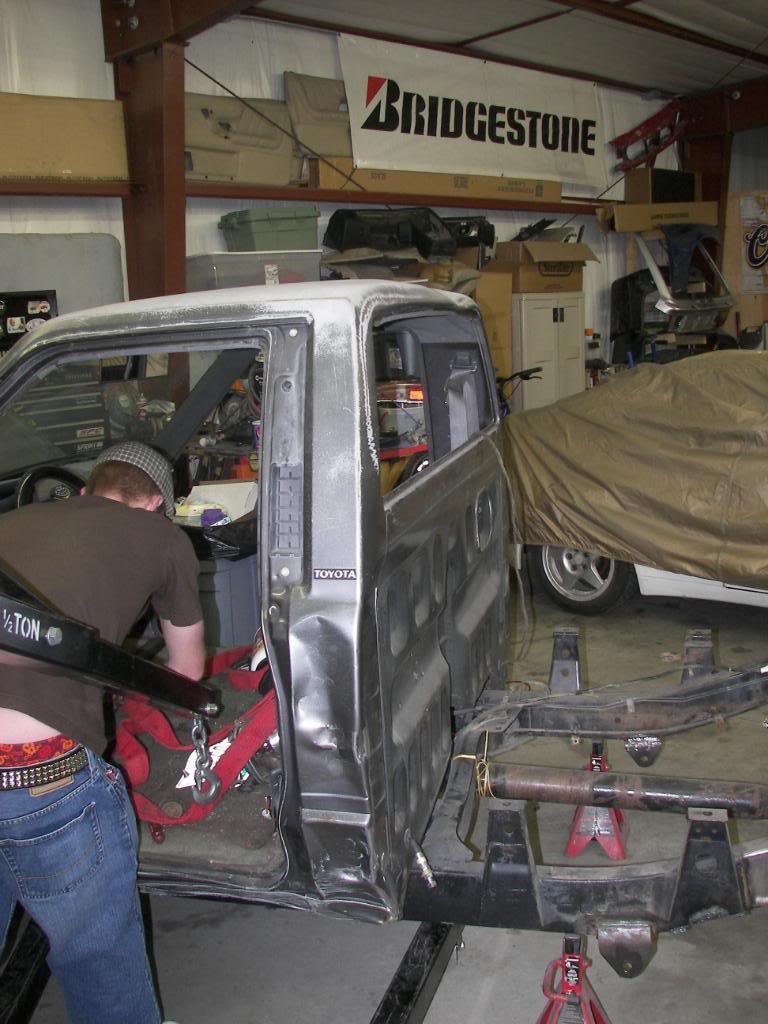
Strap and hoist time..
Bart aka madness double checking the strap
Going up...We had to make sure everything was unhooked as it went up.
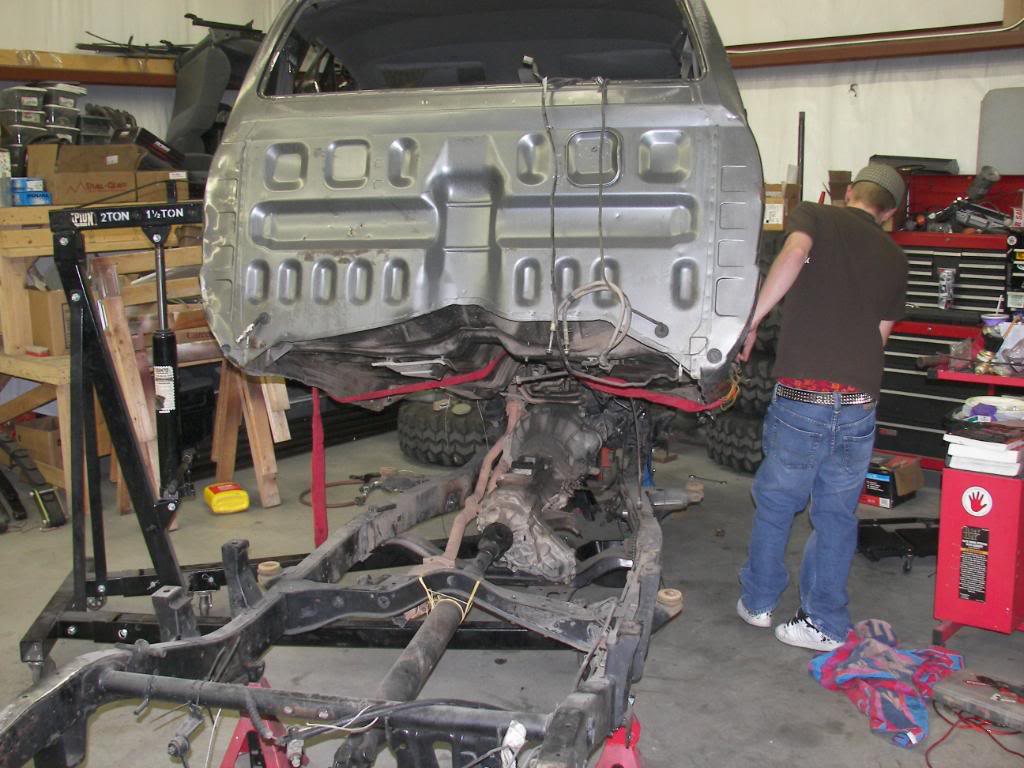
Me unhooking the vacume lines that got wrapped around the manifold as we lifted it off.
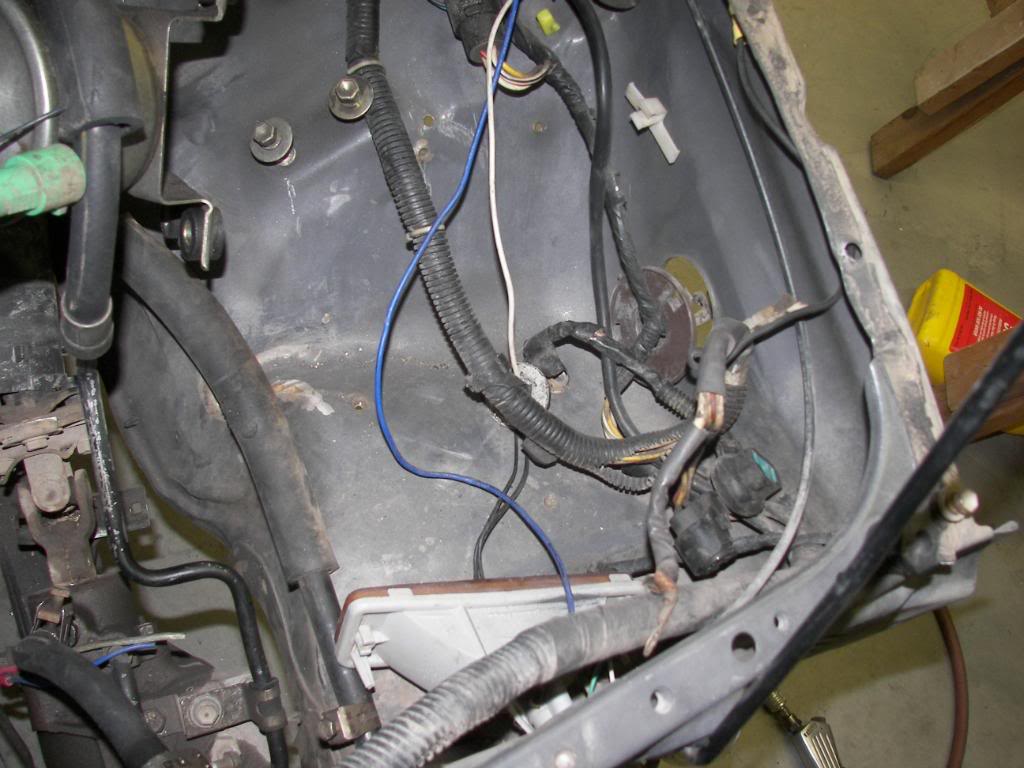
Found another ground!
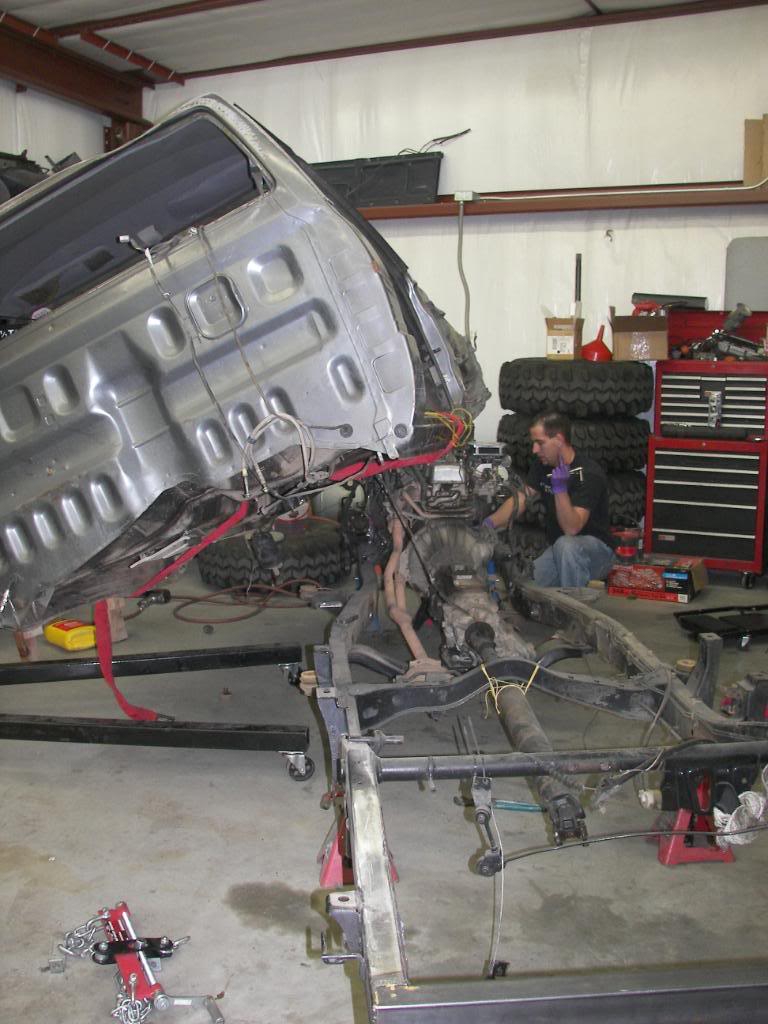
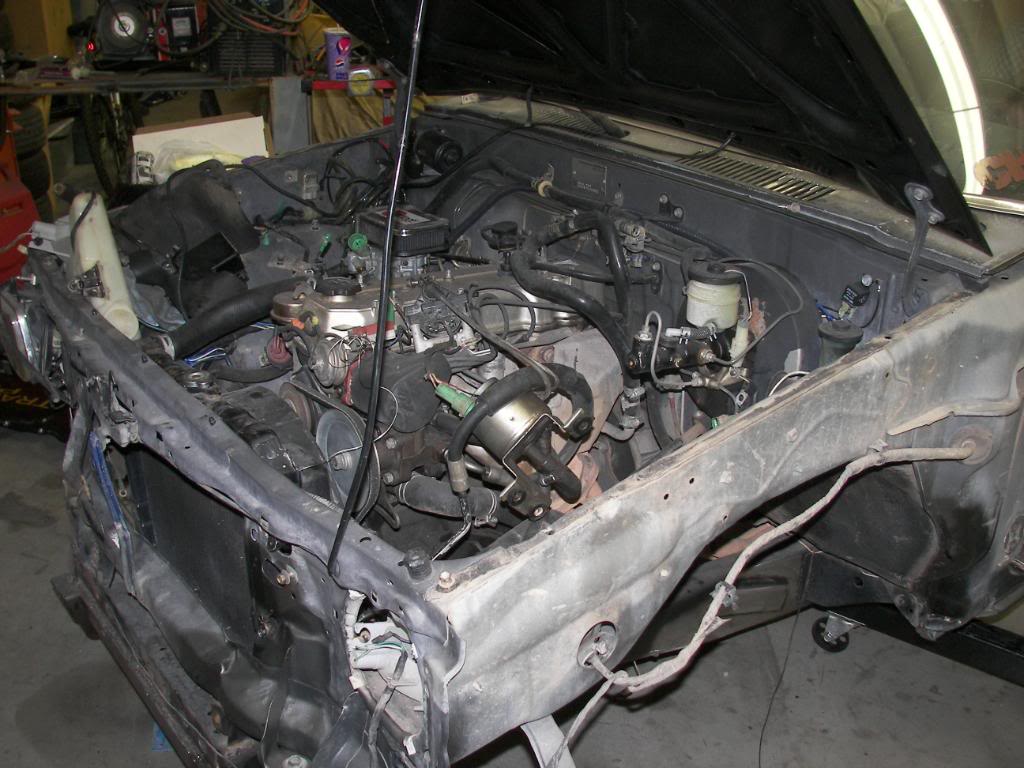
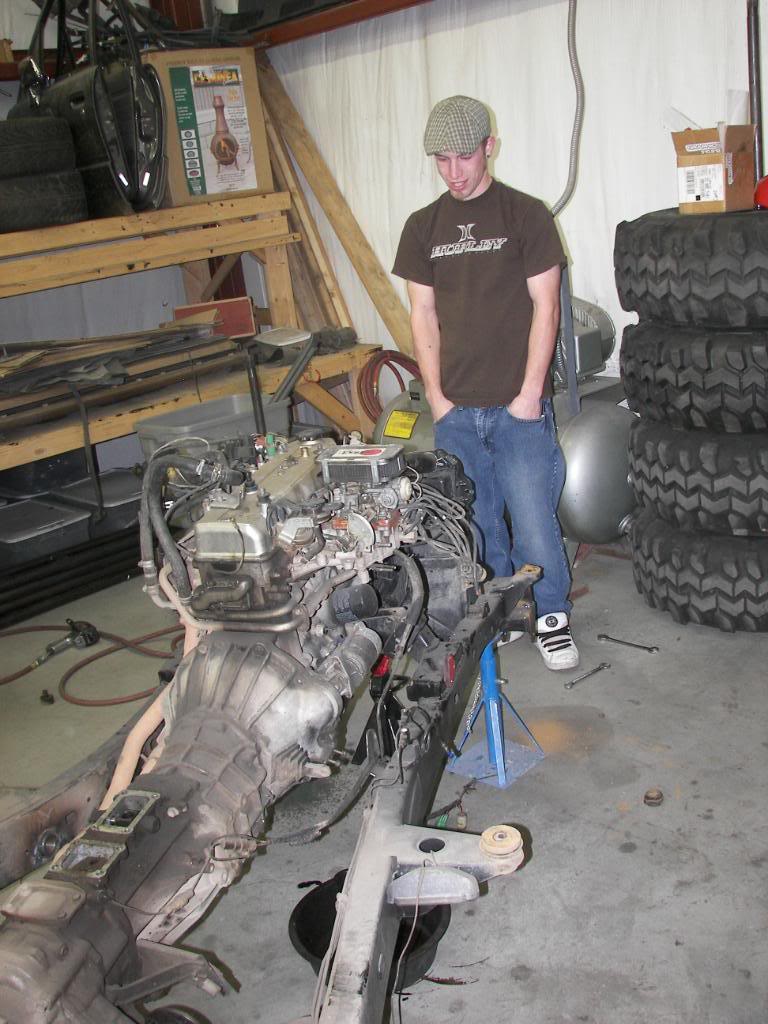
So easy for fix anything with the motor now huh...
Barts impressed that this is going down and everything has fluids...no leaks and would run if wiring was there. The cab holds wiring, and linkage tho...
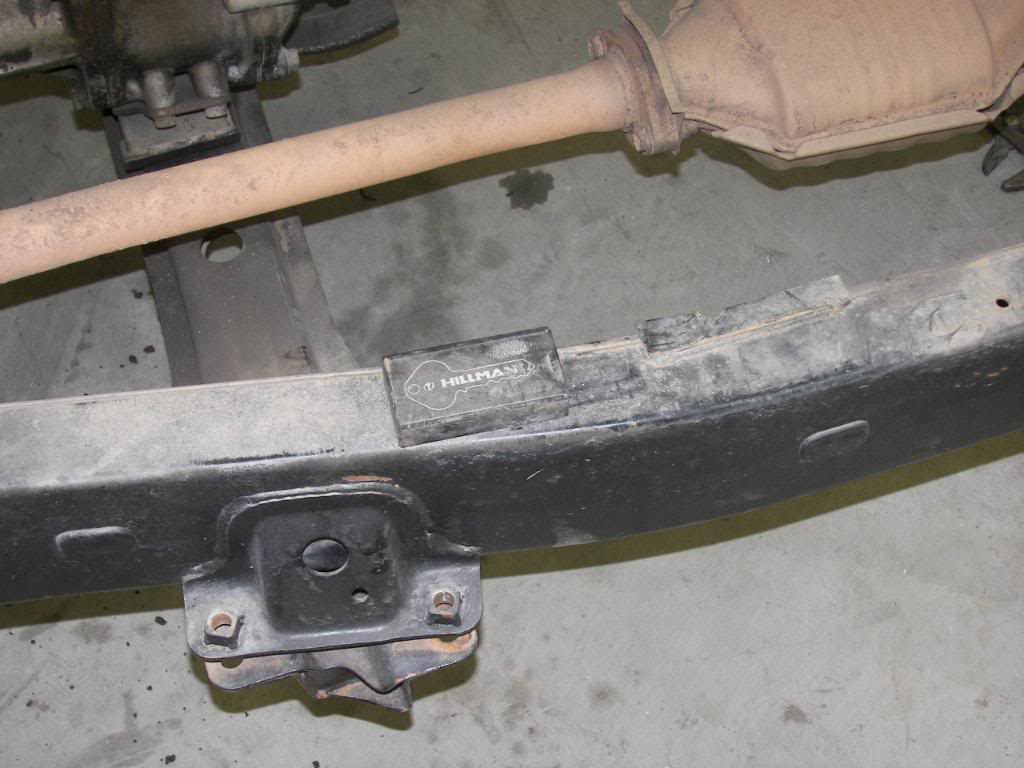
I have a hide a key that i didnt know i had lol
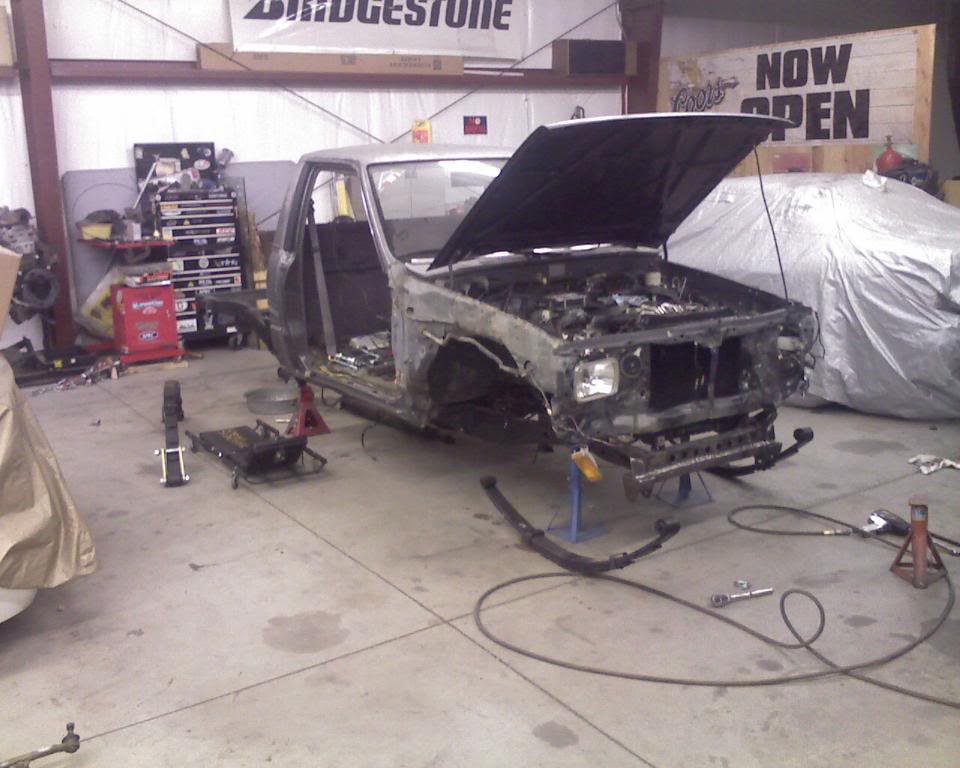
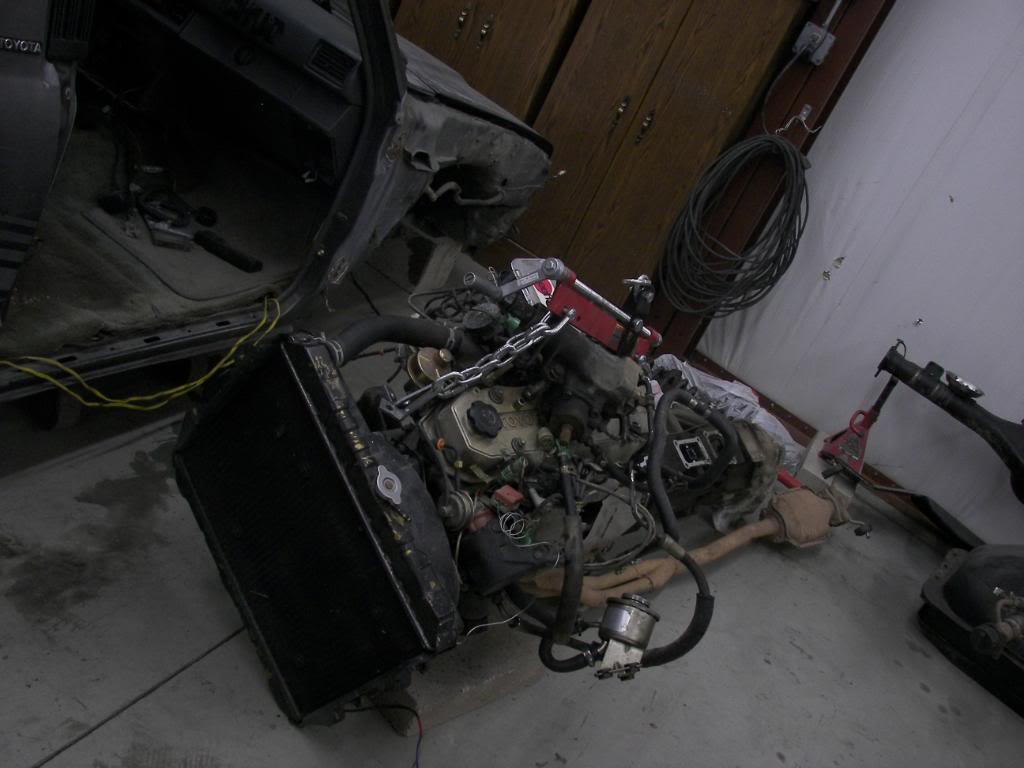
no more carbed motor.
Seriously the radiator is still attached to the motor...and nothing leaked out.
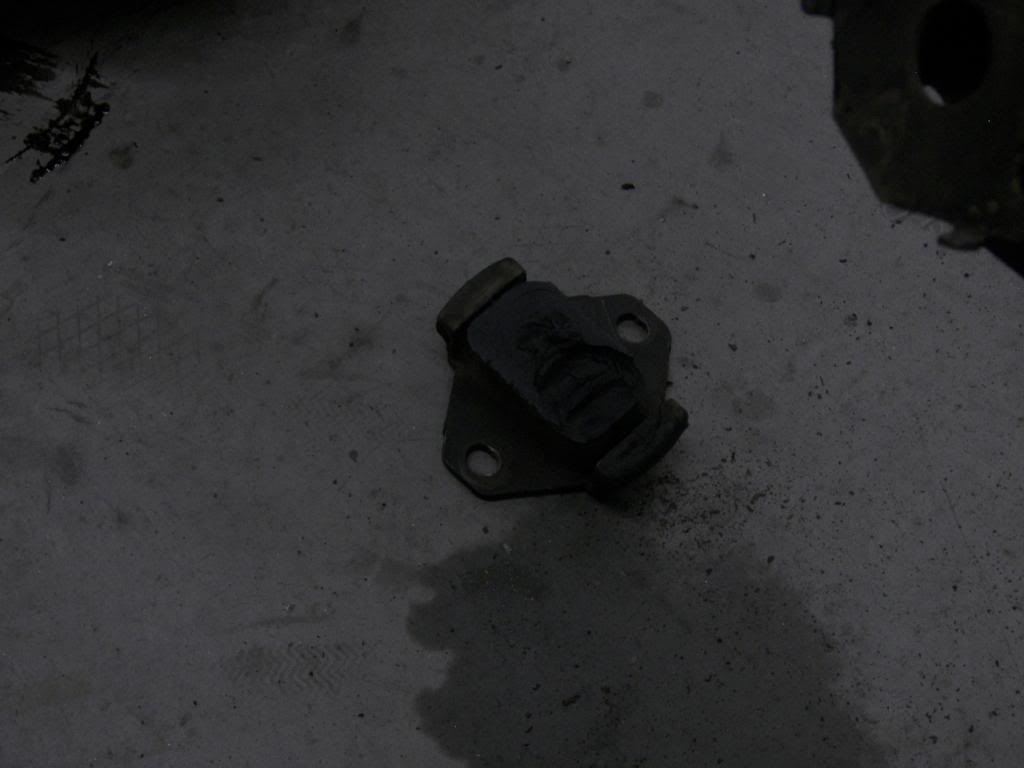
This explains a loss of response
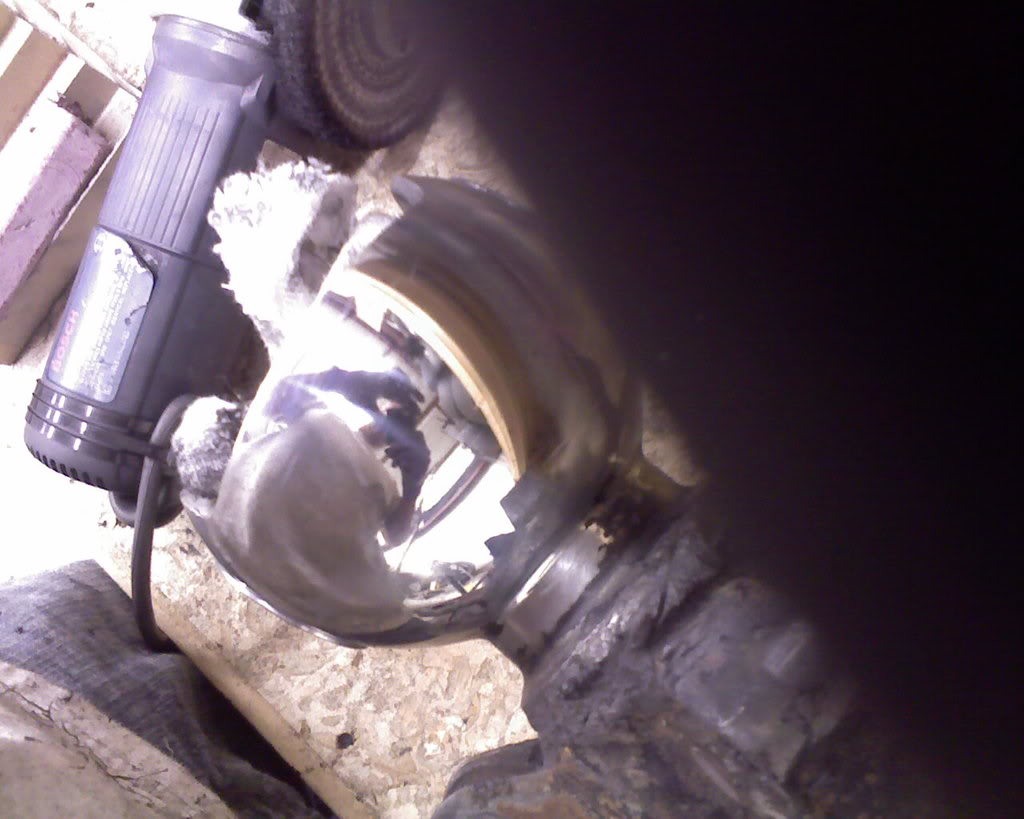
ok so some grinding is required but will be easy now with nothing in the way.
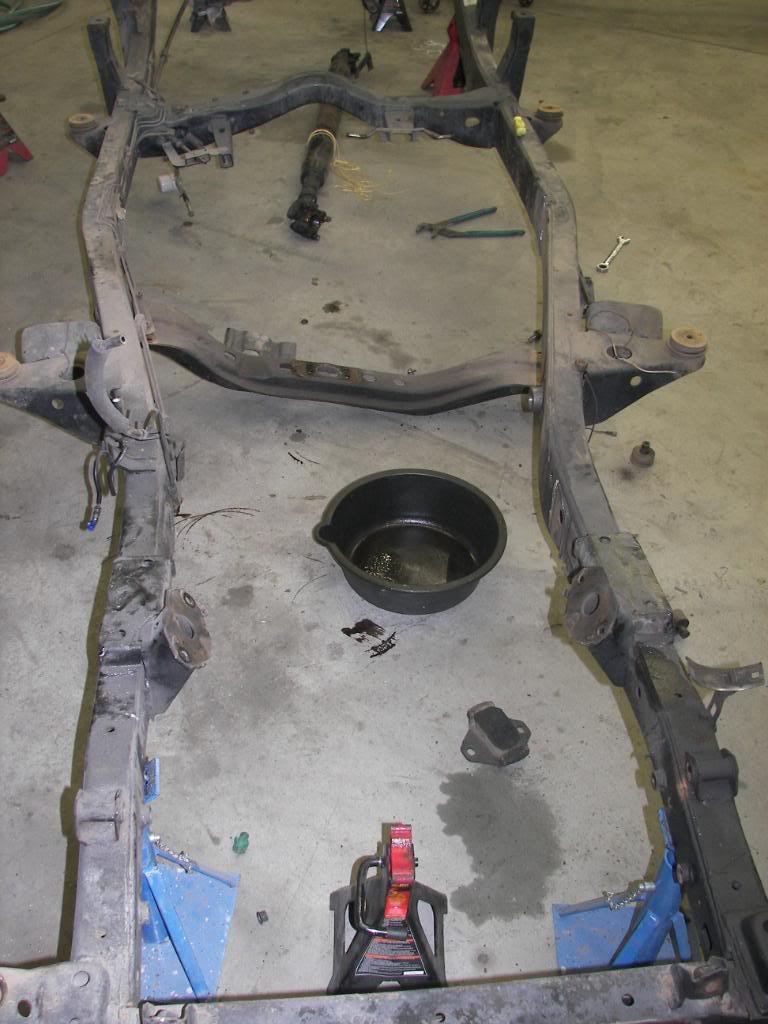
Gotta fab a way for the ebrake tab to mount to...it goes here and ran through the old Tbar mounting
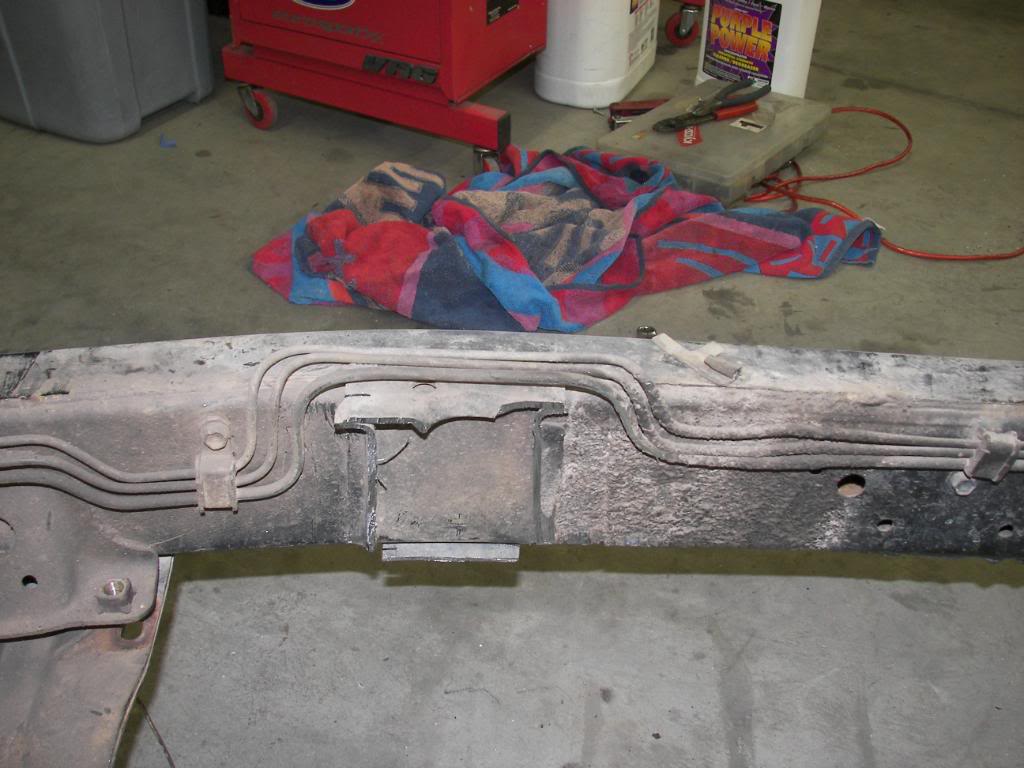
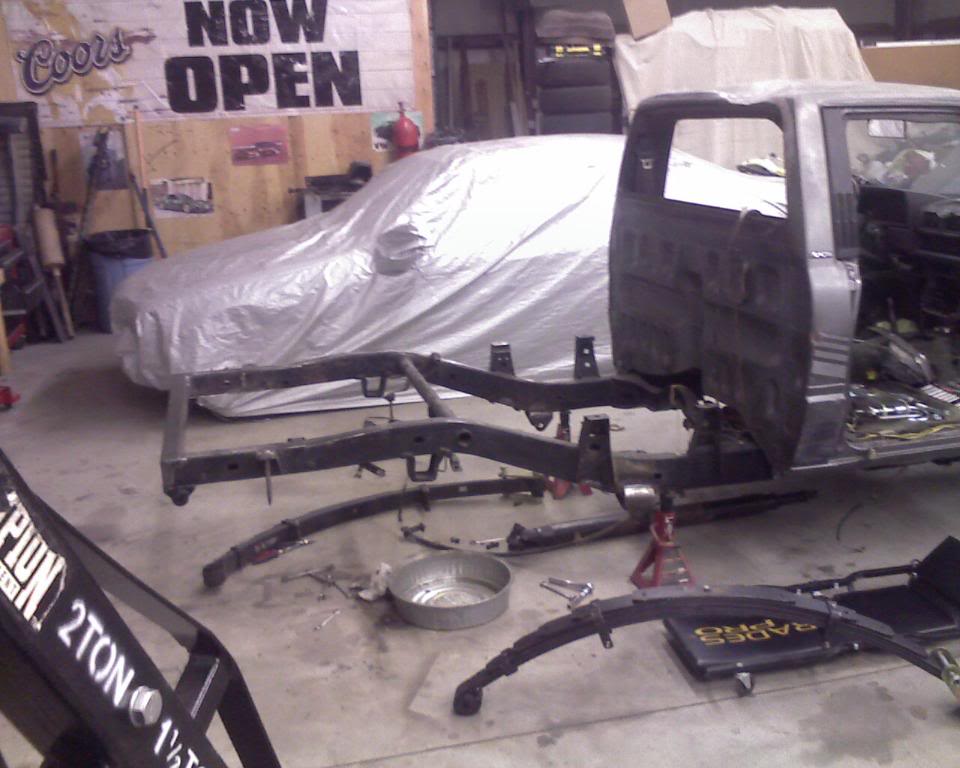
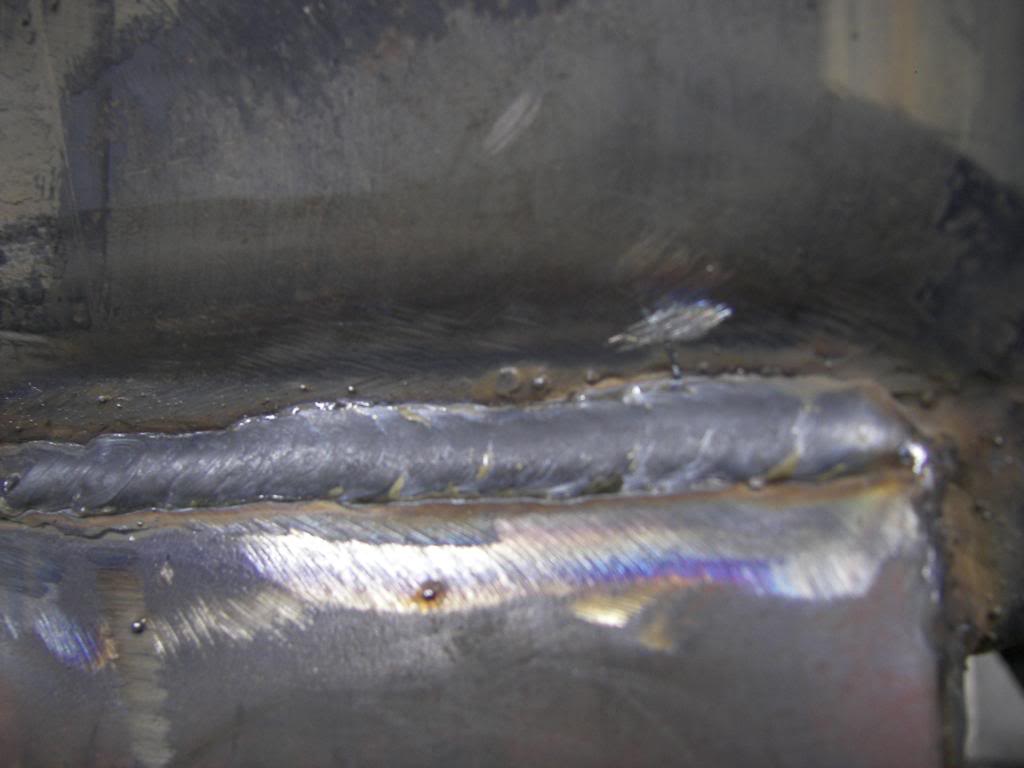
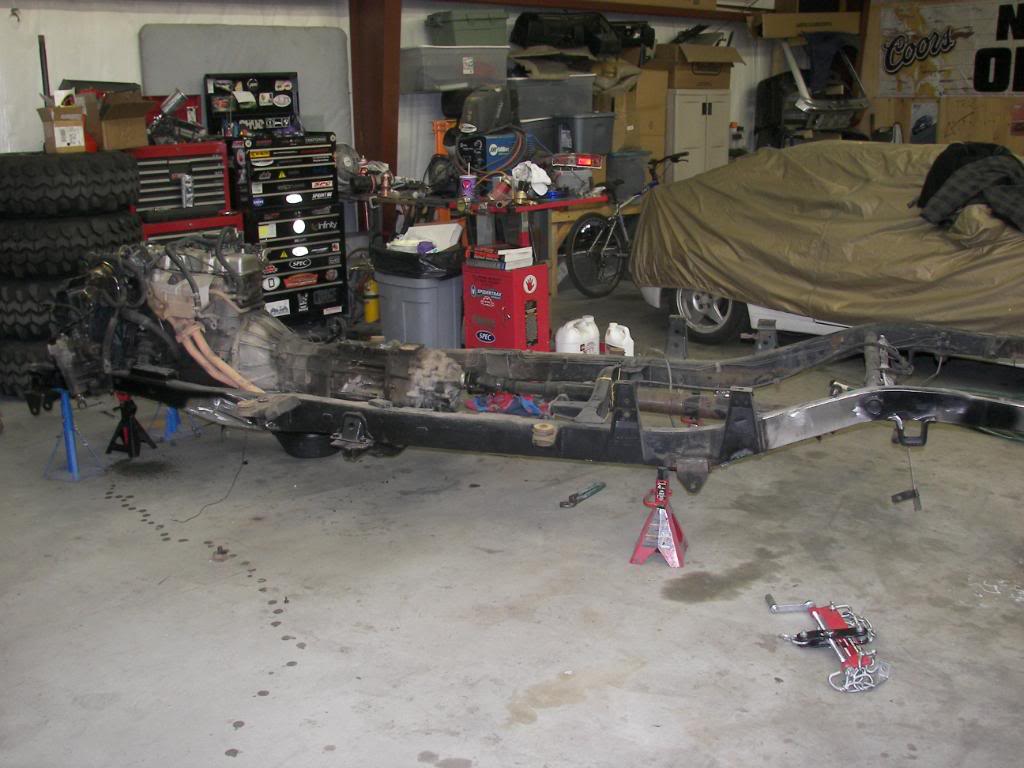
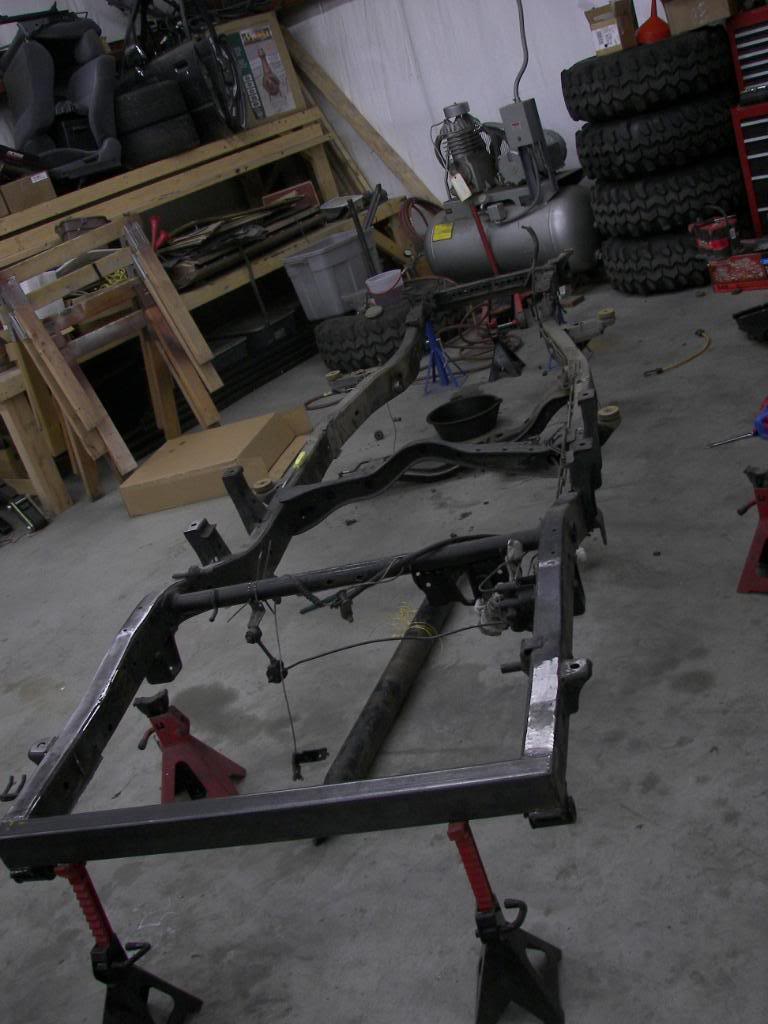
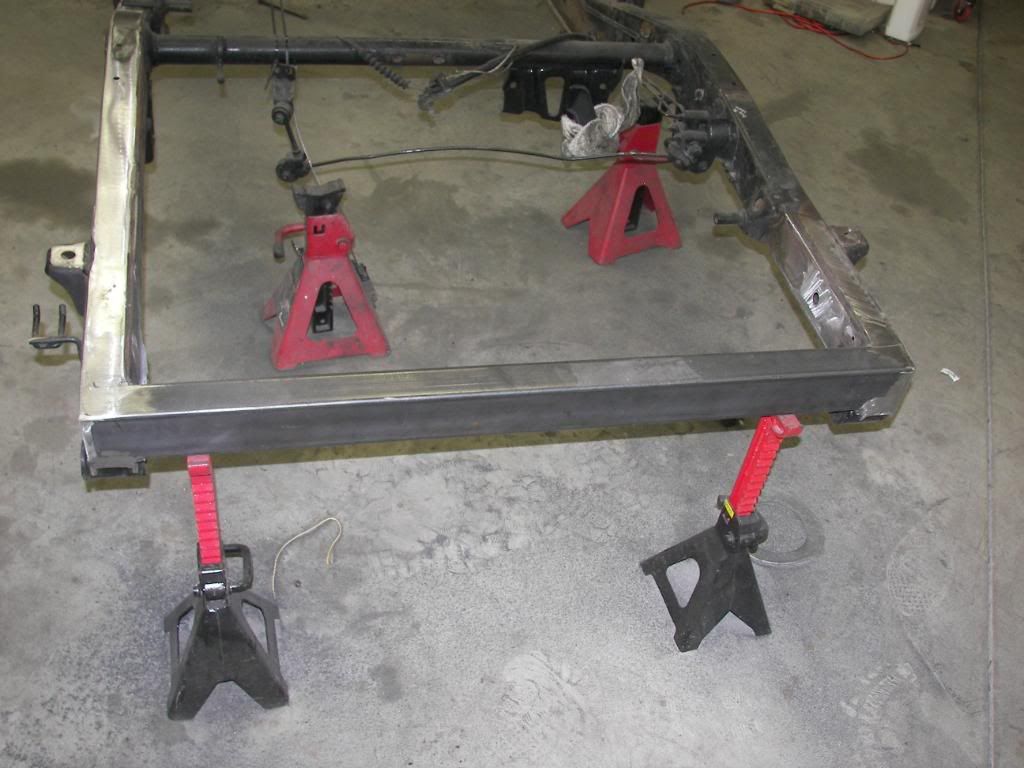
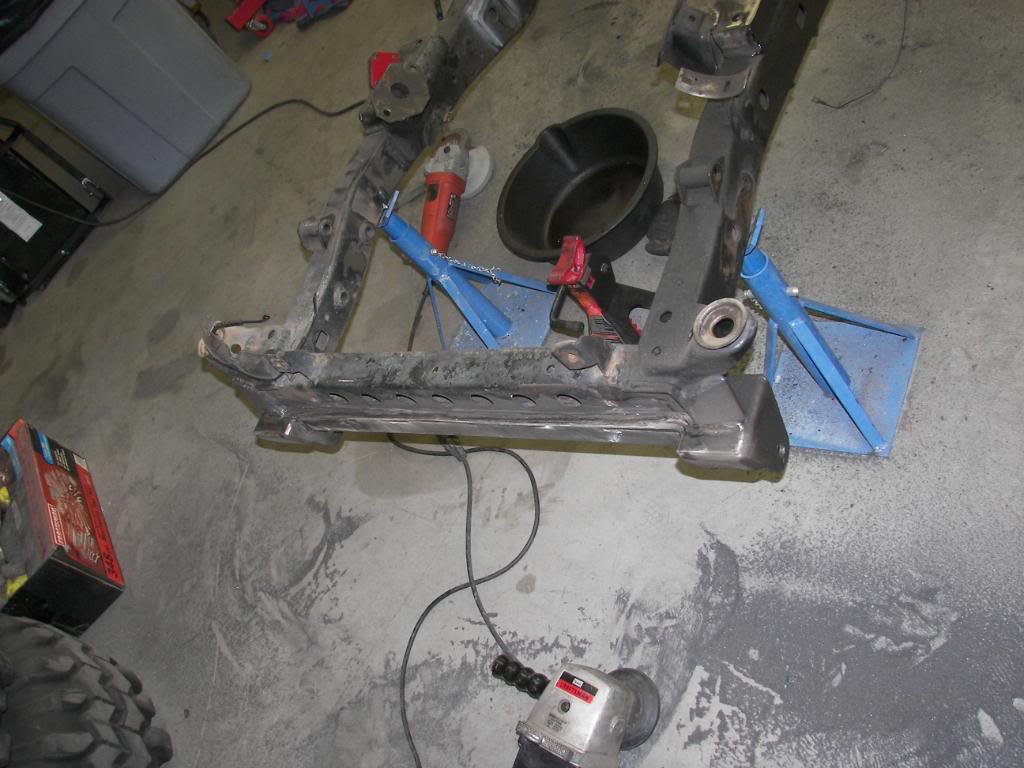
Madness's fab work in action on the new rear X member that replaces my old torn tire carrier mounting. The frame is SOOO stiff now compared to how it was.
Front hanger almost cleaned up
Rear spring hangers had to be moved 7inches forward and 2 and 3/4 back IIRC
After mock up it all has to come off.
so we started tearing it down. Here are some pics showing why the cab is being replaced because everyone thought i was crazy
you can see how the inner fender is smashed and been pounded back and smashed again and pounded back
This side is still smashed from the wreck a few years back
The rockers
The roof.
So lets get this junk off so the new goodies can go on.
Strap and hoist time..
Bart aka madness double checking the strap
Going up...We had to make sure everything was unhooked as it went up.
Me unhooking the vacume lines that got wrapped around the manifold as we lifted it off.
Found another ground!
So easy for fix anything with the motor now huh...
Barts impressed that this is going down and everything has fluids...no leaks and would run if wiring was there. The cab holds wiring, and linkage tho...
I have a hide a key that i didnt know i had lol
no more carbed motor.
Seriously the radiator is still attached to the motor...and nothing leaked out.
This explains a loss of response
ok so some grinding is required but will be easy now with nothing in the way.
Gotta fab a way for the ebrake tab to mount to...it goes here and ran through the old Tbar mounting
Madness's fab work in action on the new rear X member that replaces my old torn tire carrier mounting. The frame is SOOO stiff now compared to how it was.
Front hanger almost cleaned up
Dec 22, 2008 | 02:31 PM
#32
Thread Starter
Registered User
Joined: Apr 2005
Posts: 876
Likes: 0
From: Longmont Colorado
some info. The original plan was to 3rz swap it next year but my 2wd froze up on the highway and popped the headgasket. Rather then put the time and money in to it i am parting it and putting the EFI head on my 83 blockwith all the working air conditioning. Im going to rebuild the bottom end while im in there. The 3rz swap may or may not go down if the 22re swap doesn't run like i want it to but honestly with the way im geared i think im good.
Dec 24, 2008 | 08:04 PM
#33
Thread Starter
Registered User
Joined: Apr 2005
Posts: 876
Likes: 0
From: Longmont Colorado
thought id post up my knuckle balls. I always hear about people running a bit of sand paper over them to make them seal up better and calling it polishing...I really polished mine. I didnt remove as much metal as i would for a cosmetic piece i just smoothed out the rough areas.


 Dec 27, 2008 | 02:43 AM
#36
Thread Starter
Registered User
Joined: Apr 2005
Posts: 876
Likes: 0
From: Longmont Colorado
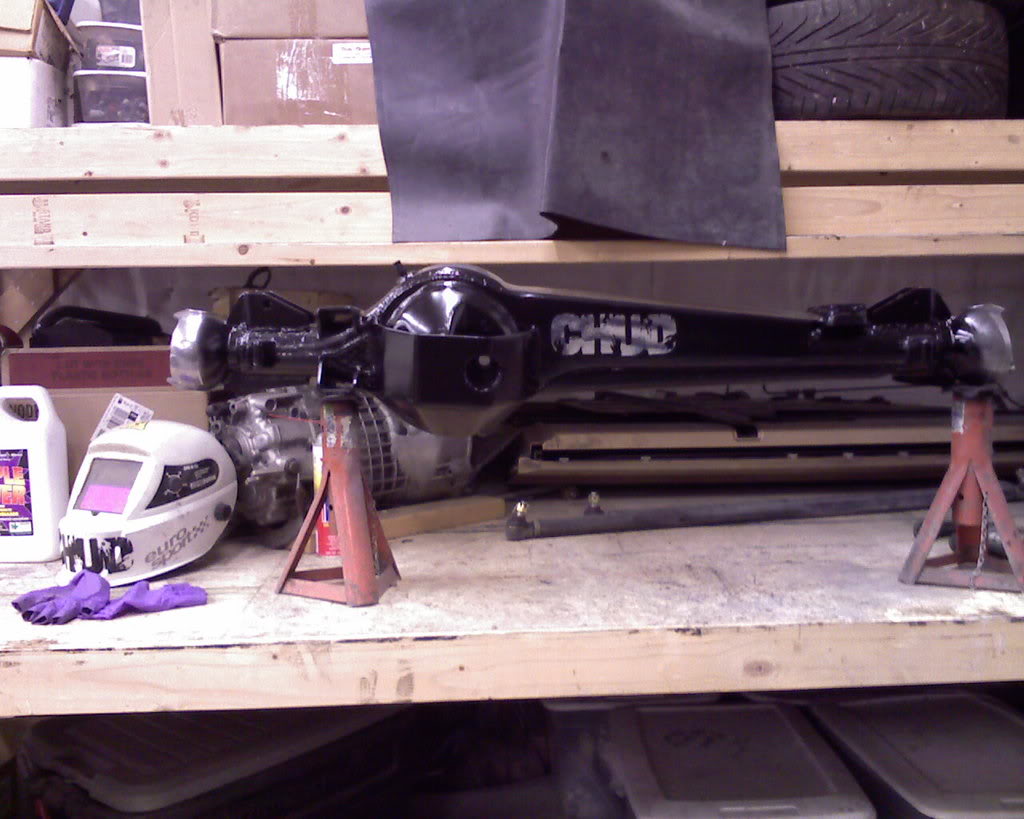
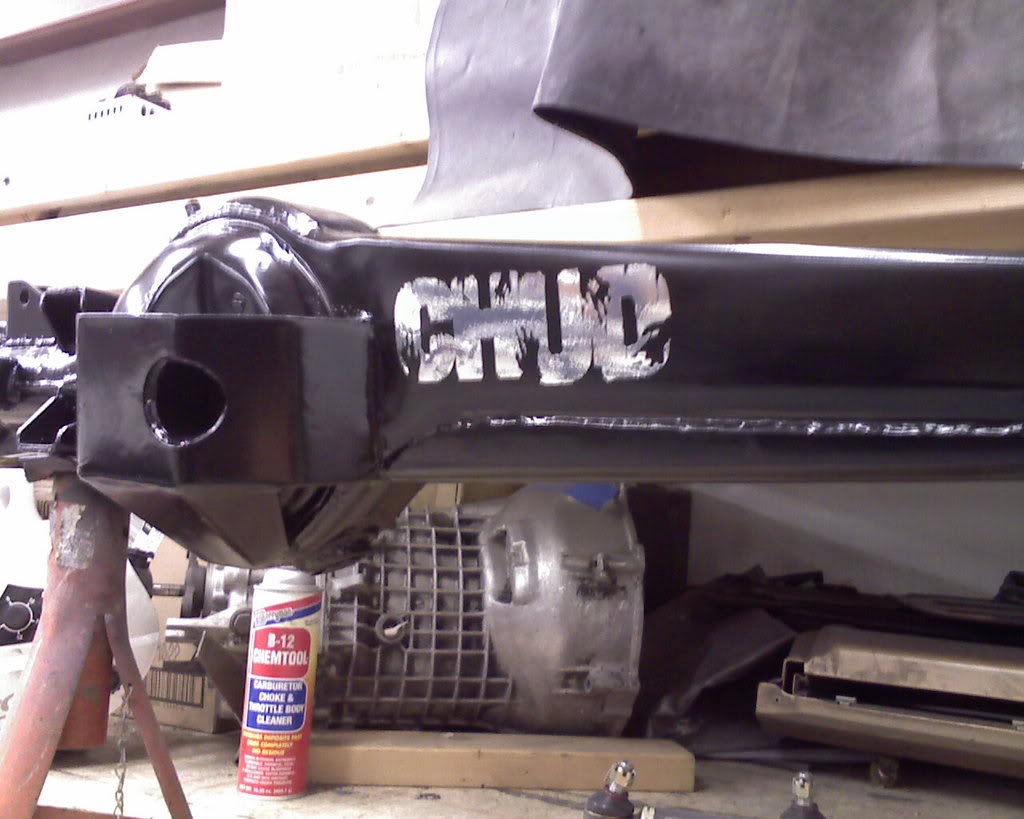
Almost done with the housing. I need to clean the overspray off the knuckle balls and put a finish buff on them and run it over to Scott@ addictedoffroad.
Another neat little tweaker project.....seamless upper truss and armor. I was going to do the bottom one too but it brakes up the axle and this took long enough. Now that this part is over i can get back to the frame and gutting the parts trucks.
The front armor is a tiny bit turned but i liked how it fit the housing better and its just a tiny bit higher on the ring gear.
I will bring the camera with me today and get some shots of us gutting the 2wd parts truck...Maybe i will get lucky and the hotties from next door will come over and get dirty.
Dec 27, 2008 | 02:48 AM
#37
Thread Starter
Registered User
Joined: Apr 2005
Posts: 876
Likes: 0
From: Longmont Colorado
Forgot to add, My brother got me the Spidertrax shifters i wanted for Xmas so i will have more polished goodies for the interior i also found chrome interior pulls and some other jazzy stuff. As much as some hate chrome bits i will have some and the interior is not going to be the normal trail rig interior 
Dec 28, 2008 | 03:27 AM
#38
Thread Starter
Registered User
Joined: Apr 2005
Posts: 876
Likes: 0
From: Longmont Colorado
mocked up the new cab tonight so we could put the sliders on. I think the 2wd cab i got sits over the frame more then the 4x4 cab....either that or the rockers were just pushed up that much.
the xtra cab thats donating the A/C and EFI parts was going to be gutted lastnight but Nate's rack too a bit longer then planned so im gathering up some plastic boxes for bolts,screws and clips for the interior stuff and one for fender bolts and J nuts so i can put all 3 trucks in bolts where they go. Putting this thing together is going to be sooooo much fun. The Parts truck will be a truggy for next summer so its getting the left over stuff from this build.
Weeks plans-
Gut parts truck-
New wheels picked up today-
Axle back to Scott for set up-
Weld sliders on-
After the axles back put shock hoops on and mod body as needed-
Rear shock tower welded in-
Pull cab back off and prep the underside/inside, bay, underside of the bed and shoot it.
Man i have a busy week.
Dec 29, 2008 | 12:03 AM
#40
Thread Starter
Registered User
Joined: Apr 2005
Posts: 876
Likes: 0
From: Longmont Colorado
The IFS lift was a Trailmaster bracket lift using a procomp diff drop and 1.5 Bjspacers. The rear was downey leafs longer shackles and when i had the topper on a 1inch flat fabtec block.
The new stuff is all trail gear 4inch front and 5 in the rear for the topper and tire carrier that will be added after paint....Sold the bed off the parts truck and tranny yesterday and im getting new wheels today(too late to pick em up lastnight) The frame and cab are spoken for already...Pretty soon we will have a fun project.
The new stuff is all trail gear 4inch front and 5 in the rear for the topper and tire carrier that will be added after paint....Sold the bed off the parts truck and tranny yesterday and im getting new wheels today(too late to pick em up lastnight) The frame and cab are spoken for already...Pretty soon we will have a fun project.


