svdude's 87 4 Runner build up
 03-19-2012, 07:00 PM
#61
Registered User

Did you texture the dashpad to match the rest of the dash assembly? If yes, how did you do it? I'm looking to do the same to my dash, but I want to make sure the repair looks factory.
 03-21-2012, 06:58 PM
#62
Registered User
Thread Starter
iTrader: (3)
Join Date: Nov 2009
Location: Fountain, CO
Posts: 219
Likes: 0
Received 0 Likes
on
0 Posts
First I used some rubbing alcohol to clean the material. It is important you do this first before sanding anything! If you sand first then you will grind and contaminants further into the plastic. Once everything is cleaned then you can sand and prep for the dye. After it's scuffed, use some more alcohol to clean the dash again. Then use all SEM products. Use a high build primer, then a texture coating. The final coat is a vinyl dye of your choosing. SEM makes a lot of different colors. SEM is a little pricey, I spent about $50 for those 3 cans. It's well worth it though.
Eventually I will re-do mine because I didn't prep my dash well enough and the cracks are back in the same place (although not nearly as big). Next time I will apply resin over the whole dash and lay a thin cloth (grill cloth) over the dash to give it a new tough skin. Then I'll primer it, texture it and re-paint it.
Eventually I will re-do mine because I didn't prep my dash well enough and the cracks are back in the same place (although not nearly as big). Next time I will apply resin over the whole dash and lay a thin cloth (grill cloth) over the dash to give it a new tough skin. Then I'll primer it, texture it and re-paint it.
04-12-2012, 09:24 AM
#63
Registered User
Thread Starter
iTrader: (3)
Join Date: Nov 2009
Location: Fountain, CO
Posts: 219
Likes: 0
Received 0 Likes
on
0 Posts
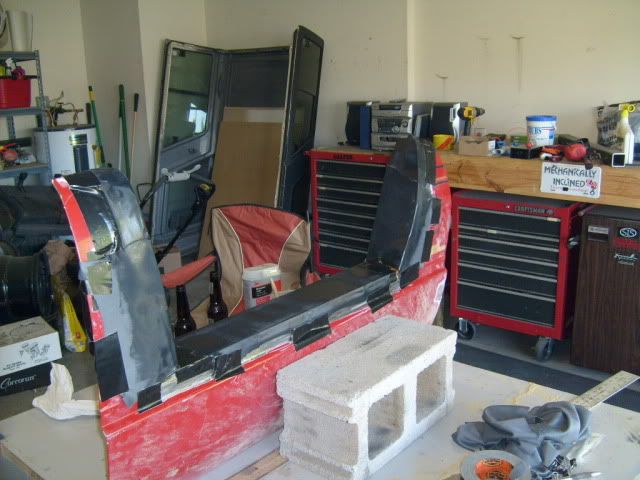
Time for an update... Not much has changed. I started on my half door project. I am only working on the pass side door for now. Once it is done I'll do the driver side.
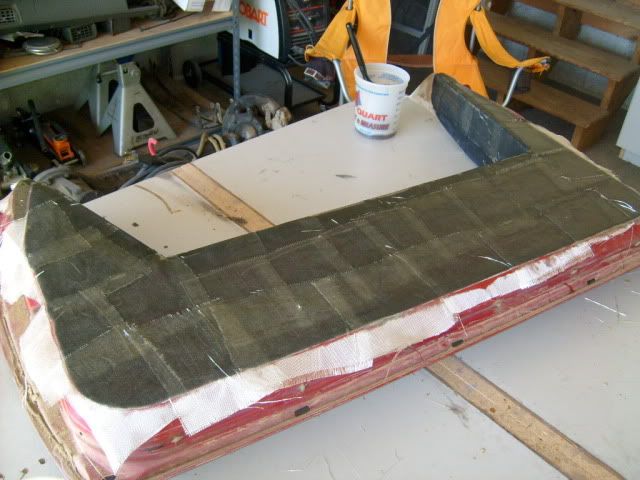
I decided to use fiberglass because I can make it form to the contours of the door pretty easily.
Naked door:

Cut up and glass laid down.


I also got a good deal on a front axle. $100 hub to hub. Shortly after I move to Colorado the runner will go under the knife and get a solid axle up front.

I decided to use fiberglass because I can make it form to the contours of the door pretty easily.
Naked door:
Cut up and glass laid down.
I also got a good deal on a front axle. $100 hub to hub. Shortly after I move to Colorado the runner will go under the knife and get a solid axle up front.
04-28-2012, 07:18 PM
#65
Registered User
Thread Starter
iTrader: (3)
Join Date: Nov 2009
Location: Fountain, CO
Posts: 219
Likes: 0
Received 0 Likes
on
0 Posts
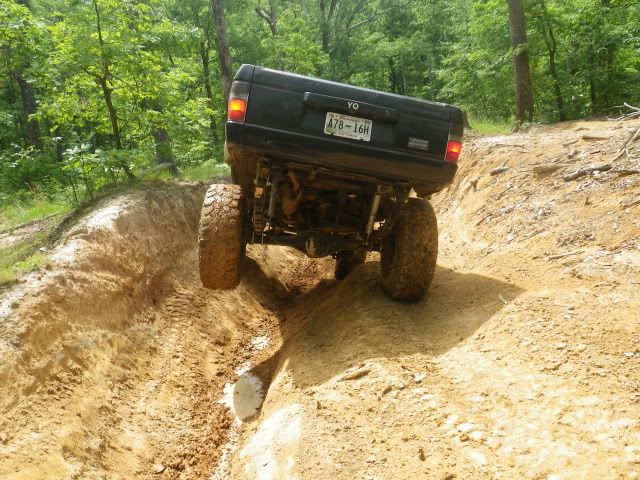
Today was a good day, a buddy and I went wheeling up at Turkey Bay at Land Between The Lakes. It's an excellent place to go wheeling and it costs $15 for a 3 day pass. Tons of good trails with various difficulties.
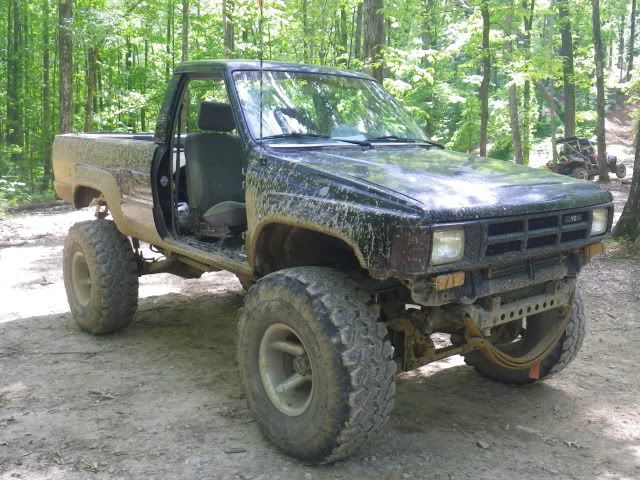
It started out awesome! We had good weather, the trails were dry and two capable 4runners! You guys have seen my runner but here's my buddies:
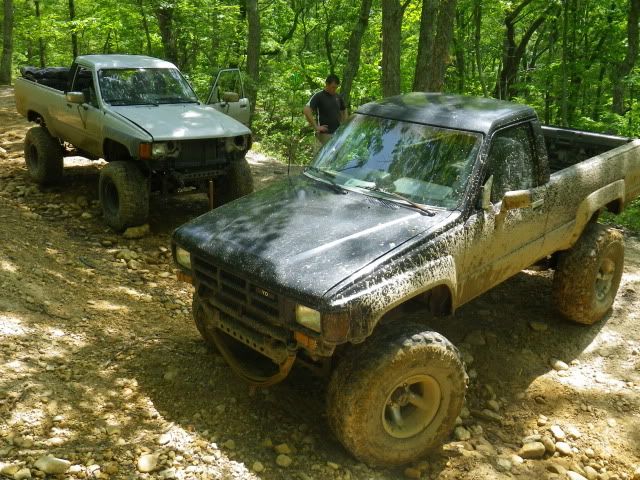
In the first half hour on the trail there was already damage! I am pretty new to 4wheeling. I never knew how to weld, fabricate, build engines, etc until I bought this 4runner. So I made a bad mistake today and learned a lesson! You would think that this is common sense but sometimes when you're having a good time and thinking about the trails, common sense doesn't always flow as it should. Anyways, I was following a bit too close to my friend and lost traction. I slid right into the back of his 4runner and pretty much destroyed the tailgate on his 4runner and shattered his rear window. I smashed the front of my 4runner pretty good and bent my hood beyond repair. Now I need to replace my buddies tailgate and fix my core support and replace my hood. Oh well, all in a day's fun
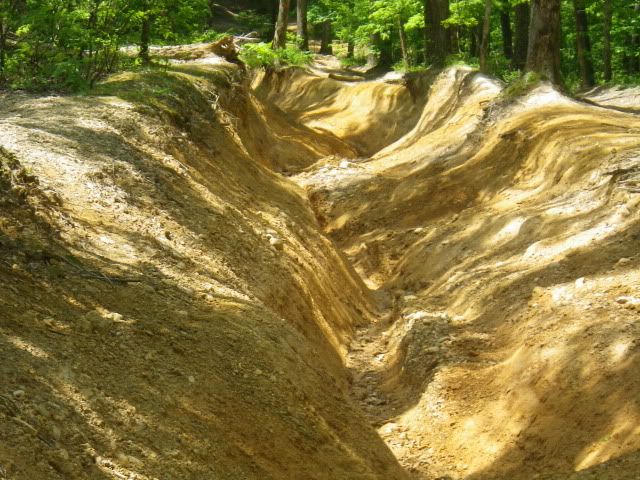
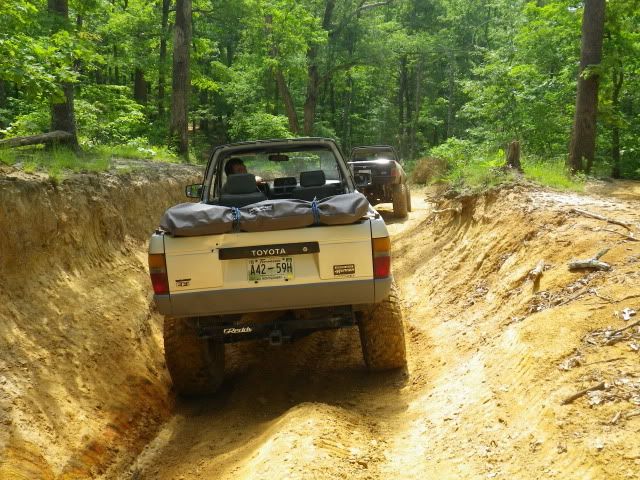
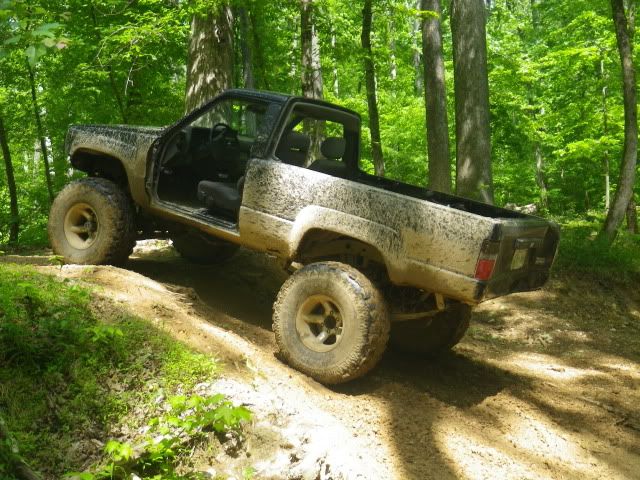
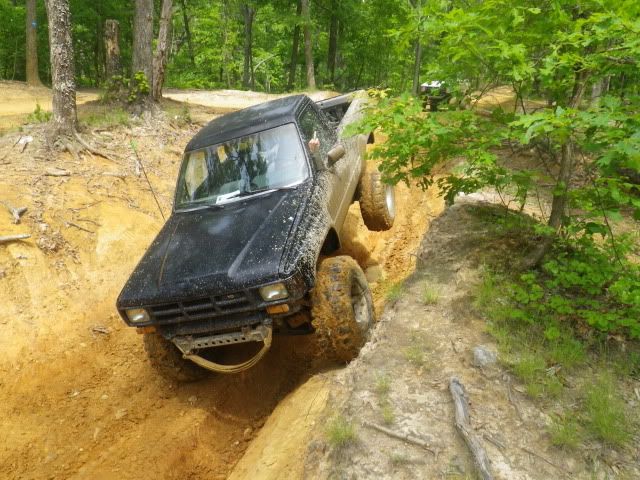
Here is the trail that I lost traction on and slid into my friend.
The damage:
Imploded tailgate (the victim)

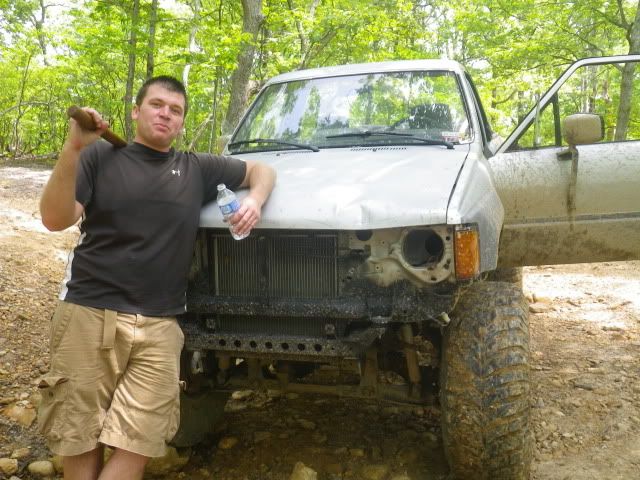
This is me crying for his poor 4runner

My damage on my 4runner:
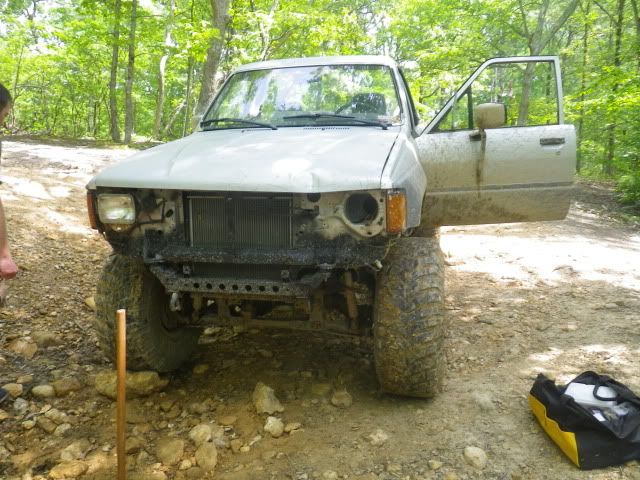

The core support pushed the radiator and fan into the underdrive pulley

After some work with a pry bar, ratchet strap and a big hammer, this was the end result:
So, now that we have the damage out of the way we can focus on the wheeling and having more fun
Random pics throughout the day:
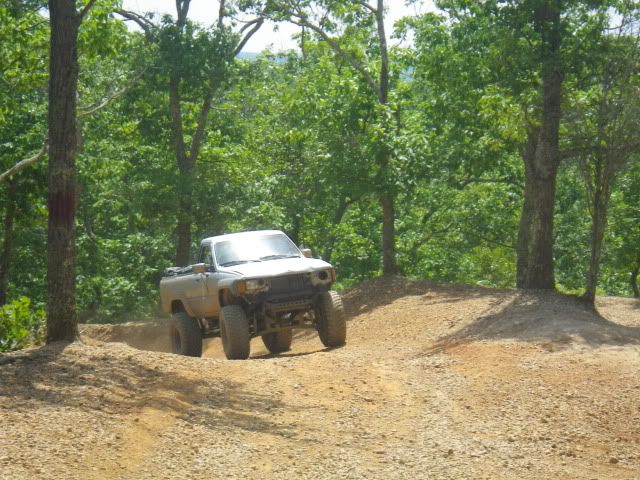

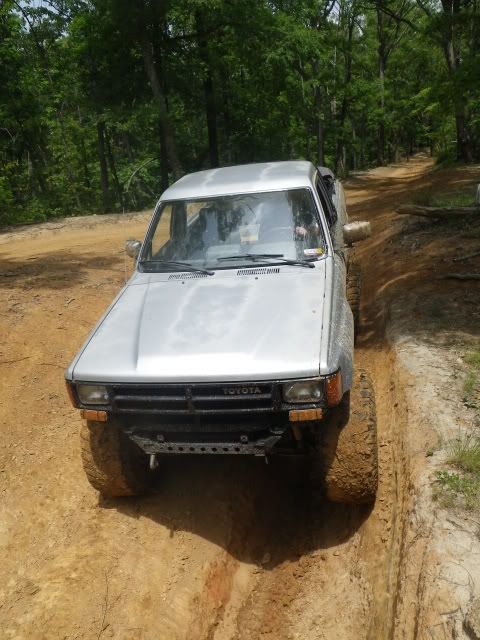
It started out awesome! We had good weather, the trails were dry and two capable 4runners! You guys have seen my runner but here's my buddies:
In the first half hour on the trail there was already damage! I am pretty new to 4wheeling. I never knew how to weld, fabricate, build engines, etc until I bought this 4runner. So I made a bad mistake today and learned a lesson! You would think that this is common sense but sometimes when you're having a good time and thinking about the trails, common sense doesn't always flow as it should. Anyways, I was following a bit too close to my friend and lost traction. I slid right into the back of his 4runner and pretty much destroyed the tailgate on his 4runner and shattered his rear window. I smashed the front of my 4runner pretty good and bent my hood beyond repair. Now I need to replace my buddies tailgate and fix my core support and replace my hood.
Oh well, all in a day's fun Here is the trail that I lost traction on and slid into my friend.
The damage:
Imploded tailgate (the victim)
This is me crying for his poor 4runner
My damage on my 4runner:
The core support pushed the radiator and fan into the underdrive pulley
After some work with a pry bar, ratchet strap and a big hammer, this was the end result:
So, now that we have the damage out of the way we can focus on the wheeling and having more fun
Random pics throughout the day:
04-28-2012, 07:20 PM
#66
Registered User
Thread Starter
iTrader: (3)
Join Date: Nov 2009
Location: Fountain, CO
Posts: 219
Likes: 0
Received 0 Likes
on
0 Posts
A few more pics and a couple videos


[youtube]9YvYE1EPjVc[/youtube]
[youtube]q44dB4famlc[/youtube]
[youtube]c-dcUtlw5To[/youtube]
[youtube]KZm3JFgQ5pE[/youtube]
[youtube]9YvYE1EPjVc[/youtube]
[youtube]q44dB4famlc[/youtube]
[youtube]c-dcUtlw5To[/youtube]
[youtube]KZm3JFgQ5pE[/youtube]
 06-12-2012, 07:04 PM
#68
Registered User
Thread Starter
iTrader: (3)
Join Date: Nov 2009
Location: Fountain, CO
Posts: 219
Likes: 0
Received 0 Likes
on
0 Posts
So... not much has changed in the last month or so. I moved to Fountain Colorado so the wheeling has gotten much better! I lowered my runner a little bit by removing two bottom springs from the rear pack and turning down my torsion bars. The runner rides much smoother and sits about 2-3 inches lower. I didn't really like the height of my runner before but now I think it's a bit better.
Also... The first wheeling trip of Colorado:
HEEELLLLOOOOO Colorado!!!


One of the great things about being here is that we're only a few minutes from some really good 4-wheeling and some great scenery!
This was my first time wheeling in the mountains here in Colorado and all I can say is what a dump! This country here is so god awful and hideous! See for yourself


There isn't too many pictures, I need a new lens for my camera and Bill was having too much fun bashing around the mountain to take lots of pics. Its cool though, we did get a few poser pics


Also... The first wheeling trip of Colorado:
HEEELLLLOOOOO Colorado!!!
One of the great things about being here is that we're only a few minutes from some really good 4-wheeling and some great scenery!
This was my first time wheeling in the mountains here in Colorado and all I can say is what a dump! This country here is so god awful and hideous! See for yourself
There isn't too many pictures, I need a new lens for my camera and Bill was having too much fun bashing around the mountain to take lots of pics. Its cool though, we did get a few poser pics
06-12-2012, 07:06 PM
#69
Registered User
Thread Starter
iTrader: (3)
Join Date: Nov 2009
Location: Fountain, CO
Posts: 219
Likes: 0
Received 0 Likes
on
0 Posts
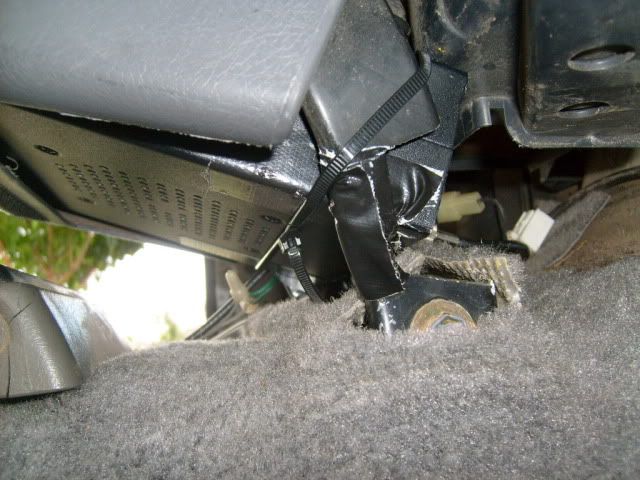
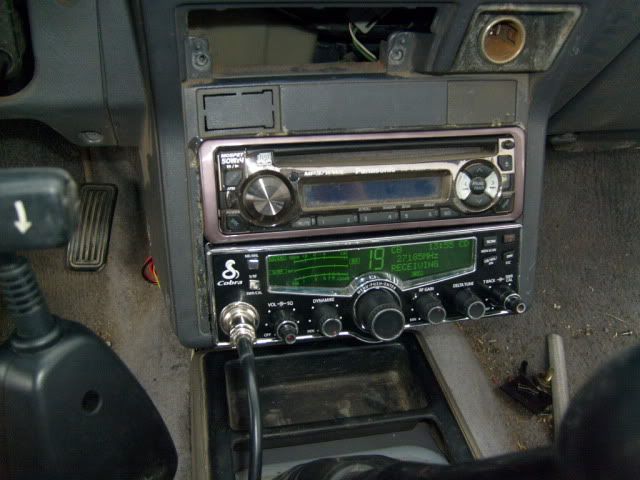
So... I didn't have a CB when I went wheeling with the group and I very quickly realized that I needed one and I needed one quickly!
I did as I always do, search craigslist because I'm cheap! I found a little compact CB that came with an antenna and a SWR meter for a whopping $40. Once I get everything installed I go to Bills place to test it out. Turns out that me being cheap bit me in the arse! Everything worked great except for the mic. I could get the radio to break squelch but it wouldn't transmit any voice. Bummer!! So I do what any other cheap B@s**** would do... get back on craigslist and find another good deal This time I found a nice Cobra 29LX (new in the box) for $70 at a pawn shop. I gave them a call and $40 later the radio was mine!
I was going to make some elaborate mount using some aluminum strap and rivet it together but I realized that due to the space I wouldn't be able to get it all in there and screw the bracket to the radio. So, like any other master fabricator would do, I used some good ol' zip ties
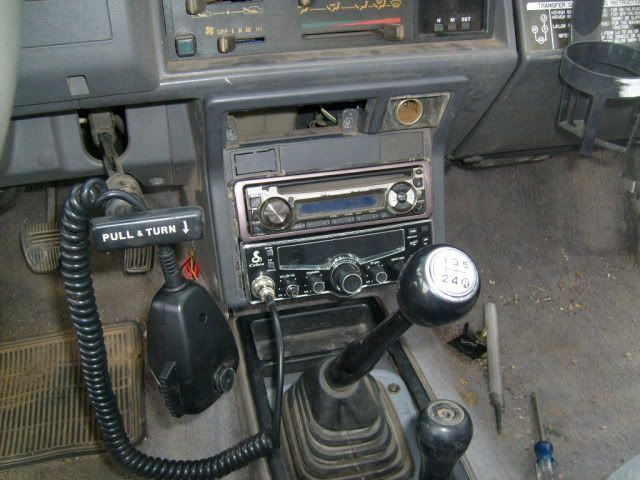
Okay, the story is over... time for the pics!
This isn't my best work but it'll do!
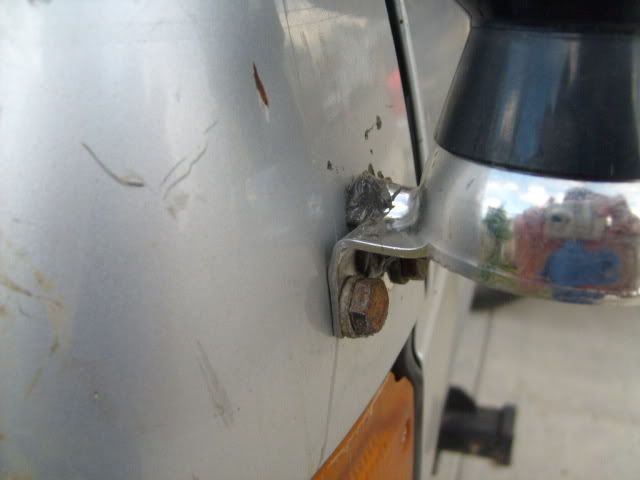
The antenna got mounted to the rear 1/4 panel. After the holes were drilled and the antenna installed I threw some RTV on it to seal it back up.
And the facial
I did as I always do, search craigslist because I'm cheap!
I found a little compact CB that came with an antenna and a SWR meter for a whopping $40. Once I get everything installed I go to Bills place to test it out. Turns out that me being cheap bit me in the arse! Everything worked great except for the mic. I could get the radio to break squelch but it wouldn't transmit any voice. Bummer!! So I do what any other cheap B@s**** would do... get back on craigslist and find another good deal This time I found a nice Cobra 29LX (new in the box) for $70 at a pawn shop. I gave them a call and $40 later the radio was mine! I was going to make some elaborate mount using some aluminum strap and rivet it together but I realized that due to the space I wouldn't be able to get it all in there and screw the bracket to the radio. So, like any other master fabricator would do, I used some good ol' zip ties
Okay, the story is over... time for the pics!
This isn't my best work but it'll do!
The antenna got mounted to the rear 1/4 panel. After the holes were drilled and the antenna installed I threw some RTV on it to seal it back up.
And the facial
06-13-2012, 08:34 AM
#70
Registered User
Looks like you are having a blast your yota. =]
Colorado I'm sure has a lot more to offer as far as offroading than Clarksville ever did. Haha.
Runner still looks great!
Colorado I'm sure has a lot more to offer as far as offroading than Clarksville ever did. Haha.
Runner still looks great!
07-07-2012, 05:59 PM
#72
Registered User
Thread Starter
iTrader: (3)
Join Date: Nov 2009
Location: Fountain, CO
Posts: 219
Likes: 0
Received 0 Likes
on
0 Posts
It's been a while since I have updated this thread. Most of my updates take place on the T4R.org site. Anyways, we went wheeling last saturday before the fires started in Waldo Canyon. We went out to Rainbow Falls and had a blast!!
Anyways, here are the pics:
Group shot:


This shot was after about a 3' drop and the vehicle was stable enough to get out and pose for a shot


There's a handful of pics on the wheeling thread posted a few posts above.
Anyways, here are the pics:
Group shot:
This shot was after about a 3' drop and the vehicle was stable enough to get out and pose for a shot
There's a handful of pics on the wheeling thread posted a few posts above.
07-07-2012, 06:03 PM
#73
Registered User
Thread Starter
iTrader: (3)
Join Date: Nov 2009
Location: Fountain, CO
Posts: 219
Likes: 0
Received 0 Likes
on
0 Posts
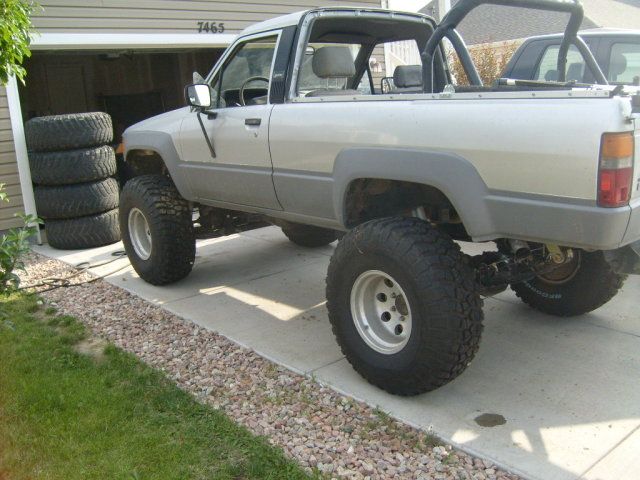
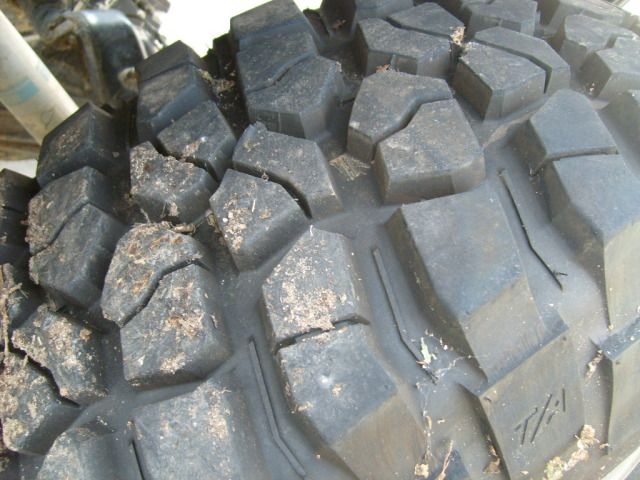
I got some new shoes for the runner. I found a heck of a deal on craigslist. I got 4 brand new 35x12.5x15 KM2's and one worn 35x12.5x15 tire (don't remember the maker) along with 5 15x10 mickey thompson classic II's, all for $850.
I'm loving the new look of the runner and I'm pretty sure that actually having tread on the front of the runner will be a good improvement on the trails

I also picked up an onboard air system today. It's going to get installed tomorrow.

I'm loving the new look of the runner and I'm pretty sure that actually having tread on the front of the runner will be a good improvement on the trails
I also picked up an onboard air system today. It's going to get installed tomorrow.
07-08-2012, 04:04 PM
#75
Registered User
Thread Starter
iTrader: (3)
Join Date: Nov 2009
Location: Fountain, CO
Posts: 219
Likes: 0
Received 0 Likes
on
0 Posts
I spent a couple hours taking my time and making some brackets to mount the compressor. I got the compressor mounted firmly on the passenger fender, it looks right at home there

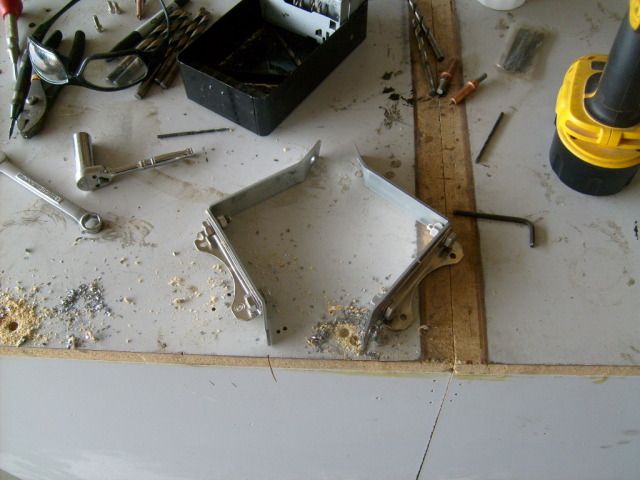


I have everything I need to mount the parts and wire everything, I just need to get some air lines and fittings. The plumbing for the air will be done tomorrow.
It's time for the fat guy to eat some lunch so I'll post more later.
I have everything I need to mount the parts and wire everything, I just need to get some air lines and fittings. The plumbing for the air will be done tomorrow.
It's time for the fat guy to eat some lunch so I'll post more later.
07-08-2012, 04:36 PM
#76
Registered User
Thread Starter
iTrader: (3)
Join Date: Nov 2009
Location: Fountain, CO
Posts: 219
Likes: 0
Received 0 Likes
on
0 Posts
I was lazy after lunch and I need to get the air lines tomorrow so I wasn't very motivated to get a lot done this afternoon. Having a tv in the garage is a pretty good distraction too.
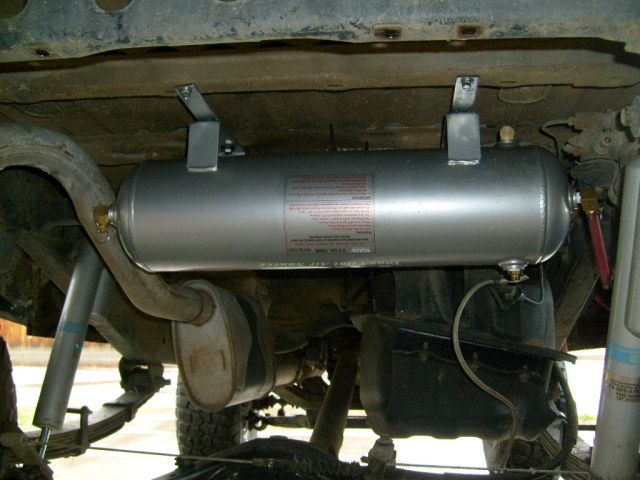
Anyways, I made two very complex brackets to hold the air tank to the bottom of the body directly above the rear axle. I also picked up some 90* 1/4"NPT fittings for the tank. Since the side of the tank is going to be close to the exhaust, I wanted to keep all the lines as close to the tank as possible. I may wrap a small section of the exhaust in some heat wrap to keep some of the heat away from the tank.


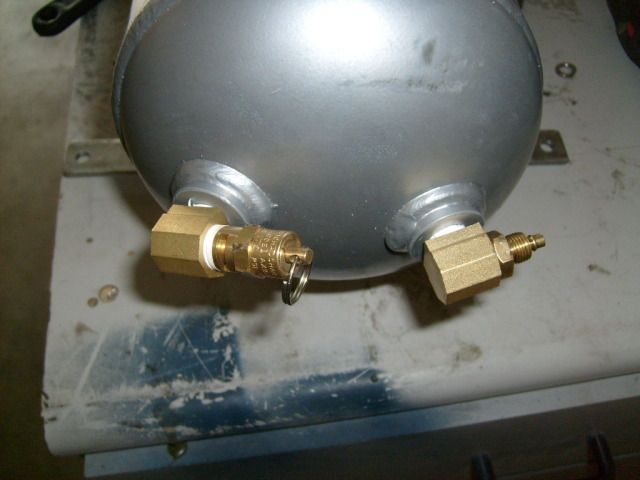

Anyways, I made two very complex brackets to hold the air tank to the bottom of the body directly above the rear axle. I also picked up some 90* 1/4"NPT fittings for the tank. Since the side of the tank is going to be close to the exhaust, I wanted to keep all the lines as close to the tank as possible. I may wrap a small section of the exhaust in some heat wrap to keep some of the heat away from the tank.
07-12-2012, 06:12 PM
#77
Registered User
Thread Starter
iTrader: (3)
Join Date: Nov 2009
Location: Fountain, CO
Posts: 219
Likes: 0
Received 0 Likes
on
0 Posts
DONE!!!
Kinda...
I got all the electrical and air lines routed with the exception of the air pressure gauge. I need to get some more fittings for the gauge so the air line for the gauge is capped at the air tank for now. I still need to get some clamps and secure the wires and air lines but they're out of the way of everything for now. It started raining just as I was finishing the electrical.
Pics!
The air tank is a little close to the exhaust so I may need to get some exhaust tape and keep the heat away. The air lines are rated for 200* and have excellent ratings for atmospheric conditions. I think they will be fine... we'll see.
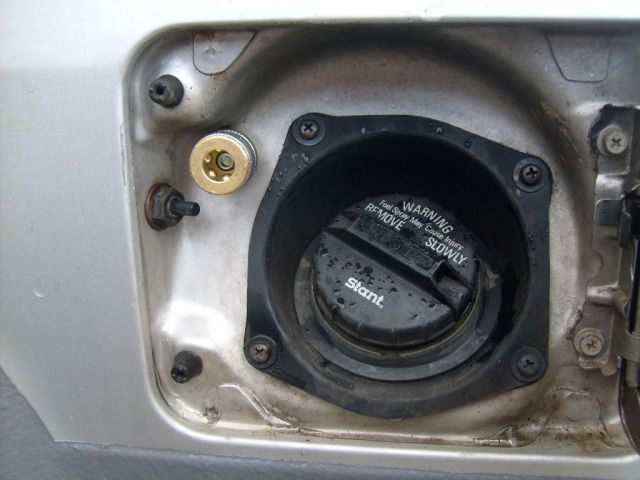
The quick release port fits like a glove in the gas tank cap
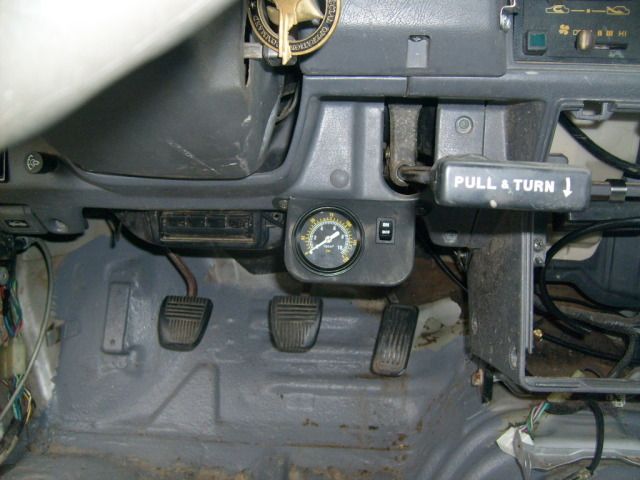
The gauge and power switch I ran mine to the constant 12v power wire in the driver side kick panel. I wanted to be able to use the compressor w/o having to turn on the 4runner.
I haven't checked for leaks yet but so far the compressor took a whole 2 minutes to fill the 2.5 gallon air tank to 150psi.
I'm loving it!! Now I can air down at the trail head and air back up within a matter of minutes
Kinda...
I got all the electrical and air lines routed with the exception of the air pressure gauge. I need to get some more fittings for the gauge so the air line for the gauge is capped at the air tank for now. I still need to get some clamps and secure the wires and air lines but they're out of the way of everything for now. It started raining just as I was finishing the electrical.
Pics!
The air tank is a little close to the exhaust so I may need to get some exhaust tape and keep the heat away. The air lines are rated for 200* and have excellent ratings for atmospheric conditions. I think they will be fine... we'll see.
The quick release port fits like a glove in the gas tank cap
The gauge and power switch
I ran mine to the constant 12v power wire in the driver side kick panel. I wanted to be able to use the compressor w/o having to turn on the 4runner.I haven't checked for leaks yet but so far the compressor took a whole 2 minutes to fill the 2.5 gallon air tank to 150psi.
I'm loving it!! Now I can air down at the trail head and air back up within a matter of minutes
07-12-2012, 06:13 PM
#78
Registered User
Thread Starter
iTrader: (3)
Join Date: Nov 2009
Location: Fountain, CO
Posts: 219
Likes: 0
Received 0 Likes
on
0 Posts
Oh yeah!! 
Staun deflators in action:
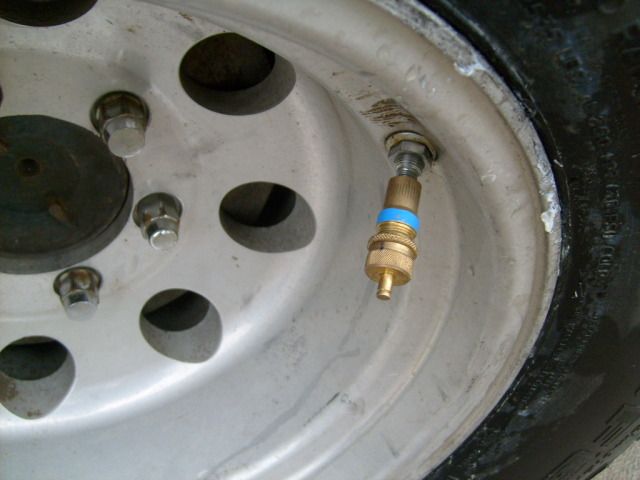
And airing back up... all within a couple of minutes.

I think airing down all 4 tires with the 4 deflators takes about 4-5 minutes total, maybe less. Then airing back up will probably take a total of about 8 minutes if not less. I tested it a few minutes ago and I went from 10psi to 25psi within a minute or two.
Staun deflators in action:
And airing back up... all within a couple of minutes.
I think airing down all 4 tires with the 4 deflators takes about 4-5 minutes total, maybe less. Then airing back up will probably take a total of about 8 minutes if not less. I tested it a few minutes ago and I went from 10psi to 25psi within a minute or two.


