
RustyAngel's Resurrection
 May 17, 2013 | 06:11 PM
#1
Thread Starter
Registered User
Joined: May 2013
Posts: 26
Likes: 0
From: Connecticut
RustyAngel's 1995 Pickup Build-up thread
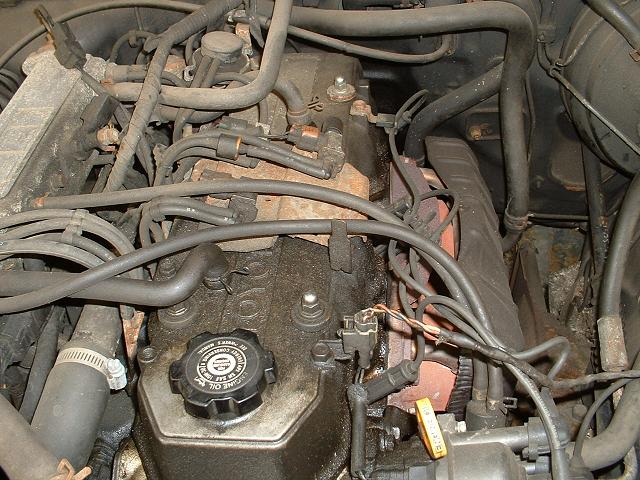
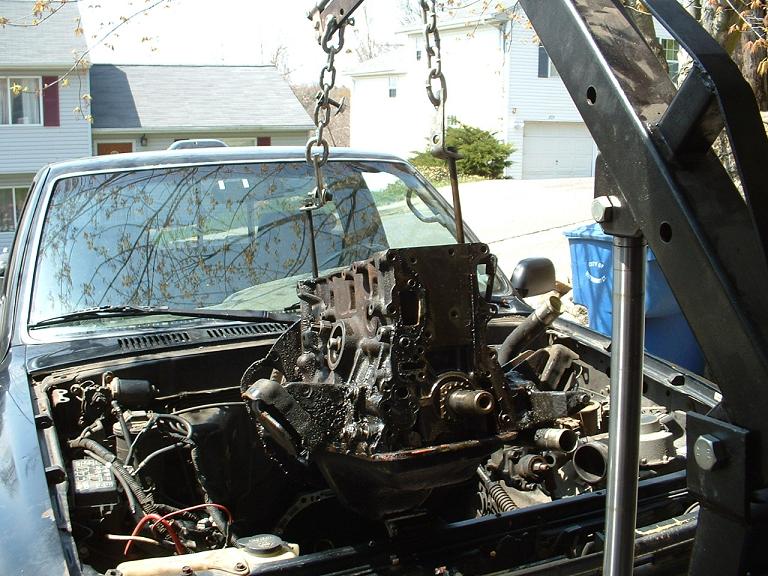
My '95 Pickup was leaking oil - badly. Looked liked the front and rear seals. Add to that my concern about the 22re timing chain needing replacement, and I decided it was time to tear into her and do some long needed repairs. Here's the starting point, about 4 weeks ago.
Last edited by rustyangel; May 18, 2013 at 07:55 PM.
 May 17, 2013 | 06:31 PM
#4
Thread Starter
Registered User
Joined: May 2013
Posts: 26
Likes: 0
From: Connecticut
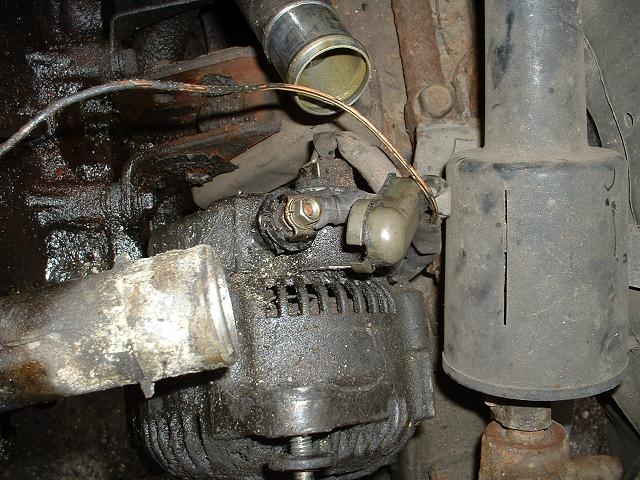
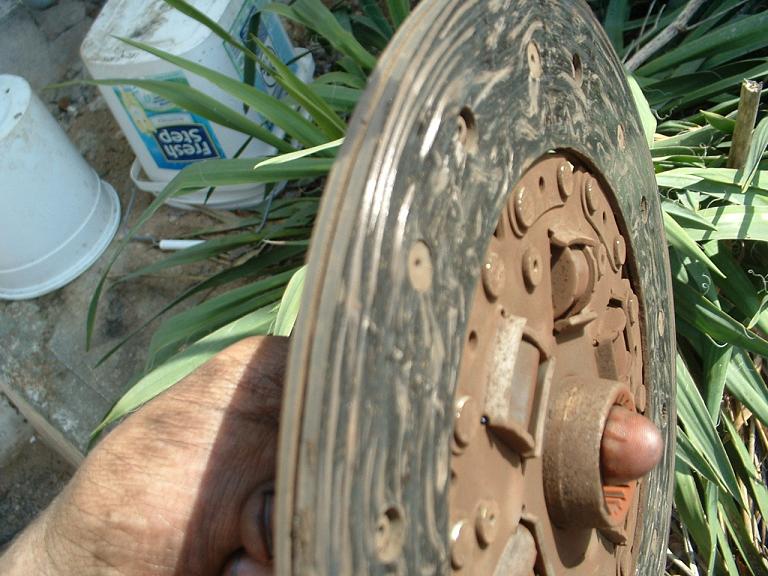
This must be the filthiest alternator ever. Its amazing the thing worked; the fins on the heat sink under the rear cover were completely packed with sludge. It took an entire can of carb cleaner to flush it clean. Its the original alternator, though.
 May 17, 2013 | 06:44 PM
#7
Thread Starter
Registered User
Joined: May 2013
Posts: 26
Likes: 0
From: Connecticut
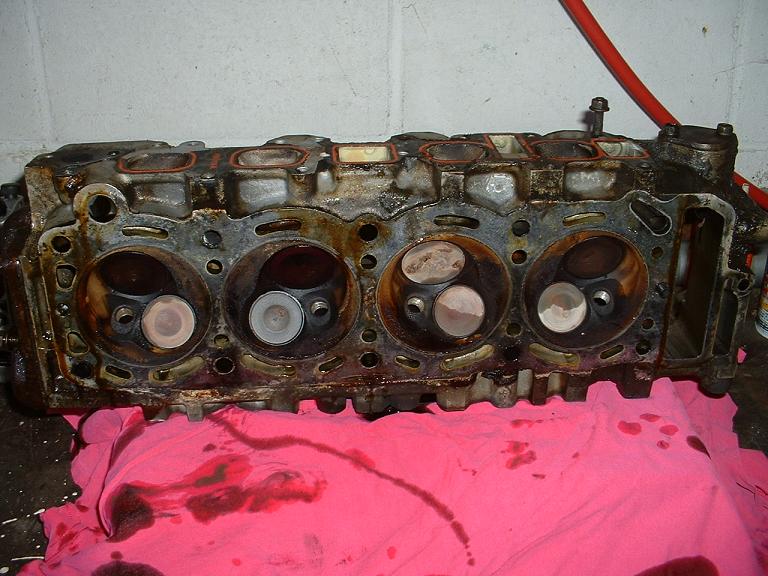
Needs Head.
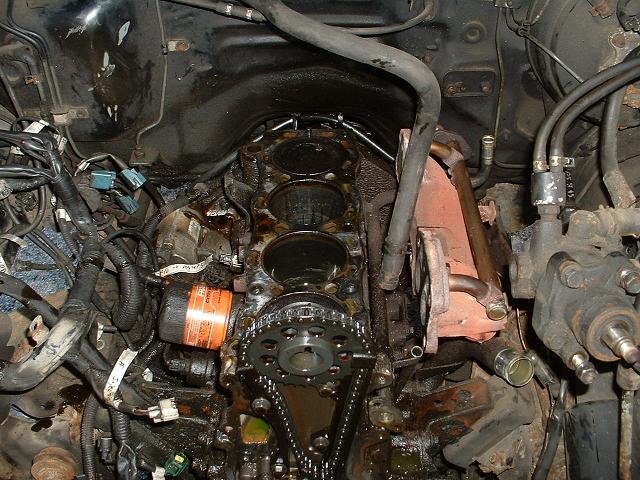
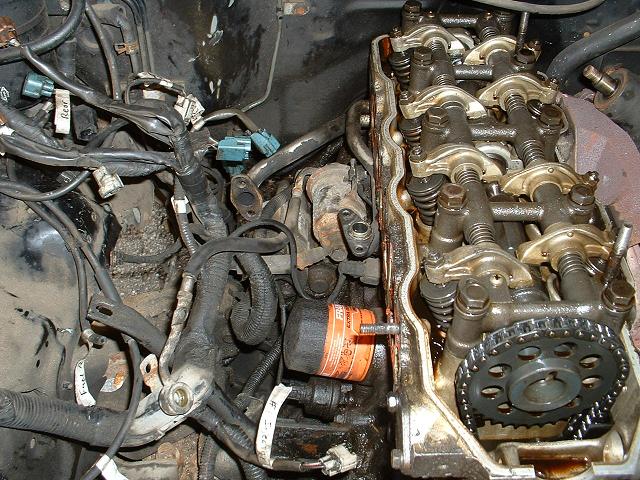
At this point, I should mention that the driver's side timing chain guide was mostly intact. However, some of the plastic had broken around the upper mounting hole, allowing it to slap around. Not as bad as it could have been, for sure. Also, the head gasket showed no signs of failure. I foolishly did not do a compression test before I started disassembly.
At this point, I should mention that the driver's side timing chain guide was mostly intact. However, some of the plastic had broken around the upper mounting hole, allowing it to slap around. Not as bad as it could have been, for sure. Also, the head gasket showed no signs of failure. I foolishly did not do a compression test before I started disassembly.
Trending Topics
May 17, 2013 | 06:52 PM
#8
Thread Starter
Registered User
Joined: May 2013
Posts: 26
Likes: 0
From: Connecticut
The valves really looked better than I expected. But I took it to a machine shop anyway. Good thing, too; they had to take off 0.020 to flatten it out. Can't believe I wasn't looking at a head gasket leak. Thanks to Ed's Auto Machine of Naugatuck.
May 17, 2013 | 07:01 PM
#9
Thread Starter
Registered User
Joined: May 2013
Posts: 26
Likes: 0
From: Connecticut
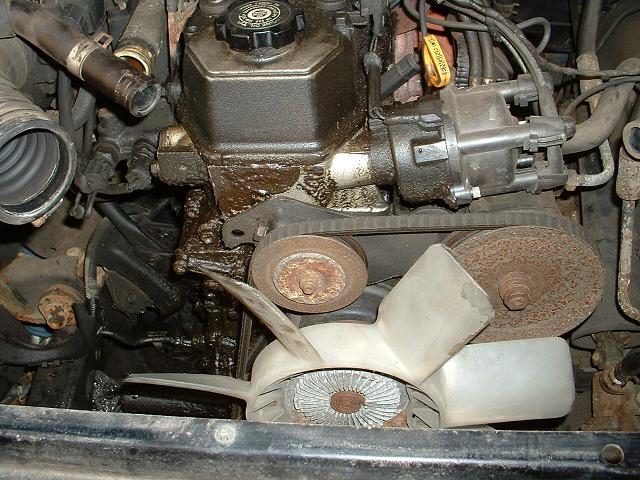
Oh yeah, the oil pan gasket was leaking too. I wonder why.
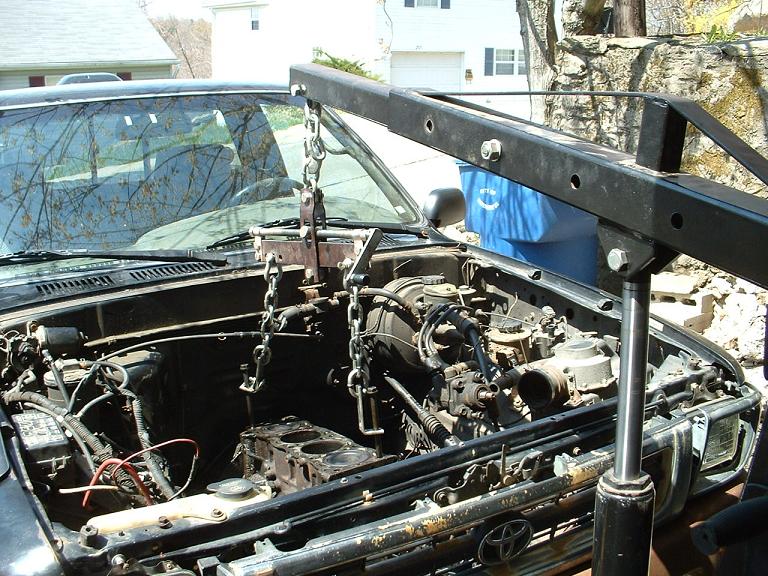
It was at this point I took a breather to chat with my girlfriend's father; a longtime car guy, and president of the Nutmeg Miata Club. I described how I was planning to unbolt the motor mounts, jack the engine up, and set it back down on blocks to give me clearance to take the oil pan off. When he saw the photos of how far in I was, he suggested I come borrow his engine hoist and stand, and just pluck the engine out. Perfect! That way I could replace the rear main seal and clutch at the same time. Project just got bigger.
Oh, and we found out how to fit an engine hoist into a Ford Focus.
May 17, 2013 | 07:07 PM
#10
Thread Starter
Registered User
Joined: May 2013
Posts: 26
Likes: 0
From: Connecticut
Returned home with the engine hoist. Removed the hood. I had left the exhaust manifold bolted to the downpipe up till now, dreading trying to undo the three rusted bolts. Again, Kroil to the rescue. I can't praise that stuff enough. The bolts came out without a second thought, and the exhaust manifold came off.

May 17, 2013 | 07:12 PM
#11
Thread Starter
Registered User
Joined: May 2013
Posts: 26
Likes: 0
From: Connecticut
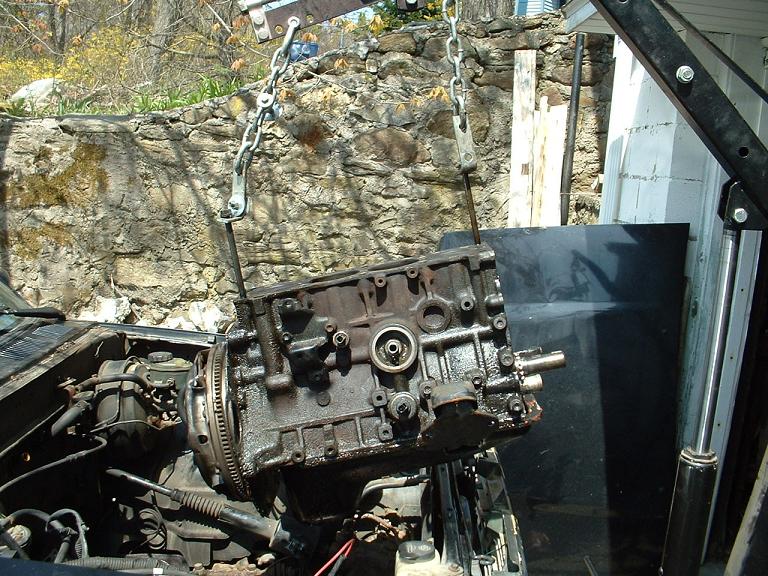
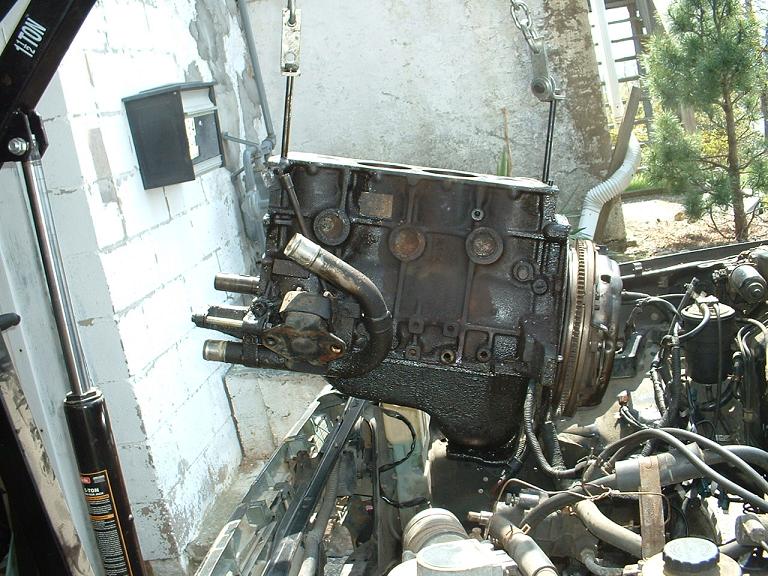
Unbolted the motor mounts, unbolted the block from the belhousing, and its ready to come out.
I'm so glad I ordered new head bolts, because the old ones have come in so handy. Here are two attaching the hoist to the block. Four more will be used shortly to bolt the block to the engine stand.
I'm so glad I ordered new head bolts, because the old ones have come in so handy. Here are two attaching the hoist to the block. Four more will be used shortly to bolt the block to the engine stand.
 May 17, 2013 | 07:39 PM
#13
Thread Starter
Registered User
Joined: May 2013
Posts: 26
Likes: 0
From: Connecticut
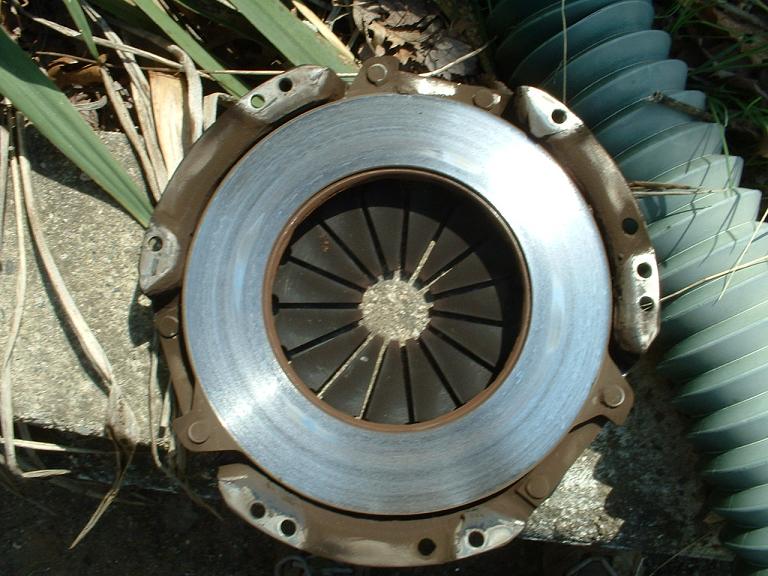
I'm the second owner of this truck. PO bought it new, killed the engine at around 100,000 miles by running it out of oil. This is a re-manufactured engine he had put in. However, he said that when then replaced the engine, the clutch was less than halfway worn in, so they put the old clutch back in. If thats correct, it means this is the original clutch, now with 249,000 miles on it. Not bad.

May 27, 2013 | 07:09 PM
#14
Thread Starter
Registered User
Joined: May 2013
Posts: 26
Likes: 0
From: Connecticut
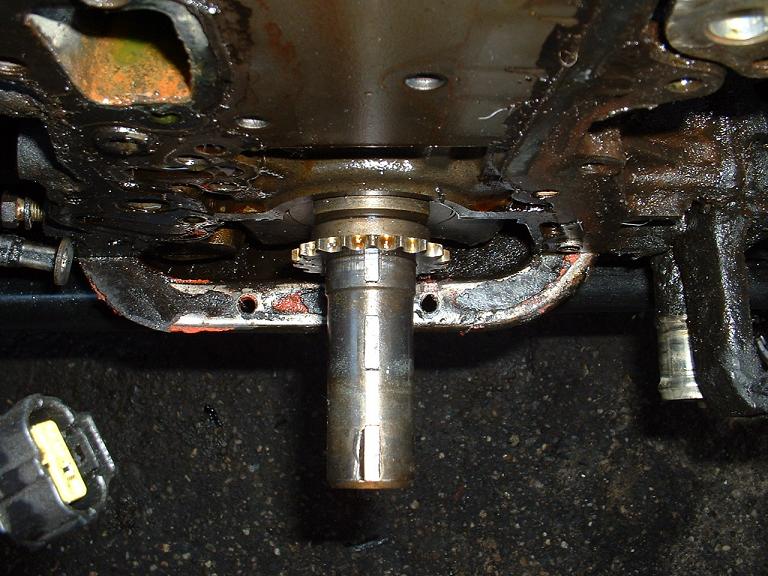
All that engine tear down and removal took place the last weekend in April. In the intervening weeks I spent time cleaning all the removed components, and painting some in preparation to reassemble everything. I didn't take any photos of that process. It was rather tedious and time consuming. And I kept discovering little problems that turned into delaying setbacks. First was when I went to install a new rear main seal. I discovered the crankshaft journal was scored, so I ordered a repair sleeve and commenced waiting for it to arrive. I also broke one of the flywheel bolts. M11 x 1.25 bolts are IMPOSSIBLE to find. I even went to the dealer, who didn't have them in stock and would've needed to order them. I asked what size they were, as I didn't want to risk ordering the wrong thing, and the parts guy said all the diagram said was "bolt". I passed on those. I nearly resorted to using 7/16"-20 bolts instead, which have a nominal major diameter of 0.4375", which is within a few thousandths of M11 x 1.25. But I ended up finding a new set of Toyota flywheel bolts on Ebay.
So repair sleeve on crankshaft and flywheel back on, I picked up the camera again at this point. I had painted the block, and proceeded to install the new clutch pilot bearing, clutch disc, and pressure plate. Then began re-assembling some of the other bracketry onto the block.
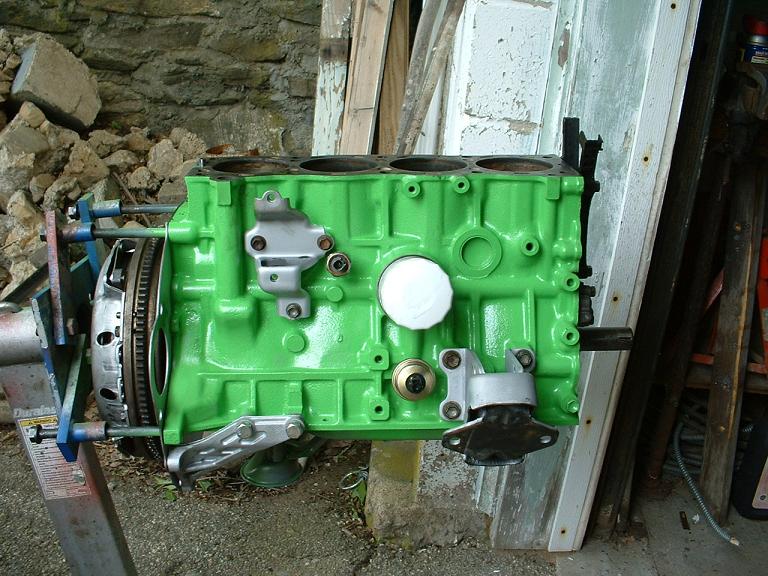
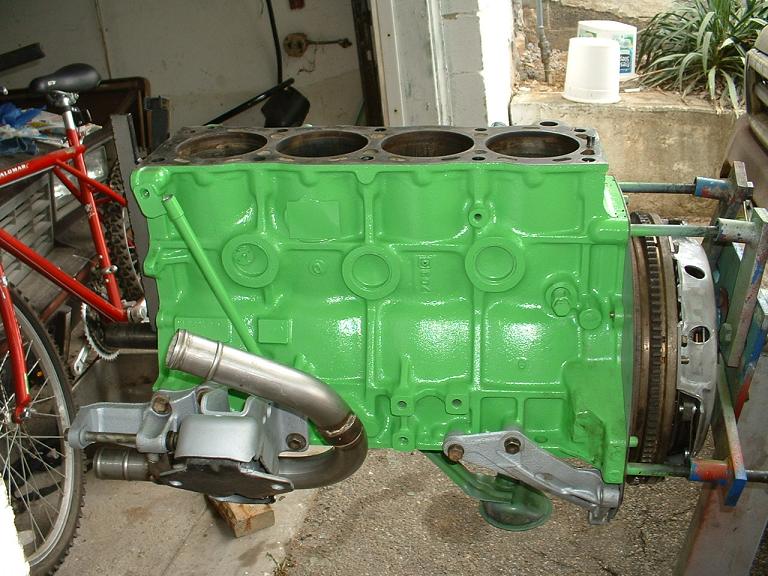
So repair sleeve on crankshaft and flywheel back on, I picked up the camera again at this point. I had painted the block, and proceeded to install the new clutch pilot bearing, clutch disc, and pressure plate. Then began re-assembling some of the other bracketry onto the block.
Last edited by rustyangel; May 27, 2013 at 07:13 PM.
May 27, 2013 | 07:18 PM
#15
Thread Starter
Registered User
Joined: May 2013
Posts: 26
Likes: 0
From: Connecticut
Installed new timing chain guides, tensioner, and crank sprocket from a Cloyes timing set. Made sure the set included a metal backed driver's side guide. (I ordered this set before I found out about engnbldr. Should I ever need to do this again, I'll be getting a set from him)


Last edited by rustyangel; May 27, 2013 at 07:20 PM.


 May 29, 2013 | 07:02 PM
#19
Thread Starter
Registered User
Joined: May 2013
Posts: 26
Likes: 0
From: Connecticut
Another delay: I discovered a crack in the timing chain cover, so I has to order a new one. Of course I found the crack AFTER I spent half an hour extracting a broken bolt. I'll post pictures of the crack later on; I didn't take any yet.
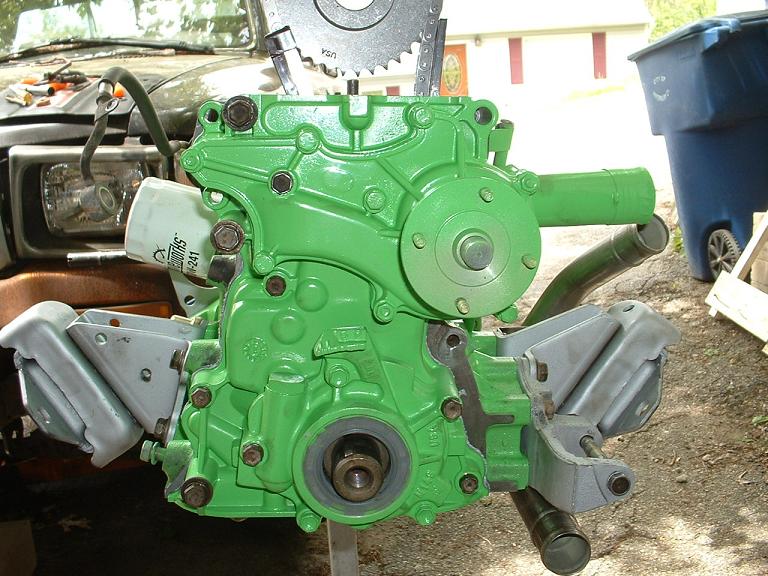
So when the new timing cover arrived, I installed the new water pump. I checked the clearances on the old oil pump with feeler gauges, and they were well within spec, so I reused it. Once it was back together, I masked it off and painted it. It was ready and waiting when I put the timing chain and camshaft sprocket on. Here it is installed.
Again, thanks to Ed's Auto Machine in Naugatuck for taking care of the head. Looking good as new:
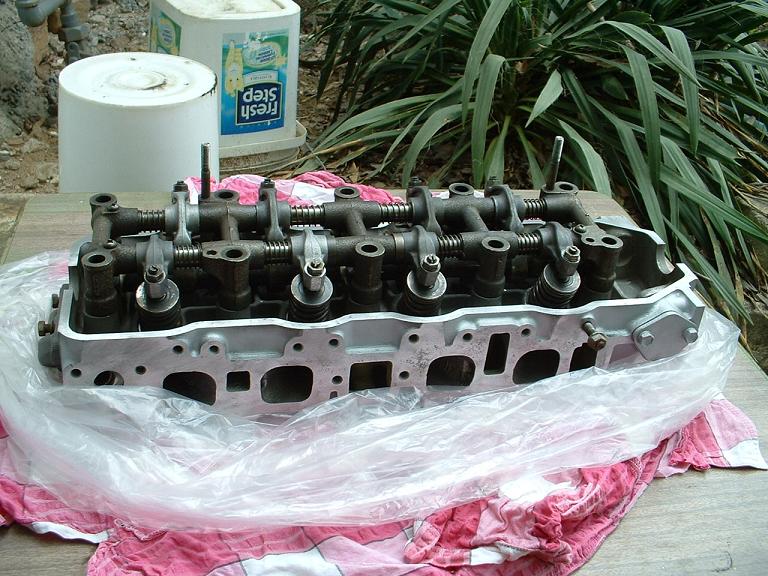
The valves cleaned up nicely:
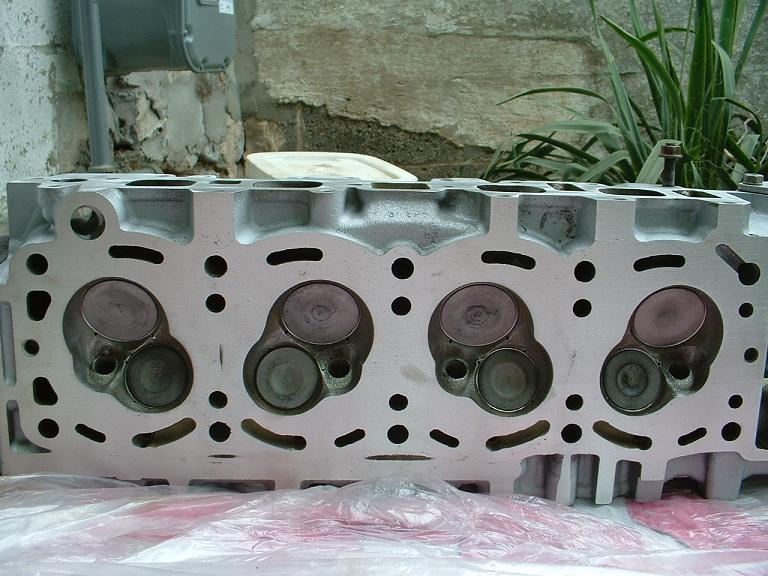
So next was chase the threads in the block to prepare them for the new head bolts:
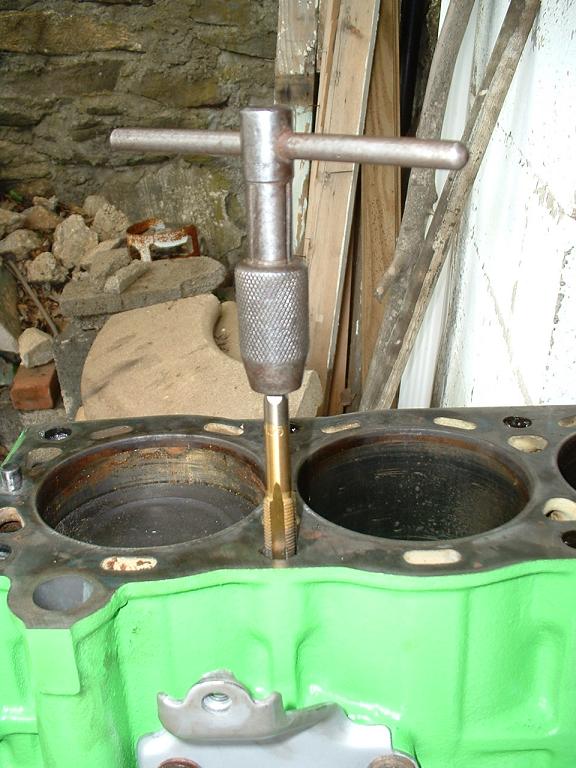
Then install the head and torque it down:
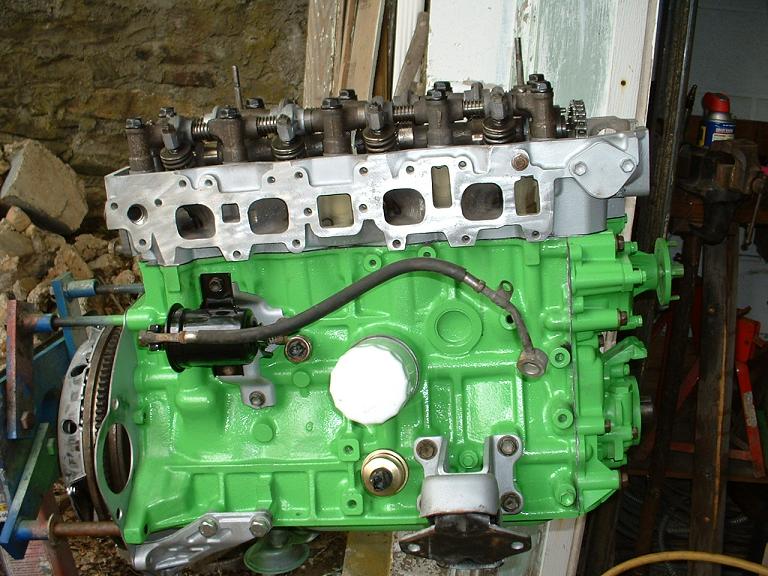
So when the new timing cover arrived, I installed the new water pump. I checked the clearances on the old oil pump with feeler gauges, and they were well within spec, so I reused it. Once it was back together, I masked it off and painted it. It was ready and waiting when I put the timing chain and camshaft sprocket on. Here it is installed.
Again, thanks to Ed's Auto Machine in Naugatuck for taking care of the head. Looking good as new:
The valves cleaned up nicely:
So next was chase the threads in the block to prepare them for the new head bolts:
Then install the head and torque it down:


