Project "Unicorn" 1987 4-Runnet
 Jan 11, 2015 | 08:43 PM
#1

Thread Starter
Registered User
Joined: Jul 2014
Posts: 20
Likes: 0
From: So Cal
Project "Unicorn" 1987 4-Runnet
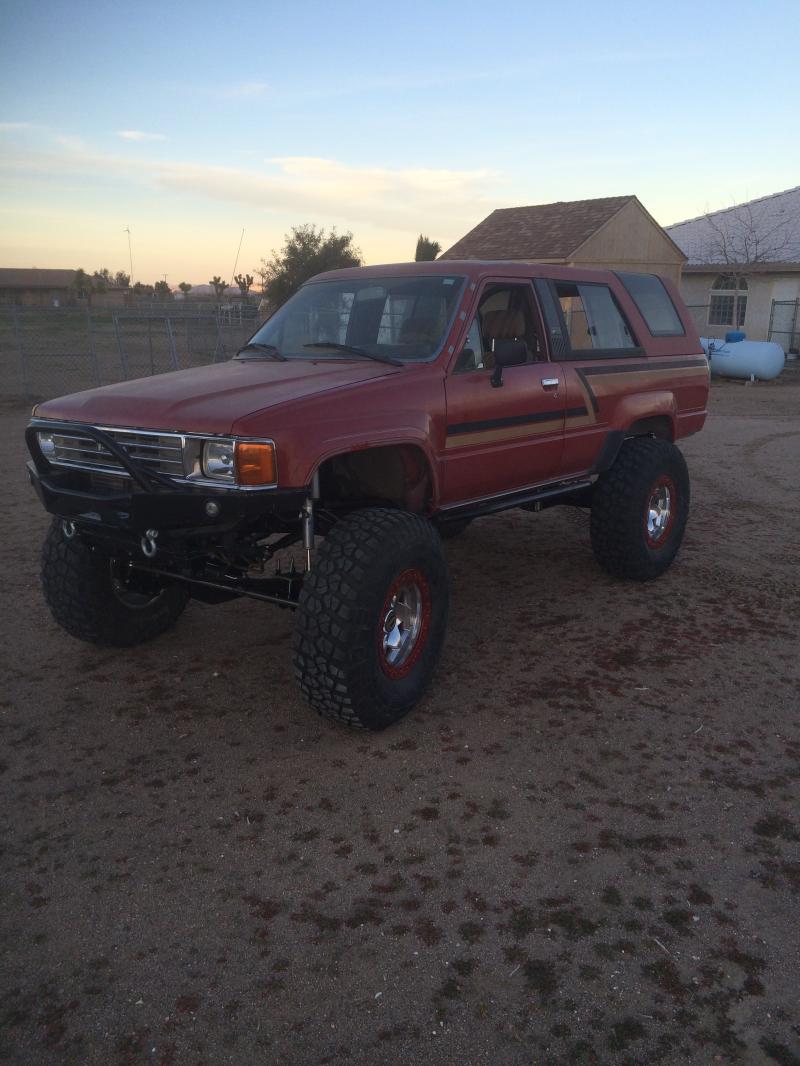
So my story begins back in August of 2013. I set out to find a 4-Runner that my need for a daily driver and part time wheeler. My hopes to find a "Unicorn" year '85 with EFI in good shape for a decent price came up short. I looked a a handful of rigs and they all were complete Junkers. I settled my search on an '87 that ran great and wasn't too beat to build for 2000$. It had a 22RE that seemed to leak from everywhere, had 245K on the clock, and an Automatic trans that would slip when it was cold, and the smell of a farm in the interior. But it ran great and drove really nice. I was pretty stoked cause it already had AT tires, steel black wheels and a tube rear bumper with tire swing mount. My plan was to collect as much parts as I could then knock out a build so I had minimal down time. Was my timeframe ever wrong. Here's how the Unicorn looked the day I brought her home. My plan was to SAS it, gear it, cage it, and some time in the future maybe do a V-8 swap.

Last edited by prerunnerrunner; Jan 11, 2015 at 08:57 PM.
Jan 11, 2015 | 08:52 PM
#2
Thread Starter
Registered User
Joined: Jul 2014
Posts: 20
Likes: 0
From: So Cal
The first thing I did was fix the broke grill and replaced the drivers front fender. Then I made a front plate bumper to hold me over till I can get something with some bling.
After I did a few things to her to make her more of a reliable driver I took it up to Big Bear for a day of light wheeling.
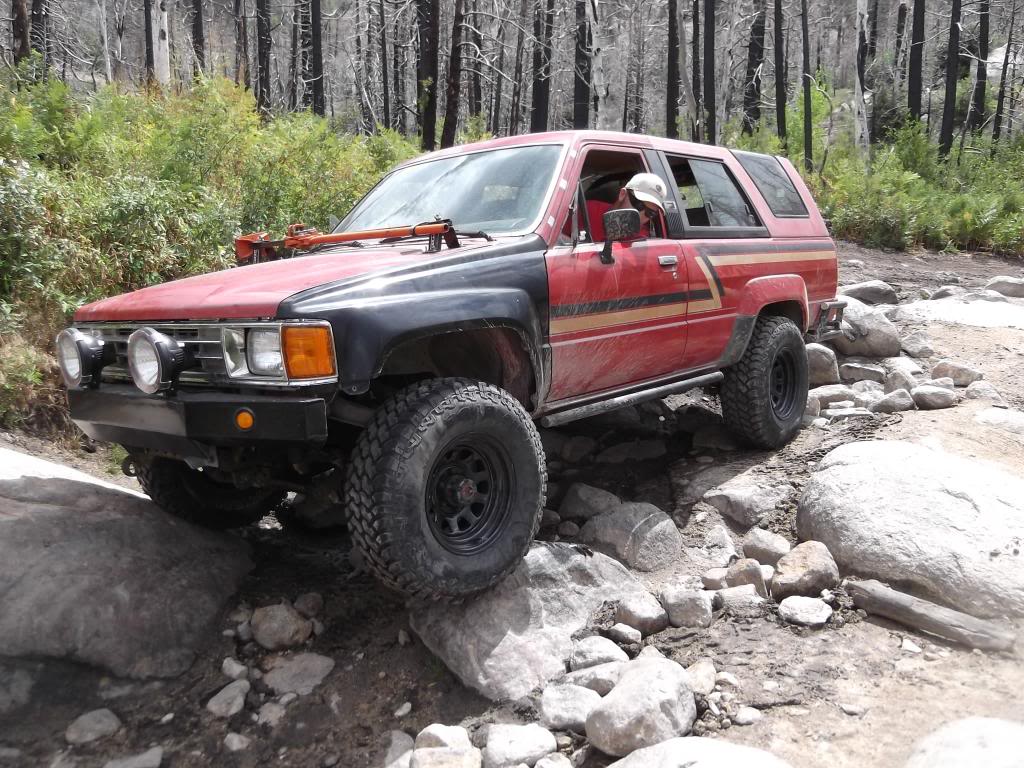
This was on the Holcomb Creek trail. A few years back this was my favorite trail to do locally intil they closed it down due to a fire. I remember it being pretty tuff but the old IFS runner did pretty good for being stockish.
Last edited by prerunnerrunner; Jan 11, 2015 at 09:39 PM.
Jan 11, 2015 | 09:14 PM
#3
Thread Starter
Registered User
Joined: Jul 2014
Posts: 20
Likes: 0
From: So Cal
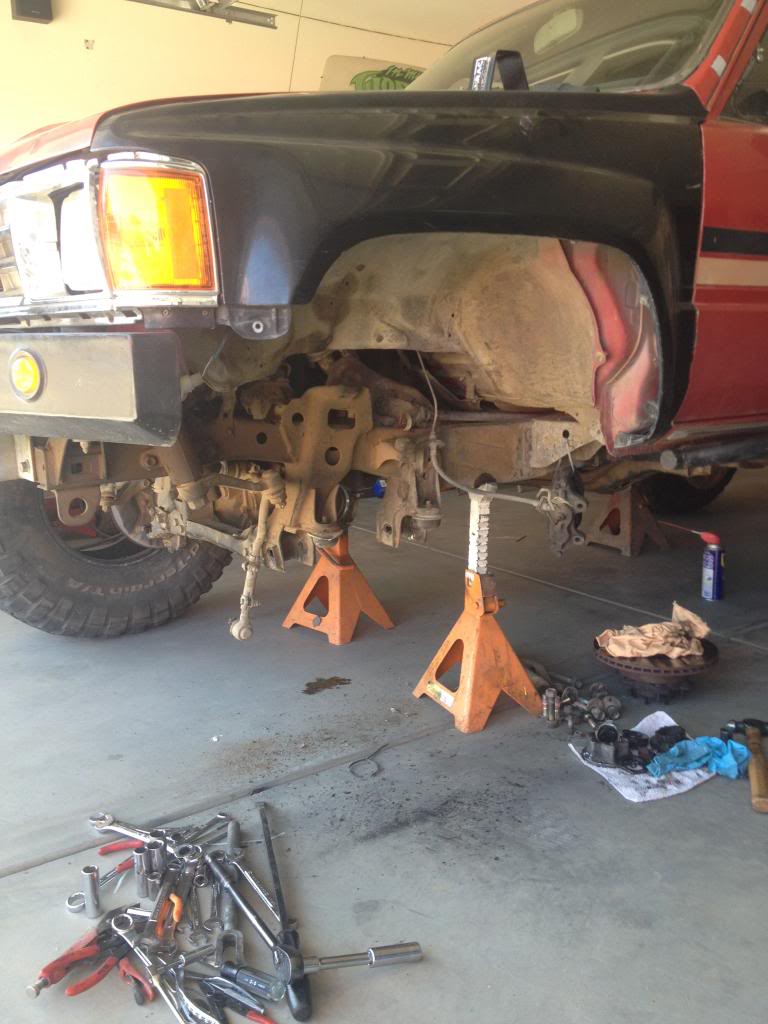
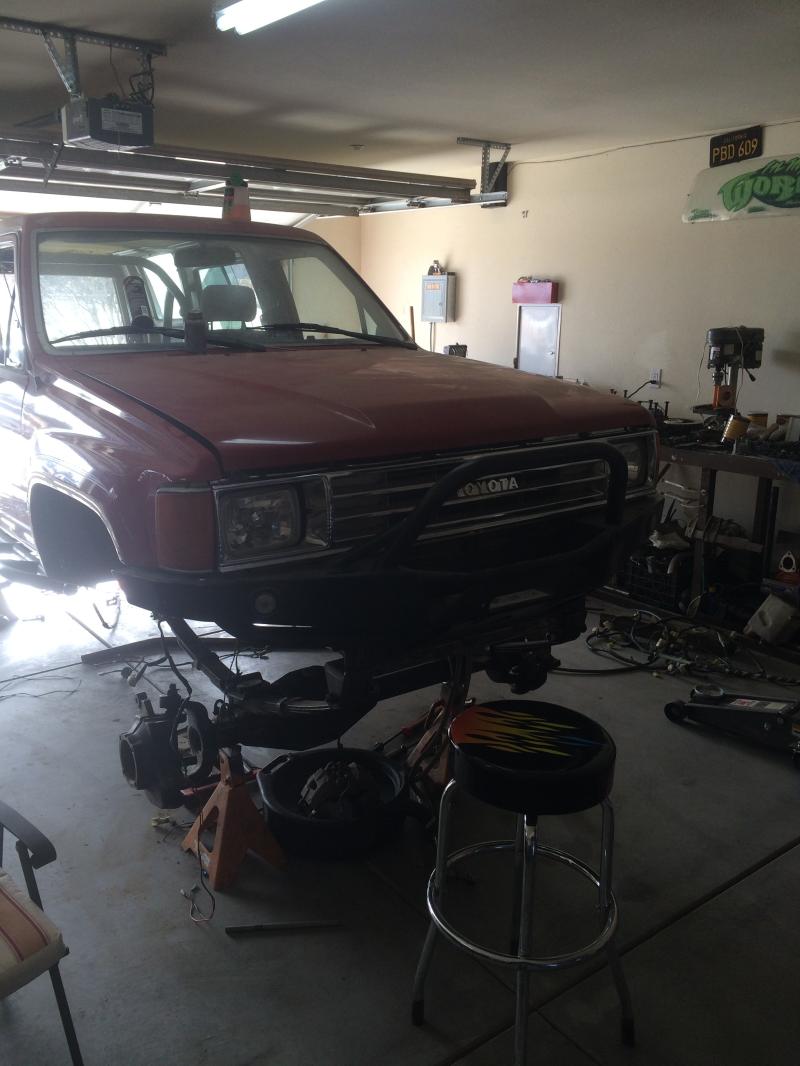
After driving it for a few months and wheeling it to the point that it needed new CV's, trans rebuild, new drive lines, and just a good bit of lovin I decided to put her on jack stands and start the SAS and manual trans swap. I didn't have the parts that I needed for the build when I started but I had some time to prep it for the new front axle and trans. Once my daughter was born and my wife quit her job I really didn't have the funds to put into the Unicorn so I had to come up with a way that I could have all the parts I needed pay for themselves. I started out buying a pretty beat '86 runner to part out and before I knew it I had parted and sold 9 rigs and aquired almost all the parts I needed and the funds to purchase everything else I needed for my build. So then the SAS started.
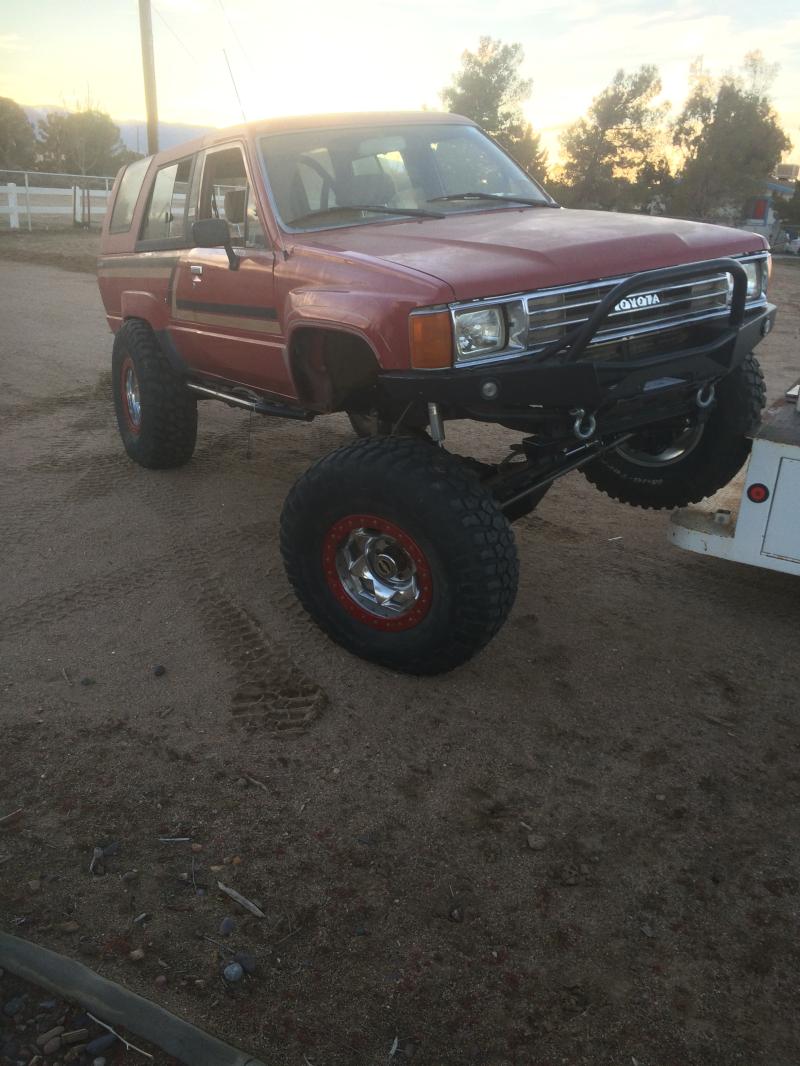
I found a decent deal on a '85 axle with 5:29's, lockrite, All-Pro hy-steer and some 5" All-Pro springs.
I decided to move my axle 4" forward from where the stock IFS location was and that required me to trim some of the body mount away to clear my shackle.
Here's how she sat with the front tacked up.


I found a decent deal on a '85 axle with 5:29's, lockrite, All-Pro hy-steer and some 5" All-Pro springs.


I decided to move my axle 4" forward from where the stock IFS location was and that required me to trim some of the body mount away to clear my shackle.


Here's how she sat with the front tacked up.

Last edited by prerunnerrunner; Jan 11, 2015 at 09:27 PM.
Jan 11, 2015 | 09:22 PM
#4
Thread Starter
Registered User
Joined: Jul 2014
Posts: 20
Likes: 0
From: So Cal
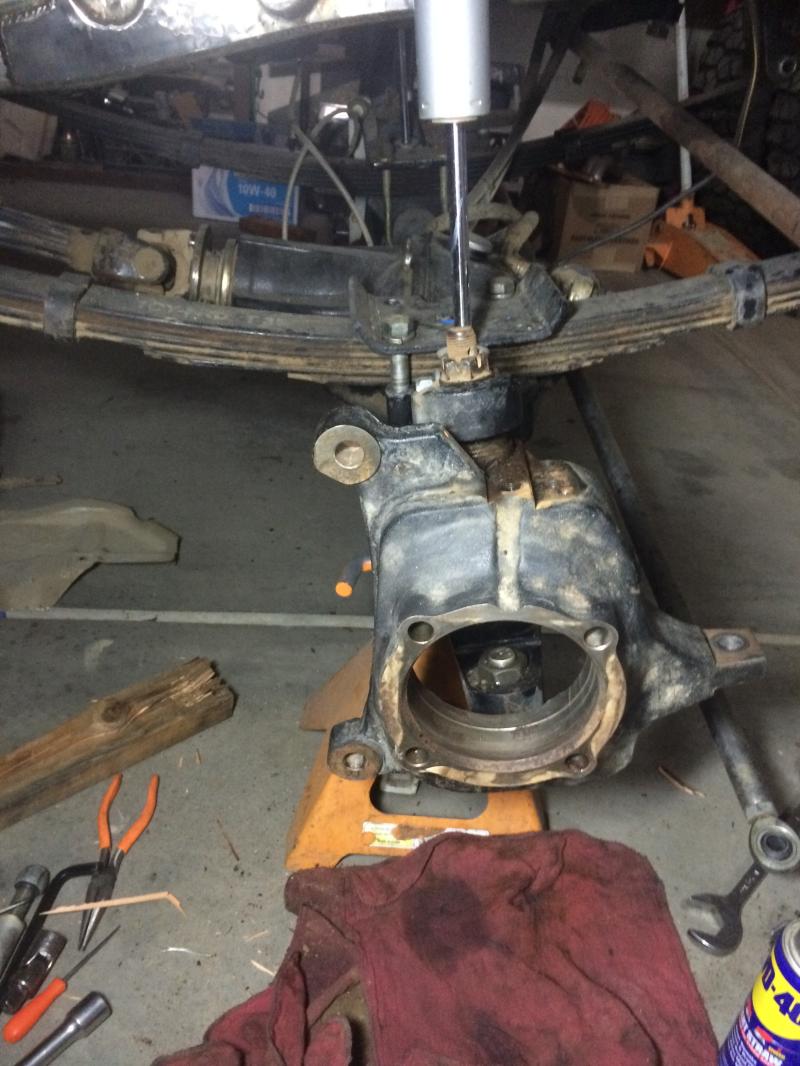
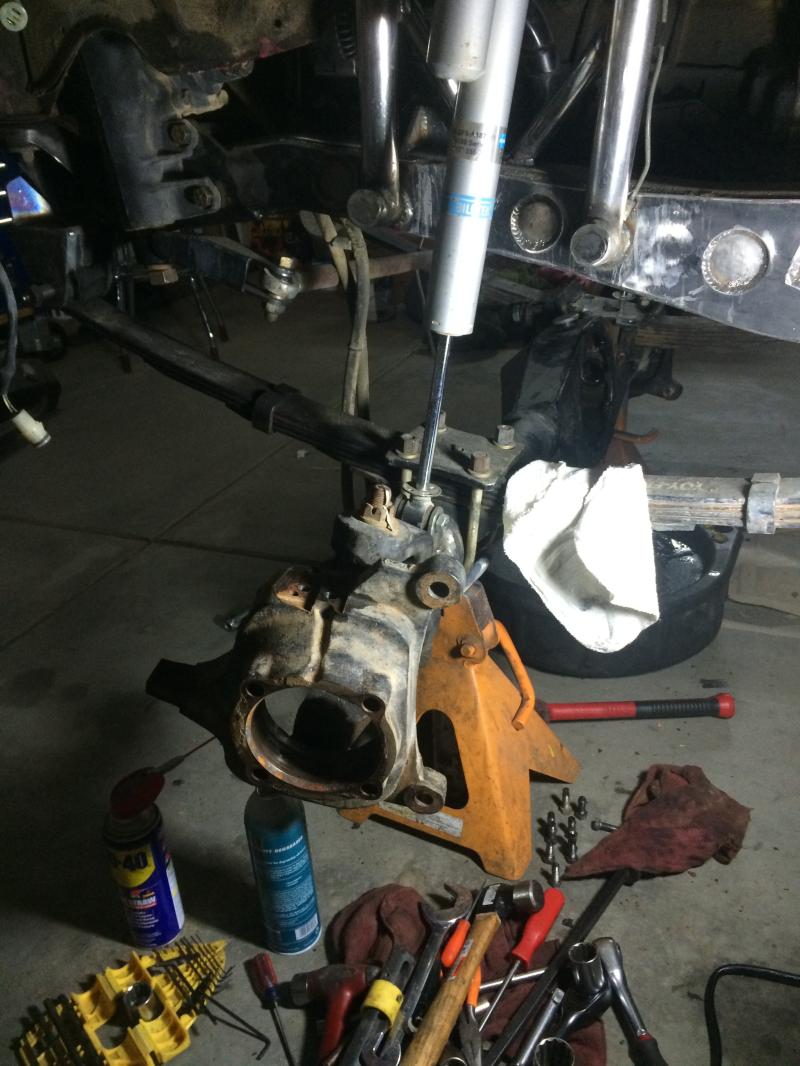
A few weeks after I had the front all set up I came across a deal on a '85 Extra cab that was pretty beat body and frame wise but had some really choice parts that I could use on my rig. The main reason I bought the truck was for the All-Pro Hybrid 60 front axle. This axle was pretty sweet in its prime but cost a fortune so All-Pro stopped production of it. I really liked the width and the fact that I wouldn't need to deal with birfields and trunnions. So the swap was a no brainier for me. The axle came with Trail-Gear hydro assist, HP 3rd with 5:29's and a Detroit. After I bolted the axle up the look was absolutely fantastic.


Last edited by prerunnerrunner; Jan 11, 2015 at 09:36 PM.
Jan 11, 2015 | 09:46 PM
#5
Thread Starter
Registered User
Joined: Jul 2014
Posts: 20
Likes: 0
From: So Cal
While cutting all the IFS brackets off I decided it would be easier to pull the engine and do the work needed to it while making it easier to cut off all the brackets and mounts not needed anymore with the SAS. Since the engine leaked from the oil pan, timing chain cover and oil pump I decided to order some parts from LC to jazz it up a bit.

While the timing cover was off I replaced the old timing chain with a new dual row LC timing chain.

While the timing cover was off I replaced the old timing chain with a new dual row LC timing chain.
Last edited by prerunnerrunner; Jan 11, 2015 at 09:47 PM.
Jan 11, 2015 | 09:59 PM
#6
Thread Starter
Registered User
Joined: Jul 2014
Posts: 20
Likes: 0
From: So Cal
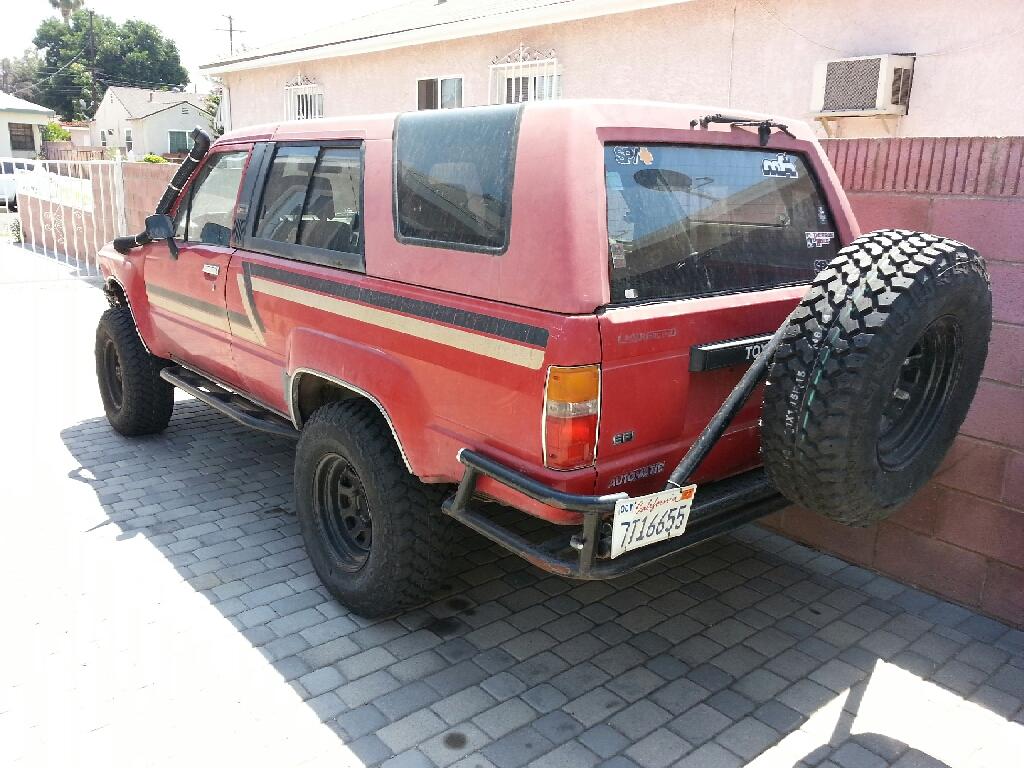
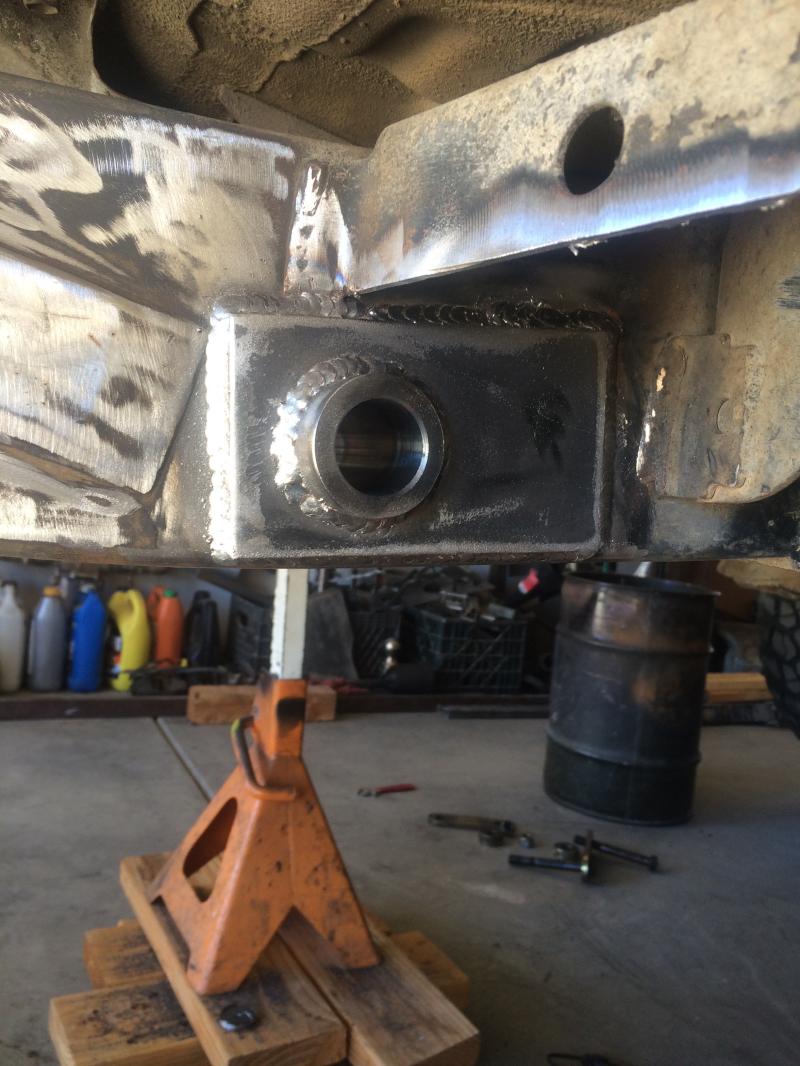
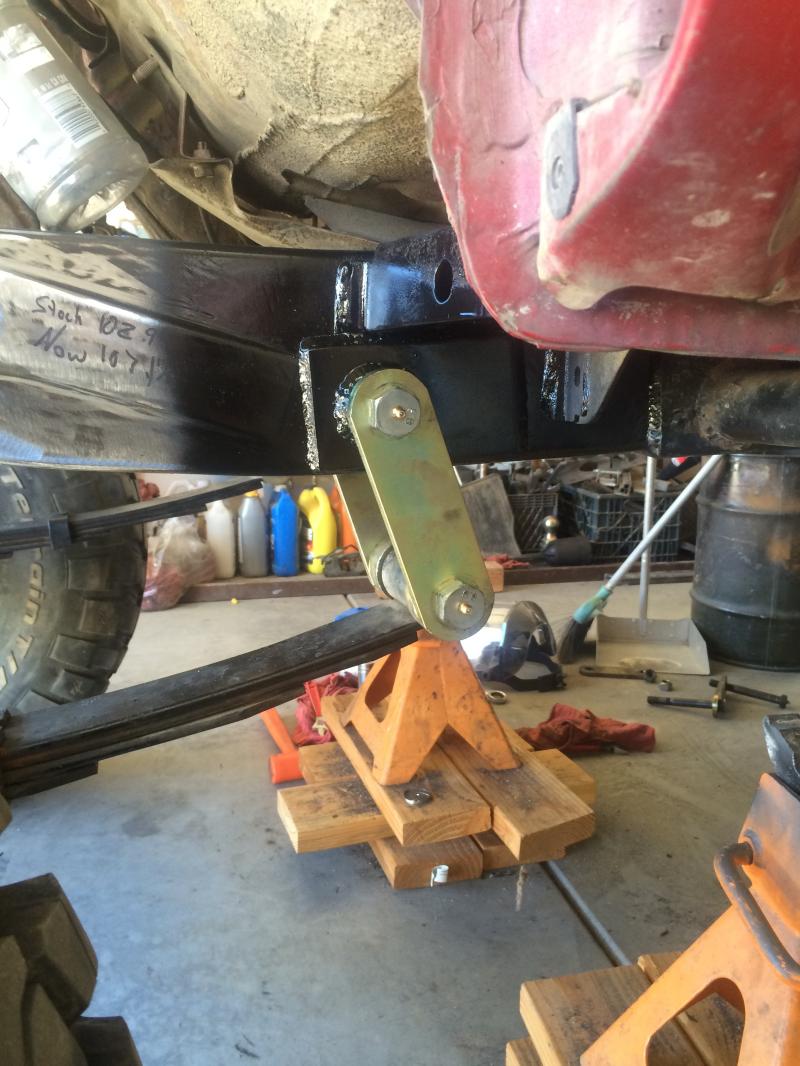
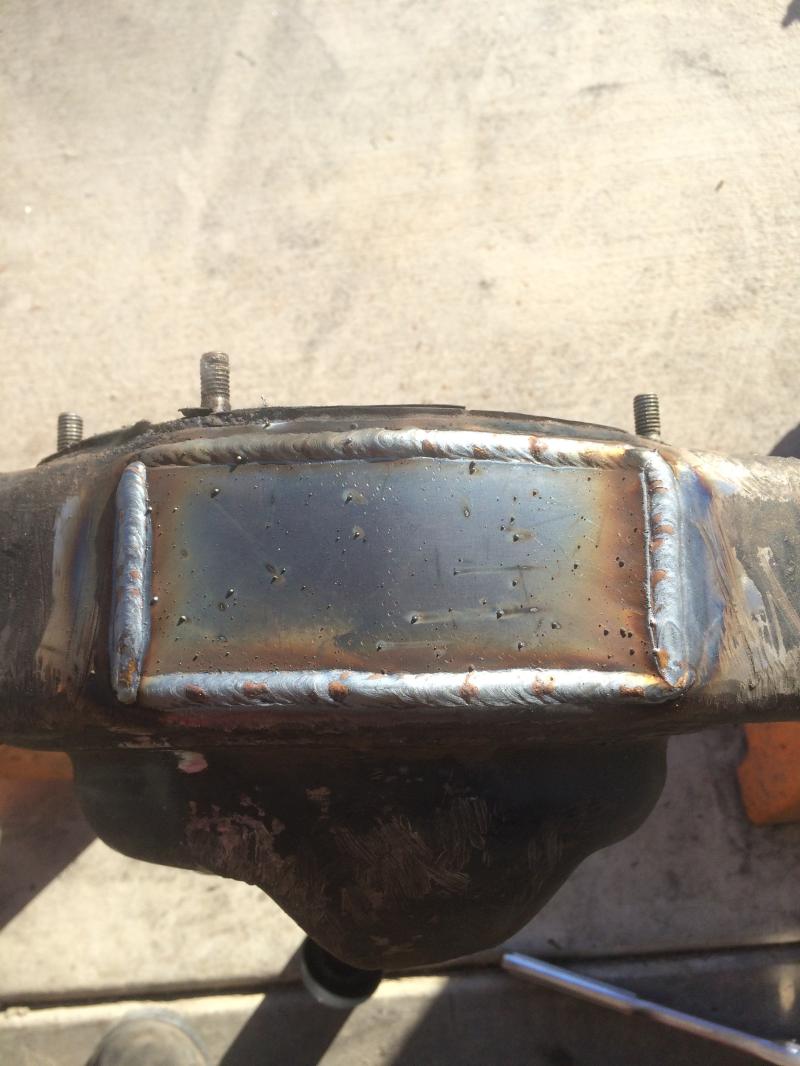
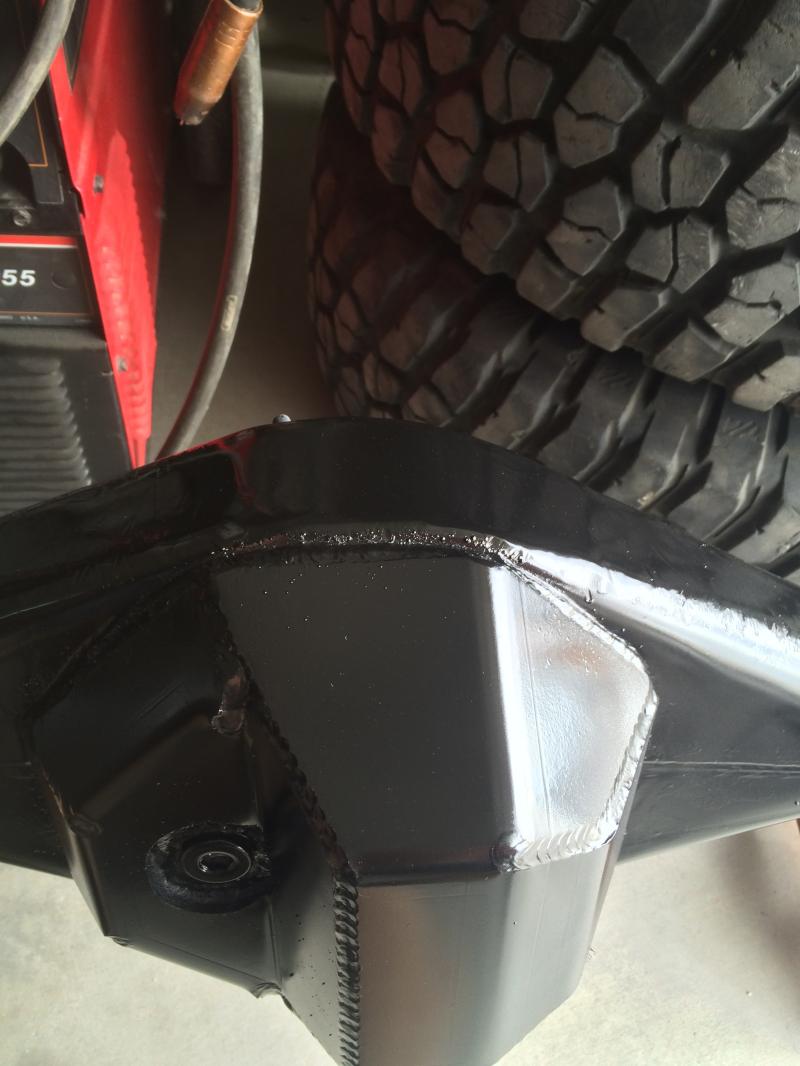
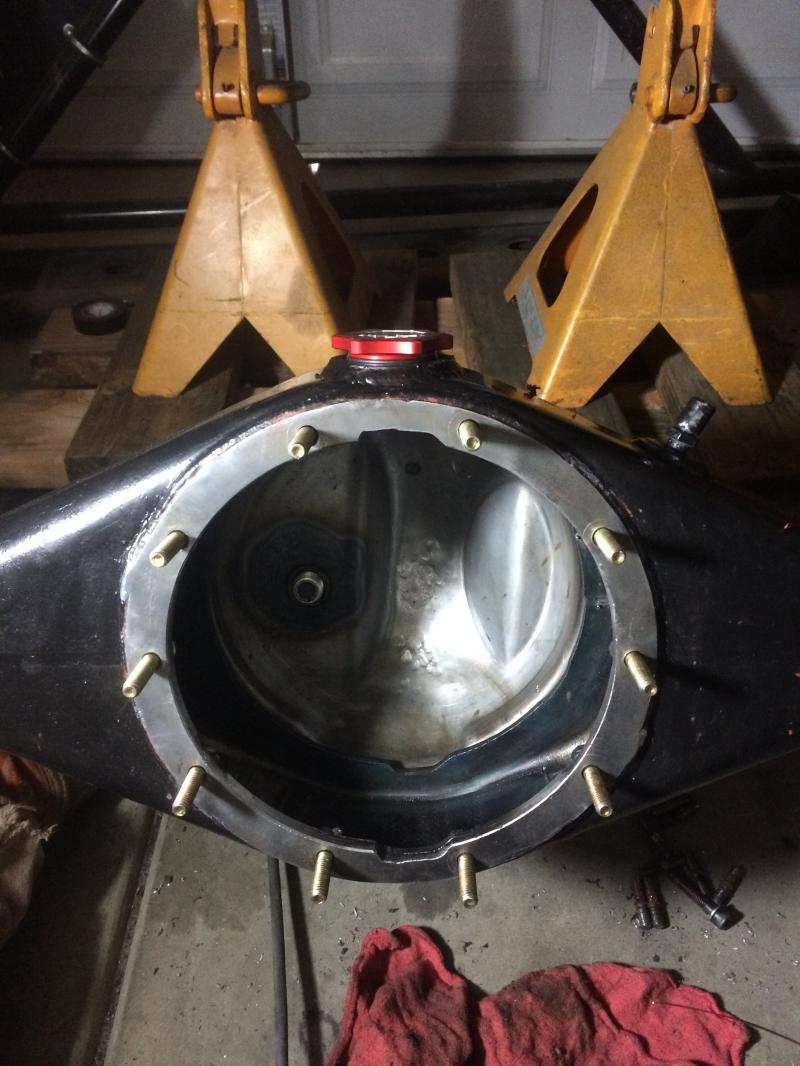
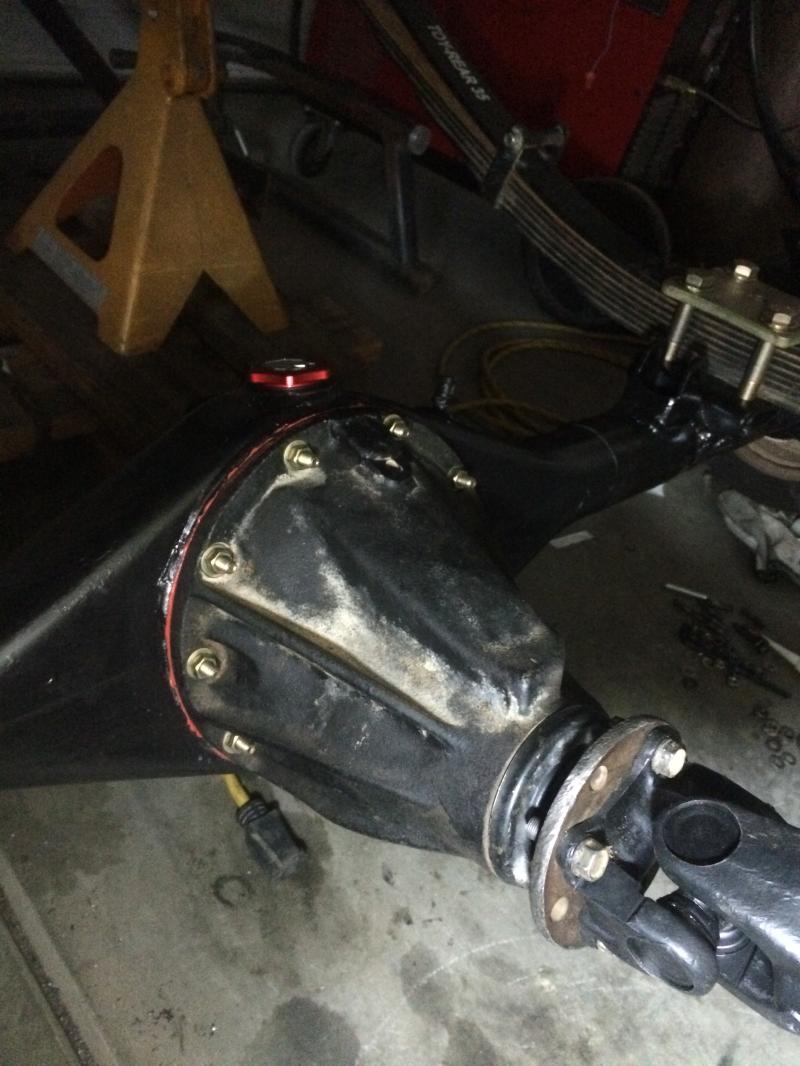
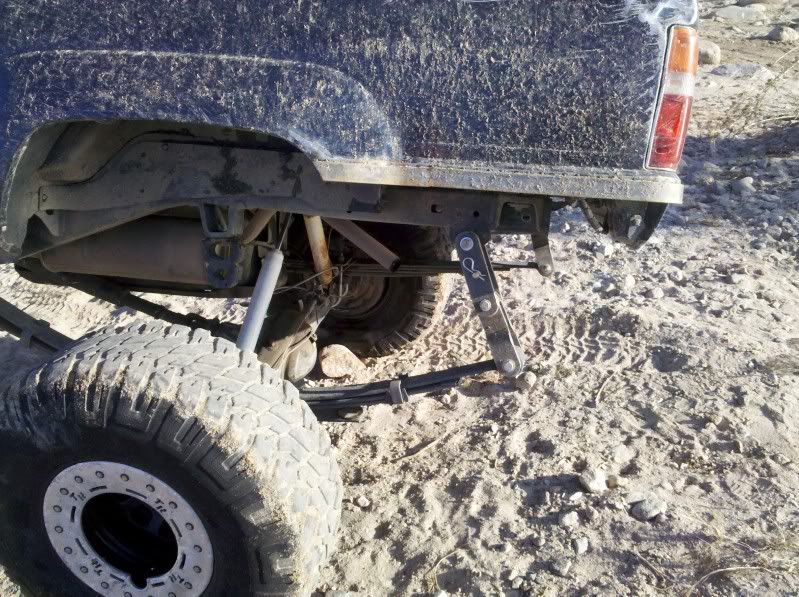
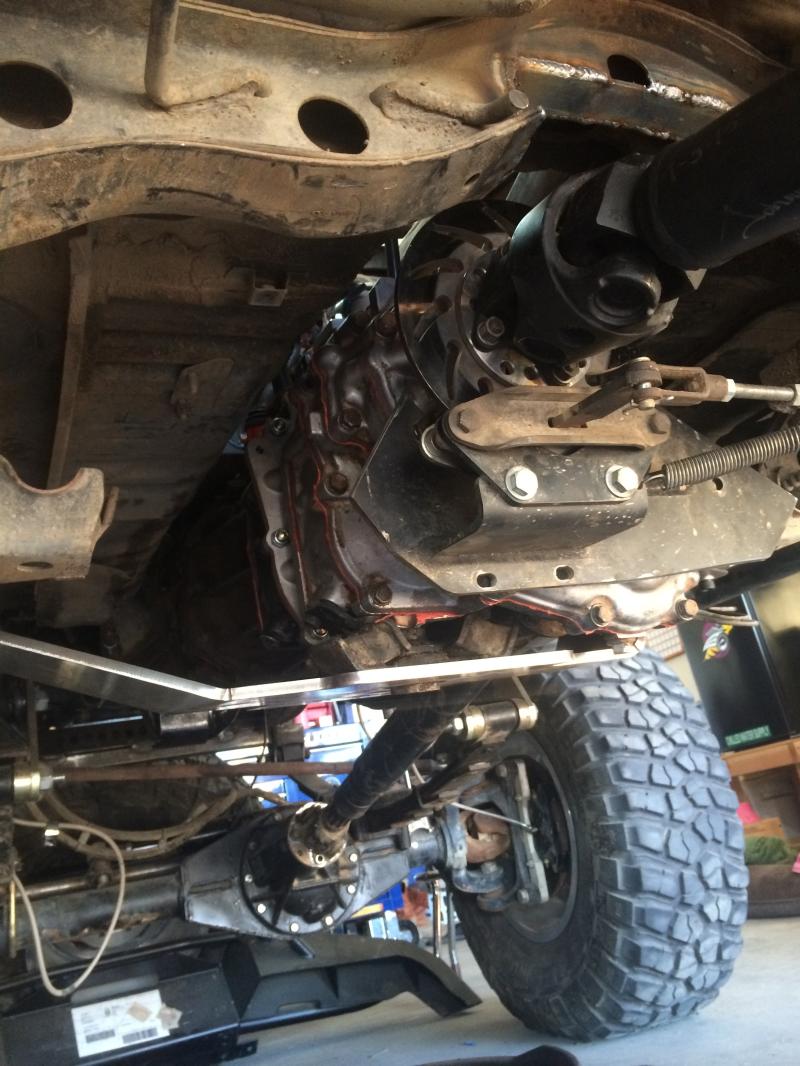
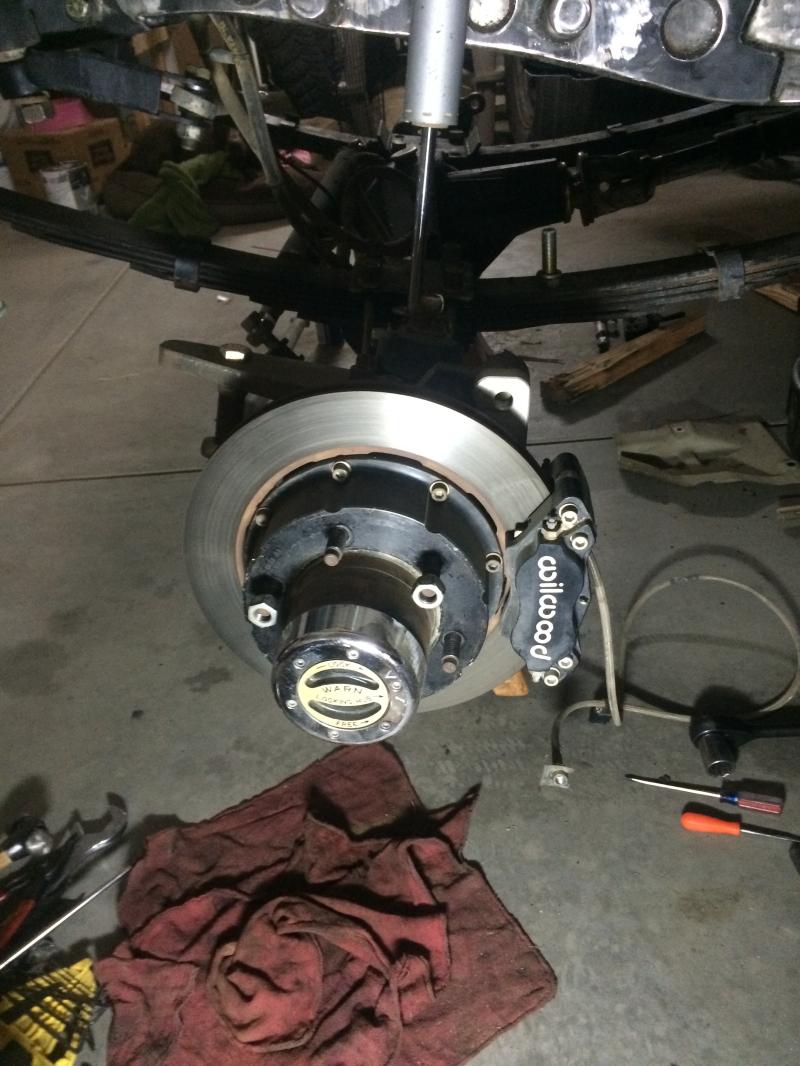
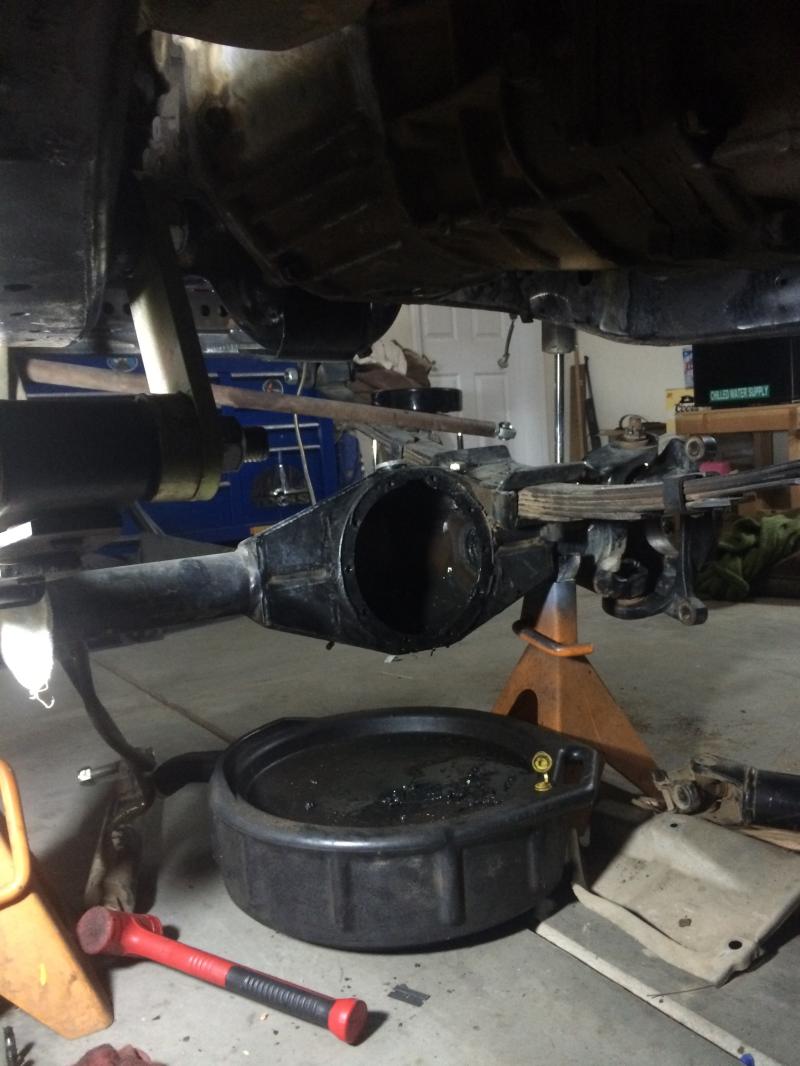
For the rear I decided to use the Sky's missing link shackles, Low Range off roads frenched spring mounts and shock mounts, Marlin Crawler diff armor, All-Pro's U-bolt eliminator and convert to rear discs.

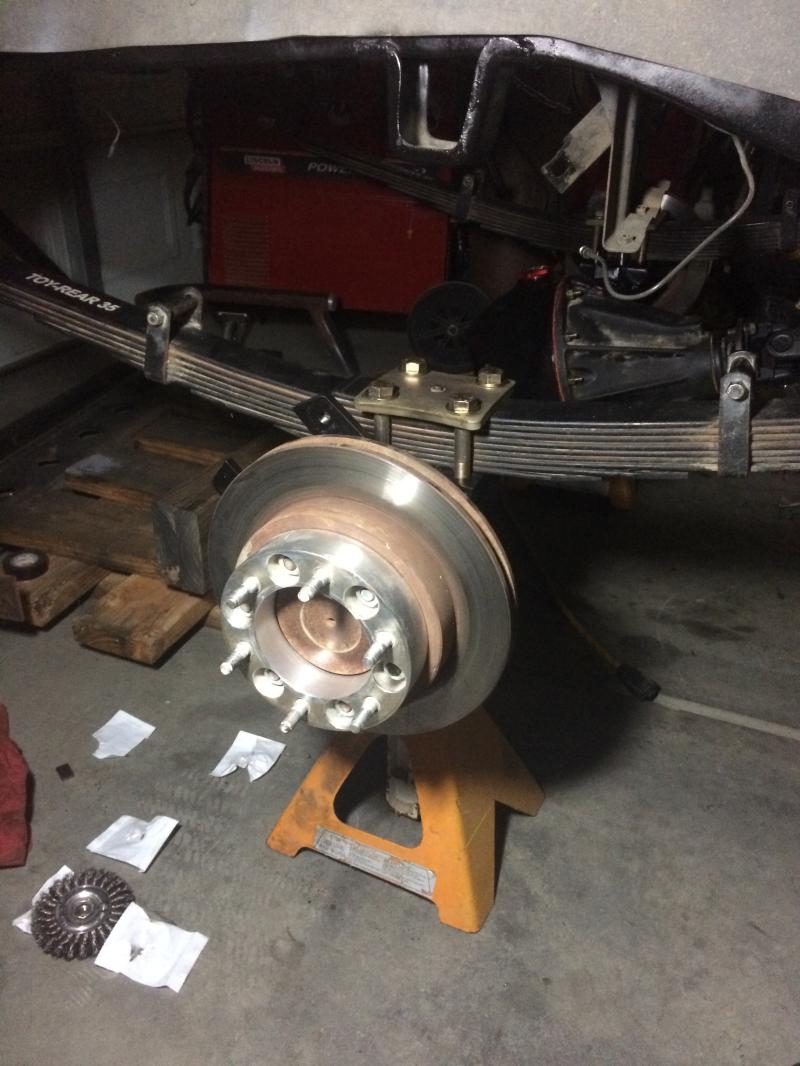
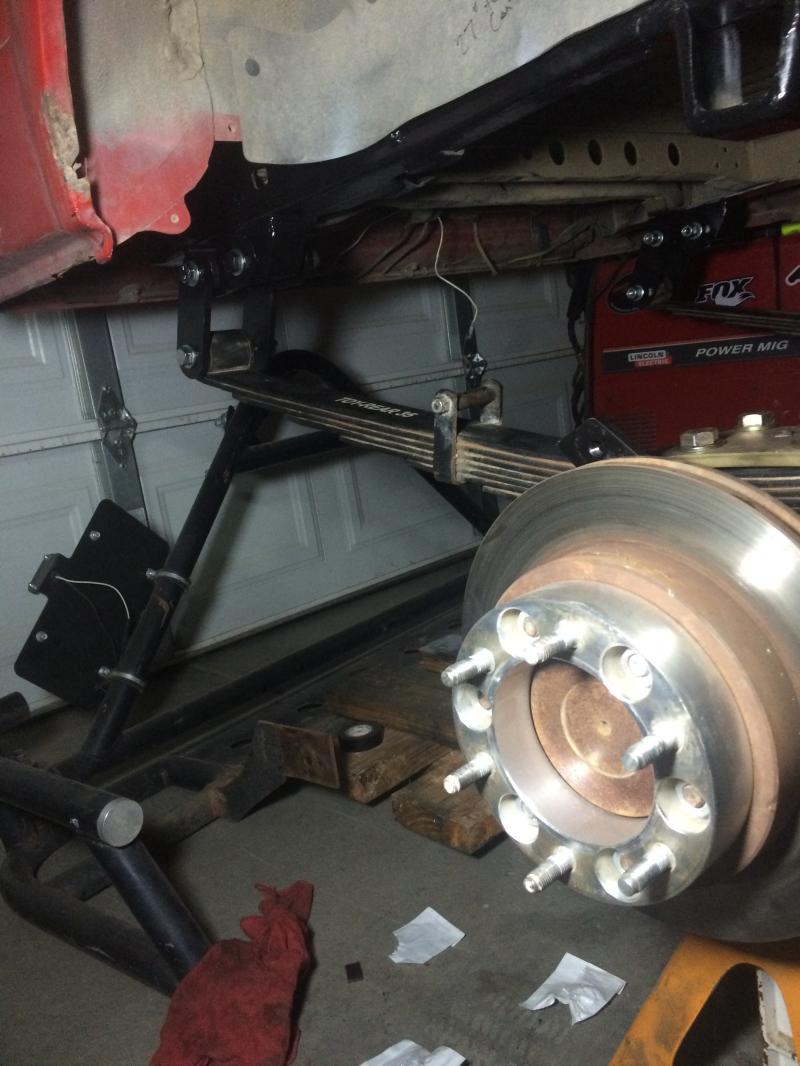
I also decided to shave the bottom drain plug and do the Grade 8 bolt install for the 3rd member studs.


I also decided to shave the bottom drain plug and do the Grade 8 bolt install for the 3rd member studs.


Last edited by prerunnerrunner; Jan 11, 2015 at 10:05 PM.
Trending Topics
Jan 13, 2015 | 05:58 AM
#8
Registered User


Joined: Oct 2009
Posts: 4,832
Likes: 332
From: Northfield, Vermont
Sweet truck! Keep the updates coming!
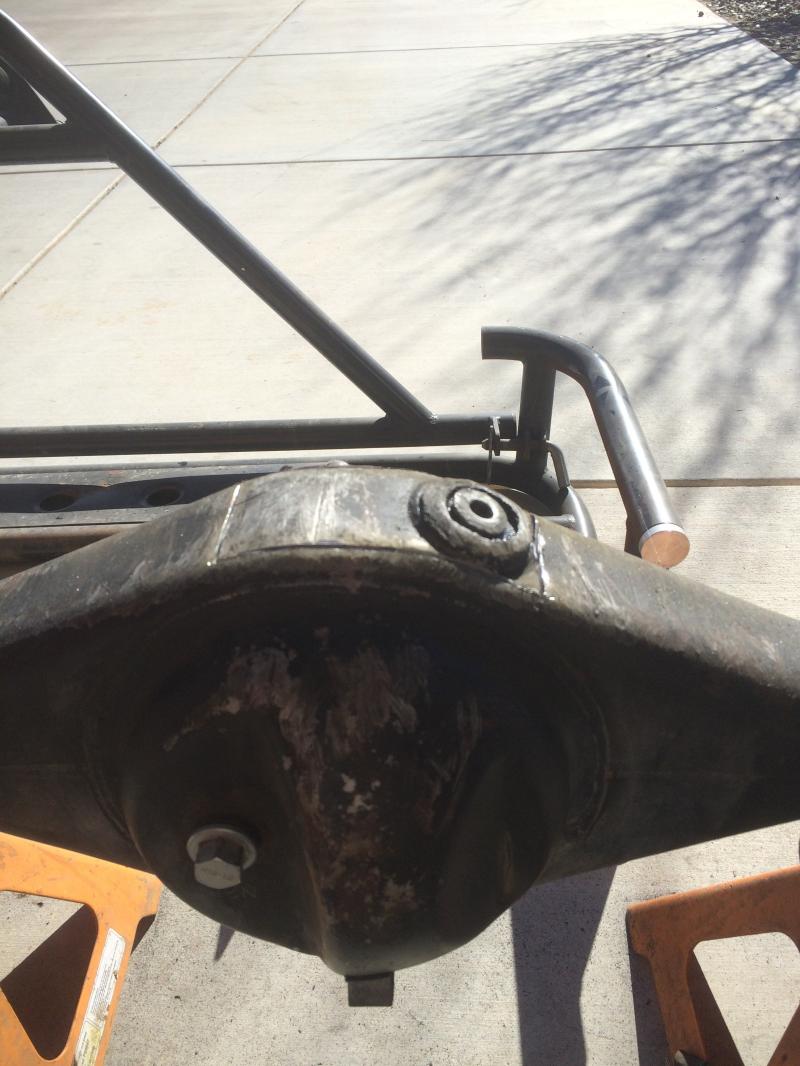
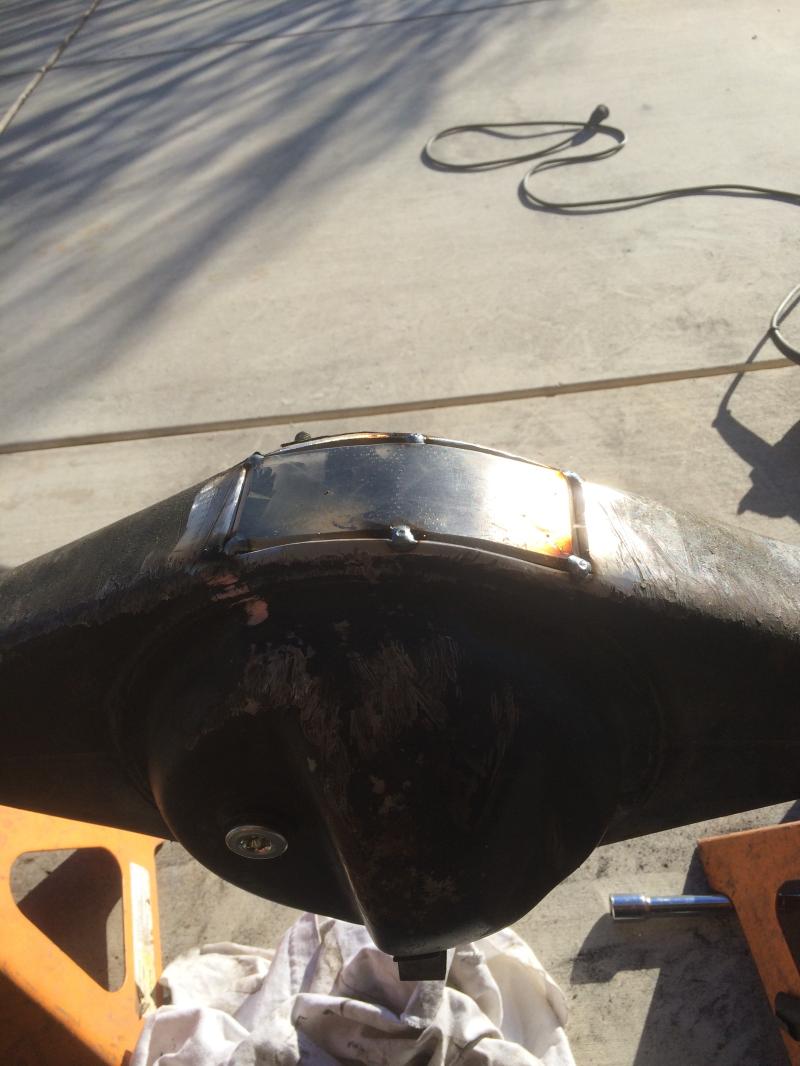
Be careful with those missing links, they like to unload unpredictably
I like that filler cap on the top of the housing. I should have done that...
Be careful with those missing links, they like to unload unpredictably
I like that filler cap on the top of the housing. I should have done that...
Last edited by rattlewagon; Jan 13, 2015 at 05:59 AM.
Jan 14, 2015 | 11:05 PM
#9
Thread Starter
Registered User
Joined: Jul 2014
Posts: 20
Likes: 0
From: So Cal
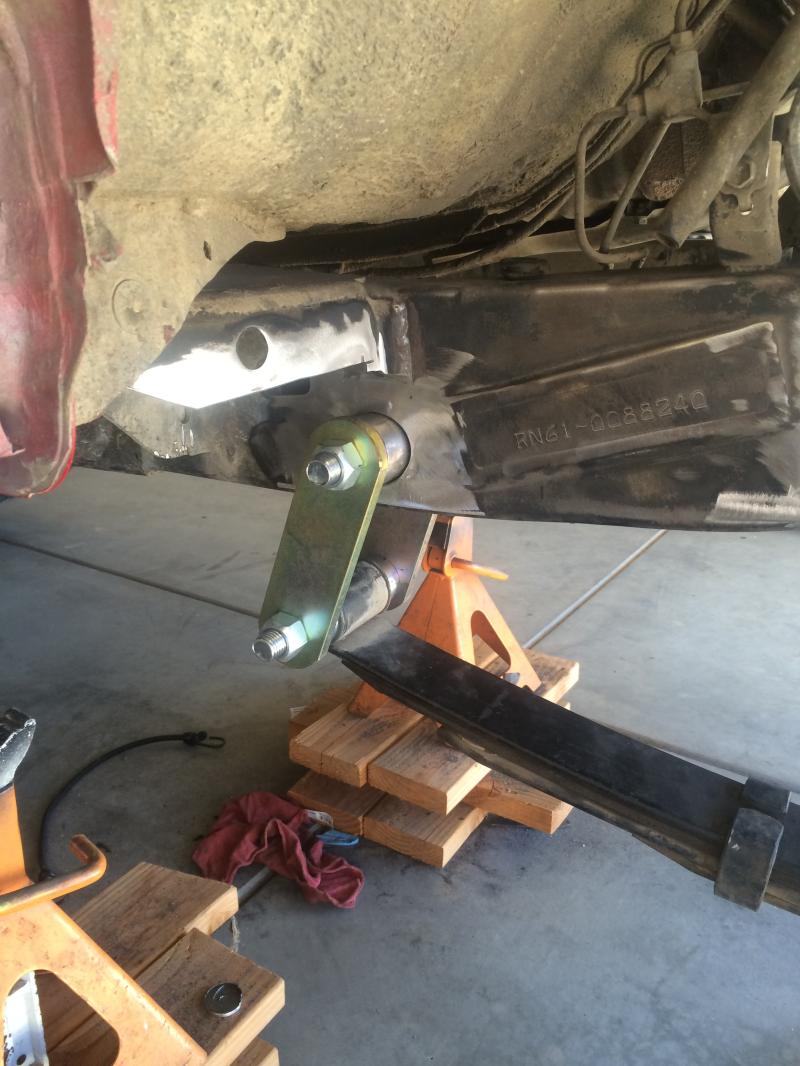
The dual shackle I have had on a few of my rigs now. Always had the option to pin them to the frame if I was going to be doing a crazy decent or downhill to keep them from "unloading". I always like the little extra droop that they allow for the rear end. This is a pic of my old rig with a dual shackle, didn't have the pin mount to the frame yet but the pin was in at least with a little intention.
I'm going to mod the sky's shackle to also have the option to be pinned like I did these.

I'm going to mod the sky's shackle to also have the option to be pinned like I did these.
Last edited by prerunnerrunner; Jan 14, 2015 at 11:06 PM.
Jan 14, 2015 | 11:15 PM
#10
Thread Starter
Registered User
Joined: Jul 2014
Posts: 20
Likes: 0
From: So Cal
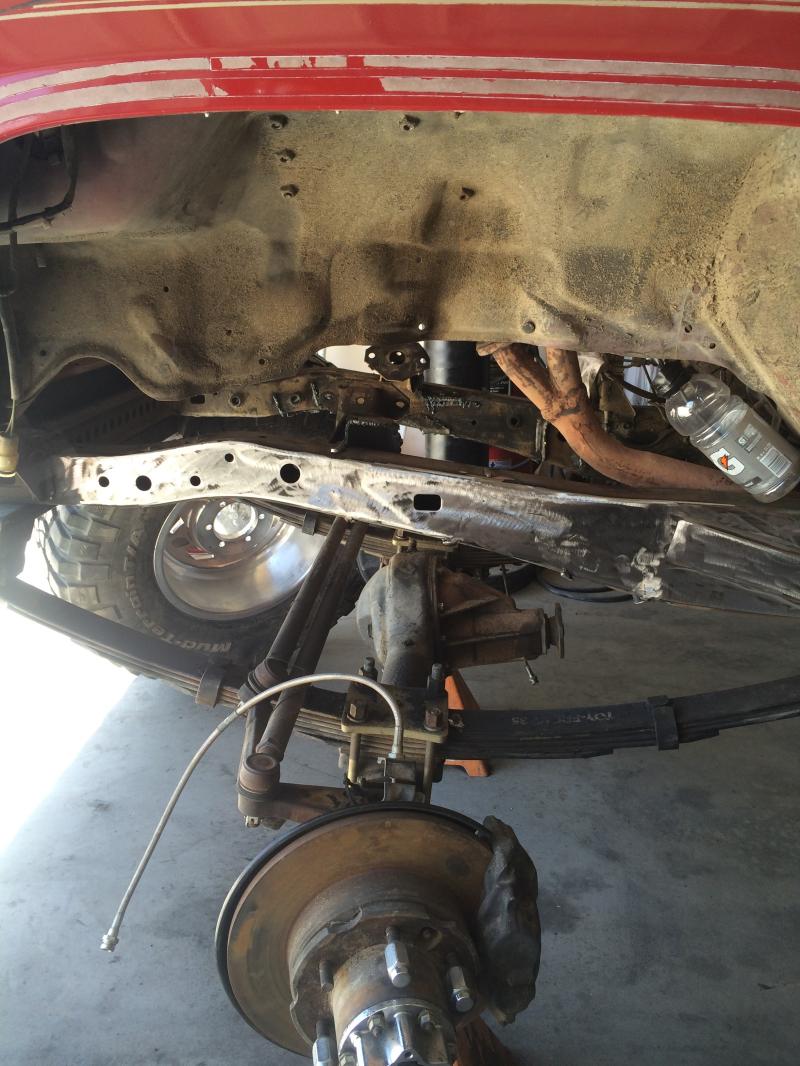
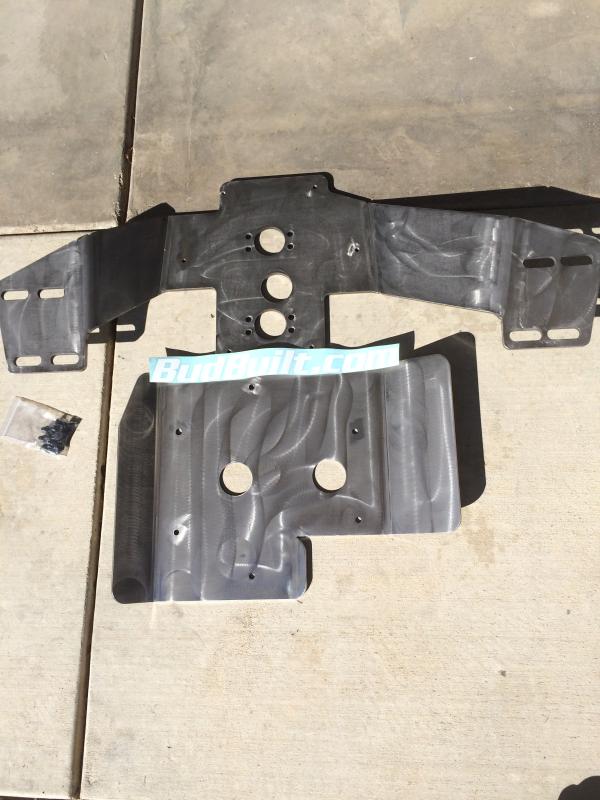
Worked on the floor a bit tonight. I ordered a bud built x-member that had no raise to the drive train from stock and recieved one with at least 1 1/2" causing me to need to cut the floors out to clear my shifters and t-case parking brake.
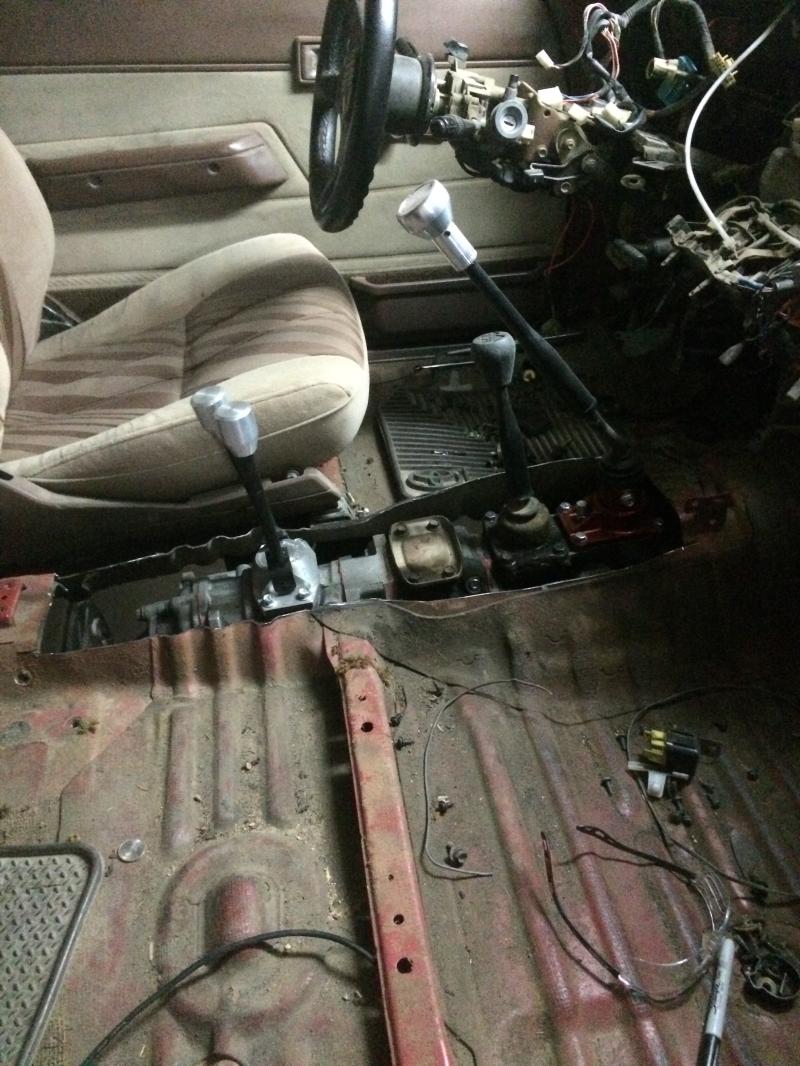
Gotta love the little bit of bling from Marlin with the R151 short throw shifter and the Daves offroad twin stick.
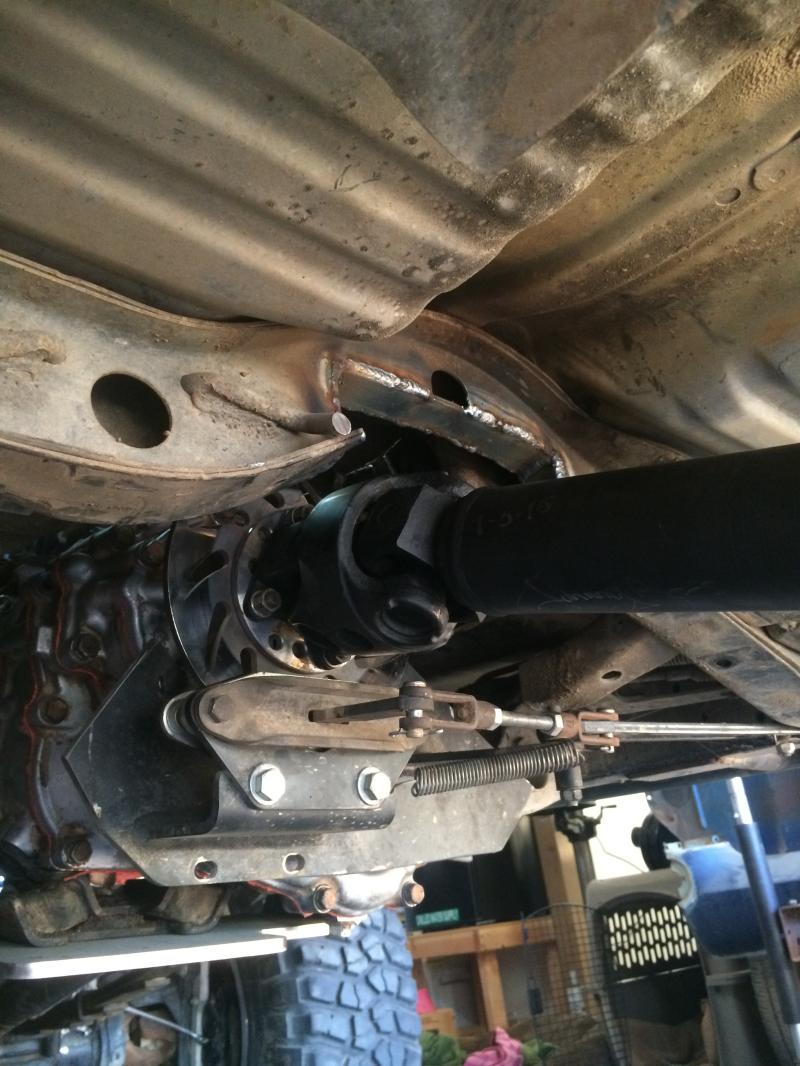
I also ran into major clearancing issues with the T-case parking brake disc and rear driveline CV. Had to cut 2" out of the frame Xmember just behind the T-cases due to the belly pan lift. Once I get the clearancing done and cleaned up I'll post some pics.


Gotta love the little bit of bling from Marlin with the R151 short throw shifter and the Daves offroad twin stick.
I also ran into major clearancing issues with the T-case parking brake disc and rear driveline CV. Had to cut 2" out of the frame Xmember just behind the T-cases due to the belly pan lift. Once I get the clearancing done and cleaned up I'll post some pics.
Last edited by prerunnerrunner; Jan 15, 2015 at 03:16 PM.


 Jan 15, 2015 | 07:27 PM
#12
Thread Starter
Registered User
Joined: Jul 2014
Posts: 20
Likes: 0
From: So Cal
Thank you, got some pics of the X-member that I finally finished notching today. Bolted the driveshaft up and it clears with plenty of room. I used 1/4 flat bar for the pieces that I welded to the x-member.


Last edited by prerunnerrunner; Jan 15, 2015 at 07:37 PM.
Jan 15, 2015 | 07:36 PM
#13
Thread Starter
Registered User
Joined: Jul 2014
Posts: 20
Likes: 0
From: So Cal
I got the front end pulled apart today. This Dana 60 stuff is super beef. I need to replace the inner axle seals and replace a bung that is welded to the housing for the passenger leaf mount. I also wanted to verify the gears and locker since I bought the axle and haven't had it apart yet. I will have to say this axle is a lot easier to work on then a Toy axle. Here's some of the progress.


Last edited by prerunnerrunner; Jan 15, 2015 at 07:41 PM.
Jan 16, 2015 | 07:06 PM
#14
Thread Starter
Registered User
Joined: Jul 2014
Posts: 20
Likes: 0
From: So Cal
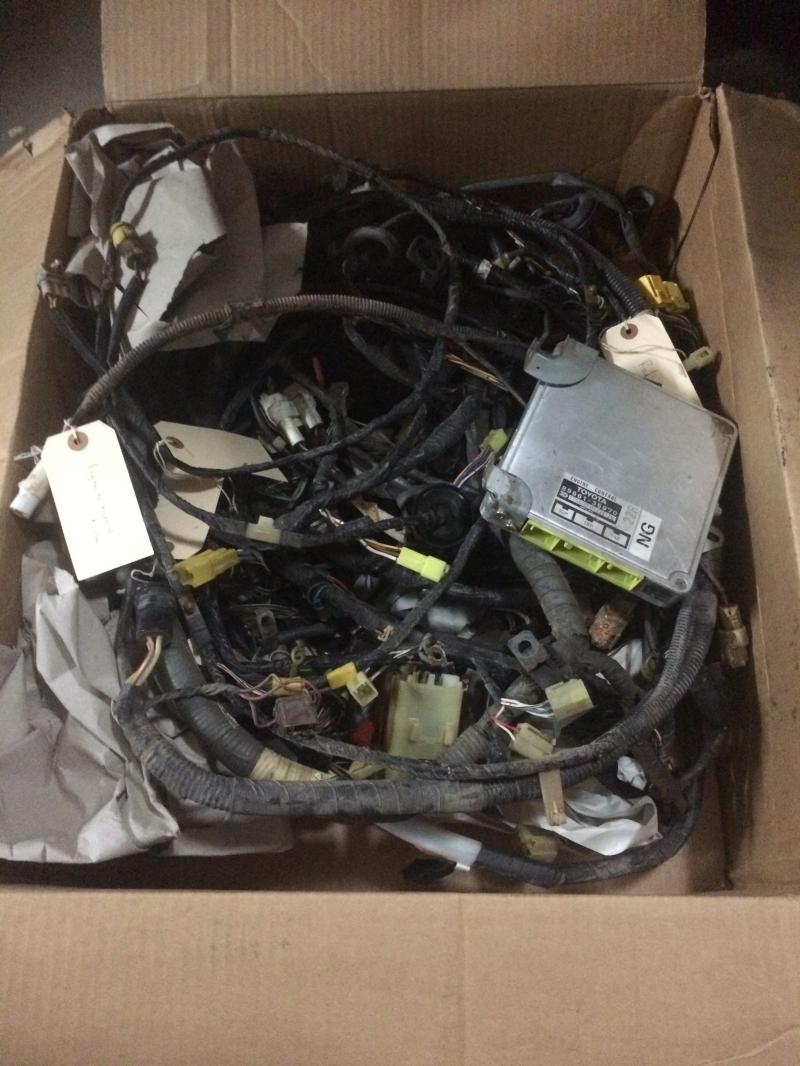
Got this sweet package in the mail today. Complete wiring harness from a '87 with a manual trans. I know I didn't need to swap the complete harness to go to the manual but my old harness was beat to snot anyway. Big shout out to fellow Yotatechy RobbiePatterson for hooking it up on a sweet deal. Its basically the only part I was needing to finish my build.
 Jan 17, 2015 | 06:14 PM
#15
Thread Starter
Registered User
Joined: Jul 2014
Posts: 20
Likes: 0
From: So Cal
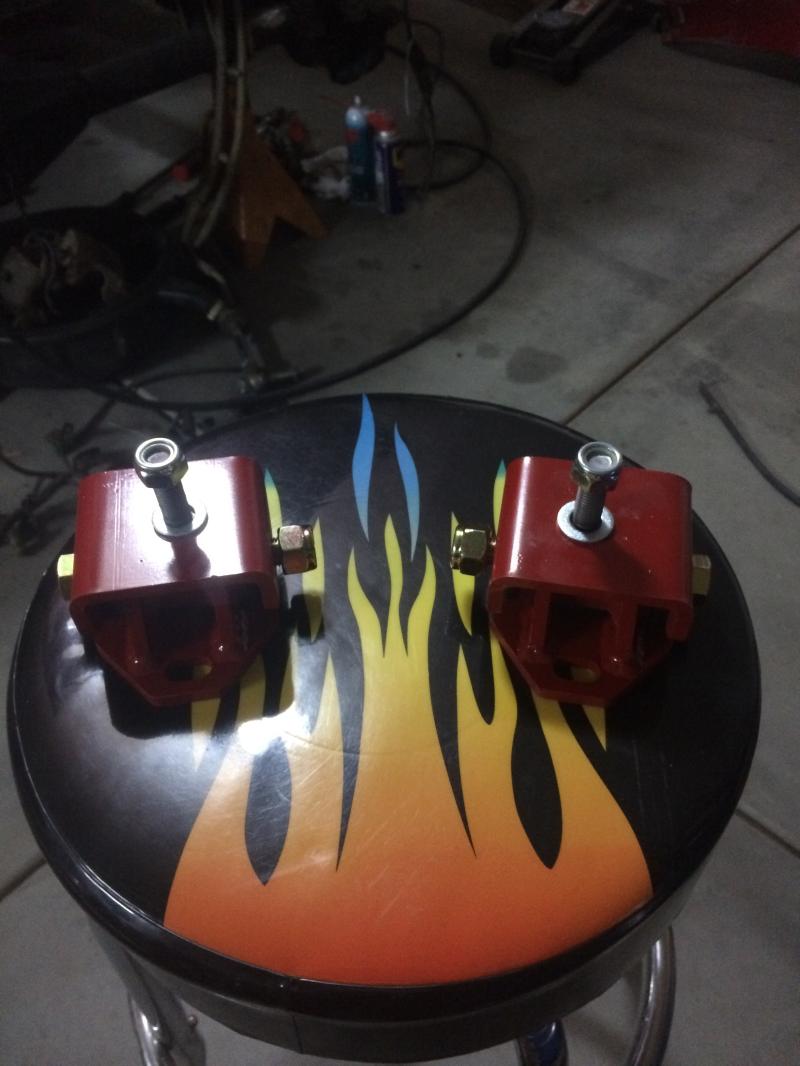
I hit a road block this weekend with the front axle. Ran all over town trying to find the inner axle seals with no luck. So while I'm waiting on those I got the new Ruff Stuff engine mounts together and painted and also got my new wiring harness installed. I can actually see the light at the end of the tunnel with this being back on the road again.
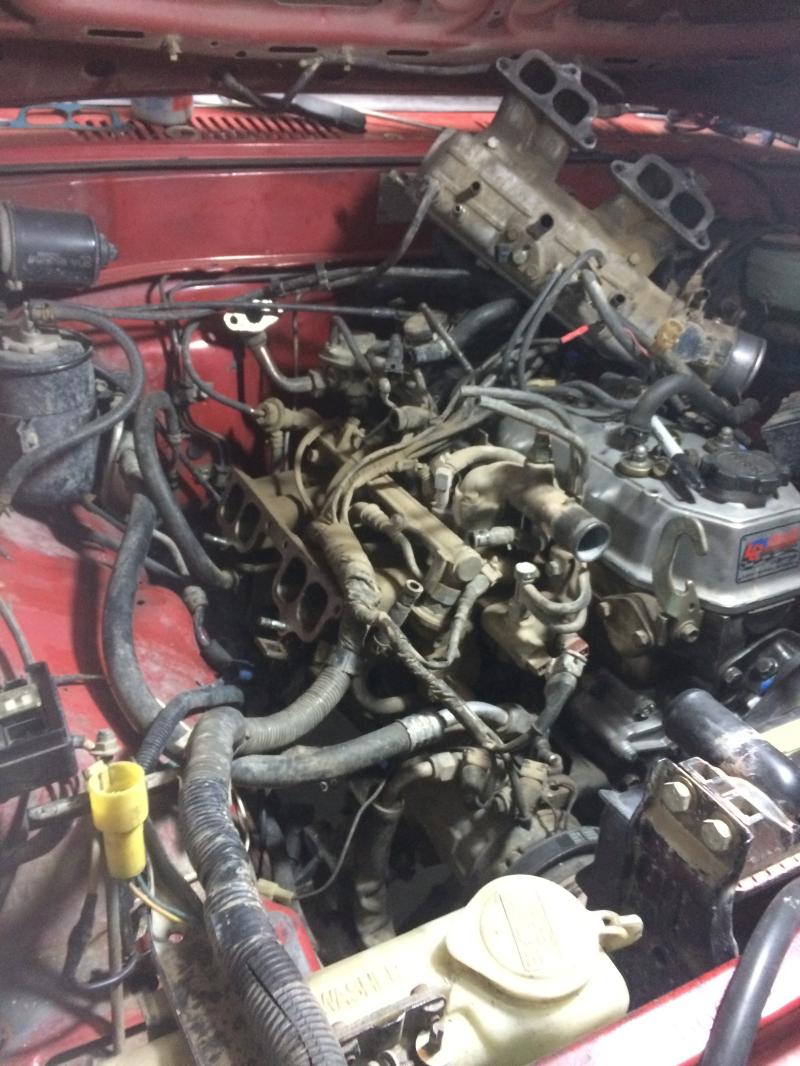
Had to pull the intake to get the injector harness off. What a pain.
Finished product!


Had to pull the intake to get the injector harness off. What a pain.

Finished product!
 Jan 18, 2015 | 12:53 PM
#17
Thread Starter
Registered User
Joined: Jul 2014
Posts: 20
Likes: 0
From: So Cal
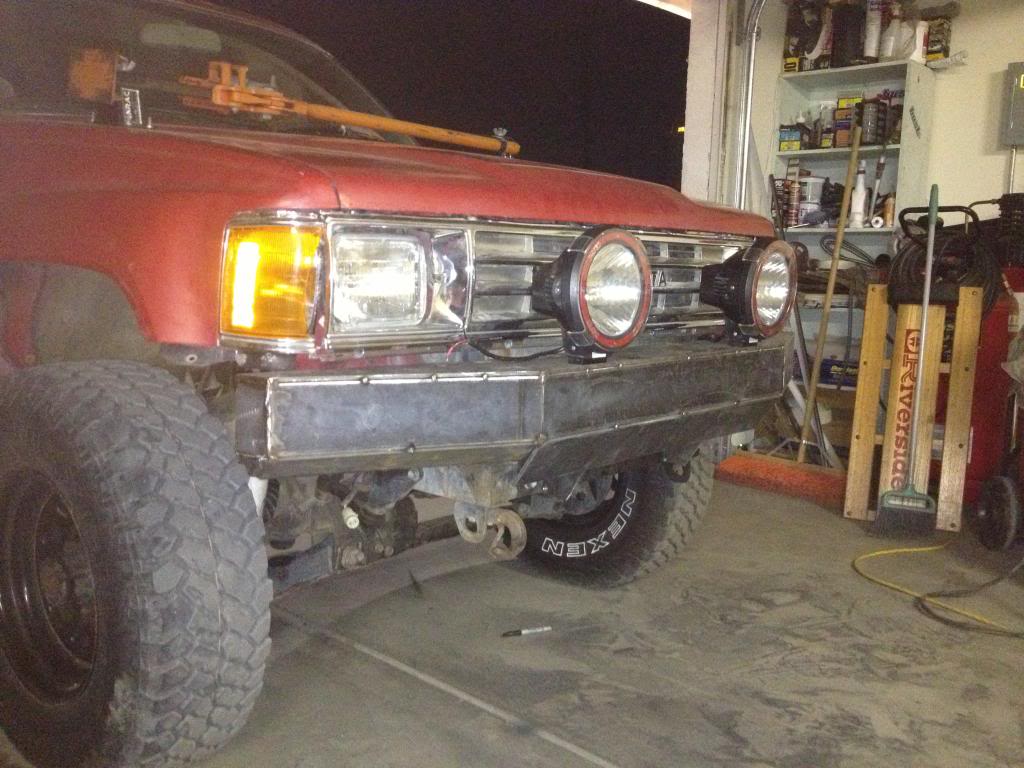
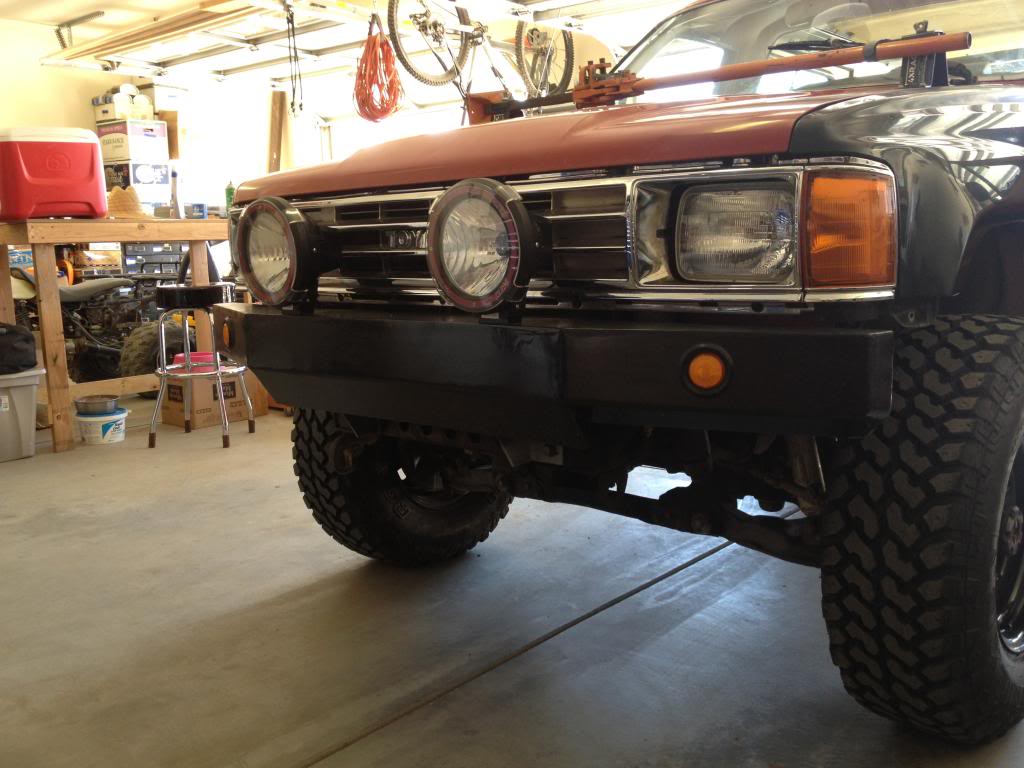
Worked on it a bit this morning and finished up the wiring swap. Only thing that needs to be done to start it is install fuel tank, exhaust, and set the distributor timing. I can't wait to take it out for the first time. Played around with my Addicted Offroad bumper, trying to get it to fit. I had to remove some metal from the existing bolt holes but looks good after I got it to bolt up.

 Feb 3, 2015 | 06:54 PM
#20
Thread Starter
Registered User
Joined: Jul 2014
Posts: 20
Likes: 0
From: So Cal
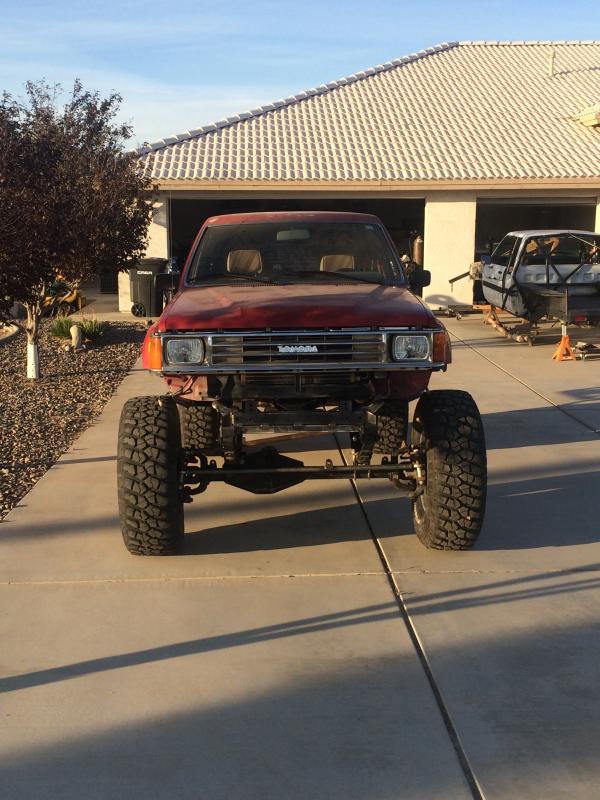
Well got her all put back together and the inner axles leak in the front axle. I'm going to drive it around a bit before I tear into it again. Other then that she runs great. Next big chore besides the axles seals is to trim the front and rear fenders. He's how she sits as of this evening.